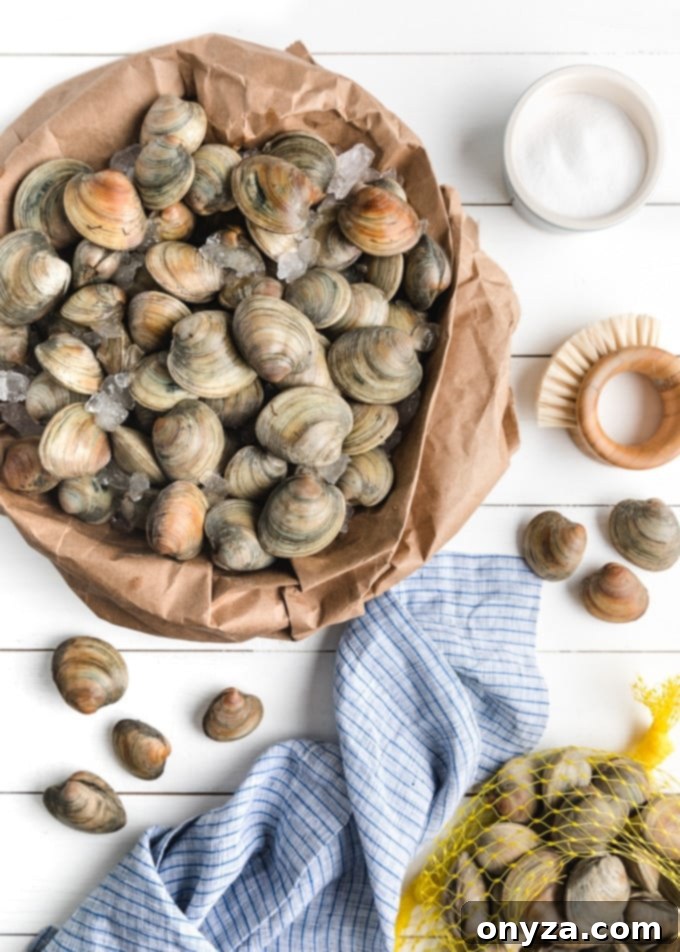
Discover the ultimate guide to fresh clams! Learn everything from selecting the best live clams at the market to mastering the essential cleaning process and storing them safely. Plus, explore inspiring recipe ideas to transform these ocean treasures into delicious meals.
Looking to identify different varieties of edible clams? Don’t miss our comprehensive Types of Clams guide for detailed information!
TABLE OF CONTENTS
(click headings to jump)
- Buying Fresh Clams: A Comprehensive Guide
- Storing Fresh Clams for Optimal Freshness
- How to Clean Clams: Purging Sand and Grit
- Delightful Fresh Clam Recipes
1. Buying Fresh Clams: A Comprehensive Guide
There’s nothing quite like the briny taste of fresh clams, whether steamed, sautéed, or added to pasta. But to truly enjoy them, it’s crucial to start with the freshest possible shellfish. Clams, like other shellfish, are sold alive, and their quality and safety depend heavily on proper selection. Perished clams can quickly harbor bacteria and compromise your entire meal. Therefore, understanding how to identify live, healthy clams at the market is your first and most critical step towards a delicious and safe culinary experience.
When you’re at the seafood counter or a dedicated fish market, arm yourself with these essential tips to ensure you’re selecting the highest quality fresh clams:
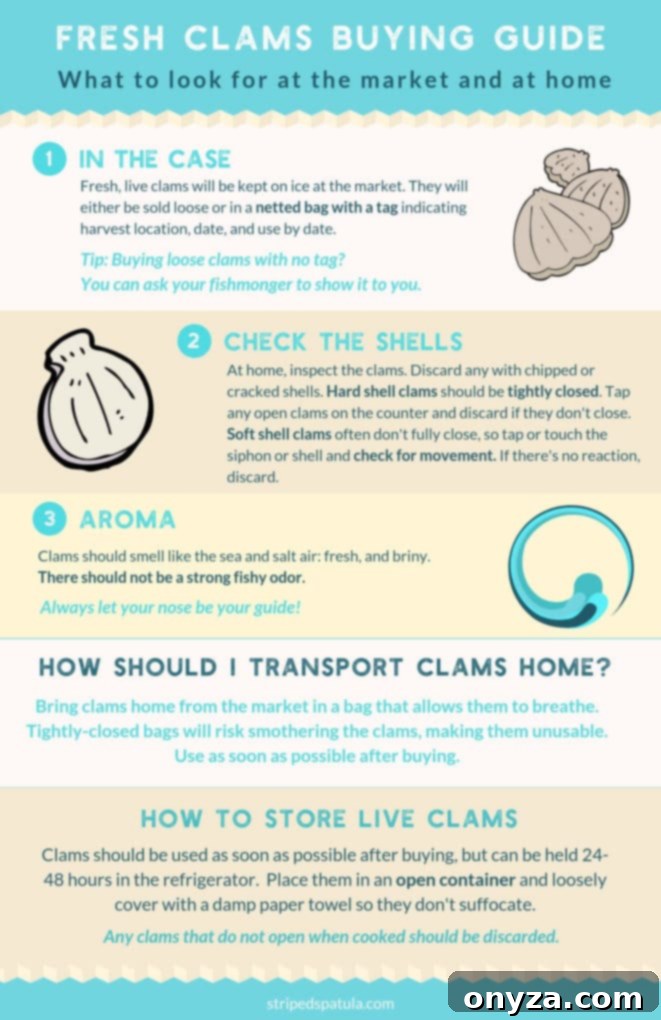
- Source and Packaging: Fresh clams are typically displayed on ice to maintain their cool temperature, crucial for their survival. Look for them in breathable bags, such as mesh or perforated plastic, or sold loose. Avoid any clams in tightly sealed bags, as they need oxygen to survive. Always check for a harvest tag, which provides vital information including the location and date of harvest, and a “use by” date. This tag is a testament to the clams’ traceability and freshness. Don’t hesitate to ask your fishmonger for this information if it’s not readily visible.
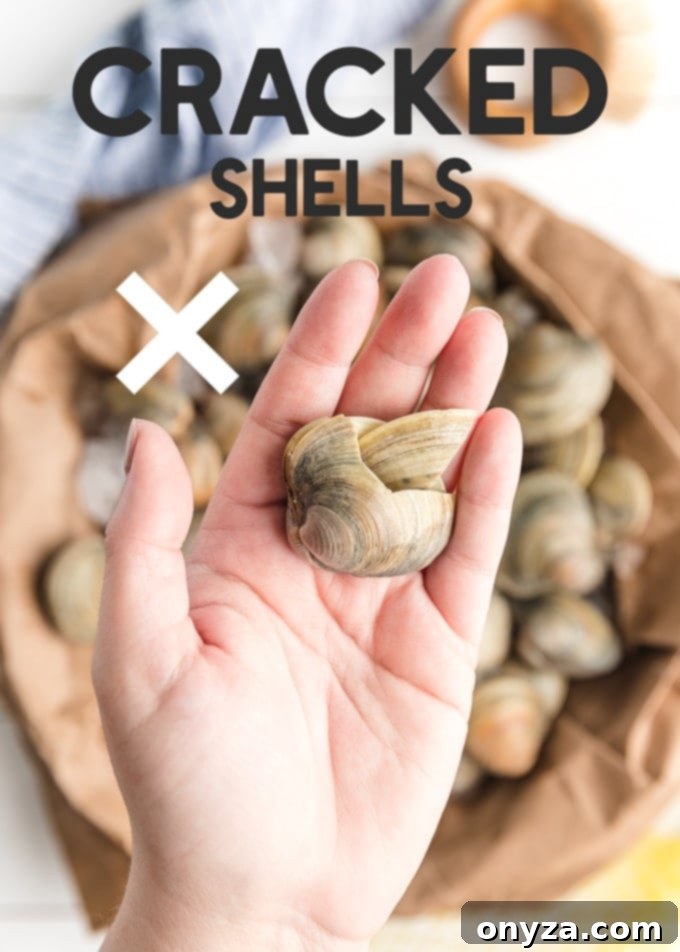
- Shell Condition for Hard Shell Clams: For varieties like littlenecks, cherrystones, and quahogs (which are hard shell clams), tightly closed shells are the primary indicator of life. If you notice any clams with shells slightly ajar, gently tap them on a hard surface or flick them with your finger. A living clam will react by slowly closing its shell within a few seconds. Any hard shell clams that remain open or have chipped, cracked, or broken shells should be immediately discarded. Their inability to close or compromised shell integrity indicates they are either dead or unhealthy.
- Checking Soft Shell Clams: Soft shell clams, such as steamers, have delicate shells and a prominent “siphon” or neck, which prevents them from closing completely. To check their vitality, gently tap or touch the side of the shell or the exposed siphon. A live soft shell clam will show a reaction, perhaps retracting its siphon if it’s small enough, or at least twitching. If there is absolutely no response to your touch or tap, the clam has perished and should not be consumed. Discard it immediately.
- The Smell Test: Fresh clams should never smell overtly fishy. Instead, they should emit a clean, refreshing aroma reminiscent of the ocean – a pleasant brininess combined with a hint of salty sea air. A strong, pungent, or “off” smell is a clear sign that the clams are no longer fresh and should be avoided. Trust your nose; it’s an excellent indicator of seafood quality.
- Proper Transport: The journey home from the market is just as important as the initial selection. Never transport or store fresh clams in a tightly sealed bag or submerged in water. Clams are living organisms and require air circulation to breathe. Restricting their air supply will quickly suffocate and spoil them, rendering them unsafe to eat. Keep the top of their breathable bag open, and ideally, place them in a cooler with some ice (but not directly in melted ice water) to maintain a cool temperature without drowning them.
By following these guidelines, you significantly increase your chances of bringing home a batch of perfectly fresh, vibrant clams that are ready to be transformed into a culinary masterpiece.
2. Storing Fresh Clams for Optimal Freshness
Once you’ve purchased your fresh clams, the clock starts ticking. While their peak flavor and texture are experienced when cooked on the day of purchase, proper storage can extend their shelf life slightly, ensuring they remain safe and delicious. Most seafood experts agree that with careful handling, fresh clams can be refrigerated for up to 24 hours, and some sources even suggest up to 48 hours. However, for best results and maximum peace of mind, it’s always advisable to consume them as soon as possible.
Here’s a reliable method for storing fresh clams in your refrigerator:
To store your clams effectively, first, transfer them from their market bag into a mesh colander. If you’ve purchased a larger quantity of clams (more than 2-3 pounds), it’s wise to divide them among several colanders. This prevents overcrowding, which can suffocate the clams by restricting air circulation and increasing local temperature, ultimately shortening their lifespan.
Next, place the colander containing the clams into a shallow bowl. This bowl will catch any liquid that the clams release as they breathe, preventing it from pooling around them. Cover the clams loosely with a damp paper towel or a clean, damp cloth. The damp towel creates a humid environment, mimicking their natural habitat and allowing them to continue breathing without drying out. This step is crucial for keeping them alive and fresh.
Refrigerate the setup immediately. The ideal temperature for storing live clams is between 35°F and 40°F (1°C to 4°C). This cool environment slows down their metabolism, keeping them dormant and extending their freshness.
During storage, it’s a good practice to check on your clams periodically, perhaps every 8-12 hours. Refresh the damp paper towel to maintain humidity, and crucially, drain off any accumulated liquid from the shallow bowl. This also gives you an opportunity to inspect the clams again. Any clams that have died during storage should be immediately removed and discarded. Dead clams can rapidly spoil and potentially contaminate the entire batch, posing a health risk.
Before you begin cooking, perform your freshness checks once more, using the same criteria as when buying them: check for tightly closed shells (hard shells) or movement (soft shells), and verify their clean, briny aroma.
A critical warning: Never store clams submerged in a bowl of fresh tap water. Fresh water contains less salt than their natural ocean environment, which can shock and kill them. Moreover, submerging them in still water deprives them of oxygen, leading to rapid spoilage. Clams need to breathe and remain in a slightly humid, airy environment.
3. How to Clean Clams: Purging Sand and Grit
After successfully buying and storing your fresh clams, the next vital step before cooking is proper cleaning. This process involves two main stages: scrubbing the shells and purging them of internal grit and sand. While many farmed clams you find at reputable seafood counters are often cultivated in environments with minimal sediment or have been pre-purged by suppliers, taking a little extra time for a thorough cleaning is a small investment that pays huge dividends in the final dish. Nothing ruins a perfectly cooked clam dish faster than biting into an unexpected mouthful of sand or grit.
I learned this lesson the hard way several years ago. Despite assurances that a bag of littleneck clams was “pre-purged,” a quick linguine with clams recipe ended up in the trashcan, thanks to the undeniable crunch of sand. Since then, I err on the side of caution, always giving my clams at least a short soak, regardless of their origin. It might seem like overkill, but it guarantees an enjoyable, grit-free dining experience.
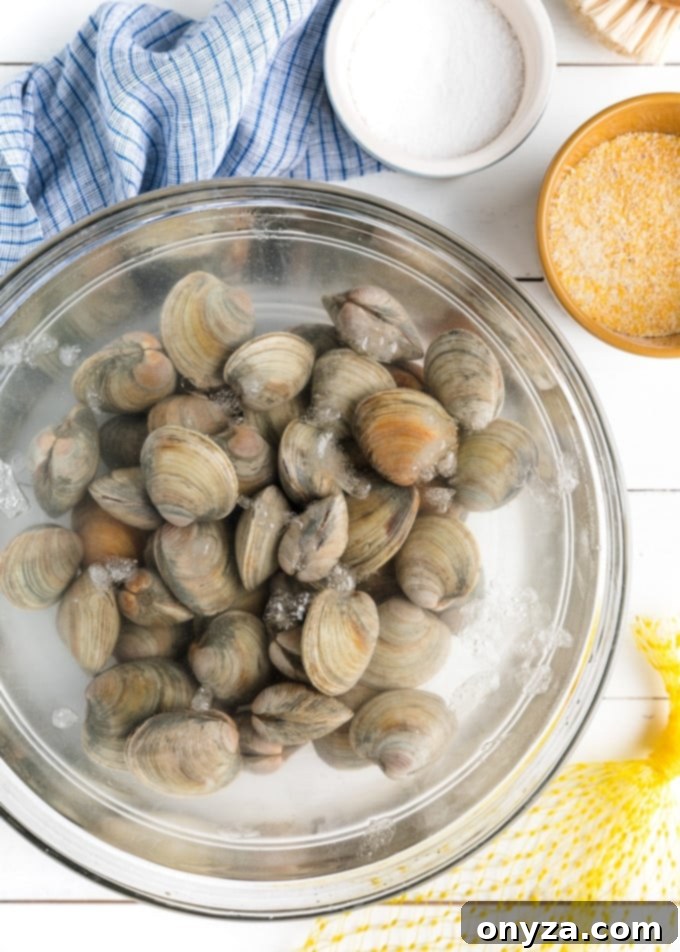
Step 1: Clean the Shells Thoroughly
Begin the cleaning process by rinsing your clams under cool, running water. While doing so, use a stiff-bristled brush (a vegetable brush works perfectly) to vigorously scrub the outside of each clam shell. This removes any superficial dirt, mud, algae, and other debris that may cling to the shells. For any stubborn barnacles or particularly entrenched dirt, the tip of a small paring knife can be used to carefully scrape them off without damaging the clam itself. Ensure all external surfaces are visibly clean before proceeding.
Step 2: Purge the Clams in Saltwater to Remove Grit
This is where the magic happens – the internal cleansing. Clams are filter feeders, meaning they naturally pump water through their bodies, taking in nutrients and expelling waste, including sand and grit. By placing them in clean saltwater, we encourage them to go through this natural filtration process, but this time, in an environment free of sediment.
To effectively de-grit your clams, use a standard ratio of 1/3 cup of non-iodized sea salt or kosher salt per 1 gallon of cold water. The water temperature is important; it should be between 45-48 degrees F (7-9 degrees C) to keep the clams active and filtering without shocking them. Iodine in regular table salt can be harmful to clams, so opt for non-iodized varieties.
In a large bowl or tub (ensure it’s not made of reactive metal like aluminum, which can affect the taste), combine the cold water and salt, stirring until the salt is completely dissolved. Gently add the scrubbed clams to this saltwater solution, ensuring they are fully submerged by at least 1.5 inches. Refrigerate the bowl and let the clams soak for increments of 20 to 30 minutes. As the clams breathe and filter the clean saltwater, they will naturally release any sediment and sand from their bellies, which will settle at the bottom of the bowl.
The number of soaking repetitions depends largely on how sandy the clams are. For cultivated or pre-purged hard shell clams, a single 20-30 minute soak might be sufficient. However, wild clams or soft shell varieties (like steamers) often carry more grit and may require two, three, or even more repetitions. After each soak, carefully lift the clams out of the water using a slotted spoon or your hands, leaving the released grit behind. Discard the sandy water, rinse the bowl, and prepare a fresh batch of saltwater for the next soak. Repeat until you see minimal or no sediment at the bottom of the bowl after a soak.
Finally, once you are satisfied that the clams are purged of sand, place them in a colander and give them a final, thorough rinse under cool running water. They are now ready for cooking.
Should I Add Cornmeal to the Water? Exploring the Great Clam Debate
The addition of cornmeal to the clam purging water is one of the most hotly debated techniques among chefs and home cooks alike. Many proponents argue that allowing clams to “feed” on cornmeal while in saltwater not only expedites the purging process but also helps plump up the clam meat and imparts a slightly sweeter flavor. The theory is that as clams filter the cornmeal, it helps push out any remaining debris from their digestive tracts more effectively.
Conversely, many experienced cooks find the addition of cornmeal unnecessary, asserting that a simple saltwater purge is perfectly adequate and effective. They argue that cornmeal can sometimes make the water cloudy, making it harder to gauge when the clams are truly clean, or that it doesn’t offer significant advantages over plain saltwater. For a good visual comparison, articles like this one from Food52 often provide side-by-side results of clams purged with and without cornmeal.
Personally, my experience with the cornmeal method has been mixed. I’ve tried it a few times, particularly with wild steamers, and while the clams certainly appeared plump and clean, I found the batches purged with saltwater alone to be equally satisfactory in terms of cleanliness and flavor. The difference, if any, was not significant enough to make it a mandatory step in my cleaning routine.
If you’re curious and wish to experiment, a good starting point is to add approximately 1/4 cup of medium-grind cornmeal for every gallon of water during your saltwater soak. It’s an optional step, but one that many swear by.
How to Clean Fresh Clams: A Step-by-Step Guide
Learn how to effectively purge fresh clams of sand and grit before cooking, ensuring a delightful, grit-free culinary experience.
Prep Time: 10 minutes
Soaking Time: 1 hour (minimum, can be longer depending on clam cleanliness)
Total Time: 1 hour 10 minutes (minimum)
Author: Amanda Biddle
Ingredients
- 2-3 pounds fresh clams
- 1-3 gallons cold water (45-48 degrees F), divided
- ⅓ to 1 cup non-iodized sea salt or kosher salt, divided
Instructions
- Inspect Clams: Begin by carefully inspecting all your fresh clams. Discard any clams that have chipped, cracked, or severely damaged shells, as these are likely compromised.
- Check Hard Shell Clams: For hard shell varieties, verify that their shells are tightly closed. If any shells are slightly open, gently tap the clam on the kitchen counter or flick it with your finger. A live clam will slowly close its shell within a few seconds. If a clam remains open after tapping, it has perished and must be discarded.
- Check Soft Shell Clams: For soft shell clams, which cannot close completely, check for responsiveness. Tap or gently touch the exposed siphon or the side of the shell. A live soft shell clam will show some movement or retraction. If there is no reaction to the stimulus, the clam is no longer alive and should be discarded.
- Scrub Shells: Rinse the inspected clams thoroughly under cold running water. Using a stiff-bristled brush, scrub the shells vigorously to remove any external debris, mud, or algae. If necessary, use the tip of a paring knife to scrape off any stubborn barnacles.
- First Saltwater Soak: In a large, non-reactive bowl or tub, combine 1 gallon of cold water (between 45-48 degrees F) with 1/3 cup of non-iodized sea salt or kosher salt. Stir well until the salt is completely dissolved. Gently add the cleaned clams to the solution, ensuring the water covers them by at least 1.5 inches. Refrigerate and allow the clams to soak for 20-30 minutes. During this time, any dead clams might float to the surface; discard these immediately.
- Check for Sediment (Initial): After the first soak, carefully lift the clams out of the bowl using a slotted spoon or your hands, being careful not to disturb the bottom sediment. Observe the water in the bowl. If there is no visible sand or grit at the bottom, your clams are likely clean and ready to cook (this is common with well-cultivated and pre-purged hard shell varieties).
- Repeat Soaking (If Needed): If you find sand or grit at the bottom of the bowl, it means the clams need further purging. Discard the sandy water, rinse the bowl thoroughly, and prepare a fresh batch of saltwater (1 gallon water, 1/3 cup salt). Return the clams to the fresh saltwater and repeat the 20-30 minute soaking process. Depending on the clam variety and the amount of sand, you may need to repeat this step 1-2 more times, or even more, until the water remains clear after a soak.
- Final Rinse: Once the clams are purged and the water runs clear, place them in a colander and rinse them well under cool running water one last time. Your fresh clams are now impeccably clean and ready for your chosen recipe.
Notes
*If you opt to add cornmeal to your soak (as discussed in the blog post above), incorporate approximately 1/4 cup of medium-grind cornmeal for every gallon of water used in your saltwater solution.
Keyword: fresh clams, how to clean clams, purging clams, preparing clams
4. Delightful Fresh Clam Recipes
With your fresh clams expertly selected, stored, and thoroughly cleaned, you’re now poised to unlock a world of culinary possibilities. Clams are incredibly versatile, offering a delicate, briny flavor that can elevate a wide array of dishes, from simple steamed preparations to hearty pasta sauces and inventive appetizers. Their quick cooking time also makes them a fantastic option for weeknight meals or impressive entertaining.
Here are some of our favorite fresh clam recipes to inspire your next seafood feast:
- Beer Steamed Clams with Bacon and Shallots: A robust and flavorful dish where clams are gently steamed in a savory broth of beer, crispy bacon, and aromatic shallots. Perfect for dipping crusty bread!
- Linguine with Clams (Linguine alle Vongole): A classic Italian masterpiece featuring tender clams tossed with al dente linguine in a light, garlicky white wine sauce. It’s elegant, simple, and utterly delicious.
- Grilled Clams with Garlic Parmesan Basil Butter: Elevate your outdoor cooking with these char-grilled clams, bursting with the irresistible flavors of garlic, Parmesan cheese, and fresh basil butter. An ideal appetizer for summer gatherings.
- Chorizo Stuffed Clams: A fantastic starter that combines the brininess of clams with the smoky, spicy kick of chorizo sausage, baked to golden perfection. A true crowd-pleaser.
- Steamed Clams with White Wine: A simple yet sophisticated preparation where clams are steamed open in a fragrant broth of white wine, garlic, and herbs. This method truly allows the natural flavor of the clams to shine.
- Classic Clam Chowder: While not linked here, creamy clam chowder is a timeless favorite, often made with littleneck or quahog clams, potatoes, and bacon.
- Baked Clams Oreganata: Another excellent option, these clams are typically baked on the half-shell with a crispy breadcrumb, garlic, and herb topping.
Whether you prefer the simplicity of steamed clams or the richness of a pasta dish, fresh clams offer a delightful culinary journey. Experiment with different recipes and discover your own favorite way to enjoy these wonderful gifts from the sea!
