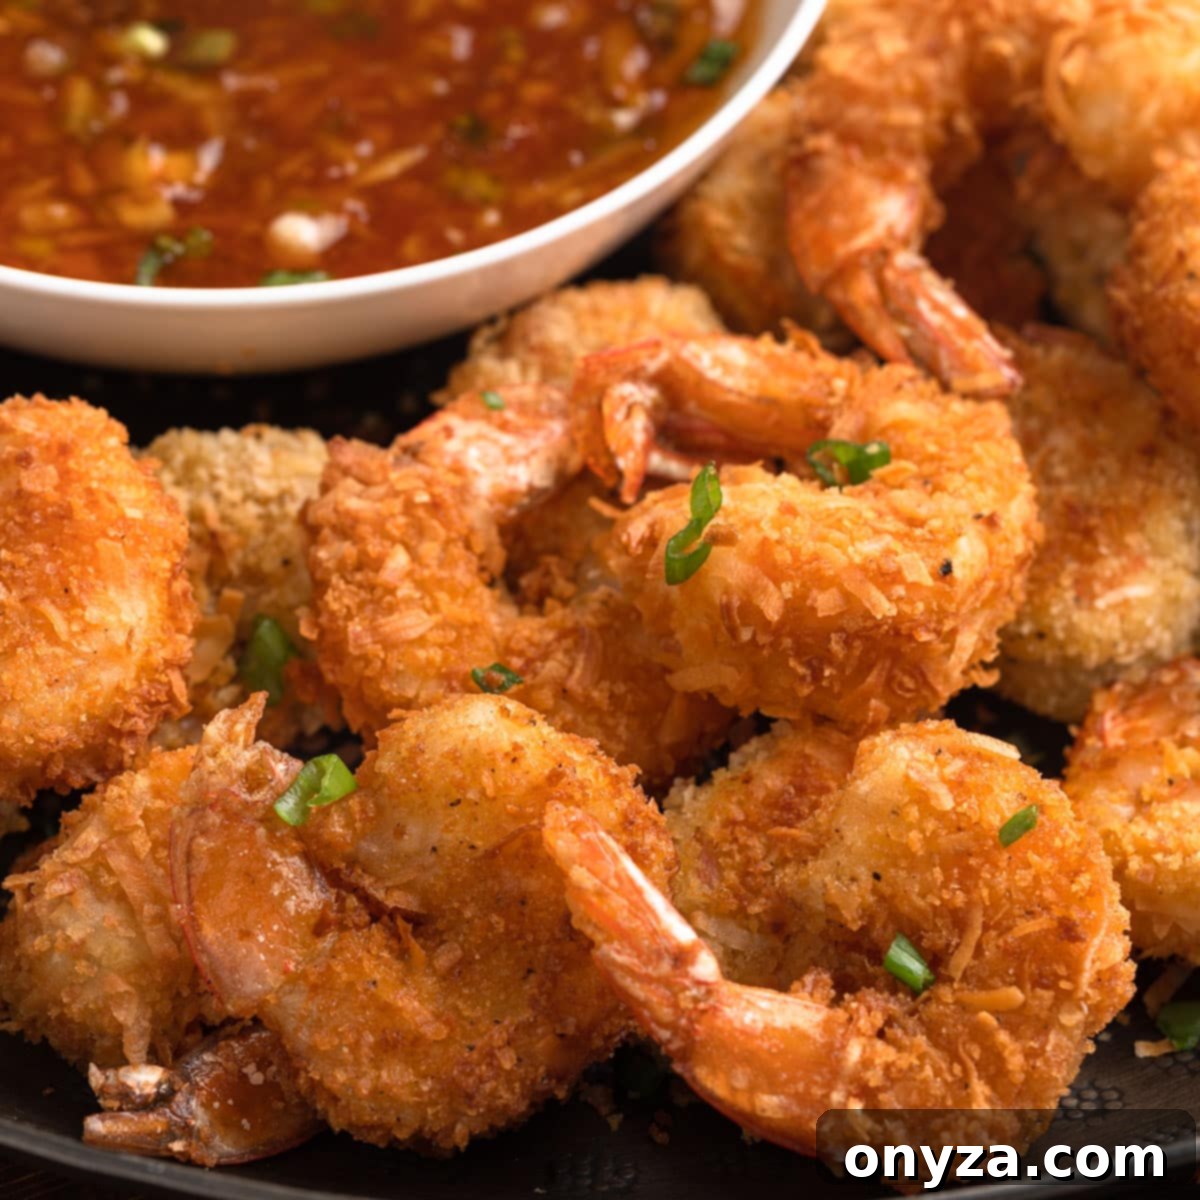
Prepare to delight your taste buds with the irresistible charm of Coconut Shrimp! This beloved appetizer, celebrated for its perfect balance of sweet and savory flavors, combined with an unbelievably crispy crunch, is a guaranteed crowd-pleaser year-round. Whether you’re hosting a lively game day gathering, enjoying a relaxed poolside afternoon, or planning an elegant holiday party, these golden-brown bites are sure to impress. Our ultimate guide simplifies the process, offering versatile cooking methods—deep-frying for that classic restaurant-quality crisp, baking for a lighter touch, or air-frying for a perfectly crunchy result with less oil. Get ready to create a memorable dish that’s as easy to make as it is delicious to devour.
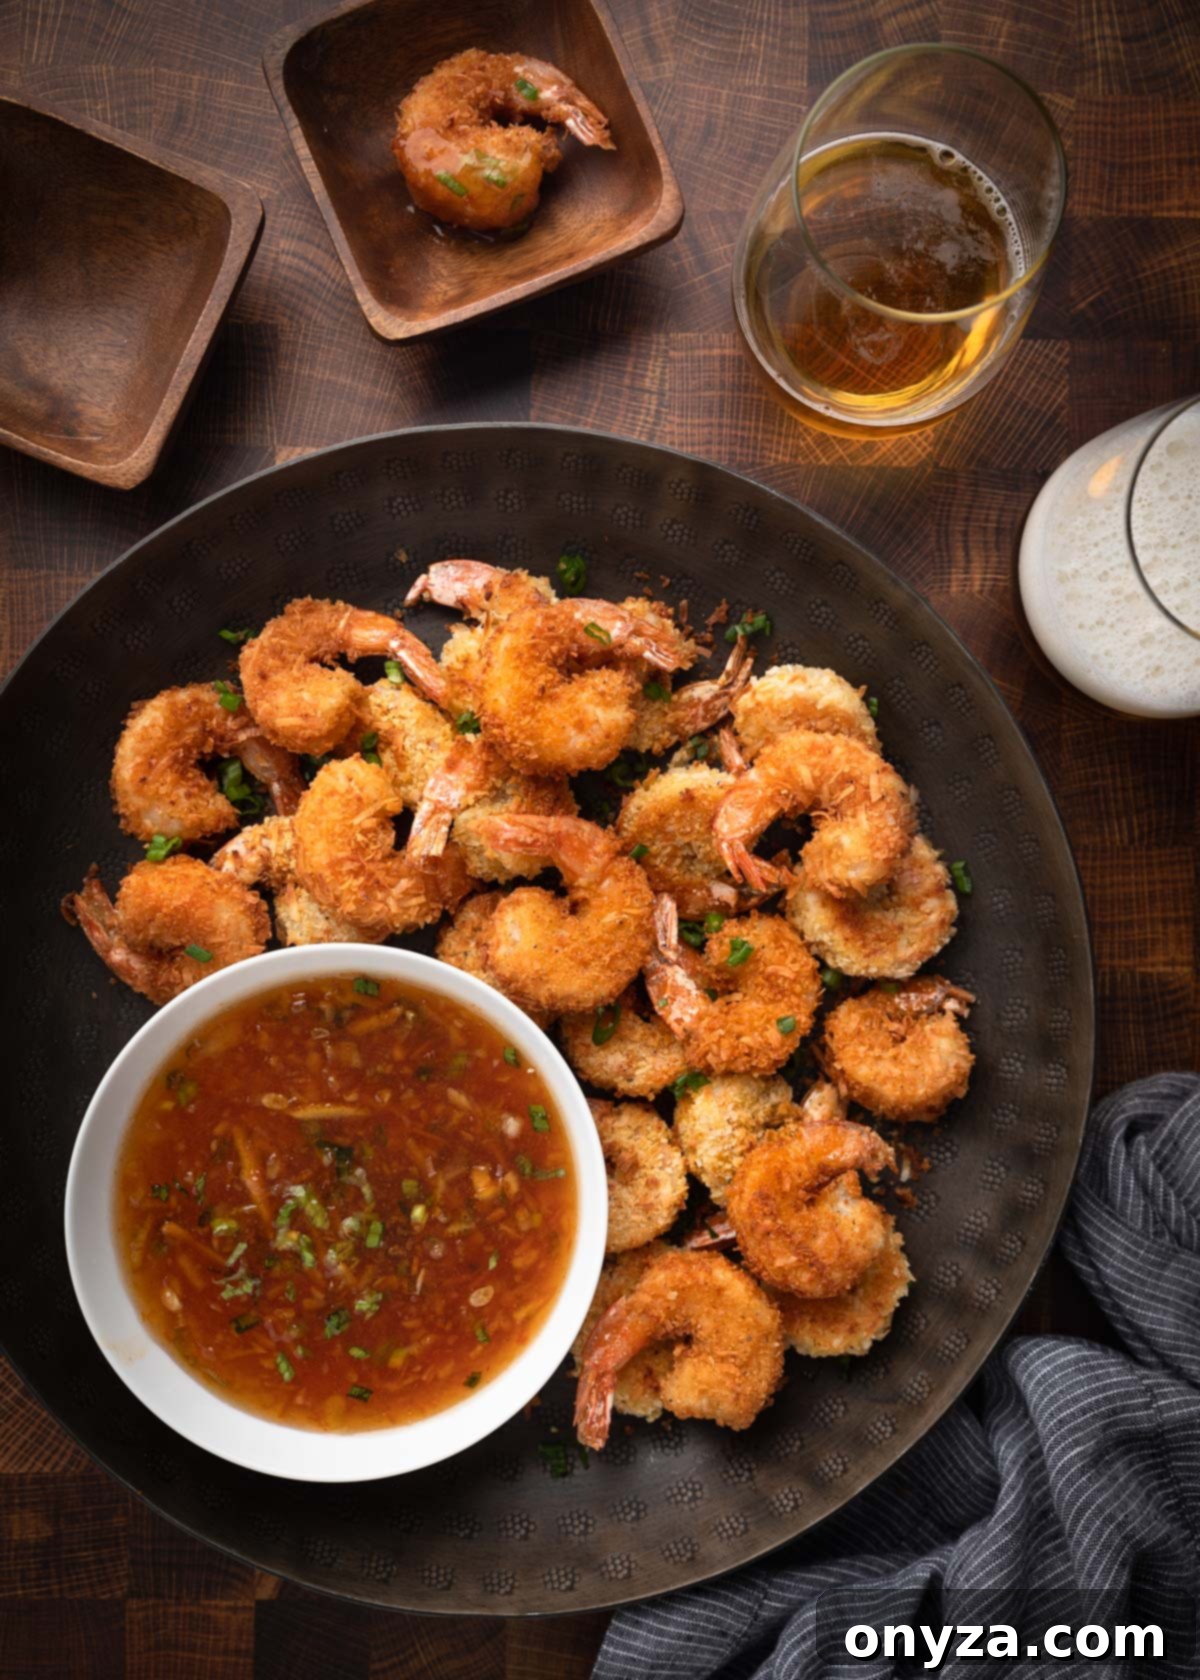
Getting Started: Essential Tips for Perfect Coconut Shrimp
Before you dive into the cooking process, a little preparation and understanding of key ingredients can make all the difference in achieving truly exceptional Coconut Shrimp. Follow these guidelines to ensure the best results and a fantastic culinary experience.
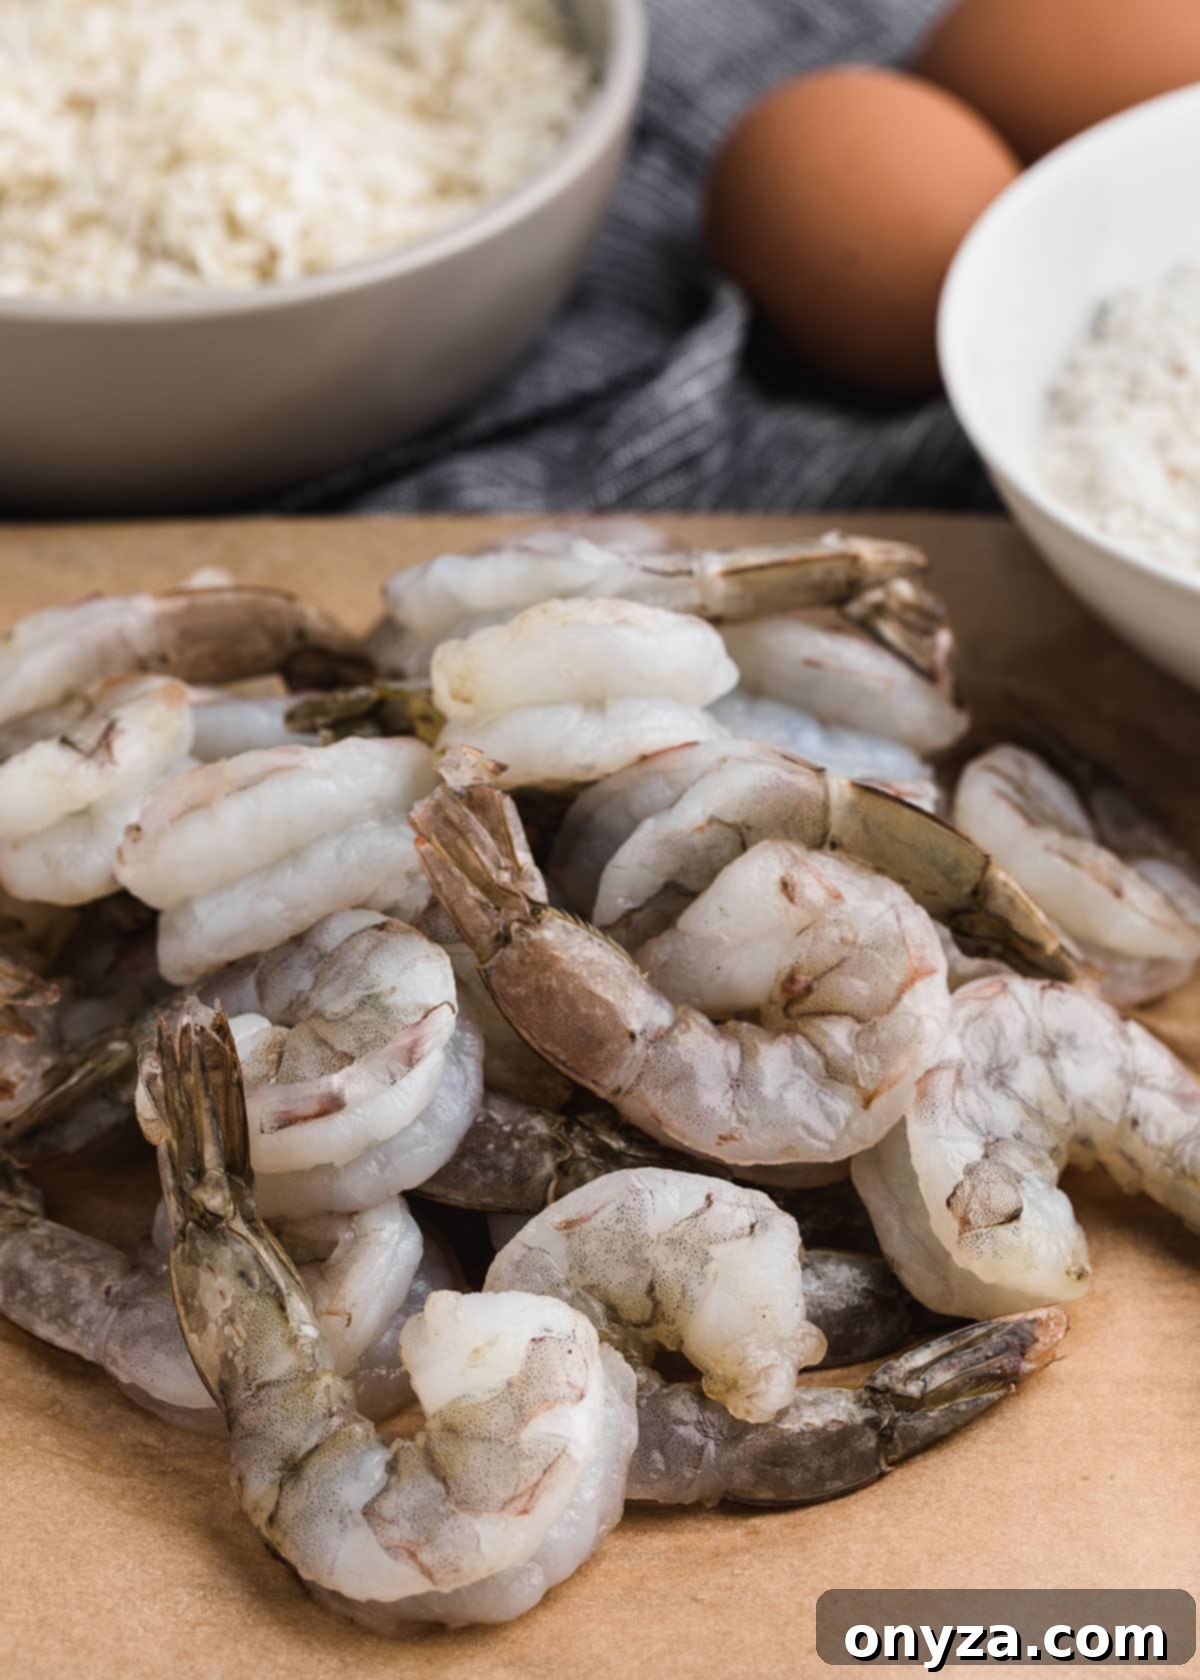
- Choosing the Right Shrimp: The foundation of great coconut shrimp is, of course, the shrimp itself! You’ll want to use raw, deveined, and shelled shrimp with the tails left on. The tail acts as a convenient, built-in handle, making dipping a breeze for your guests. We highly recommend using 16/20 count shrimp. This size strikes the ideal balance: large enough to make a substantial and visually appealing appetizer, yet small enough to cook evenly within the breading and be comfortable to eat. Smaller shrimp might overcook quickly, while significantly larger ones can be awkward for dipping.
- Shopping Smart for Shrimp: Understanding shrimp sizing can be a bit confusing, as numbers often refer to how many shrimp are in a pound. Before you head to the market, consider reviewing a Shrimp Sizing Guide. This will help you confidently select the right count for your recipe, ensuring consistency in your dish and preventing any guesswork.
- Selecting Your Cooking Method: One of the beauties of this recipe is its versatility. You have three excellent options for cooking your Coconut Shrimp, each offering unique benefits: deep-frying, baking, or air-frying. Each method offers a slightly different texture and preparation experience. Deep-frying provides the ultimate crispy, golden exterior. Baking is a lighter alternative, using less oil, while air-frying offers a fantastic crunch similar to deep-frying but with much less fat and a quicker cleanup. We’ll delve deeper into the Comparing Cooking Methods section below to help you decide which approach best suits your preferences and kitchen setup.
Mastering Homemade Coconut Shrimp: A Step-by-Step Guide
Creating crispy, golden Coconut Shrimp at home is a surprisingly straightforward process that yields impressive results. The key lies in proper preparation and a classic three-step breading technique. Let’s walk through each stage to ensure your shrimp turns out perfectly golden and delightfully crunchy every time.
Step 1: Preparing and Breading the Shrimp for Perfection
The first crucial step is preparing your shrimp for breading. If you’re using frozen raw shrimp, it’s absolutely essential to defrost them completely. Once thawed, pat them thoroughly dry with paper towels. Removing every bit of excess moisture is vital for the breading to adhere properly and achieve that desired crispiness; wet shrimp will result in a soggy, poorly adhered breading that won’t crisp up.
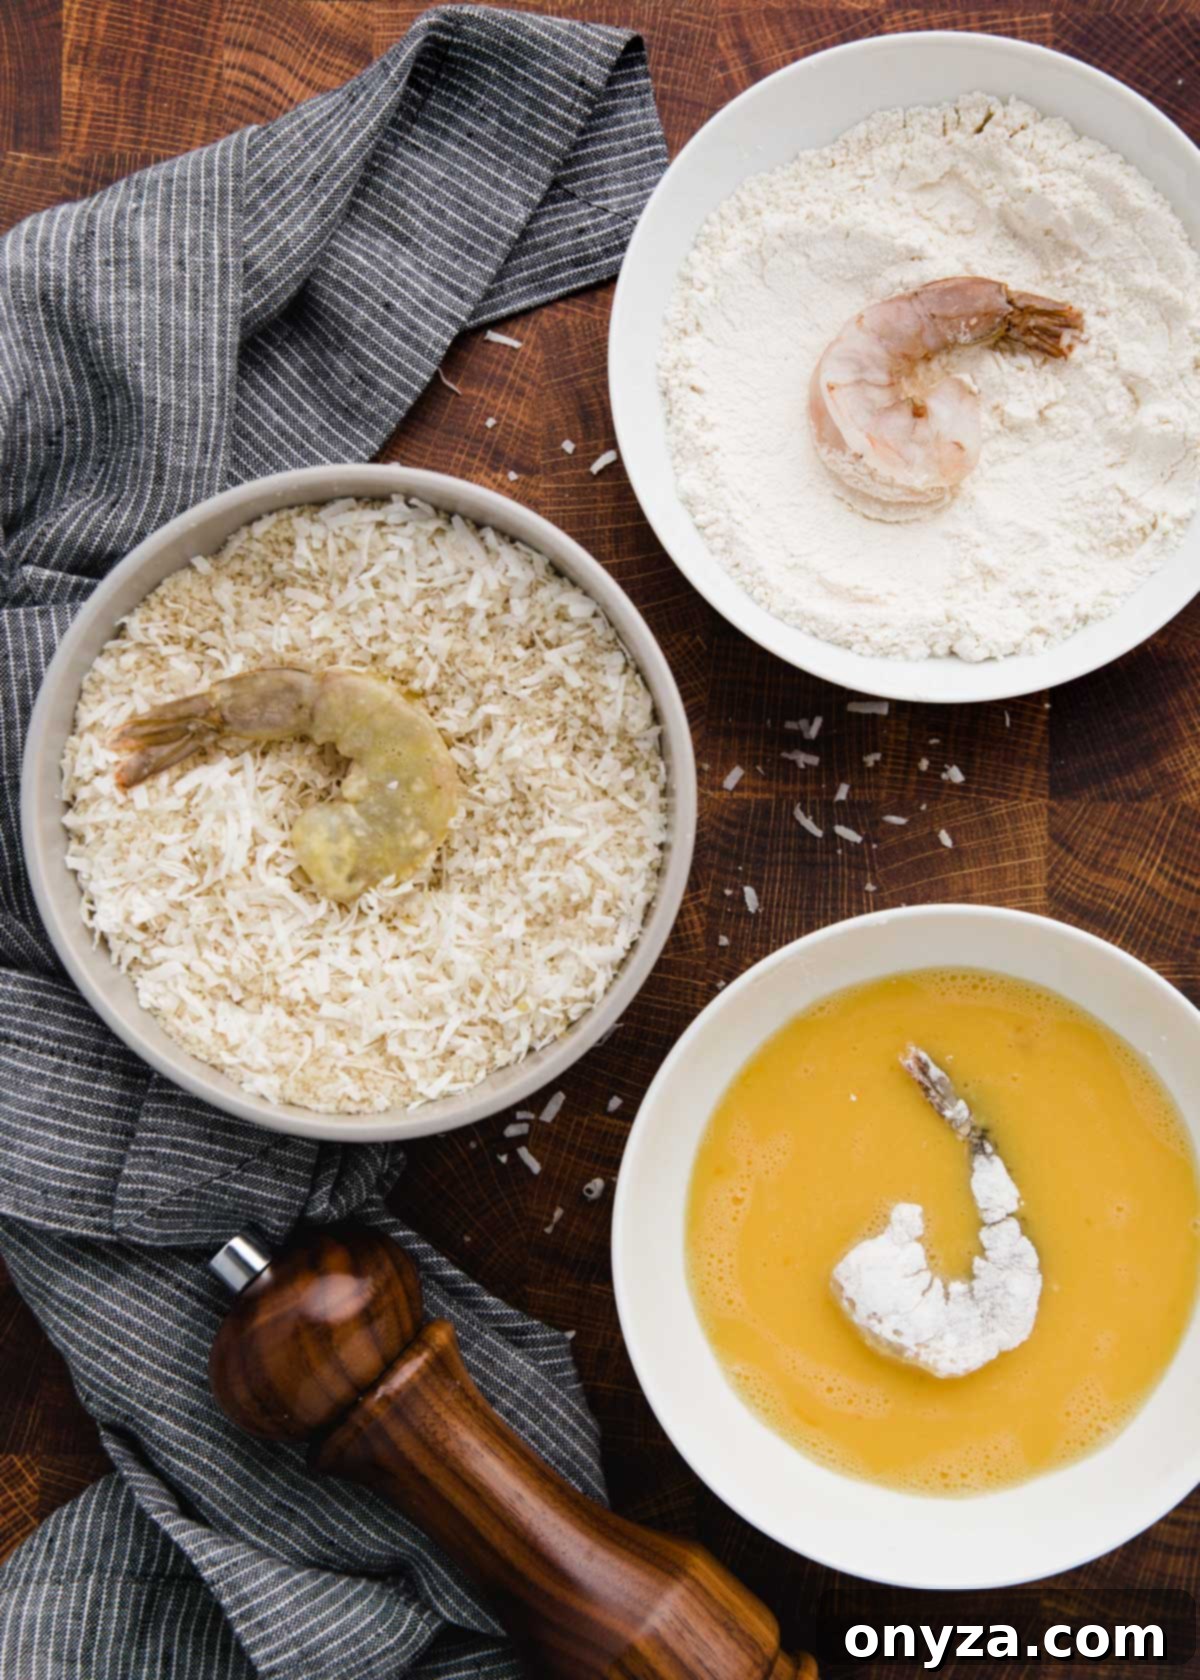
We employ a time-tested, classic three-step breading process to achieve that signature crunchy coating on your Coconut Shrimp. This method ensures maximum adherence and a wonderfully crisp texture. Set up three shallow bowls or trays side-by-side for an organized and efficient breading assembly line, making the process smooth and mess-free:
- Flour Dredge: Begin by dredging each cleaned shrimp in a bowl of all-purpose flour. Season the flour generously with a pinch of kosher salt and freshly ground black pepper. Make sure the shrimp is fully coated, then gently shake off any excess flour. This initial layer is crucial as it creates a dry surface, allowing the egg wash to stick more effectively and forming the base for the subsequent layers.
- Egg Wash Immersion: In the second bowl, prepare your egg wash by beating two whole eggs with a splash of cool water until well combined. Dip each floured shrimp into the egg mixture, ensuring it’s fully coated. Lift the shrimp, allowing any excess egg to drip back into the bowl. This sticky layer is what binds the final crunchy coating firmly to the shrimp.
- Crunchy Coconut-Panko Coating: The final step involves the star coating. In your third bowl, combine shredded coconut with plain panko breadcrumbs. Panko, a Japanese-style breadcrumb, is renowned for its light, airy, and extra-crispy texture, making it far superior to regular breadcrumbs for achieving that signature crunch in this recipe. Season this mixture with salt and pepper to enhance the overall flavor. Gently press each egg-washed shrimp into this coating, ensuring an even and thorough covering on all sides. The more coating that adheres, the crispier and more flavorful your shrimp will be.
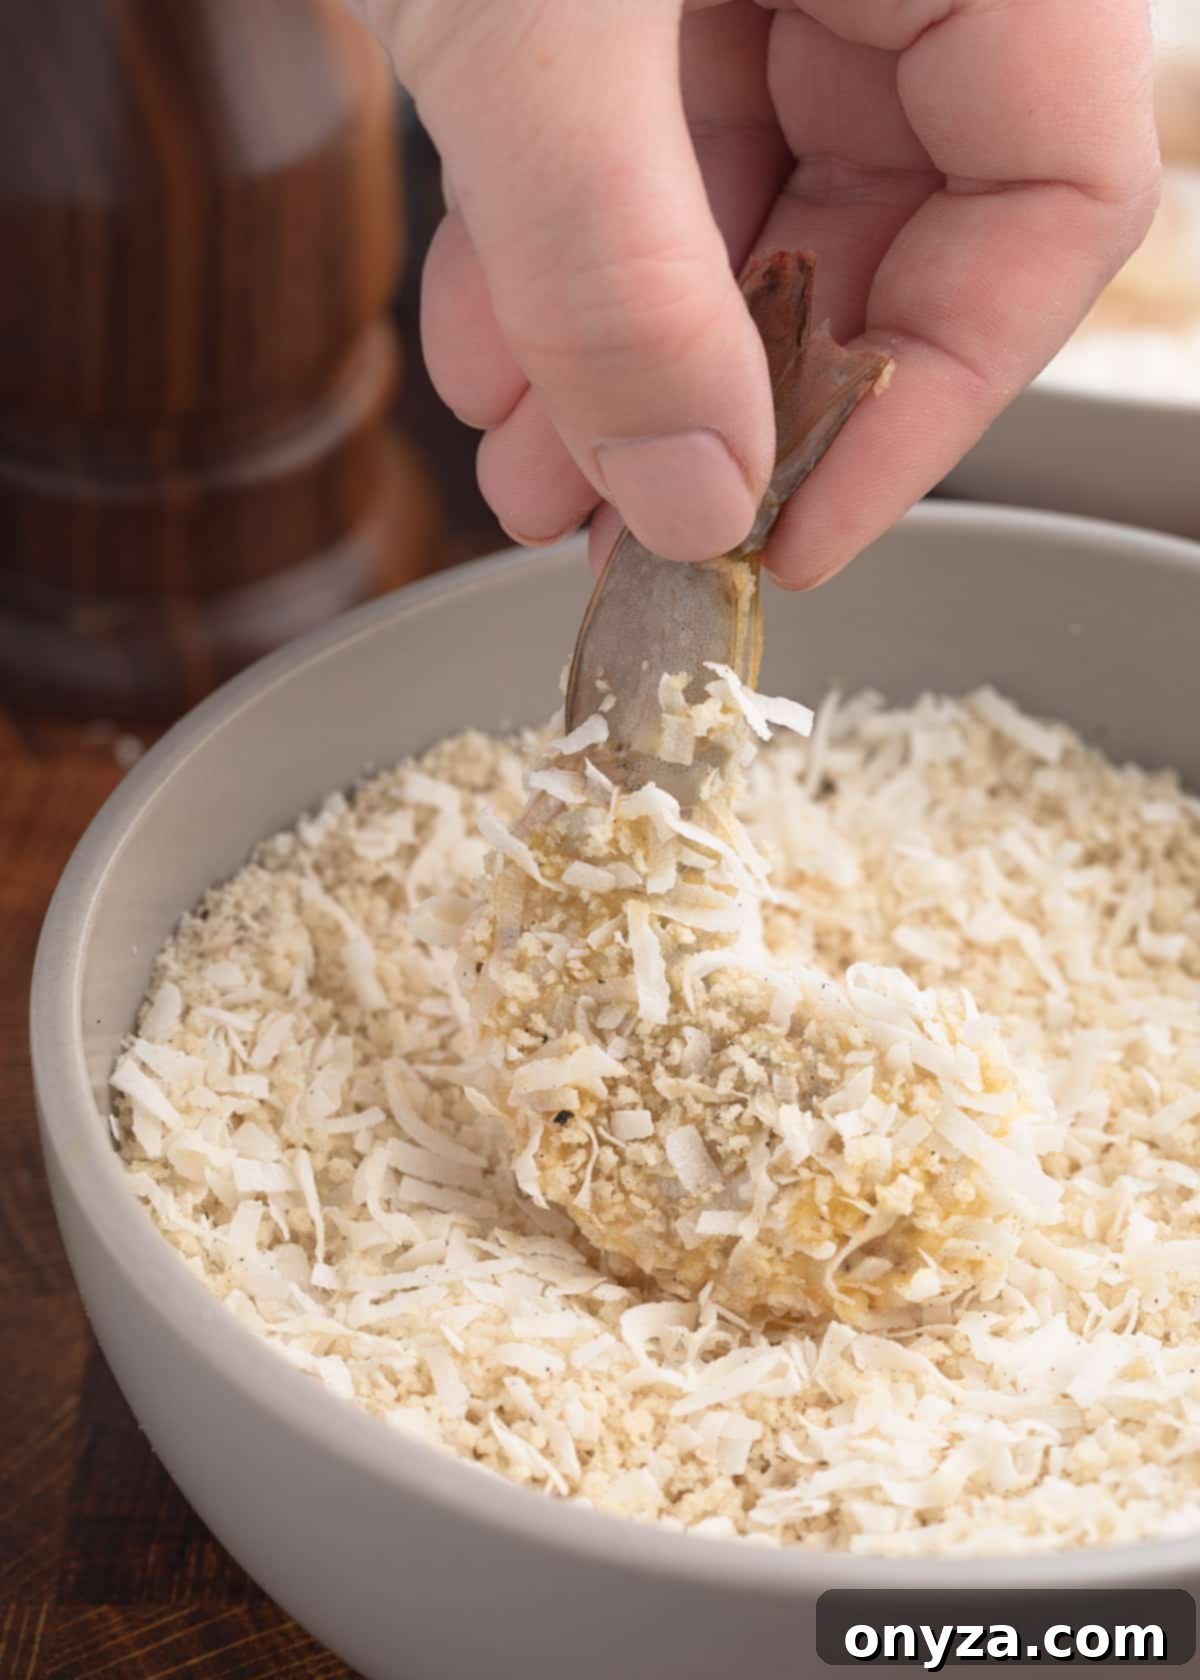
Choosing Your Coconut: When it comes to the shredded coconut, you have a choice between sweetened or unsweetened varieties. It’s important to use shredded coconut, not flaked or desiccated, as the texture is key. My personal preference leans towards unsweetened shredded coconut. This is because I typically serve these shrimp with a sweet-spicy dipping sauce, and using unsweetened coconut prevents the overall bite from becoming excessively sugary, allowing the savory shrimp and coconut flavor to shine. However, if you prefer a sweeter Coconut Shrimp, or if your chosen dipping sauce isn’t particularly sweet, sweetened shredded coconut would be an excellent choice to enhance that tropical flavor profile.
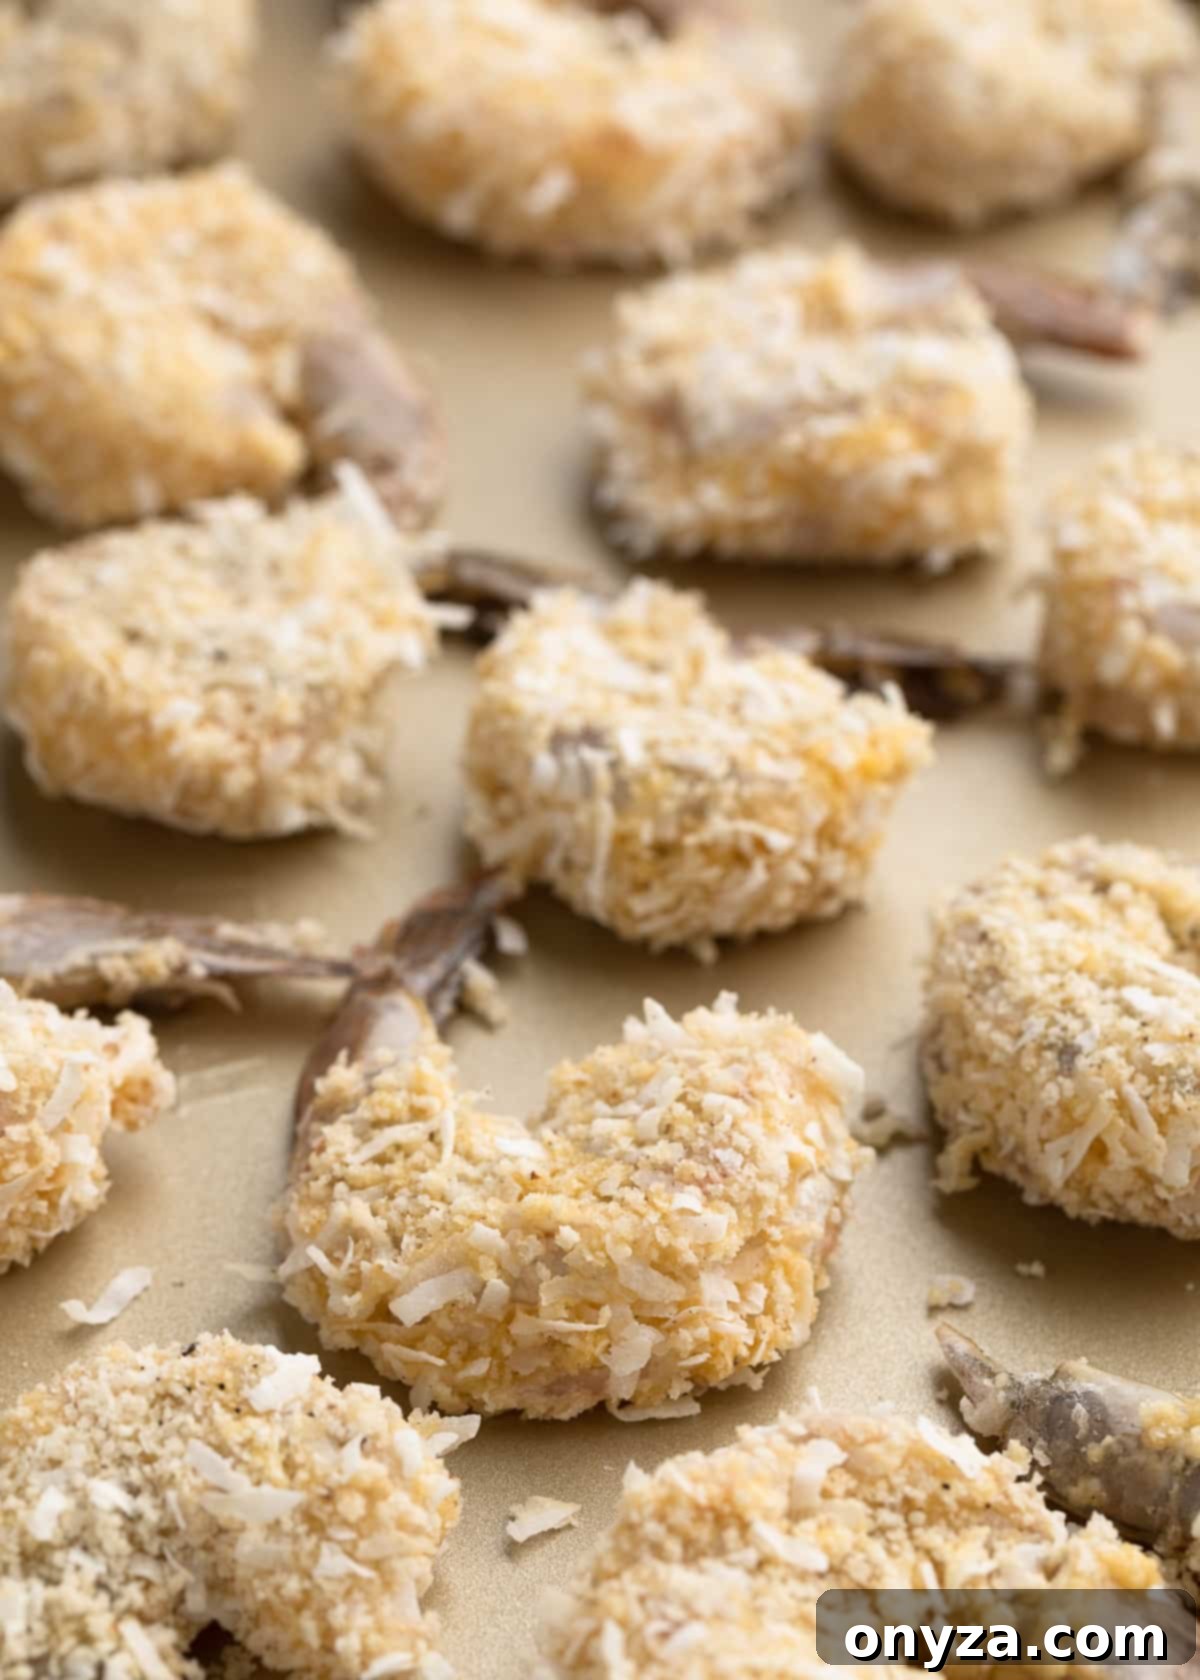
Make-Ahead Tip for Effortless Entertaining: Preparing for a party often involves juggling multiple dishes. Thankfully, Coconut Shrimp can be partially prepared in advance to ease your workload. Once you’ve meticulously breaded the shrimp, arrange them in a single layer on a baking sheet, ensuring they don’t touch. Cover the sheet tightly with plastic wrap or aluminum foil, and refrigerate for up to 6 hours before you plan to cook them. When your guests arrive or you’re ready to serve, simply remove them from the fridge and cook using your chosen method, adding just a minute or two to the cooking time if they are particularly chilled.
Step 2a: Deep Frying for Ultimate Crispy Coconut Shrimp
For that undeniably crispy, golden-brown coating reminiscent of your favorite restaurant appetizer, deep-frying is the way to go. This method yields the most indulgent and satisfying crunch, making it a classic choice for perfect Coconut Shrimp.
To begin, pour 2 to 3 inches of a neutral frying oil (such as vegetable, canola, or peanut oil) into a high-sided, heavy-bottomed pot or an electric deep fryer. Heat the oil to precisely 350°F (175°C). If you’re using a pot on the stovetop, a clip-on thermometer is indispensable for accurately monitoring and maintaining the temperature. Consistent oil temperature is key to preventing greasy shrimp or uneven cooking.
Work in small batches to avoid overcrowding the pot, which can drastically lower the oil’s temperature. I recommend frying 5 to 6 shrimp at a time, depending on the size of your pot. Carefully lower the breaded shrimp into the hot oil. For safety and ease, a spider strainer or a long-handled slotted spoon is ideal for handling the shrimp. Fry for approximately 2 to 4 minutes, gently moving the shrimp around in the oil occasionally to ensure even browning and a consistent cook. The breading will turn a beautiful golden hue, and the shrimp will be opaque throughout, reaching an internal temperature of 145°F (63°C), as verified with an instant-read thermometer.
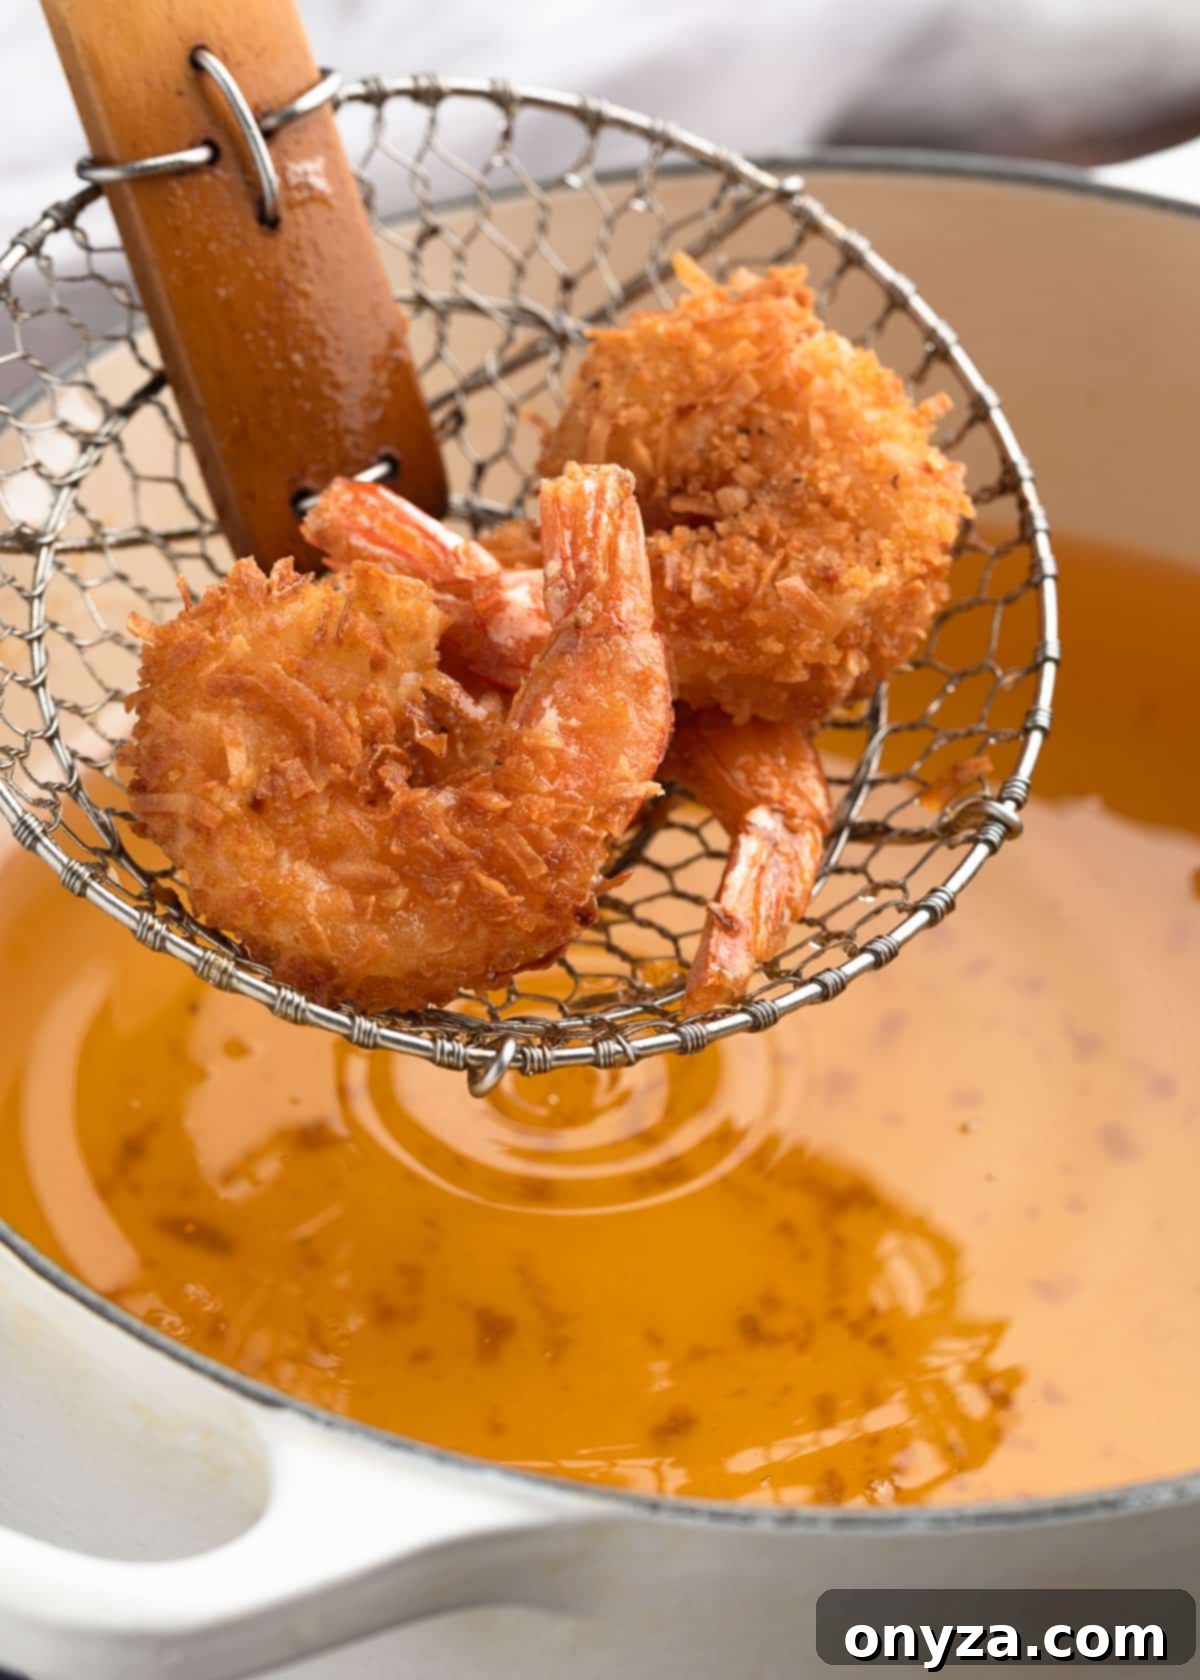
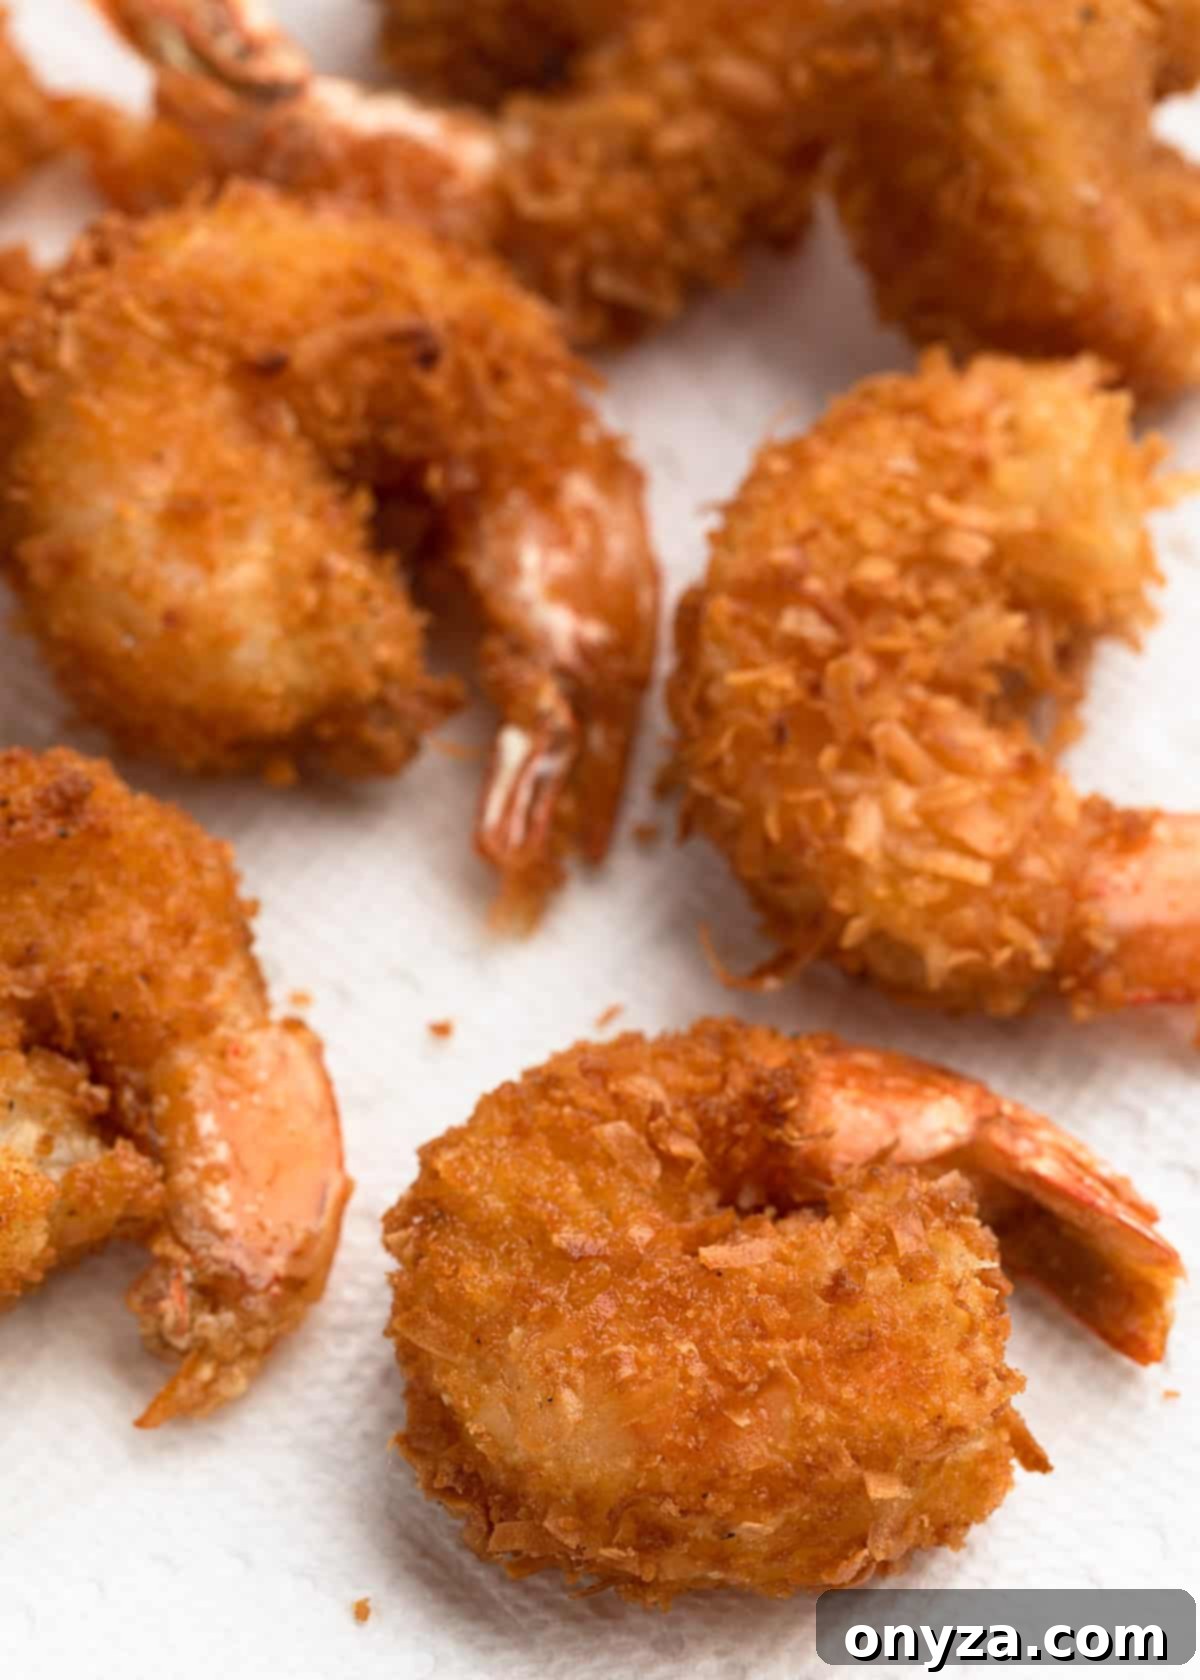
Once cooked, use your spider strainer or slotted spoon to transfer the shrimp to a paper towel-lined plate or a wire rack set over a baking sheet to drain any excess oil. This step is crucial for maintaining their crisp texture and preventing them from becoming soggy.
Deep Frying Best Practice: The exact number of shrimp you can deep-fry per batch will depend on the size of your pot. For example, a 3.5-quart pot can typically accommodate 5 to 6 shrimp per batch, but adjust as necessary for your specific equipment. It is imperative to avoid overcrowding the pot. Frying too many shrimp at once will cause a significant and rapid drop in the oil’s temperature, leading to shrimp that are greasy, less crispy, and unevenly cooked. Patience in batch frying is rewarded with superior results, ensuring each piece is perfectly cooked and golden.
2b. Baking Coconut Shrimp: A Lighter, Flavorful Alternative
For those seeking a healthier approach without sacrificing flavor or a satisfying crisp, baking Coconut Shrimp in the oven is an excellent alternative to deep-frying. This method uses significantly less oil while still delivering a delightful, crispy breading and a delicious golden finish.
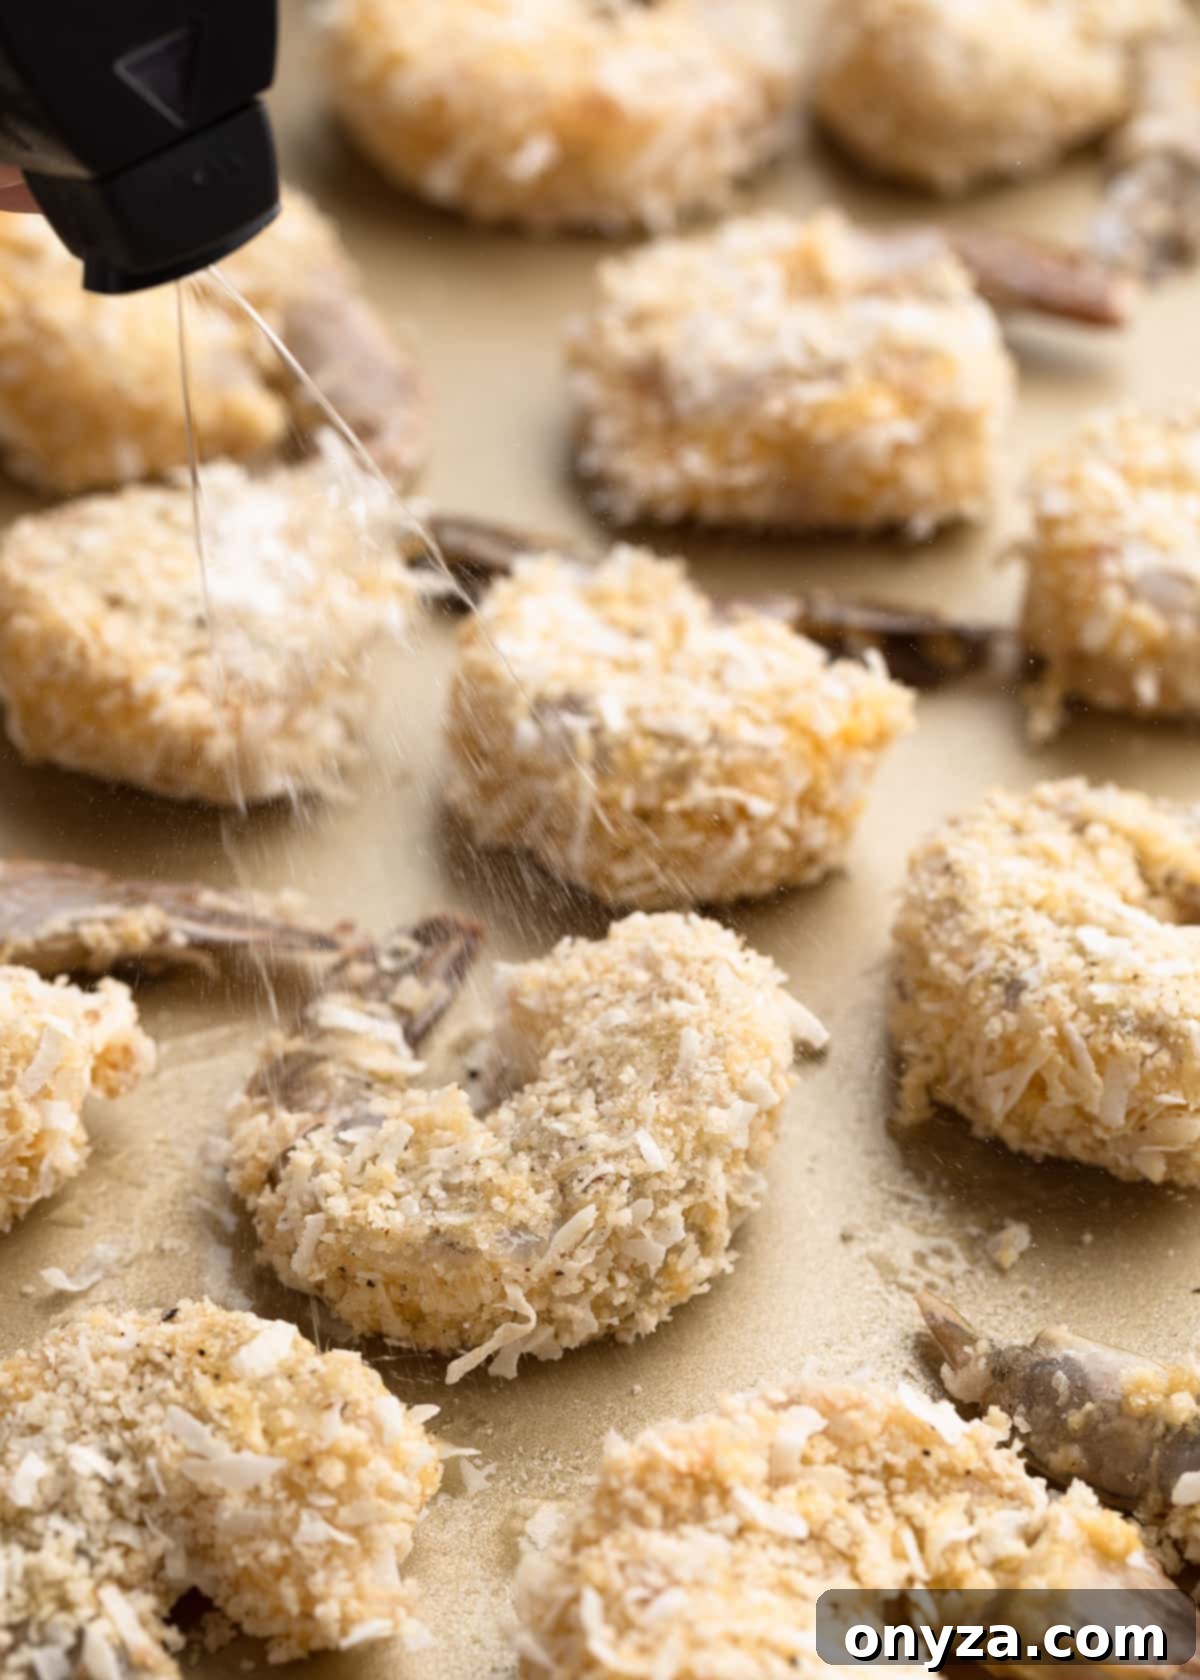
Start by preheating your oven to 425°F (220°C). Arrange the breaded shrimp in a single layer on a sheet pan, ensuring they don’t touch each other. This allows for even air circulation and uniform browning. Next, lightly spray both sides of each shrimp with a neutral, high-heat cooking oil. An oil mister or aerosol spray works perfectly for this, providing an even coating without overdoing it, which helps in achieving a crisp exterior. You could also lightly brush with oil.
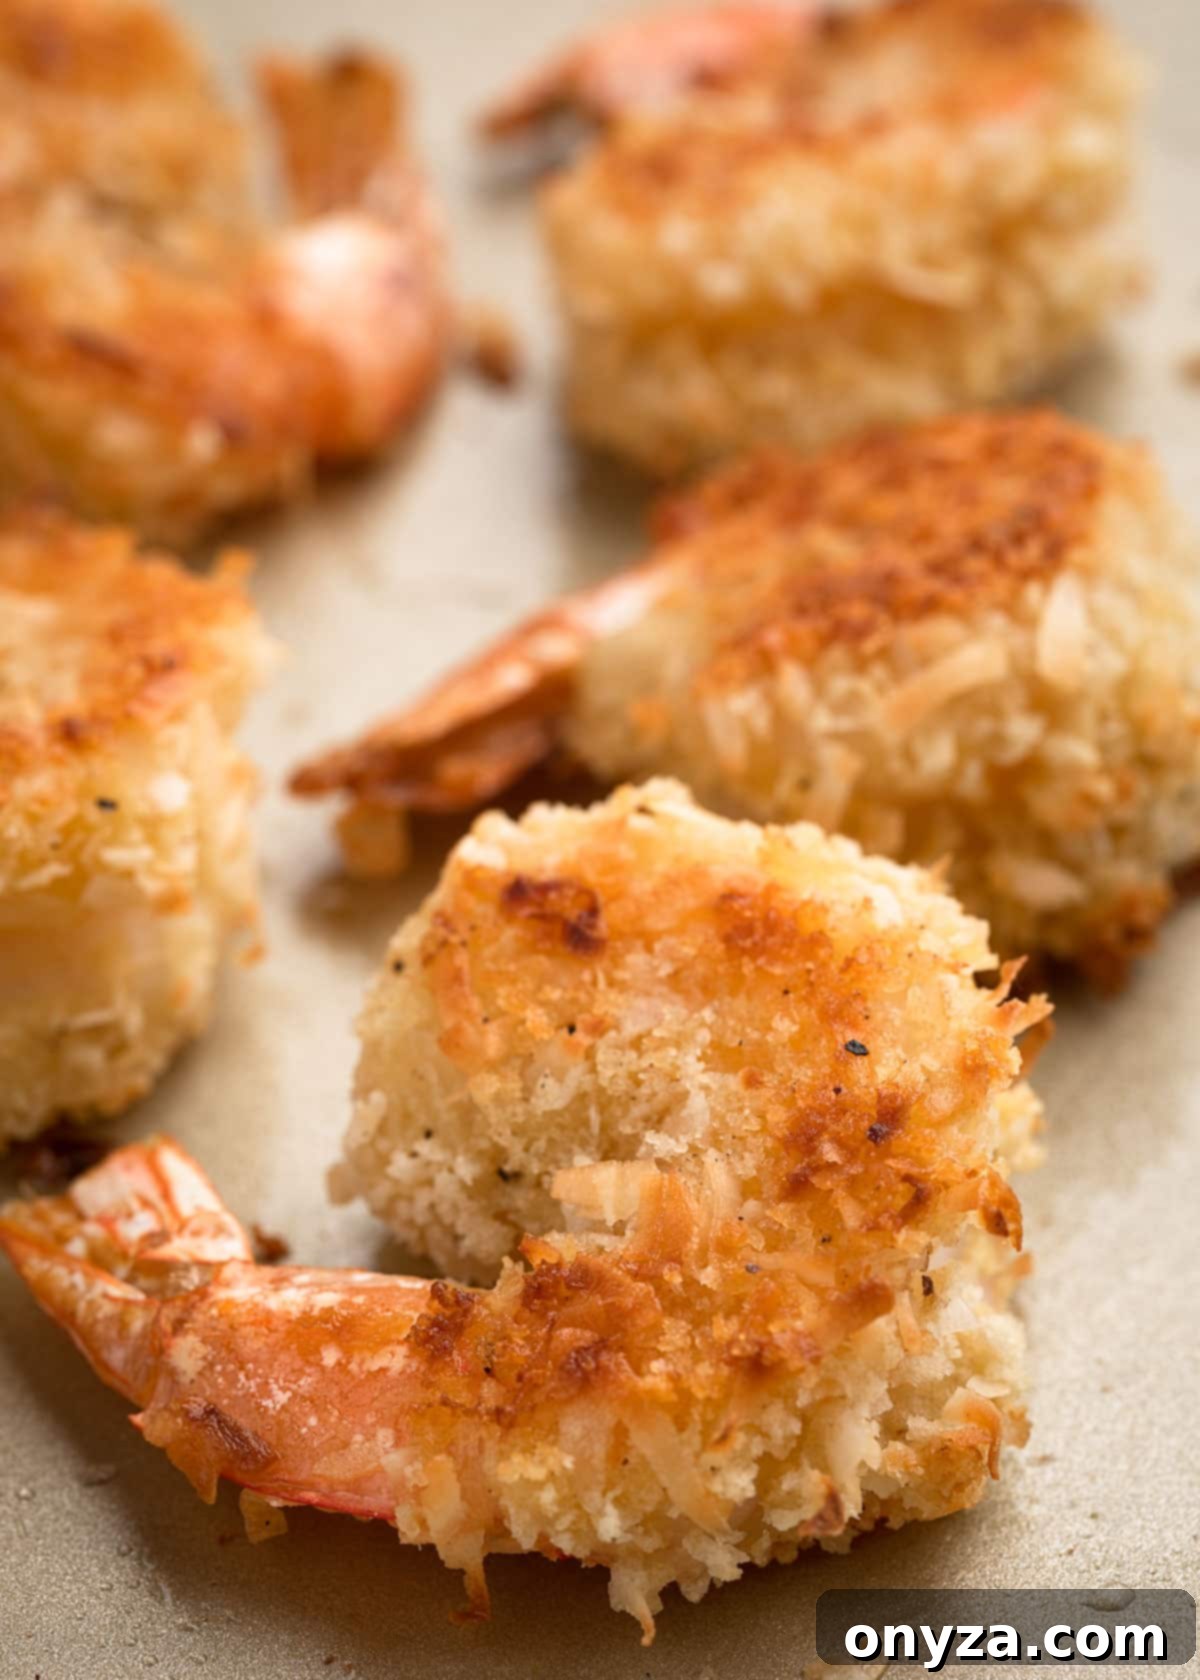
Bake for approximately 8 to 10 minutes. Halfway through the cooking time, gently flip the shrimp to ensure both sides achieve a golden-brown hue and even crispness. The shrimp are ready when they are cooked through (opaque throughout) and the coconut-panko breading is lightly browned and crispy to the touch.
2c. Air Frying Coconut Shrimp: The Modern Approach to Crispness
Air frying has revolutionized home cooking, offering a method that delivers exceptional crispiness with minimal oil, making it a fantastic choice for Coconut Shrimp. An air fryer cooks food in a smaller space with a more concentrated, circulating airflow compared to a conventional oven, resulting in a notably crispier texture than baking, without the deep-frying mess or excessive oil.
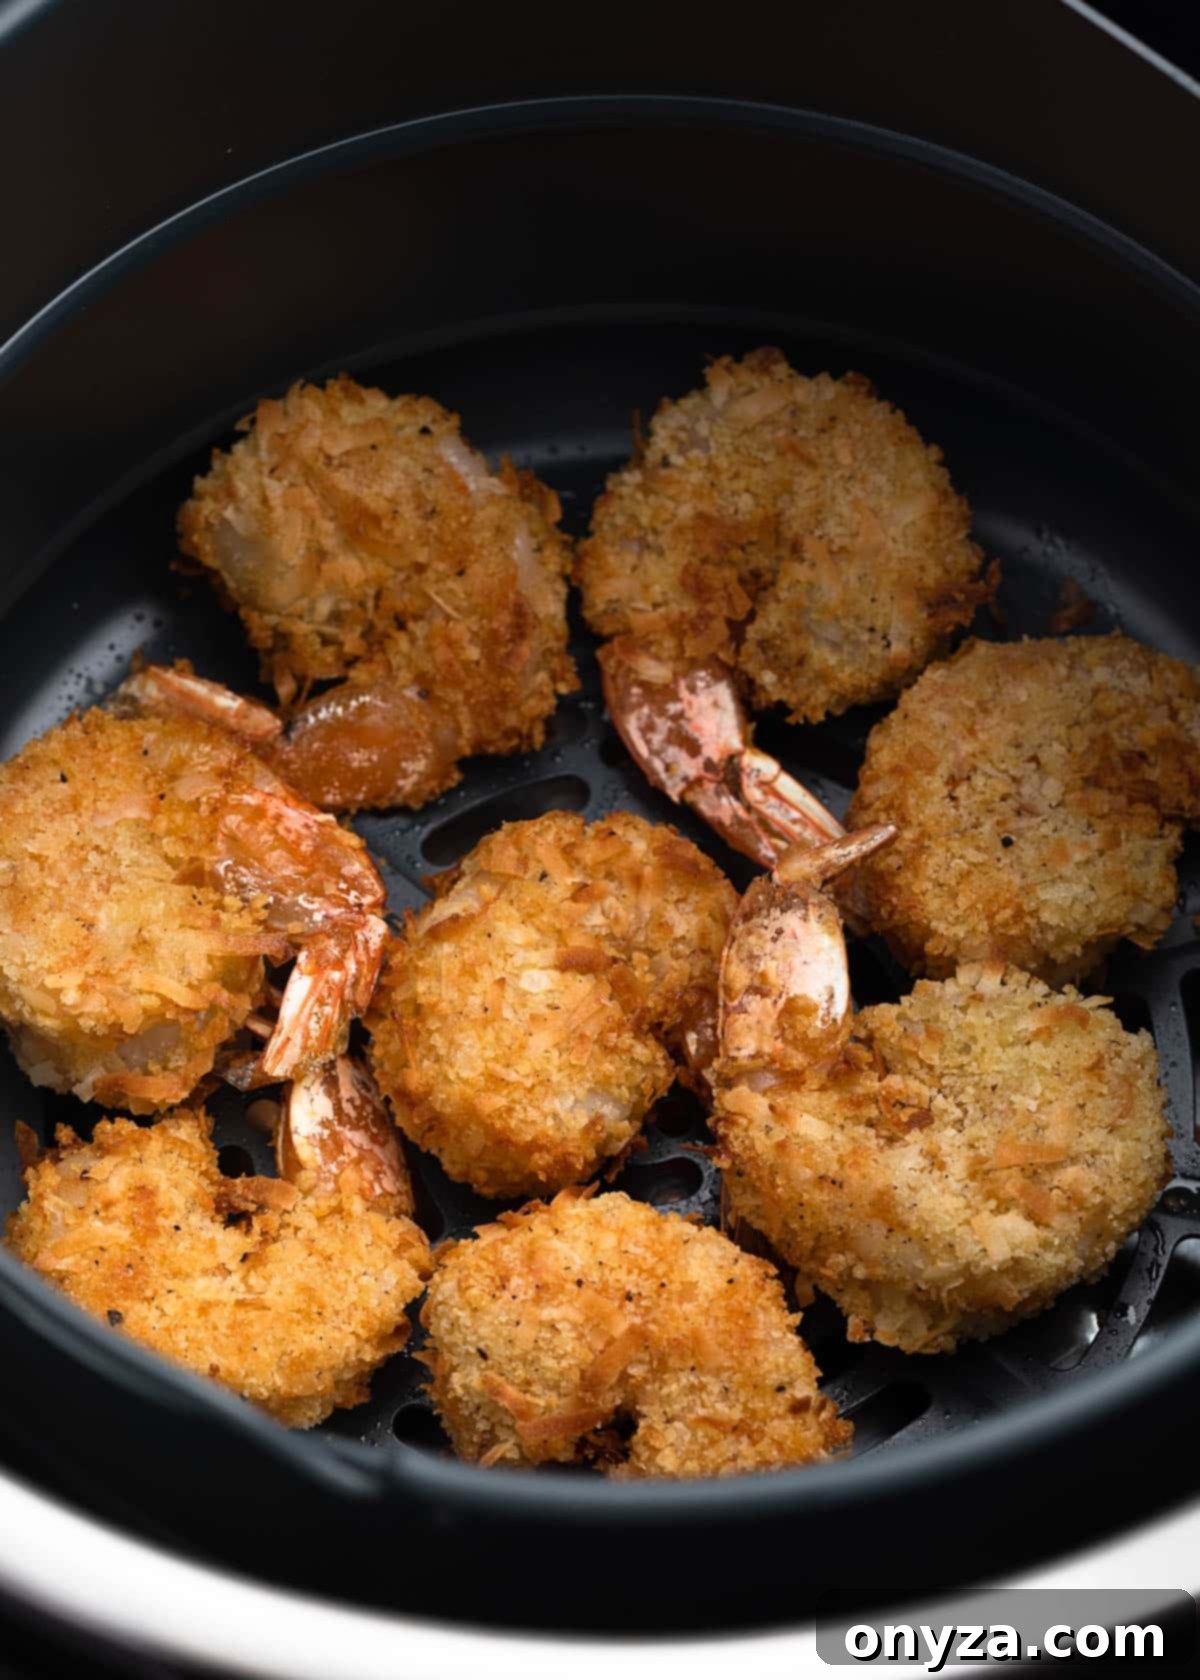
To begin, preheat your air fryer to 400°F (200°C) following your specific model’s manufacturer instructions. (For example, many models, like a Ninja Pro XL air fryer, recommend a 3-minute preheat.) Just as with baking, spray both sides of your breaded shrimp with a neutral cooking oil. This ensures a golden, crispy exterior and helps the coating brown beautifully.
Arrange the shrimp in a single layer within the air fryer basket. It’s crucial to leave some space between each piece to allow the hot air to circulate freely and crisp the coating evenly. If necessary, cook the shrimp in batches to avoid overcrowding, which can lead to steaming instead of frying, resulting in a less crispy product.
Air fry for approximately 6 to 8 minutes, flipping the shrimp once halfway through. Keep a close eye on them, as air fryer cooking times can vary considerably between models, so adjustments may be needed. You’re looking for a beautiful golden-brown color and opaque shrimp throughout. If they appear a bit dry when you flip them, a light re-spritz of oil on the second side can help achieve that perfect, even finish. Be mindful not to overcook, as shrimp can quickly become tough and rubbery.
Comparing Coconut Shrimp Cooking Methods: Finding Your Favorite Crisp
Choosing the “best” method for cooking Coconut Shrimp often comes down to personal preference, desired texture, and your available kitchen equipment. Here’s a breakdown to help you decide which technique aligns with your culinary goals and lifestyle:
- Deep-Fried Coconut Shrimp: For the purists and those craving the most authentic, restaurant-style experience, deep-frying is unmatched. This method delivers the absolute crispiest, most uniformly golden coating. The full immersion in hot oil ensures every inch of the breading achieves maximum crunch and a rich, deep flavor that is simply irresistible. While it’s generally considered the most indulgent option, the unparalleled texture and taste make it a true treat.
- Air-Fried Coconut Shrimp: A fantastic middle-ground, air-frying produces results that are remarkably close to deep-fried shrimp in terms of crispiness and golden color, but with significantly less oil. The powerful circulating hot air within the compact air fryer basket crisps the coating beautifully, offering a satisfying crunch that makes it a top contender for a healthier yet equally delicious alternative. It’s often quicker and less messy than traditional deep-frying, making it ideal for everyday cooking.
- Baked Coconut Shrimp: While still delicious and a great option for a lighter meal, baked Coconut Shrimp will generally be the least crunchy and may not achieve the same uniform golden-brown color as the other two methods. The parts of the shrimp directly touching the baking pan will likely brown the most, creating a pleasant but less consistent crisp. However, if you’re looking for the absolute lightest option, want to minimize oil intake, or don’t have an air fryer, baking remains a very good and convenient choice. They still offer a delightful flavor and a pleasant texture, just with a slightly softer crunch.
Ultimately, all three methods yield delightful Coconut Shrimp. We encourage you to experiment with each to discover your personal favorite and the method that best fits your kitchen and dietary preferences!
Storing and Reheating Coconut Shrimp: Keep the Flavor Alive
While Coconut Shrimp are undoubtedly best enjoyed fresh and hot, you can certainly store leftovers and reheat them. Proper storage and reheating techniques are key to preserving as much of their delicious flavor and texture as possible, ensuring you can enjoy them again without compromise.
- Storage: Any leftover Coconut Shrimp should be stored promptly in an airtight container in the refrigerator for up to 3 days. Keep in mind that their texture won’t be identical to freshly cooked shrimp upon reheating, as the breading naturally softens, but they will still be quite tasty and enjoyable.
- Reheating for Crispiness: To restore some of that beloved crispiness, avoid the microwave at all costs. For the best results, reheat the shrimp in a 350°F (175°C) oven for about 5 minutes, or just until they are heated through. For an even crispier outcome, especially if you have one, use an air fryer at 350°F (175°C) for 2 to 4 minutes, keeping a close eye to prevent overcooking and achieve optimal crispness.
- Avoid the Microwave: We strongly advise against reheating Coconut Shrimp in the microwave. Microwaves tend to steam food, which will inevitably make the crispy breading soggy and the shrimp itself rubbery and unappetizing. This method will completely compromise the texture you worked so hard to achieve.
Always be careful not to overheat when warming them up. Overcooked shrimp, whether initially or during reheating, can quickly become tough, dry, and lose their delicate flavor and tender texture.
Serving Suggestions: Enhancing Your Coconut Shrimp Experience
Coconut Shrimp are a fantastic standalone appetizer, but a few simple additions can elevate your serving presentation and enhance the overall flavor experience. They are always best served hot, immediately after they come out of the fryer, oven, or air fryer, to ensure maximum crispness and the most enjoyable texture.
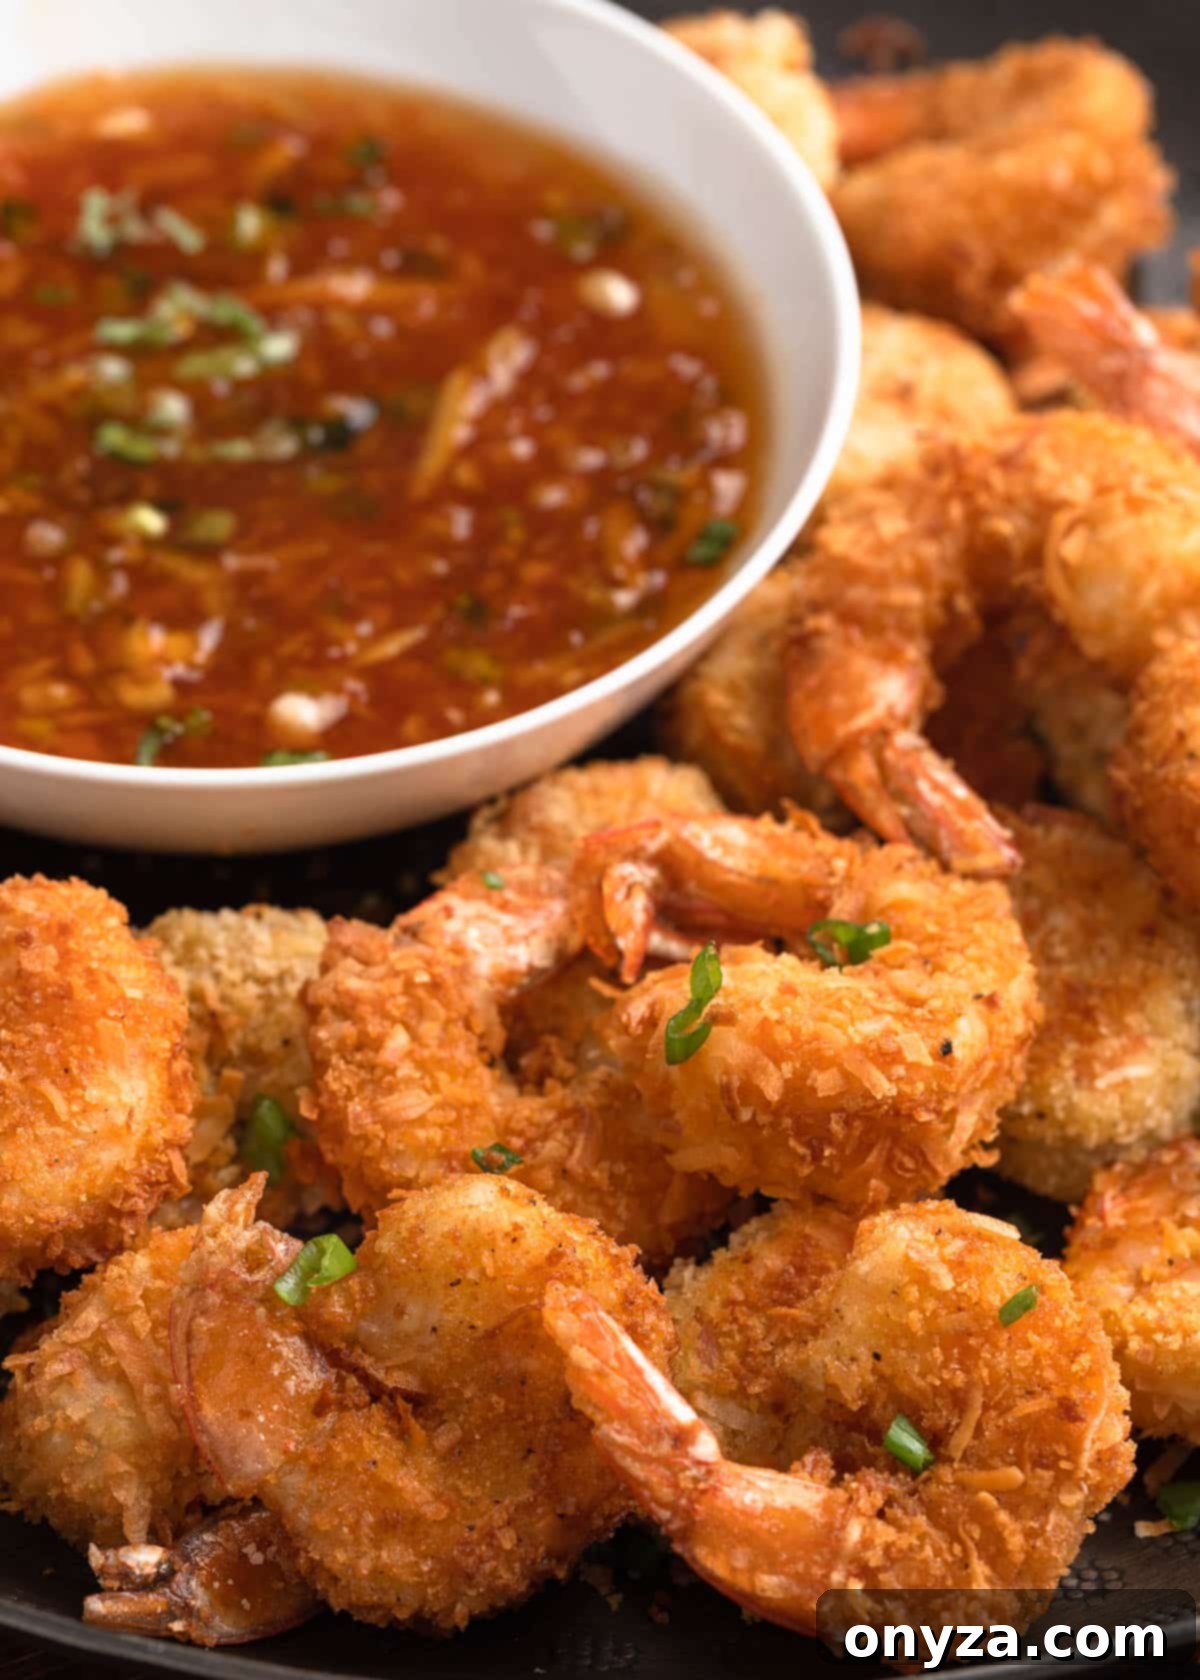
For a fresh and vibrant garnish, consider sprinkling the platter with thinly sliced scallions or finely chopped cilantro. These herbs add a beautiful pop of color and a fresh, aromatic counterpoint to the richness of the shrimp. A squeeze of fresh lime juice just before serving is also a wonderful way to add a bright, zesty pop of freshness that complements the rich coconut flavor beautifully, cutting through any richness.
No Coconut Shrimp experience is complete without the perfect dipping sauce! My family particularly enjoys these shrimp with a sweet-spicy accompaniment, like my homemade Orange-Chili Dipping Sauce, which allows you to customize the heat level to your taste. For a creamy, savory option that still offers a refreshing tang, try them with my Creamy Cilantro Lime Sauce. If you’re short on time or prefer a ready-made solution, store-bought Thai Sweet Chili Sauce is a convenient and delicious alternative that pairs wonderfully with the sweet coconut notes. You can typically find it in the international aisle of most well-stocked grocery stores.
Explore More Delicious Shrimp Appetizers
If you’re a fan of shrimp and looking for more impressive appetizer ideas, be sure to check out these other popular recipes that are perfect for entertaining or a delightful family meal:
- Bacon Wrapped Shrimp with Bourbon Glaze
- Crispy Air Fryer Shrimp
- Poached Shrimp (Perfect for Classic Shrimp Cocktail)
- Elevated Roasted Shrimp Cocktail
Craving even more? Dive into our full collection of Shrimp Recipes for endless inspiration and discover your next favorite seafood dish!
Coconut Shrimp Recipe
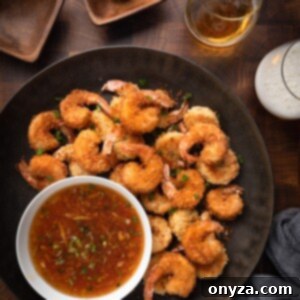
Crispy Coconut Shrimp, prepared three ways—deep-fried, baked, or air-fried! This easy recipe is perfect for a casual dinner, a fantastic game day snack, or an elegant appetizer for holiday entertaining. Serve with a sweet-spicy dipping sauce for an unforgettable restaurant-quality bite at home.
Recipe by: Amanda Biddle
Recipe Details:
- Prep Time: 20 minutes
- Cook Time: 10 minutes
- Total Time: 30 minutes
- Yields: 4 to 5 servings (approx. 4 shrimp per serving)
- Rating: 5 out of 5 stars (based on 1 vote)
Ingredients
- 1 pound raw 16/20 count shrimp, deveined, shelled, tails left on
- ½ cup all-purpose flour
- 2 large eggs
- 1 teaspoon cool water
- ¾ cup unseasoned Panko breadcrumbs
- ¾ cup shredded coconut (unsweetened or sweetened – unsweetened recommended for balanced sweetness with dipping sauce)
- Diamond Crystal kosher salt and freshly-ground black pepper, to taste
- Vegetable, canola, or peanut oil (for deep frying) OR neutral oil spray (for baking or air frying)
- Thinly-sliced scallions or chopped cilantro, for optional garnish
- Orange-Chili Dipping Sauce or Creamy Cilantro Lime Sauce, for serving
Instructions
For All Cooking Methods: Breading the Shrimp
- Prepare three shallow bowls or trays for your breading station. In the first bowl, place the all-purpose flour and season it with a pinch each of kosher salt and black pepper.
- In the second bowl, whisk together the two large eggs with 1 teaspoon of cool water until thoroughly combined. This creates your egg wash.
- In the third bowl, combine the ¾ cup of unseasoned Panko breadcrumbs with ¾ cup of shredded coconut. Season this mixture with ½ teaspoon each of kosher salt and black pepper.
- Thoroughly pat the raw shrimp dry with paper towels to remove any excess moisture, which is crucial for a crisp coating.
- One at a time, dredge each shrimp completely in the seasoned flour, shaking off any excess.
- Next, dip the floured shrimp into the egg wash, allowing any excess egg to drip off.
- Finally, roll the shrimp generously in the coconut-panko mixture, gently pressing to ensure the coating adheres evenly and completely to all sides.
To Deep-Fry Coconut Shrimp:
- Heat 2-3 inches of neutral frying oil (vegetable, canola, or peanut) in a heavy-bottomed, deep pot or an electric deep fryer to a precise temperature of 350°F (175°C). Use a kitchen thermometer for accurate temperature monitoring.
- Carefully lower the breaded shrimp into the hot oil in small batches of about 5-6 shrimp at a time. Avoid crowding the pot, as this will drop the oil temperature and lead to greasy, unevenly cooked shrimp.
- Fry for approximately 3-4 minutes, gently moving the shrimp around with a spider strainer for even browning, until the breading is golden brown and the shrimp are opaque throughout.
- Remove the deep-fried shrimp from the oil using the spider strainer and transfer them to a double layer of paper towels set on a plate or a wire rack to drain excess oil.
To Bake Coconut Shrimp:
- Preheat your oven to 425°F (220°C). Position an oven rack in the lower-middle position.
- Arrange the breaded shrimp in a single layer on a baking sheet, ensuring there is space between each piece for optimal airflow and browning.
- Lightly spray both sides of each shrimp with a neutral vegetable oil spray or another high-heat neutral-flavored oil spray of your choice.
- Bake for 8-10 minutes, flipping the shrimp over once halfway through the baking time, until the breading is light golden and the shrimp are fully cooked and opaque.
To Air-Fry Coconut Shrimp:
- Preheat your air fryer to 400°F (200°C) according to your appliance’s instructions (typically 3-5 minutes).
- Lightly spray both sides of the breaded shrimp with vegetable oil spray, as described in the baking method.
- Place the shrimp in the air fryer basket in a single layer, ensuring there’s a little space between each piece for optimal air circulation. Cook in batches if necessary to avoid overcrowding.
- Air fry for 6-8 minutes, flipping the shrimp once during cooking, until the breading is golden and crispy, and the shrimp are cooked through and opaque. If they appear dry when flipping, give them another light spritz of oil. Monitor closely as air fryer times can vary.
To Serve Coconut Shrimp:
- Arrange the freshly cooked Coconut Shrimp on a beautiful serving platter immediately after cooking.
- Garnish with thinly-sliced scallions or chopped cilantro, if desired, for a pop of color and fresh aroma.
- Serve hot with your favorite dipping sauce, such as our recommended Orange-Chili Dipping Sauce or Creamy Cilantro Lime Sauce, or a store-bought Thai Sweet Chili Sauce.
Notes for Success:
- Nutrition Estimate: The nutrition estimates provided below are for deep-fried shrimp, assuming approximately 10% oil absorption. These values are for the shrimp only and do not include any dipping sauce. Please use these as an approximation.
- Prep-Ahead Convenience: For easier entertaining, you can bread the shrimp up to 6 hours in advance. Store them in a single layer on a baking sheet, covered tightly with plastic wrap or foil, in the refrigerator. When cooking, you might need to add an extra minute or two to the cooking time if they are well chilled.
- Spice it Up: For a delightful kick and a bit more heat, consider whisking ½ teaspoon of cayenne pepper into the all-purpose flour mixture during the breading process.
- Further Information: For more detailed insights on shrimp sizing, a comprehensive comparison of cooking methods, and additional reheating suggestions, please refer to the detailed sections in the main blog post above.
Nutrition Estimate
(Based on deep-fried shrimp, assuming 10% oil absorption. Values are for shrimp only and do not include dipping sauce. Nutrition information is automatically calculated, so should only be used as an approximation.)
- Serving: 4 shrimp
- Calories: 575 kcal
- Carbohydrates: 28g
- Protein: 30g
- Fat: 38g
- Saturated Fat: 29g
- Cholesterol: 391mg
- Sodium: 1048mg
- Potassium: 225mg
- Fiber: 2g
- Sugar: 8g
- Vitamin A: 153 IU
- Vitamin C: 5mg
- Calcium: 203mg
- Iron: 5mg
Please note that our recipes have been developed using the US Customary measurement system and have not been specifically tested for high altitude/elevation cooking and baking. Adjustments to cooking times or ingredient quantities may be necessary for different environmental conditions or regions.
Editor’s note: This recipe was originally published on Striped Spatula in January 2020. We have since updated this blog post with improved copy to best serve our readers, including enhanced instructions, additional tips, and a focus on SEO best practices for a richer reading experience.
