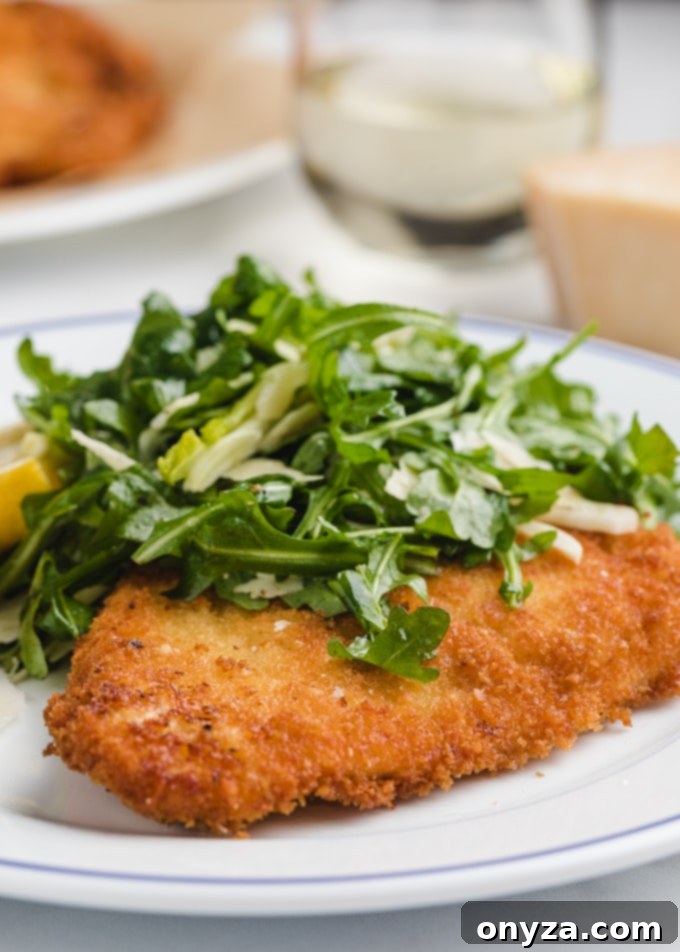
Indulge in the crispy, golden delight of Chicken Milanese – a timeless family favorite that transforms an ordinary meal into an extraordinary culinary experience. These perfectly thin, breaded chicken cutlets, often served alongside a vibrant arugula salad, promise a quick yet elegant dinner solution. Ready in just 30 minutes, Chicken Milanese is versatile enough for a busy weeknight, a romantic date night, or a sophisticated casual dinner party. Get ready to discover the secrets to achieving restaurant-quality results right in your own kitchen!
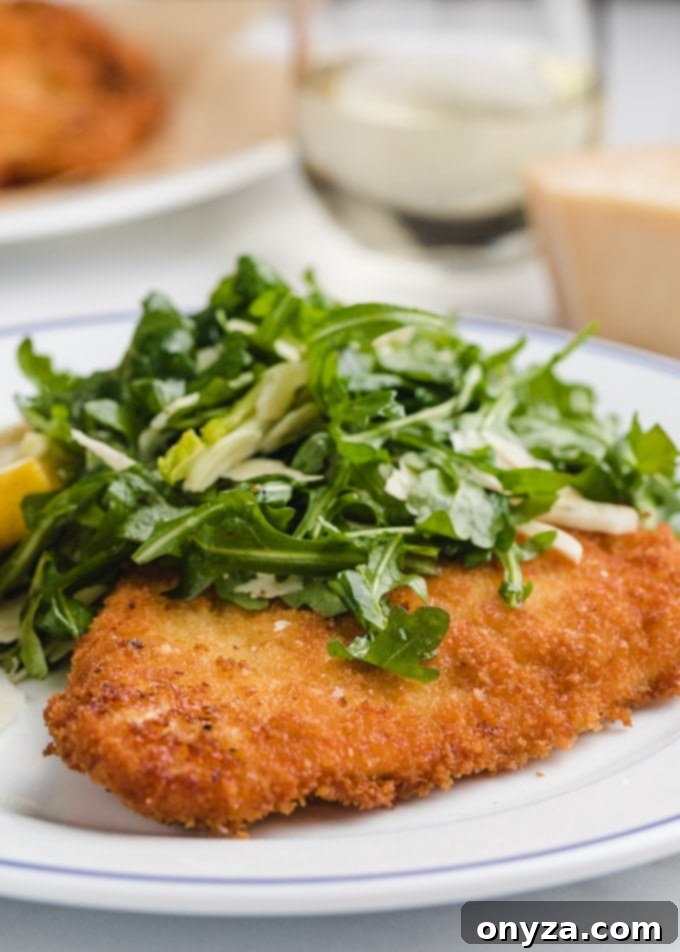
What is Chicken Milanese? A Culinary Journey of Crispy Cutlets
The concept of a breaded and pan-fried meat cutlet is a universally cherished culinary tradition, with nearly every culture boasting its own distinctive version. From Austria’s iconic Wiener Schnitzel to Japan’s savory Tonkatsu, and the hearty Chicken Fried Steak beloved in the Southern U.S., these dishes share a common thread of satisfying crispiness. In Italy, specifically the gastronomic hub of Milan, this tradition manifests as the renowned Veal Milanese (Cotoletta alla Milanese).
Chicken Milanese emerges as a hugely popular and accessible variation of this classic Italian recipe. It features succulent, thinly-sliced chicken breast cutlets, meticulously breaded and then shallow-fried to golden perfection in a pan, typically using clarified butter or a neutral oil. The result is a wonderfully crisp exterior that yields to tender, juicy chicken within.
While traditionalists swear by pan-frying, modern cooking methods offer lighter alternatives without compromising on flavor or texture. For those seeking a quicker, less oil-intensive approach, Chicken Milanese can also be prepared beautifully in an air fryer. We’ll explore both techniques in this comprehensive guide, ensuring you can achieve perfect results no matter your preference.
Traditionally, this exquisite dish is presented simply, allowing the flavors of the chicken to shine. A squeeze of fresh lemon juice adds a bright, zesty counterpoint, cutting through the richness of the fried cutlet. It’s most commonly paired with a light, peppery salad, usually one based on fresh arugula, creating a balanced and utterly delicious meal experience.
Mastering Chicken Milanese: A Step-by-Step Guide to Crispy Perfection
Crafting exquisite Chicken Milanese at home is far simpler than you might imagine. This dish requires only a handful of readily available ingredients and straightforward techniques. By paying close attention to a few key preparation tips, you’ll consistently achieve the crispiest chicken and the most flavorful results, turning every meal into a special occasion.
Selecting and Preparing Your Chicken Cutlets for Optimal Tenderness
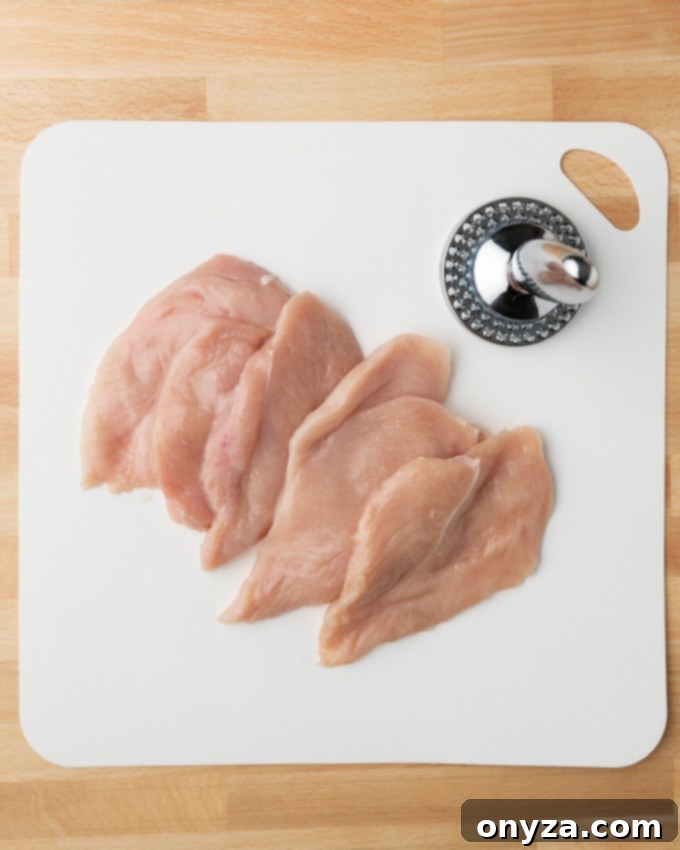
The foundation of a great Chicken Milanese lies in its thin cutlets. To begin, you’ll need thin chicken breast cutlets. Many grocery stores offer these pre-cut at the butcher counter, saving you a step. If pre-cut options aren’t available, simply purchase boneless, skinless chicken breasts and prepare them at home. The goal is a uniform thickness that allows for quick and even cooking.
To achieve the ideal thinness, you’ll need to pound the chicken. Place each chicken breast or half-breast between two sheets of plastic wrap or inside a large, unsealed zip-top freezer bag (leaving it unsealed prevents trapped air from tearing the bag). Using the flat side of a meat mallet, a meat pounder, or even a heavy-bottomed skillet, gently pound the chicken until it reaches a consistent thickness of about 1/4-inch. The plastic wrap or bag prevents the chicken from tearing and keeps your work surface clean.
If you’re starting with full, thick chicken breasts, use a sharp chef’s knife to first slice each breast horizontally, creating two thinner halves. Then, proceed with pounding these halves. When pounding, aim for even pressure across the entire surface of the meat. Avoid hitting too hard in one spot, which can cause the delicate chicken to tear. Consistent thickness is crucial for ensuring the cutlets cook uniformly and become perfectly crispy without drying out.
A good meat mallet makes all the difference! Consider investing in a quality reversible meat tenderizer, featuring both flat and spiked sides. A well-weighted mallet with dishwasher-safe components ensures both effectiveness and easy sanitization after use.
The Art of Perfect Breading: Achieving that Signature Crispy Coating
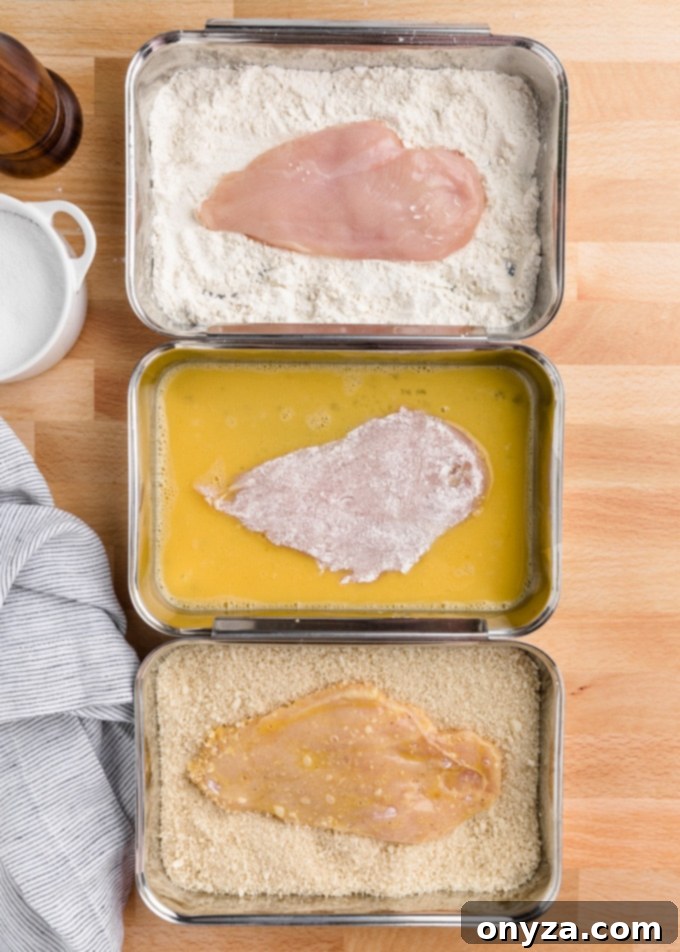
The crispy, golden crust is what truly defines Chicken Milanese. This is achieved through a classic three-step breading process, each component playing a vital role. Set up three separate shallow plates, dishes, or breading trays for an efficient assembly line:
- Flour: In the first dish, place all-purpose flour seasoned generously with salt and freshly ground black pepper. This initial layer creates a dry surface for the egg wash to adhere to.
- Egg Wash: In the second dish, whisk large eggs with a teaspoon of cool water and a pinch of salt and pepper. The water helps thin the egg, ensuring a lighter, more even coating.
- Panko & Parmesan: In the third dish, combine unseasoned Panko breadcrumbs with grated Parmigiano Reggiano cheese and another pinch of salt.
Panko breadcrumbs are highly recommended for this recipe due to their coarser, flakier texture, which fries up exceptionally crispy and light. If Panko isn’t available, regular (unseasoned) breadcrumbs can be used as a substitute, though the final texture may be slightly less airy.
Why flour the chicken cutlets first? The flour provides a much drier, more textured surface for the egg wash to cling to, compared to the raw chicken itself. This crucial first step ensures an even, consistent breading that adheres firmly and won’t slide off during frying, resulting in that perfectly crisp crust.
As you move each cutlet through the breading station, attention to detail is key. For each step, ensure the coating is even, covering the entire surface of the chicken. Gently shake off any excess flour before moving to the egg wash. Similarly, let any excess egg wash drip off before transferring to the panko. You want a thin, even layer of egg, not a thick, gloppy coating. When you reach the final panko layer, press the breadcrumbs firmly into both sides of the cutlet. This action helps them adhere securely, preventing them from falling off during cooking. Gently shake off any loose crumbs before transferring the fully breaded cutlet to a holding plate, ready for cooking.
Cooking Methods: Pan-Fried for Classic Crisp, Air-Fried for Lighter Crunch
Once your chicken cutlets are perfectly breaded, it’s time to cook them. While shallow frying on the stovetop is the traditional method, offering unparalleled crispiness, preparing Chicken Milanese in an air fryer presents a fantastic option for a quicker, lighter, and equally delicious weeknight meal. Both methods yield superb results, allowing you to choose based on your preference and kitchen equipment.
Traditional Shallow Frying for Golden Perfection
For the classic experience, you’ll need a large, heavy-bottomed skillet and a suitable cooking fat. Options include neutral vegetable oil, regular olive oil (avoid extra-virgin, as its low smoke point isn’t ideal for frying), or the quintessential choice for Milanese-style cutlets: clarified butter. Each fat imparts a subtle, distinct flavor to the chicken cutlets; experimenting with them can help you discover your family’s favorite.
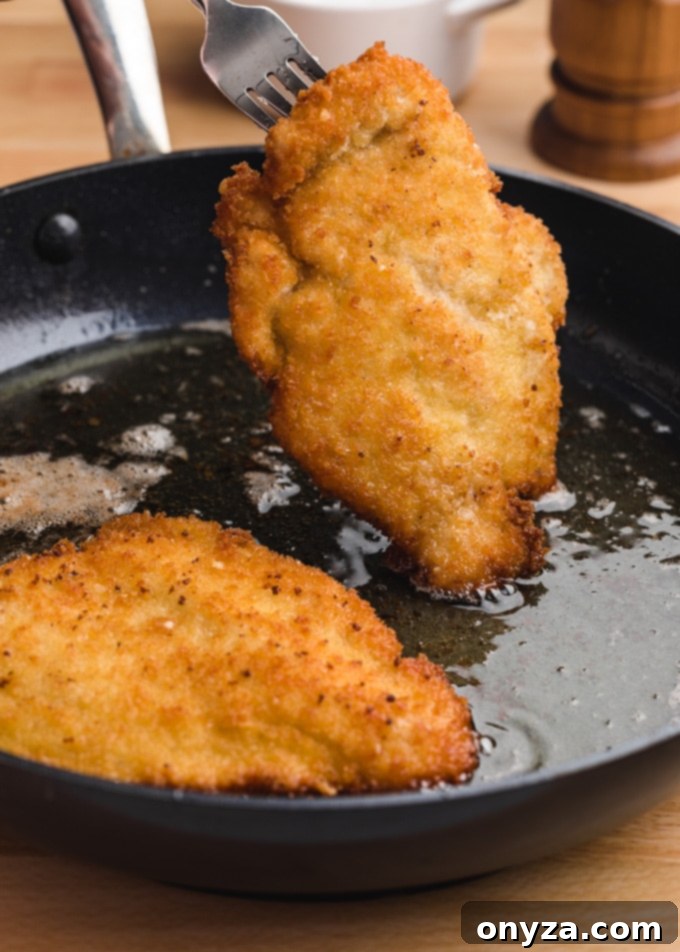
Heat approximately 1/4-inch of your chosen fat in the skillet over medium-high heat until it shimmers. The oil should be hot enough to sizzle immediately when a breadcrumb is dropped in, but not smoking. Carefully place 2-3 breaded cutlets into the hot oil at a time, ensuring you don’t overcrowd the pan. Overcrowding can lower the oil temperature, leading to soggy rather than crispy chicken. Fry each side for about 3-4 minutes, or until the breading is a beautiful golden brown and the internal temperature of the chicken reaches 165 degrees F (74 degrees C) with an instant-read thermometer. Achieving an even golden color requires careful monitoring and adjusting heat as needed.
Convenient Air Frying for a Lighter Crunch
For a lighter take, the air fryer is an excellent tool. Before placing the cutlets into the air fryer basket, spray each side generously with olive oil or vegetable oil spray. This helps achieve a lovely golden hue and contributes to the crisp texture without submerging the chicken in oil. Arrange the cutlets in a single layer in your air fryer basket, ensuring there’s enough space for air to circulate around each piece.
Cook the cutlets at a temperature between 390-400 degrees F (199-204 degrees C) for a total of 10-15 minutes, flipping them halfway through the cooking process. The chicken should be thoroughly cooked, and the breading should be lightly browned and crispy. While air-fried cutlets might not achieve the deep golden color of their shallow-fried counterparts, they are wonderfully crunchy, juicy, and significantly lower in calories. In many households, air-fried Chicken Milanese has become a regular, guilt-free indulgence.
It’s important to remember that cooking times can vary significantly between different air fryer brands and models. For your initial batch, closely monitor the cutlets, checking frequently to pinpoint the optimal cooking time for your specific appliance. This ensures consistent, perfectly cooked Chicken Milanese every time. If you enjoy this air-fried method, you might also like to explore other air fryer recipes for quick and easy meals.
Elevating Your Meal: Perfect Pairings for Chicken Milanese
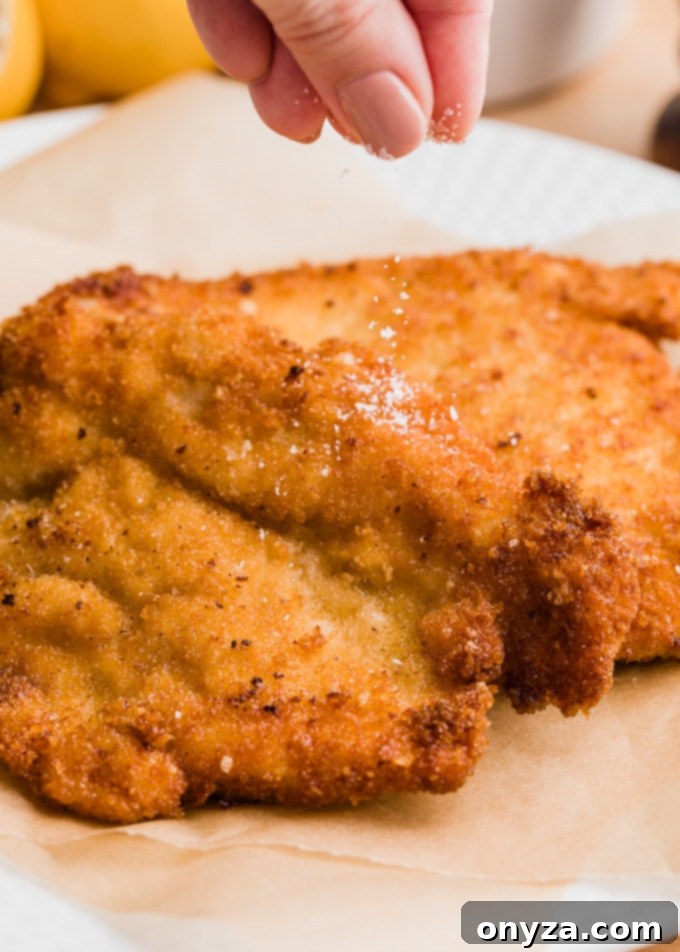
Serving Chicken Milanese is all about enhancing its inherent deliciousness. The moment those golden, crispy cutlets emerge from the pan or air fryer, a simple yet crucial step is to lightly sprinkle them with a touch of kosher or flaky sea salt. This seasoning adheres beautifully to the hot surface, amplifying every bite. Additionally, a generous squeeze of fresh lemon juice over each cutlet is non-negotiable; its bright acidity cuts through the richness of the fried chicken, adding a refreshing zest that truly elevates the dish.
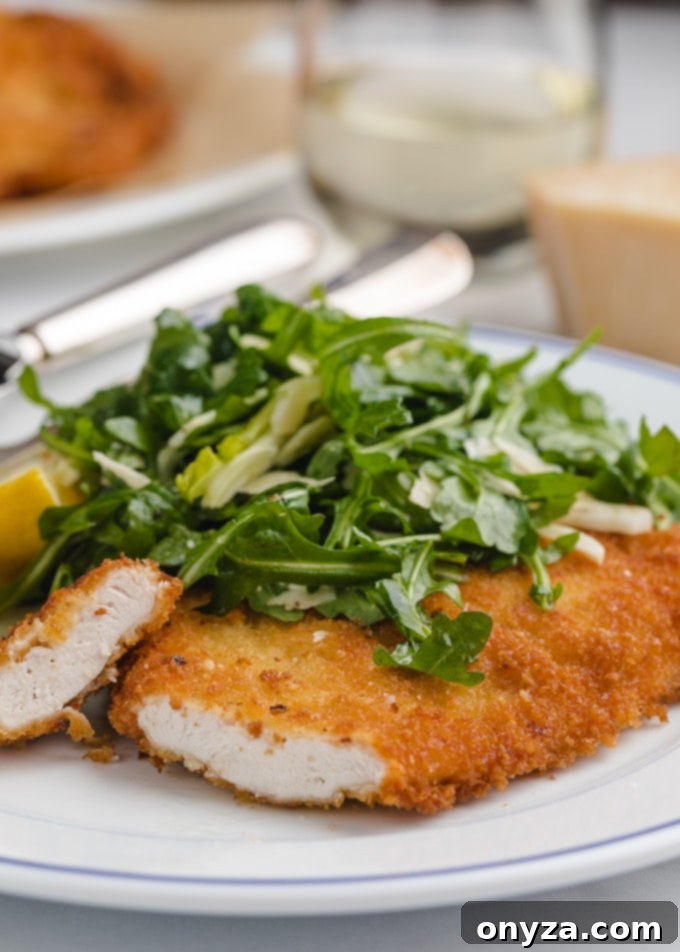
My absolute favorite accompaniment for Chicken Milanese is a straightforward yet sophisticated Arugula Salad, particularly one featuring thinly shaved fennel. Dressed lightly with a vibrant lemon vinaigrette and adorned with delicate shavings of Parmigiano Reggiano or Pecorino Romano, this salad offers the perfect textural and flavor contrast. Its peppery notes and crisp texture provide a refreshing counterpoint to the warm, crunchy chicken, creating a harmonious and balanced meal.
Beyond the classic arugula salad, Chicken Milanese pairs wonderfully with a variety of side dishes. Consider serving it with simple roasted asparagus, steamed green beans, or a light caprese salad for a complete Italian-inspired feast. For those who prefer a starch, a side of creamy mashed potatoes or a light pasta dish tossed with olive oil and herbs can also complement the chicken beautifully. The versatility of Chicken Milanese makes it suitable for almost any culinary imagination.
When it comes to wine pairings, this dish shines with crisp, dry white wines. We particularly enjoy Chicken Milanese with a glass of Sauvignon Blanc, an unoaked Chardonnay, or a refreshing Pinot Grigio. These wines offer the ideal acidity and fruit notes to complement the chicken without overpowering its delicate flavors, making for a truly delightful dinner, especially perfect for a relaxed yet elegant date night.
Frequently Asked Questions About Chicken Milanese
Can I prepare Chicken Milanese ahead of time?
While Chicken Milanese is best enjoyed immediately after cooking for maximum crispiness, you can certainly prepare components in advance. The chicken cutlets can be pounded and breaded up to a few hours ahead of time. Store them in a single layer on a baking sheet lined with parchment paper in the refrigerator, loosely covered with plastic wrap, to prevent the breading from becoming soggy. This allows for quick frying right before serving.
How do I store and reheat leftovers?
Leftover Chicken Milanese can be stored in an airtight container in the refrigerator for up to 2-3 days. To reheat, avoid the microwave, as it will make the breading soggy. The best way to regain some crispiness is to reheat the cutlets in a preheated oven at 350°F (175°C) for 10-15 minutes, or in an air fryer at 350°F (175°C) for 5-7 minutes, until heated through and crisp.
What if I don’t have Panko breadcrumbs?
While Panko breadcrumbs are highly recommended for their superior crispiness, you can absolutely substitute them with regular unseasoned breadcrumbs. The final texture might be slightly less airy, but the dish will still be delicious. For an even finer texture, you could also use homemade breadcrumbs from stale bread, pulsed in a food processor.
Can I make this gluten-free?
Yes, Chicken Milanese can easily be adapted to be gluten-free. Simply substitute all-purpose flour with a gluten-free all-purpose flour blend, and use gluten-free Panko breadcrumbs (widely available in most grocery stores). Ensure all other ingredients, like Parmesan cheese, are also certified gluten-free if strict adherence is required.
Chicken Milanese Recipe Card
Amanda Biddle presents her delicious recipe for Chicken Milanese. These crispy, thinly-sliced chicken cutlets are an easy dinner for a busy night and elegant enough for guests. This recipe includes instructions for both classic pan-fried and lighter air-fried methods.
Prep Time: 15 minutes | Cook Time: 15 minutes | Total Time: 30 minutes | Servings: 6 servings (1 cutlet each)
Ingredients
- 1-1/2 pounds boneless, skinless chicken breasts or thin-sliced chicken cutlets (about 3-4 breasts or 6-7 cutlets)
- ⅓ cup all purpose flour
- 2 large eggs
- 1 teaspoon cool water
- 1-1/4 cups unseasoned Panko breadcrumbs
- ¼ cup grated Parmigiano Reggiano
- kosher salt and black pepper (to taste)
- olive oil, vegetable oil, or clarified butter, for shallow frying (not extra-virgin olive oil) OR
- olive oil or vegetable oil spray, for air frying
- lemon wedges, for serving
- Arugula Salad, for serving
Instructions
General Preparation
- If using boneless chicken breasts, slice them in half horizontally to create two thinner halves. Pound these halves, or the pre-cut chicken cutlets, using a meat mallet between layers of plastic wrap, or in an open plastic zip-top bag, to about 1/4-inch thickness.
- Prepare 3 plates or breading trays. Place flour in the first with 1/2 teaspoon each kosher salt and black pepper. In the second, beat the eggs with the cool water and a pinch of salt and pepper. In the third, mix together panko, Parmigiano Reggiano, and a pinch of salt.
- Bread each chicken cutlet by dredging both sides in flour, then dipping in the egg wash to coat, and finally in the panko, gently pressing the breadcrumbs into the cutlet to adhere. In each step, let the excess coating fall off before moving to the next ingredient.
Pan-Fried Method
- Heat about 1/4 inch of oil or clarified butter in a large skillet over medium-high heat until shimmering. Cook cutlets 2-3 at a time (do not crowd the pan), for about 3-4 minutes per side, until the chicken is cooked through (165 degrees F / 74 degrees C on an instant-read thermometer) and the breading is golden.
- Transfer chicken cutlets to a platter and finish with a sprinkling of kosher or sea salt and a squeeze of fresh lemon juice. Top with arugula salad and serve immediately.
Air-Fried Method
- Spray chicken cutlets on each side with olive oil or vegetable oil spray.
- Cook chicken cutlets in a single layer in the air fryer basket at 390-400 degrees F (199-204 degrees C), flipping once, until chicken is cooked through and breading is crispy and lightly browned (about 10-15 minutes total). Cooking times will vary by air fryer brand – keep a close eye on your first batch to determine the correct cooking time for your specific model.
Nutrition Information (Estimated)
Calories: 239kcal | Carbohydrates: 7g | Protein: 13g | Fat: 18g | Saturated Fat: 13g | Cholesterol: 97mg | Sodium: 156mg | Potassium: 173mg | Fiber: 1g | Sugar: 1g | Vitamin A: 146IU | Vitamin C: 1mg | Calcium: 66mg | Iron: 1mg
Nutrition information is automatically calculated, so should only be used as an approximation.
Please note that our recipes have been developed using the US Customary measurement system and have not been tested for high altitude/elevation cooking and baking.
We hope you enjoy this delightful Chicken Milanese recipe! We’d love to hear your thoughts and see your creations. Please consider rating and commenting below to share your experience with our community!
