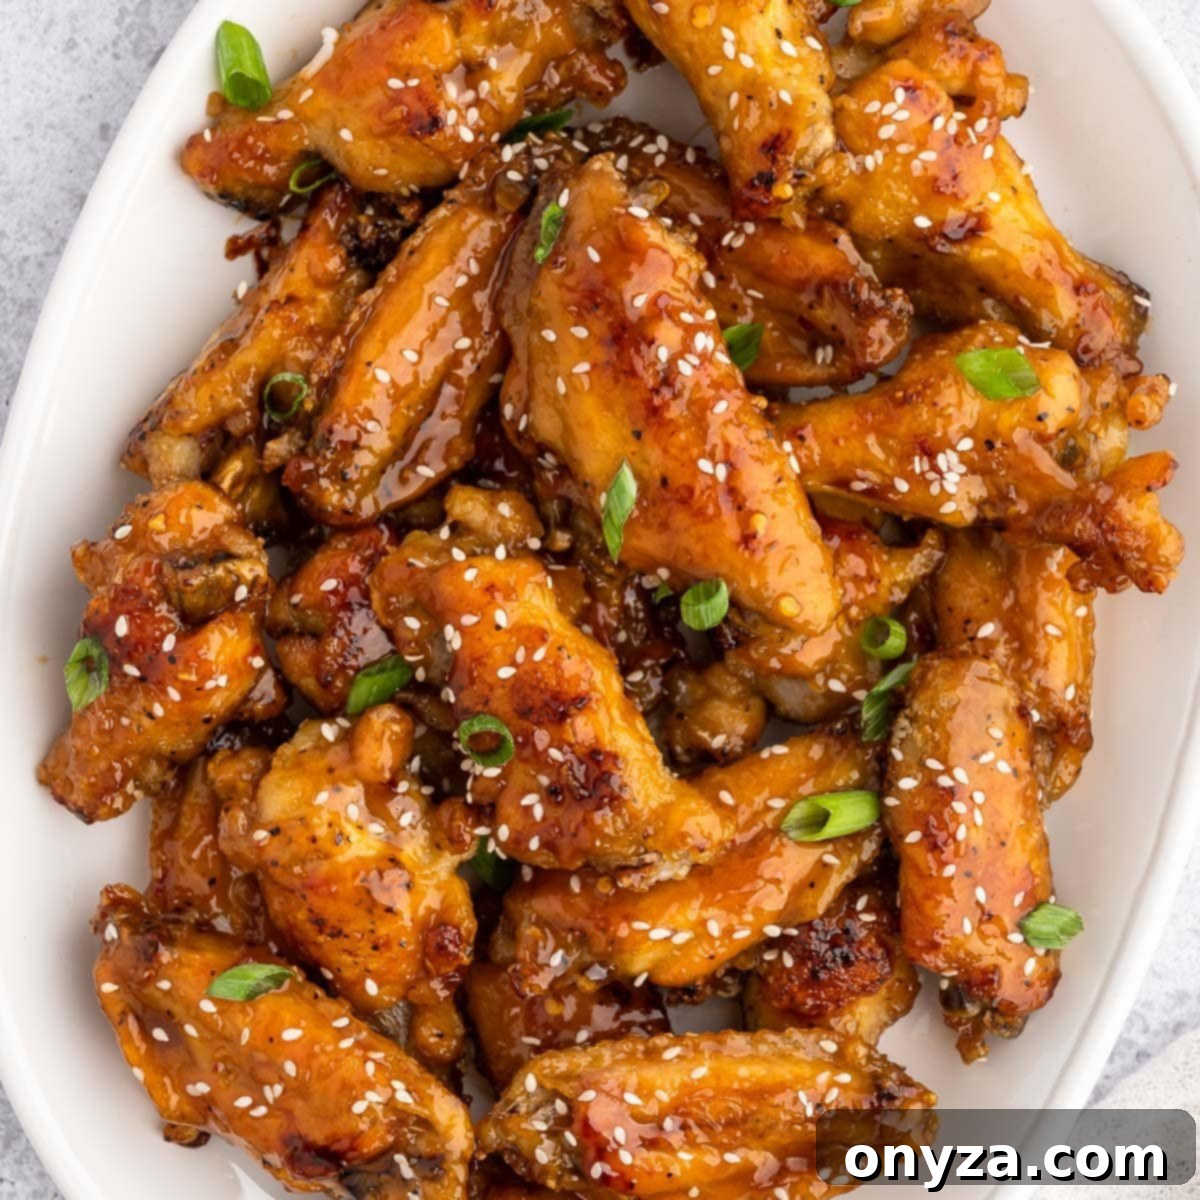
Irresistible Honey Garlic Chicken Wings: Your Go-To Recipe for Crispy, Sticky Perfection
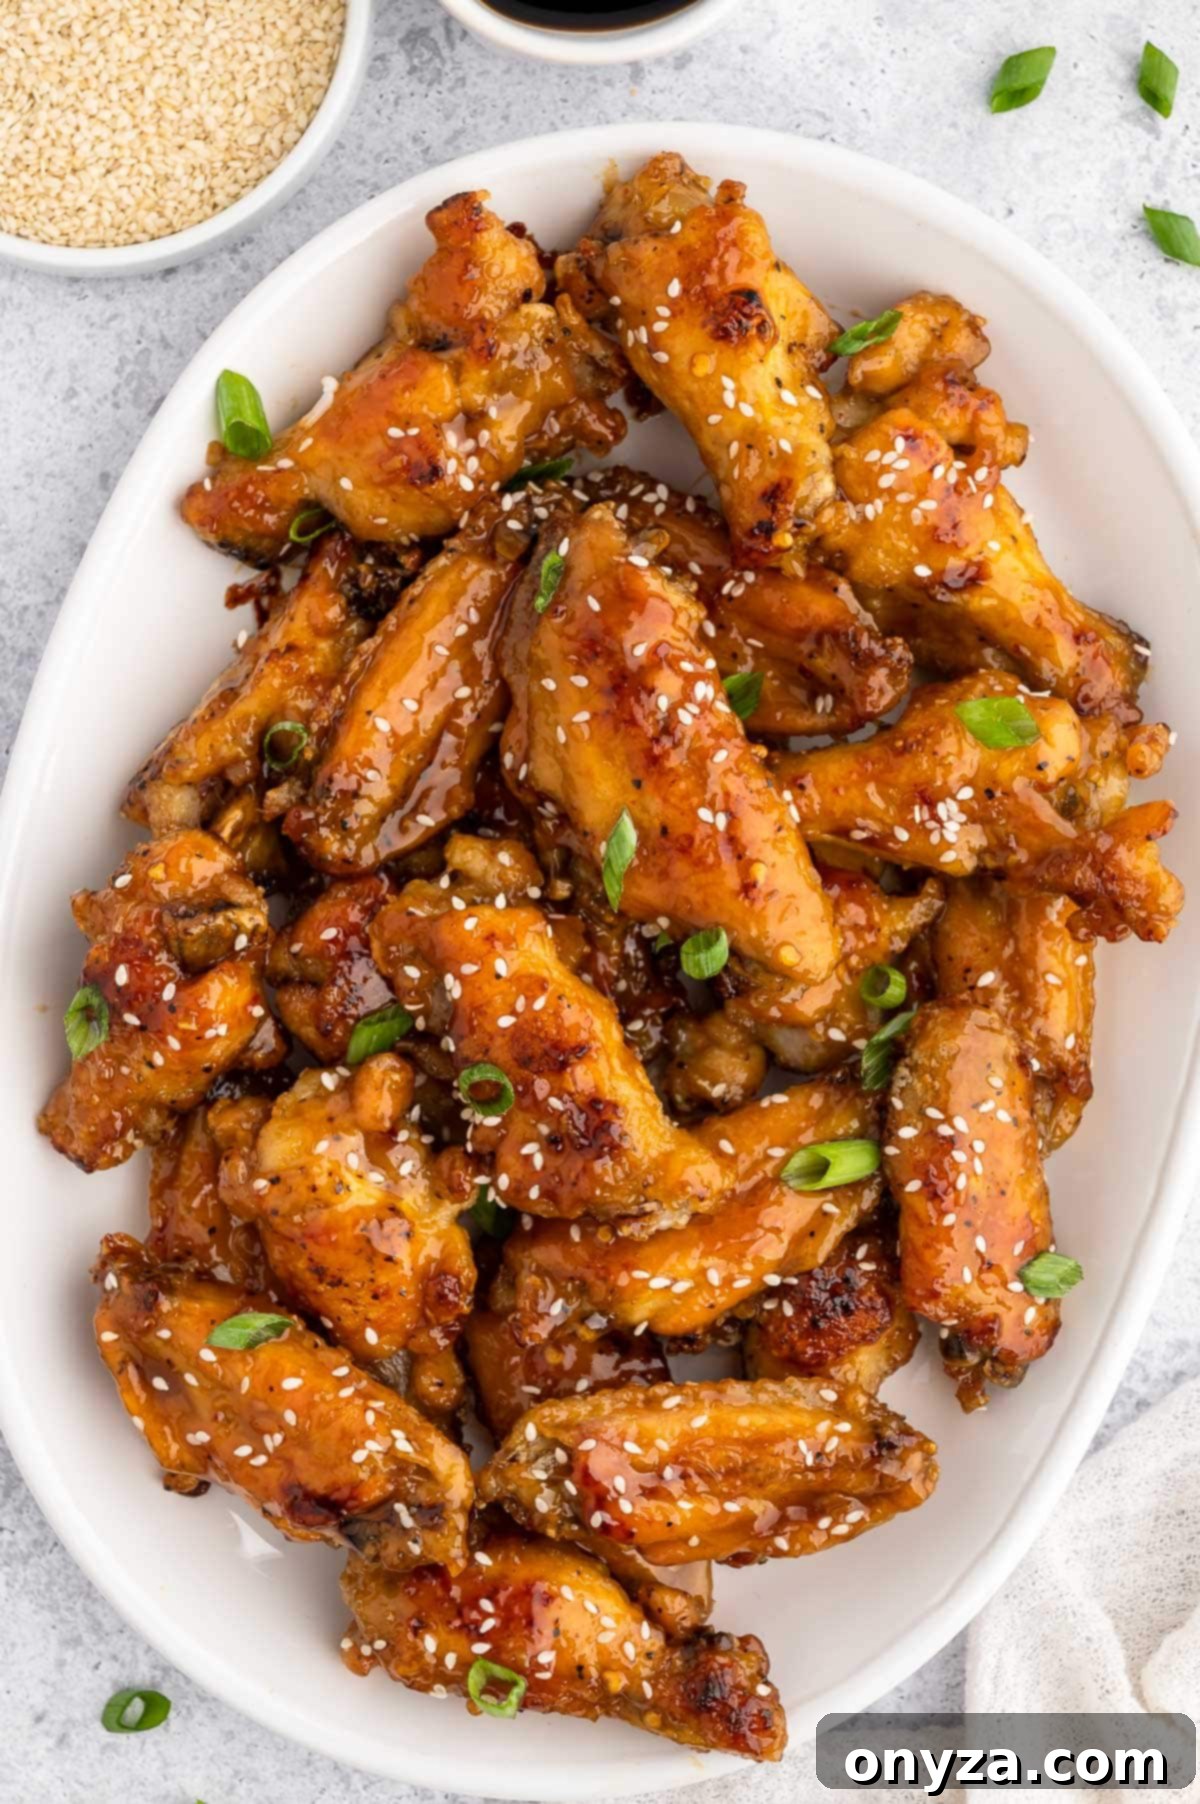
Craving a dish that’s both intensely flavorful and incredibly satisfying? Look no further than these amazing **Honey Garlic Chicken Wings**. Imagine golden-brown, crispy chicken wings enveloped in a glossy, sticky-sweet, and savory sauce with a hint of zest. This recipe delivers a phenomenal balance of sweet, salty, and tangy notes, making it an instant crowd-pleaser.
Whether you’re planning an epic game day spread, a casual get-together with friends, or simply seeking a delicious and easy weeknight dinner, these wings are the perfect solution. They come together in an hour or less, from your kitchen to the table, and can be cooked to crispy perfection using either your oven or an air fryer. Serve them alongside fluffy rice and fresh stir-fried vegetables for a complete meal, or let them shine as a star appetizer – just be sure to have plenty of napkins ready!
This post contains affiliate links. As an Amazon Associate, I earn a commission (at no additional cost to you) from qualifying purchases made by clicking these links. As always, all recommendations and opinions expressed are my own.
Why These Honey-Garlic Chicken Wings Are a Must-Try
What makes these honey garlic wings truly special and a recipe you’ll revisit again and again? It’s a combination of exceptional flavor, ease of preparation, and versatility that caters to any occasion.
- Irresistible Flavor Fusion. These wings offer an exquisite blend of Asian-inspired tastes that are hard to beat. The rich, savory depth of soy sauce and fresh garlic forms the backbone, beautifully complemented by the sticky sweetness of honey. A subtle warmth from ginger and an optional kick of heat from red pepper flakes elevate the profile, creating a truly addictive experience that satisfies all your cravings.
- Effortless Preparation. Forget the mess and fuss of deep frying! This recipe utilizes baking or air frying, significantly reducing hands-on cooking time and simplifying the process. Once the wings are in the oven or air fryer, you’re free to prepare other dishes or simply relax. Moreover, using a lined baking sheet ensures remarkably easy cleanup, allowing you to enjoy your meal without dreading the aftermath.
- A Lighter, Healthier Alternative. By baking or air frying instead of deep-frying, this recipe presents a lighter option without compromising on texture or taste. The chicken wings emerge wonderfully juicy on the inside with a perfectly crisp exterior, all without the excess grease often associated with fried versions. It’s guilt-free indulgence at its best.
- Ultimate Versatility for Any Occasion. These honey garlic wings are incredibly adaptable, making them suitable for a wide range of events. Hosting a lively game day party? They’re the perfect appetizer. Planning a laid-back gathering with friends? They’ll be devoured in minutes. Or, if you’re simply seeking a flavorful and stress-free weeknight dinner, serve them with a side of steamed rice, a crisp green salad, roasted potatoes, or your favorite roasted vegetables for a complete and satisfying meal.
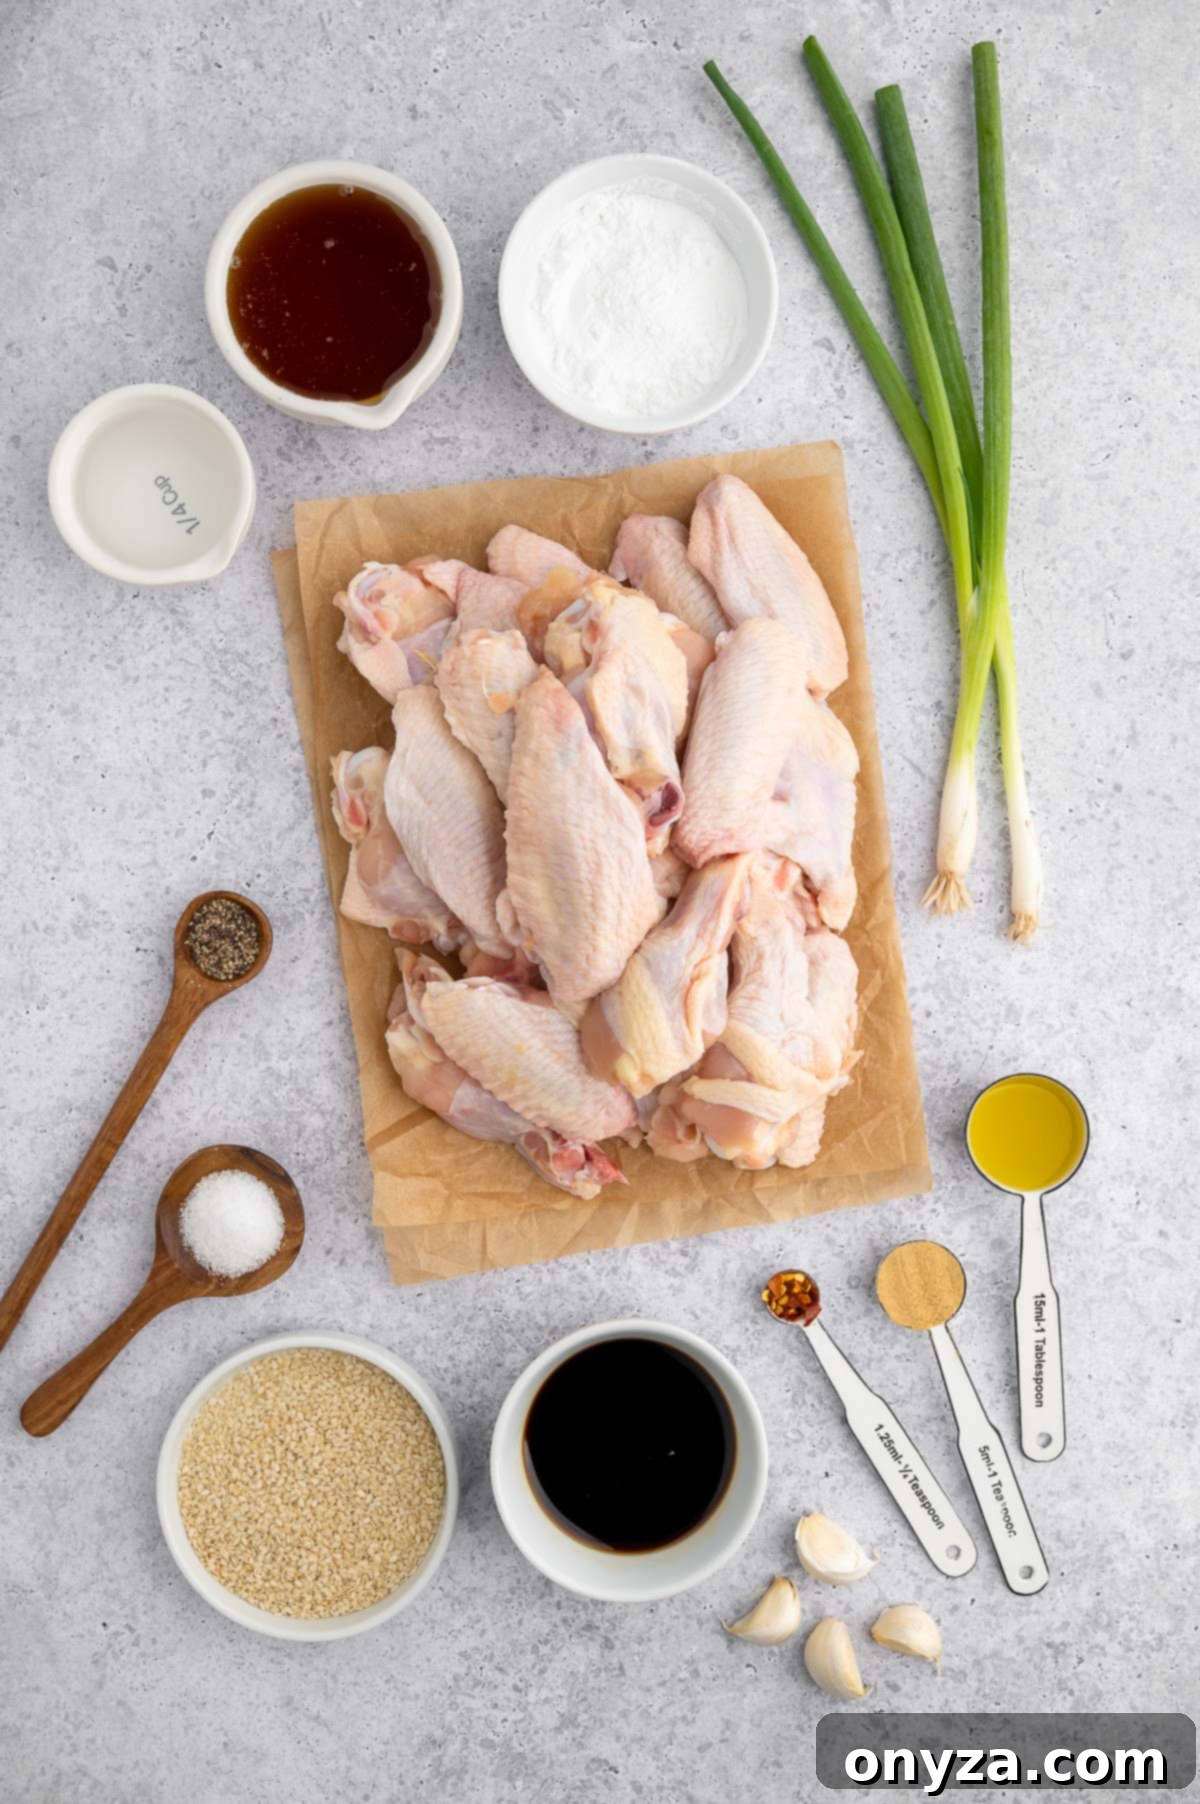
Essential Ingredients for Your Honey Garlic Masterpiece
Creating these delectable wings requires a thoughtful selection of ingredients, each playing a crucial role in developing that signature sweet, savory, and sticky flavor profile.
- Chicken Wings: You’ll need about 2-1/2 pounds of split chicken wings, typically sold as “drumettes” and “flats.” These are often pre-cut and labeled as “party wings” at your local supermarket, making preparation simple. If you purchase whole wings, you can easily split them yourself at the joint and remove the wing tips. Trimming ensures even cooking and easier handling.
- Cornstarch: This unassuming ingredient is the secret to achieving that wonderfully light and crispy coating without deep frying. When baked, cornstarch creates a delicate crust that locks in moisture and helps the wings brown beautifully. Tapioca starch is a suitable alternative if cornstarch isn’t available.
- Garlic Powder, Salt, and Pepper: These foundational seasonings infuse the cornstarch coating with flavor. We recommend using Diamond Crystal Kosher Salt or a fine sea salt for its consistent flavor and dissolving properties, alongside freshly ground black pepper for a pungent kick. The garlic powder ensures an even distribution of garlicky goodness on every wing.
- Neutral Oil: A light brushing of oil before baking or air frying helps the wings crisp up and prevents sticking. Opt for a neutral-flavored oil with a high smoke point, such as vegetable oil, peanut oil, or light olive oil. These oils won’t overpower the delicate flavors of the sauce.
- Honey: The star of the sauce, honey provides the essential sweetness and creates that desirable sticky texture. Its natural floral notes add depth to the overall flavor. Feel free to use your favorite variety; lighter honeys will give a milder sweetness, while darker honeys might add a richer, more robust undertone.
- Soy Sauce: This ingredient delivers the crucial umami and savory depth. Japanese-style shoyu (like Kikkoman) is widely available and works perfectly. For a less intense sodium flavor, reduced-sodium soy sauce is an excellent choice, which is my personal preference. If you’re looking for a gluten-free option, Tamari is a fantastic substitute. For another gluten-free or lower sodium alternative, coconut aminos offer a slightly sweeter, milder flavor profile.
- Water: Used to thin the sauce to the perfect consistency, allowing it to coat the wings evenly without becoming too thick or syrupy too quickly.
- Fresh Garlic: Minced fresh garlic cloves are indispensable for infusing the wing sauce with an aromatic, pungent flavor that complements the honey beautifully. Fresh garlic provides a more vibrant taste compared to garlic powder in the sauce.
- Fresh Ginger: Grated fresh ginger root adds a warm, spicy, and fragrant counterpoint to the sweet and savory elements of the sauce. For the best flavor and texture, I highly recommend grating it on a fine Microplane. If fresh ginger isn’t accessible, you can substitute powdered ginger; start with 1/8 teaspoon as its potency can vary, and adjust to taste.
- Crushed Red Pepper Flakes: These are entirely optional but highly recommended if you enjoy a touch of heat. A small amount adds a pleasant warmth that balances the sweetness without making the wings overly spicy. Adjust the quantity to suit your heat preference.
- Toasted Sesame Seeds and Scallions: These garnishes are not just for visual appeal; they add a wonderful textural crunch and a fresh, oniony bite that brightens the rich flavors of the wings. Always use fresh scallions for the best results.
How to Prepare Perfect Honey Garlic Chicken Wings
Making these delicious wings is a straightforward two-step process that ensures maximum crispiness and flavor. First, you’ll bake the seasoned wings to cook them through and develop their crispy exterior. Then, they’re tossed in the glorious honey-garlic sauce and returned to the oven for a final glaze and caramelization.
1. Preparing the Wings for Baking
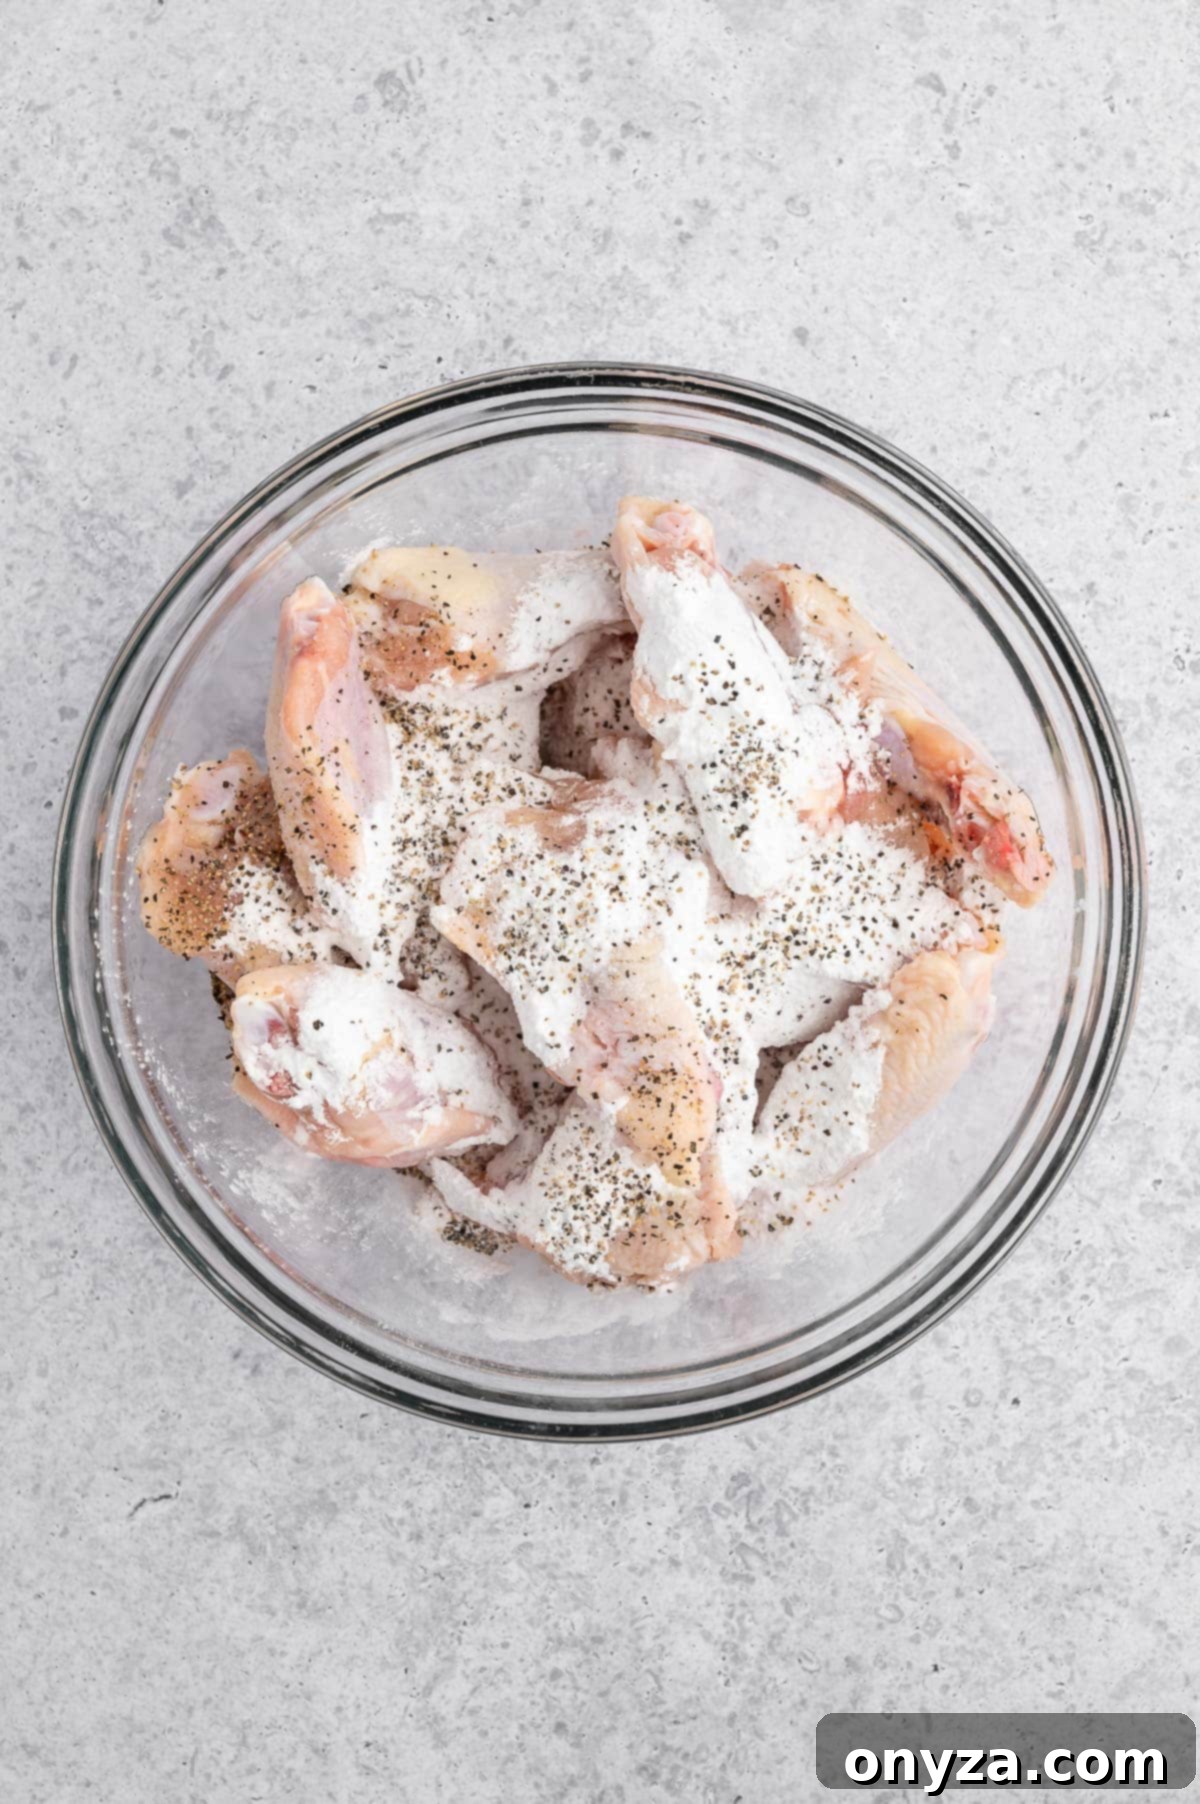
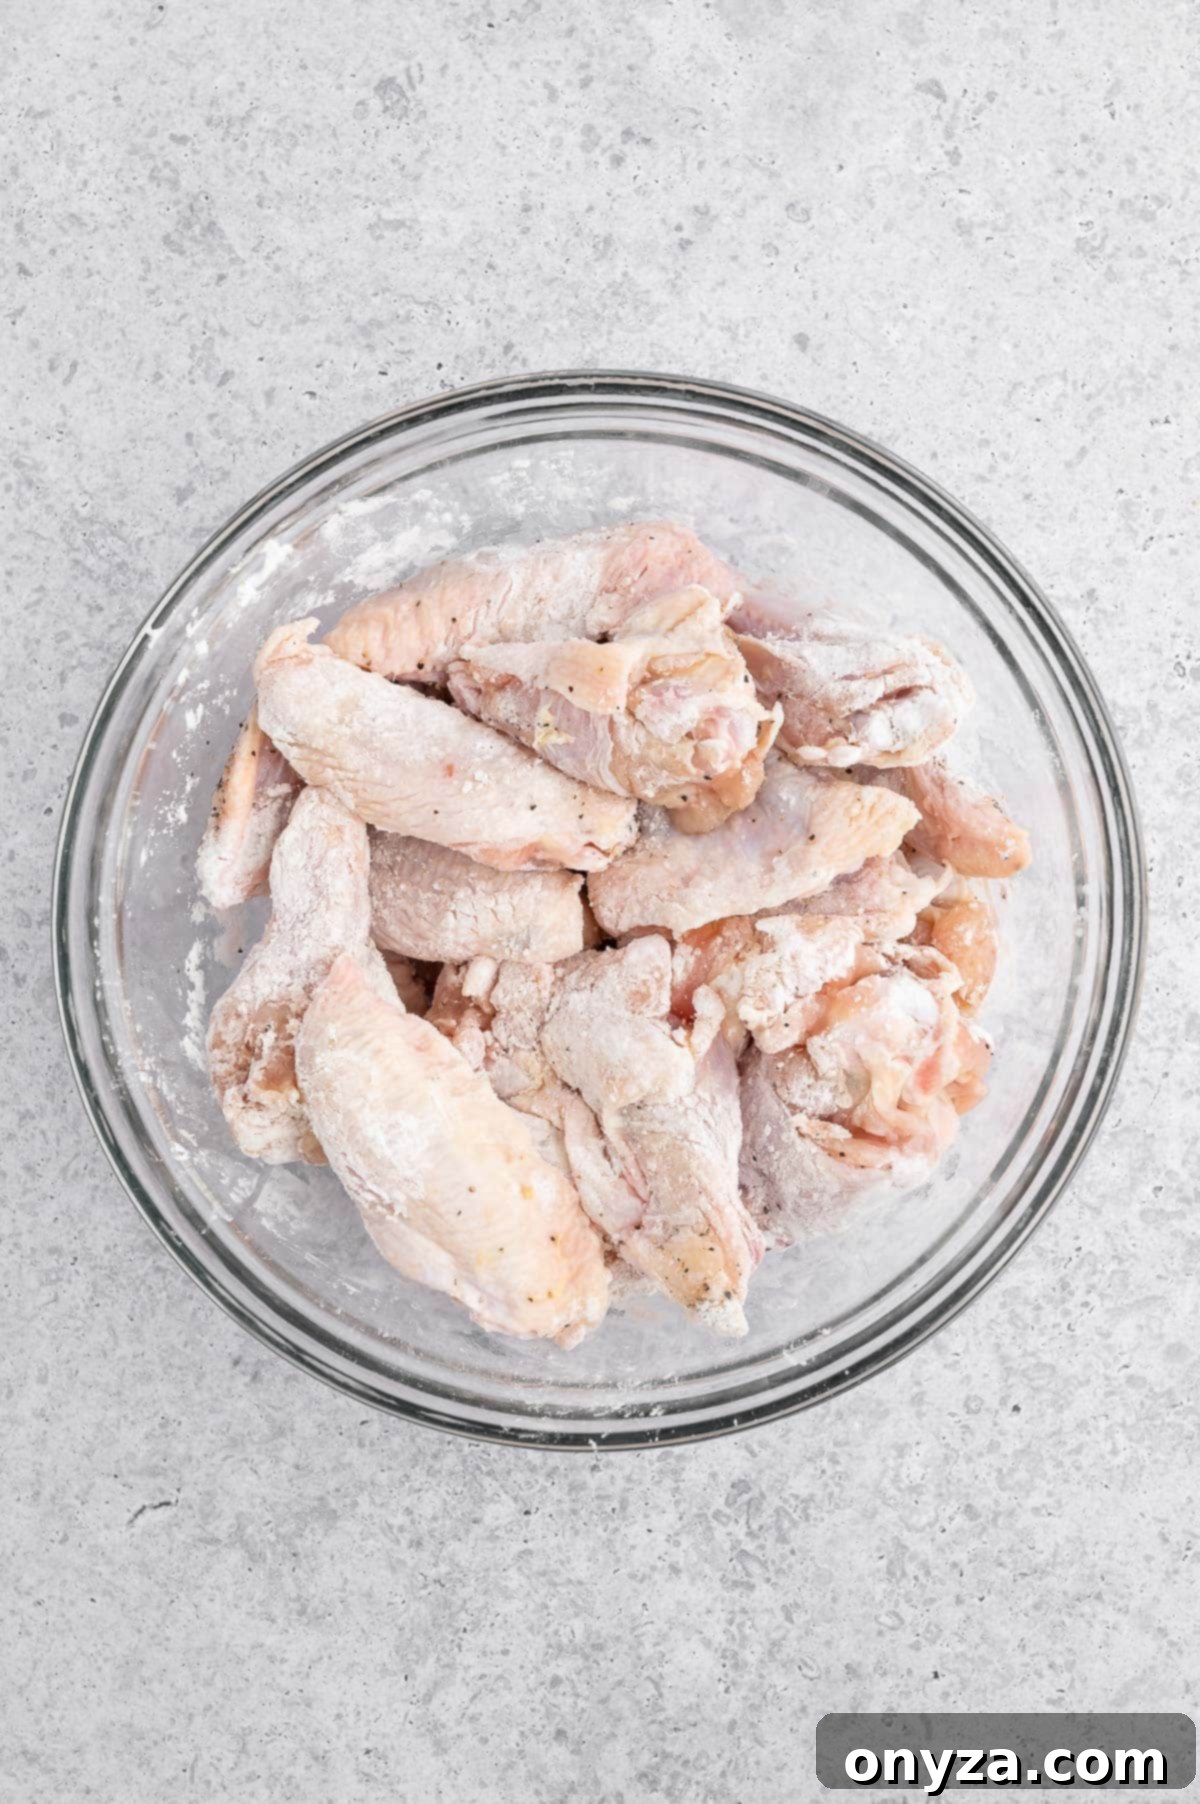
The key to achieving truly crispy baked wings starts with proper preparation. Begin by thoroughly patting the chicken wings dry with paper towels. This step is crucial, as excess moisture will steam the wings instead of allowing them to crisp up and brown beautifully during cooking. Transfer the dried wings to a large bowl or, for an even easier method, a gallon-size disposable plastic zip-top bag.
Next, sprinkle the cornstarch, garlic powder, salt, and black pepper over the wings. If you’re using a bowl, use a rubber spatula or clean hands to ensure every wing piece is evenly coated with the starch and seasonings. If you opt for the zip-top bag method, simply seal the bag and shake it vigorously until all the wings are uniformly coated. I personally find the bag method superior for its even distribution and significantly easier cleanup!
2. Baking the Crispy Wings
Preheat your oven to a robust 425°F (218°C) with the oven racks positioned in the upper-middle and lower-middle sections to ensure even heat distribution. Line two rimmed half-sheet pans with aluminum foil, then place a piece of parchment paper over the foil. This clever combination is a game-changer for cleanup: the parchment prevents the wings from sticking, while the foil catches any chicken juices that might seep through, protecting your baking pans.
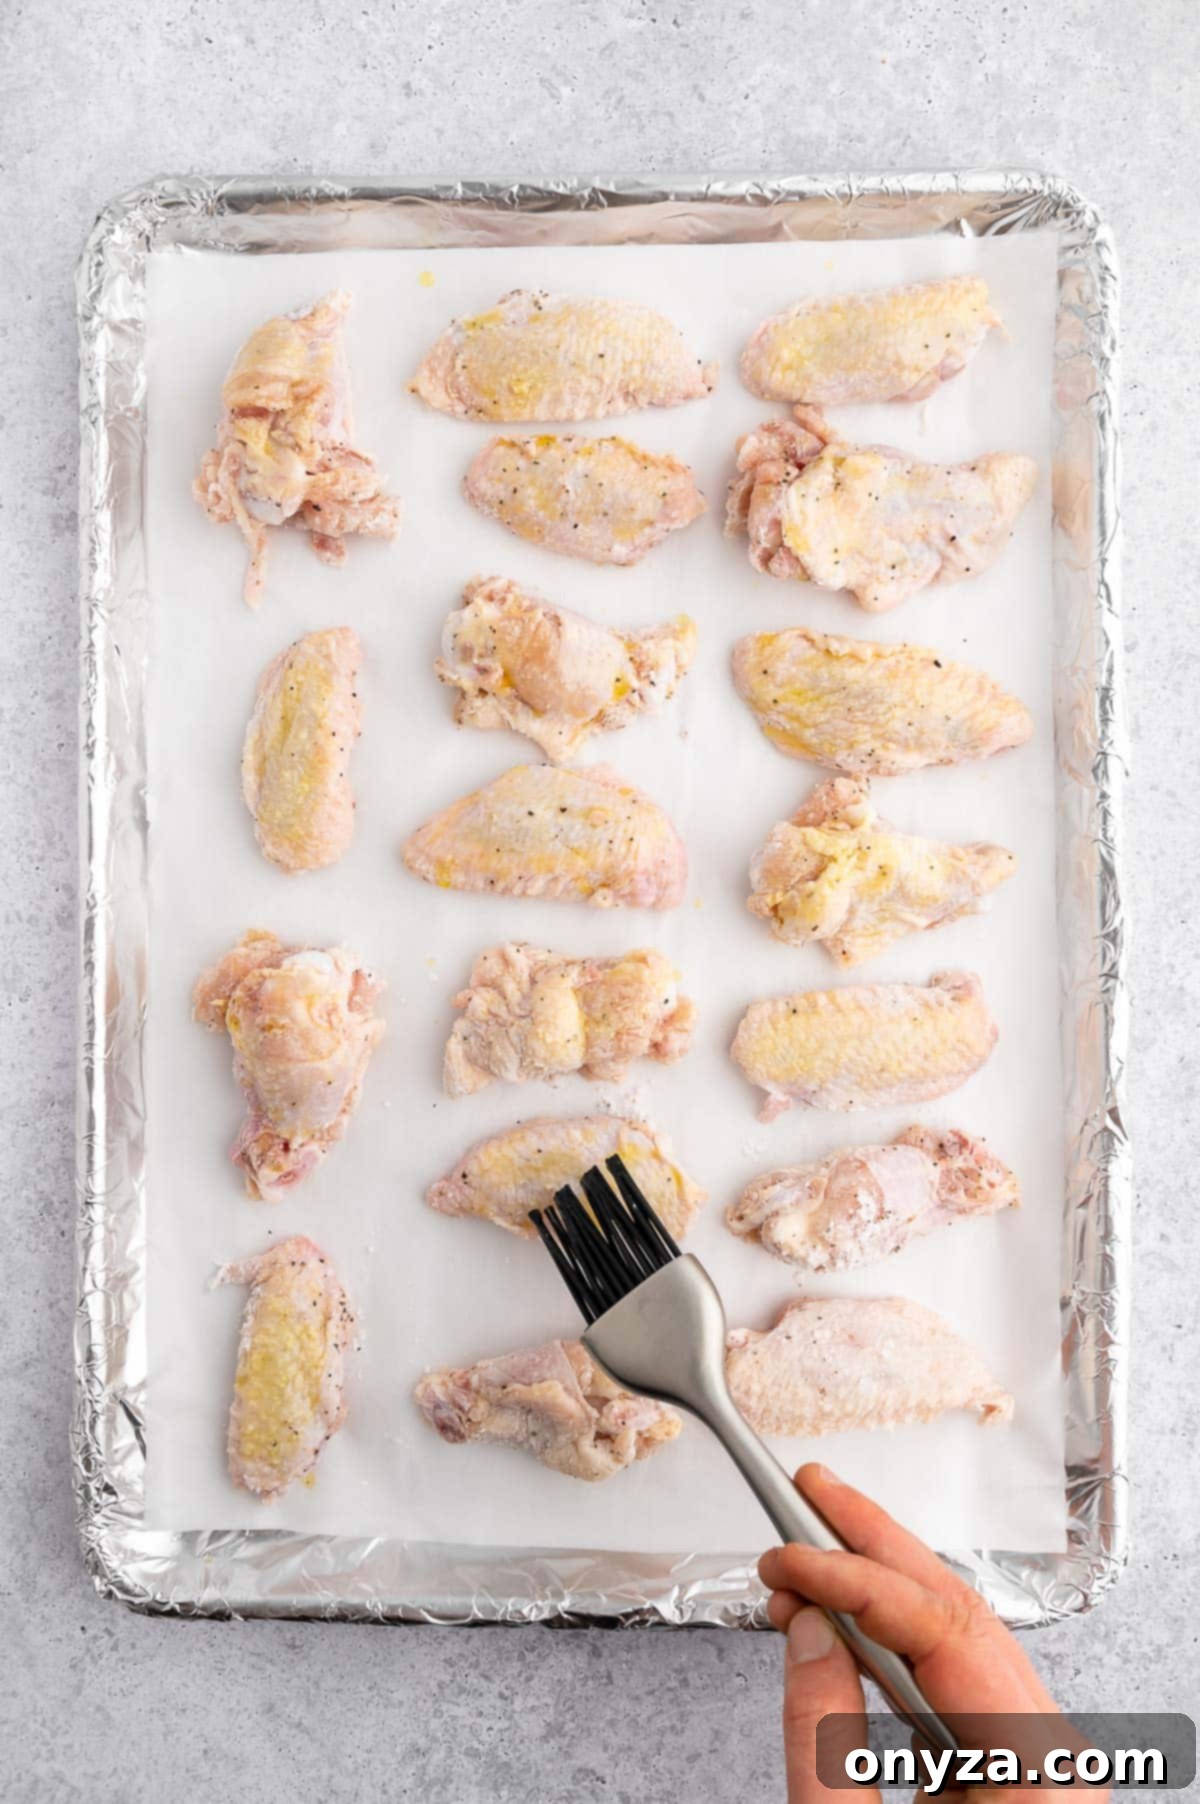
Carefully arrange the seasoned wings onto the prepared sheet pans in a single layer, ensuring there’s ample space between each piece. Overcrowding the pans will lead to steaming instead of crisping, so resist the urge to pack them too tightly. Lightly brush the tops of the wings with your chosen neutral oil. The oil aids in browning and crisping the top, while the bottoms will naturally crisp from the rendered chicken fat as they cook.
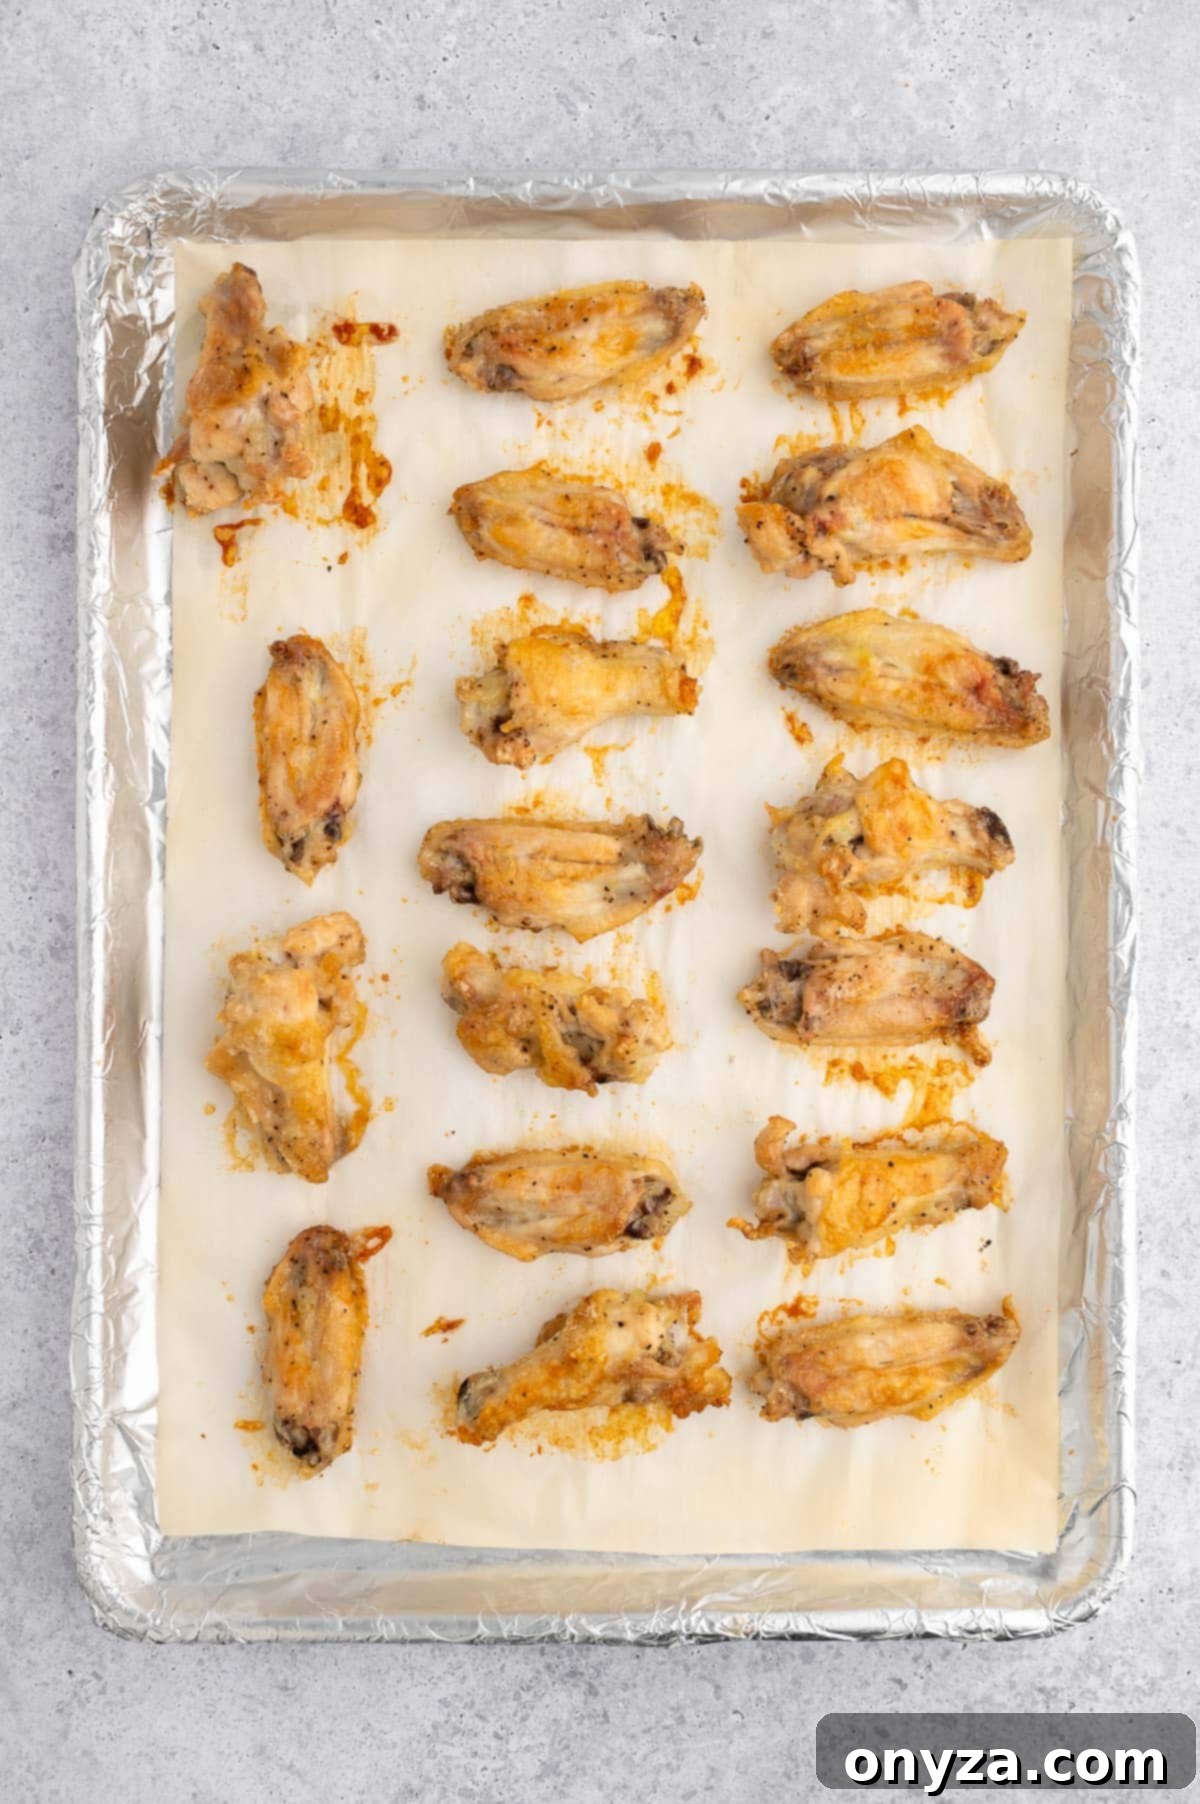
Bake the wings for 35-45 minutes. The precise cooking time will vary depending on the size and thickness of your wing pieces. Halfway through the baking process, approximately after 18-20 minutes, use tongs to flip each wing over on the sheet pans and rotate the positions of the pans in the oven (move the upper pan to the lower rack and vice versa). This ensures uniform cooking and consistent crispiness on all sides.
Achieving Perfect Wing Doneness: While chicken wings are safe to consume once their internal temperature reaches 165°F (74°C), for truly tender, fall-off-the-bone results, you’ll want them to reach a higher temperature. Aim for an internal temperature of at least 175°F (79°C), with 185-200°F (85-93°C) often yielding the most deliciously juicy and tender texture. Use a meat thermometer inserted into the thickest part of the wing, avoiding the bone, to check for doneness.
3. Crafting the Irresistible Wing Sauce
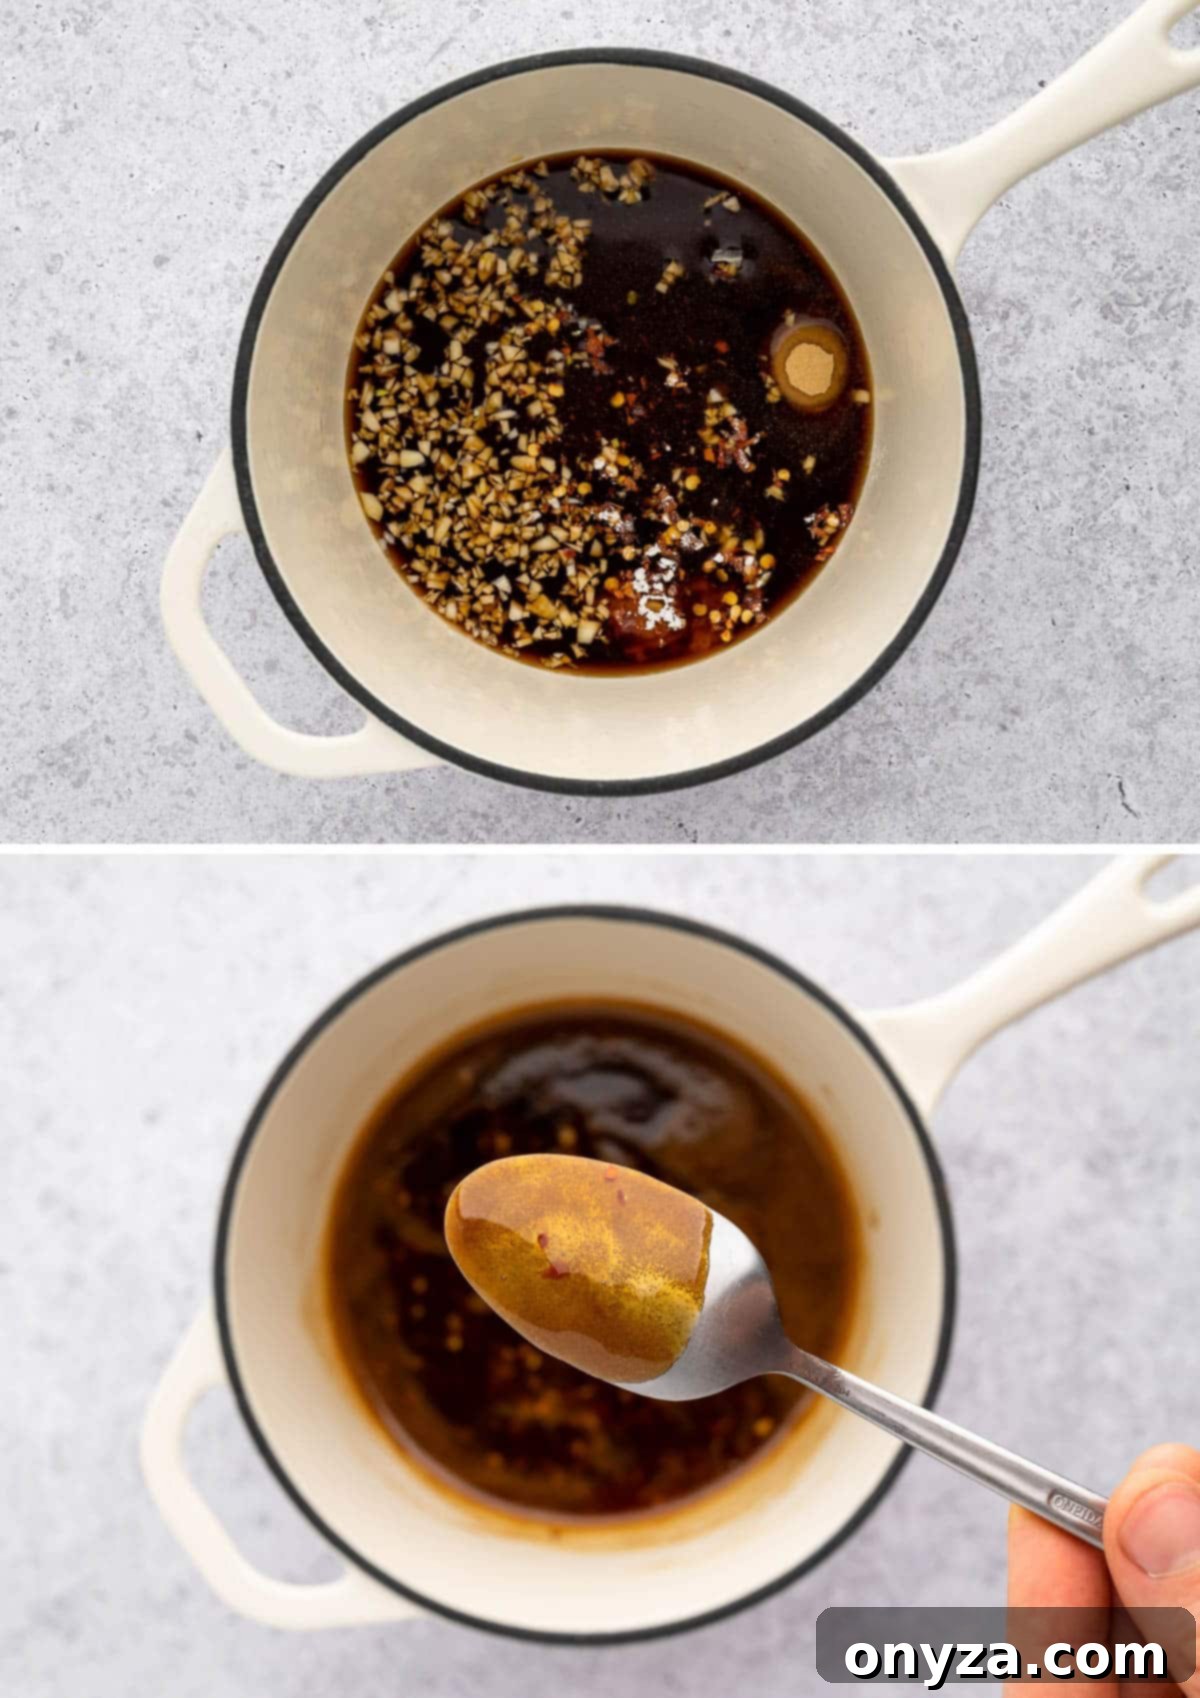
While your wings are baking to golden perfection, it’s time to prepare the star of the show: the sweet and savory honey-garlic glaze. In a medium saucepan, whisk together the honey, water, soy sauce, minced fresh garlic, finely grated fresh ginger, cornstarch, and the optional crushed red pepper flakes. Whisk until the cornstarch is fully dissolved and all ingredients are well combined.
Place the saucepan over medium to medium-high heat and bring the mixture to a low boil. Once it begins to bubble gently, reduce the heat to maintain a steady simmer. Continue to cook the sauce for approximately 8 minutes, stirring frequently to prevent sticking and ensure even thickening. Using a small rubber spatula is ideal for stirring, as it allows you to scrape down the sides of the saucepan effectively. The sauce is ready when it has thickened enough to coat the back of a spoon. Be vigilant and avoid overcooking the glaze, as this can cause it to become overly thick and harden considerably as it cools.
4. Glaze and Finish the Wings to Perfection
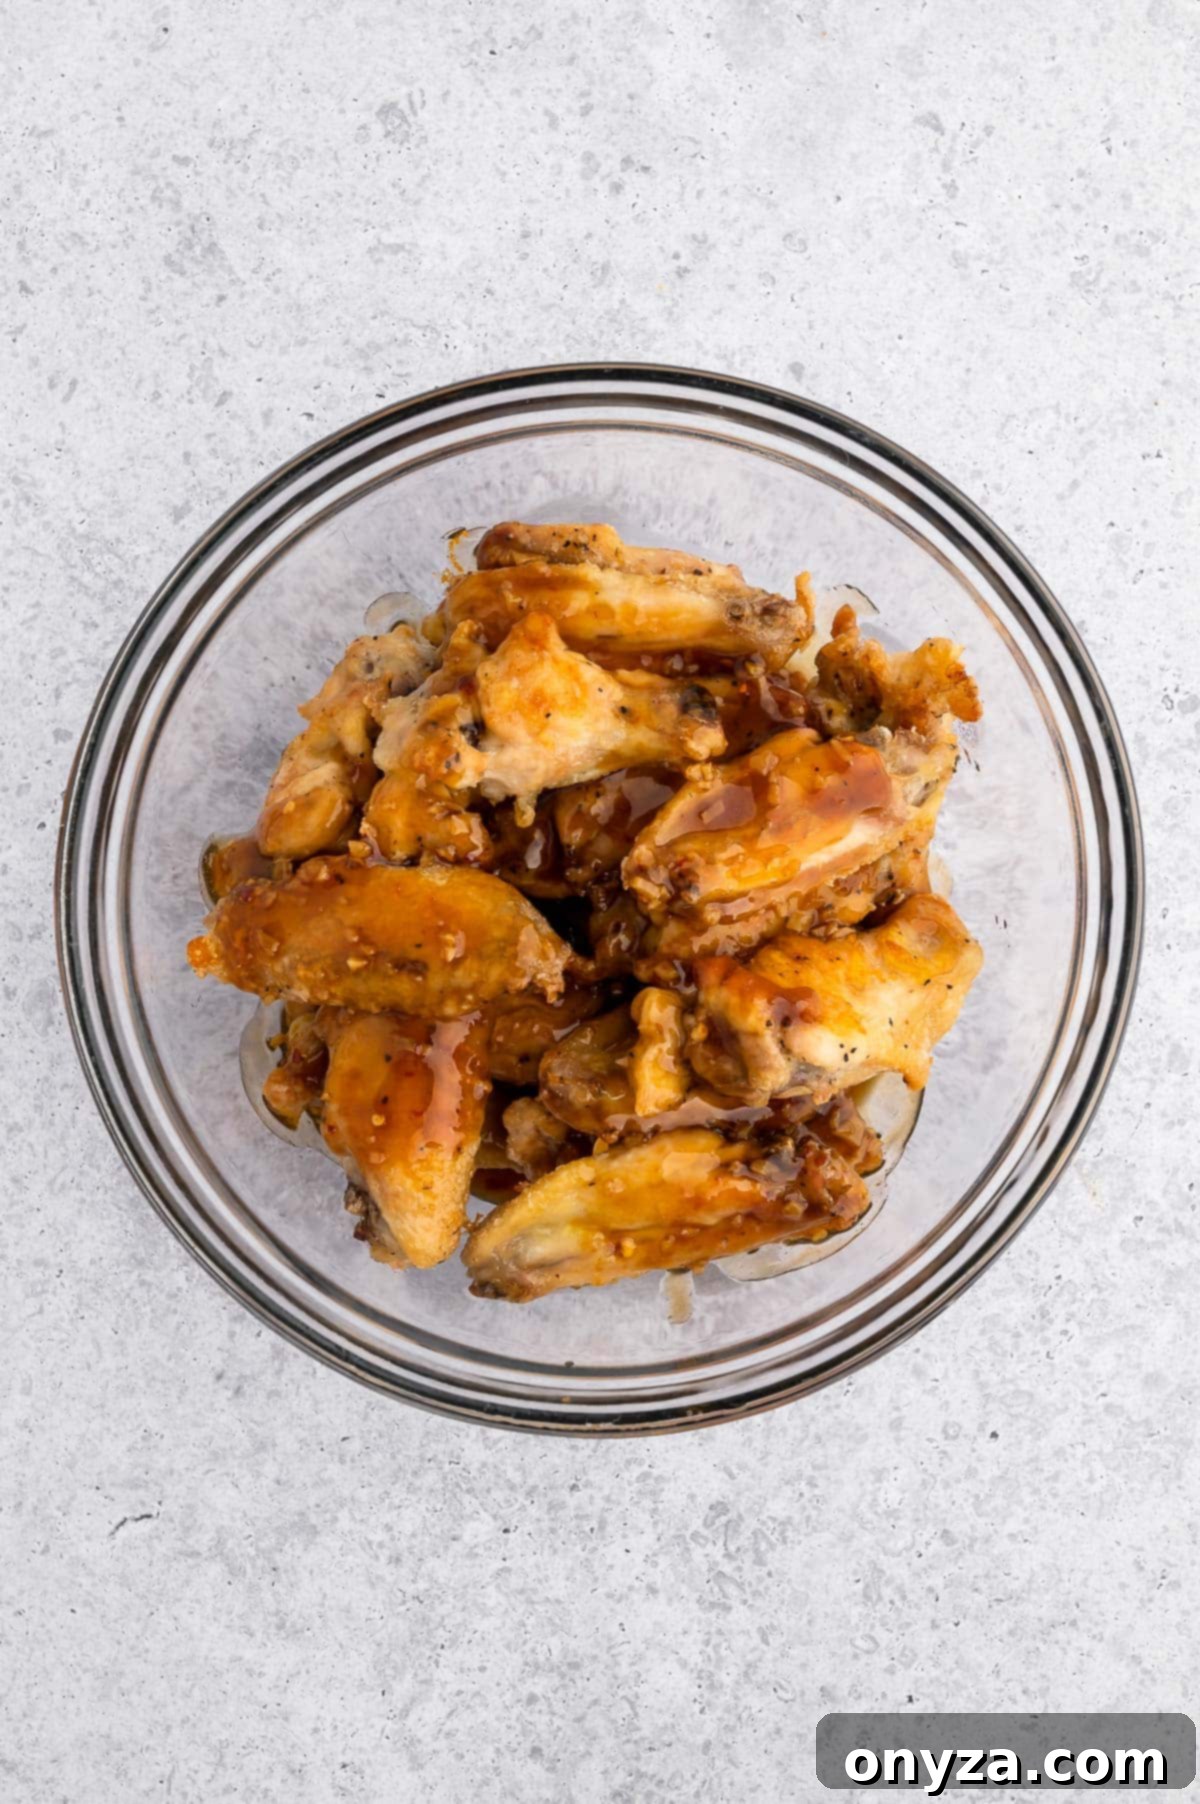
Once your wings are beautifully baked and crispy, carefully transfer them from the baking sheets into a large mixing bowl using tongs – remember, they will be very hot! Pour the prepared honey-garlic sauce generously over the wings. Use the tongs to gently toss them, ensuring every single piece is thoroughly coated in the luscious glaze. This is where the magic truly happens, transforming simple wings into a sticky, flavor-packed delight.
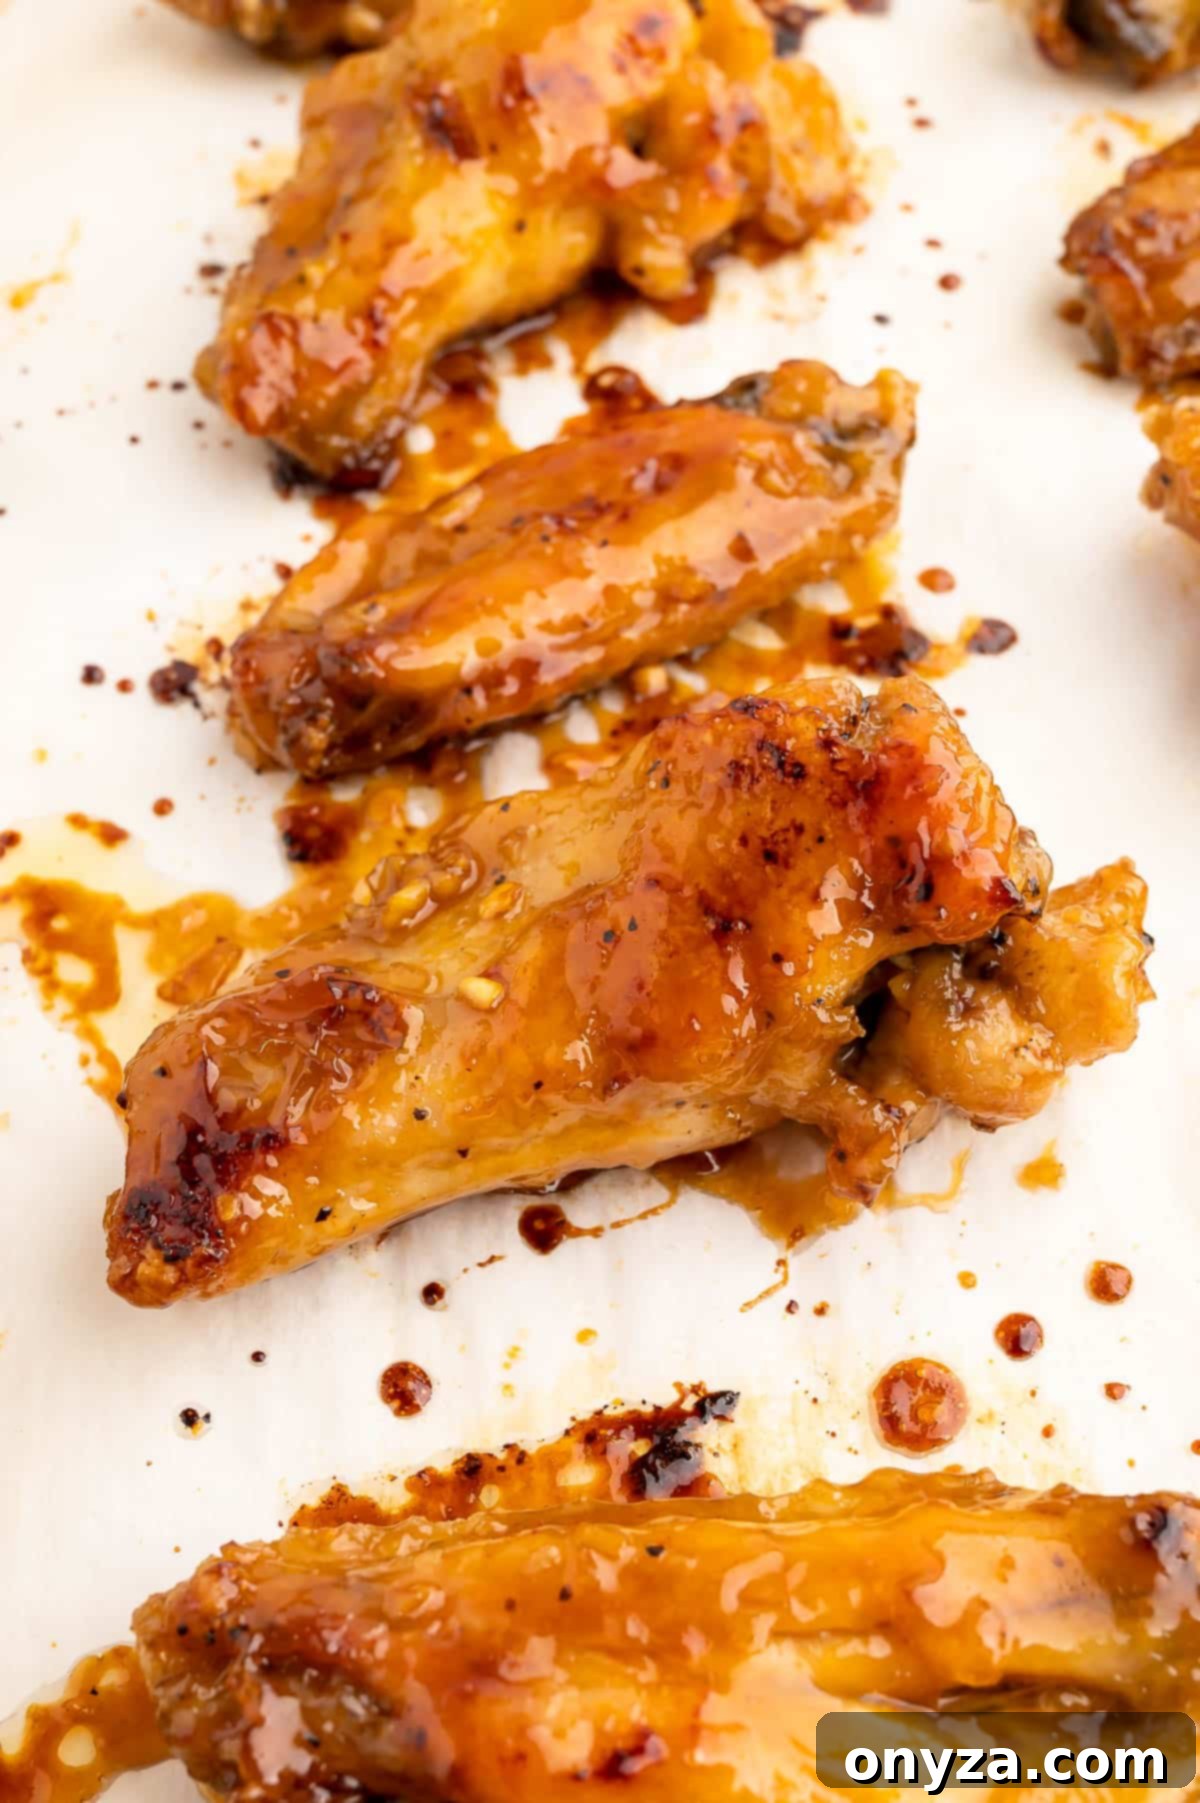
Return the coated wings to the same lined baking sheets, arranging them once again in a single layer. Take any remaining sauce left in the mixing bowl and brush it over the tops of the wings for an extra layer of flavor and shine. Place the baking sheets back into the oven and continue to bake for another 8-10 minutes. Halfway through this final baking stage, flip the wings over and baste them with any residual sauce. This second bake allows the honey-garlic glaze to caramelize, intensifying its flavor and creating that signature sticky finish. Crucially, **watch them very closely during this stage to prevent the sugars in the honey from burning.** The goal is a bubbly, caramelized glaze, not a burnt one.
Achieving Crispy Wings with an Air Fryer
For those who prefer the speed and intense crispiness an air fryer offers, these Honey-Garlic Chicken Wings adapt beautifully to this cooking method. However, there are a few important considerations to keep in mind to ensure optimal results.
On the positive side, the contained convection cooking space of an air fryer often produces wings that are even crispier than those baked in a traditional oven, and they typically cook in less time. This can be a huge advantage for quick meals or smaller batches.
The primary drawback, however, is capacity. Unless you possess a very large air fryer, you will almost certainly need to cook this recipe in multiple batches to avoid overcrowding the basket. Overcrowding inhibits air circulation, leading to steamed, rather than crispy, wings. This batch cooking can negate some of the time-saving benefits when preparing a full recipe batch. Additionally, cleanup can sometimes be more challenging, especially with traditional basket-style air fryers. Using disposable parchment liners designed for air fryers can be incredibly helpful, particularly after the wings have been glazed, as the caramelized sauce can stick stubbornly. **It is strongly advised against using a toaster oven-style air fryer or any model with exposed heating elements directly beneath the basket when glazing the wings, as the sugary sauce can drip and burn onto these elements, causing a difficult mess and potential safety hazard.**
For best air fryer results, preheat your air fryer to 390°F (199°C). Lightly spray the basket with nonstick cooking spray or use a suitable liner. Brush the tops of your prepped wings with oil, just as you would for oven baking. Arrange them in a single layer in the air fryer basket, ensuring they are not touching. Cook for approximately 12 minutes, then flip them over and continue cooking for another 10 minutes, or until golden brown and crispy. After tossing the wings with the honey-garlic sauce, return them to the air fryer in a single layer for an additional 3-4 minutes, just until the sauce is bubbly and caramelized. Keep a close watch to prevent burning.
Important Air Fryer Note: Air fryer times and temperatures can vary significantly between brands and models. Always keep a close eye on your first batch of wings and adjust the cooking times and temperatures as needed for your specific appliance to achieve the perfect crispy, glazed result.
Serving and Storing Your Delicious Wings
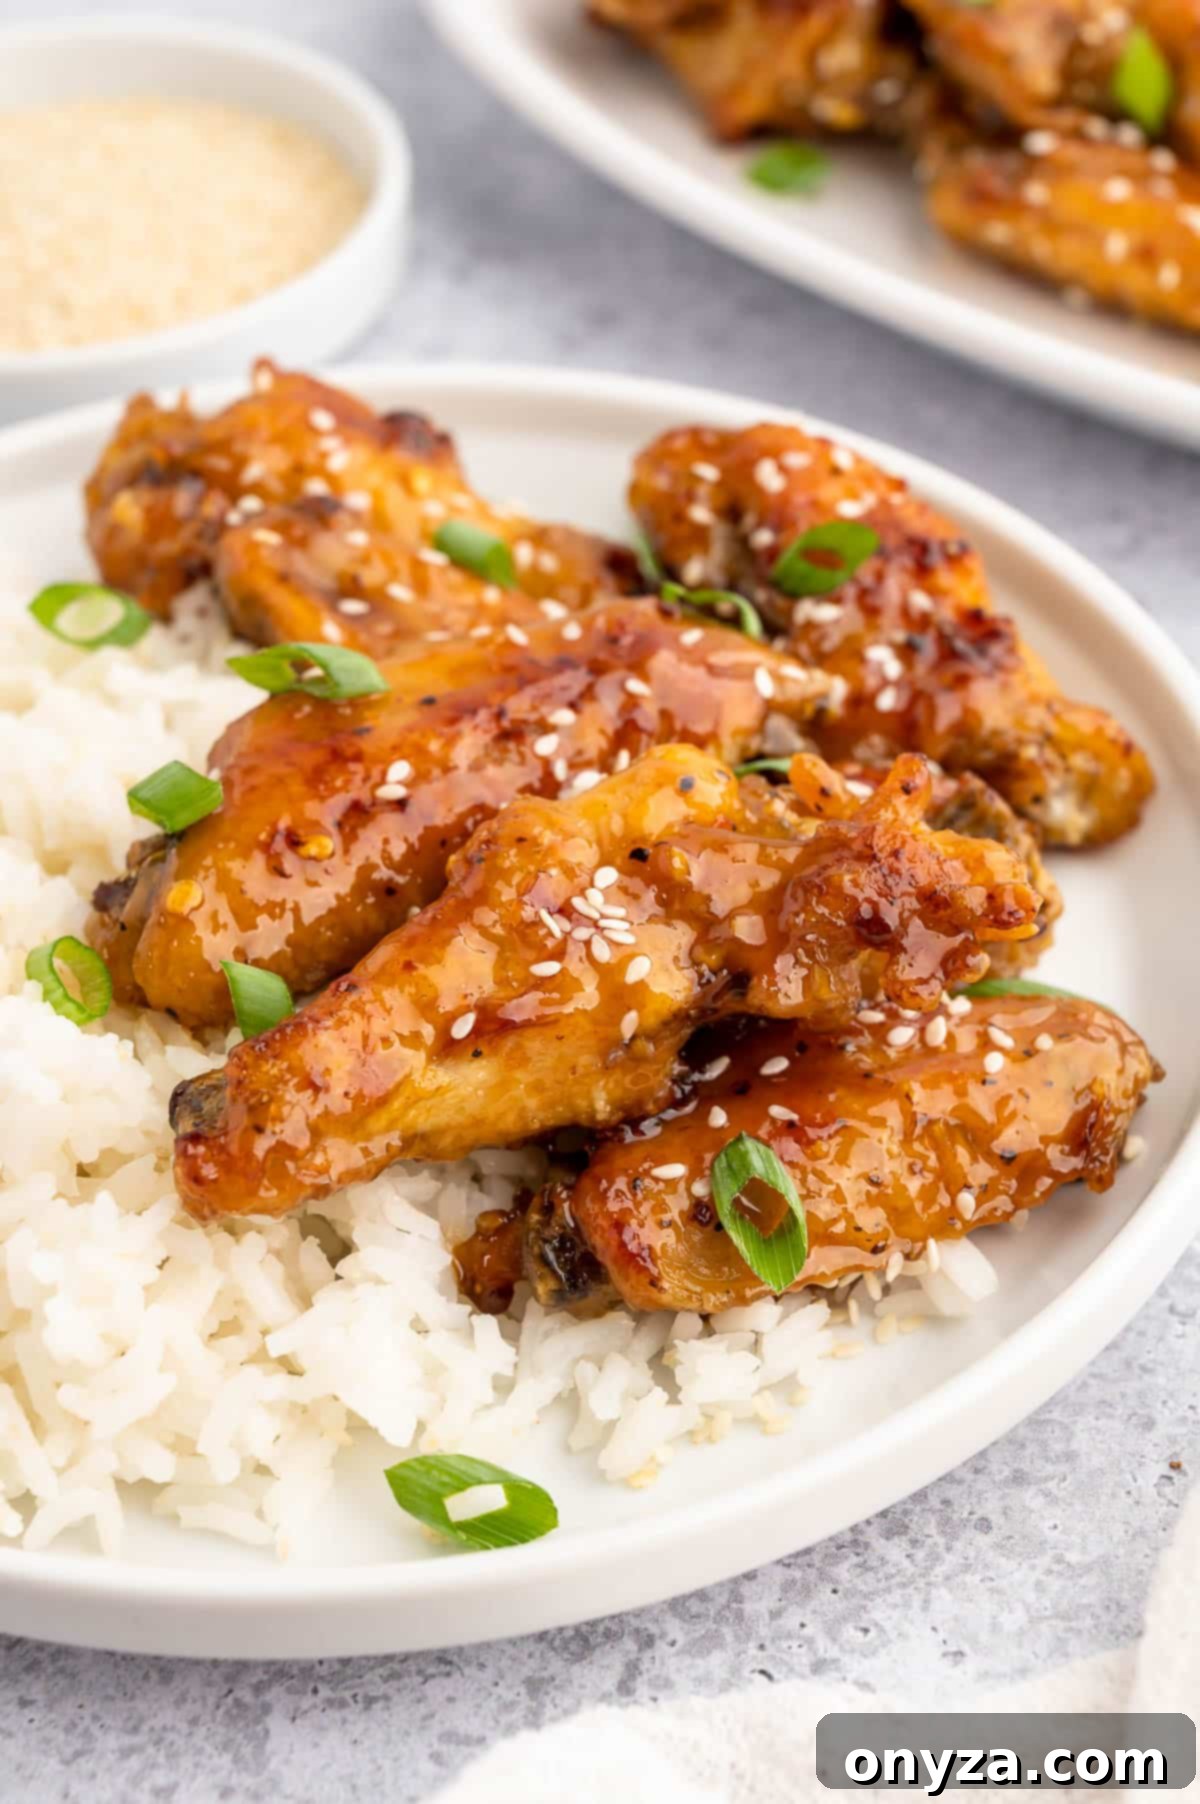
Once your honey garlic chicken wings are hot, bubbly, and perfectly caramelized, it’s time to serve them! Pile them high on a large platter for an impressive presentation. Finish with a generous sprinkle of toasted sesame seeds for a nutty crunch and thinly sliced scallions for a burst of fresh, oniony flavor and vibrant color. These sticky wings are best enjoyed hot, so serve them immediately and be sure to provide plenty of napkins or even moist towelettes for your guests!
These versatile wings can be enjoyed in many ways. For a satisfying family dinner, pair them with steaming white or brown rice and a side of quick stir-fried vegetables or a simple fresh salad. As an appetizer for a party, they are an undeniable hit. A good rule of thumb for appetizer portions is to estimate 4-6 wings per person, but consider planning for more if you have hearty eaters or if the wings are the primary attraction on your menu. Serve them alongside a cool dipping sauce, like ranch or blue cheese, though they are perfectly delicious on their own.
While these wings are truly at their peak the day they are made, any leftovers can be stored and reheated for a convenient second meal or snack. To store, simply place them in an airtight container and refrigerate for up to 3-4 days. For reheating, spread the wings in a single layer on a parchment-lined baking sheet and bake in a preheated oven at 350°F (175°C) for 10-15 minutes, or until heated through and crispy again (reaching an internal temperature of 165°F/74°C). If using an air fryer, reheat at 350°F (175°C) for 3-5 minutes in a lined or nonstick basket. **When reheating, keep a close eye on the wings to ensure the sauce doesn’t get too dark or burn.**
Expert Tips for the Best Honey Garlic Wings
To ensure your honey garlic chicken wings turn out perfectly every time, keep these expert tips in mind:
- Pat Dry Thoroughly: This is the single most important step for achieving crispy skin. Moisture creates steam, which prevents browning and crisping. Don’t skip it!
- Don’t Overcrowd the Pan/Basket: Whether baking or air frying, give your wings space. Overlapping pieces will steam instead of crisp, resulting in soft, unappealing skin.
- Monitor Sauce Closely During Glazing: The honey-garlic sauce contains sugars that can burn quickly in the high heat of the oven. Keep a watchful eye during the final glazing step to achieve beautiful caramelization without charring.
- Use Fresh Ingredients: Fresh garlic and ginger make a significant difference in the vibrancy and depth of the sauce’s flavor. A Microplane makes grating ginger effortless.
- Aim for Optimal Internal Temperature: While 165°F (74°C) is safe, cooking wings to 185-200°F (85-93°C) renders more fat and connective tissue, resulting in a more tender, succulent, and enjoyable wing.
- Taste and Adjust the Sauce: Before thickening, taste your sauce. Want it sweeter? Add a touch more honey. More savory? A splash more soy sauce. Spicier? A few more red pepper flakes.
Frequently Asked Questions (FAQ)
Here are answers to some common questions about making honey garlic chicken wings:
- Can I use frozen chicken wings? Yes, but you must thaw them completely before preparing. Pat them extra dry after thawing to remove any residual moisture, as frozen wings tend to release more water.
- How can I make this recipe gluten-free? To make these wings gluten-free, simply ensure you use Tamari or coconut aminos instead of regular soy sauce. Cornstarch is naturally gluten-free.
- How can I make the wings spicier? To add more heat, increase the amount of crushed red pepper flakes in the sauce. You could also add a pinch of cayenne pepper or a dash of your favorite hot sauce to the glaze.
- Can I prepare the wings or sauce ahead of time? You can prep the wings by coating them in the cornstarch and seasoning mixture a few hours in advance and storing them in the refrigerator. The sauce can be made a day or two ahead and stored in an airtight container in the fridge. Reheat the sauce gently over low heat, stirring frequently, before tossing with the baked wings.
- What’s the difference between drumettes and flats? Chicken wings are typically sold as three parts: the drumette (which resembles a small drumstick), the flat (the middle section with two bones), and the wing tip (the pointy end, often discarded or used for stock). This recipe uses the drumettes and flats for optimal meat-to-skin ratio and ease of eating.
More of Our Favorite Chicken Recipes
- Crispy Chicken Milanese
- Classic Chicken Marsala
- Flavorful Balsamic Marinated Chicken Breasts
- Authentic General Tso’s Chicken
Honey Garlic Chicken Wings
by Amanda Biddle
These Honey Garlic Chicken Wings are crispy, sticky, and loaded with sweet-salty-zesty flavors. Easy to make in the oven or air fryer for a party appetizer or a fun weeknight dinner.
Prep Time: 15 minutes
Cook Time: 45 minutes
Total Time: 1 hour
Servings: 4 servings (approx. 6 wing pieces per serving)
Print Recipe
Ingredients
For the Wings
- 2-1/2 pounds split chicken wings (drumettes and flats, often labeled “party wings”)
- ¼ cup cornstarch
- 1 teaspoon kosher or fine sea salt
- ½ teaspoon freshly-ground black pepper
- ½ teaspoon garlic powder
- 2 tablespoons vegetable oil (or other high-heat, neutral flavored oil)
For the Sauce
- ½ cup honey
- ¼ cup water
- ¼ cup soy sauce (reduced sodium recommended)
- 4 large garlic cloves, minced (about 1 tablespoon)
- ½ tablespoon finely-grated fresh ginger (use a microplane)
- 1 teaspoon cornstarch
- ¼ teaspoon crushed red pepper flakes (optional, for a spicy kick)
For Serving
- ½ tablespoon toasted sesame seeds
- 1 scallion, thinly sliced
Instructions
Prep the Wings
- Use paper towels to thoroughly pat the wings dry. Place them in a large bowl or a gallon-size disposable zip-top bag. Sprinkle the cornstarch, salt, pepper, and garlic powder over the wings. Stir with a rubber spatula or, if using a zip-top bag, seal and shake well to evenly coat all the wings.
Bake the Wings
- Preheat oven to 425°F (218°C) with racks in the upper-middle and lower-middle positions. Line 2 half-sheet pans with foil, then place parchment paper over the foil.
- Divide the coated wings between the lined sheet pans, ensuring ample space between each wing for crisping. Lightly brush the tops of the wings with oil. Place the sheet pans in the oven and bake for 35-45 minutes, or until golden brown and crispy. Halfway through cooking, rotate the pans in the oven and use tongs to flip the wings.
Make the Sauce
- While the chicken bakes, combine the honey, water, soy sauce, minced garlic, grated ginger, cornstarch, and optional red pepper flakes in a saucepan. Whisk until smooth.
- Bring the mixture to a low boil over medium to medium-high heat. Once bubbling, reduce heat to a simmer and cook for about 8 minutes, stirring frequently with a small rubber spatula, until the sauce thickens enough to coat the back of a spoon.
Glaze and Finish the Wings
- Carefully transfer the baked wings to a large bowl using tongs (do not turn off the oven). Pour the prepared sauce over the wings and toss gently with tongs until fully coated.
- Return the glazed wings to the lined sheet pans in a single layer. Brush any remaining sauce from the bowl over the tops of the wings.
- Bake the glazed wings for 5 minutes. Flip them, baste again with any leftover sauce, and continue baking for 4-5 minutes longer, until the glaze is bubbly and caramelized. **Watch closely to prevent the sugars from burning.**
- Transfer the finished wings to a large platter. Sprinkle with toasted sesame seeds and thinly sliced scallions. Serve hot with plenty of napkins!
Notes
- Internal Temperature of Cooked Wings: Chicken wings are safe to eat when their internal temperature reaches 165°F (74°C), but for the best texture and tenderness, aim for 185-200°F (85-93°C).
- Storage: Refrigerate leftover wings in an airtight container for 3-4 days.
- Reheating: Reheat in the oven or air fryer at 350°F (175°C). This typically takes 10-15 minutes on a parchment-lined baking sheet in the oven, or 3-5 minutes in a lined air fryer basket. Monitor closely to prevent the sauce from burning during reheating. Reheated wings should reach an internal temperature of at least 165°F (74°C).
Air Frying the Wings:
Please read the “Using an Air Fryer to Make This Recipe” section in the article above for important considerations before using this method.
Air fryer times and temperatures can vary by model. I do not recommend using an air fryer with exposed heating elements under the cooking space (such as a toaster oven-style model), especially after adding the glaze to the wings.
- Preheat your air fryer to 390°F (199°C). Spray the bottom of the basket with nonstick cooking spray, or use a disposable liner that fits your model.
- Brush the tops of the wings with oil, as in the baked wing instructions. Place them into the air fryer basket in a single layer without crowding them. Depending on the size of your air fryer, you might need to do this in 2-3 batches.
- Air fry the wings for 12 minutes. Flip them, and continue cooking for another 10 minutes on the second side, until golden and crispy.
- Follow the instructions above for tossing the wings with the sauce and brushing the tops. Return the wings to the air fryer in a single layer for 3-4 minutes, until the sauce is bubbly and caramelized. Keep a close eye on the wings to ensure they don’t burn.
Nutrition Estimate
Serving: 6 wing pieces | Calories: 380kcal | Carbohydrates: 46g | Protein: 13g | Fat: 17g | Saturated Fat: 4g | Polyunsaturated Fat: 6g | Monounsaturated Fat: 6g | Trans Fat: 0.2g | Cholesterol: 47mg | Sodium: 1443mg | Potassium: 188mg | Fiber: 1g | Sugar: 35g | Vitamin A: 159IU | Vitamin C: 2mg | Calcium: 33mg | Iron: 1mg
Nutrition information is automatically calculated, so should only be used as an approximation.
About our recipes
Please note that our recipes have been developed using the US Customary measurement system and have not been tested for high altitude/elevation cooking and baking.
★ ★ ★ ★ ★
