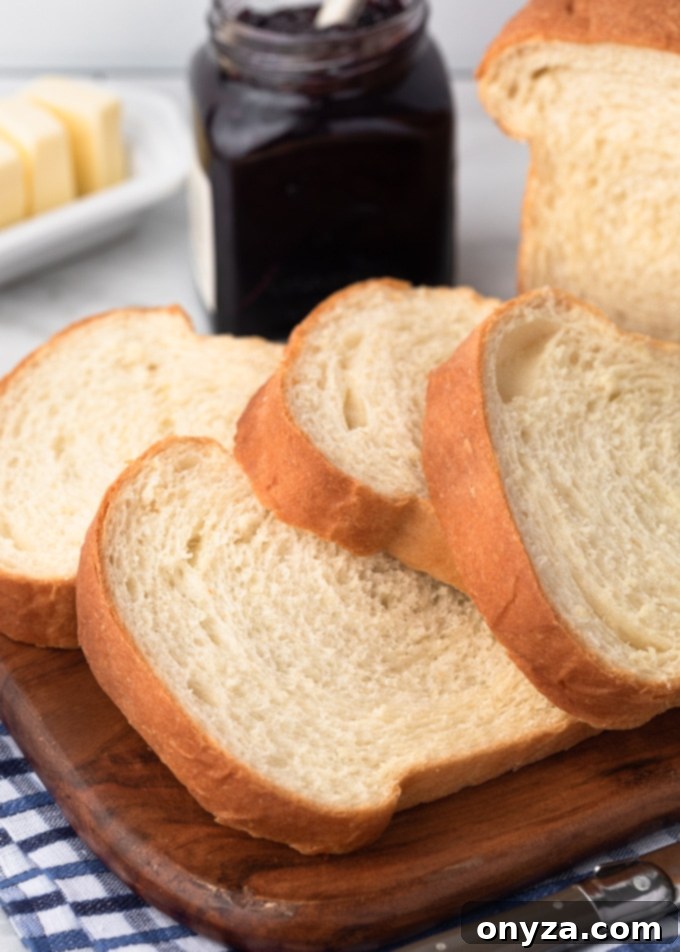
The Ultimate Guide to Baking Homemade White Bread: A Fluffy, Easy Recipe for Everyone
Discover the unparalleled joy of baking your own homemade white bread. With its impossibly fluffy texture, soft crumb, and a delightful butter-topped crust, this recipe is a true game-changer. Whether you’re a novice stepping into the world of bread-making or an experienced baker seeking a timeless classic, this easy-to-follow guide will lead you to a perfect loaf every time. Prepare to fill your home with the irresistible aroma of freshly baked bread and enjoy a versatile staple that surpasses anything from the store.

Why Bake Your Own White Bread? A Journey to Kitchen Comfort
My journey into the wonderful world of bread-making began unexpectedly during a particularly long blizzard. Trapped indoors, with our store-bought bread supplies dwindling, a strong craving for toast with my morning eggs hit me. That day, my mom generously shared her simple white bread recipe. As I carefully followed each step, the kitchen slowly filled with an aroma that was, quite simply, the essence of coziness. The moment I tasted that first warm, buttery slice, I was hooked. It ignited a passion to create all kinds of bread from scratch right in my own kitchen.
Classic white bread, often underestimated, is one of the most rewarding loaves to bake at home. While it does require a bit of patience and time commitment, the payoff is absolutely worth every minute. The resulting pillowy-soft, golden-crusted loaf, kissed with melted butter, is genuinely superior to any commercial white bread you’ll ever find. It’s not just food; it’s an experience – a taste of comfort and accomplishment.
This comprehensive homemade white bread tutorial has been crafted for **bakers of all skill levels**. Whether you’ve been expertly turning out loaves for years or this is your very first foray into yeast baking, I’ve packed this post with clear, visual step-by-step instructions, along with all the tried-and-true tips and tricks I’ve gathered over my baking journey. My goal is to empower you to create magnificent bread with confidence and ease.
If you find yourself with any questions as you read through this guide or during your baking process, please don’t hesitate to reach out. I’m here to help you succeed!
Looking to bake bread but don’t have any yeast on hand? Don’t worry! Try my Classic Beer Bread recipe for an incredibly easy and delicious quick-bread alternative that requires no yeast.
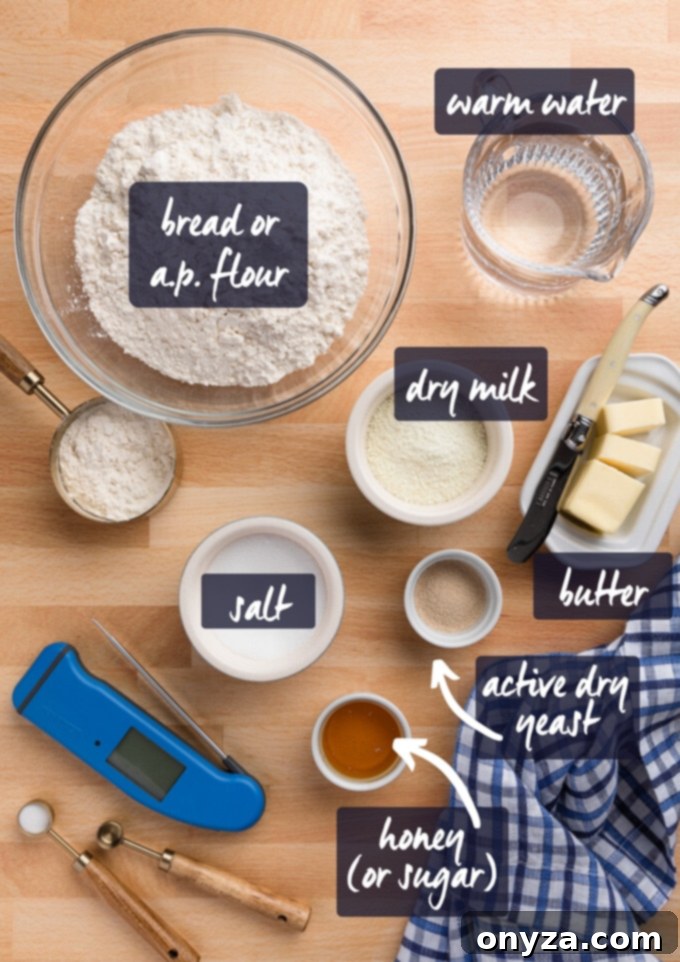
Essential Ingredients and Equipment for Perfect White Bread
Baking homemade white bread doesn’t demand a complex array of ingredients. In fact, you’ll only need seven core components, most of which are likely already staples in your pantry. Understanding the role of each ingredient and having the right tools makes all the difference.
Key Pantry Staples: Understanding Each Component
- Flour (Bread Flour or All-Purpose): The foundation of your loaf. We’ll delve into the differences and why your choice matters below.
- Active Dry Yeast: The living organism responsible for the bread’s rise, texture, and distinctive flavor. Freshness is key!
- Dry Milk Powder: This might seem unusual, but it’s a secret ingredient for a softer crumb, better browning, and improved shelf life. It also adds a subtle richness without making the bread overly dense.
- Table Salt: Crucial for enhancing the bread’s flavor and controlling yeast activity. Don’t skip it!
- Softened Unsalted Butter: Adds incredible flavor, tenderness, and contributes to that beautiful golden crust. Using unsalted butter allows you to control the overall salt content precisely.
- Honey (or Granulated Sugar): Provides food for the yeast, aids in browning, and contributes a delicate sweetness to the finished bread.
- Warm Water: Essential for activating the yeast. Temperature control here is paramount for a successful rise.
Indispensable Baking Tools
While bread-making can be done with minimal equipment, a few key tools will significantly streamline the process and help ensure consistent results. These items are excellent investments for any aspiring baker:
- Instant-Read Thermometer: Absolutely vital for accurately checking water temperature for yeast proofing and the internal temperature of your baked loaf for perfect doneness. A few degrees off can make a big difference.
- Stand Mixer fitted with a Dough Hook: While not strictly necessary (you can knead by hand!), a stand mixer takes the heavy lifting out of kneading, developing the gluten effortlessly and consistently.
- Rolling Pin: Used for shaping the dough into an even rectangle before rolling it into a loaf.
- Loaf Pan (8 1/2″ x 4 1/2″ or 9″ x 5″): The vessel that gives your bread its classic shape. Make sure it’s properly buttered or greased to prevent sticking.
- Pastry Brush (link): Perfect for brushing melted butter onto your warm, freshly baked loaf, adding flavor and softening the crust.
- Wire Rack (link): Essential for cooling your bread evenly and preventing the bottom crust from becoming soggy.
Choosing Your Stand Mixer
If you’re in the market for a stand mixer, here are two models that I personally own and highly recommend. I used the 5-quart Artisan in this post.
- KitchenAid Artisan Series 5-Qt. Stand Mixer
- KitchenAid 7-Quart Pro Line Stand Mixer
As an Amazon Associate, I earn from qualifying purchases.
What Kind of Flour Should I Use? Bread Flour vs. All-Purpose
For this versatile recipe, you have the option of using either **bread flour** or **all-purpose flour**, and both will yield excellent results. However, there are subtle differences to note.
Bread flour is generally my preferred choice for most yeast-leavened loaves. It boasts a higher protein content—typically around 12.7% for King Arthur brand, compared to all-purpose flour’s 11.7%. This higher protein level means more gluten development, which translates to a sturdier dough structure and a more characteristic “chew” in the final baked loaf. The robust gluten network traps the gasses produced by the yeast, resulting in a lighter, airier crumb.
That being said, white bread is one of those forgiving recipes where all-purpose flour performs remarkably well. The texture of loaves baked with all-purpose flour will be slightly less chewy, and the internal crumb might be a tiny bit less tight and open compared to those made with bread flour. Both options produce a delicious loaf, so feel free to use what you have on hand or what you prefer for your ideal texture.
Step-by-Step Guide to Crafting Your Homemade White Bread
To make the bread-making process as straightforward as possible, I’ve broken down this recipe into six distinct, manageable categories: Proofing the Yeast, Mixing and Kneading the Dough, The First Rise, Shaping the Loaf, The Second Rise, and Baking the Loaf. While this might sound like many steps, don’t be deterred! A significant portion of this process is “hands-off,” allowing the yeast to work its magic while you attend to other things.
Phase 1: Activating the Yeast (Proofing)
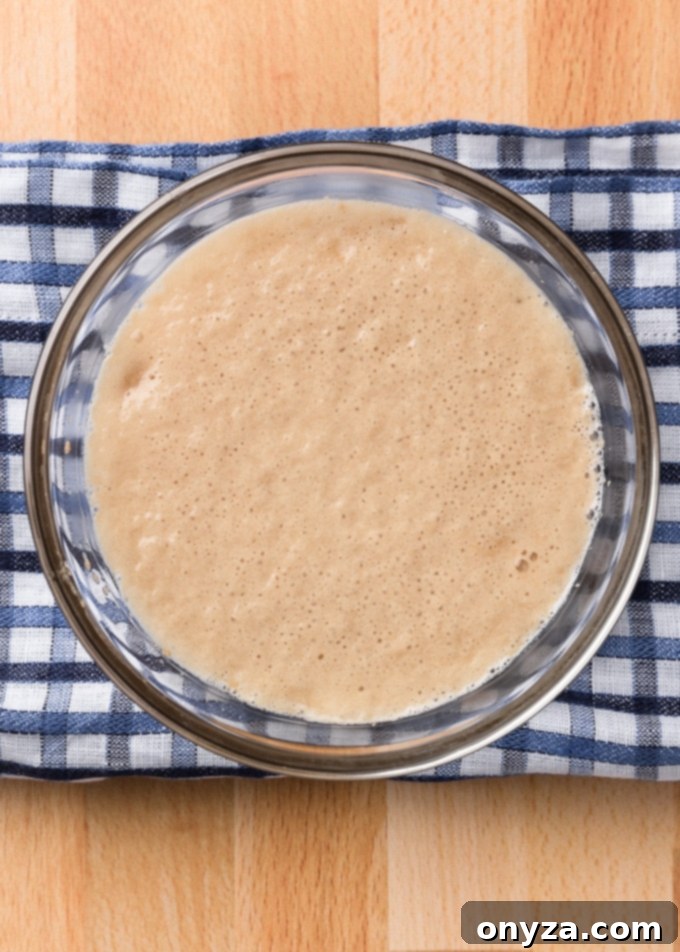
The very first and crucial step when working with active dry yeast is to proof it. This process “wakes up” the dormant yeast and, more importantly, confirms its viability, ensuring your loaf will rise beautifully. If your yeast is old or inactive, your bread simply won’t rise, and this step prevents wasted ingredients and effort.
To proof your yeast, combine half of the warm water specified in the recipe with a small amount of the honey or granulated sugar. Stir in the active dry yeast until fully dissolved. For accurate temperature control, I highly recommend using an instant-read thermometer – I personally rely on the Thermapen ONE in my kitchen. The water temperature should ideally be between **100 to 110 degrees F (38 to 43 degrees C)**. If the water is too cold, the yeast won’t activate; if it’s too hot, it will kill the yeast, rendering it useless.
Within 5 to 10 minutes, you should observe the mixture becoming foamy with a noticeable layer of small bubbles on the surface. This indicates that the yeast is active and thriving. If, after this time, you don’t see any foam or bubbles, and you are certain the water temperature was within the correct range, it means your yeast is no longer viable and should be discarded. Start with a fresh packet of yeast to ensure success.
Phase 2: Mixing and Kneading the Dough
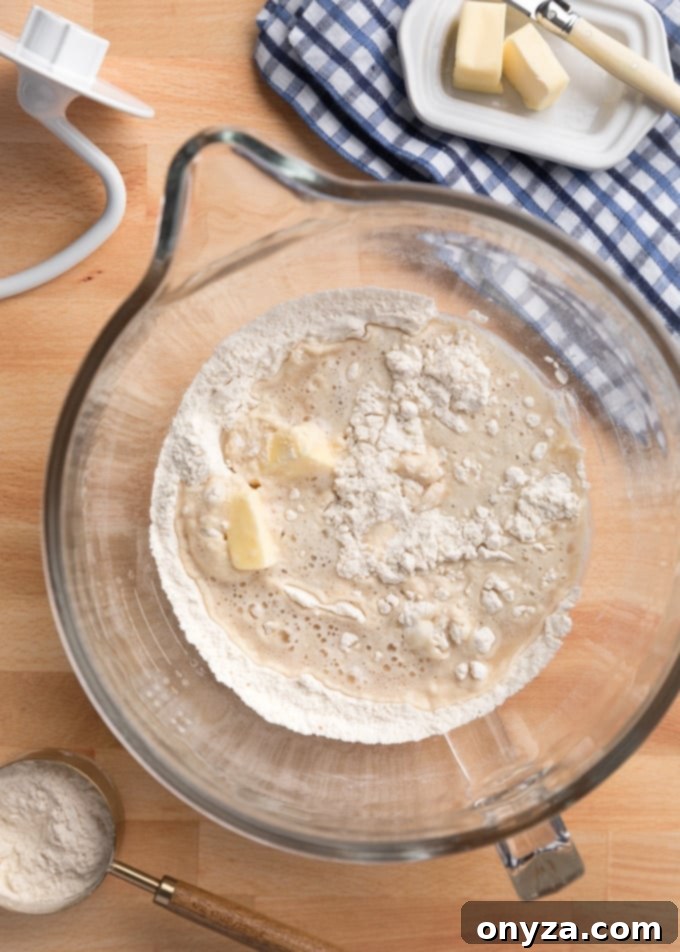
A stand mixer equipped with a dough hook makes the mixing and kneading of bread dough incredibly easy and efficient. Once your yeast is actively proofing, you can prepare the other ingredients. Place all of the remaining ingredients into the mixer bowl. After the yeast mixture is foamy and ready, add it to the bowl with the other dry ingredients.
When measuring your flour, it’s crucial to use the spoon-and-level method for accuracy. Gently spoon the flour into your measuring cup until it overflows, then level it off with the back of a knife. While the recipe calls for 2.5 to 3 cups of flour, it’s important to **start by adding only 2.5 cups initially**. This allows for adjustments based on environmental factors like humidity.
With all ingredients in the bowl, attach the dough hook and begin mixing on low speed. Allow the mixer to work for 3-5 minutes, ensuring all the flour is thoroughly incorporated and a rough dough forms.
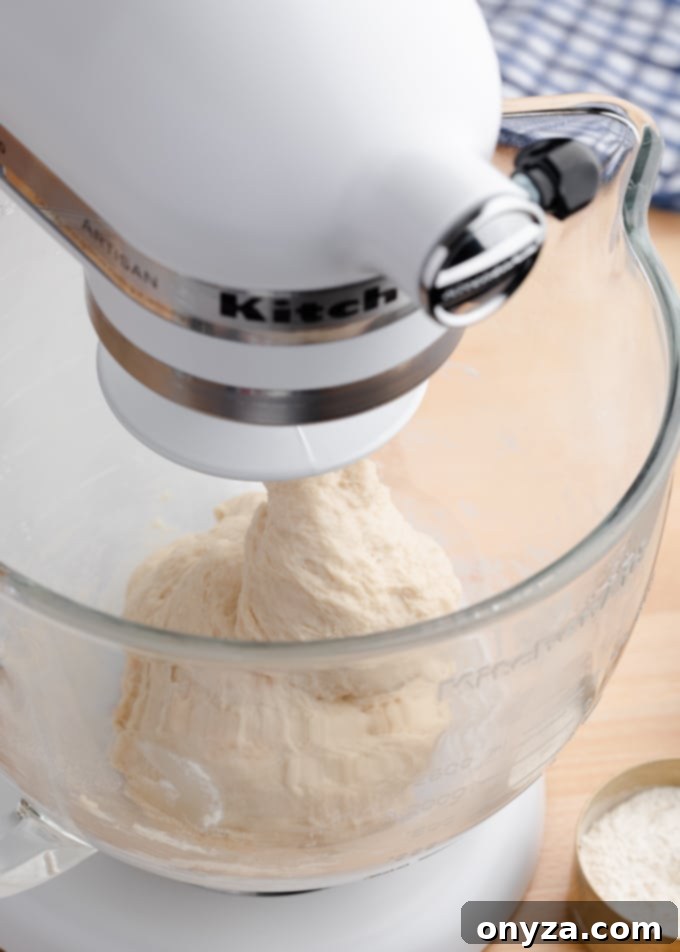
Achieving the Perfect Dough Texture
After the initial 2.5 cups of flour have been incorporated, pause the mixer and assess the dough’s texture. It should feel soft and slightly tacky to the touch. Crucially, it should not be so sticky that it heavily clings to the sides of the mixer bowl. A gentle stick in a small circle at the very bottom center of the bowl is usually acceptable.
If the dough appears too sticky, gradually add small amounts of the reserved 1/2 cup of flour, one tablespoon at a time. Mix briefly after each addition to see how the dough absorbs it. The exact amount of flour needed can vary based on the humidity in your kitchen and even the time of year. For the dough pictured in this post, I found that adding an additional 3 to 4 tablespoons was perfect to achieve the ideal consistency.
Once the dough has reached the desired soft and slightly tacky texture, increase your mixer speed by one notch (medium-low on most stand mixers) and allow it to knead for another 7-10 minutes. During this kneading phase, you’ll observe the dough transforming into a soft, smooth ball with a noticeably elastic quality. A good test for proper kneading is the “windowpane test”: pinch off a small piece of dough and gently stretch it. If you can stretch it thin enough to see light through it without tearing, your gluten has developed sufficiently.
Why does kneading make the dough elastic? The very short answer: kneading develops the gluten in the flour (and will continue to develop during rising). Gluten is a protein network that gives bread its structure and chewiness. To dive deeper into the science behind this fascinating process, check out “Yeast’s Crucial Roles in Breadbaking“ from Fine Cooking.
Phase 3: The First Rise – Developing Flavor and Volume
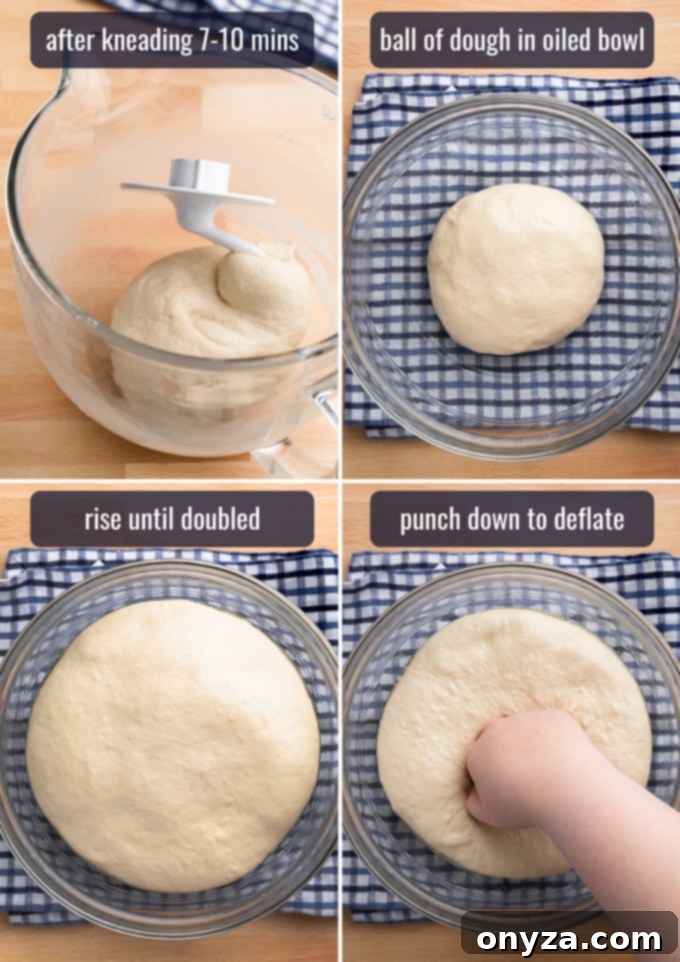
With the kneading complete, your dough is now ready for its first rise, also known as bulk fermentation. This crucial stage allows the yeast to feast on the starches and sugars within the dough, producing carbon dioxide and alcohol. This fermentation process not only causes the dough to expand and double in size but also continues to develop the gluten structure, contributing significantly to the bread’s final texture and complex flavor.
For the first rise, choose a large bowl – ideally, one that’s twice the size of your dough ball – to accommodate its growth. Lightly oil the bottom and sides of the bowl to prevent the dough from sticking. You can even use your stand mixer bowl for this step to minimize cleanup, as long as it’s properly oiled. Gently place the dough ball into the oiled bowl, turning it once to coat all sides with a thin layer of oil. This prevents a dry crust from forming during the rise.
Cover the bowl loosely with a clean kitchen towel or plastic wrap, and place it in a warm (but not excessively hot) spot in your kitchen. Optimal proofing temperatures are usually around 75-80 degrees F (24-27 degrees C). This rise will typically take anywhere from **1 to 2 hours**, though it can sometimes take longer depending on the ambient temperature. In cooler environments, the rise will be slower; in warmer environments, it will be faster.
It is far more important to monitor the dough visually until it has doubled in size rather than strictly adhering to a timer. Use the clock as a guide, but trust your eyes to determine when the dough is truly ready. A properly risen dough will feel soft and airy.
Where’s the best place in your kitchen to let your dough rise? Finding the perfect warm, draft-free spot can be key. Options include a slightly warmed (but turned off) oven, near a sunny window, or in a dedicated bread proofer if you have one. Check out these tips and tricks from Taste at Home for more ideas. I often use the proofing setting on my oven – consult your appliance manual to see if you have this convenient feature!
Phase 4: Expertly Shaping Your Loaf
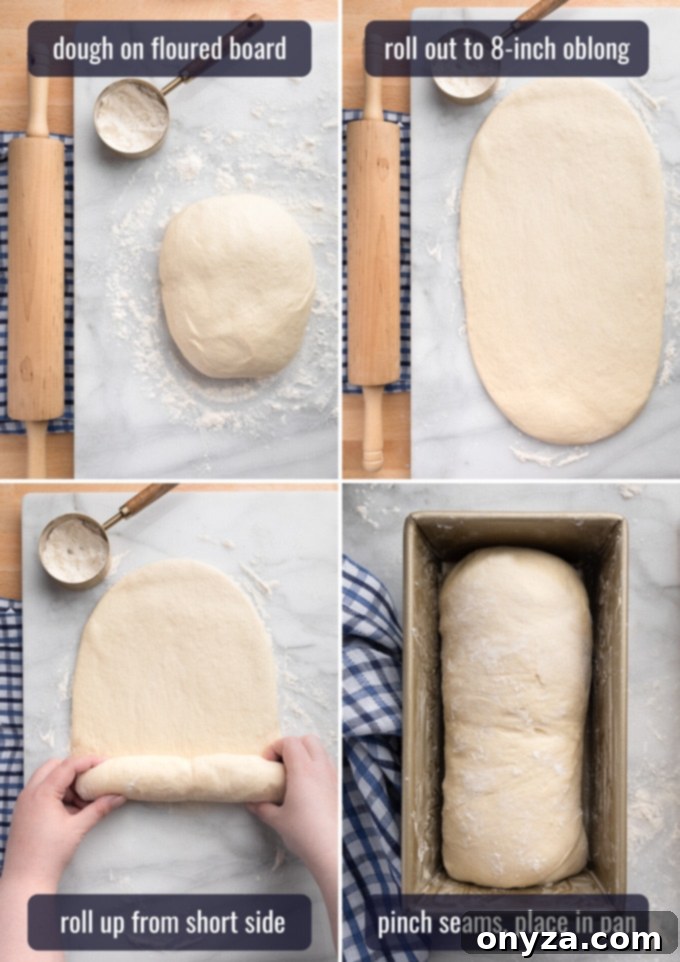
Once your dough has successfully doubled in size during its first rise, it’s time for shaping. Begin by gently punching the center of the dough to deflate it. This expels the accumulated gases and prepares the gluten for the final shaping.
Transfer the dough onto a lightly floured surface. Using a rolling pin, carefully roll the dough into an oblong shape. Aim for a rectangle approximately 8 inches wide and about 1/4-inch thick. As you roll, pay attention to any large air bubbles that might form within the dough; gently press these out with your fingertips. Failing to do so can lead to undesirable gaps or large holes in the crumb of your sliced bread.
Starting from one of the 8-inch ends, tightly roll up the dough toward the opposite end, creating a compact log. The key here is to roll it as tightly as possible without tearing the dough. A tight roll helps create a consistent internal structure and prevents large air pockets in the finished loaf. Once rolled, use your fingers to firmly pinch the bottom seam and the side seams together, sealing the dough securely.
Finally, carefully transfer the shaped dough to your already buttered or greased loaf pan, placing it seam-side down. This ensures that the seam doesn’t split during baking, maintaining a smooth, attractive top crust.
Phase 5: The Second Rise – Final Proof for a Light Crumb
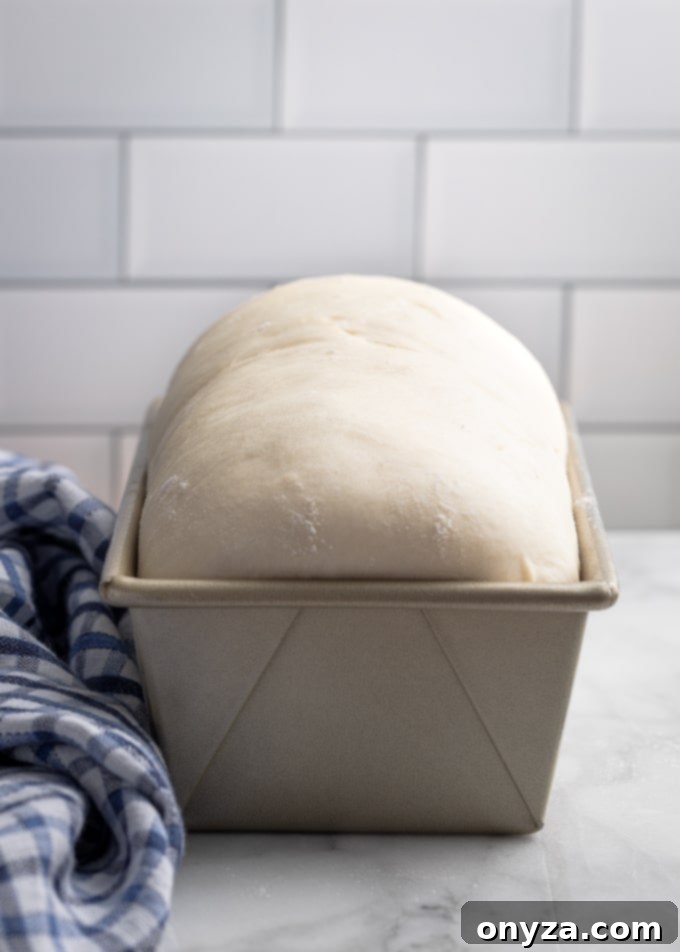
This is the crucial final step before your beautiful loaf heads into the oven! The shaped dough now needs to undergo a second rise, often called the “final proof.” During this period, the yeast will produce more gas, expanding the dough further and giving the bread its final light and airy texture.
Loosely cover the loaf pan with a piece of plastic wrap that you’ve lightly coated with cooking spray. This prevents the plastic wrap from sticking to the rising dough and allows it room to expand without hindrance. Place the covered loaf pan in a warm, draft-free spot, similar to the first rise. This second rise will typically take about an hour, but as with the first rise, duration can vary. Resist the urge to rush this stage; proper proofing is essential for a tender, well-risen loaf.
Want to be sure your loaf is perfectly ready for baking? Gently press the top of the dough with the tip of your index finger. If the indentation you create remains and doesn’t spring back out, your loaf has reached its optimal proof and is ready to be baked. If it springs back too quickly, it needs more time; if it collapses, it might be over-proofed, though this is less common with active dry yeast and careful monitoring.
Phase 6: Baking to Golden Perfection
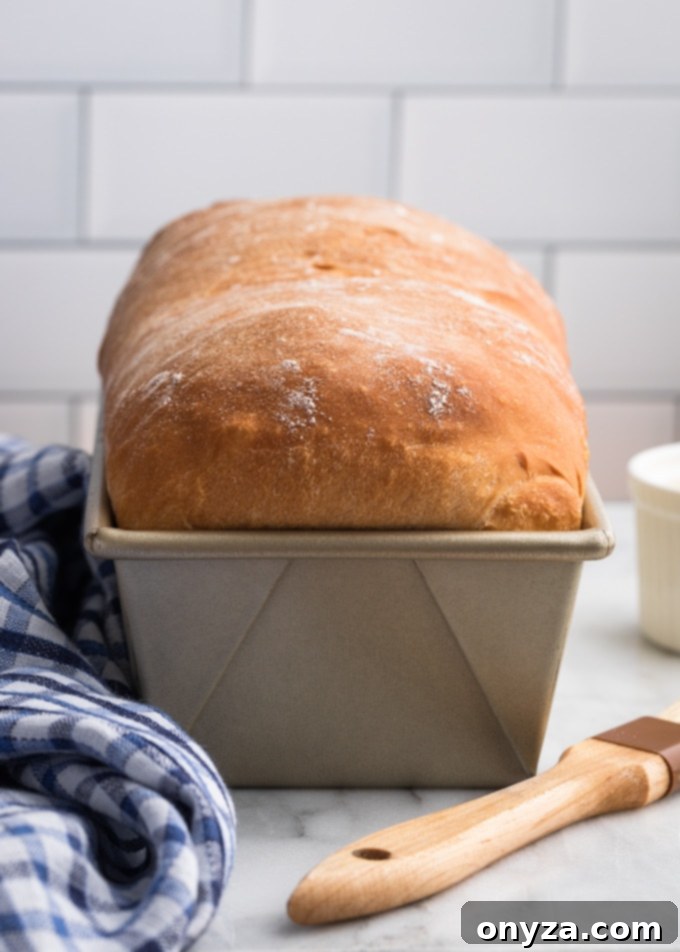
As your dough nears the end of its second rise, preheat your oven to **350 degrees F (175 degrees C)**. Position an oven rack in the lower third of the oven. This placement helps ensure even baking and a beautifully browned bottom crust without over-browning the top too quickly.
Once the dough has completed its second rise, carefully remove the plastic wrap and place the loaf pan into the preheated oven. Bake for approximately **35 to 45 minutes**. There are several indicators to confirm your bread is perfectly baked:
- The crust should be a rich, golden brown color.
- An instant-read thermometer inserted into the center of the loaf should register an internal temperature between **190-200 degrees F (88-93 degrees C)**. This is the most reliable method for ensuring doneness.
- When you gently tap the bottom of the loaf, it should produce a hollow sound.
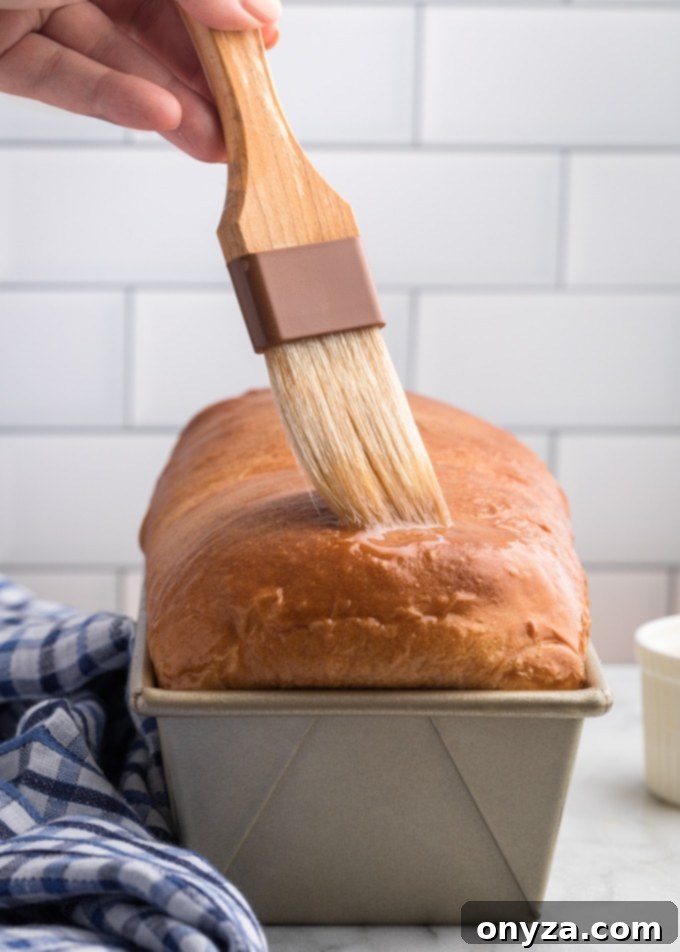
As soon as you remove the hot bread from the oven, immediately brush the top with the remaining tablespoon of melted butter using your pastry brush. This not only imparts an additional layer of rich flavor but also helps to create a soft, supple crust that is easier to slice. This step truly elevates the homemade experience!
To prevent the sides and bottom of your freshly baked loaf from becoming soggy, it’s crucial to remove it from the pan as quickly as possible. Allow the bread to cool in the loaf pan for only about 5 minutes. Then, using a thin knife to gently loosen the edges if needed, turn the bread out onto a wire rack to finish cooling completely. Cooling on a wire rack allows air to circulate around all sides, maintaining the crispness of the crust.
Serving Suggestions and Storage Tips for Homemade White Bread
There’s nothing quite like a slice of homemade white bread enjoyed the day it’s made, still slightly warm from the oven, slathered with softened butter and your favorite jam. However, I find myself loving it equally, if not more, the next morning when it’s lightly toasted to perfection.
For short-term storage, once your loaf has fully cooled to room temperature, place it in an airtight container or a large zip-top bag. Stored this way, it will remain wonderfully fresh for 3-4 days at room temperature. Avoid refrigerating bread, as it tends to dry out quickly in the cold environment.
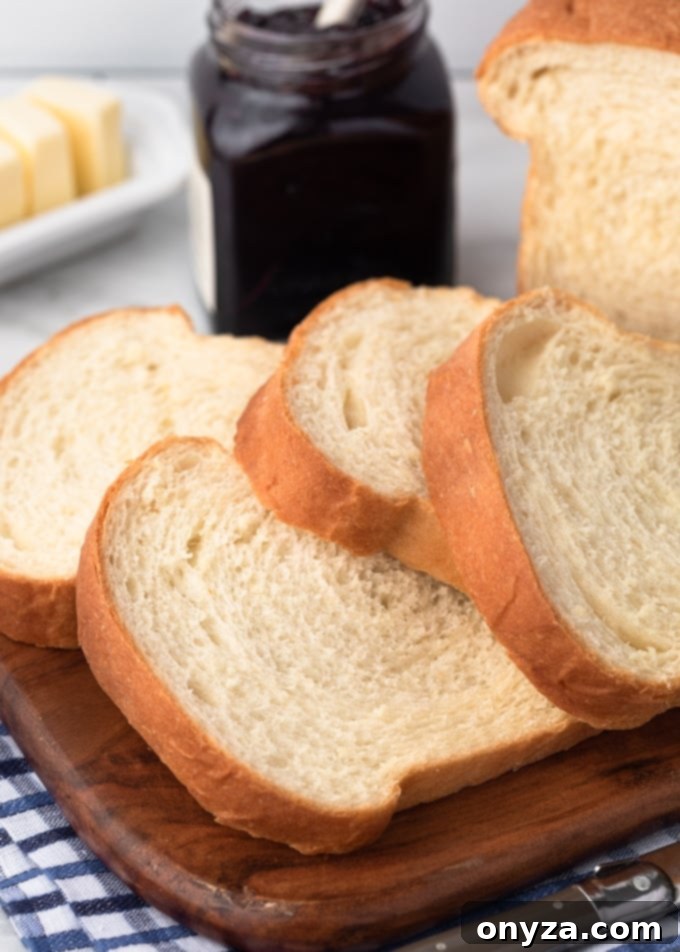
For longer storage, the freezer is your best friend. I prefer to slice the cooled loaf first, then arrange the slices in zip-top bags before freezing them for up to 3 months. This method allows you to easily pull out individual slices as needed for toast or sandwiches, without having to defrost the entire loaf. You can certainly wrap and freeze a full loaf as well, but the pre-sliced option offers unparalleled convenience.
This versatile homemade white bread is a true kitchen hero. It’s equally fantastic for creating hearty cold sandwiches, like a delicious chicken salad sandwich, or for making comforting warm sandwiches, such as a classic grilled cheese. It pairs perfectly with eggs for a satisfying breakfast and makes a wonderful snack spread with homemade peanut butter or your favorite fruit jam.
Homemade White Bread Recipe Card
This easy homemade white bread recipe yields a fluffy, soft, and butter-topped loaf that’s perfect for any meal. Using your stand mixer simplifies the process, making it accessible for bakers of all levels.
Homemade White Bread
By Amanda Biddle
This butter-topped homemade white bread is perfect for sandwiches, breakfast, or spread with your favorite jam for a cozy snack. Easy to make using your stand mixer!
- Prep Time: 40 minutes
- Cook Time: 35 minutes
- Rising Time: 3 hours
- Total Time: 4 hours 15 minutes
- Servings: 10 slices (1 loaf)
Ingredients
- 2-1/2 to 3 cups bread flour or all-purpose flour (measured with a spoon-and-level method)
- 2-1/4 teaspoons active dry yeast (1 packet)
- 2 tablespoons honey or granulated sugar, divided
- 1 cup warm water (105 to 110 degrees F), divided
- 3 tablespoons unsalted butter, divided (plus additional for pan)
- 1-1/2 teaspoons table salt
- 3 tablespoons dry milk powder
Instructions
Proof the Yeast
- In a small bowl, stir together 1/2 cup of the warm water, a teaspoonful of the honey or sugar, and the yeast. Let stand for 5 to 10 minutes until the mixture is foamy and small bubbles rise to the surface.
Mix and Knead the Dough
- While the yeast is proofing, whisk 2-1/2 cups flour, the salt, and the milk powder in the bowl of a stand mixer. Soften 2 tablespoons of butter, cut it into a few pieces, and add it to the mixer bowl with the rest of the honey (no need to stir).
- When the yeast is proofed, stir in the remaining 1/2 cup of water, and add the entire liquid mixture to the dry ingredients in the stand mixer.
- Fit the mixer with the dough hook and mix on low speed for 3-5 minutes, until all of the flour is incorporated. Check the dough consistency. It should be slightly tacky to the touch, but not sticking heavily to the sides of the bowl. It’s ok if it gently sticks in a small circle to the center of the bottom. If needed, add some of the remaining 1/2 cup of flour a tablespoon at a time, mixing to incorporate after each addition, until the described consistency is reached.
- Increase the mixer speed by one notch and let the dough knead for 7-10 minutes, until a soft ball forms that has an elastic texture.
- Lightly oil the bottom and sides of a large bowl. Add the dough ball to the bowl and gently roll it around so it has a light coating of oil on all sides. Cover the bowl with a towel or plastic wrap and let it rise at room temperature, in a bread proofer, or in a warm (not hot) spot in your kitchen, for 1-2 hours, until doubled in size.
Shaping the Loaf
- Butter an 8-1/2 x 4/-1/2 or 9×5-inch loaf pan. Set aside.
- Punch the risen dough down to deflate it. Place the dough on a floured board and roll it out to an 8-inch wide oblong shape, about 1/4 inch thick. If you see any large air bubbles in the dough, press them out.
- Starting at the short end, tightly roll up the dough to a log. Pinch the bottom and side seams to seal. Place the dough, bottom seam side down, in the prepared pan.
- Loosely cover the pan with a piece of plastic wrap sprayed with cooking spray and let the dough rise for another 1-2 hours, until it is 1 to 1-1/4 inches higher than the top of the loaf pan.
Bake the Bread
- When the dough is almost finished with its second rise, preheat the oven to 350 degrees F, with the rack in the lower third of the oven.
- Uncover the pan and bake the bread for 35-45 minutes. The bread is ready when the top is golden, the center reads 190-200 degrees F on an instant read thermometer, and the loaf sounds hollow when tapped.
- Melt the remaining 1 tablespoon of butter and brush it over the top of the loaf when you take it out of the oven. Let the bread cool in the loaf pan for 5 minutes. Use a thin knife to loosen the sides from the pan and turn the bread out onto a wire rack to cool.
- Slice the bread when just slightly warm or room temperature and serve.
Notes
The article above this recipe card contains additional information and tips for success. We highly encourage you to give it a read!
Nutrition Estimate
Calories: 98kcal | Carbohydrates: 14g | Protein: 2g | Fat: 4g | Saturated Fat: 2g | Cholesterol: 9mg | Sodium: 131mg | Potassium: 59mg | Fiber: 1g | Sugar: 5g | Vitamin A: 154IU | Vitamin C: 1mg | Calcium: 31mg | Iron: 1mg
Nutrition information is automatically calculated, so should only be used as an approximation.
Please note that our recipes have been developed using the US Customary measurement system and have not been tested for high altitude/elevation cooking and baking.
There’s a profound satisfaction that comes from pulling a warm, golden loaf of homemade white bread from your oven. It’s more than just a recipe; it’s an experience that fills your home with comforting aromas and your table with delicious possibilities. Enjoy the process, savor the results, and delight in sharing your creation with loved ones.
