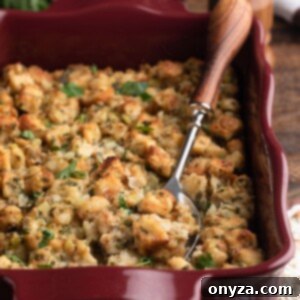
Prepare to elevate your holiday feast with this phenomenal Traditional Bread Stuffing, a timeless side dish that consistently steals the show at any Thanksgiving gathering. Imagine a symphony of flavors and textures: delightfully fluffy and buttery bread cubes, infused with the aromatic essence of classic celery, onions, and a medley of fresh herbs. Baked to golden perfection, it promises a soft, tender interior contrasting beautifully with irresistible crispy edges. Best of all, thoughtful prep-ahead options ensure a remarkably easier and more enjoyable holiday entertaining experience!
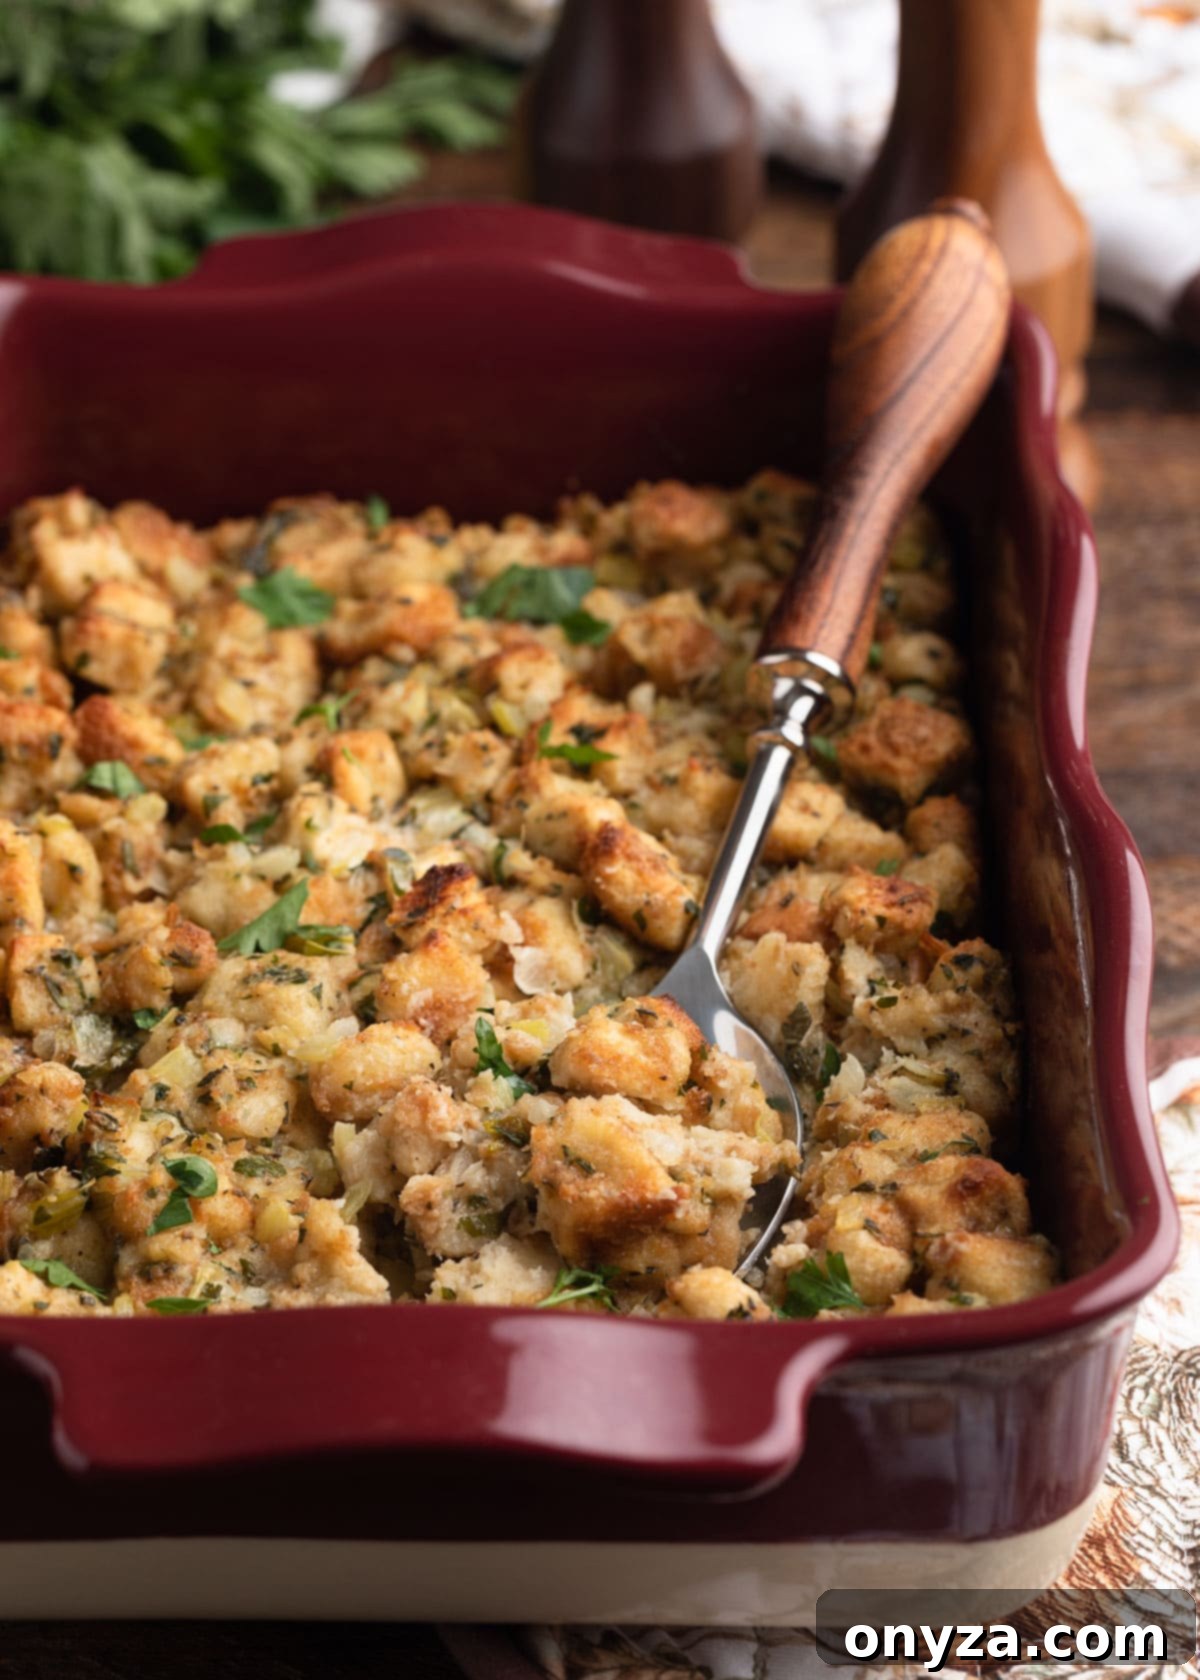
Embracing Tradition: The Heart of This Classic Bread Stuffing Recipe
Often, the terms “stuffing” and “dressing” spark a friendly debate, especially around the holiday table. Technically, a dish is called “stuffing” if it’s cooked inside the turkey cavity, absorbing the rich juices and flavors as it bakes. Conversely, if it’s prepared and baked in a separate dish, it’s typically referred to as “dressing.” However, culinary traditions vary widely by region and family. In many households, including ours, the beloved side retains the name “stuffing” regardless of whether it’s baked inside or alongside the bird. What truly matters is the irresistible flavor and comforting texture it brings to your holiday meal.
This Traditional Bread Stuffing recipe stands as a testament to simplicity and widespread appeal. It’s a straightforward, crowd-pleasing dish that delivers on all fronts: rich flavor, perfect texture, and a comforting aroma that fills your home. While this recipe celebrates the classic profile, should you desire a delightful twist for your holiday table, explore my other creative variations such as Cranberry Pecan Stuffing, offering a sweet and nutty counterpoint, or the hearty and robust Sausage and Chestnut Stuffing, both designed to impress and add unique character to your spread. These alternatives prove that while the classics are cherished, there’s always room for new traditions and exciting flavors.
Crafting the Perfect Holiday Side: A Step-by-Step Guide to Traditional Bread Stuffing
Creating homemade stuffing might seem daunting, but this recipe breaks it down into easy, manageable steps, ensuring a delicious outcome every time. From preparing the ideal bread foundation to infusing it with aromatic herbs and baking it to perfection, we’ll guide you through each stage to achieve that coveted balance of crispy edges and a moist, tender interior.
Step 1: The Foundation – Crafting the Ideal Croutons
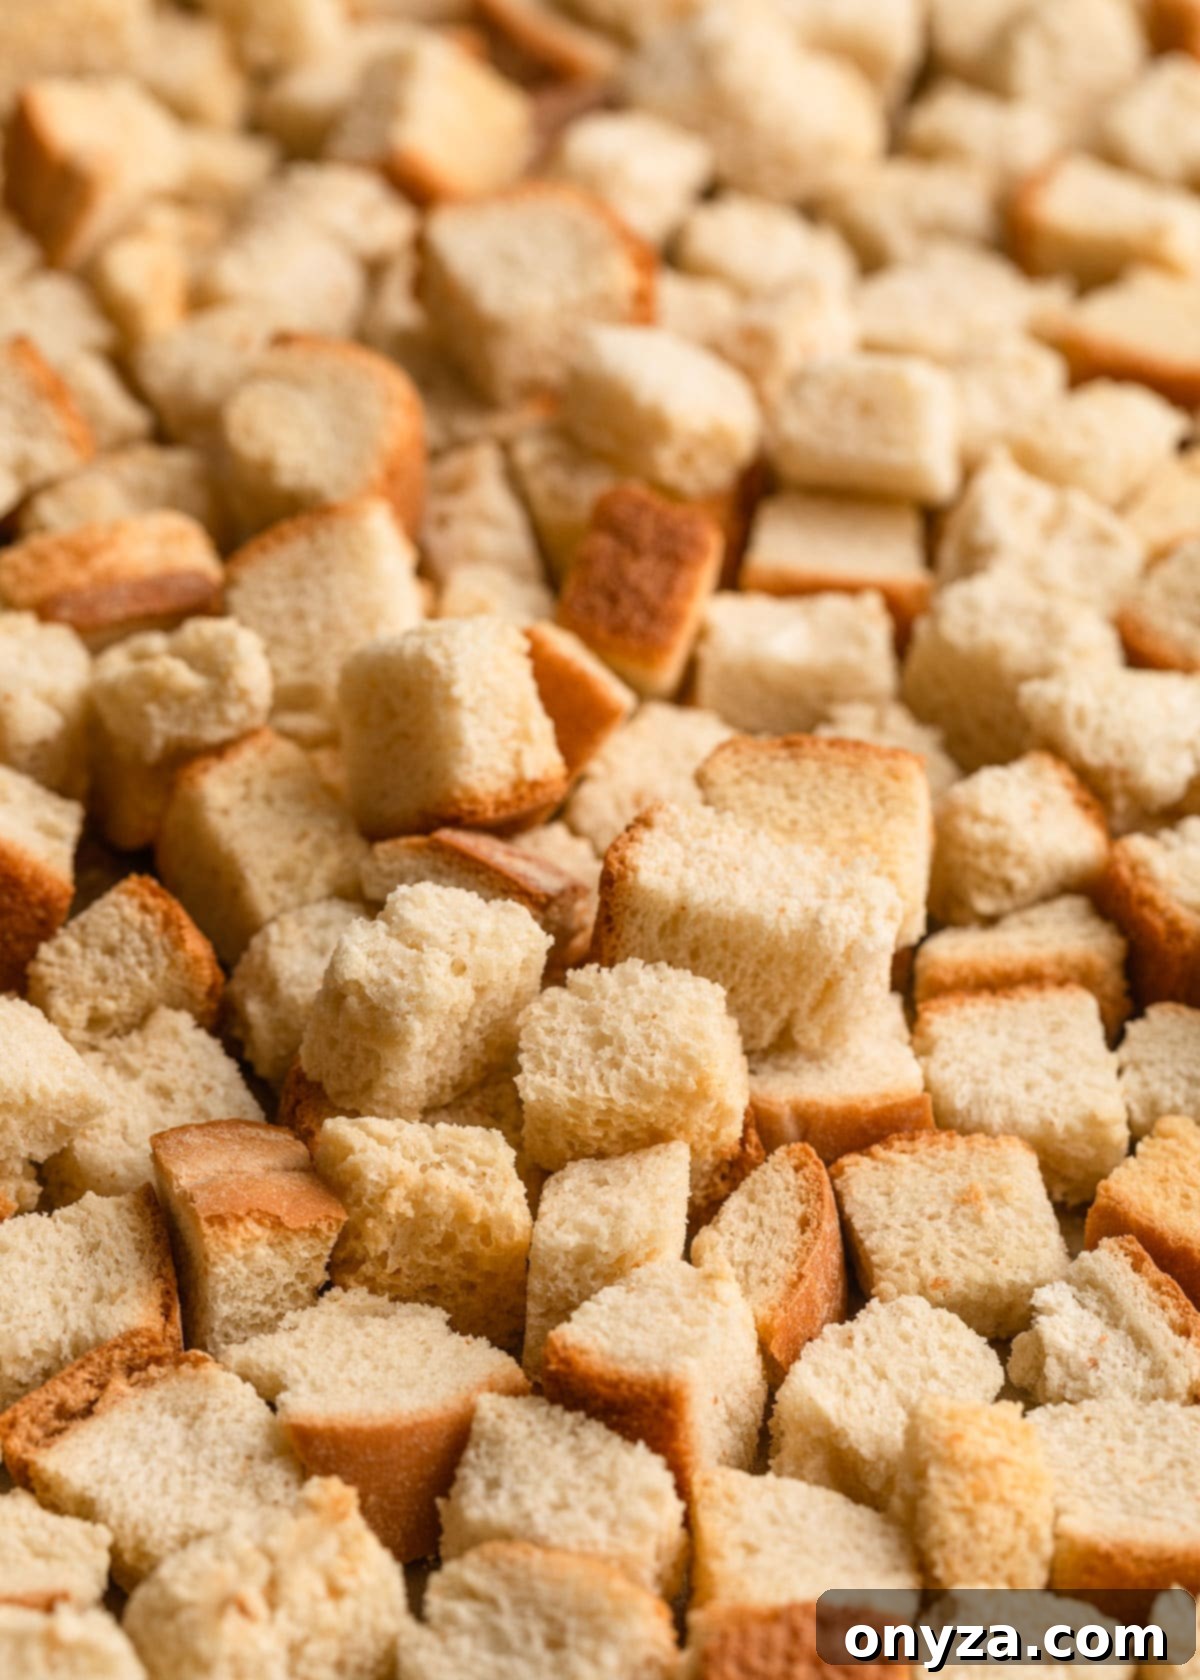
The secret to truly outstanding, fluffy, and traditional stuffing lies in the quality and preparation of your bread. After extensive testing, I’ve discovered that firm “country white” or “farmhouse” style sandwich bread yields the most consistent and superior results. Its hearty, tight density is crucial, allowing it to absorb the savory liquids without disintegrating into a mushy consistency – a common pitfall with softer breads.
For this recipe, my top recommendations are the 1-1/2 pound loaves of Arnold Country White or Pepperidge Farm Farmhouse Hearty White. These specific brands consistently deliver the desired texture and structural integrity. While other sandwich bread styles, such as sourdough, can be used, ensure they possess a similarly tight crumb structure. It’s vital to steer clear of very soft, airy loaves, as they simply won’t hold the liquid effectively, resulting in a soggy stuffing. The goal is a bread base that maintains its form while becoming wonderfully moist.
Begin by cutting or tearing the bread, including the end pieces, into uniform 1/2- to 3/4-inch pieces. Precision here contributes to even drying and absorption. There’s no need to remove the soft crusts from standard sandwich bread; they add to the texture and flavor. Once cubed, spread the bread pieces evenly across two rimmed half-sheet pans. This even distribution is critical for uniform drying. Bake them in a preheated oven at a low temperature of 250°F for approximately one hour, or until they are completely dried out and have just begun to acquire a light golden hue. The goal is thoroughly dried croutons, not toasted ones.
To confirm doneness, gently squeeze a crouton between your fingertips. It should feel firm and crisp throughout. If you detect any softness in the middle, the croutons require a bit more baking time. Properly dried croutons are the backbone of a perfectly textured stuffing.
Smart Prep Ahead Tip: To minimize stress on the big day, you can prepare and bake these croutons up to 5 days in advance. Once completely cooled, store them at room temperature in an airtight container or a large zip-top bag. This simple step significantly streamlines your holiday cooking process.
Step 2: Aromatic Foundation – Preparing the Vegetable-Herb Mixture
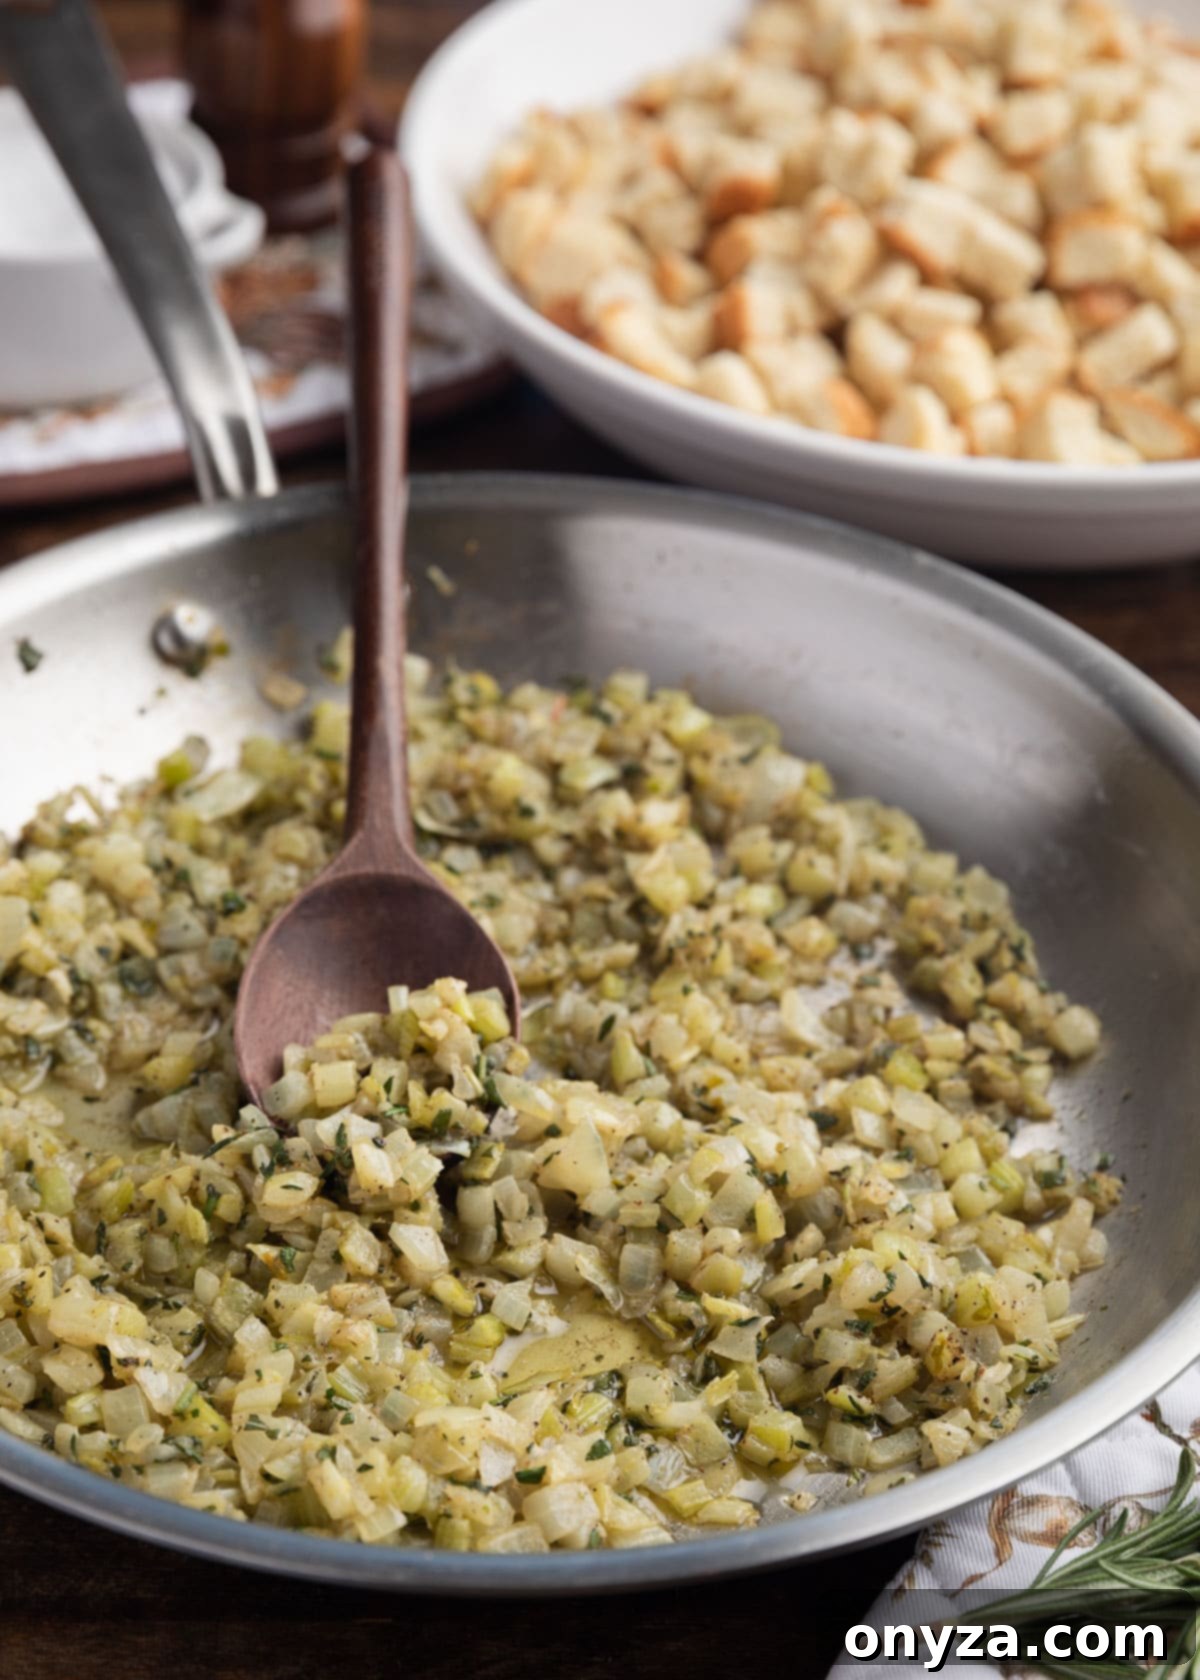
The soul of this Traditional Bread Stuffing resides in its aromatic base, crafted from precisely diced onions and celery. While absolute perfection in knife skills isn’t essential, striving for a consistent 1/4-inch dice for both vegetables is highly recommended. This uniformity ensures they cook evenly and integrate seamlessly into the stuffing, providing a balanced texture and flavor in every bite.
For the herbs, we embrace a classic and harmonious blend that defines traditional stuffing. Utilize finely chopped fresh sage, thyme, rosemary, and flat-leaf parsley. Fresh herbs are paramount here; their vibrant flavors and aromas are incomparable to dried alternatives, infusing the stuffing with a distinct holiday essence.
Smart Prep Ahead Tip: To further simplify your holiday prep, dice the onions and celery a day in advance and store them securely in airtight containers in the refrigerator. For the most potent and fresh flavor, however, it is best to chop the herbs on the same day you plan to assemble the stuffing, ensuring their peak aromatic contribution.
In a large, heavy-bottomed frying pan or skillet, melt a generous amount of unsalted butter over medium heat. Once the butter is shimmering, add the diced onions and celery. Sweat these vegetables gently for 8–10 minutes. The key here is not to brown them, which would introduce a different, often less desirable, flavor profile. Instead, cook them just until the celery softens to a tender crisp and the onions become translucent, releasing their sweet, savory essence without caramelizing. This process creates a fragrant, moist base for your stuffing.
Next, introduce the finely chopped fresh sage, thyme, rosemary, and the indispensable poultry seasoning. I highly recommend Bell’s Seasoning for its classic, robust blend that truly boosts the herbaceous flavors and adds a depth of complexity that is hard to achieve otherwise. Season generously with salt and freshly ground black pepper. Continue cooking for another couple of minutes, stirring constantly, until the herbs become wonderfully fragrant and their aromas fully bloom in the pan. This step is crucial for developing the rich, savory profile of the stuffing.
Step 3: Bringing it All Together – Assembling Your Signature Stuffing
With your perfectly dried croutons and aromatic vegetable-herb mixture ready, it’s time to assemble the stuffing. In a generously sized mixing bowl, combine the baked croutons with the entire cooked vegetable mixture. Be sure to scrape every last bit of that flavorful butter and herb residue from the frying pan into the bowl using a rubber spatula – it’s packed with taste! Toss in the freshly chopped parsley at this stage as well, ensuring it’s evenly distributed throughout.
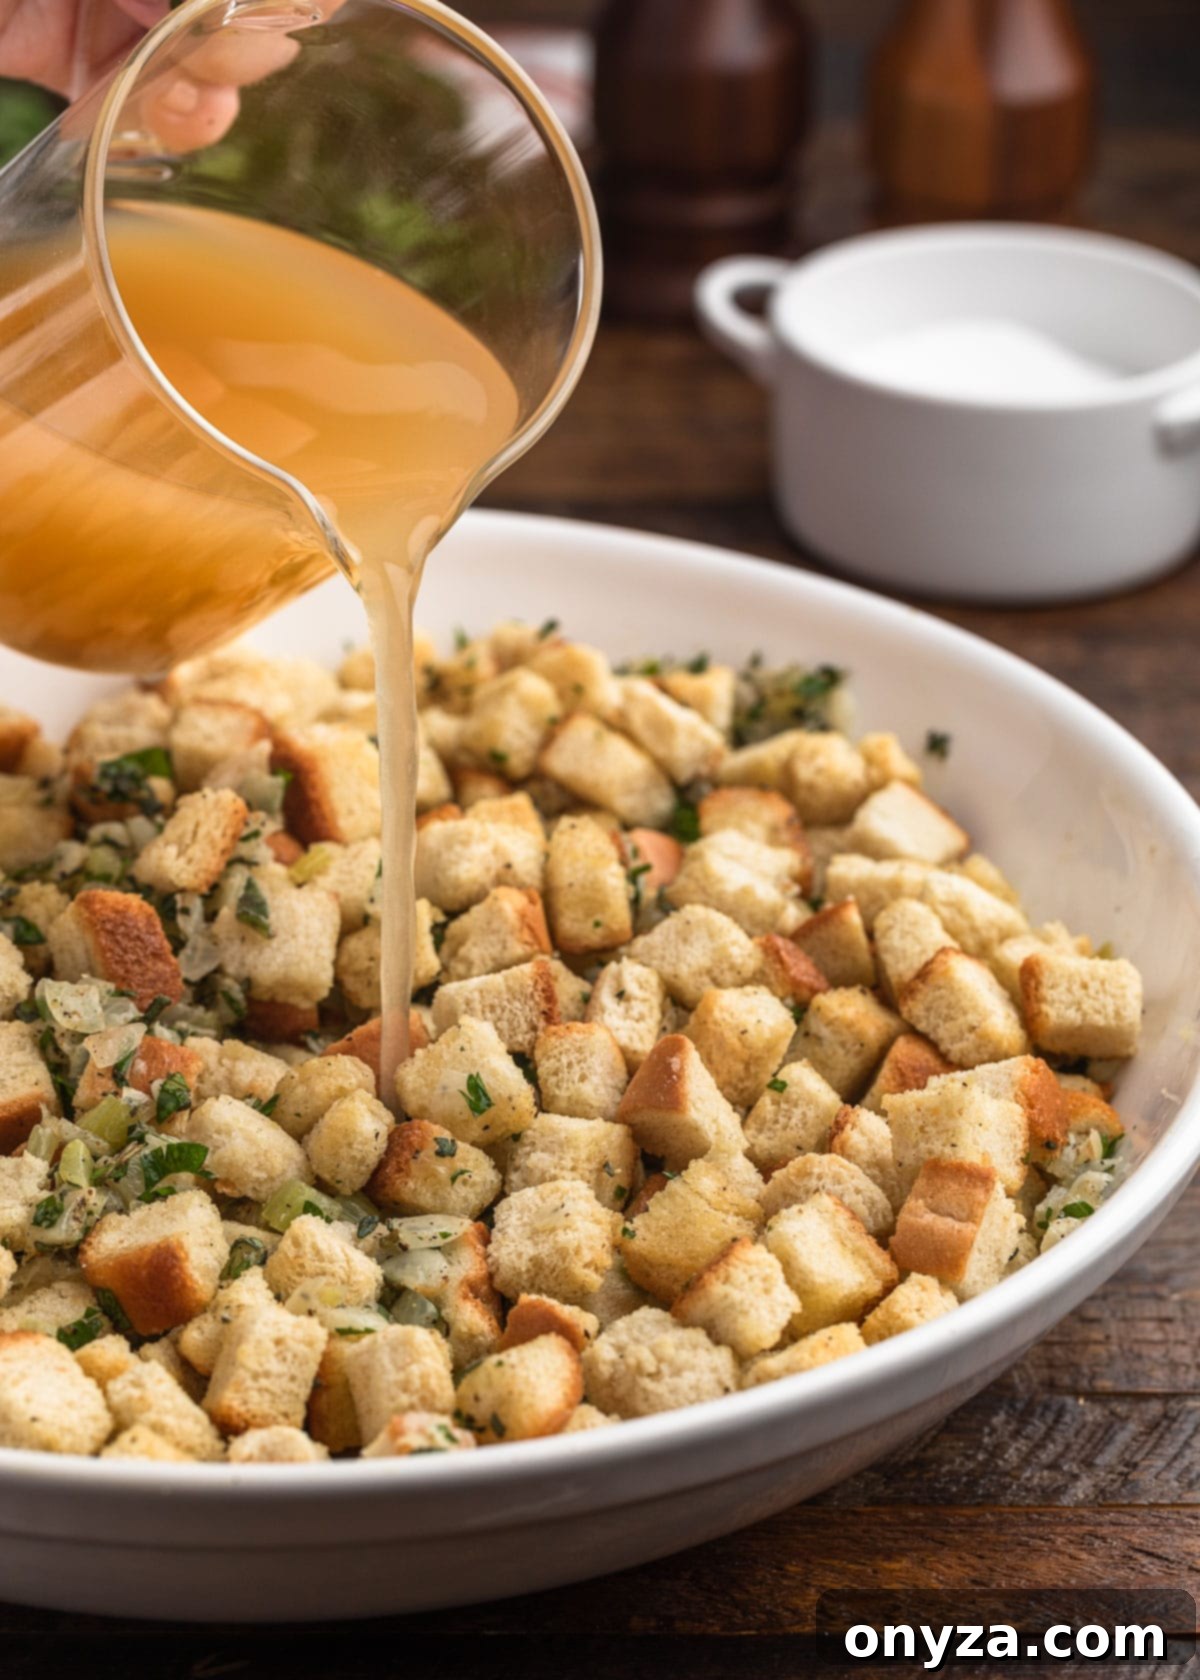
The next critical step involves reconstituting the dried croutons with a high-quality low-sodium chicken or turkey stock (or broth). The precise amount of liquid you’ll need can vary. Factors such as the specific type of bread used, how thoroughly the croutons were dried, and your personal preference for a moister or firmer stuffing all influence the final quantity. Generally, you’ll require between 2-1/4 to 3 cups of broth or stock, but always adjust to achieve your desired consistency.
A Note on Stock Selection: For unparalleled flavor, I enthusiastically recommend using my Make-Ahead Turkey Stock. Its homemade richness elevates the stuffing significantly. If opting for store-bought broth or stock, look for low-sodium varieties, not just “reduced sodium.” A great option is Pacific Foods Organic Free-Range Low Sodium Chicken Broth, which typically contains around 40 mg of sodium per cup, allowing you to control the seasoning precisely.
Begin by pouring 1-3/4 cups of stock over the crouton mixture. Gently toss everything together until the liquid is evenly distributed. Allow the mixture to sit for a few minutes, giving the bread ample time to begin soaking up the savory broth. After this initial absorption, taste the stuffing for seasoning. This is your absolute last opportunity to adjust the salt and pepper before incorporating the raw eggs. Proper seasoning at this stage is crucial for a perfectly flavored stuffing.
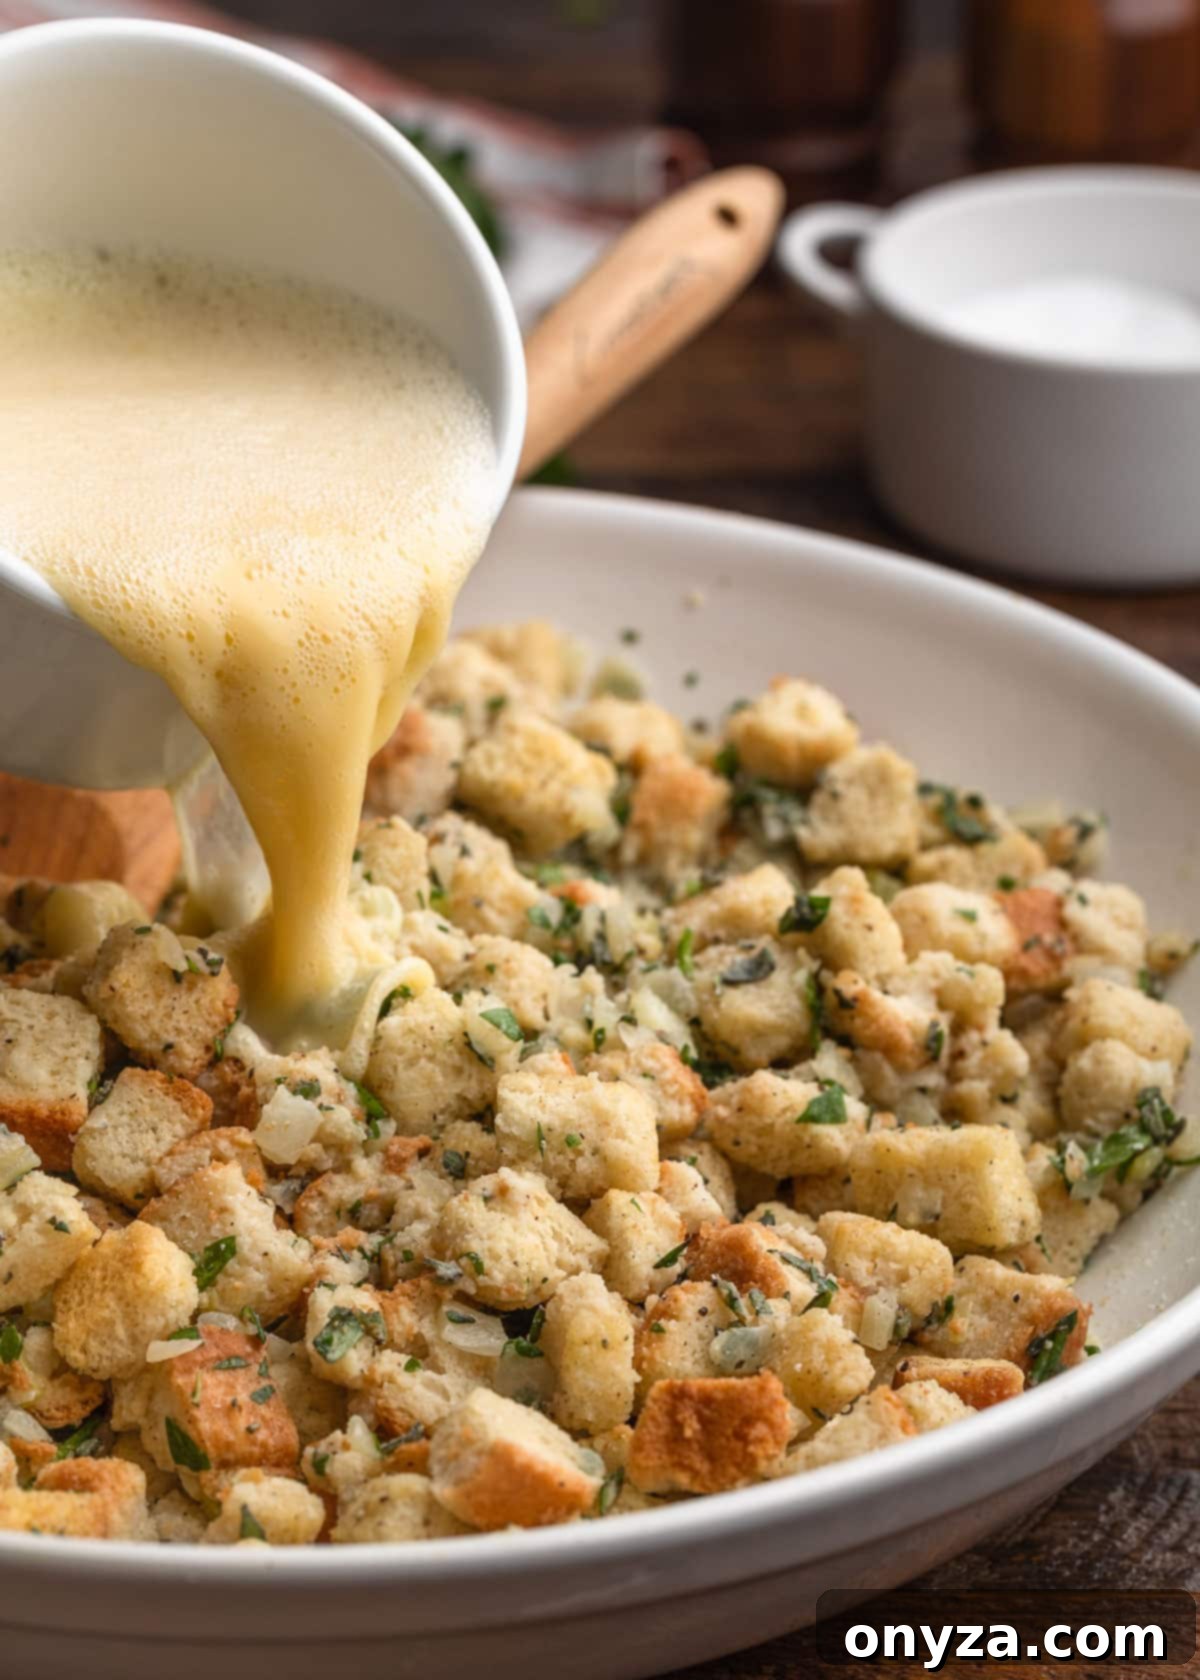
Once you are completely satisfied with the seasoning, whisk together another 1/2 cup of stock with the eggs until well combined. Gently pour this egg-and-stock mixture over the stuffing and toss thoroughly to ensure every crouton is coated. The eggs act as a binder, contributing to the stuffing’s overall structure and moistness. Let the mixture sit again for a few more minutes to allow for further absorption. Now, check the texture by squeezing a crouton between your fingertips. It should feel moistened throughout, but crucially, it should not be mushy or fall apart. It should retain some integrity.
If the stuffing still feels too dry for your preference, gradually add additional broth or stock, a little bit at a time. After each addition, gently toss and let it soak in before adding more, until you achieve your desired moisture level. It’s important to note that different bread types absorb liquid differently; for instance, Pepperidge Farm Farmhouse typically requires slightly less liquid than Arnold Country White due to its denser crumb. This careful approach ensures your stuffing reaches the perfect, unforgettably moist and flavorful consistency.
Step 4: The Grand Finale – Baking Your Stuffing to Perfection
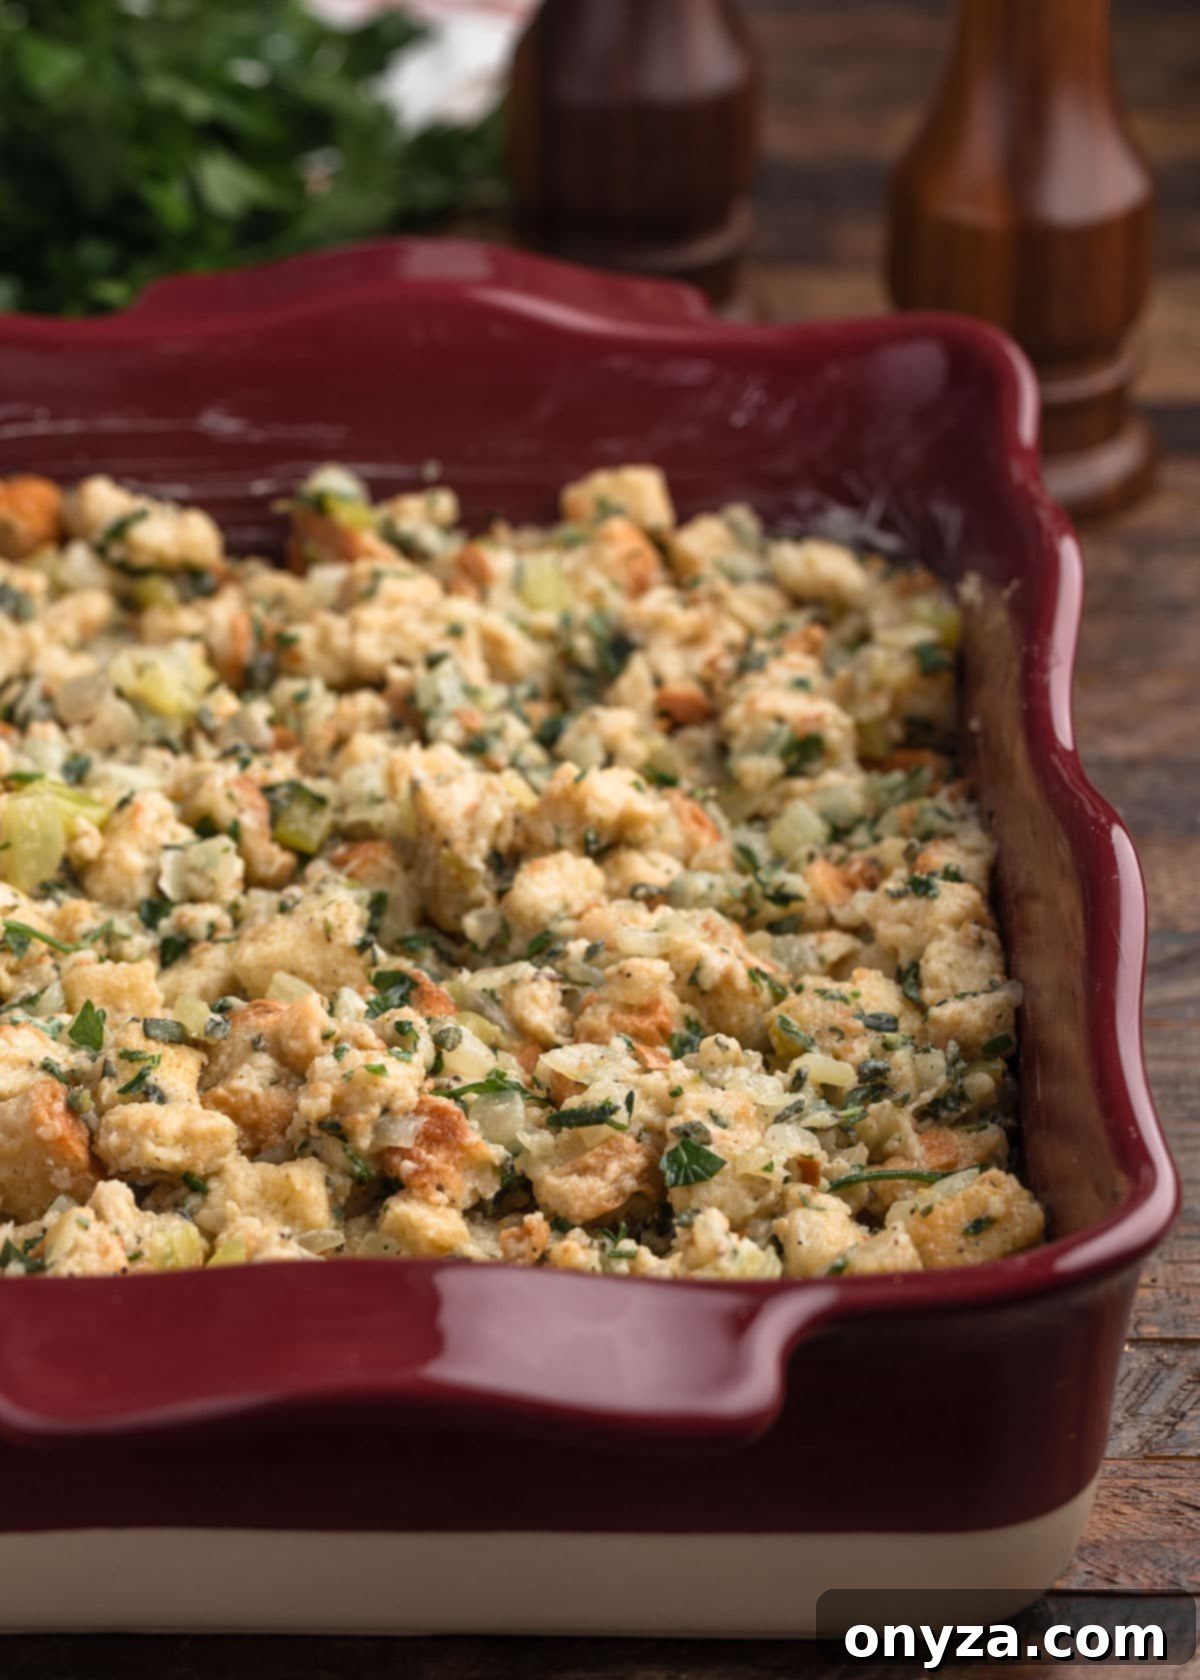
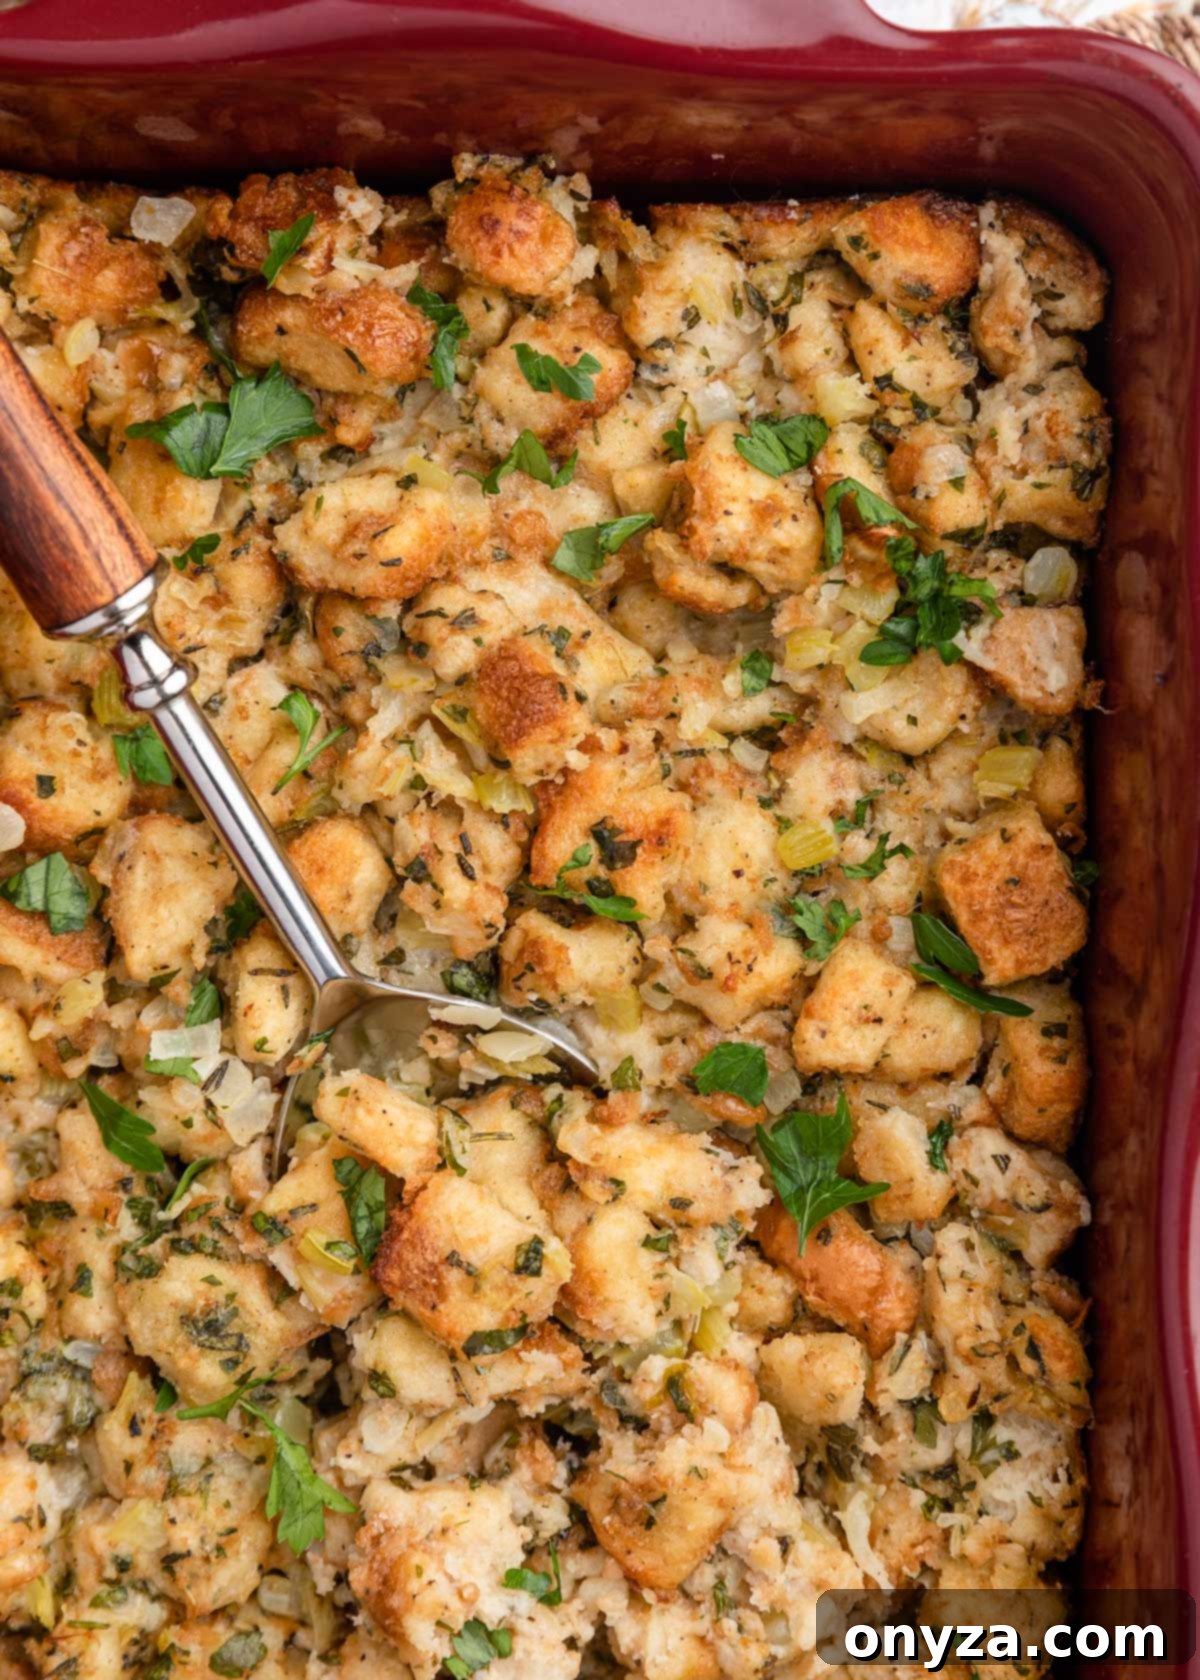
Once your Traditional Bread Stuffing is perfectly assembled and seasoned, it’s time for the final, transformative step: baking. Carefully transfer the prepared stuffing mixture into a buttered 3-quart gratin dish or a standard 13×9 baking dish. Buttering the dish not only prevents sticking but also contributes to the delicious golden-brown crust that forms along the edges. For an extra layer of flavor and to encourage that beautiful golden-crisp topping, cut the remaining butter into small pieces and scatter them evenly over the surface of the stuffing.
Cover the dish tightly with aluminum foil. This initial covering allows the stuffing to steam gently, ensuring the interior remains wonderfully moist and tender as it bakes. Place the covered dish in a preheated oven at 375°F and bake for 30 minutes. The foil acts as a shield, preventing the top from browning too quickly.
After the initial 30 minutes, carefully remove the foil. This is when the magic happens! Allow the stuffing to continue baking uncovered for another 15-20 minutes. During this final stage, the exposed surface will develop those coveted crispy, golden-brown edges that provide a delightful textural contrast to the soft interior. Keep a close eye on it to prevent over-browning.
Your stuffing is ready when the edges are visibly crispy and golden, and the center reaches an internal temperature of at least 165°F (74°C) when checked with an instant-read thermometer. This temperature ensures both safety and optimal texture. The result will be a perfectly baked, incredibly flavorful stuffing that will be the highlight of your holiday meal.
Strategic Planning: Essential Make-Ahead Options for Stress-Free Holiday Stuffing
Holiday cooking can be hectic, but preparing parts of your Traditional Bread Stuffing in advance can significantly ease the pressure. While the USDA advises against assembling and holding unbaked stuffing, even under refrigeration, due to potential bacterial growth (refer to their comprehensive guide: Stuffing and Food Safety for detailed information), there are several safe and effective strategies to get a head start on your homemade stuffing before the big holiday:
- Prepare Ingredients Ahead of Time: This is the simplest and safest way to tackle your stuffing prep. You can bake and dry the bread croutons up to 5 days in advance, storing them in an airtight container at room temperature. Similarly, chop your onions and celery a day or two before, keeping them refrigerated in sealed containers. For best flavor, fresh herbs should be chopped on the day of assembly. With these components prepped, all you need to do is combine them and bake on the day you plan to serve.
- Freeze Unbaked Stuffing for Later: If you prefer to have the entire dish ready to bake from frozen, assemble the stuffing completely and transfer it into a buttered, freezer-to-oven-safe baking dish. Cover it very tightly with a double layer of aluminum foil to prevent freezer burn. This unbaked stuffing can be frozen for up to 3 months. When you’re ready to bake, there’s no need to thaw! Simply place the covered, frozen dish directly into a preheated 350°F (175°C) oven and bake for 1 hour. After this initial hour, remove the foil, increase the oven temperature to 375°F (190°C), and continue baking for an additional 15–20 minutes, or until the top of the stuffing is beautifully golden and crispy. Always ensure the internal temperature reaches a safe 165°F (74°C) before serving.
By utilizing these make-ahead options, you can enjoy a more relaxed and joyful holiday, knowing that a delicious, homemade stuffing is just a few steps away.
Elevating Your Holiday Table: Expert Tips for Serving Traditional Bread Stuffing
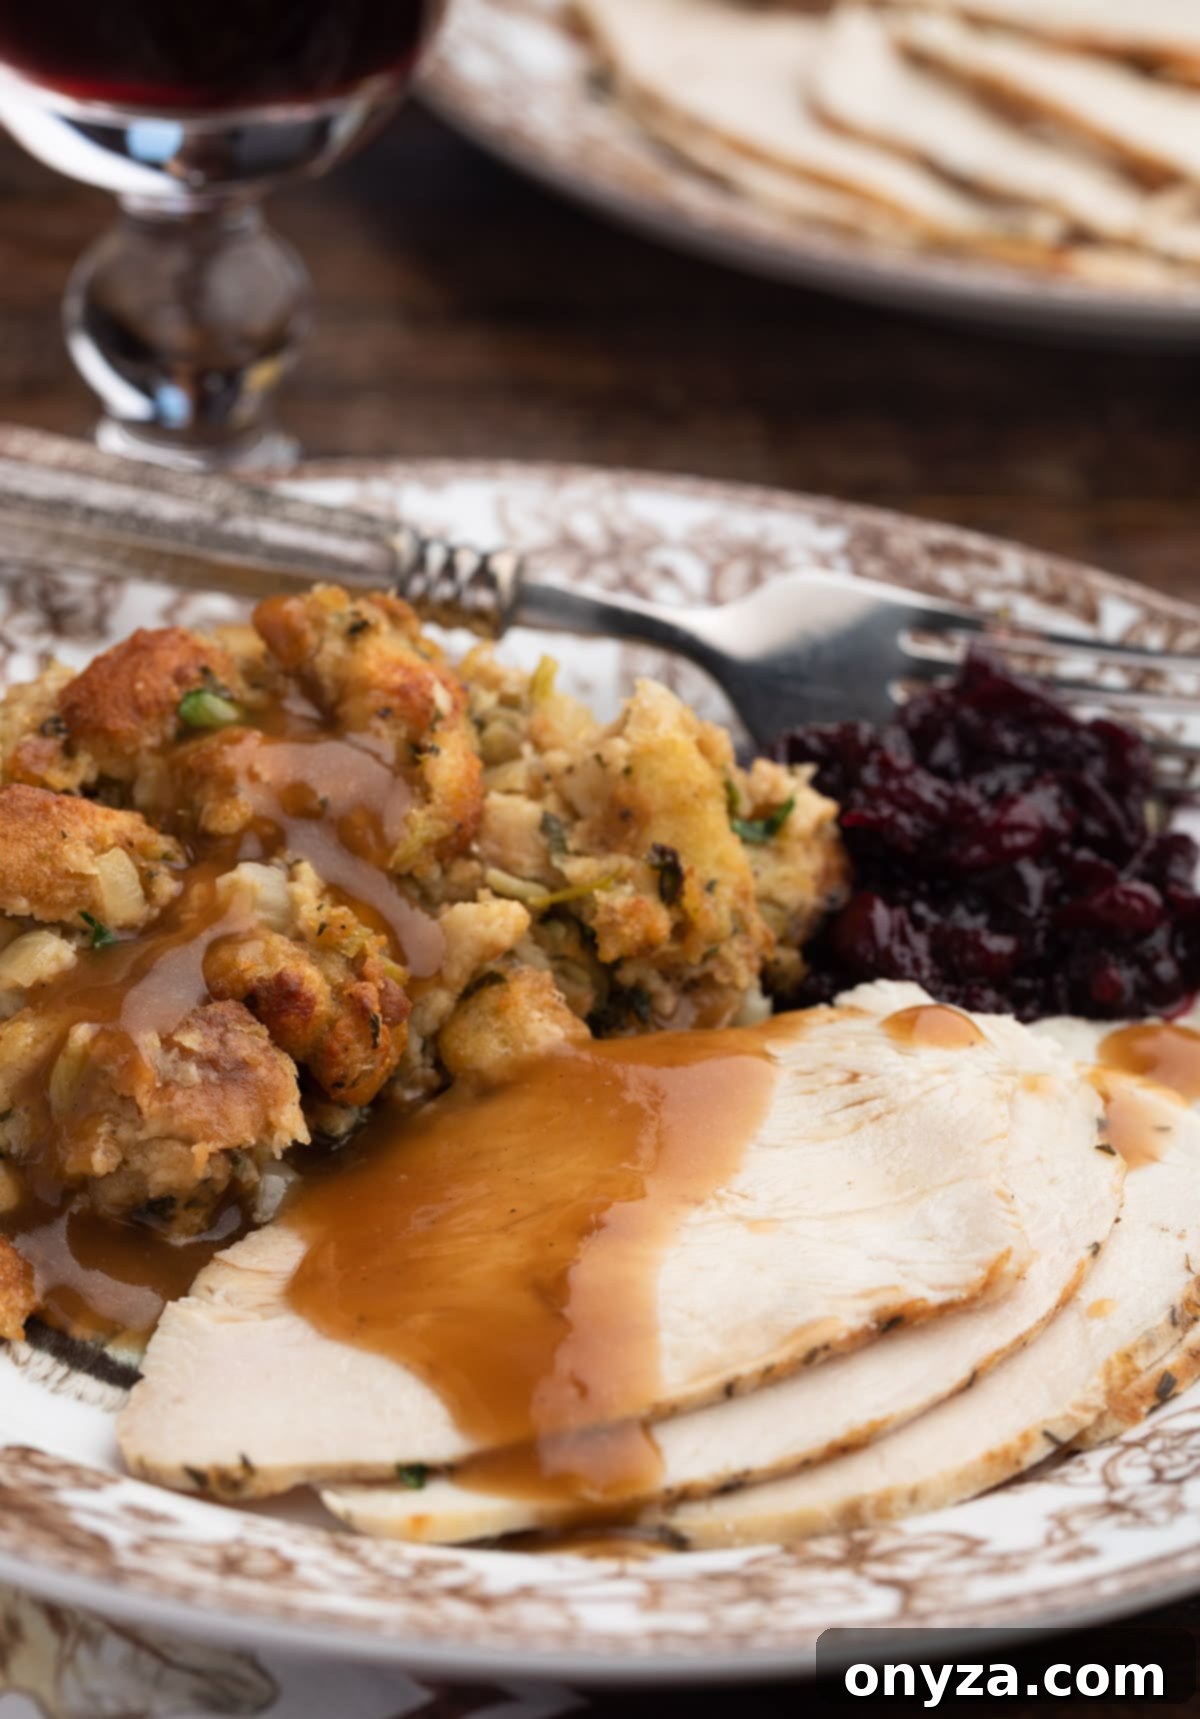
This savory Traditional Bread Stuffing is inherently delicious on its own, but with a few thoughtful touches, you can transform it into an unforgettable centerpiece for your holiday meal. It pairs exquisitely with classic roasted turkey, such as my Herb Roasted Turkey Breast, or even a simple yet elegant Roasted Chicken. Here are some pro tips to ensure your stuffing is a standout side dish on your festive table:
- Allow for a Brief Rest: Patience is a virtue, especially after baking. Once you remove the stuffing from the oven, resist the urge to immediately serve it. Instead, let the stuffing rest, uncovered, for 10-15 minutes at room temperature. This crucial resting period allows the flavors to meld and deepen, and the texture to firm up slightly, ensuring that each spoonful holds together perfectly rather than crumbling.
- Garnish for Visual Appeal and Freshness: Presentation matters! Just before serving, sprinkle a generous amount of freshly chopped flat-leaf parsley over the stuffing. This simple garnish not only adds a beautiful pop of vibrant green color, making the dish visually appealing, but also contributes a fresh, herbaceous note that brightens the overall flavor profile.
- Maintain Optimal Warmth: If you’re not planning to serve the stuffing immediately after its resting period, it’s important to keep it warm without compromising its texture. The best method is to transfer the dish to a low-temperature oven, around 200–250°F (93-121°C), covered with foil. Alternatively, a covered chafing dish can keep it warm for a short period. For the best possible texture – crispy edges and a moist interior – I highly recommend serving this stuffing within 30-45 minutes of being baked. While keeping it warm, ensure its internal temperature remains above 140°F (60°C) for food safety. If you notice the stuffing starting to dry out slightly, a light drizzle of warm chicken or turkey stock or broth will revive its moisture.
- The Ultimate Companion: Serve with Gravy: While our herb stuffing is wonderfully flavorful on its own, its true potential is unleashed when paired with a rich, homemade turkey gravy. The savory, silky gravy complements the textures and flavors of the stuffing perfectly. If you’re a gravy enthusiast like me, you’ll find yourself generously drizzling it over every possible item on your Thanksgiving plate – and the stuffing is undoubtedly one of its best canvases!
Expand Your Feast: More Favorite Thanksgiving Side Dishes to Explore
No holiday meal is complete without a diverse array of delectable side dishes. Beyond our beloved Traditional Bread Stuffing, here are some other cherished recipes that promise to enhance your Thanksgiving spread and delight every palate:
- Brandied Cherry Cranberry Sauce: A sophisticated take on a holiday classic, offering sweet and tart notes with a hint of warmth.
- Buttermilk Sweet Potato Casserole: A creamy, comforting dish with a tangy twist, perfect for those who love sweet and savory combinations.
- Brown Butter Whipped Sweet Potatoes: Silky smooth sweet potatoes elevated by the rich, nutty flavor of brown butter.
- Haricots Verts with Lemon-Herb Brown Butter: Elegant and vibrant green beans, brightened with citrus and infused with aromatic herbs.
- Cream Cheese Mashed Potatoes: Incredibly rich and velvety mashed potatoes, made irresistible with the addition of cream cheese.
- Roasted Brussels Sprouts with Pomegranate Glaze: Crispy roasted Brussels sprouts tossed in a sweet and tangy pomegranate glaze, a delightful contrast.
Rating: 5 out of 5 stars from 1 vote
Traditional Bread Stuffing with Herbs
by Amanda Biddle
This classic bread stuffing (or dressing) recipe is the perfect side dish for your holiday table. Buttery, fluffy, and packed with the flavors of fresh herbs, it’s easy to prepare and always a crowd-pleaser. Plus, you can prep parts of the recipe ahead to enjoy a stress-free Thanksgiving!
Prep Time: 1 hour 30 minutes
Cook Time: 1 hour
Resting Time: 15 minutes
Total Time: 2 hours 45 minutes
Servings: 12 servings
Ingredients
- 1-1/2 pound loaf firm country white or farmhouse sandwich bread (24 ounce loaf; I use Arnold Country White or Pepperidge Farm Farmhouse White)
- 10 tablespoons unsalted butter, divided
- 2 cups small diced yellow onion (about 1/4-inch dice)
- 1 cup small diced celery (about 1/4-inch dice)
- 2 tablespoons fresh sage leaves, finely chopped
- 1 tablespoon fresh rosemary, chopped
- 2 teaspoons fresh thyme leaves, chopped
- ½ teaspoon poultry seasoning (I use Bell’s)
- ¼ cup chopped flat-leaf parsley leaves, plus additional for garnish (optional)
- 1-1/2 teaspoons Diamond Crystal kosher salt, plus additional to taste
- 1 teaspoon freshly-ground black pepper, plus additional to taste
- 2-1/4 to 3 cups low sodium turkey or chicken broth or stock, plus additional as needed
- 2 large eggs
Instructions
- Preheat oven to 250°F (120°C).
- Cut or tear bread, including the end pieces, into 1/2- to 3/4-inch pieces, leaving soft crusts on. Spread into an even layer on two rimmed half-sheet pans.
- Bake 50-60 minutes, until bread is lightly-toasted and dry throughout. Rotate pans halfway through baking time. Let croutons cool completely at room temperature. (You should have about 1 pound of croutons.)
- Raise oven temperature to 375°F (190°C) and place a rack in the middle position. Butter a 3-quart gratin or 13×9 baking dish.
- Melt 8 tablespoons butter in a skillet over medium-high heat until foaming subsides. Add celery and onion and cook, stirring frequently, until the celery is softened and the onions are translucent, about 8-10 minutes.
- Stir in 1-1/2 teaspoons kosher salt, 1 teaspoon freshly ground black pepper, sage, rosemary, thyme, and poultry seasoning. Cook for an additional 1-2 minutes until the herbs are fragrant.
- In a large bowl, mix together croutons, onion and celery mixture, and parsley. Moisten with 1-3/4 cups broth or stock and let stand for a few minutes for the bread to soak up the liquid. Season to taste with additional salt and pepper.
- In your liquid measuring cup, beat together 1/2 cup broth/stock and the eggs. Fold the mixture into the stuffing to combine and let it stand again for a few minutes to soak in. Squeeze a crouton between your fingertips; it should be moistened through but not mushy and falling apart. If the stuffing seems dry, add some of the additional liquid a little bit at a time, letting it soak in before adding more.
- Transfer the stuffing to the prepared baking dish. Cut the remaining butter into small cubes and dot it over the top of the stuffing.
- Cover the pan with a piece of foil and bake for 30 minutes. Uncover and continue baking for 15-20 minutes, until edges are crispy and the center reads 165°F (74°C) on an instant-read thermometer.
- Let the stuffing stand for 15 minutes at room temperature after baking. Garnish with additional chopped fresh parsley and serve with roasted turkey, chicken, and your favorite holiday sides (including a drizzle of gravy!).
Notes
Broth/Stock: Make sure you’re using low sodium broth or stock, not “reduced sodium,” when following the kosher salt measurements in the recipe. The brand I recommend for store-bought (Pacific Foods Organic Low Sodium Chicken Stock) contains 40 mg of sodium per cup. Homemade stock, like my Turkey Stock, typically has a negligible amount of added salt, if any. If your broth or stock is higher in sodium, adjust the amount of added salt as needed.
I usually need to use 3 cups of liquid when making this recipe, but you may need to adjust depending on the type of bread you’re using and how moist you prefer your stuffing.
Prep Ahead: See the “Make Ahead Options” section in the article above for detailed tips.
Nutrition Estimate
Serving: 0.08 recipe | Calories: 285kcal | Carbohydrates: 33g | Protein: 8g | Fat: 13g | Saturated Fat: 7g | Polyunsaturated Fat: 2g | Monounsaturated Fat: 4g | Trans Fat: 0.4g | Cholesterol: 58mg | Sodium: 474mg | Potassium: 220mg | Fiber: 2g | Sugar: 5g | Vitamin A: 526IU | Vitamin C: 5mg | Calcium: 149mg | Iron: 3mg
Nutrition information is automatically calculated, so should only be used as an approximation.
About Our Recipes
Please note that our recipes have been developed using the US Customary measurement system and have not been tested for high altitude/elevation cooking and baking.
