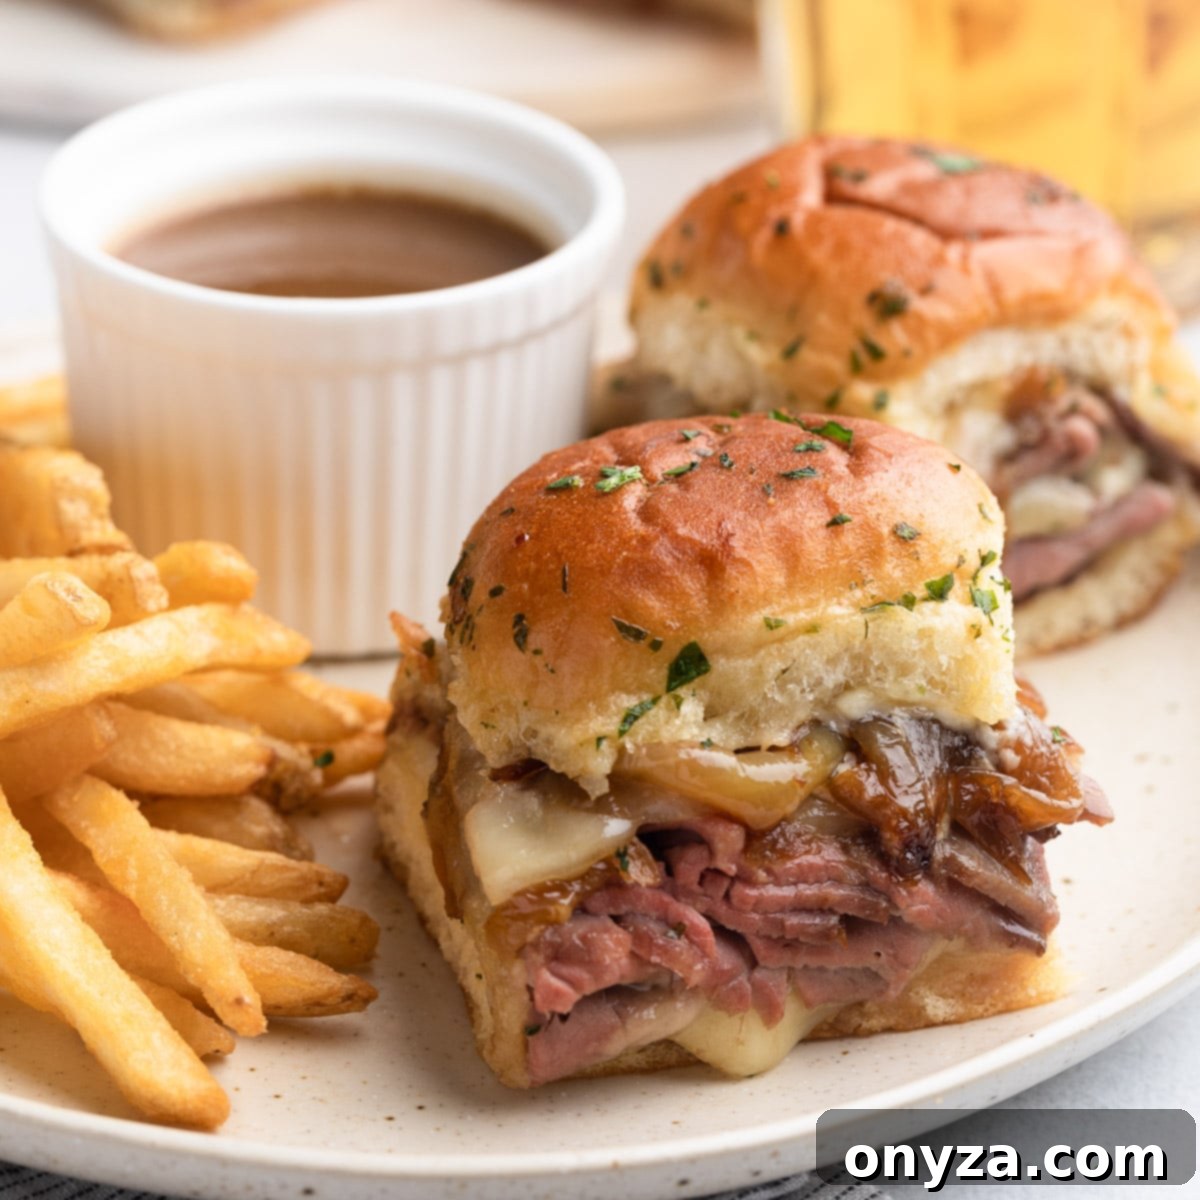
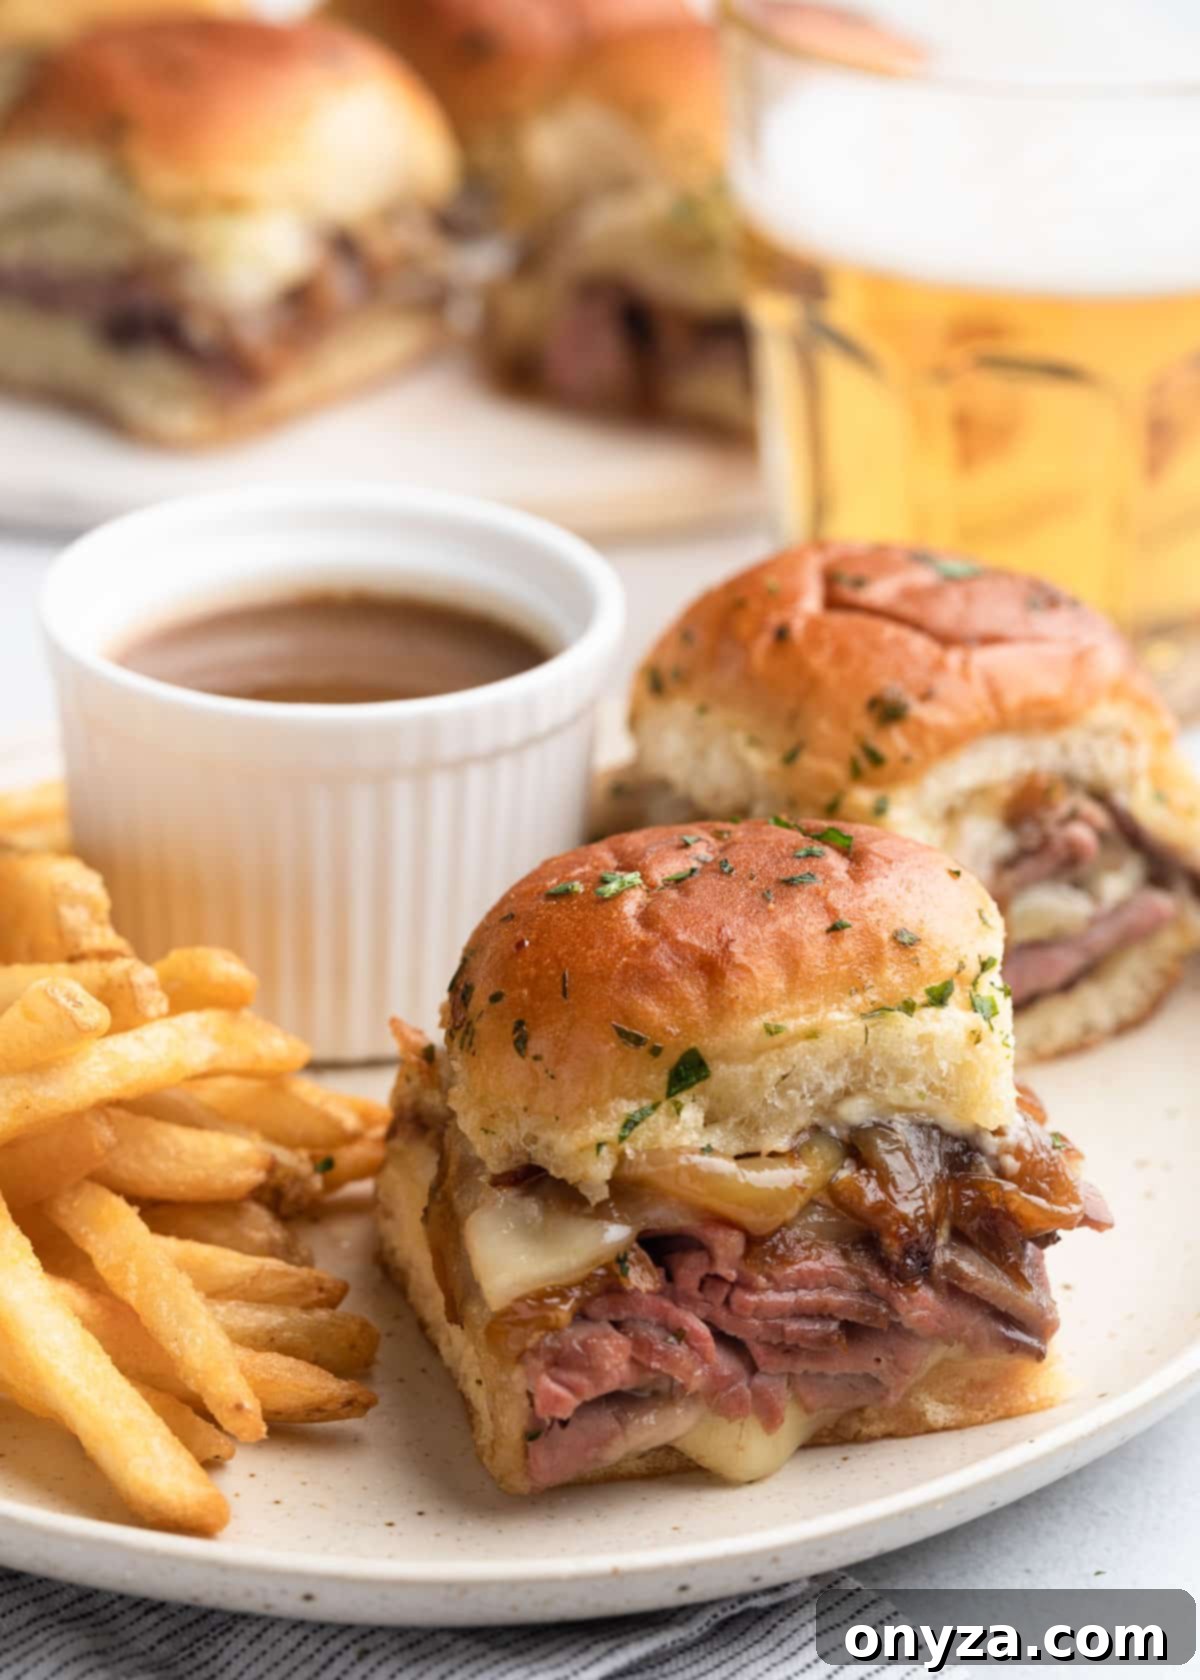
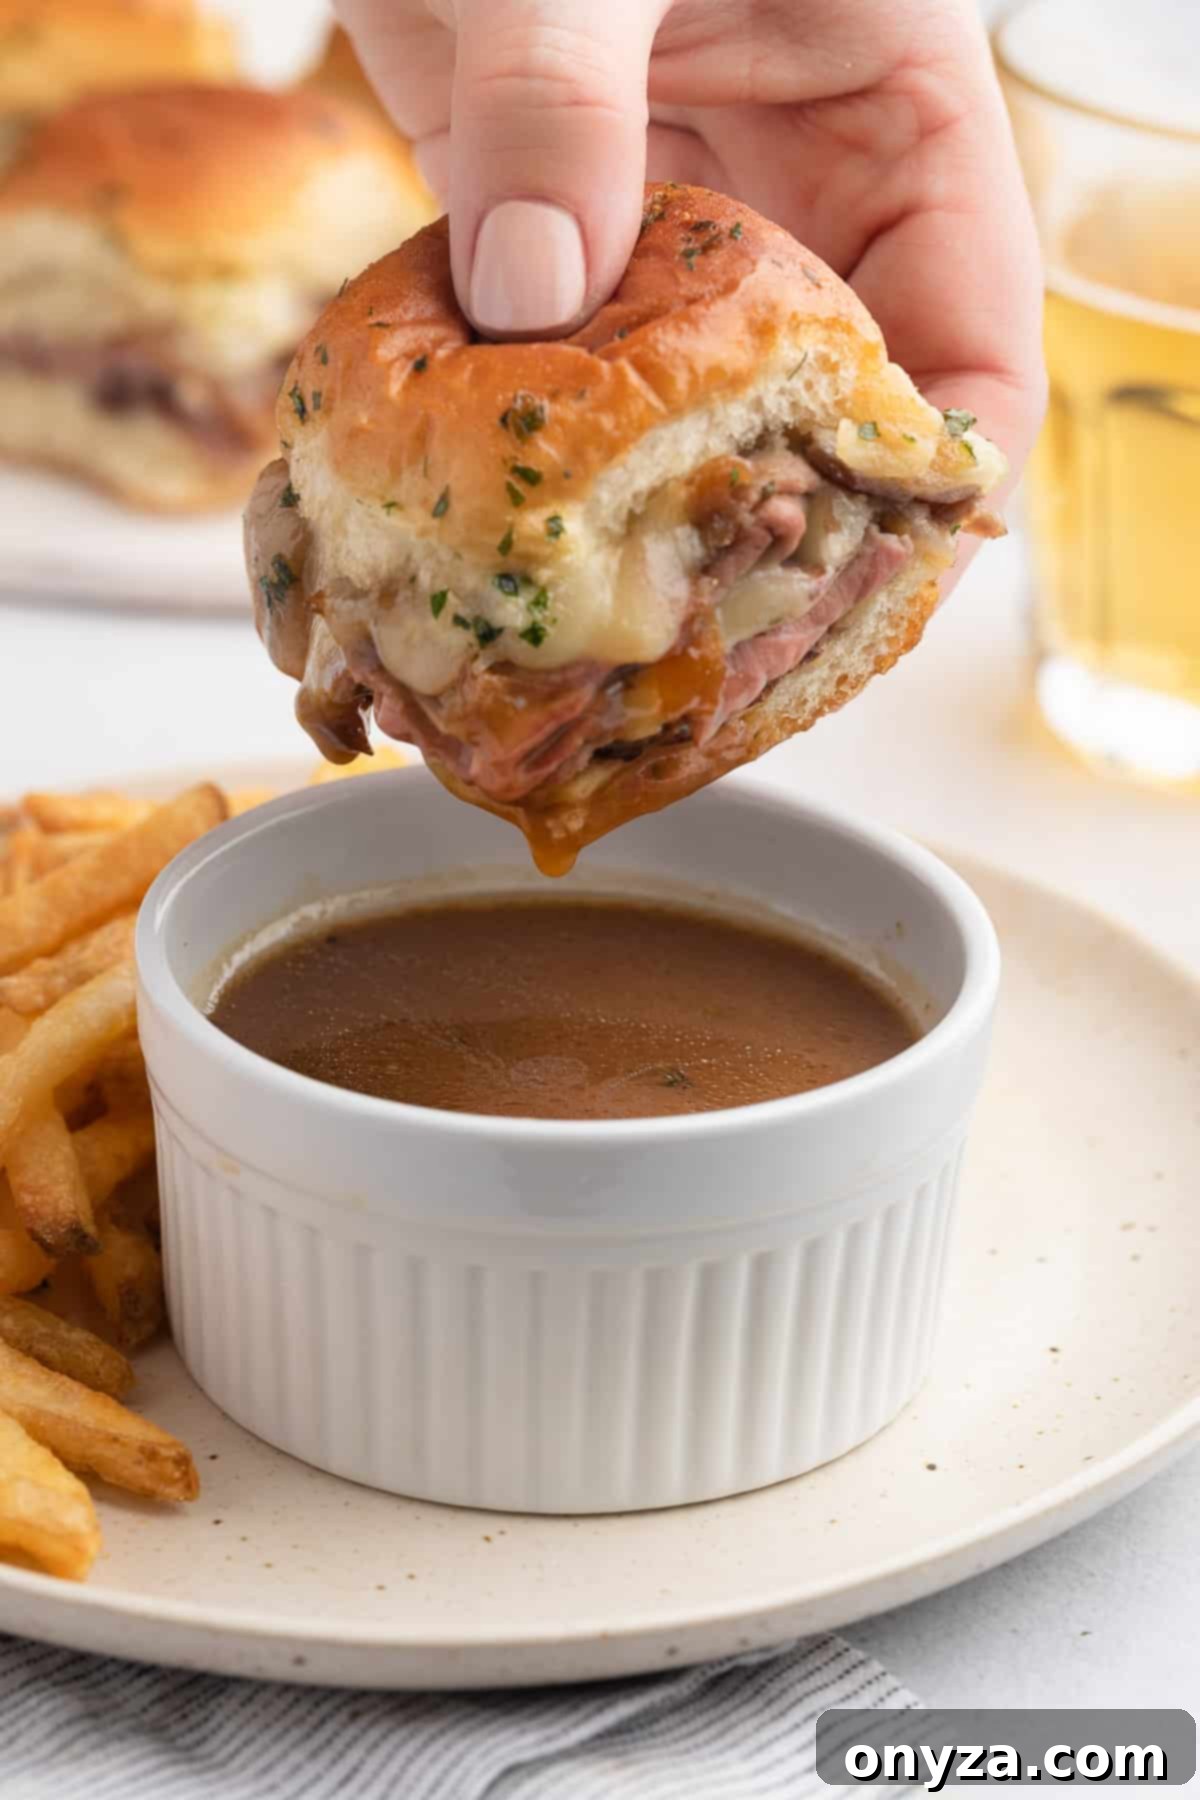
Welcome to a delightful twist on a beloved classic: French Dip Sliders! These miniature sandwiches take the iconic flavors of the traditional French Dip and transform them into irresistible, bite-sized delights, perfect for any gathering. Imagine succulent slices of tender roast beef, generously layered with rich, gooey melted cheese, and sweet, deeply caramelized onions, all nestled within soft, buttery rolls. Each slider is then brushed with a savory herbed butter sauce and baked to golden perfection, creating an unparalleled symphony of textures and tastes. Served alongside a rich, homemade au jus for dipping, these sliders offer the ultimate classic French Dip experience in a fun, shareable format. Whether you’re hosting a lively game day party, planning a casual weeknight dinner, or simply looking for an easy yet impressive appetizer, this recipe is designed to be a crowd-pleaser. It’s simple to prepare, packed with incredible flavor, and guarantees a memorable meal that your guests will rave about. Get ready to elevate your entertaining with these utterly delicious and wonderfully convenient French Dip Sliders!
This post contains affiliate links. As an Amazon Associate, I earn a commission (at no additional cost to you) from qualifying purchases made by clicking these links. As always, all recommendations and opinions expressed are my own.
Why These French Dip Sliders Are a Must-Make
These French Dip Sliders aren’t just another appetizer; they’re a culinary experience designed to impress with minimal effort. Here’s why they’re sure to become a staple in your recipe repertoire:
- Effortless Crowd-Pleaser. Preparing food for a crowd can often be daunting, but these sliders simplify the process without compromising on taste or presentation. They are inherently designed for sharing, making them an ideal choice for any casual get-together, from spirited game days to lively backyard BBQs or even relaxed family dinners. Their individual portion size makes them easy for guests to grab and enjoy, ensuring everyone gets a taste of this comforting classic.
- Unforgettable Flavor Profile. Every bite of these French Dip Sliders is a journey through classic, mouth-watering flavors. We layer tender, thinly sliced roast beef with rich, melty cheese, sweet and savory caramelized onions, and a zesty horseradish-mayonnaise spread that adds a delightful kick. The final touch, a savory au jus for dipping, ties all these components together, delivering the full, robust experience of a traditional French Dip sandwich in a perfectly sized slider.
- Remarkably Easy to Assemble. Don’t let their gourmet taste fool you; these sliders are incredibly simple to put together. The assembly process involves just a few straightforward steps: slicing the rolls, spreading the condiments, layering the fillings, and baking until golden. For an even quicker preparation on busy weeknights, you can make the caramelized onions ahead of time, allowing you to whip up these delicious sliders in a flash.
- Incredibly Versatile for Any Occasion. The beauty of these French Dip Sliders lies in their versatility. They can effortlessly transition from a star appetizer on your game-day menu, complementing other snacks like wings or nachos, to a satisfying main course. When served as the main event, they pair wonderfully with a variety of sides, offering a hearty and complete meal that caters to diverse tastes and preferences.
Craving more irresistible slider recipes? Be sure to explore my popular Ham and Cheese Sliders and the uniquely flavorful Reuben Sliders!
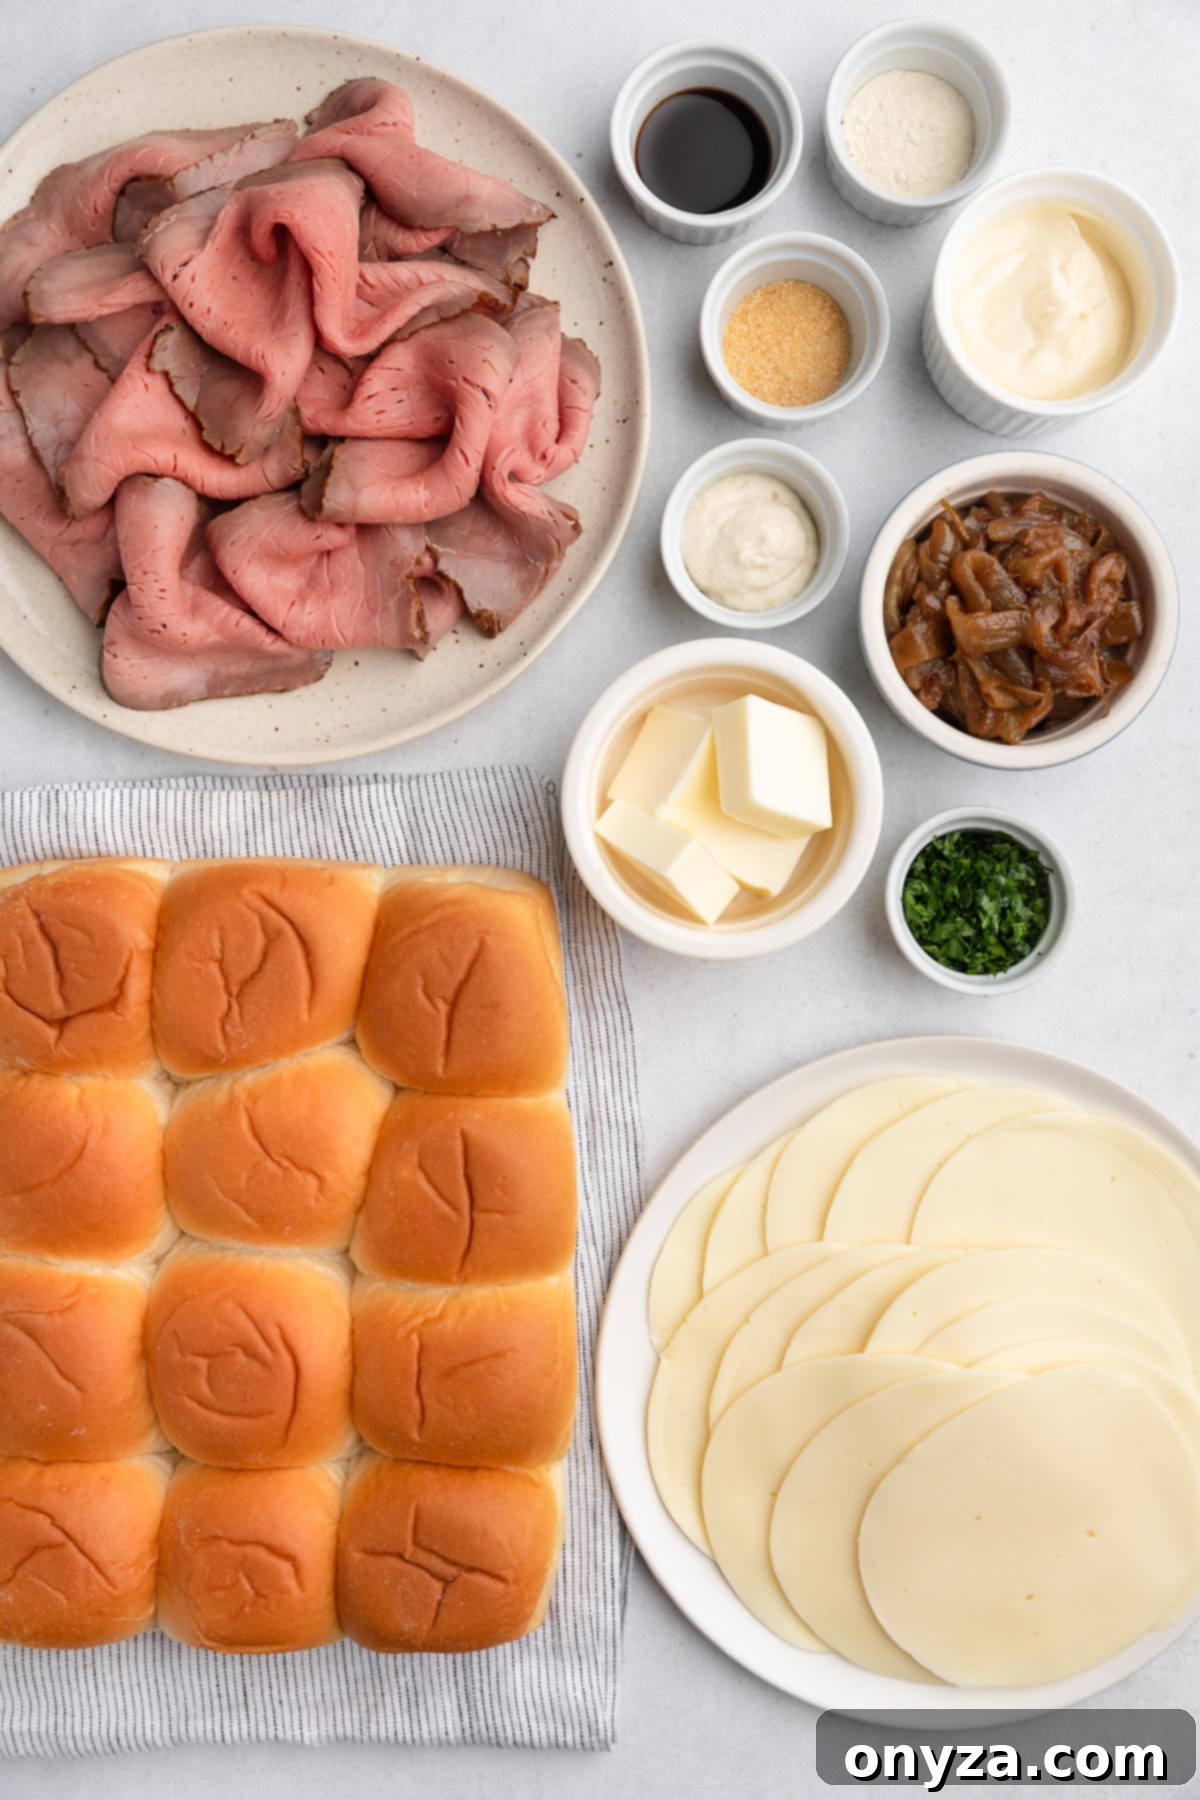
Essential Ingredients for Your Perfect French Dip Sliders
Crafting the perfect French Dip Sliders begins with selecting high-quality ingredients. Here’s a detailed look at what you’ll need to bring this recipe to life:
For the Flavorful Sliders
- Slider Rolls: The Foundation of Flavor. We highly recommend a 12-count package of King’s Hawaiian Savory Butter Rolls (easily identifiable by their yellow banner). These rolls are celebrated for their soft texture and delicate savory notes, which perfectly complement the rich fillings. If you prefer a touch of sweetness, King’s Hawaiian Original Sweet Rolls (orange banner) are an excellent alternative that adds a subtle delightful contrast.
- Roast Beef: The Heart of the Sandwich. For the best results, visit your local deli counter and request thinly sliced roast beef. Opt for a variety that leans slightly rare; this ensures the beef remains incredibly tender and juicy even after baking, preventing it from drying out in the oven. The quality of your roast beef significantly impacts the overall flavor.
- Cheese: The Melty, Gooey Layer. Thinly sliced Swiss or provolone cheese are ideal choices for these sliders. Both varieties melt beautifully, creating a wonderfully gooey texture that blankets the roast beef. Their mild, slightly nutty flavors harmonize perfectly with the robust beef and zesty horseradish mayo, adding depth without overpowering other elements.
- Mayonnaise and Cream-Style Horseradish: The Zesty Spread. This dynamic duo creates a creamy, tangy spread with just the right amount of kick to cut through the richness of the beef and cheese. Choose a high-quality mayonnaise, such as Hellmann’s or Duke’s, for the best flavor and texture. For cream-style horseradish, I personally recommend Inglehoffer Cream Style Horseradish, a robust, shelf-stable sauce known for its authentic, grated fresh horseradish root flavor.
- Caramelized Onions: Sweet and Savory Depth. Slow-cooked until they reach a golden-brown hue and sweet, sticky perfection, caramelized onions are a non-negotiable component. They introduce an exquisite layer of rich, umami-packed flavor that elevates the sliders from good to extraordinary. For convenience, you can easily prepare these ahead of time using my Best Caramelized Onions recipe.
- Unsalted Butter: The Golden Glaze. Melted unsalted butter forms the base of our savory basting sauce. When brushed over the rolls, it infuses them with moisture, adds a beautiful golden sheen, and imparts a rich, irresistible flavor that makes these sliders truly special.
- Seasonings: Aromatic Enhancements. Onion powder, garlic powder, and Worcestershire sauce are mixed into the melted butter sauce. These seasonings provide an aromatic boost and a hint of umami, deepening the overall savory profile of the sliders without overwhelming the core flavors.
- Chopped Parsley: Freshness and Color. A sprinkle of fresh flat-leaf parsley is added to the butter sauce and used as a garnish for the finished sliders. This not only introduces a vibrant pop of color but also a fresh, herbaceous note that brightens the entire dish.
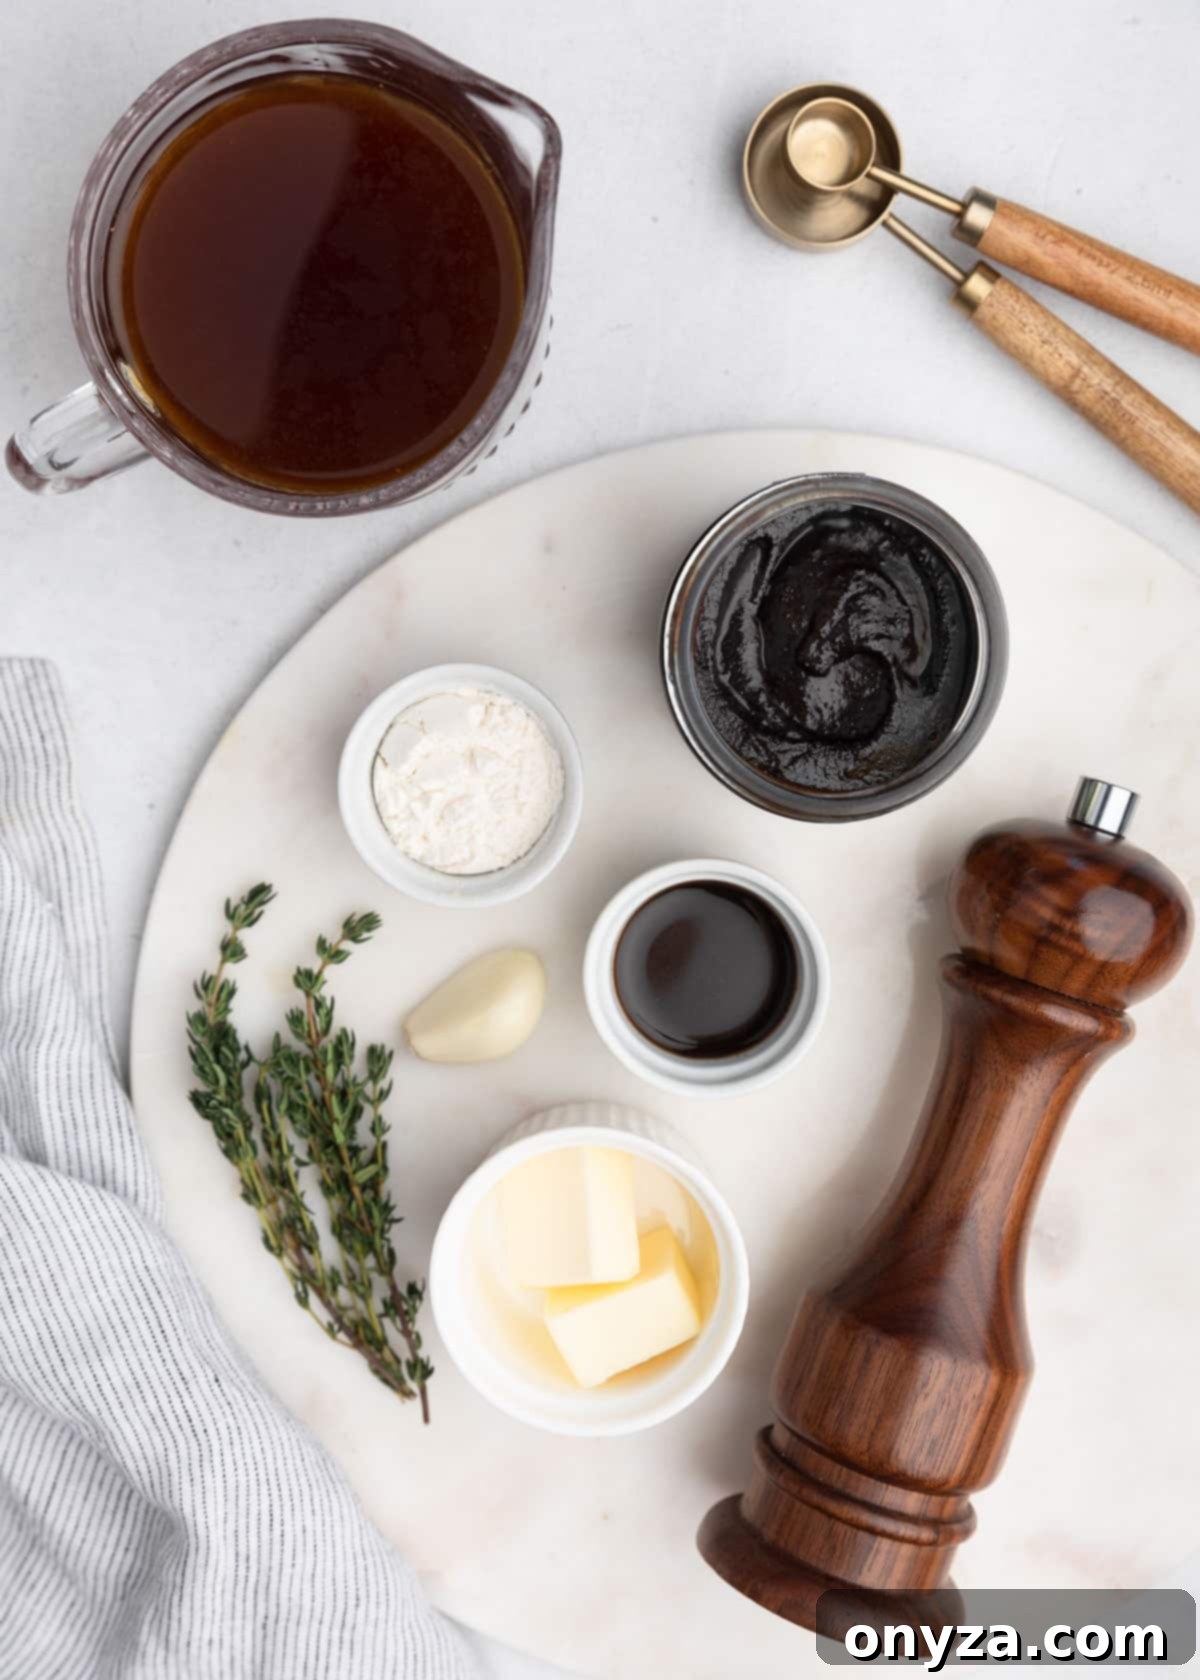
For the Authentic Au Jus
- Beef Broth or Stock: The Flavorful Foundation. The quality of your au jus starts with its base. Always opt for a high-quality beef broth or stock; this will significantly impact the depth and richness of your dipping sauce, ensuring a truly authentic French Dip experience.
- Unsalted Butter: Richness and Mouthfeel. While traditional jus often relies on pan drippings from roasted beef, unsalted butter serves as a fantastic substitute in this recipe, adding a luxurious richness and smooth mouthfeel to your homemade au jus.
- All-Purpose Flour: A Touch of Body (Optional). Unlike classic French Dip sandwiches served on crusty baguettes, sliders use softer rolls. A small amount of all-purpose flour helps to slightly thicken the jus, allowing it to cling beautifully to the rolls without making them overly soggy. This quick method helps achieve a perfect consistency. If you prefer a thinner, more traditional jus, you can certainly omit the flour.
- Worcestershire Sauce: Savory Depth and Tang. This versatile condiment is crucial for adding a complex layer of savory, umami-rich flavor, along with a subtle tanginess that balances the richness of the beef broth.
- Roasted Beef Base: Intensifying Flavor (Optional, but Recommended). To further enrich the depth of your au jus, a roasted beef base is an excellent addition. I personally favor Better Than Bouillon’s Reduced Sodium Roasted Beef Base. It provides a concentrated beefy flavor without excessively increasing the sodium content. Adjust the amount to taste, depending on the inherent flavorfulness of your chosen broth or stock.
- Minced Garlic and Fresh Thyme: Aromatic Infusion. These aromatics are gently simmered in the jus, imparting subtle yet profound layers of flavor. The fresh thyme adds an earthy, herbaceous note, while the garlic provides a warm, pungent undertone.
- Kosher Salt and Freshly Ground Black Pepper: Seasoning to Perfection. Seasoning is key to a balanced jus. Adjust the amounts to your personal preference, keeping in mind that the sodium content will vary depending on the brand of broth or stock you choose. Always taste and adjust as you go!
Selecting the Ideal Baking Dish
{This section contains affiliate links}
For baking these delicious sliders, the right dish makes a difference. You’ll need a rectangular glass or ceramic baking dish that measures at least 10.5×7.5 inches. A standard 13×9-inch dish also works wonderfully, providing a bit of extra space around the edges, which makes lifting the baked slab of sliders out with a spatula much easier and prevents accidental spills.
For optimal results, I strongly recommend using a baking dish with a light-colored interior. Darker pans tend to absorb more heat, which can lead to over-browning or even burning on the bottom of the rolls. If you’re using a darker pan, it’s a good practice to reduce your oven temperature by 25 degrees Fahrenheit to ensure the sliders bake evenly and achieve that perfect golden-brown crust without burning.
The beautiful dark blue dish featured in many of the photos for this post is the Staub Ceramics 10.5×7.5-inch Rectangular Baking Dish. I’ve also had great success preparing this recipe in the slightly larger Staub Ceramics 13×9-inch Rectangular Baking Dish and the elegant Emile Henry 13×9-inch Large Rectangular Baker.
Step-by-Step Guide to Making French Dip Sliders
Creating these delightful French Dip Sliders is a straightforward and rewarding process. Follow these steps for perfect results every time.
Step 1: Perfectly Prep Your Slider Rolls
Begin by carefully slicing the entire slab of slider rolls horizontally. The goal is to separate the tops from the bottoms in one clean cut. A long, sharp serrated knife is your best tool for this, ensuring a smooth and even slice. I personally love and recommend my Mercer Culinary Millennia 10-Inch Bread Knife, which is pictured in the recipe photos for its precision and ease of use.
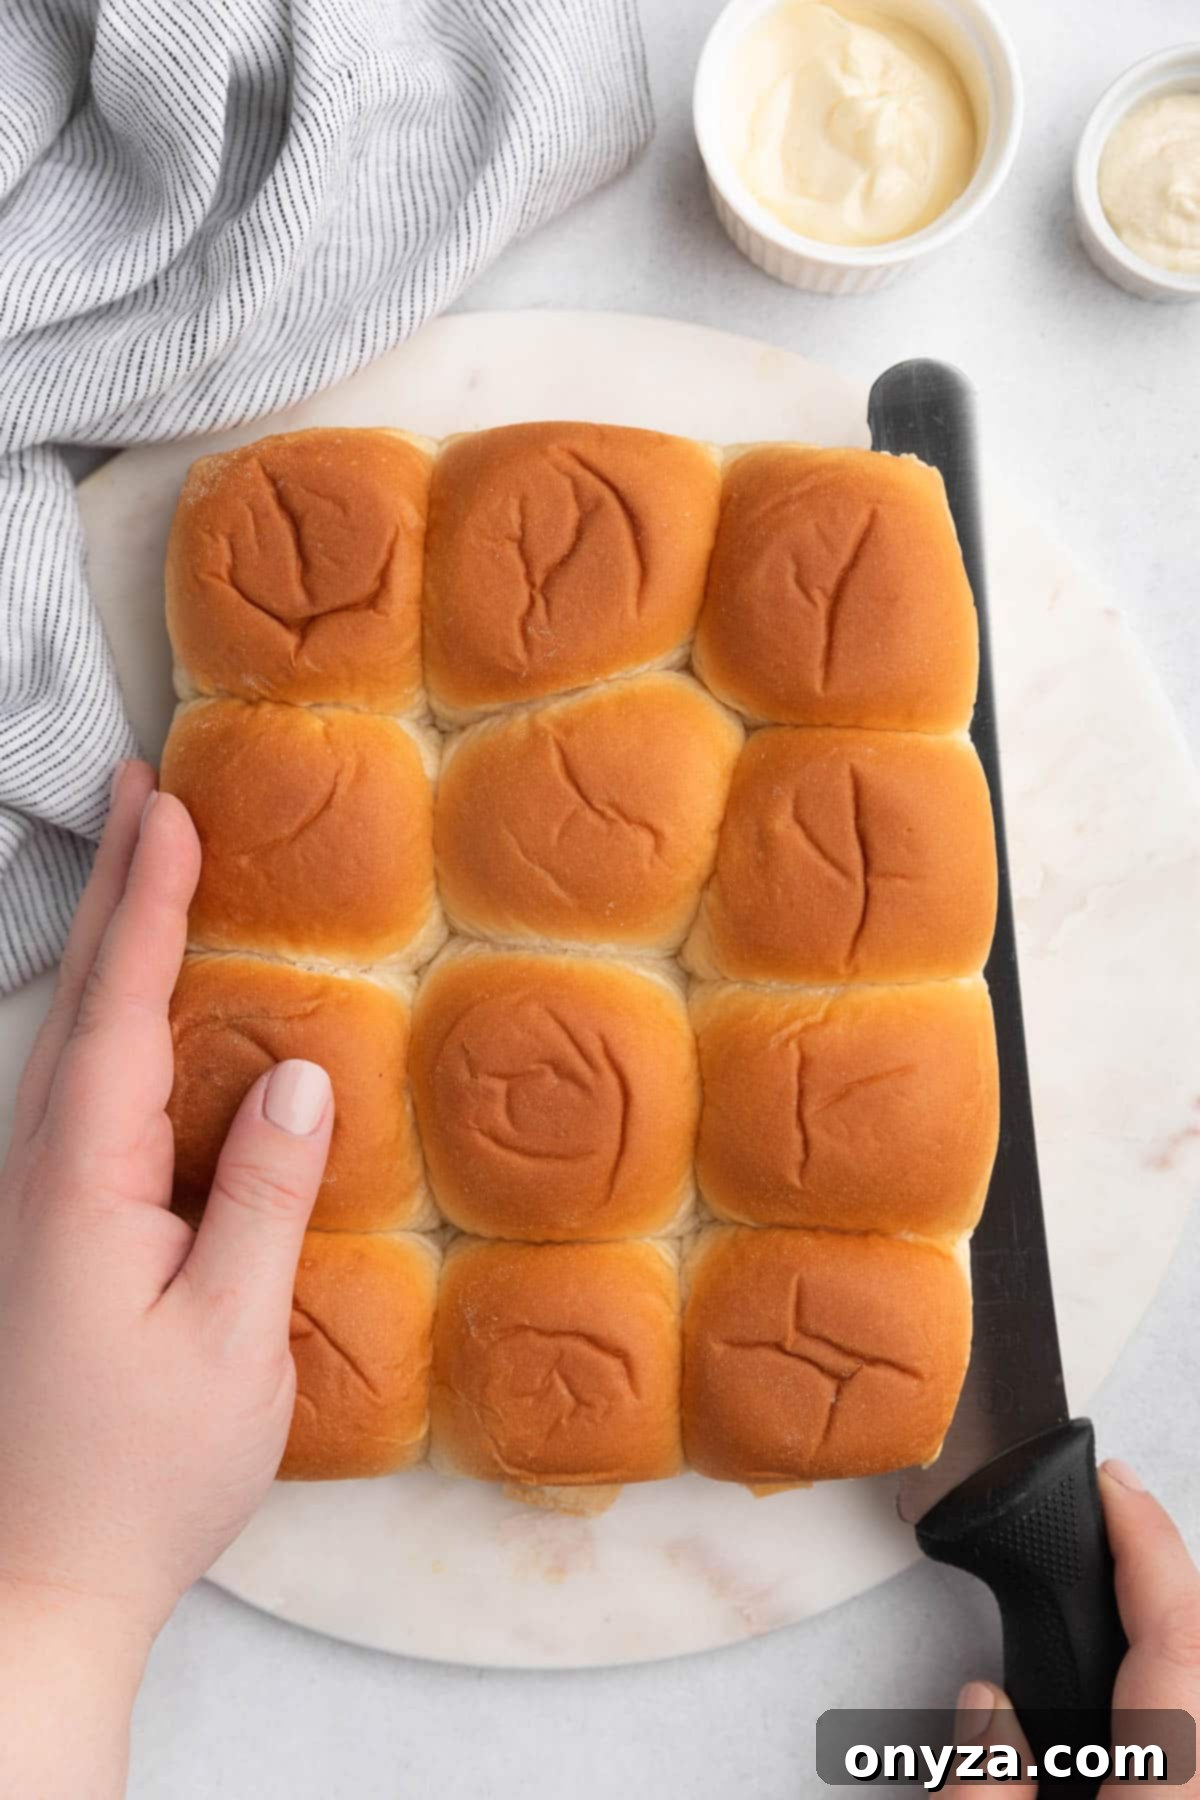
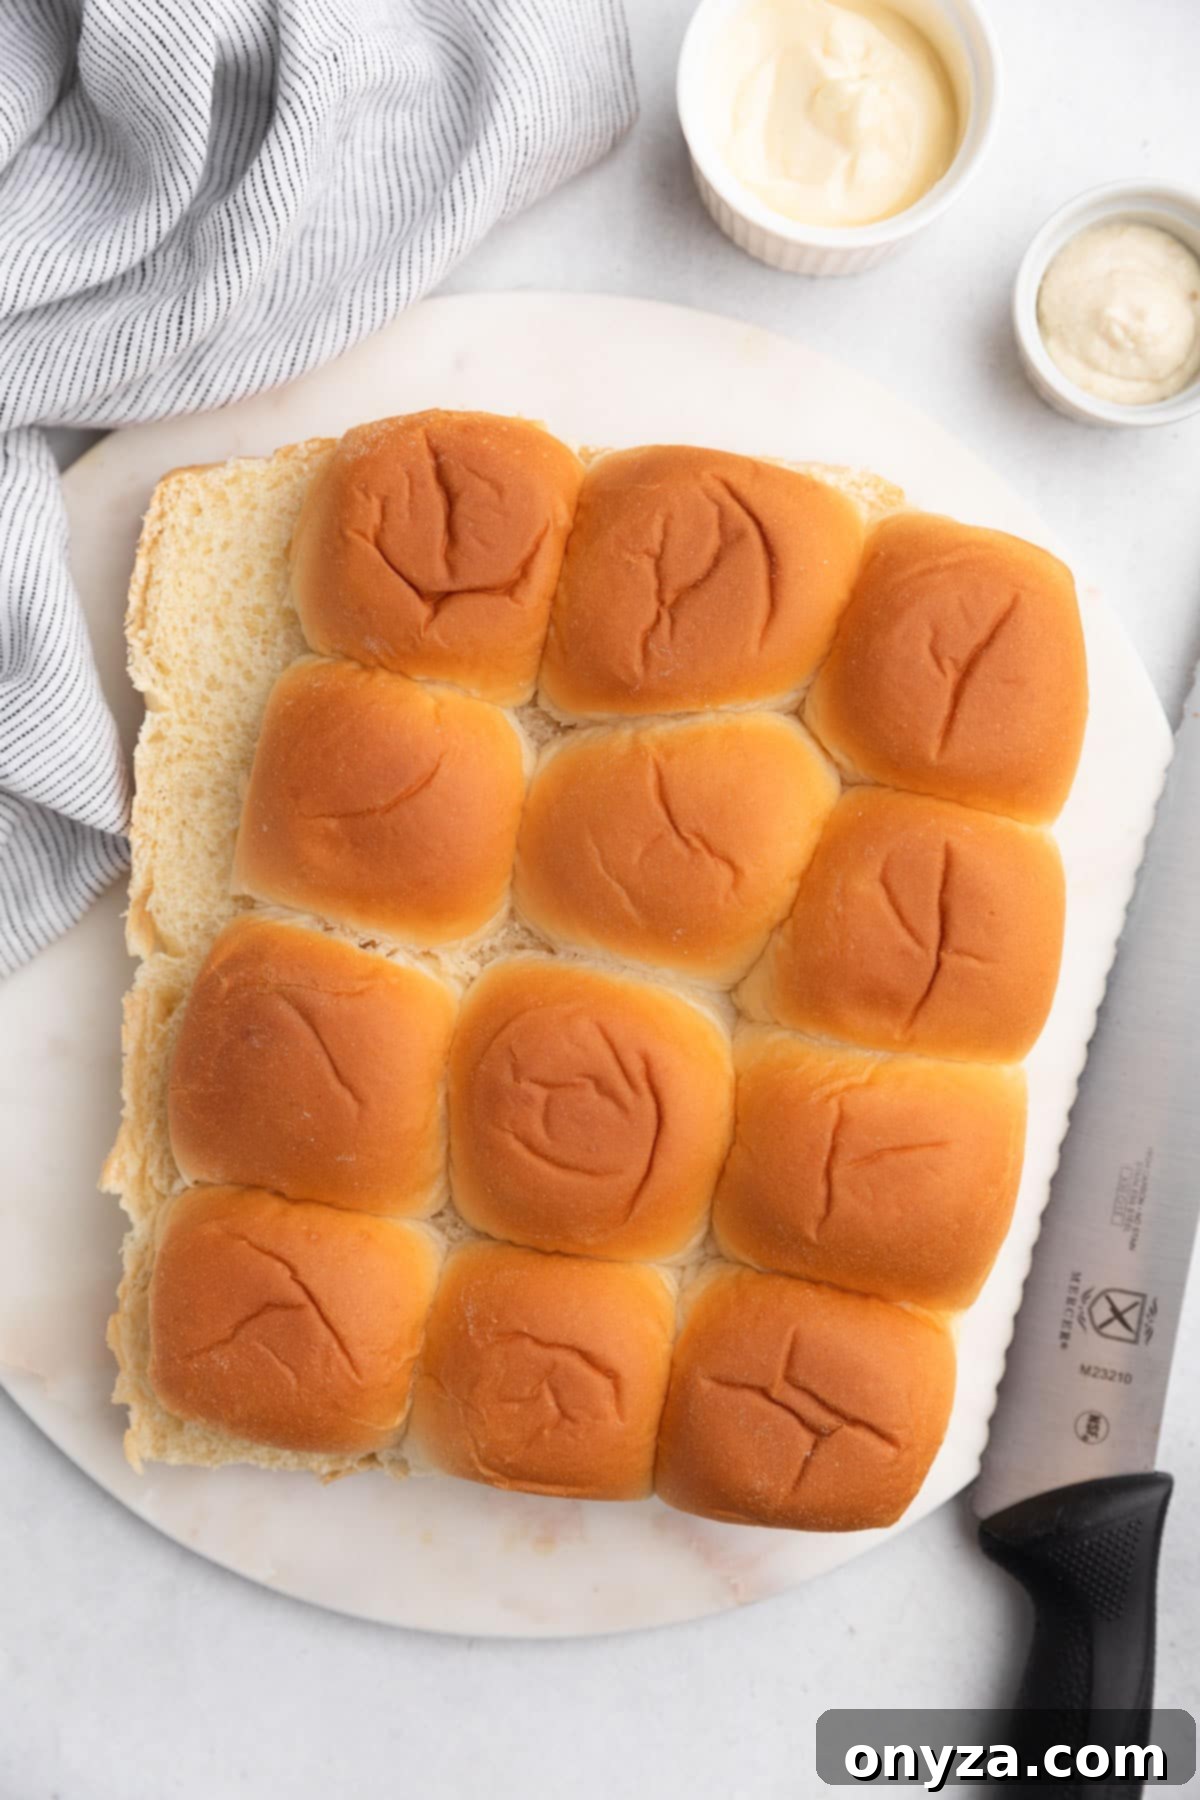
To prevent the rolls from becoming soggy from the juicy fillings and the au jus, a crucial step is to lightly toast their cut sides. Place both the top and bottom halves of the rolls, cut-side up, on a baking sheet. Position the baking sheet on the second rack from the top of your oven, approximately 6 inches from the broiler element. Broil for just 1-2 minutes, until they achieve a delicate golden toast. This step creates a slight barrier, keeping the rolls firm. It’s vital to keep a very close eye on them during this process; rolls can go from perfectly toasted to burnt in mere seconds under the broiler.
Step 2: Expertly Assemble Your Sliders
Once your rolls are prepped, it’s time to assemble these flavor-packed sliders. Begin by lightly coating your chosen baking dish with cooking spray. Gently place the toasted bottom halves of the rolls into the prepared dish, ensuring the toasted side faces upwards.
In a small bowl, combine the mayonnaise and cream-style horseradish, mixing until smooth. This creates our zesty spread. Evenly spread half of this delectable mixture over the toasted surface of the bottom rolls in the baking dish.
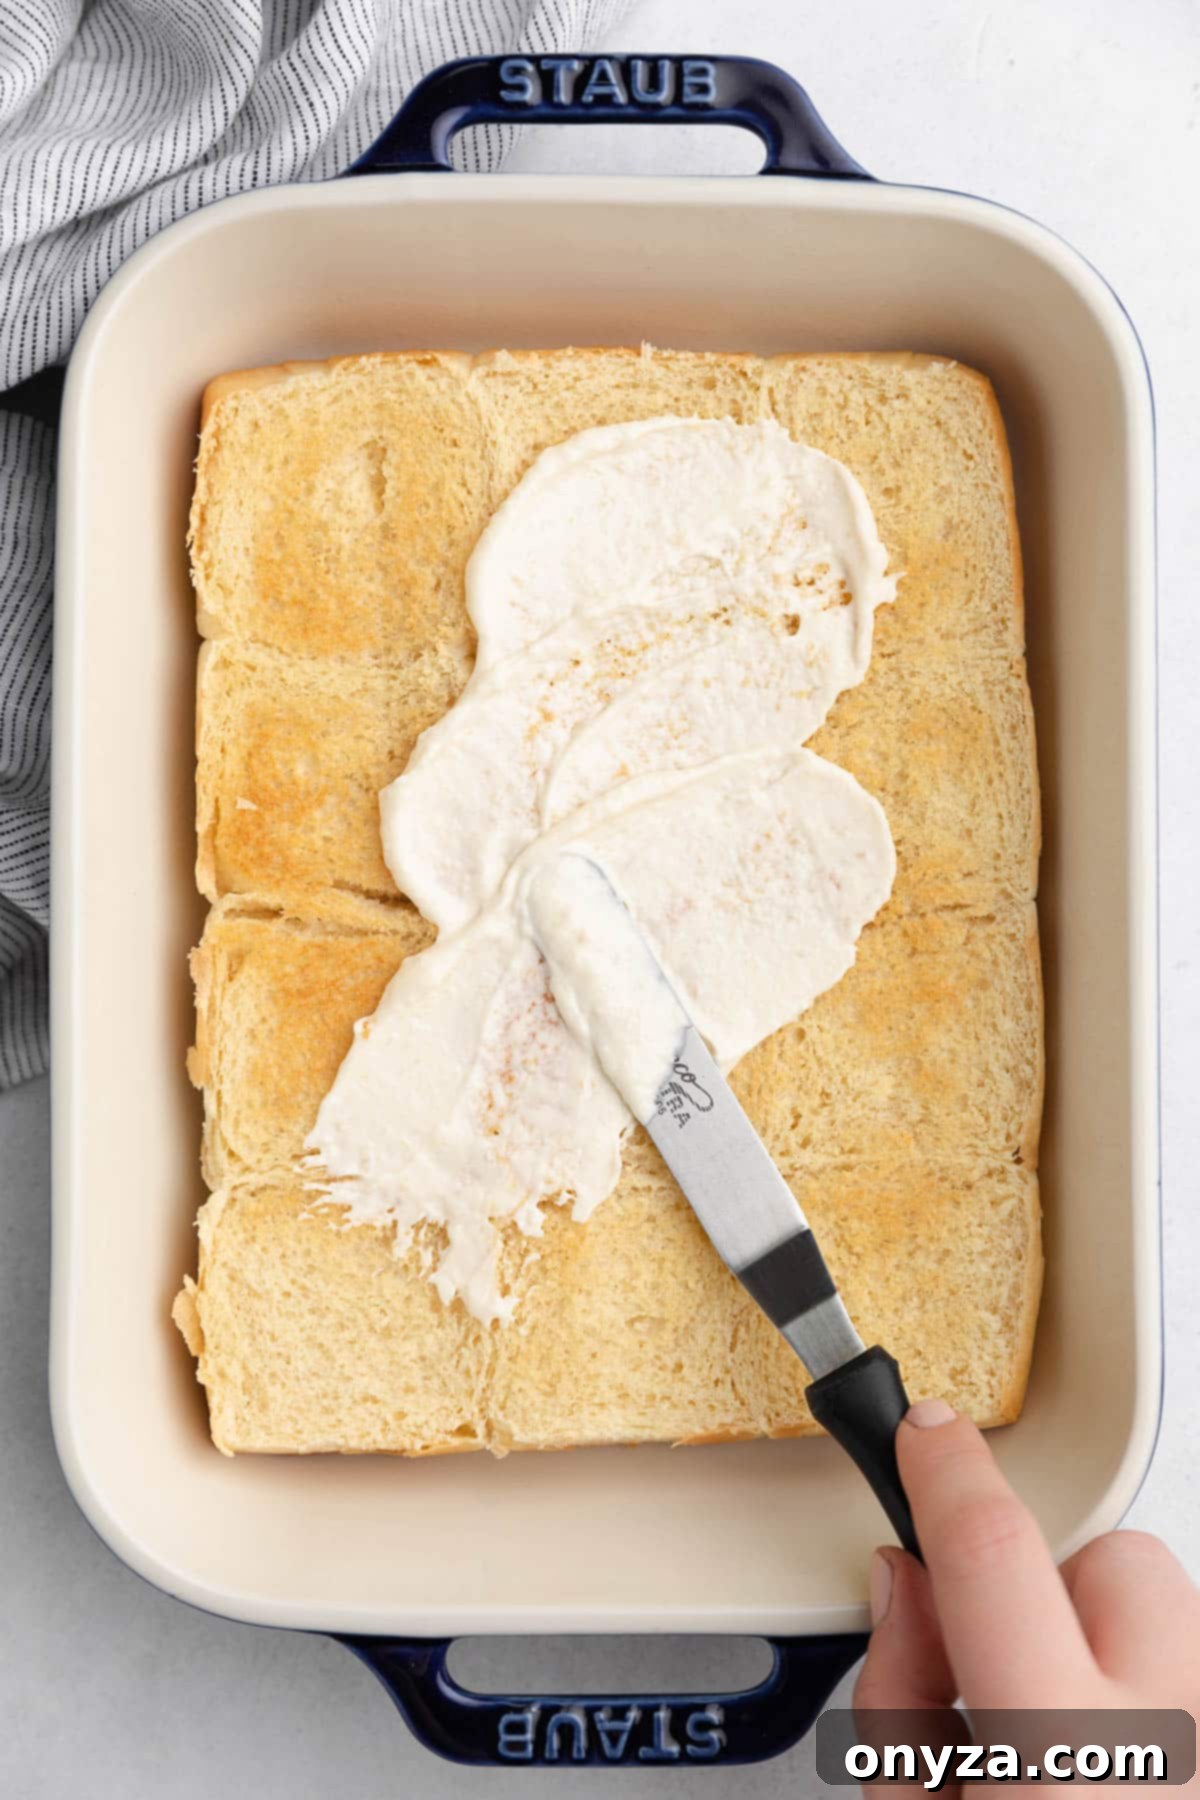
Now, it’s time for the layers! Start by placing half of your thinly sliced cheese over the horseradish mayo. Follow this with a generous layer of all the roast beef, ensuring it’s evenly distributed. Next, spread the sweet caramelized onions over the roast beef. Finish this savory stack with the remaining half of the cheese. Finally, take the toasted top halves of your rolls and spread the rest of the horseradish-mayo mixture onto their toasted side. Carefully place these tops, mayo-side down, over the cheese layer, completing your slider assembly.
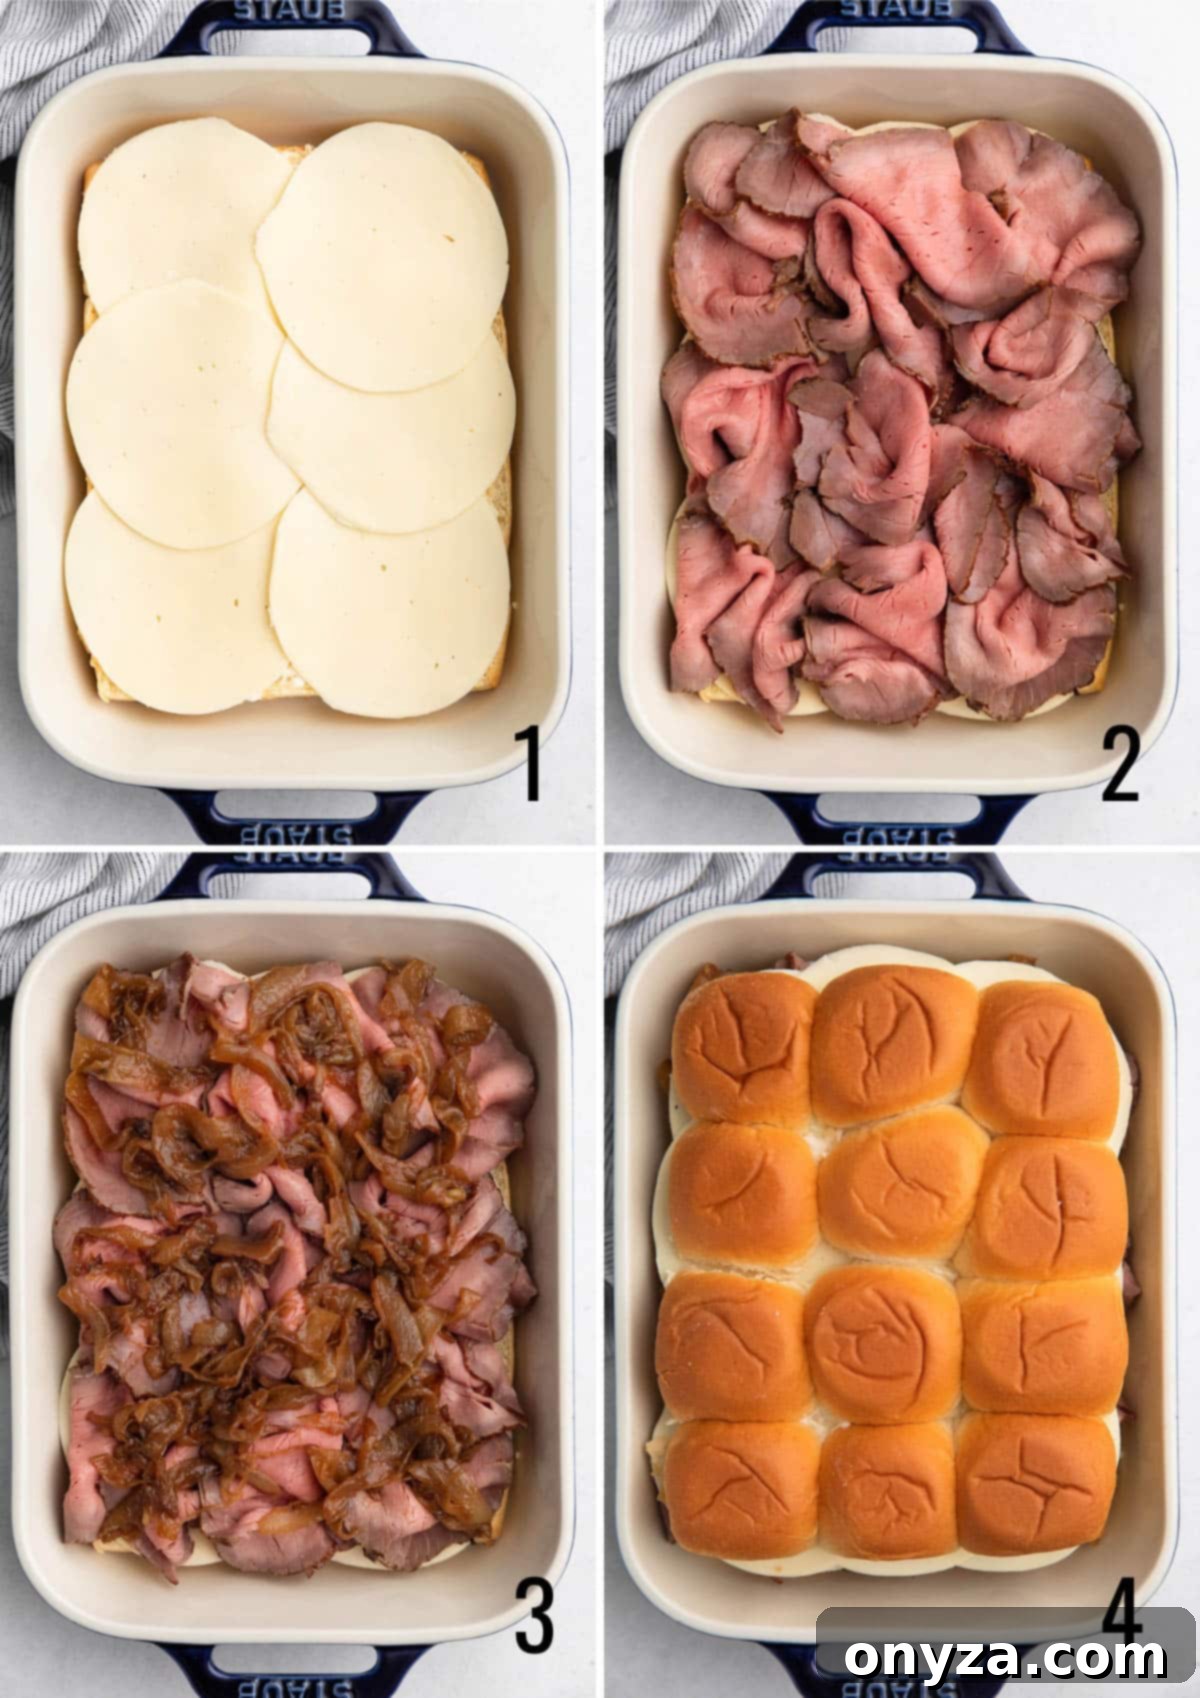
Step 3: Baste with Butter and Bake to Perfection
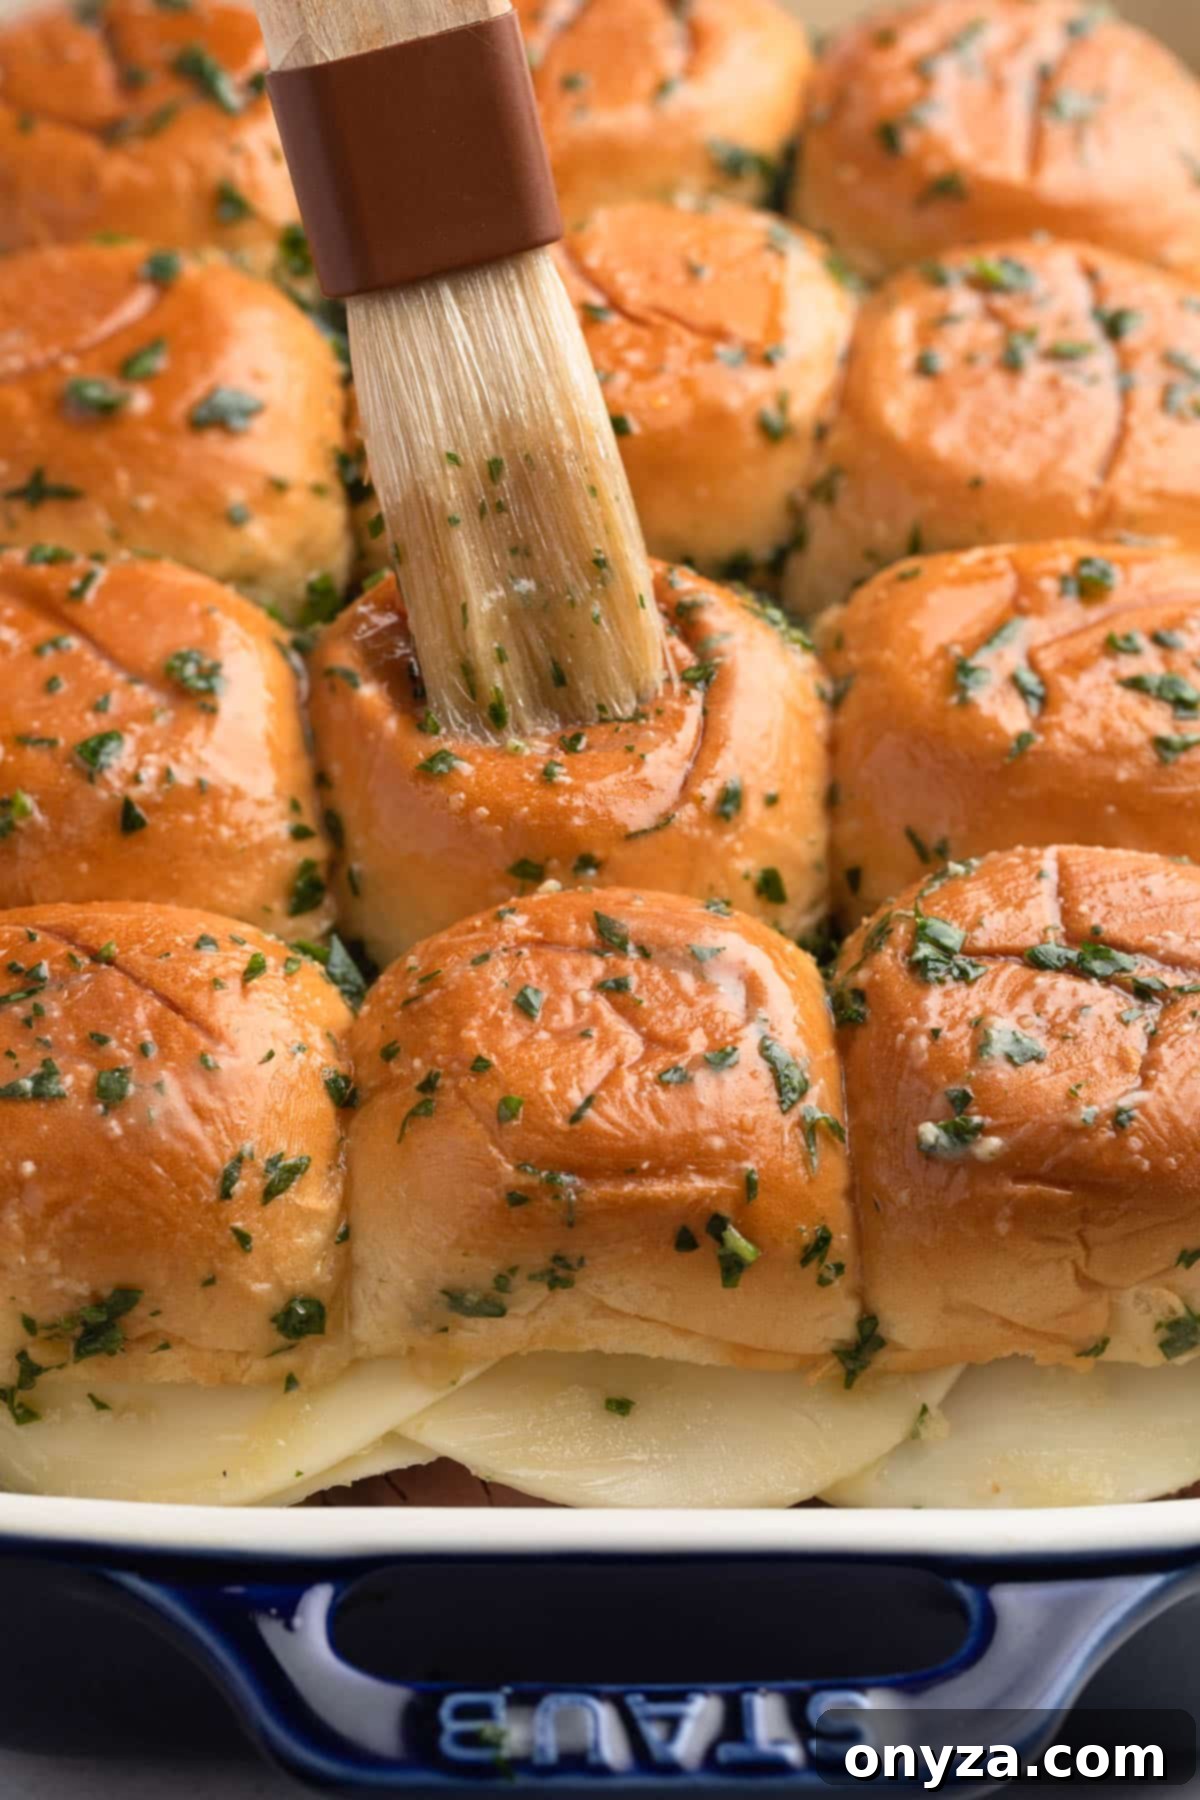
In a small bowl, whisk together the melted unsalted butter, Worcestershire sauce, onion powder, garlic powder, and half of the chopped fresh parsley. You may wish to add a tiny pinch of salt to this mixture to enhance its flavors, but remember that the accompanying au jus will also contribute saltiness to the finished sliders, so season judiciously.
Using a pastry or basting brush, generously apply this savory butter mixture over the tops and sides of the assembled slider rolls. Don’t be concerned if some butter pools at the bottom of the dish; the rolls will beautifully absorb it as they bake, infusing them with incredible flavor and moisture. Ensure the parsley is evenly distributed across the tops of the rolls for both taste and visual appeal.
We use a two-step baking process to guarantee that your sliders are impeccably toasted and golden on the outside, while remaining wonderfully gooey and melty on the inside:
First, cover the baking dish securely with aluminum foil. Bake in a preheated oven at 350 degrees F (175 degrees C) for 20-25 minutes, or until the cheese within the sliders is fully melted and bubbly. This initial covered bake allows the internal ingredients to heat through and melt without the rolls browning too quickly.
Next, carefully remove the foil. Return the uncovered dish to the oven and continue baking for an additional 5 to 8 minutes. During this final stage, the rolls will toast to a beautiful golden-brown and develop a satisfyingly crisp top crust. Watch closely to prevent over-browning.
Step 4: Prepare the Rich Au Jus
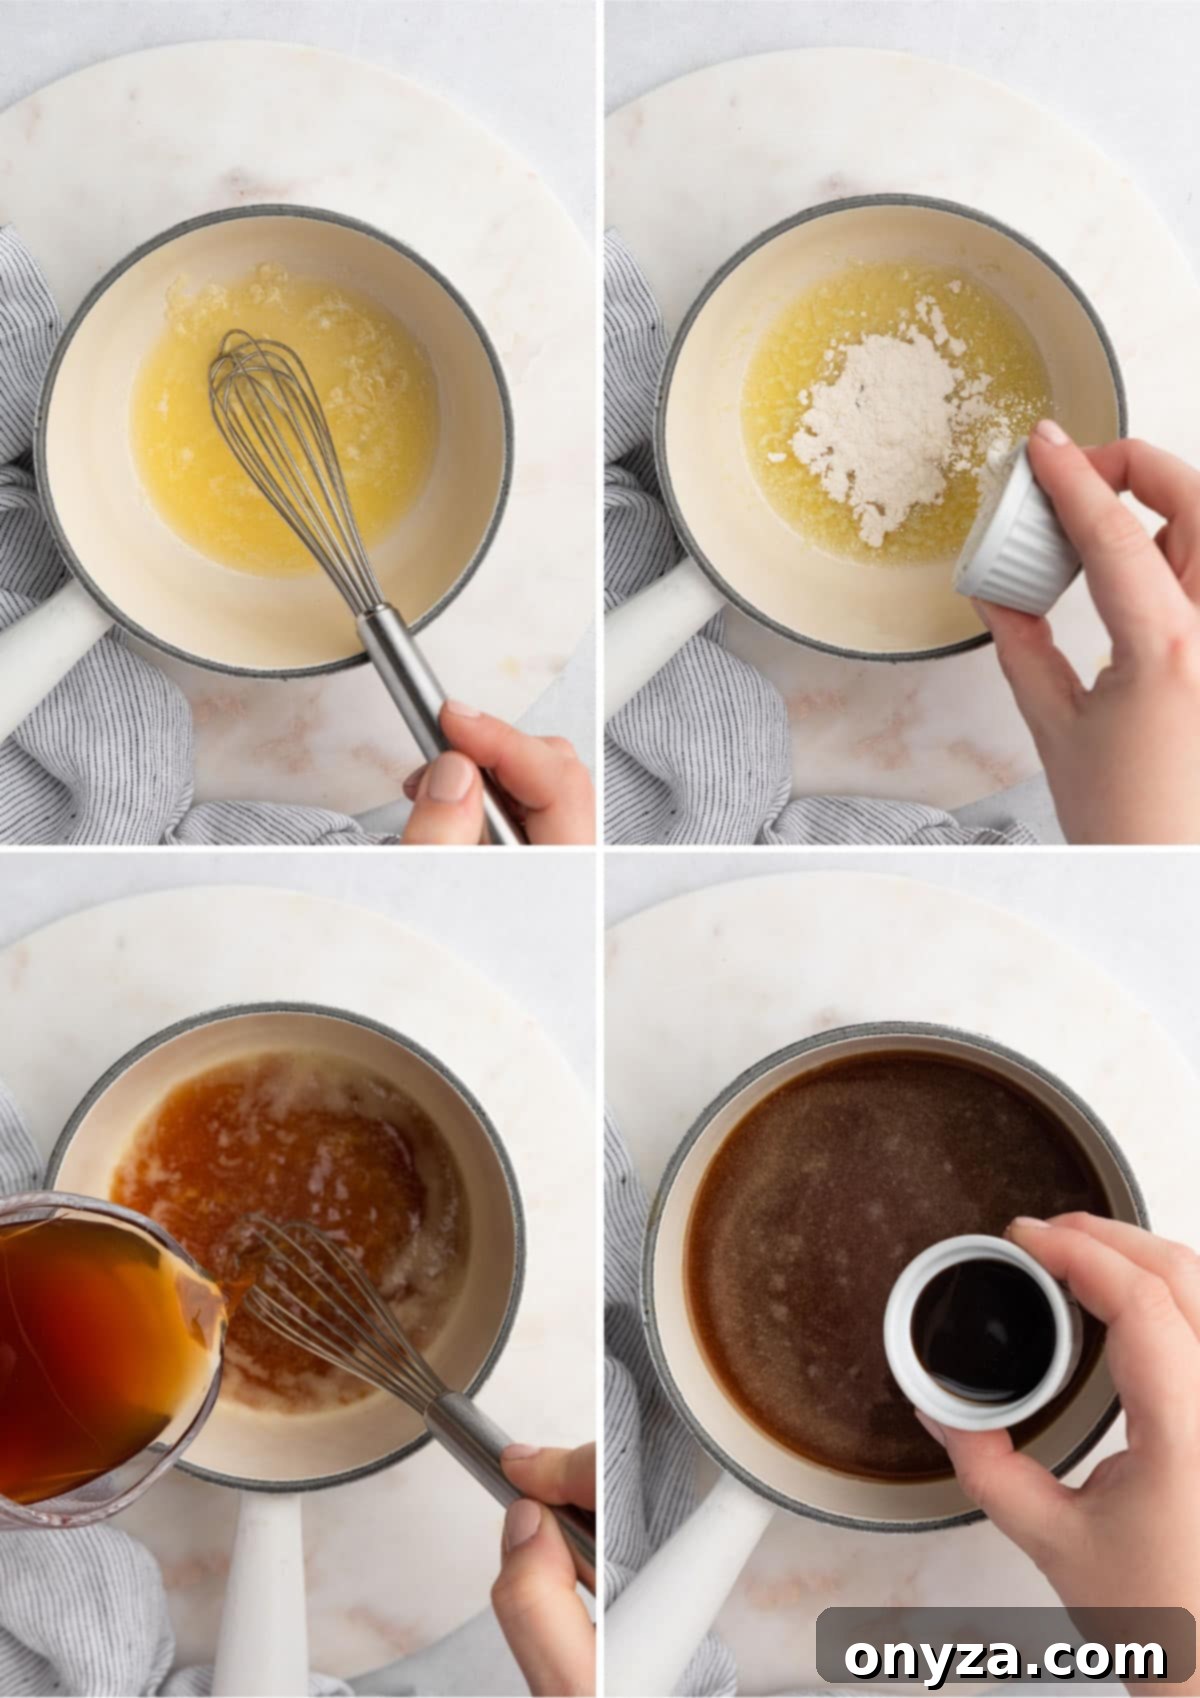
While your sliders are baking to perfection, it’s the ideal time to prepare the savory dipping jus on your stovetop. In a small saucepan, melt the unsalted butter over medium heat. Add the minced garlic and sauté for 1-2 minutes, stirring constantly, until it becomes fragrant but not browned.
Stir in the all-purpose flour and continue to cook for another 1-2 minutes. This step is crucial for cooking out the raw flour taste and creating a roux that will slightly thicken your jus. Gradually whisk in the beef broth, ensuring there are no lumps, followed by the Worcestershire sauce, fresh thyme, and ¼ teaspoon of black pepper.
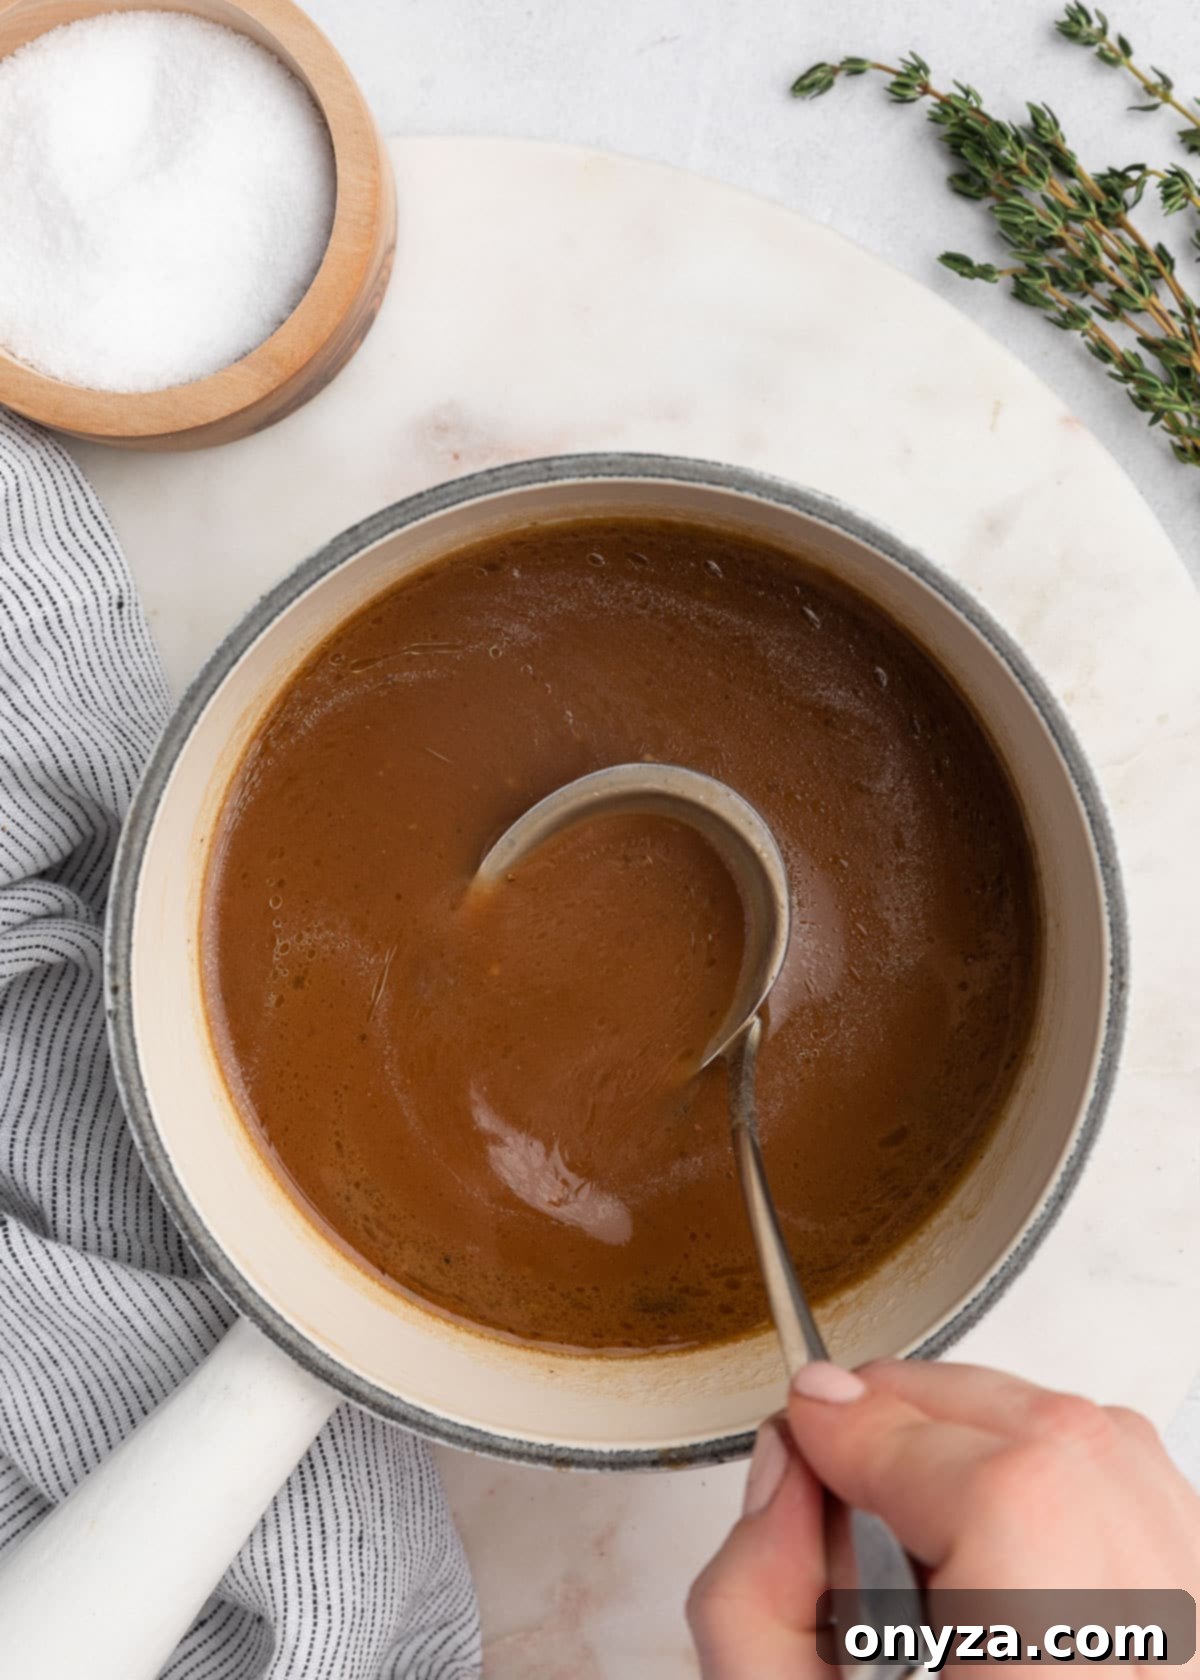
Bring the mixture to a boil, then reduce the heat to a gentle simmer. Let it simmer for approximately 10 minutes, stirring occasionally. This allows the flavors to meld and deepen. Taste the jus at this point. If you desire a richer, more profound beef flavor, whisk in 1-2 teaspoons of Better Than Bouillon Reduced Sodium Roasted Beef Base. The exact amount will depend on the initial flavor intensity of your beef broth. Once dissolved, taste again and adjust the seasoning with additional salt and freshly ground black pepper as needed to suit your preference.
For a perfectly smooth and elegant au jus, I always recommend straining it through a fine-mesh sieve before serving to remove any bits of garlic and thyme. However, if you prefer a more rustic texture, you can certainly leave it unstrained. Keep the finished au jus warm until you are ready to serve the baked sliders.
Presenting and Serving Your French Dip Sliders
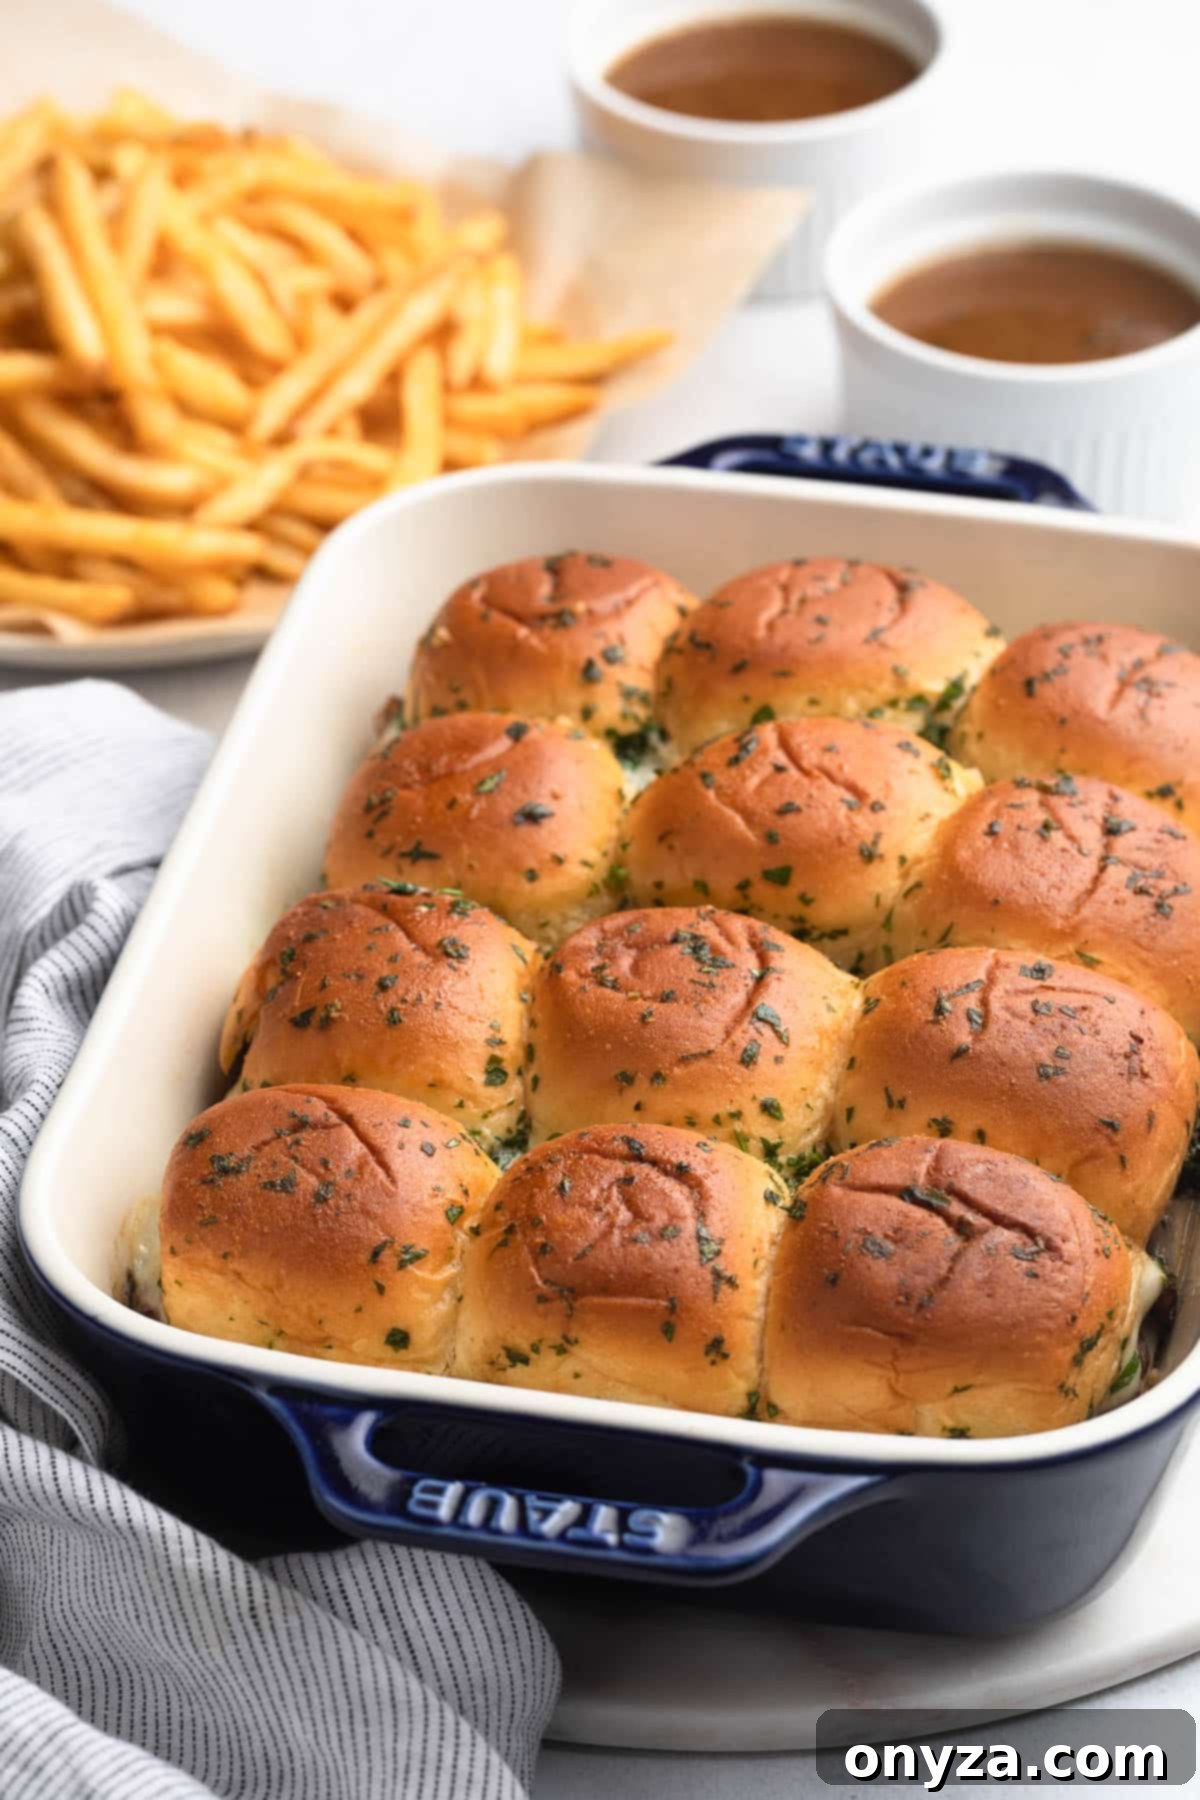
Once your French Dip Sliders emerge from the oven, allow them to rest in the baking dish for a few minutes. This brief resting period helps the cheese and fillings firm up slightly, making them much easier to slice into individual portions. For effortless transfer from the baking dish to a cutting board, I find that a large cake lifter is incredibly useful.
On the cutting board, use your serrated knife to carefully slice the slab of sliders into 12 individual servings. Before presenting, add a final touch of freshness and color by sprinkling the remaining chopped fresh parsley over the tops of the sliders. This simple garnish elevates their visual appeal.
Serve these delectable sliders immediately with the warm au jus on the side for dipping. I love offering a small ramekin of jus to each guest, allowing them to dip at their leisure. Depending on the number of people I’m serving and whether these are an appetizer or a main course, I might use 4-ounce or 6-ounce ramekins.
When planning your menu, consider portion sizes: if serving as an appetizer, plan for about 1-2 sliders per guest, especially if you have other dishes. For a main course, a good target is 3-4 sliders per person, adjusting based on appetite and accompanying sides.
Here are some of our favorite side dishes that perfectly complement these hearty and flavorful French Dip Sliders for lunch or dinner:
- Crispy Shoestring Fries: A classic pairing! We love preparing ours in an air fryer for extra crispiness. For an elevated twist, toss them with minced garlic and grated Parmesan cheese after cooking to create irresistible garlic-parmesan fries. Don’t forget, fries are also fantastic for dipping into any leftover au jus or extra horseradish mayo!
- Crunchy Potato Chips: For a quick and easy side, a bowl of your favorite kettle-style potato chips provides a satisfying crunch and salty balance to the rich sliders.
- Fresh Garden Salad: To lighten the meal and add a refreshing contrast, serve the sliders alongside a crisp green garden salad with a light vinaigrette. This helps balance the richness and adds a welcome freshness.
Storing and Reheating Your French Dip Sliders
While these French Dip Sliders are undeniably at their best when enjoyed fresh from the oven, you can certainly store and reheat any leftovers. It’s important to note that the texture of the rolls will be softer upon reheating compared to their initial crispy state, but they will still be delicious.
To store, allow both the sliders and the au jus to cool completely to room temperature. Transfer the leftover sliders to an airtight container and store the au jus in a separate airtight container. Both can be refrigerated for up to 2-3 days.
When you’re ready to reheat, wrap the desired number of sliders loosely in aluminum foil and place them on a baking sheet. Bake in a preheated oven at 350 degrees F (175 degrees C) for 10-15 minutes, or until they are warmed through. The exact reheating time will depend on whether your sliders are still in a slab or have been separated into individual portions (individual sliders will heat more quickly).
If you desire to re-crisp the tops of the rolls, carefully open the foil during the last 5 minutes of heating, allowing the tops to become golden and slightly crispy again. Simultaneously, gently reheat the au jus on the stovetop over low heat or in the microwave until it reaches at least 165 degrees F (74 degrees C), ensuring it’s piping hot and ready for dipping.
Common Questions and Smart Substitutions
Here are some frequently asked questions and helpful tips for customizing your French Dip Sliders:
- What can I use as an alternative to horseradish? If cream-style horseradish isn’t to your liking or you simply don’t have any on hand, a fantastic substitute is an equal amount of Dijon mustard. Dijon offers a similar tangy, piquant kick that complements the roast beef beautifully. For those who enjoy a bit of texture, grainy mustard is another excellent option that adds both flavor and visual interest.
- Do I have to make homemade au jus? While the homemade au jus in this recipe offers superior flavor and control over ingredients, you absolutely do not have to make it from scratch. For a time-saving alternative, you can use your favorite store-bought “au jus gravy” or a pre-packaged mix. McCormick Au Jus Gravy Mix is a popular choice that works well. To enhance the flavor of a store-bought mix, consider stirring in about ¼ teaspoon of dried thyme as it simmers; this simple addition can significantly deepen its savory profile.
- Can I make these sliders ahead of time? Yes, you can assemble the sliders up to 4 hours before they need to go into the oven. The key is to prepare everything as directed, but crucially, leave off the butter sauce. Once assembled, cover the dish tightly with plastic wrap and refrigerate. Before baking, remove them from the refrigerator and let them sit at room temperature for about 30 minutes to take the chill off. Apply the butter sauce just before placing them in the oven, and then proceed with the baking instructions as outlined in the recipe.
- Can I prep the caramelized onions in advance? Absolutely! Caramelized onions are a wonderful ingredient to prepare ahead of time. You can make them 3-4 days before you plan to assemble your sliders and store them in an airtight container in the refrigerator. This recipe only calls for ½ cup, but I highly recommend making a full batch using my Best Caramelized Onions recipe. The remaining caramelized onions are incredibly versatile and can be used in numerous other delicious dishes, such as my Savory Palmiers, Ham & Cheese Puff Pastry Slab Pie, or the indulgent Ultimate Steak Sandwich!
CRAVING MORE? Subscribe to my newsletter and join me on Facebook, Pinterest, and Instagram for the latest recipes and news.
Pin
French Dip Sliders
Ingredients
- 1 package King’s Hawaiian Savory Butter Rolls (yellow banner on package)
- ¼ cup mayonnaise
- 1 tablespoon cream-style horseradish (I use Inglehoffer–see note)
- ½ pound provolone or Swiss cheese , thinly sliced
- ½ pound deli roast beef , thinly sliced
- ½ cup caramelized onions
- 4 tablespoons unsalted butter , melted
- 1 teaspoon Worcestershire sauce
- ½ teaspoon onion powder
- ¼ teaspoon garlic powder
- ½ tablespoon chopped fresh flat-leaf parsley , plus additional for garnish, if desired
For the Jus
- 2 cups beef broth or stock
- 2 tablespoons unsalted butter
- 1 large garlic clove , minced
- 1-1/2 tablespoons all purpose flour (optional, see note)
- 1 tablespoon Worcestershire sauce
- 1-2 teaspoons Better Than Bouillon Reduced Sodium Roasted Beef Base (if needed, see note)
- 1 teaspoon fresh thyme (or 1/4 teaspoon dried)
- kosher salt and freshly-ground black pepper (added 1/4 tsp pepper)
Instructions
Prep the Rolls
- Use a serrated bread knife to slice the rolls horizontally into two slabs (tops and bottoms). Place the halves, cut side up, on a baking sheet.
- Preheat your oven’s broiler on high with the rack on the second position from the top (6 inches from the broiler element). Broil the rolls until lightly toasted. This will take just 1-2 minutes. Don’t walk away from the oven, and watch them carefully! They can burn quickly.
Make the Sliders
- Preheat your oven to 350 degrees F with the rack in the middle position. Lightly coat a rectangular ceramic or glass baking dish (measuring at least 10.5×7.5-inches) with cooking spray. Place the bottom half of the rolls into the baking dish, toasted side up.
- In a small bowl, stir together the mayonnaise and cream-style horseradish. Spread half of the mixture over the bottom slab of the rolls.
- Layer half of the cheese over the horseradish mayo, followed by all of the roast beef, the caramelized onions, and the remaining cheese. Spread the rest of the horseradish mayo onto the toasted side of the roll tops and place them over the cheese layer.
- In a small bowl, combine melted butter, Worcestershire sauce, garlic powder, onion powder, and parsley. Brush the butter sauce over the tops and sides of the sliders, letting it drip down into the baking dish around the rolls. Distribute the parsley evenly across the tops of the rolls. It might look like a lot of butter sauce–the rolls will soak it up as they bake!
- Cover the pan with foil and bake for 20 minutes, until the sliders are heated through and the cheese is melted. Remove the foil and continue baking for 5-8 minutes, until the tops of the rolls are golden and crisp.
- Let the sliders stand for just a couple of minutes and then cut them into individual servings using a serrated knife. Garnish with additional chopped parsley (if desired) and serve with jus on the side for dipping.
Make the Jus
- While the sliders are baking, make the jus. Melt the butter in a saucepan over medium heat. Add the garlic, and cook, stirring, until fragrant, about 1-2 minutes. Stir in the flour and continue cooking for another 1-2 minutes.
- Gradually whisk in the beef broth, followed by the Worcestershire sauce, thyme, and 1/4 teaspoon pepper. Bring to a boil, reduce heat, and simmer for 10 minutes, stirring occasionally.
- Taste the jus. If you find that it needs to be more flavorful, whisk in beef base, to taste. (I usually add 1-2 teaspoons; the amount will vary by how flavorful the initial broth/stock is.) Season the jus to taste with salt and pepper.
- Strain the jus through a fine mesh sieve and discard the solids. Keep the jus warm until ready to serve the sliders, pouring it into small cups for guests to dip into on their plates.
Notes
Cream-style horseradish. Pungency can vary by brand. I use and love the Inglehoffer brand for this recipe. If you’re using a less robust brand, increase the quantity to taste. Similarly, if your brand of horseradish sauce is very strong (or you’re hesitant about the flavor of horseradish in the sliders), start with 1/2 tablespoon and increase to taste.
Adding Flour to the Jus. A little bit of flour gives this quick jus a bit of body, which I find keeps the soft rolls from immediately becoming soggy when dipped. If you prefer a thinner jus, omit the flour.
Baking Dish. I recommend using a pan with a light-colored interior. If using a darker pan, reduce the oven temperature to 325 degrees F, and keep an eye on the sliders as they bake so the bottoms don’t burn.
For substitutions and prep-ahead instructions, see the FAQ’s in the article above.
Nutrition Estimate
Nutrition information is automatically calculated, so should only be used as an approximation.
Please note that our recipes have been developed using the US Customary measurement system and have not been tested for high altitude/elevation cooking and baking.
