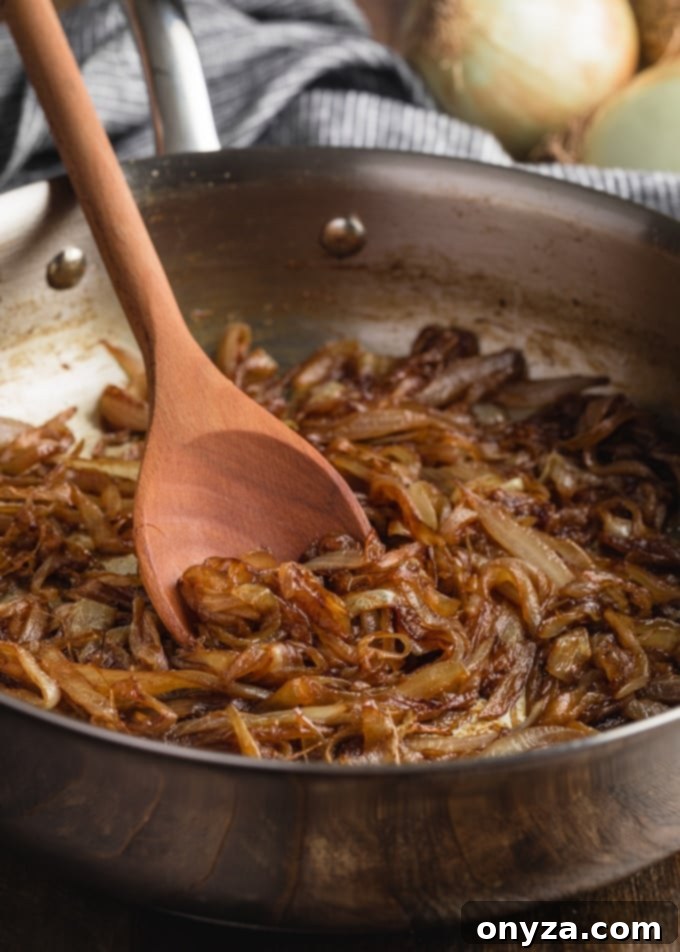
Discover the ultimate guide to mastering caramelized onions, transforming simple onions into sweet, golden, and deeply flavorful gems. This comprehensive tutorial provides step-by-step instructions, expert tips, make-ahead strategies, and inspiring recipe ideas to elevate your culinary creations.
ARTICLE GUIDE
(click headings to jump)
The Magic of Caramelized Onions
Essential Tools and Ingredients
Step-by-Step Guide to Caramelizing Onions
Storing Caramelized Onions (Make Ahead)
Top Tips for Flawless Caramelized Onions
Delicious Ways to Use Caramelized Onions
The Magic of Caramelized Onions: A Culinary Essential
Few ingredients possess the transformative power of caramelized onions. What starts as a humble, pungent vegetable, through the magic of low and slow cooking, becomes a sweet, deeply savory, and incredibly versatile culinary treasure. These golden, jammy strands are bursting with complex flavors that can elevate a simple sandwich, add depth to a gourmet meal, or become the star of an appetizer. If you’ve ever wondered how to achieve that perfect balance of sweetness and umami, this guide is your definitive resource.
Caramelized onions aren’t just an ingredient; they’re an experience. They embody patience and a simple cooking technique that yields profound flavor. Forget the quick sautéed onions; true caramelization requires time, allowing the natural sugars within the onions to slowly break down and brown through the Maillard reaction. This process develops unparalleled sweetness and a nutty, rich complexity that instant methods simply cannot replicate. Once you master this skill, you’ll find yourself reaching for these sweet, savory gems to enhance countless dishes, making them a true staple in your kitchen.
This comprehensive guide will walk you through every step of making truly exceptional caramelized onions. From selecting the right variety and proper slicing techniques to the art of low and slow cooking, we’ll cover all the nuances. We’ll also delve into smart make-ahead strategies and offer a plethora of inspiring ideas for incorporating these flavorful additions into your everyday cooking. Prepare to become a caramelized onion connoisseur!
Essential Tools and Ingredients for Perfect Caramelized Onions
Achieving perfectly caramelized onions is a straightforward process, but having the right tools and quality ingredients makes all the difference. Here’s what you’ll need to get started:
- Large Yellow Onions: While you can technically caramelize any onion variety, classic yellow onions are highly recommended for their ideal balance of natural sugars and moisture content. They caramelize beautifully, yielding that signature golden-brown hue and sweet flavor. Sweet onions (like Vidalia or Walla Walla) can also be used, though they might caramelize a bit faster due to their higher sugar content. Red onions work too, offering a slightly different, often vibrant, result.
- Sharp Knife: A keen blade is crucial for uniform slicing. Consistent thickness ensures that all your onion pieces cook evenly, preventing some from burning while others remain undercooked.
- Large Skillet or Heavy-Bottomed Pot: A spacious cooking vessel is essential to avoid overcrowding the onions, which can lead to steaming instead of caramelizing. Stainless steel or cast iron skillets are ideal as they retain heat exceptionally well and allow for the development of a rich “fond” (the browned bits that stick to the bottom of the pan), which adds immense flavor when deglazed. A Dutch oven also works wonderfully.
- Wooden Spoon or Heatproof Spatula: This will be your primary tool for stirring the onions frequently and scraping up the flavorful fond from the bottom of the pan.
- Butter and Neutral Oil: A combination of unsalted butter and a neutral oil (such as vegetable, canola, or regular olive oil – *not* extra-virgin, which has a lower smoke point) is key. The oil helps to raise the overall smoke point of the fat, preventing the butter from burning before the onions have a chance to soften and brown, while still imparting that delicious buttery flavor.
- Kosher Salt: A pinch of kosher salt at the beginning of the cooking process helps to draw out moisture from the onions, aiding in the “sweating” phase and enhancing their natural flavors as they caramelize.
- A Splash of Liquid for Deglazing: This is an optional but highly recommended step to unlock extra flavor. Water, vegetable or beef broth/stock, white or red wine, beer, or even brandy can be used. This liquid helps to dissolve the flavorful browned bits (fond) from the bottom of the pan, incorporating them back into the onions.
Step-by-Step Guide to Caramelizing Onions
Mastering caramelized onions is a test of patience, but the rewards are well worth the effort. Follow these steps for consistently delicious results:
Step 1: Prepare and Slice the Onions with Precision
Proper preparation is the first secret to perfectly caramelized onions. Begin by halving each onion lengthwise, from the root end to the tip. Next, carefully cut out the tough root end by trimming a “V” shape around the solid white area. This helps to keep the onion layers intact initially while removing the fibrous core. Peel and discard the outer papery layers of the onion.
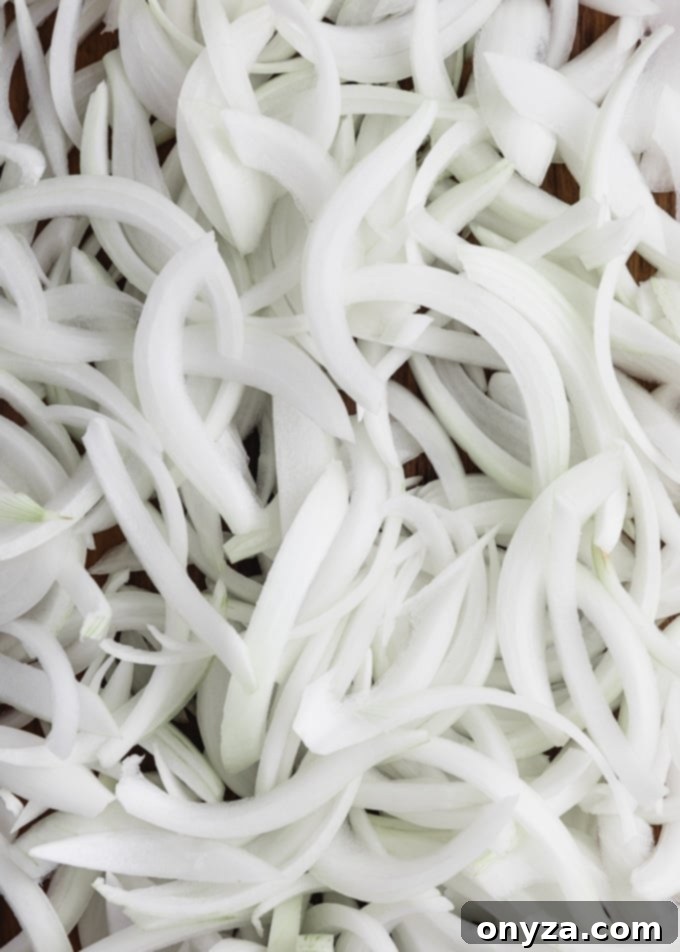
For consistent caramelization, slice the onion halves lengthwise into uniform 1/4-inch thick wedges. As you slice, ensure the angle of your knife follows the natural curve of the onion, creating long, elegant strands. Once sliced, gently separate the layers of onion. Uniformity in thickness is paramount; unevenly cut onions will cook at different rates, leading to some pieces being burnt while others are still raw.
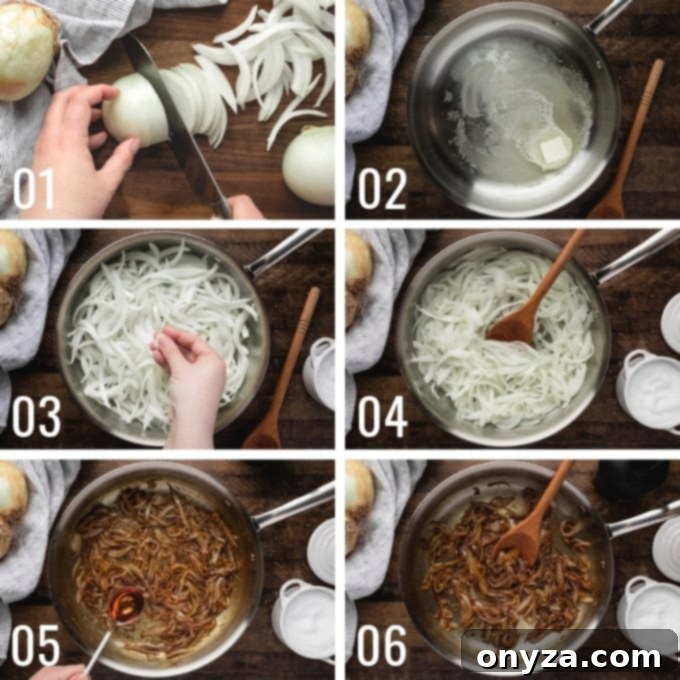
Alternatively, you can create a half-moon shape by first halving the onions lengthwise, then placing the cut side down and slicing them crosswise into 1/4-inch thick pieces. Whichever slicing method you choose, remember that consistency is key for even cooking. (Refer to Photo 01 for visual guidance on slicing.)
Step 2: Sweat the Onions to Release Moisture
This initial cooking phase is crucial for softening the onions and setting the stage for caramelization. In your chosen large skillet or heavy-bottomed pot, melt 1 tablespoon of neutral oil and 1 tablespoon of unsalted butter over medium-high heat. Wait until the foaming from the butter subsides, indicating the fats are properly heated. Add your sliced onions to the pan along with a generous pinch of kosher salt. Stir the onions well to ensure they are thoroughly coated with the oil and butter. (See Photos 02 and 03.)
Cook the onions over medium-high heat, stirring occasionally, for about 5-8 minutes. During this “sweating” process, the onions will begin to soften significantly and release their natural liquids. You’ll notice them becoming translucent and shrinking in volume. This step helps to break down the onion’s cell walls, making them more pliable and ready for the slow browning process ahead. (Observe Photo 04 for the appearance of sweated onions.)
Step 3: Caramelize Low and Slow for Deep Flavor
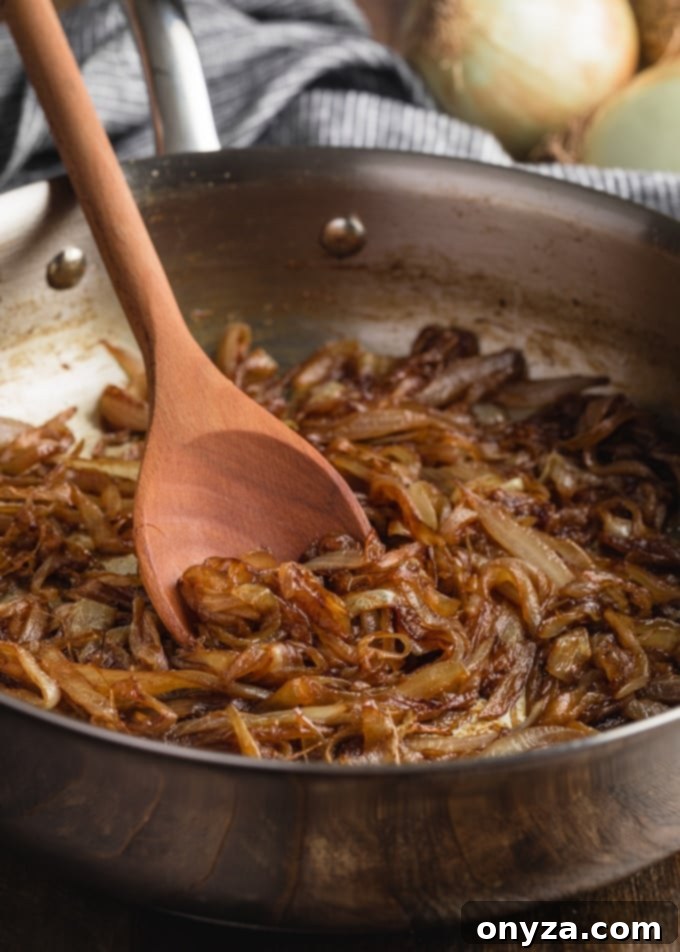
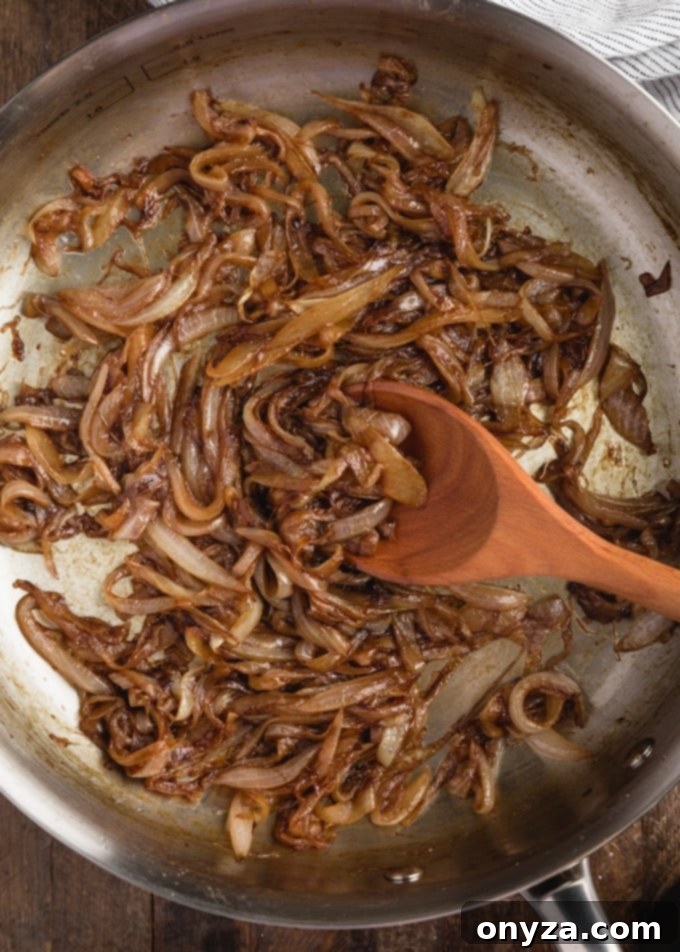
Now comes the heart of the process – true caramelization. Reduce the heat to medium-low. This is where patience is key; rush this stage, and you risk burning the onions instead of caramelizing them. Continue to cook, stirring frequently (every few minutes), for approximately 30-40 minutes longer. The onions will gradually transform, slowly transitioning from soft and translucent to a beautiful golden brown, developing a profound sweetness and rich, nutty flavor. The Maillard reaction, a complex chemical process involving amino acids and sugars, is at play here, creating hundreds of new flavor compounds and the desired deep color. The frequent stirring prevents sticking and ensures even browning.
Once the onions have reached your desired level of deep golden-brown caramelization, deglaze the pan. Add 1 tablespoon of your chosen liquid (water, broth, wine, beer, or brandy) to the hot pan. Use your wooden spoon to scrape up all the flavorful browned bits (the fond) that have accumulated on the bottom of the skillet. Stir for an additional minute, allowing the liquid to evaporate and the fond to mix thoroughly with the onions, enriching their flavor even further. This step is essential for capturing all the deliciousness developed during cooking. (Follow Photos 05-06 for visual cues during this critical phase.)
Make-Ahead and Storage: Enjoying Caramelized Onions Anytime
Caramelized onions are an excellent ingredient to prepare in advance, making meal prep significantly easier and ensuring you always have this flavor booster on hand. Their rich, sweet, and savory profile develops over time, and they store remarkably well, allowing you to enjoy them days or even months after cooking.
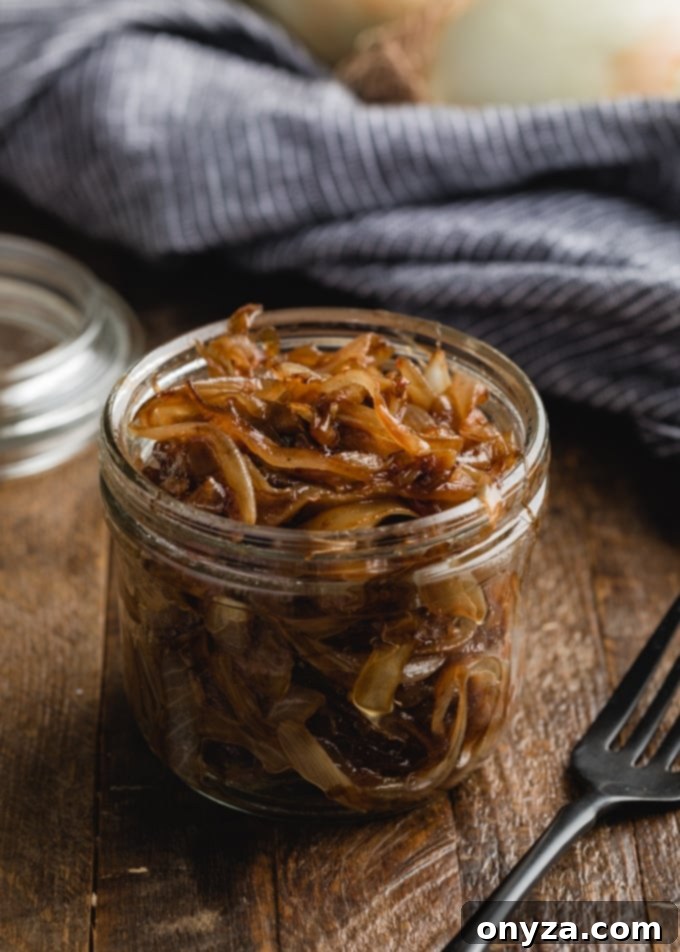
To store caramelized onions in the refrigerator, simply allow them to cool completely to room temperature. Once cooled, transfer them to an airtight container. Properly stored, caramelized onions will keep beautifully for 3-4 days in the refrigerator. This makes them perfect for prepping on a Sunday to use in various dishes throughout the week.
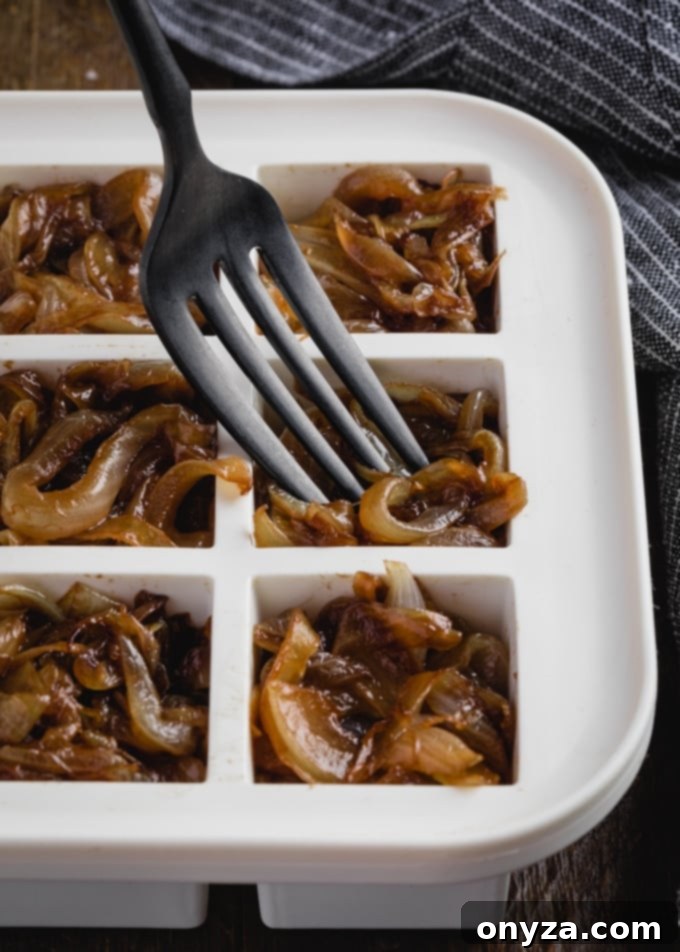
For longer-term storage, caramelized onions are also freezer-friendly. Freezing them in individual portions is a fantastic way to ensure you always have a spoonful or a cup ready whenever a recipe calls for them. When frozen, they will last for approximately 3 months. Before using, always check for any signs of freezer burn, which can indicate a loss of quality, though they will still be safe to eat.
Smart Freezing Tip: To maximize convenience, I highly recommend portioning your caramelized onions before freezing. Silicone ice cube trays and muffin tins are perfect for this. For smaller amounts, like a tablespoon or two, use ice cube trays. For larger portions, such as a quarter or half cup, muffin tins work wonderfully. Simply spoon the cooled caramelized onions into the molds. Once they are fully frozen and solid, pop them out of the trays and transfer them to labeled freezer-safe bags or containers. This method allows you to grab exactly the amount you need for any recipe without having to thaw an entire batch, significantly reducing waste and prep time. Imagine reaching for a pre-portioned block of sweet, jammy onions to instantly elevate your weekday meals!
Top Tips for Flawless Caramelized Onions Every Time
Achieving truly exceptional caramelized onions is a craft, and these expert tips will help you perfect your technique and ensure delicious results every time:
- Slice Uniformly, Not Too Thinly: The consistency of your onion slices is paramount. Aim for approximately 1/4-inch thickness. Slicing them too thinly (paper-thin) makes them prone to burning quickly and unevenly, while overly thick slices will take an excessively long time to cook through. Uniform thickness guarantees that every piece caramelizes at roughly the same rate, resulting in a consistent texture and color throughout your batch. Take the time to slice carefully; it makes a huge difference in the final outcome.
- Monitor and Stir Constantly Towards the End: As the onions approach their deep golden-brown stage, they can quickly transition from perfectly caramelized to burnt. Their natural sugars become more concentrated, making them susceptible to scorching. Therefore, it’s crucial to watch them carefully during the last 10-15 minutes of cooking and stir very frequently, almost continuously. This vigilance ensures an even caramelization and prevents any part from burning, preserving their sweet, complex flavor.
- Never Skip Deglazing the Pan: Deglazing is a simple yet powerful step that adds incredible depth of flavor and color to your caramelized onions. The browned bits, or “fond,” stuck to the bottom of your pan are packed with concentrated flavor compounds. Adding a splash of liquid (water, broth, wine, etc.) and scraping these bits off allows them to dissolve and reincorporate into the onions. This process not only prevents waste of flavor but also gives your onions an even richer hue and a more robust taste profile.
- Patience is Your Best Ingredient – Don’t Rush It! The hallmark of truly great caramelized onions is the result of a “low and slow” cooking process. While it might be tempting to crank up the heat to speed things along, this is the quickest way to end up with burnt, bitter onions rather than sweet, jammy ones. Caramelization is a gradual process where the natural sugars slowly transform. Allow at least 45-60 minutes (sometimes more, depending on quantity) over medium-low heat. Embrace the journey; the delicious outcome is a testament to your patience.
- Customize Flavors for Your Dish: Caramelized onions are incredibly versatile and can be subtly flavored to complement the dish they will accompany. Consider the liquid you use for deglazing: for a burger topping, a splash of beer adds a fantastic malty note. When pairing with chicken or richer meats, a dry white wine or even a hint of Madeira wine can add sophisticated depth. For a more pungent, slightly acidic finish perfect for crostini or goat cheese tarts, stir in a tablespoon of high-quality balsamic vinegar during the last minute of cooking. You can also incorporate freshly chopped herbs like thyme, rosemary, or sage during the final minutes to infuse additional aromatic layers.
Delicious Ways to Use Caramelized Onions
Once you’ve mastered the art of making caramelized onions, a world of culinary possibilities opens up. Their sweet, savory, and umami-rich flavor profile makes them an incredibly versatile ingredient that can elevate almost any dish. Here are some of our favorite ways to incorporate these golden gems into your cooking:
- Burgers and Sandwiches: Elevate your ordinary burger to gourmet status with a generous spoonful of caramelized onions. They pair exceptionally well with sharp cheeses like blue cheese, Gruyère, or aged cheddar. Similarly, they are an absolute must-have on a pan-seared steak sandwich, adding a layer of sophisticated sweetness that cuts through the richness of the meat.
- Savory Tarts and Quiches: Fold caramelized onions into quiche fillings or use them as a base for savory tarts and galettes. Their sweetness balances the richness of eggs and cheese, creating a harmonious and deeply satisfying bite.
- Pasta and Risotto: Stir caramelized onions into creamy pasta sauces or risottos for an instant boost of complex flavor. They add a luxurious depth that can transform simple dishes into something extraordinary. Imagine a creamy mushroom risotto enriched with sweet caramelized onions!
- Flatbreads and Pizzas: Use caramelized onions as a sophisticated topping for flatbreads or pizzas. Pair them with goat cheese, fresh herbs, and a drizzle of balsamic glaze for an appetizer that’s sure to impress.
- Stuffed Meats: Incorporate them into stuffing for chicken breasts, pork loin, or even a holiday turkey. They add moisture, sweetness, and a savory backbone to the filling.
- Soups and Stews: French onion soup, of course, relies entirely on perfectly caramelized onions. But they can also enhance other soups and stews, providing a deep, foundational flavor. Add a spoonful to beef stew, lentil soup, or even a simple vegetable broth for added richness.
- Salads: Don’t limit them to warm dishes! A spoonful of caramelized onions can add a surprising and delightful twist to fresh salads. They are particularly good with peppery greens like baby arugula, where their sweetness provides a lovely counterpoint to the bitterness.
- Omelets and Frittatas: Brighten up your breakfast or brunch by folding caramelized onions into your morning omelet or frittata. They add a gourmet touch with minimal effort.
- Side Dishes: Mix them with roasted vegetables (like Brussels sprouts or green beans), mashed potatoes, or even mac and cheese for an extra layer of flavor.
Try These Delicious Recipes Featuring Caramelized Onions:
- Savory Palmiers with Caramelized Onions and Cheese
- Homemade Spaetzle with Caramelized Onions and Herbs
- Hearty Ham and Swiss Puff Pastry Slab Pie with Caramelized Onions
CRAVING MORE CULINARY INSPIRATION? Be sure to subscribe to our exclusive newsletter for the latest recipes, cooking tips, and seasonal culinary insights delivered straight to your inbox. You can also join our vibrant community on Facebook, Pinterest, and Instagram to stay updated and share your own delicious creations!
Caramelized Onions
10 minutes
50 minutes
1 hour
1 cup onions (approximate)
Ingredients
- 2 large yellow onions (about 1 pound)
- 1 tablespoon neutral oil (such as vegetable, canola, or regular olive)
- 1 tablespoon unsalted butter
- 1 tablespoon water, broth, balsamic vinegar, wine, beer, or liquor (for deglazing)
- kosher salt (to taste)
Instructions
To Slice the Onions
- Halve each onion lengthwise (root end to tip). Cut the root out of each half by trimming a “v” shape around the solid white area. Remove and discard the onion peels.
- Slice the onion halves lengthwise into 1/4-inch thick wedges. The angle of your knife should follow the curve of the onion slice. Separate the layers.
- You can also slice the onions into a half moon shape. Cut the onions in half lengthwise, and then slice them crosswise into 1/4-inch thick slices.
Make sure your onions are sliced as uniformly as possible so they caramelize evenly.
To Caramelize
- Melt butter and oil over medium-high heat until foaming subsides. Add onions and a pinch of kosher salt and cook, stirring, until onions begin to soften and release their liquid, about 5-8 minutes.
- Lower heat to medium-low and cook, stirring often, until onions are soft and deeply golden brown, about 30-40 minutes longer. Deglaze the pan with 1 tablespoon of your liquid of choice and cook, stirring, for an additional 1-2 minutes, scraping any brown bits from the bottom of the pan to incorporate them.
- Use as directed in your recipe. Caramelized onions can be stored, tightly covered, in the refrigerator for 3-4 days, and in the freezer for up to 3 months. (Click here to read about additional storage instructions.)
Notes
Nutrition Estimate
Nutrition information is automatically calculated and should only be used as an approximation. Please consult a professional for precise dietary advice.
Please note that our recipes have been developed using the US Customary measurement system and have not been tested for high altitude/elevation cooking and baking. Adjustments may be necessary depending on your location and specific conditions.
