Welcome to the ultimate guide for crafting mouth-watering Baked Ham and Cheese Sliders! Whether you’re hosting a lively Game Day party, planning a casual get-together, or simply seeking a comforting family meal, these sliders are guaranteed to be a crowd-pleaser. Imagine tender, thinly sliced Black Forest ham, perfectly complemented by a duo of savory cheddar and creamy Swiss cheeses, all nestled within soft, slightly sweet Hawaiian slider buns. Each slider is then generously brushed with a tangy Dijon-mayo spread and a rich, buttery poppy seed sauce before being baked to golden perfection. The result? A irresistibly toasty, cheesy, and savory treat that will quickly become the MVP of any spread.
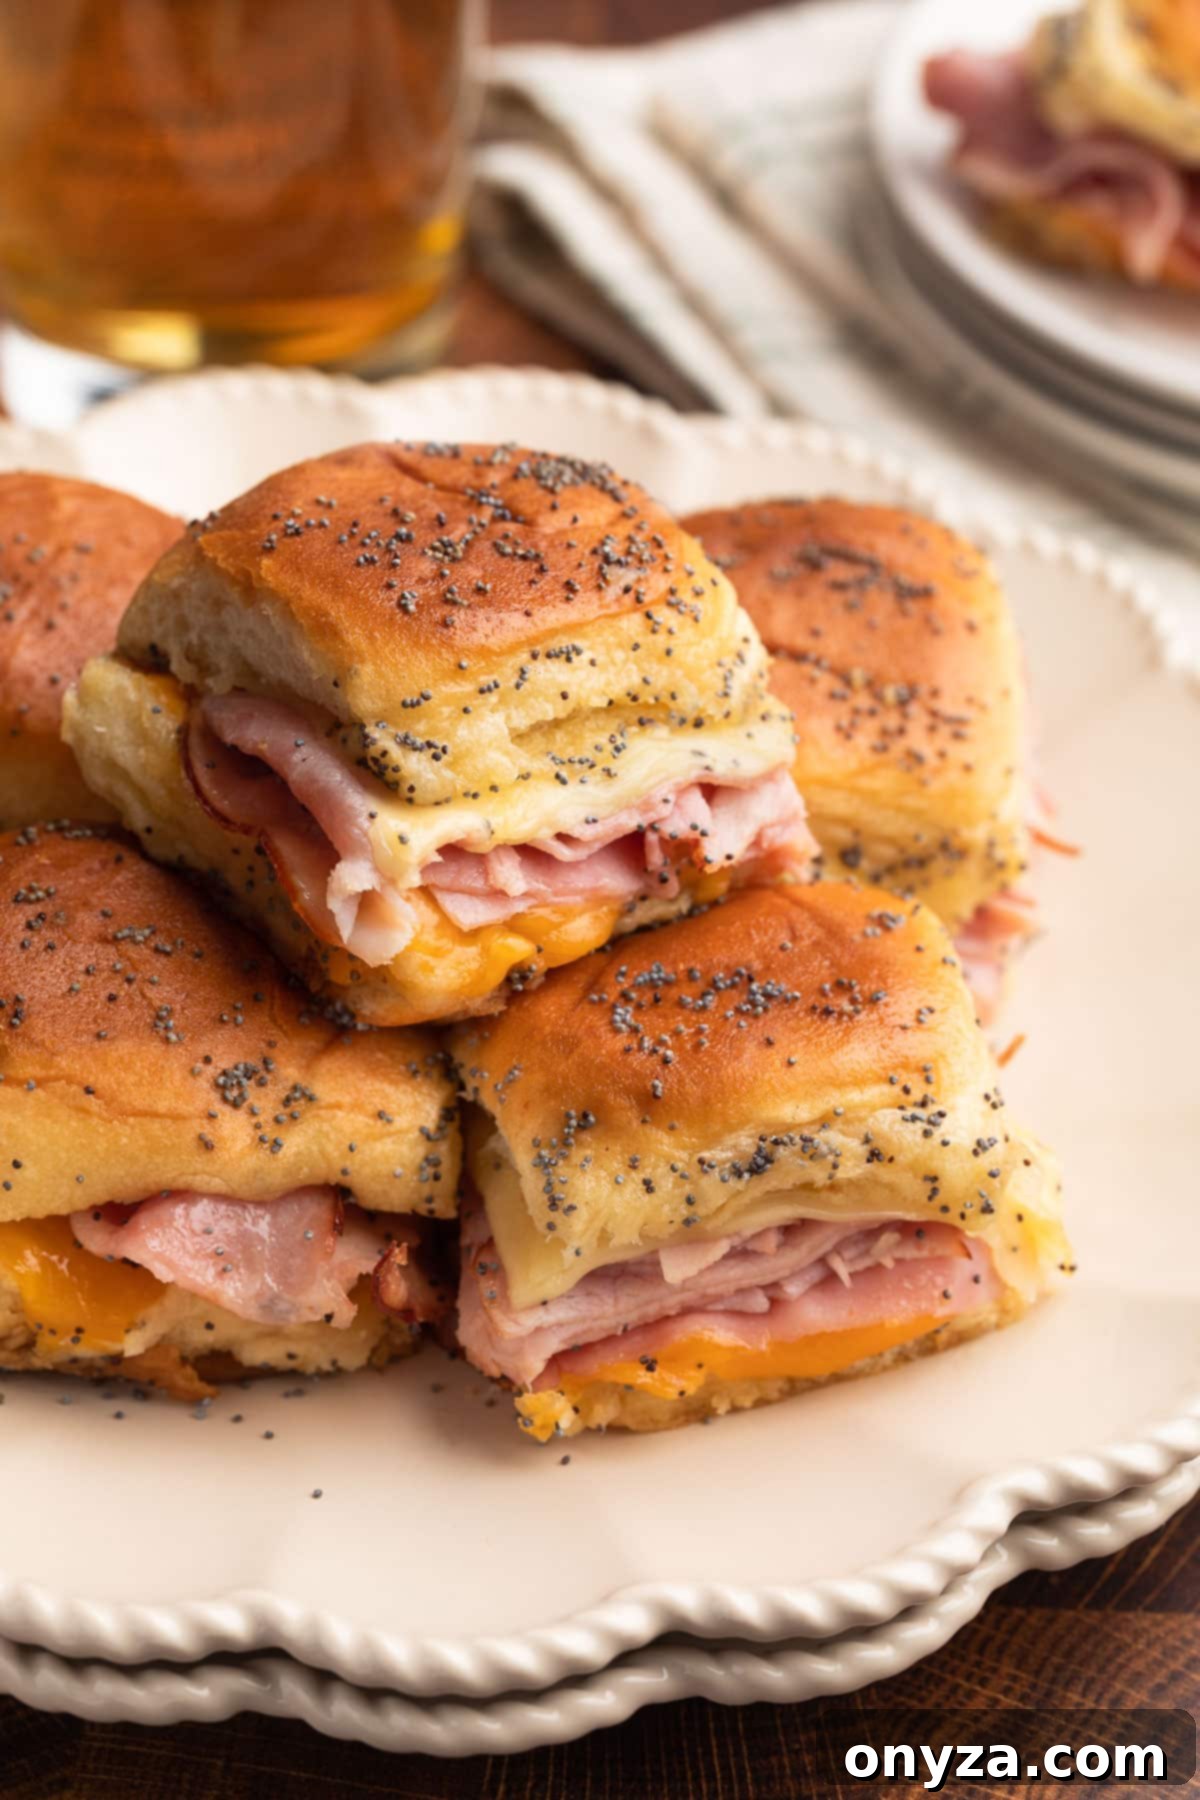
Why These Baked Ham and Cheese Sliders Are an Absolute Must-Make
These aren’t just any sliders; they’re a culinary experience designed for maximum enjoyment with minimal effort. Here’s a closer look at what makes this recipe truly stand out:
- Effortlessly Simple to Prepare: One of the greatest virtues of these ham and cheese sliders is their straightforward preparation. Requiring just a handful of readily available ingredients, you might already have most of them in your pantry and fridge. This recipe is a fantastic solution for those busy weeknights when you crave a warm, homemade meal but find yourself short on time. It’s also an excellent way to utilize leftover deli meats, ensuring nothing goes to waste.
- Perfect for Any Gathering: Planning to feed a hungry crowd for a big game, a family reunion, or just a relaxed evening with friends? These sliders are your go-to. They are universally loved and incredibly easy to scale up for larger batches. Watch them disappear quickly as guests flock to grab these savory bites—they’re the quintessential party food that always leaves everyone satisfied.
- Infinitely Customizable: While the classic ham and cheese combination is undeniably delicious, this recipe serves as a versatile canvas for your culinary creativity. Feel free to swap out Black Forest ham for smoked turkey, honey ham, or even a spicy capicola for a kick. Experiment with different cheeses like zesty pepper jack, mild havarti, or smoky gouda. The Dijon-mayo spread can also be customized with a touch of honey for sweetness or a dash of hot sauce for extra heat. The possibilities are endless, allowing you to tailor them perfectly to your taste preferences.
- Explosive Flavor in Every Bite: Prepare for a symphony of flavors and textures. The harmonious blend of savory ham, rich melted cheddar and Swiss cheeses, the sharp tang of Dijon mustard, and the unique, nutty crunch of the poppy seed butter sauce creates an irresistible combination. Baked until golden brown and bubbly, these sliders offer the ultimate comfort food experience, delivering pure satisfaction with every bite.
Craving more delicious slider ideas? Don’t miss our Reuben Sliders, featuring tender corned beef, Swiss, sauerkraut, and Russian dressing! Or, try the savory French Dip Sliders, served with succulent roast beef and caramelized onions, perfect for dipping au jus!

Essential Ingredients for Your Baked Ham and Cheese Sliders
Crafting the perfect slider begins with selecting quality ingredients. Here’s a breakdown of what you’ll need and why each component is crucial:
- King’s Hawaiian Rolls: These iconic rolls are the heart of our sliders. Their signature slightly sweet flavor and incredibly soft, fluffy texture provide the ideal foundation, soaking up the buttery sauce beautifully. For this recipe, a 12-count package of Original Sweet Hawaiian Rolls is recommended. If you prefer a less sweet profile, the King’s Hawaiian Savory Butter Rolls make an excellent substitute.
- Ham: For an exquisite flavor, thinly sliced Black Forest ham from your local deli counter is highly recommended. Its smoky, slightly sweet notes pair wonderfully with the cheeses. However, feel free to explore other varieties like classic Virginia ham, maple or honey-glazed ham, or even a spicier hot ham if you desire an extra kick. This recipe is also a fantastic way to repurpose leftover holiday ham, such as a Honey Mustard Glazed Ham.
- Cheese: A blend of sharp cheddar and creamy Swiss cheese offers a delightful contrast in flavor and texture, melting beautifully to create a gooey, satisfying interior. If you have a preference, you can use just one type of cheese, or get adventurous with other melty options like spicy pepper jack, mild havarti, or rich gouda. Ask your deli to slice the cheese thinly for optimal melting.
- Mayonnaise: A high-quality mayonnaise forms the base of our irresistible sandwich spread. Opt for a reputable brand like Hellmann’s Real Mayonnaise or Duke’s Real Mayonnaise for the best flavor and creamy texture.
- Dijon Mustard: This adds a crucial tangy and slightly spicy depth to the sliders. Classic options such as Maille Dijon Originale or Edmond Fallot Moutarde de Dijon are excellent choices. For a sweeter variation on the spread, consider using Honey Dijon.
- Butter: Essential for the rich, flavorful sauce that glazes the tops of the sliders. Unsalted butter is preferred, allowing you to control the seasoning precisely. A pinch of kosher salt can be added later if needed, considering the varying saltiness of different ham types.
- Poppy Seeds: These tiny seeds are more than just a garnish. They contribute a subtle nutty flavor and a delightful, signature crunch to the slider buns, reminiscent of a classic deli roll.
- Worcestershire Sauce: A small amount of Worcestershire sauce works wonders in deepening the savory profile of the butter sauce, adding complex salty, tangy, and umami notes that elevate the overall flavor.
- Onion Powder: This ingredient provides a sweet, savory onion essence to the butter sauce without the texture of fresh onion. For those who enjoy a bit more texture, a small amount of dried, minced onion can be substituted.

Crafting Your Baked Ham and Cheese Sliders: A Step-by-Step Guide
Step 1: Preparing the Rolls for Perfection
Begin by carefully slicing your King’s Hawaiian rolls horizontally through the middle, separating the tops from the bottoms. For the cleanest cut, a sharp serrated knife is indispensable; a Mercer Culinary Millenia 10-inch Bread Knife is highly recommended. The goal is for the tops to remain connected in a single layer, but if a roll or two separates, don’t fret. Simply nestle them back into place when you reassemble the sliders; the melted cheese will act as a delicious adhesive.

To prevent your sliders from becoming soggy and ensure a delightful texture, we’ll lightly toast the cut sides of the rolls before adding the fillings. Place both halves of the rolls, cut-side up, on a baking sheet. Preheat your oven’s broiler and position the oven rack on the second slot from the top. Broil the rolls for a mere 1 to 2 minutes, just until they achieve a light golden hue.
A crucial tip: Maintain vigilance and do not leave the oven unattended! Broiling is a swift process, and rolls can go from perfectly toasted to burnt in a matter of seconds. Stay close to prevent any culinary mishaps.

Step 2: Preparing Your Baking Dish
Lightly coat a rectangular glass or ceramic baking dish with cooking spray. Gently place the toasted bottom halves of the rolls into the prepared dish. An ideal dish size would be at least 10.5×7.5 inches, though a standard 13×9-inch dish also works wonderfully for larger batches. The baking dish showcased in this article is a beloved Emile Henry ceramic baker, similar to the elegant Emile Henry Ultime Collection Rectangular Baking Dish in white.
Important Baking Note: If you are using a baking pan with a darker finish, it’s advisable to reduce your oven temperature by 25 degrees Fahrenheit when baking. Darker pans tend to absorb more heat, which can lead to over-browning or even burning the bottom of your sliders.
Step 3: Crafting the Dijon-Mayo Spread and Assembling the Sliders
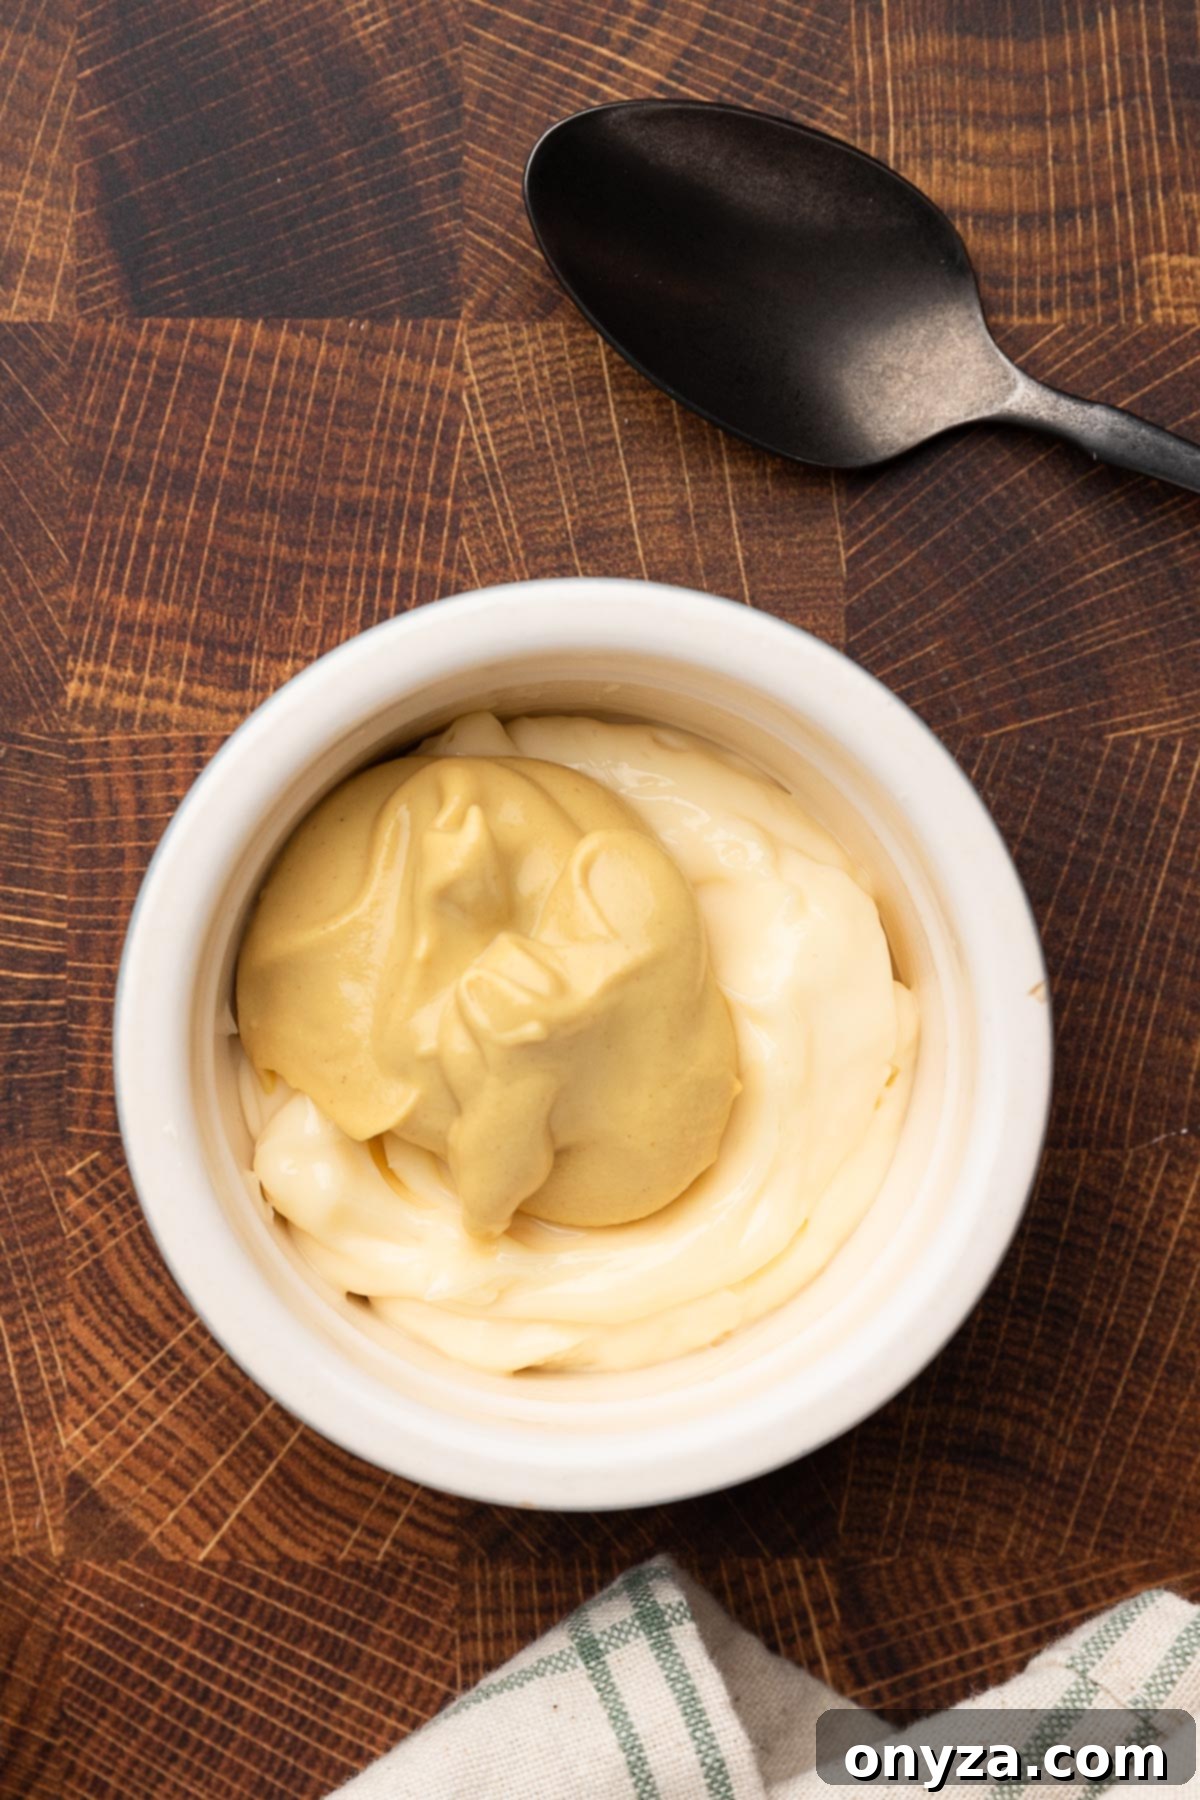
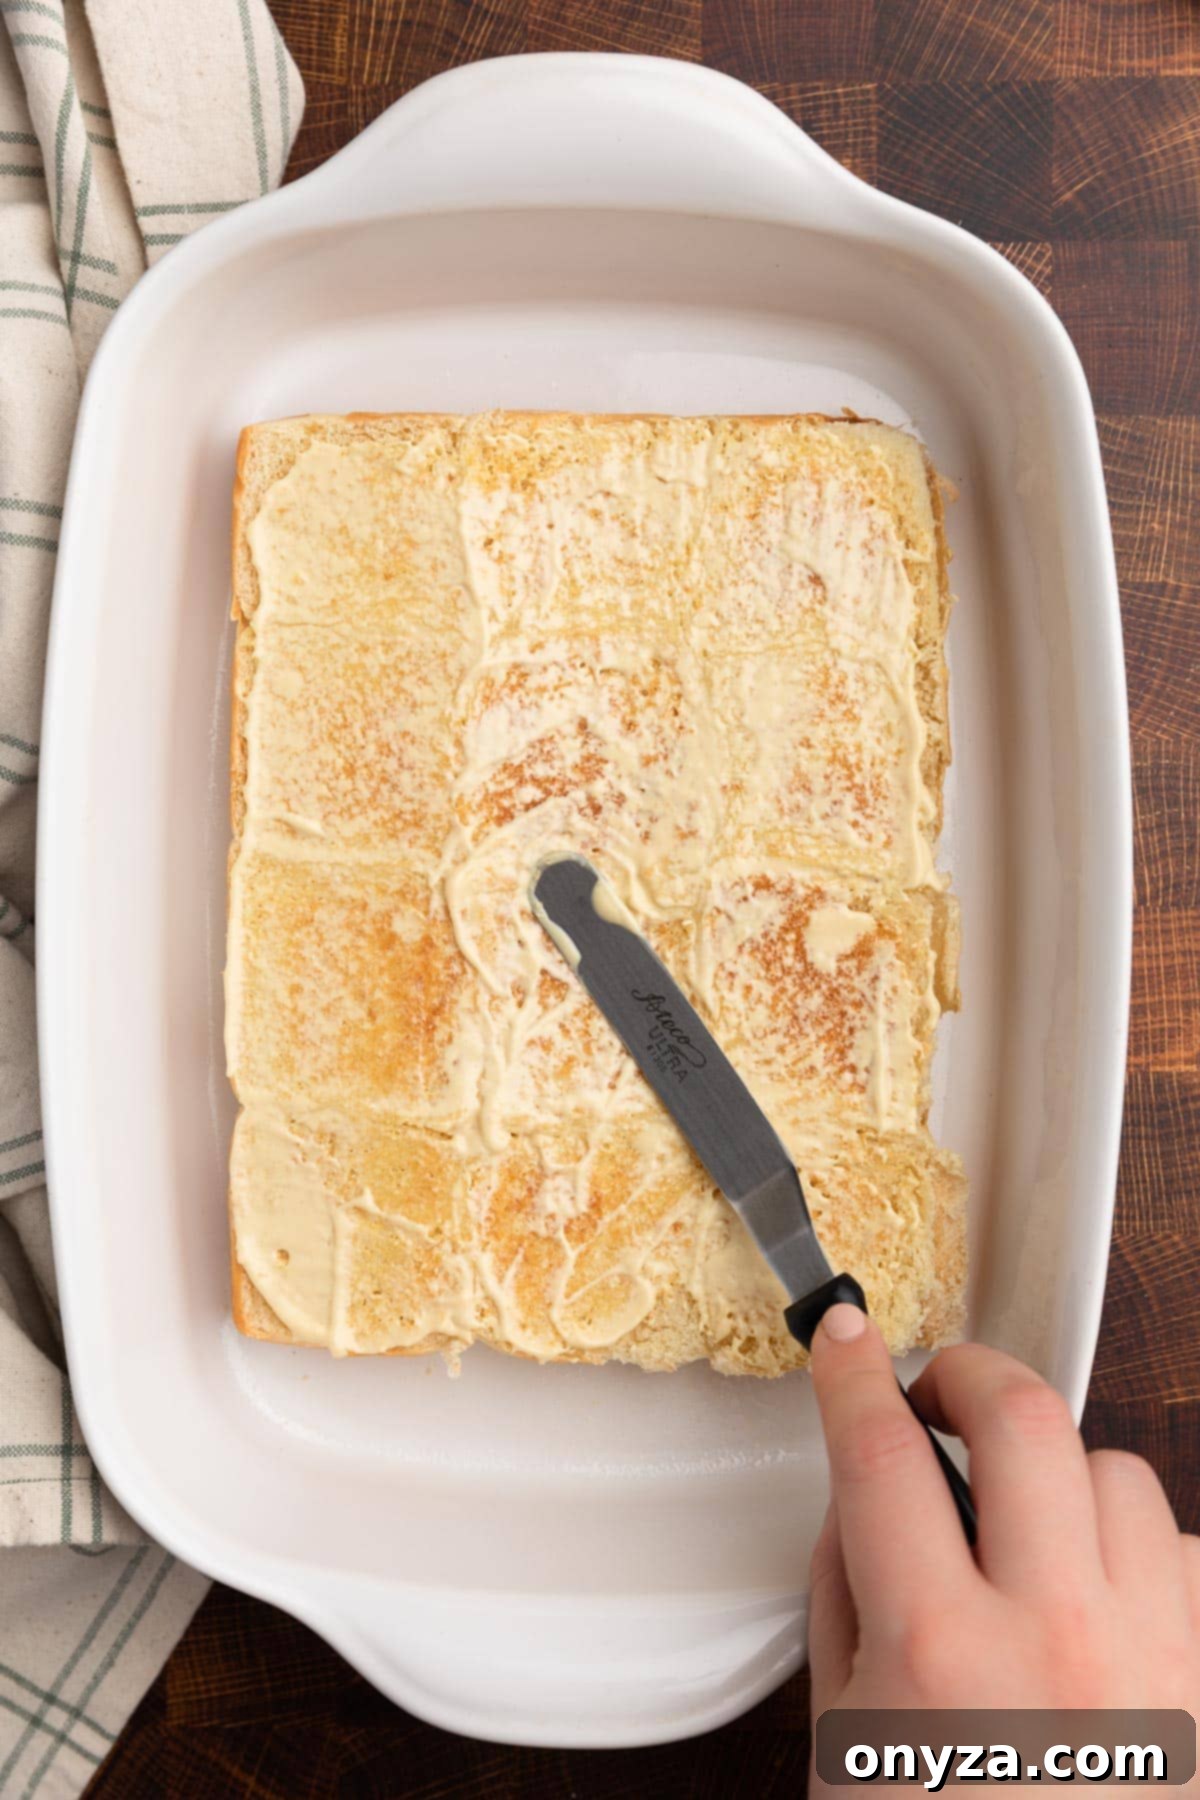
In a small bowl, whisk together the mayonnaise and Dijon mustard to create your flavorful spread. Spread a little more than half of this mixture evenly over the toasted bottom halves of the rolls nestled in your baking dish.
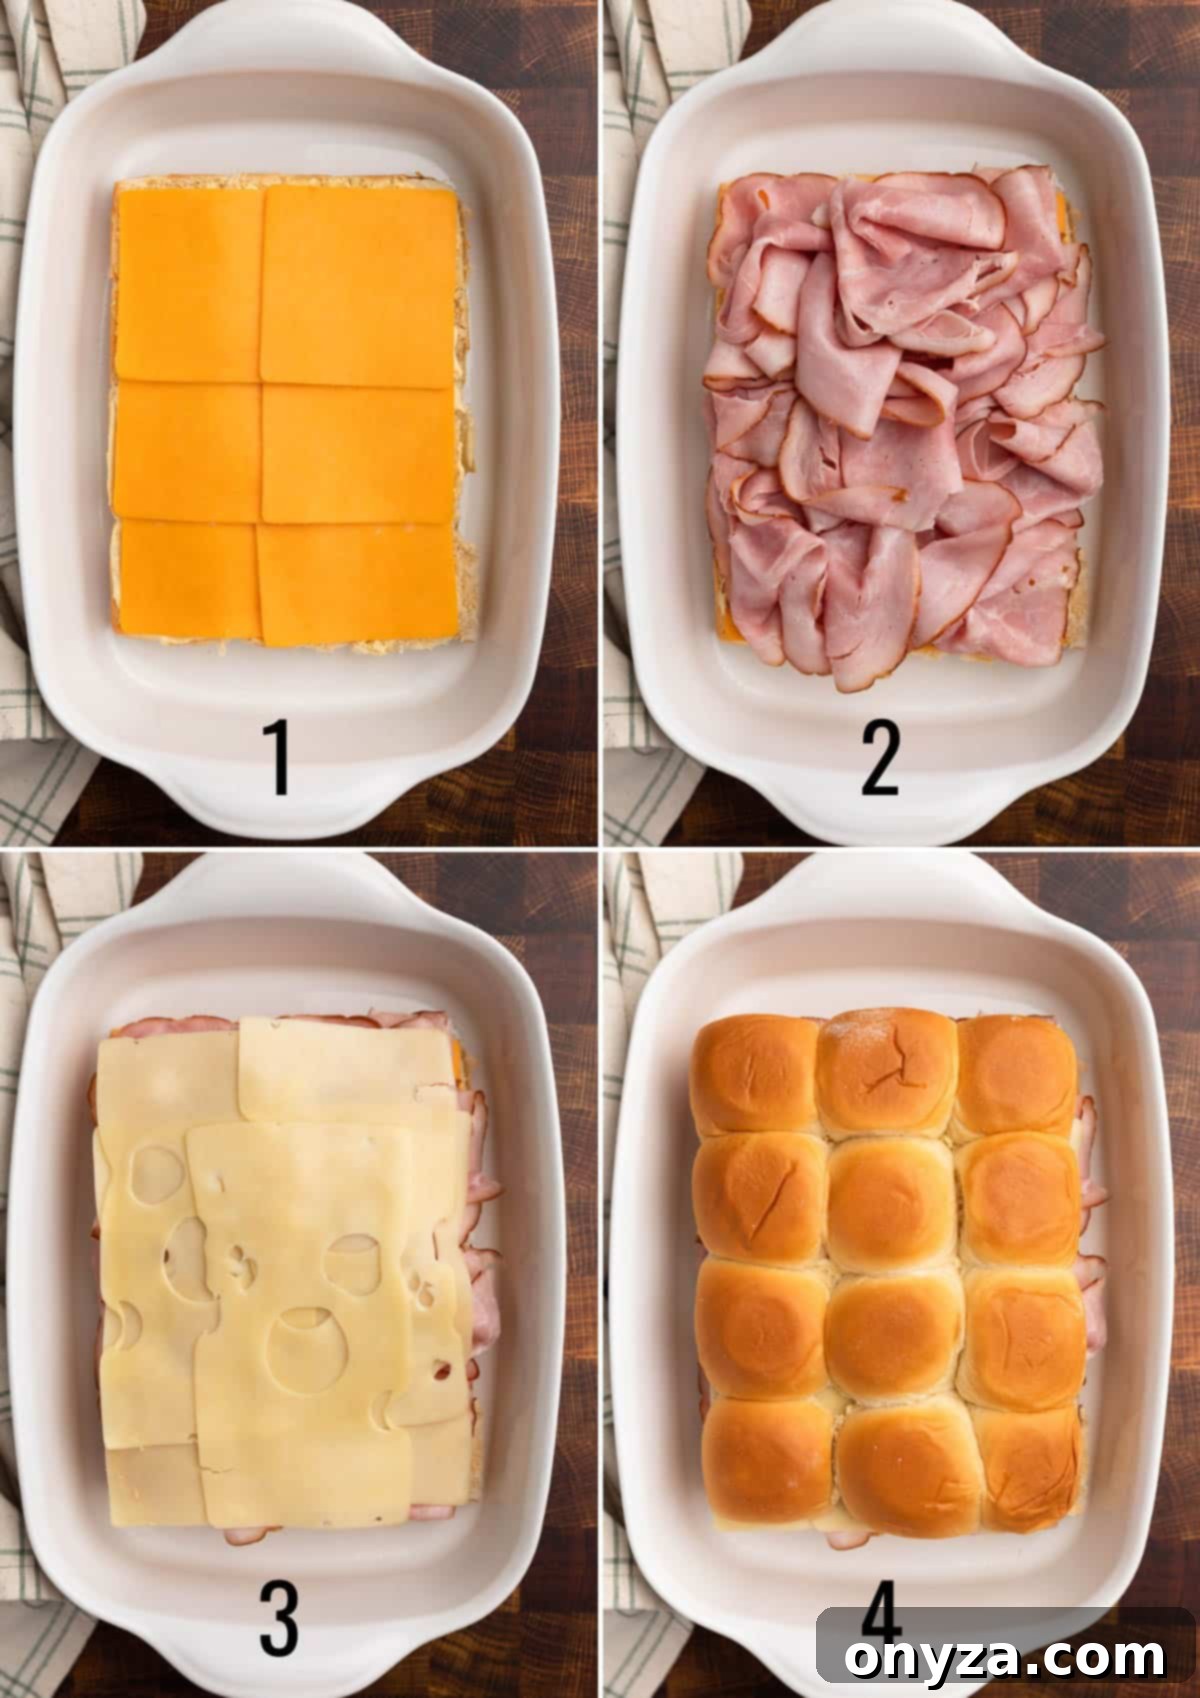
Now, it’s time to build your sliders! Layer the cheddar cheese slices generously over the Dijon-mayo spread. Follow this with a layer of your thinly sliced ham, and then top with the Swiss cheese. On the toasted side of the top halves of the rolls, spread the remaining Dijon-mayo mixture in a thin layer, and then carefully place these tops over the Swiss cheese layer, completing your slider sandwiches.
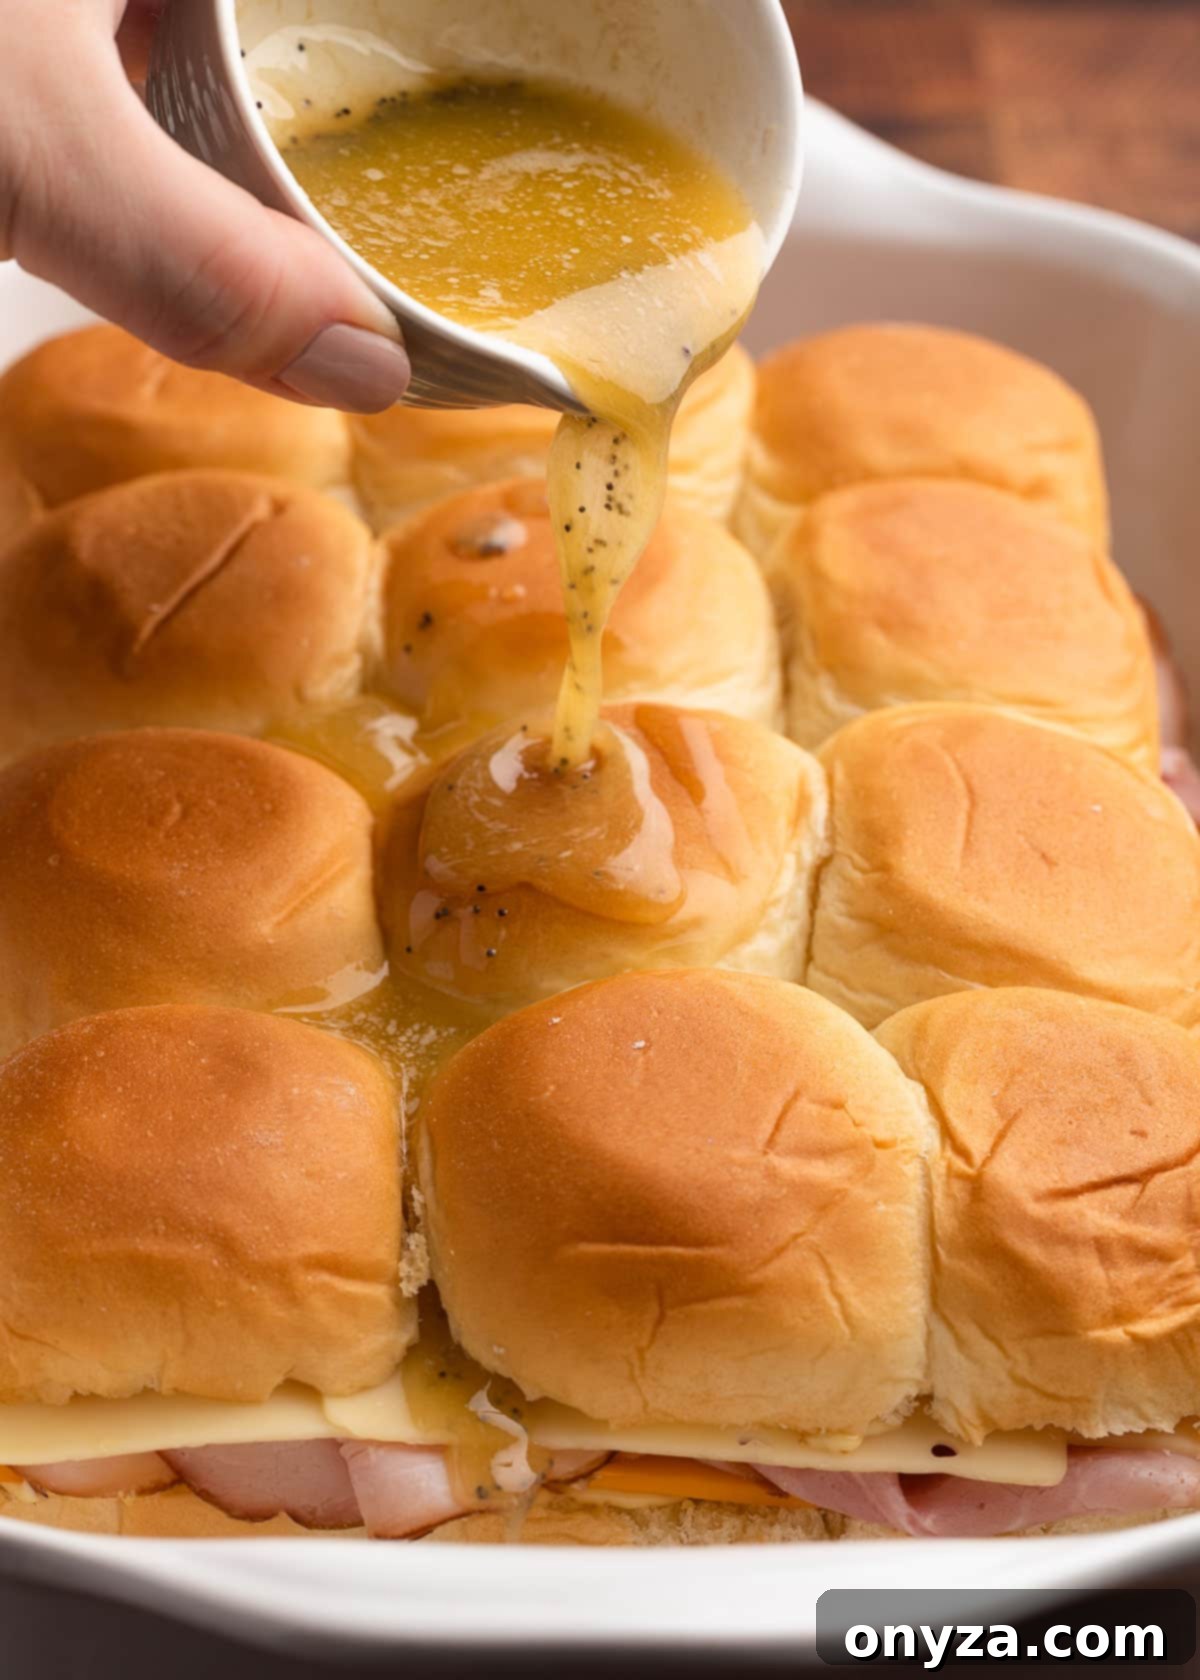
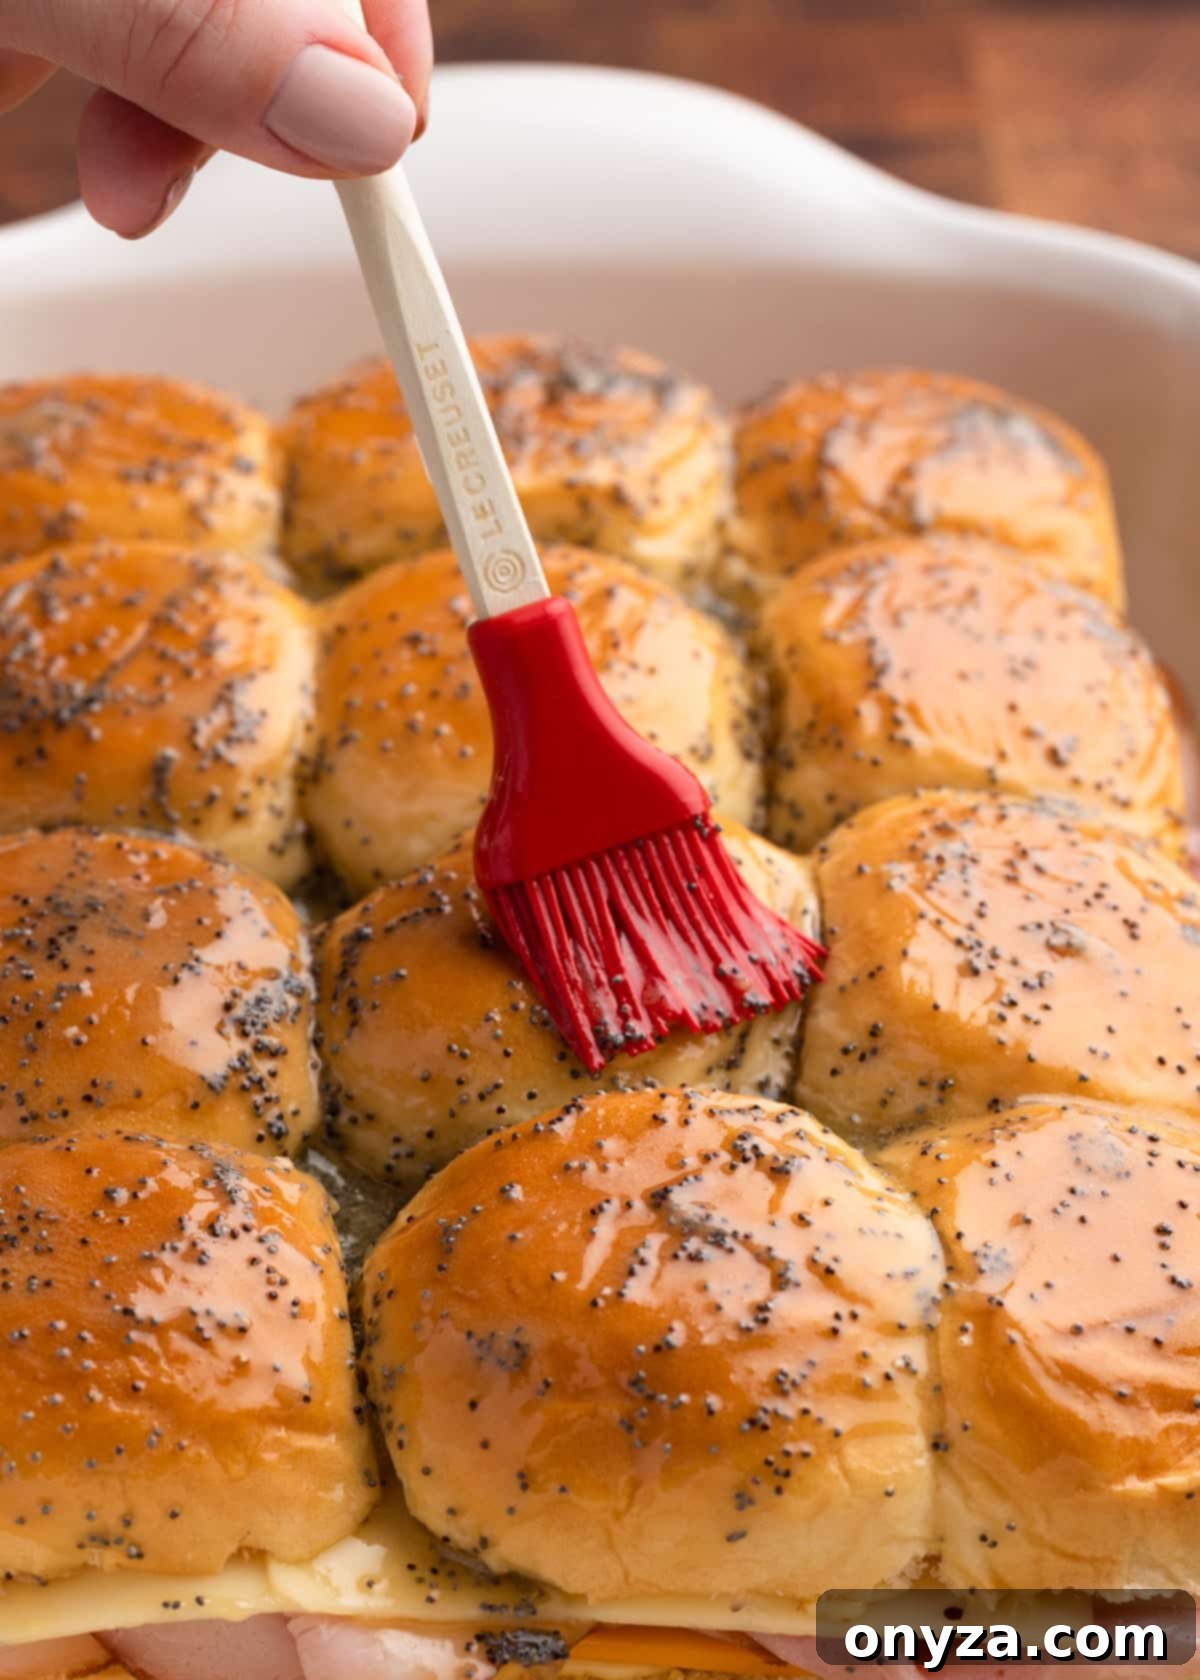
For the glorious butter sauce, combine the melted butter, Worcestershire sauce, poppy seeds, onion powder, and an optional pinch of kosher salt in a small bowl. Stir until well combined. Drizzle this aromatic mixture generously over the tops of the assembled buns, allowing it to seep into all the delightful crevices. A small basting brush or pastry brush is ideal for ensuring the poppy seeds and buttery sauce are distributed uniformly across the tops and sides of the rolls. Don’t worry if it looks like a lot of sauce; the bread will absorb it beautifully, creating perfectly buttery and flavorful sliders during baking.
Step 4: Baking Your Sliders to Golden Perfection
To achieve sliders that are wonderfully warm and gooey on the inside with perfectly crisp, golden-brown tops, we employ a simple yet effective two-stage baking method. This ensures even heating and ideal texture.
First, cover your pan of assembled sliders tightly with aluminum foil. Bake them in a preheated oven at 350 degrees Fahrenheit (175 degrees Celsius) for 20 minutes. The foil acts as an insulator, allowing the layers within the sliders to heat evenly and the cheeses to melt beautifully without prematurely browning the buns.
After 20 minutes, remove the foil and return the sliders to the oven for an additional 5 to 10 minutes. During this final stage, keep a close eye on them, as oven temperatures and pan types can vary. Your goal is that irresistible golden-brown finish on the rolls, indicating a crispy exterior and perfectly melted, bubbly cheese within.
Serving Your Delicious Ham and Cheese Sliders
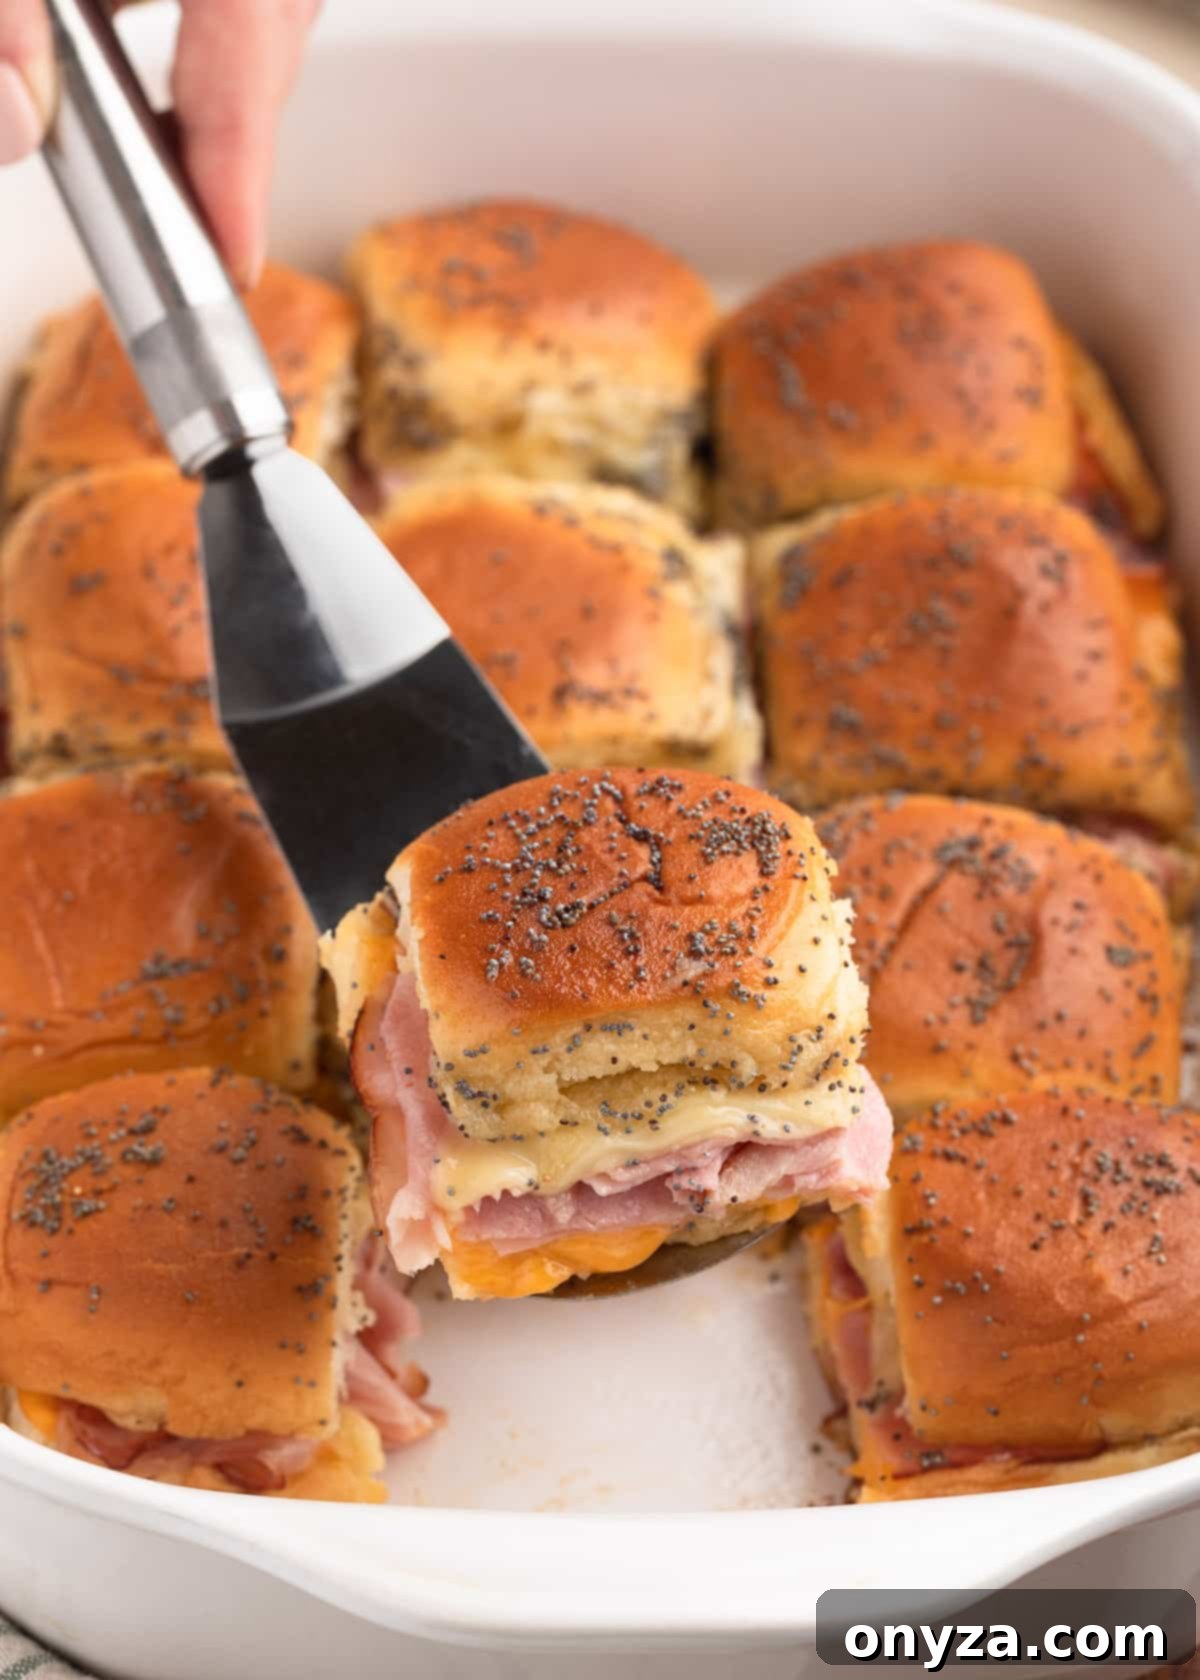
Once baked, allow the sliders to rest for a couple of minutes before slicing them into individual servings. This brief resting period helps the internal structure set, ensuring cleaner cuts. The same serrated bread knife used for slicing the buns works perfectly here. You can slice them directly in the baking pan or carefully transfer the entire slab to a cutting board. A cake lifter can be incredibly helpful for moving the baked sliders intact to a board.
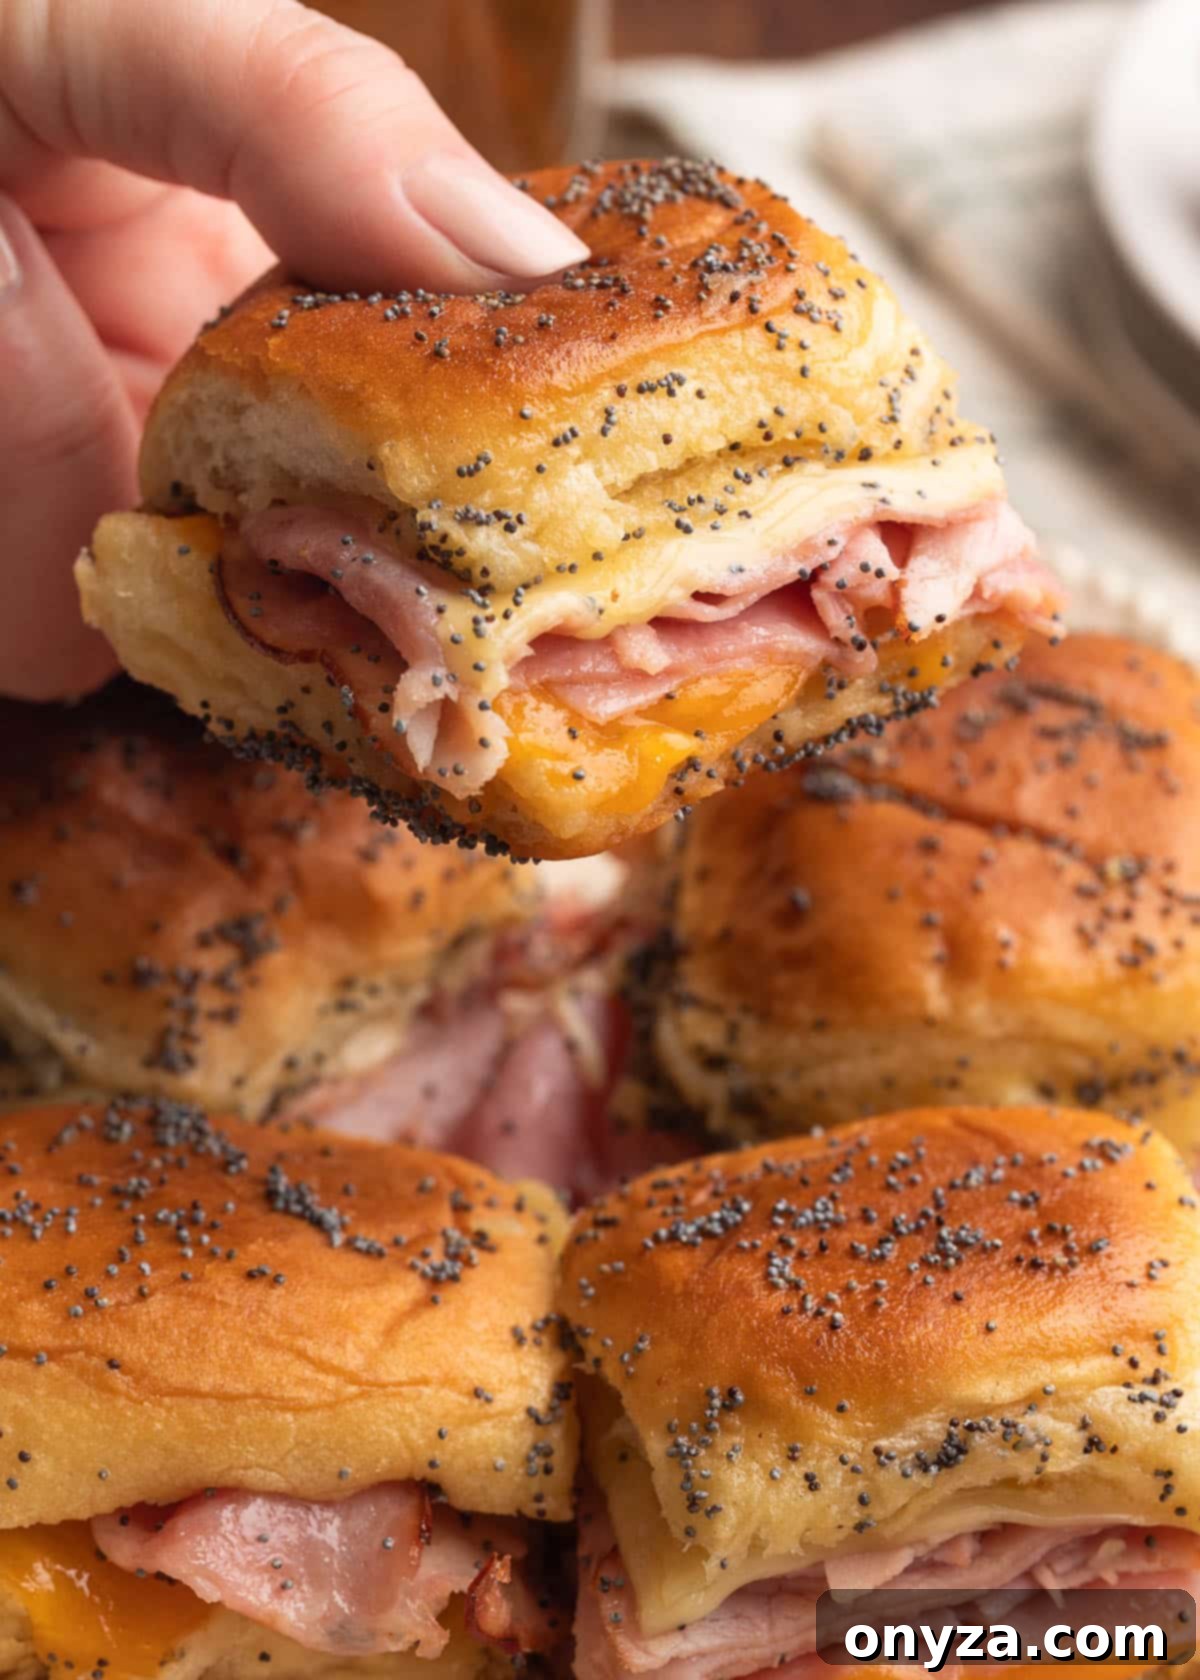
These Baked Ham and Cheese Sliders are versatile enough to be served either as a delightful appetizer or a satisfying main course. For a hearty meal, classic pairings include crunchy potato chips, crispy french fries, creamy deli-style potato salad, or a refreshing Homemade Cole Slaw. If you prefer a lighter accompaniment, a crisp green salad provides a perfect balance to the richness of the sliders.
Remember, these sliders are at their absolute best when enjoyed warm, so encourage your guests to dive in as soon as they’re ready!
Frequently Asked Questions (FAQ)
Here are answers to some common questions about making and serving these delightful sliders:
- Can I prepare these sliders in advance? Absolutely! These sliders can be assembled a few hours ahead of time, minus the butter sauce. After assembly, cover them and store in the refrigerator. Before baking, allow them to sit at room temperature for about 20 minutes to take off the chill. Then, brush with the butter sauce and proceed with the baking instructions as written for the freshest taste and texture.
- How many people does this recipe serve? The serving size depends on the occasion and your guests’ appetites. If serving as a main dish, plan for approximately 3 sliders per person, or 4 for those with heartier appetites. If these are part of a larger Game Day spread with other appetizers, dips, and snacks, 1 to 2 sliders per person should suffice.
- Can I substitute other deli meats for the ham? Yes, you can certainly swap out the ham. For the best flavor and texture in baked sliders, we recommend choosing other smoked deli meats like thinly sliced smoked turkey breast or smoked chicken breast. These options will hold up well and complement the other flavors.
- How should I store and reheat leftovers? Leftover sliders can be stored in an airtight container in the refrigerator for 2-3 days. While they are undeniably best enjoyed fresh, you can reheat them. Place them in a foil-covered baking dish and warm in a 350°F (175°C) oven for 5-10 minutes, or until heated through. For a slightly crisper top, remove the foil for the last few minutes of reheating. Note that the texture and flavor are significantly better on the day they are made.
- What kind of baking dish is best for sliders? A glass or light-colored ceramic baking dish is ideal. These materials distribute heat evenly, promoting consistent baking and preventing the bottoms from over-browning. If using a darker metal pan, remember to reduce the oven temperature by 25°F as dark pans conduct heat more intensely.
More Exciting Game Day Appetizers and Snacks
Expand your party menu with these fantastic recipes that are perfect for any gathering:
- Honey Garlic Chicken Wings
- Cheesy Garlic Pull Apart Bread
- Pigs in a Blanket
- Ham and Cheese Puff Pastry Slab Pie
- Cajun-Spiced Mixed Nuts
CRAVING MORE DELICIOUS RECIPES? Subscribe to our newsletter and join our community on Facebook, Pinterest, and Instagram for the latest recipes, cooking tips, and culinary news.
Baked Ham and Cheese Sliders
by Amanda Biddle
Score a touchdown on your game-day menu with these Baked Ham & Cheese Sliders! Perfect for casual gatherings, these cheesy, buttery, savory sliders are easy to make and irresistibly tasty.
Prep Time: 20 minutes | Cook Time: 28 minutes | Total Time: 48 minutes
Servings: 6 servings (2 sliders per person)
Ingredients
- 1 package King’s Hawaiian Original Sweet Rolls (12-count)
- 3 tablespoons mayonnaise
- 2 tablespoons Dijon mustard
- ½ pound thinly-sliced deli ham (such as Black Forest)
- ¼ pound deli-sliced sharp cheddar cheese
- ¼ pound deli-sliced Swiss cheese
- 4 tablespoons unsalted butter, melted
- 1 teaspoon Worcestershire sauce
- 1-½ teaspoons poppy seeds
- ½ teaspoon onion powder
- Pinch kosher salt, if needed
Instructions
- To make the slider spread, combine mayonnaise and 2 tablespoons Dijon mustard in a small bowl. Stir well and set aside.
- Using a sharp serrated bread knife, carefully slice the slider buns in half horizontally, separating the tops from the bottoms. Place both halves, cut-side up, on a baking sheet.
- Preheat your oven’s broiler to high, ensuring the rack is in the second position down from the top (approximately 6 inches from the broiler element). Broil the rolls on the cut-sides only for 1-2 minutes, until they are lightly toasted and golden. It is crucial to watch them continuously and do not walk away from the oven, as they can burn very quickly! Broiling times may vary by oven.
- Preheat the oven to 350°F (175°C) with the rack positioned in the middle. Lightly spray a glass or light-colored ceramic baking dish with cooking spray. (If using a pan with a darker interior, reduce the oven temperature to 325°F / 160°C to prevent over-browning.)
- Place the toasted bottom halves of the rolls into the prepared baking dish. Spread a little more than half of the prepared Dijon-mayo mixture evenly onto these rolls.
- Assemble the sliders by layering the cheeses and meat: first, a layer of cheddar cheese, followed by the ham, and then the Swiss cheese. Spread the remaining Dijon-mayo thinly onto the toasted side of the top halves of the rolls and carefully place them over the Swiss cheese layer.
- In a separate small bowl, whisk together the melted butter, Worcestershire sauce, poppy seeds, onion powder, and an optional pinch of salt (if using). Pour this mixture generously over the tops of the assembled sliders. Use a basting brush or pastry brush to ensure the butter and poppy seeds are evenly distributed over the tops and sides of the buns. It’s perfectly fine if some of the butter pools around the sliders in the baking dish; the bread will absorb it during baking.
- Cover the baking dish tightly with aluminum foil and let it stand for 5 minutes. Bake for 20 minutes, or until the sliders are thoroughly heated through and the cheese is gloriously melted and bubbly. Carefully remove the foil and continue baking for another 5-10 minutes, until the tops of the rolls achieve a beautiful golden-brown and crispy finish. Keep a close watch during this final stage to prevent them from becoming too dark.
- Allow the baked sliders to rest for a few minutes before cutting them into individual servings with a serrated knife. Serve them hot alongside potato chips, fries, or your favorite sandwich accompaniments.
Nutrition Estimate
Serving: 2 sliders | Calories: 495kcal | Carbohydrates: 33g | Protein: 23g | Fat: 30g | Saturated Fat: 15g | Polyunsaturated Fat: 4g | Monounsaturated Fat: 6g | Trans Fat: 0.3g | Cholesterol: 110mg | Sodium: 814mg | Potassium: 162mg | Fiber: 0.4g | Sugar: 12g | Vitamin A: 588IU | Vitamin C: 0.2mg | Calcium: 320mg | Iron: 1mg
Nutrition information is automatically calculated, so should only be used as an approximation.
Please note that our recipes have been developed using the US Customary measurement system and have not been tested for high altitude/elevation cooking and baking.
Like this recipe? We’d love to hear from you! Rate it and leave a comment below!
