Unlock the Secrets to Crafting Exquisite Homemade Caramel Apples!
Discover essential tips and tricks to create gourmet, caramel-dipped apples perfect for autumn festivities, thoughtful gift-giving, and delightful entertaining.
As the leaves begin to change and a crisp coolness fills the air, few treats capture the essence of autumn quite like the classic caramel apple. There’s a certain magic in a perfectly coated, shiny apple, reminiscent of childhood visits to the orchard and festive fall gatherings. While store-bought versions can be tempting, nothing compares to the unparalleled taste and charm of homemade caramel apples. Crafting them at home allows for endless customization, ensuring each bite is a personalized delight.
For an elevated flavor experience, I highly recommend using my signature Apple Cider Caramel recipe. Infused with the warm, comforting notes of fresh apple cider and a subtle hint of cinnamon, this caramel offers a uniquely sweet, rich, and ever-so-slightly tart coating that beautifully complements the crisp, juicy apples beneath. It transforms a simple treat into a gourmet sensation, making these homemade caramel apples a standout choice for any fall celebration.
These decadent homemade caramel apples are not just a wonderful indulgence for your own family; they also make exceptionally thoughtful gifts. Imagine presenting friends or loved ones with a beautifully wrapped, handcrafted caramel apple – it’s a gesture that truly embodies the spirit of the season. They are also the quintessential treat for any Halloween party, harvest festival, or casual autumn gathering, bringing smiles and a touch of nostalgic sweetness to any occasion.
Why Homemade Caramel Apples Are The Ultimate Fall Treat
There’s an undeniable allure to homemade caramel apples that simply can’t be matched by their mass-produced counterparts. The process itself is a delightful autumn activity, whether you’re making them solo or gathering loved ones for a fun dipping session. Beyond the joy of creation, homemade apples offer superior freshness, allowing you to select peak-season apples and pair them with a caramel made from high-quality ingredients, free from artificial flavors or preservatives. This control over ingredients means a richer, more authentic caramel flavor that truly shines through.
Furthermore, making them at home gives you complete creative freedom. You can customize the thickness of the caramel, choose your favorite apple varieties, and experiment with a myriad of toppings to suit every palate. This personal touch makes homemade caramel apples not just a dessert, but a heartfelt expression of autumn’s bounty, perfect for sharing and creating lasting memories.

Choosing the Perfect Apples for Your Caramel Creations
The foundation of an exceptional caramel apple lies in selecting the right apple. While personal preference plays a significant role, certain varieties stand out for their texture, flavor balance, and ability to hold up to a rich caramel coating. The goal is to find an apple that is firm, crisp, and offers a pleasant counterpoint to the sweetness of the caramel.
I generally advise against apples with a very mild flavor or a mealy texture, such as Red Delicious. These often lack the structural integrity and vibrant taste needed to truly complement the caramel. Instead, look for apples that deliver a satisfying crunch and a good balance of sweet and tart notes.
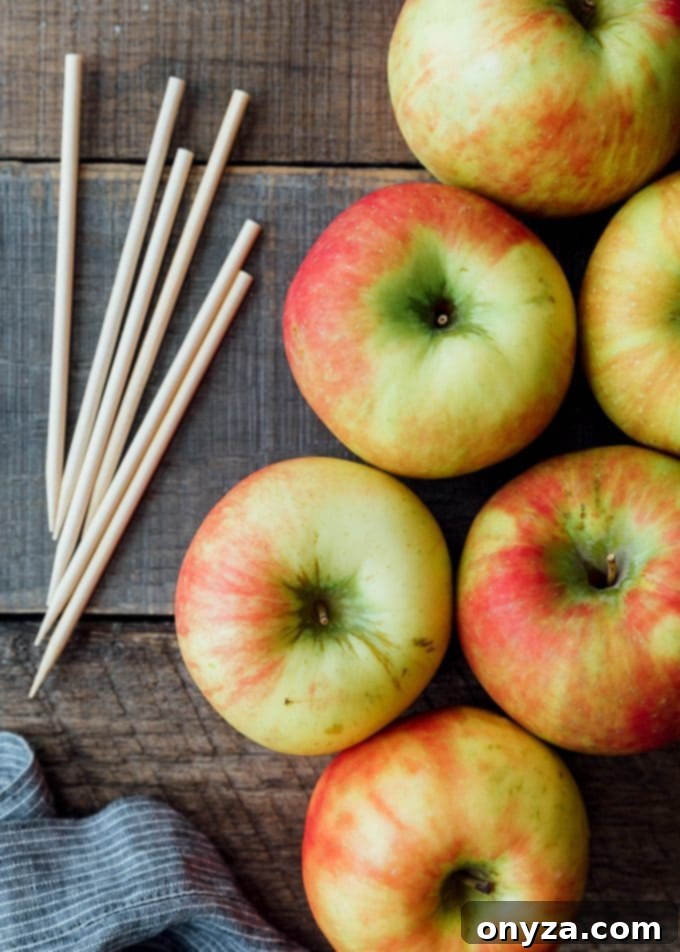
My top recommendation for caramel apples is the **Honeycrisp**. As its name implies, it’s incredibly crisp and juicy, providing a delightful snap with every bite. Its naturally sweet flavor pairs beautifully with the hint of tartness found in an apple cider caramel. Other excellent choices that offer similar desirable qualities include Fuji, Cameo, Jonathan, Pink Lady, and Jonagold. These varieties all boast a firm texture and a well-rounded flavor profile that can stand up to the richness of the caramel.
If you lean towards a bolder, more tart experience to cut through the caramel’s sweetness, **Granny Smith** apples are an iconic choice. Their distinctively sour flavor creates a fantastic contrast that many caramel apple aficionados adore. While they can be a bit too sour for my personal taste, their popularity is undeniable, especially when paired with a rich, buttery caramel.
Tips for Selecting Your Apples:
- Firmness is Key: Gently squeeze the apple. It should feel solid and have no soft spots.
- Size Matters: Medium-sized apples are generally easier to handle and eat once coated.
- Freshness: Choose apples that look vibrant and feel heavy for their size, indicating juiciness.
- Wash Thoroughly: Always wash and thoroughly dry your apples before dipping to ensure the caramel adheres properly.

Essential Supplies for Dipping Caramel Apples
Before you dive into the delicious world of caramel dipping, ensuring you have the right tools at hand will make the process smooth and enjoyable. Preparation is key to achieving those perfectly coated, gourmet caramel apples.
Choosing Your Dipping Sticks:
The first essential item is a sturdy stick to hold your apple. You’ll find a few great options:
- Wooden Apple Dipping Sticks: These are widely available during the fall season, often found in the produce section of grocery stores or at local orchards. They are specifically designed for apples and provide a good grip.
- Craft/Popsicle Sticks: A readily available alternative, these work well, especially for smaller apples or if you’re making a large batch.
- Cleaned Twigs: For a rustic, natural aesthetic, consider using sturdy, cleaned twigs. As seen in this inspiring post on Leite’s Culinaria, they add wonderful character to an autumn display. Ensure they are food-safe and thoroughly cleaned before use.
No matter which stick you choose, make sure it’s securely inserted into the apple’s core for a stable handle during dipping.
Preparing Your Working Surface:
Once your apples are dipped, they’ll need a place to set without sticking. Have a baking sheet or tray ready, lined with one of these options:
- Wax Paper: This is my go-to. It makes peeling the set caramel off the bottom of the apple incredibly easy, preventing any sticky messes.
- Butter-Brushed Parchment Paper: If you don’t have wax paper, parchment paper lightly greased with butter is an excellent alternative to prevent sticking.
Mastering the Art of Dipping Caramel Apples
Dipping caramel apples might seem intimidating at first, but with a few simple techniques, you’ll be creating confectionery masterpieces in no time. The key is to work efficiently and maintain the right caramel consistency.
The Dipping Technique:
- Caramel Setup: Transfer your warm caramel into a small to medium-sized pot or bowl. If necessary, you can gently tilt the pot to create a deeper pool of caramel on one side, making it easier to fully submerge the apple.
- Insert Sticks: Ensure your chosen sticks are firmly inserted into the stem end of each apple, pushing down until secure.
- Chill Apples: This is a crucial step! Place your apples with sticks inserted into the refrigerator for at least 30 minutes, or until well-chilled. Cold apples help the warm caramel set faster and adhere better, reducing slippage.
- Dip and Roll: Holding the apple by its stick, carefully dip it into the warm caramel. Lower the apple onto its side, then slowly roll it (using the stick as a handle) to ensure an even coating. You can choose to fully cover the apple or leave a small section of apple exposed near the stem for a more rustic look – it’s entirely your preference!
- Drip Off Excess: Once coated, lift the apple and allow any excess caramel to drip back into the pot. A slight rotation can help ensure an even layer and prevent too much caramel from pooling at the bottom.
- Set on Prepared Tray: Place the dipped apple onto your prepared wax paper or butter-brushed parchment-lined baking sheet. Repeat with the remaining apples.

Ensuring Your Caramel Stays Put: Tips for Perfect Adherence
One of the most common challenges when making caramel apples is preventing the caramel from sliding down the sides. Here’s how to ensure a beautifully coated apple every time:
- The Chilled Apple Advantage: The most important trick is to **make sure your apples are very well chilled before dipping.** When a cold apple meets warm caramel, it creates a thermal shock that helps the caramel begin to set almost instantly, allowing it to adhere more effectively to the apple’s surface. Don’t skip this step!
- Managing the “Caramel Foot”: You’ll almost always get a small pool of caramel at the bottom of the apple as it cools and sets – affectionately known as the “caramel foot.” Personally, I find this extra bit of caramel a delightful treat! However, if you prefer to minimize it, you can gently scrape any excess caramel from the very bottom of the apple with a rubber spatula before placing it on the baking sheet.
- Maintaining Caramel Temperature: As you dip multiple chilled apples, the caramel in your pot will naturally cool down and thicken. If the caramel becomes too thick to create a smooth, even coating, simply **rewarm it over medium-low heat on the stove.** It usually only takes about 20-30 seconds of gentle heating to return to the ideal dipping consistency. Stir occasionally to prevent scorching.

Elevate Your Caramel Apples with Irresistible Toppings
While a plain caramel apple is a classic delight, adding toppings transforms them into truly gourmet treats. The possibilities are endless, allowing you to customize each apple to perfection. Be sure to add your chosen toppings immediately after dipping, while the caramel is still warm and tacky, so they adhere well.
Classic and Beloved Toppings:
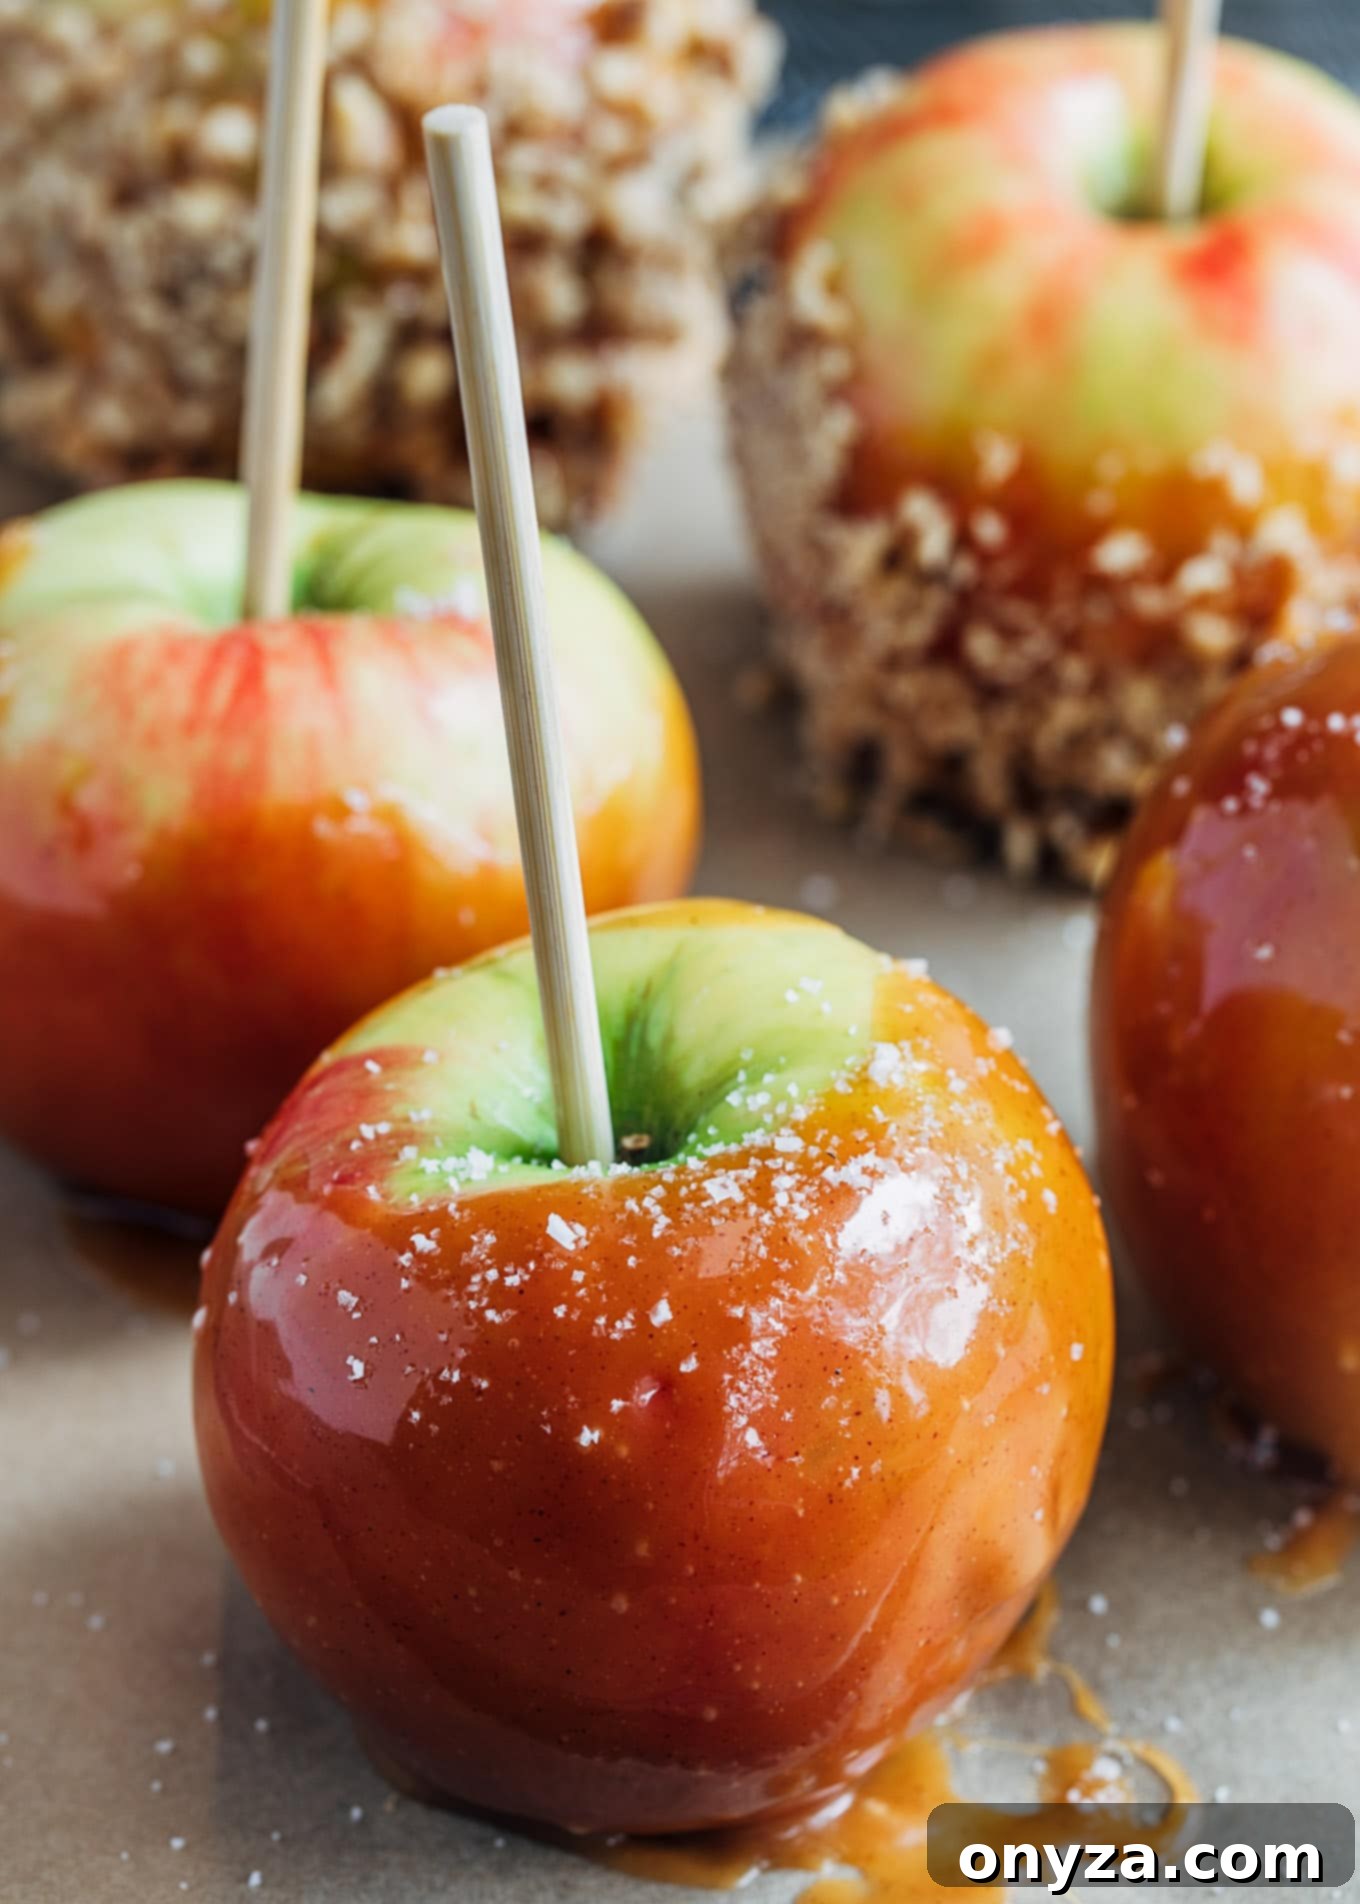
- Flaked Sea Salt: My absolute favorite! A delicate sprinkle of flaked sea salt over the still-wet caramel provides an incredible pop of saltiness that brilliantly cuts through the sweet, rich, and slightly tart caramel. It’s a sophisticated flavor combination that elevates the entire experience.
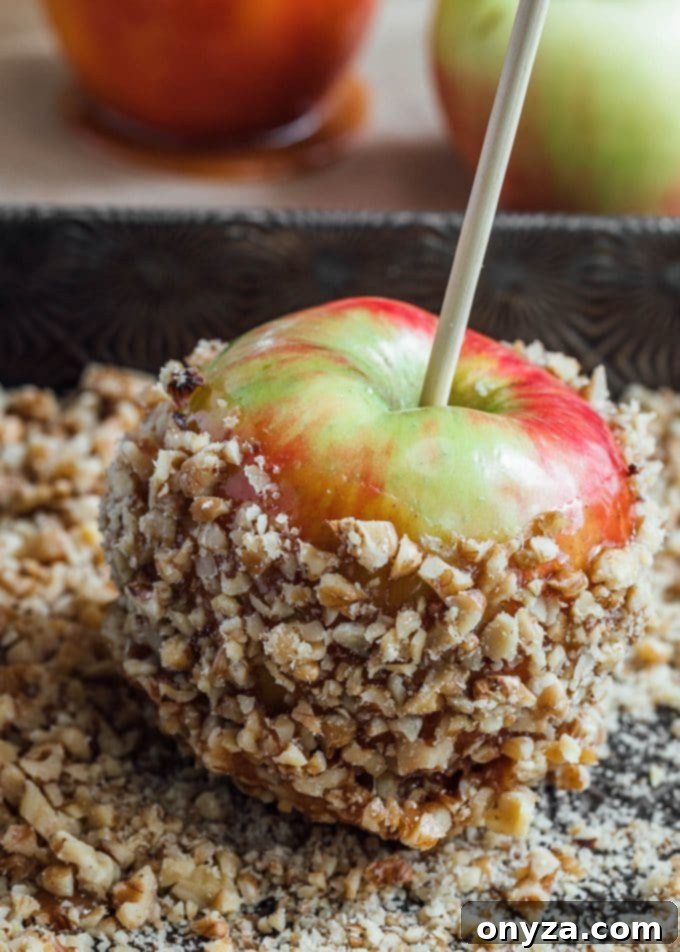
- Chopped Nuts: For a satisfying crunch and nutty flavor, roll your dipped apples in finely chopped nuts. Walnuts, pecans, and peanuts are popular choices. Ensure the nuts are chopped on the finer side so they adhere evenly and are easy to manage when slicing or biting into the apple. Toasted nuts will offer an even deeper flavor.
- Chocolate Drizzle or Dip: Chocolate and caramel are a match made in heaven. For a decadent finish, drizzle melted chocolate over your caramel-dipped apples, or even partially dip them.
- Tip: Make sure your caramel-dipped apple has been refrigerated for at least 15 minutes and the caramel is firmly set before applying chocolate. This prevents the caramel from melting or sliding when it comes into contact with the warm chocolate. Dark chocolate, milk chocolate, or even white chocolate can be used.
Creative Topping Ideas:
- Crushed Cookies or Candies: Think crushed Oreos, graham crackers, pretzels, or even your favorite Halloween candies for a playful touch.
- Toasted Coconut Flakes: Adds a delightful chewiness and tropical hint.
- Sprinkles: A fun option, especially for kids or festive holiday themes.
- Dried Fruit Bits: Finely chopped dried cranberries, cherries, or apricots can add a chewy texture and fruity tang.
Don’t be afraid to mix and match! A caramel apple drizzled with dark chocolate and sprinkled with flaked sea salt, or one rolled in pecans and then given a white chocolate swirl, truly takes this autumn treat to the next level.

Storage and Serving Suggestions for Caramel Apples
Once your homemade caramel apples are perfectly dipped and adorned with toppings, proper storage ensures they remain fresh and delicious. To maintain their crispness and prevent the caramel from becoming too soft, always store them in the refrigerator.
- Refrigeration: Place each caramel apple on a piece of wax paper or parchment paper and store them in an airtight container in the refrigerator for up to 3-5 days. This will keep the apples from browning too quickly and the caramel firm.
- Serving Temperature: For the best flavor and texture, allow the caramel apples to sit at room temperature for about 15-20 minutes before serving. This softens the caramel slightly, making it easier to bite into without being too sticky or hard.
- Serving Presentation: Caramel apples can be served whole, allowing guests to enjoy the full experience of biting into the entire treat. Alternatively, for easier sharing, carefully slice the apples into wedges just before serving. A warm knife can help cut through the caramel cleanly.
- Gift Giving: If you’re giving them as gifts, wrap each apple individually in clear cellophane bags, tied with a festive ribbon. This not only makes for a beautiful presentation but also protects the apple and keeps it fresh until ready to be enjoyed.
Troubleshooting Common Caramel Apple Challenges
Even with the best intentions, homemade caramel apples can sometimes present a few hurdles. Here are quick solutions to common issues you might encounter:
- Caramel Too Thin or Runny: If your caramel isn’t adhering well or drips excessively, it likely hasn’t been cooked to a high enough temperature. For best results, ensure your caramel reaches the “firm ball” stage (245-250°F / 118-121°C) on a candy thermometer. If it’s already made, you can gently rewarm it and cook it a bit longer, stirring constantly, until it reaches the correct temperature.
- Caramel Too Thick: If the caramel is too stiff and won’t coat smoothly, it might be overcooked or too cool. Gently rewarm it over low heat, stirring in a tiny bit of water or cream (1/2 teaspoon at a time) until it reaches a more pliable consistency. Be careful not to add too much liquid.
- Caramel Sliding Off: This is almost always due to apples that aren’t cold enough or weren’t thoroughly washed and dried. Make sure apples are ice-cold from the fridge, and that their waxy coating (often present on store-bought apples) has been completely removed and they are bone dry.
- Apples Browning Too Quickly: While lemon juice can help prevent browning on cut apples, it’s not ideal for whole caramel apples as it can affect caramel adhesion. The best defense is proper storage in the refrigerator and consuming them within a few days.
Beyond Caramel Apples: More Apple-Inspired Recipes for Your Orchard Haul
After a successful trip to the apple orchard, you might find yourself with an abundance of crisp, juicy apples. While caramel apples are a fantastic way to enjoy them, there are countless other delicious apple recipes to explore. Here are a few more favorites to inspire your autumn baking and cooking:
- Miniature Apple Raspberry Pies (Striped Spatula)
- Apple Pizza with Gorgonzola Cheese (Champagne Tastes)
- Our Favorite Apple Pie (Striped Spatula)
- Apple Pie French Toast (Fox & Briar)
- Hard Cider Braised Chicken with Bacon and Apples (Striped Spatula)
Watch How It’s Done: Homemade Caramel Apple Video Guide
Sometimes, seeing the process in action makes all the difference. Check out this helpful video to guide you through each step of making your own gourmet homemade caramel apples.
(Video player content would appear here, typically an iframe or a JS-driven player with the above metadata for search engines.)
Homemade Caramel Apples Recipe

Homemade Caramel Apples
By Amanda Biddle
Homemade Caramel Apples are easy to make and a great fall treat for all ages. Perfect for a Halloween party, or for gift giving!
Prep Time: 40 minutes
Cook Time: 20 minutes
Total Time: 1 hour
Servings: 6 to 12 apples
Ingredients
- 6 large apples (or 8-12 smaller)
- 1 recipe apple cider caramel, cooked to 245-250 degrees F.*
- Wooden skewers or popsicle sticks
- Toppings, such as chopped walnuts, peanuts, or flaked sea salt, if desired
Instructions
- Wash and de-stem apples and dry thoroughly. Insert a wooden skewer or popsicle stick into the center of each apple, where the stems were, pushing down until firmly secured. Refrigerate apples until well-chilled, at least 30 minutes.
- Line a baking sheet or tray with wax paper. Dip chilled apples into the caramel, rolling to coat up the sides. Let excess caramel drip back into the pot. If you don’t want a “foot” on your caramel apples, use a rubber spatula to gently scrape any excess caramel from the bottom.
- If the caramel starts to get too thick to smoothly dip the apples, gently rewarm it on the stove. As you get toward the end of your caramel supply, use a spoon to pour the caramel over the apples.
- If desired, roll the dipped apples in chopped nuts or lightly sprinkle with flaked sea salt and transfer to the prepared baking sheet. Chill apples until caramel is firm before enjoying, about 15 minutes.
Notes
You can use just about any homemade caramel recipe to dip apples, so if apple cider caramel isn’t your favorite, use any that is! Be sure to cook it to “firm ball stage,” 245-250 degrees F, for best results.
Nutrition Estimate
Calories: 116kcal | Carbohydrates: 30g | Sodium: 2mg | Potassium: 238mg | Fiber: 5g | Sugar: 23g | Vitamin A: 120IU | Vitamin C: 10.2mg | Calcium: 13mg | Iron: 0.3mg
Nutrition information is automatically calculated, so should only be used as an approximation.
About Our Recipes
Please note that our recipes have been developed using the US Customary measurement system and have not been tested for high altitude/elevation cooking and baking.
