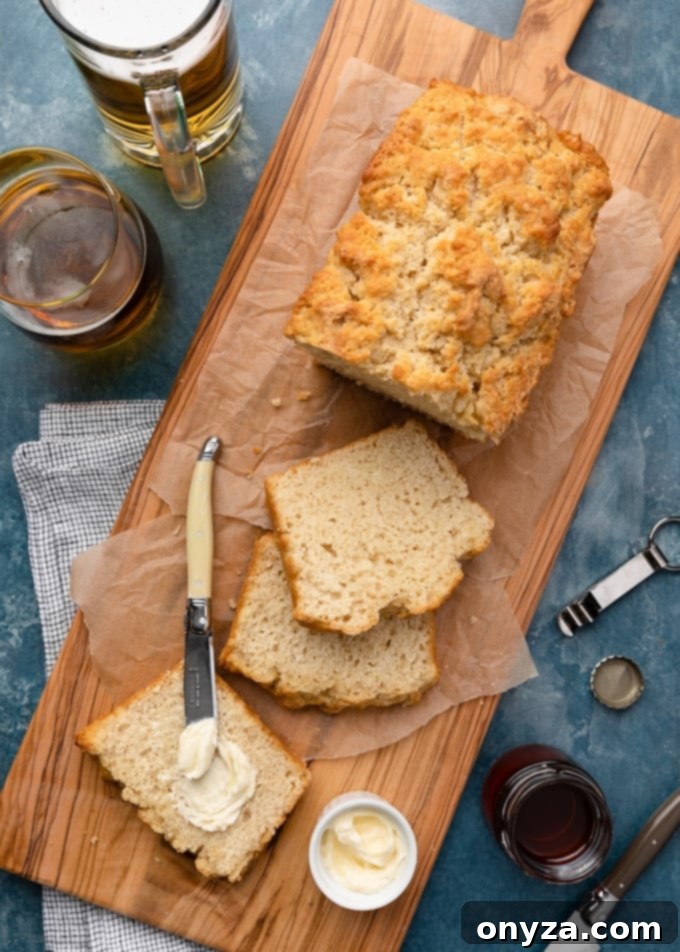
Classic Beer Bread: An Easy Homemade Recipe for Every Occasion
Master the art of making a beloved quick bread classic with this incredibly simple homemade beer bread recipe. Requiring just six basic ingredients and a single mixing bowl, this rustic, flavorful loaf is effortlessly easy to prepare, making it perfect for game day gatherings, a comforting snack, or an impressive side dish for any casual get-together.
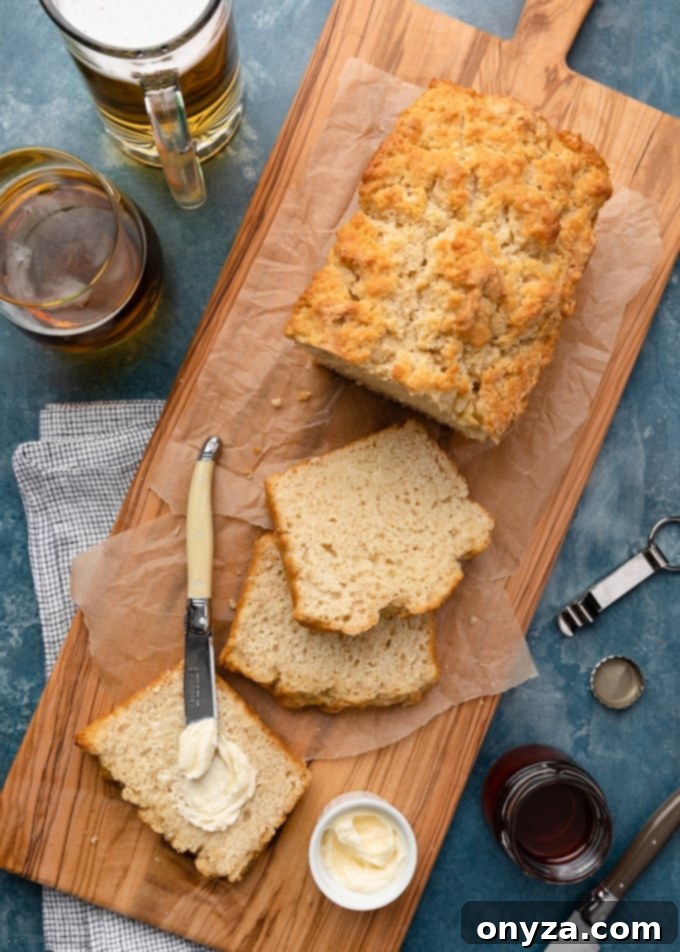
Way back in my college days, many moons ago, one of the first breads I ever attempted in my tiny apartment kitchen was beer bread. It quickly became a staple, cherished for its straightforward nature – no complex proofing or kneading required – and its undeniable deliciousness. My friends couldn’t get enough of it, and it often disappeared moments after emerging from the oven.
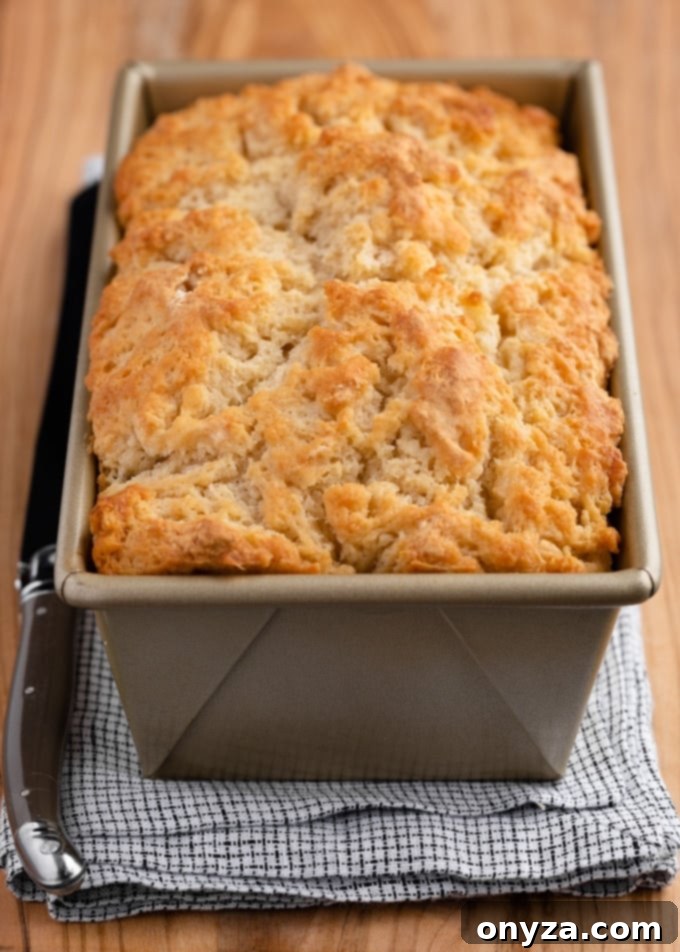
With its signature lightly-sweet profile, wonderfully buttery, craggy crust, and dense yet tender crumb, beer bread truly stands as a timeless classic in the world of quick breads. It’s a recipe I always keep readily available, a reliable choice for those moments when I need a fuss-free yet exceptionally flavorful bread, whether for a spontaneous snack attack or for impressing guests without any culinary stress. This versatile loaf effortlessly transitions from a rustic appetizer to a hearty accompaniment for soups and stews, proving its worth time and again.
Unlocking the Flavors: Essential Ingredients for Perfect Beer Bread
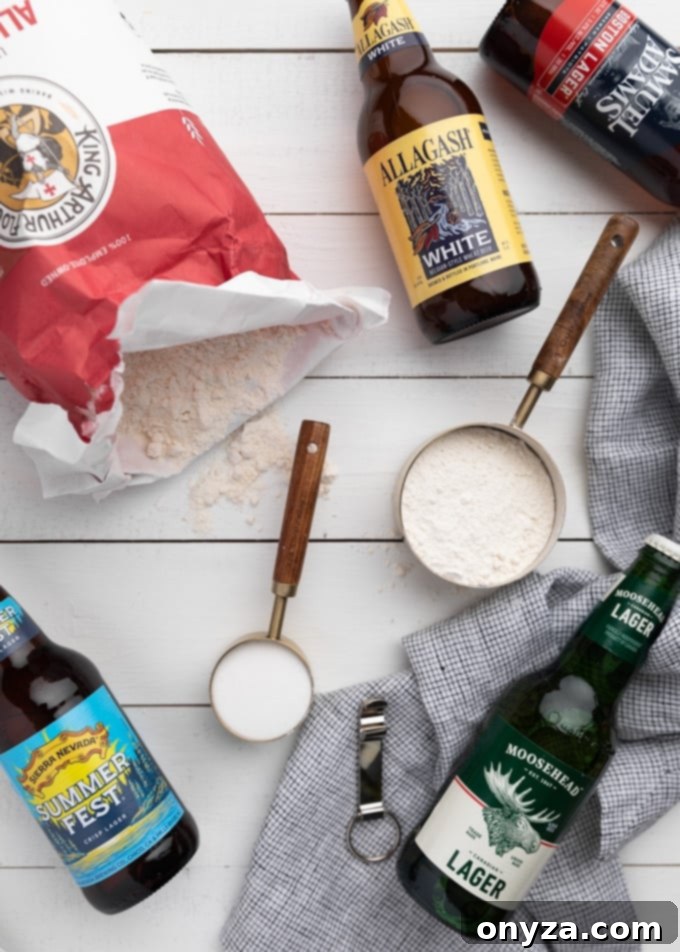
One of the most appealing aspects of beer bread is its incredible simplicity, calling for just six pantry staples. This minimal ingredient list makes it an ideal recipe for both novice and experienced bakers alike. To whip up this delightful loaf, you’ll need:
- All-Purpose Flour: The foundation of our bread, providing structure.
- Baking Powder: The crucial leavening agent that gives this quick bread its rise without yeast.
- Table Salt: Essential for balancing the flavors and enhancing the overall taste.
- Granulated Sugar: Adds a touch of sweetness and contributes to the beautiful browning of the crust.
- Beer: The star ingredient, offering unique flavor notes and additional leavening.
- Melted Butter: For richness, tenderness, and that irresistible golden, crisp crust.
That’s truly all it takes to create a remarkably satisfying homemade bread!
Choosing Your Brew: The Art of Selecting Beer for Beer Bread
The type of beer you choose is perhaps the most influential factor in defining your bread’s final flavor. It’s a matter of personal preference and how prominently you wish the beer’s characteristics to shine through in the baked loaf. My personal favorites, and those often praised by my friends, lean towards lighter-tasting, crisp lager-style beers and fragrant Belgian-style witbiers. These choices impart a subtle, yeasty note and a gentle depth of flavor without overpowering the bread.
From extensive experimentation, I’ve observed that beers with very strong or intensely hops-forward profiles tend to dominate the bread’s flavor, sometimes leading to an unpleasantly bitter aftertaste. Consequently, I generally steer clear of brews like intensely bitter IPAs (India Pale Ales) and heavy, roasty stouts for this particular recipe. While these beers are fantastic in their own right, their robust characteristics can often overshadow the delicate balance we seek in a classic beer bread.
Curious to understand more about bitterness in beer? This insightful article from Craft Beer Joe, Hoppy vs. Bitter: Understanding the Difference, offers a fascinating read!
I’ve experimented with a wide array of beers over the years, from celebrated craft brews like Allagash White and Moosehead, to widely available commercial options such as Heineken and Miller Highlife. While Samuel Adams Boston Lager is a popular choice, we found it lent a more pronounced aroma and a slightly less favorable flavor balance in our bread compared to other lighter lagers. The beauty of this recipe lies in its adaptability, inviting you to explore and discover your own ideal beer pairing.
For the mildest and most subtle beer flavor in your bread, opt for a light beer. Excellent choices include Miller Lite, Coors Light, or Bud Light. These options will contribute to a beautifully tender crumb and a very gentle yeast flavor without any strong hoppy notes.
For a delightful seasonal variation or a unique twist on the classic recipe, consider using seasonal brews. During the autumn months, we particularly enjoy baking loaves with pumpkin ale, which infuses the bread with warm, earthy spices, or hard cider for a subtly fruity and tangy note. Imagine the possibilities with a crisp apple cider in the fall or even a light lemon shandy in the summer!
Ultimately, the most enjoyable way to determine your favorite beer for beer bread is through hands-on experimentation. Grab a bottle of your preferred brew and bake a loaf! If the resulting flavor is too strong, too bitter, or overly fruity for your taste, you’ll know to explore a different option for your next batch. Each loaf offers a new adventure in flavor.
Mastering the Bake: Expert Tips for Irresistible Beer Bread
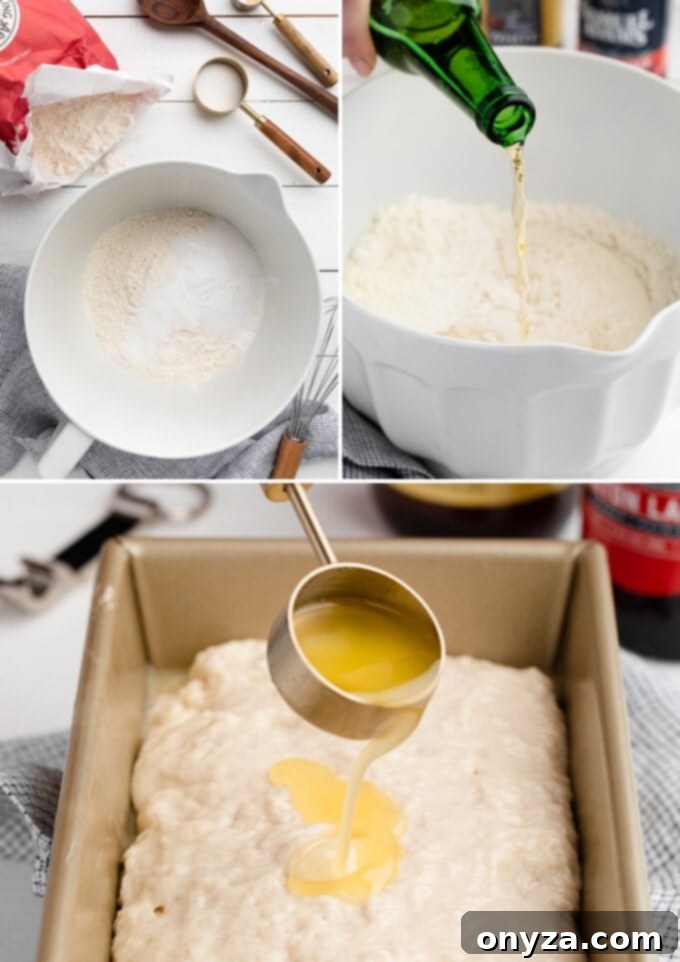
Making beer bread is refreshingly simple, almost foolproof. The basic process involves four easy steps: 1.) whisking together the dry ingredients, 2.) mixing in the beer until just combined, 3.) pouring melted butter over the batter in a loaf pan, and 4.) baking until golden. While beer bread inherently possesses a dense and chewy crumb, I’ve encountered loaves that, regrettably, turned out too tough or dry. Over my many years of baking this beloved recipe, I’ve discovered a few key tips that consistently ensure the most wonderfully textured (and best-tasting) loaf every single time.
- Sift the Flour for a Lighter Crumb: This step is often overlooked but makes a significant difference. I always advocate for the “spoon and sweep” method when measuring flour (gently spooning flour into the measuring cup and leveling the top with the straight edge of a knife to avoid compaction). However, for beer bread, I find that sifting the flour *before* measuring it out creates an even lighter, more tender, and uniform crumb. Sifting aerates the flour, breaks up any clumps, and ensures it mixes more evenly with the other dry ingredients, preventing a heavy or dense loaf.
- Utilize Room Temperature Beer for Optimal Rise: Resist the urge to grab a bottle straight from the fridge! Using room temperature beer is crucial for achieving the best rise and an exquisitely tender baked texture. Cold ingredients can stiffen the batter and hinder the activation of the baking powder, resulting in a less airy and potentially tougher bread. Allowing your beer to come to room temperature ensures it integrates smoothly with the dry ingredients and helps the leavening agents work efficiently.
- Avoid Over-mixing the Dough at All Costs: This is arguably the most critical tip for a perfectly tender beer bread. When you incorporate the beer, your goal is simply to mix until the dry ingredients are just moistened and everything appears incorporated. This usually takes no more than 5 or 6 gentle turns in the bowl with a wooden spoon or a sturdy spatula. You might even see a few dry streaks, and that’s perfectly fine! Overworking the dough develops the gluten too much, leading to a tough, rubbery, and overly dense loaf. A minimally mixed batter will yield that desirable dense-yet-tender texture we’re aiming for.
- Don’t Skimp on the Butter Drizzle: That luscious melted butter drizzled over the top of the batter before baking isn’t just for flavor – it’s key to developing beer bread’s characteristic wonderfully crisp, golden, and deeply flavored crust. The butter sinks into the top layer of the batter, creating an unparalleled richness and a satisfying crunch with every bite.
Your Beer Bread Questions Answered: FAQs
Q. Can I use other sweeteners instead of granulated sugar?
A. Absolutely! The flexibility of this recipe allows for wonderful customization. I’ve successfully made this loaf with light brown sugar, which imparts a subtle molasses note, as well as with honey and maple syrup. Maple syrup, especially, is delicious when paired with a pumpkin ale during the fall, creating a uniquely comforting flavor profile.
Just as with granulated sugar, you can adjust the quantity of these natural sweeteners from 1 to 4 tablespoons, depending on your personal preference and how sweet you like your bread to be. Remember that honey and maple syrup are generally sweeter than granulated sugar, so you might start with a smaller amount and adjust to taste in future batches.
Q. Why do you specify a range for the sweetener quantities?
A. The range for sweetener quantities is designed to give you complete control and allow for ultimate customization of your loaf! The ideal sweetness level often depends on how you plan to serve the bread. For instance, if you intend to pair the bread with a savory soup or a hearty stew, you might opt for a less sweet version (1-2 tablespoons). Conversely, if the slices are destined to be enjoyed on their own as a sweet snack or with a dollop of honey butter, you might prefer a slightly sweeter loaf (3-4 tablespoons).
The amount of sweetener can also be influenced by the type of beer you’re using. Some beers (and especially hard ciders) possess a natural sweetness that will require less added sugar in the bread to achieve a balanced flavor. Experimentation is key to finding your perfect balance!
Q. I see many beer bread recipes that call for self-rising flour. Can I use it here?
A. Yes, you certainly can! I typically don’t keep self-rising flour in my pantry, which is why I developed this recipe using all-purpose flour, baking powder, and salt. Self-rising flour is simply all-purpose flour that already has baking powder and a bit of salt mixed into it.
To substitute self-rising flour in this recipe, you would simply omit the baking powder and the table salt specified in the ingredient list. Use the same quantity of self-rising flour as you would all-purpose flour (3 cups). This substitution works perfectly well and provides the same delicious results!
Q. Can I add mix-ins to my beer bread?
A. Absolutely! Beer bread is incredibly versatile and welcomes various mix-ins to enhance its flavor and texture. For a savory twist, consider adding shredded cheddar cheese and finely chopped chives or green onions to the dry ingredients before adding the beer. Dried herbs like rosemary or thyme also work beautifully. For a sweeter loaf, dried cranberries, chopped nuts, or a sprinkle of cinnamon can be delightful additions. Just be mindful not to over-mix when incorporating these additions to maintain the bread’s tender crumb.
Q. What kind of loaf pan should I use?
A. For optimal baking results, I recommend using a standard 1-pound (8.5″ x 4.5″ x 2.75″ high) light-colored metal loaf pan. Lighter pans promote even browning and heat distribution, whereas dark-colored pans can sometimes lead to an overly dark or thick crust. Ensure you generously butter or grease your pan to prevent sticking, as this dense bread can sometimes cling to the sides.
Beyond the Oven: Serving and Storing Your Homemade Beer Bread
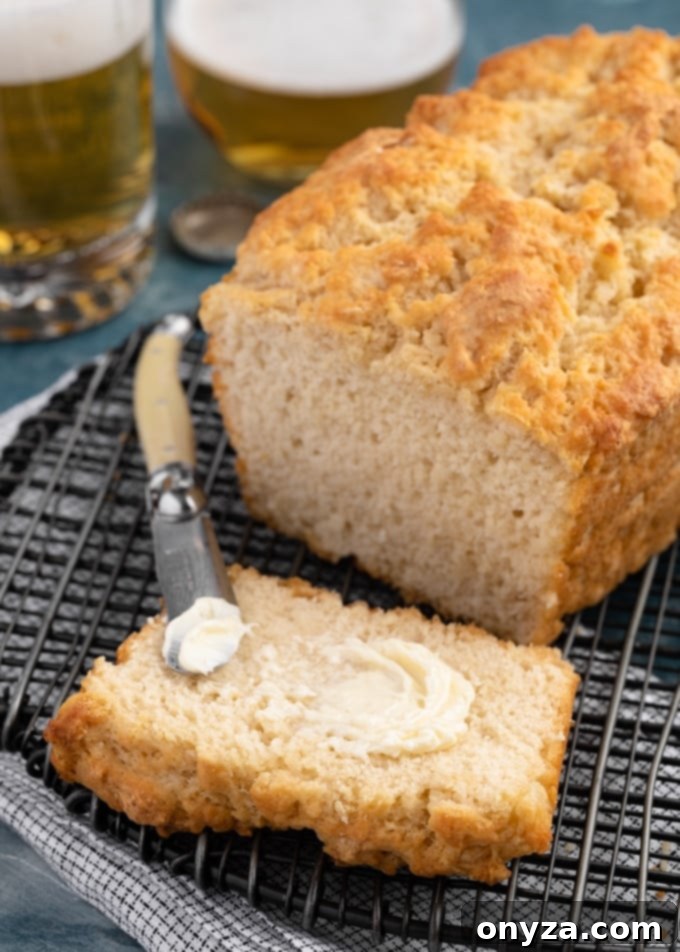
Beer bread is best enjoyed when it’s just slightly warm, still carrying that comforting aroma from the oven. My favorite way to serve it is with a generous dollop of softened or whipped butter, usually salted, to complement its rich flavor. For those moments when I crave a sweet indulgence, a drizzle of golden honey or a spread of homemade honey or maple butter transforms it into an irresistible treat.
On the savory side, beer bread is an exceptional companion for a robust bowl of chili on game day (it pairs wonderfully with my Instant Pot Texas-Style Chili), a hearty soup, or a slow-cooked stew. You can also cut it into elegant cubes to serve with your favorite dips or simply enjoy it on its own as an effortless, home-baked snack. Its versatility knows no bounds.
It’s important to note that beer bread is truly at its peak on the day it’s baked. The unique texture and fresh flavors are most pronounced then. By day two and beyond, it can become a little heavier and lose some of its initial charm.
That being said, if you find yourself with leftovers, proper storage is key to extending its freshness for another day. Once completely cooled, wrap the loaf tightly in plastic wrap or place it in an airtight container. Store it at room temperature. For the best possible texture and flavor on the second day, I highly recommend re-warming the loaf. Wrap it loosely in aluminum foil and bake it in a preheated oven at 350 degrees F (175 degrees C) for 8-10 minutes, or until warmed through. This helps to revive its crust and tenderize the crumb.
My friends and I have, unfortunately, not been fond of the texture of beer bread that has been frozen. While some breads freeze well, we find that beer bread tends to lose its desirable consistency upon thawing. For this reason, it’s a recipe we prefer to make and serve fresh, embracing its ephemeral deliciousness.
Crafting a loaf of homemade beer bread is more than just baking; it’s an experience of warmth, simplicity, and delightful flavor. From the subtle aroma of the beer mingling with the flour to the golden, buttery crust emerging from the oven, every step is a testament to the joy of making something truly special with minimal effort. Whether you’re a seasoned baker or just starting your culinary journey, this classic quick bread promises a rewarding and delicious outcome that’s sure to become a beloved favorite in your kitchen.
CRAVING MORE? Subscribe to my newsletter and join me on Facebook, Pinterest, and Instagram for the latest recipes and news.
A video tutorial for making this delicious beer bread would typically be found here.
Save Recipe | Pin Recipe | Print Recipe
Rated 5 from 15 votes
Classic Beer Bread Recipe
by Amanda Biddle
Beer Bread is a classic quick bread that’s great for casual entertaining. It’s lightly-sweet, buttery, and delicious served as an appetizer, snack, or side.
Prep Time: 10 minutes
Cook Time: 45 minutes
Total Time: 55 minutes
Servings: 8 slices
Ingredients
- 3 cups sifted all-purpose flour (approx. 350 grams, measured with spoon-and-level method after sifting)
- 1 tablespoon baking powder (12 grams)
- 1 teaspoon table salt (6 grams)
- 2 to 4 tablespoons granulated sugar (25-50 grams, depending on desired sweetness)
- 12 ounce bottle of beer, room temperature
- 2 tablespoons butter, melted (28 grams), plus additional for greasing the loaf pan
Instructions
- Preheat oven to 375 degrees F (190 degrees C). Generously butter a 1 pound (8 1/2″ x 4 1/2″ x 2 3/4″ high) loaf pan.
- In a large mixing bowl, whisk together the sifted flour, baking powder, salt, and sugar until well combined. Pour in the room temperature beer and stir gently with a wooden spoon or spatula, just until the dry ingredients are moistened and everything is incorporated. Be careful not to over-mix; the batter will be thick and may have a few dry streaks, which is perfectly normal for a tender bread.
- Spoon the thick batter into the prepared loaf pan and spread it out evenly so it reaches all four corners. Drizzle the 2 tablespoons of melted butter over the top of the batter.
- Bake for 35-55 minutes, or until the top is beautifully golden brown and a cake tester (like a wooden skewer or toothpick) inserted into the center of the loaf comes out with just a few moist crumbs attached. Baking time can vary slightly depending on your specific oven and the heat conductivity of your pan; my loaves typically take between 40-45 minutes.
- Allow the freshly baked bread to cool in the loaf pan for 5 minutes before carefully inverting it onto a wire rack to cool further. For the best flavor and texture, slice the bread when it is just slightly warm or has reached room temperature, and serve immediately.
Notes
- This bread is truly best enjoyed on the day it’s baked. If you have leftovers, ensure they are completely cooled, then wrap the loaf tightly in plastic wrap or store it in an airtight container at room temperature for an additional day. To refresh the loaf, wrap it loosely in foil and warm it in a 350 degrees F (175 degrees C) oven for 8-10 minutes.
- For substitutions regarding sweeteners or flour types, please refer to the FAQ’s section above.
- For detailed tips on selecting the best beer to use in this recipe, please see the Beer Types section above.
Nutrition Estimate
Serving: 1 slice
Calories: 227 kcal
Carbohydrates: 41g
Protein: 5g
Fat: 3g
Saturated Fat: 2g
Cholesterol: 8mg
Sodium: 319mg
Potassium: 163mg
Fiber: 1g
Sugar: 3g
Vitamin A: 87IU
Calcium: 52mg
Iron: 2mg
Nutrition information is automatically calculated and should only be used as an approximation. Values may vary based on specific ingredients and preparation methods.
Please note that our recipes have been developed using the US Customary measurement system and have not been tested for high altitude/elevation cooking and baking, which may require adjustments.
★ Like this recipe? Please rate and comment below!
