The Secret to a Perfect Apple Pie: A Foolproof Recipe with Pre-Cooked Filling
Experience the ultimate homemade apple pie! Our foolproof recipe leverages a pre-cooked filling for consistent results every time. Paired with a flaky all-butter crust and a scoop of creamy vanilla ice cream, this dessert promises to be an instant family favorite.
For many home bakers, achieving the quintessential apple pie can feel like chasing a culinary unicorn. The quest for that perfect balance – tender, flavorful apples encased in a golden, crisp crust, without any watery sogginess or an embarrassing gap between the filling and the top layer – often leads to frustration. I know this feeling all too well. For years, my apple pies were a gamble, a delicious enigma that sometimes delivered perfection and other times, fell short.
I recall countless attempts where the apples stubbornly refused to soften, leaving a toothsome, almost raw texture within a beautifully browned crust. Then there were the pies that, despite looking promising straight out of the oven, revealed a soupy, overly juicy interior upon slicing, turning a delightful dessert into a messy disappointment. And perhaps the most common heartbreak: the dreaded “pie gap,” where the once-voluminous apple mound collapsed during baking, leaving an unsightly void beneath the top crust.
These unpredictable outcomes were particularly unwelcome when baking for guests or during the bustling holiday season. Baking should be a joy, not a source of culinary anxiety! Determined to conquer the apple pie dilemma, I embarked on a journey of research and experimentation over a decade ago. It was then that I discovered a simple yet revolutionary technique that transformed my baking forever: **par-cooking the apple filling.** This method ensures a consistently glorious apple pie, every single time.
Pre-Cooked Filling: Your Key to Foolproof Apple Pie Perfection
The concept of pre-cooking apple pie filling isn’t new, but it’s a technique that has been a game-changer for countless bakers, myself included. My initial encounter with this brilliant method was through the esteemed pages of Joy of Cooking, and since then, I’ve seen it embraced in various forms across many reputable recipes. The fundamental principle remains consistent: gently simmer the sliced apples on the stovetop with sugar and spices until they reach that ideal state of tenderness – soft enough to be enjoyed, yet firm enough to retain their shape and provide a satisfying bite.
During this simmering process, the apples naturally release their abundant juices, which then thicken beautifully with the aid of a cornstarch slurry. This crucial step accomplishes several things at once: it ensures the apples are perfectly cooked before they even enter the oven, eliminating the risk of crunchy, underdone fruit. It also allows the filling to settle and reduce in volume, preventing that frustrating gap that often forms between the baked crust and the filling. Furthermore, by thickening the juices beforehand, you bid farewell to watery, soggy pie bottoms, guaranteeing a firm, flavorful foundation for your dessert.
Once the filling has achieved its luscious consistency and cooled to room temperature, it’s simply poured into your prepared pie crust and baked until the crust is a magnificent golden brown. It’s truly that straightforward, and the results are, without exaggeration, foolproof. Say goodbye to guesswork, inconsistency, and those common apple pie pitfalls. Embrace the ease and confidence that comes with knowing your homemade apple pie will be a showstopper every single time.

Selecting the Best Apples for Your Masterpiece
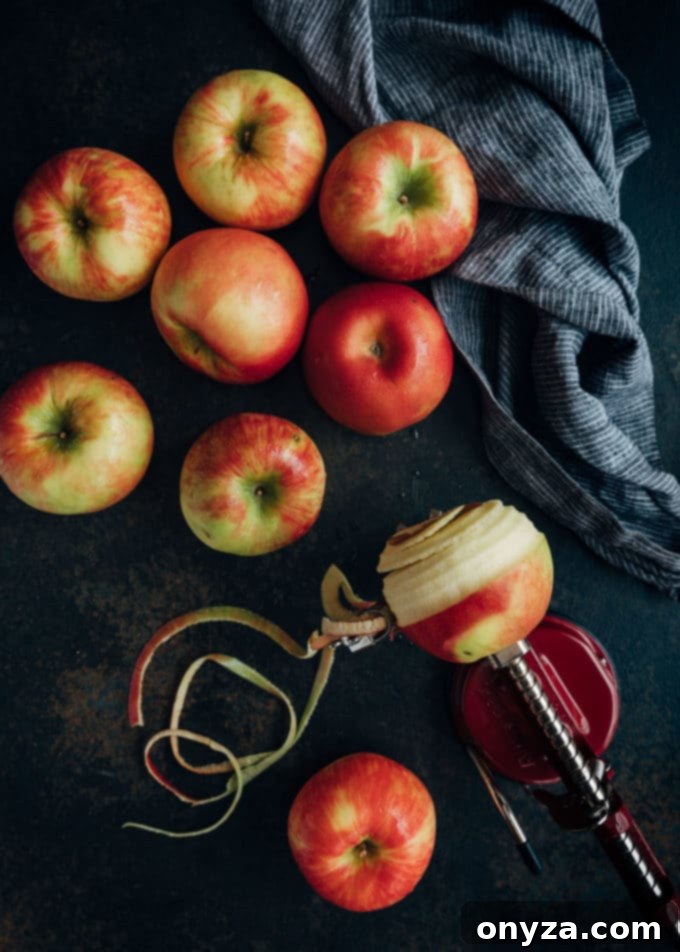
The choice of apples is paramount, especially when employing the par-cooking method. You want varieties that are culinary workhorses, capable of softening beautifully without disintegrating into an unappetizing applesauce-like mush. While there’s a vast world of apple varieties, some stand out for their superior performance in pies.
My personal preference leans towards a sweeter apple pie, so I tend to avoid the intensely tart Granny Smith apples, though a small quantity can be included for complexity if you desire. Instead, I seek out varieties that offer a delightful balance of sweetness and subtle tartness, along with a firm texture that holds up well to cooking. My absolute favorite combination often includes the wonderfully sweet “Jonathan” apples paired with the sweet-tart “Cameo,” both of which are delightful finds at local orchards during the autumn harvest. “Fuji” apples are another excellent choice, renowned for their crisp texture and balanced sweetness, making them ideal for a robust pie filling.
When cooking the apples, I incorporate a touch of apple cider into the pot. This seemingly small addition works wonders, elevating the overall flavor profile and adding a beautiful depth to the natural glaze that forms as the fruit simmers. Complementing this with fragrant Saigon cinnamon, freshly-grated Grenada nutmeg, a blend of light brown and granulated sugar, and the foundation of an all-butter crust, you’re set to create an apple pie that isn’t just visually stunning, but also incredibly aromatic and richly flavored. The scent alone as it bakes will draw everyone to the kitchen, eagerly awaiting a slice.
Should you find yourself with an abundance of apples after crafting your pie, consider making these charming Apple Rose Puffs from Homemade and Yummy. They offer an easy yet elegant addition to any dessert spread!

Choosing the Right Pie Plate for a Flawless Crust
While the aesthetics of stoneware pie plates are undeniable, and they often become cherished heirlooms in the kitchen, their performance for baking apple pie isn’t always my first choice, particularly when aiming for a perfectly golden-brown bottom crust. The material of your pie plate significantly impacts heat distribution and, consequently, the final texture and color of your crust.
My experience has shown that some stoneware pie plates take considerably longer to heat up and conduct heat evenly, which can result in a paler, less crisp bottom crust, especially in pies where the crust isn’t blind-baked. Since you can’t typically see the bottom crust until you’ve cut into the pie (unless you’re using a clear glass plate), I often find myself adding an extra 10-15 minutes to the baking time when using stoneware. It’s crucial to keep a vigilant eye on the top crust during this extended baking period, covering it with foil if it starts to brown too quickly, ensuring a beautiful, even bake.
Among stoneware options, I highly recommend Emile Henry pie plates. They are not only stunning but also deliver excellent baking results. For bakers who prioritize a reliably browned and crisp bottom crust, metal pie plates are often the go-to. My favorite metal option is the Williams-Sonoma Gold Touch series, which boasts nonstick properties and consistently yields gorgeously browned crusts. For those who prefer the visibility and even heating of glass, the classic Pyrex pie plate remains an unbeatable choice. (Please note, these are genuine recommendations based on personal experience, not sponsored endorsements!)
Ultimately, if achieving a beautifully browned and crisp bottom crust is a top priority for your apple pie – and for me, it absolutely is – starting with a quality metal pie plate is often your best bet. Experimentation with different types will help you discover which pan best suits your baking style and produces your ideal apple pie.

Serving Your Delectable Homemade Apple Pie
The beauty of this homemade apple pie lies in its versatility and inherent deliciousness, making it a perfect dessert for any occasion. For the purists among us, enjoying a slice of this pie slightly warm, on its own, is an experience in simple perfection. The rich flavors of the apples and spices, enveloped in a flaky crust, truly shine without any embellishment.
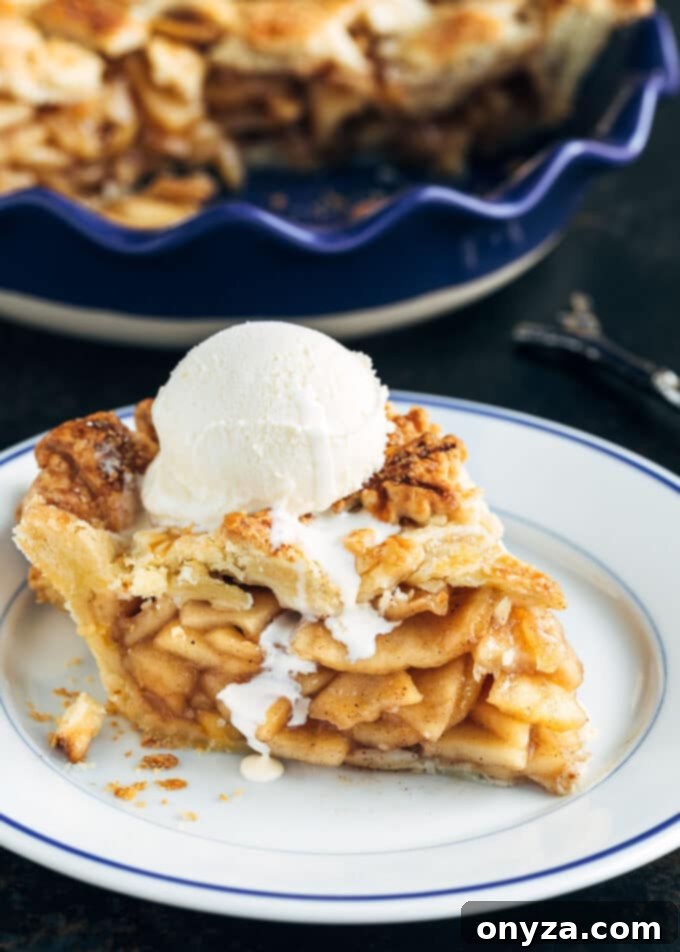
However, if you’re inclined to elevate the experience, this pie is an excellent candidate for the classic à la mode treatment. A generous scoop of premium ice cream, whether it’s the rich creaminess of French Vanilla or the delicate specks of Vanilla Bean, melts just enough to mingle with the warm pie, creating an irresistible blend of temperatures and textures. For an extra layer of indulgence, consider a dollop of bourbon-spiked whipped cream, which adds a sophisticated depth and a hint of warmth that beautifully complements the apple filling.
For those who appreciate a touch of decadence, a drizzle of homemade Apple Cider Caramel over the pie (and perhaps even over your ice cream) provides a luxurious finishing touch. This enhances the apple flavor and adds a sticky, sweet dimension that will make every bite memorable. Regardless of how you choose to serve it, this stress-free apple pie is guaranteed to provide a sweet, satisfying, and utterly delightful conclusion to any meal, especially during special gatherings or holiday feasts.

Complete Your Dessert Experience with a Perfect Wine Pairing!
Hugh Preece, an esteemed Sommelier and Italian Wine Ambassador from Vinitaly Academy, offers an exquisite pairing suggestion to elevate your apple pie experience:
He recommends enjoying this homemade apple pie with a bottle of G.D. Vajra –Moscato d’Asti DOCG, Piedmont, Italy.
Hugh describes this delightful wine as possessing a “beautiful soft color with enchanting green reflections. Its aromatics unfold with notes of yellow and exotic fruits, intertwined with subtle hints of herbs and spice. On the palate, you’ll discover delicate and persistent bubbles, evoking flavors of baked melon, refreshing lime sorbet, and a touch of biscuit. It’s a remarkably well-balanced and flexible Moscato, offering a creamy and lightly mouthwatering finish that perfectly complements the rich flavors of apple pie.”
More Delicious Pie Recipes for Your Holiday Table
- Classic Pumpkin Custard Pie
- Irresistible Caramel Apple Hand Pies
- Decadent Chocolate Pecan Pie with Bourbon
- Creamy Coconut Custard Pie
Homemade Apple Pie Recipe

This recipe for homemade apple pie, featuring a par-cooked apple filling, ensures a consistently perfect dessert, ideal for any holiday gathering or sweet craving. It’s best enjoyed within a day of baking. To re-warm the pie before serving, place it on a baking sheet in a 350-degree F (175°C) oven for about 15 minutes.
- Prep Time: 40 minutes
- Cook Time: 1 hour 30 minutes
- Total Time: 2 hours 10 minutes
- Servings: 8 servings
- Author: Amanda Biddle
Ingredients
- 1 recipe all-butter pie crust (for a double-crust pie)
- 4 pounds mixed sweet and sweet-tart apples (such as Cameo and Jonathan, peeled, cored, and cut into 1/4-inch thick slices)
- 2 tablespoons cornstarch
- 3 tablespoons apple cider, divided
- ½ cup light brown sugar, lightly-packed
- ¼ cup granulated sugar
- 1 teaspoon ground cinnamon
- ¼ teaspoon ground nutmeg
- ¼ teaspoon salt
- 2 tablespoons unsalted butter, chilled and cut into 1/2-inch dice
- 1 egg beaten with 1 tablespoon cool water (for egg wash)
- Extra granulated sugar or turbinado sugar, for sprinkling over the pie
Instructions
Prepare the Crusts
- Roll out two disks of pie dough to 12-inch diameters (about 1/8-inch thick). Fit one crust into a 9- or 10-inch pie plate and trim the overhang flush with the plate’s edge. Be careful not to stretch the dough when fitting it into the plate.
- Keep the second crust flat. Refrigerate both crusts for 30 minutes. Remove them from the refrigerator 5 minutes before filling and baking.
Make the Filling
- In a small bowl, combine 1 tablespoon apple cider with 2 tablespoons cornstarch, stirring until completely dissolved. Set this mixture aside.
- In a large, heavy-bottomed pot, combine the apple slices, the remaining 2 tablespoons of apple cider, brown sugar, granulated sugar, cinnamon, nutmeg, and salt. Cover the pot and cook over medium-low heat, stirring gently and occasionally, until the apples are soft but still retain their shape, which should take approximately 15 minutes.
- Stir in the cornstarch/apple cider mixture you prepared earlier. Continue cooking, now uncovered, until the juices in the pot become thick and clear, about 5 minutes. Remove the pot from the heat and let the apple filling cool completely to room temperature.
Fill and Bake the Pie
- Preheat your oven to 400 degrees F (200°C) with an oven rack positioned in the lower-middle section. Place a baking sheet on the rack to catch any drips and help brown the bottom crust.
- Pour the cooled apple pie filling into the pie plate lined with the bottom crust. Sprinkle the 2 tablespoons of chilled, diced butter evenly over the filling.
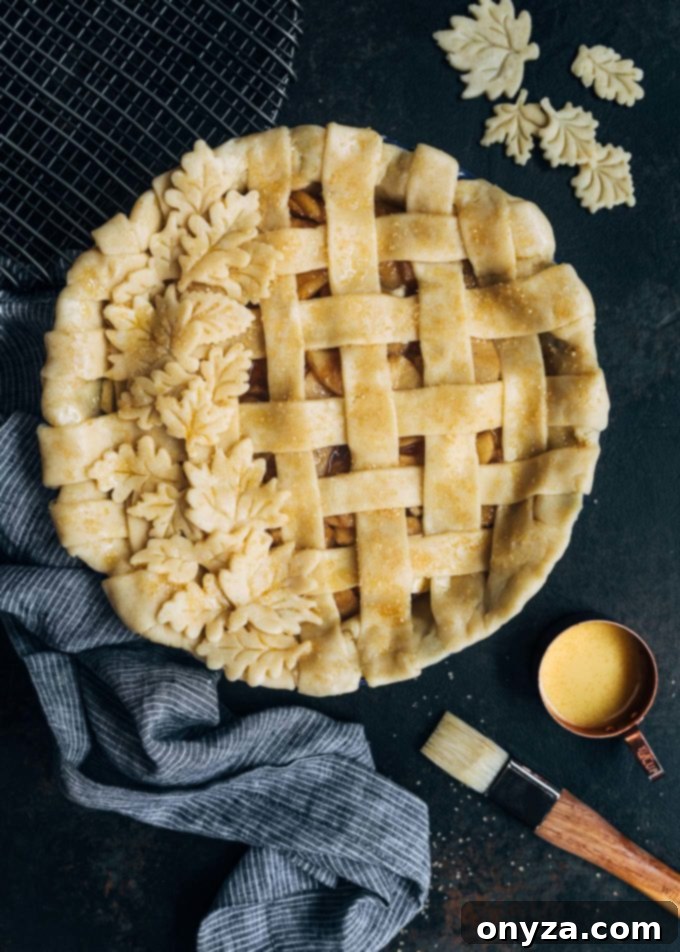
- For a traditional top crust, carefully place the second rolled dough round over the filling (you can roll the dough around a rolling pin or fold it into quarters for easier transfer). Trim the top layer of dough to a 1/2-inch overhang, then tuck it under the bottom dough and crimp or flute the edges as desired to seal the pie. Cut 3-5 small slits in the center of the top crust to allow steam to escape during baking. If you wish, decorate the top with seasonal crust cutouts made from excess dough.
- Lightly brush the entire top of the pie with the egg wash (egg beaten with water) and then sprinkle generously with granulated or turbinado sugar for a beautiful sparkle and crisp finish.
- Carefully place the pie on the preheated baking sheet in the oven. Bake at 400 degrees F (200°C) for 20 minutes. After 20 minutes, reduce the oven temperature to 325 degrees F (160°C) and continue baking until the filling is bubbling thickly and the crust is a deep golden brown. This usually takes an additional 30-40 minutes (if using a stoneware pie plate, you might need to add about 10 minutes more). Monitor the pie closely; if the top and/or edges are browning too quickly, loosely cover them with aluminum foil to prevent burning.
- Once baked, transfer the pie to a wire rack and allow it to cool completely to room temperature, which will take at least 3 hours. This cooling time is essential for the filling to set properly. Slice and serve your magnificent homemade apple pie.
Notes
In Case of Especially Juicy Apples:
Some apple varieties naturally release more juice than others when cooked. If, after thickening and cooling, your filling appears to have an excessive amount of liquid, use a slotted spoon to transfer the cooked apple slices to the lined pie plate. Then, pour about 1/2 cup of the thickened juices over the apples in the pie plate. This helps ensure a perfectly set pie without excess moisture.
To Make a Lattice Crust:
- Chill one round of your rolled pie dough (about 1/8-inch thick) until it is firm. Then, using a pastry cutter or a sharp knife, cut the dough into strips that are approximately 3/4- to 1-inch wide.
- Start by laying 5-7 strips of dough across the top of your filled pie, spaced about 1/2-inch apart. Begin with the longest strip in the center. Once these are in place, fold every other strip halfway back on itself.
- Now, working from the center, place the longest remaining strip of dough perpendicular to the strips you just laid. This new strip should lie over the strips that were not folded back. Then, carefully lay the folded strips back over this new perpendicular strip.
- Next, fold back the strips that were not folded back in the previous step. Place another perpendicular strip of dough, and lay the newly folded strips back over it. Repeat this weaving pattern until you reach the edge of the pie, then continue the process on the other side of the pie, always working outwards from the center.
- Once your lattice is complete, trim the edges of the strips, leaving about a 1-inch overhang. Tuck this overhang under the bottom crust and then crimp or flute the edges as you would for a solid top pie crust to seal everything in.
Need a visual guide for weaving a lattice? Check out this helpful video from Saveur.
Nutrition Estimate
Nutrition information is automatically calculated, so should only be used as an approximation.
- Calories: 346 kcal
- Carbohydrates: 65g
- Protein: 2g
- Fat: 9g
- Saturated Fat: 3g
- Cholesterol: 7mg
- Sodium: 188mg
- Potassium: 297mg
- Fiber: 6g
- Sugar: 43g
- Vitamin A: 210 IU
- Vitamin C: 10.4mg
- Calcium: 32mg
- Iron: 1mg
About Our Recipes
Please note that our recipes have been developed using the US Customary measurement system and have not been tested for high altitude/elevation cooking and baking. Adjustments may be necessary depending on your location.
Loved this recipe? Please consider rating and leaving a comment below!
