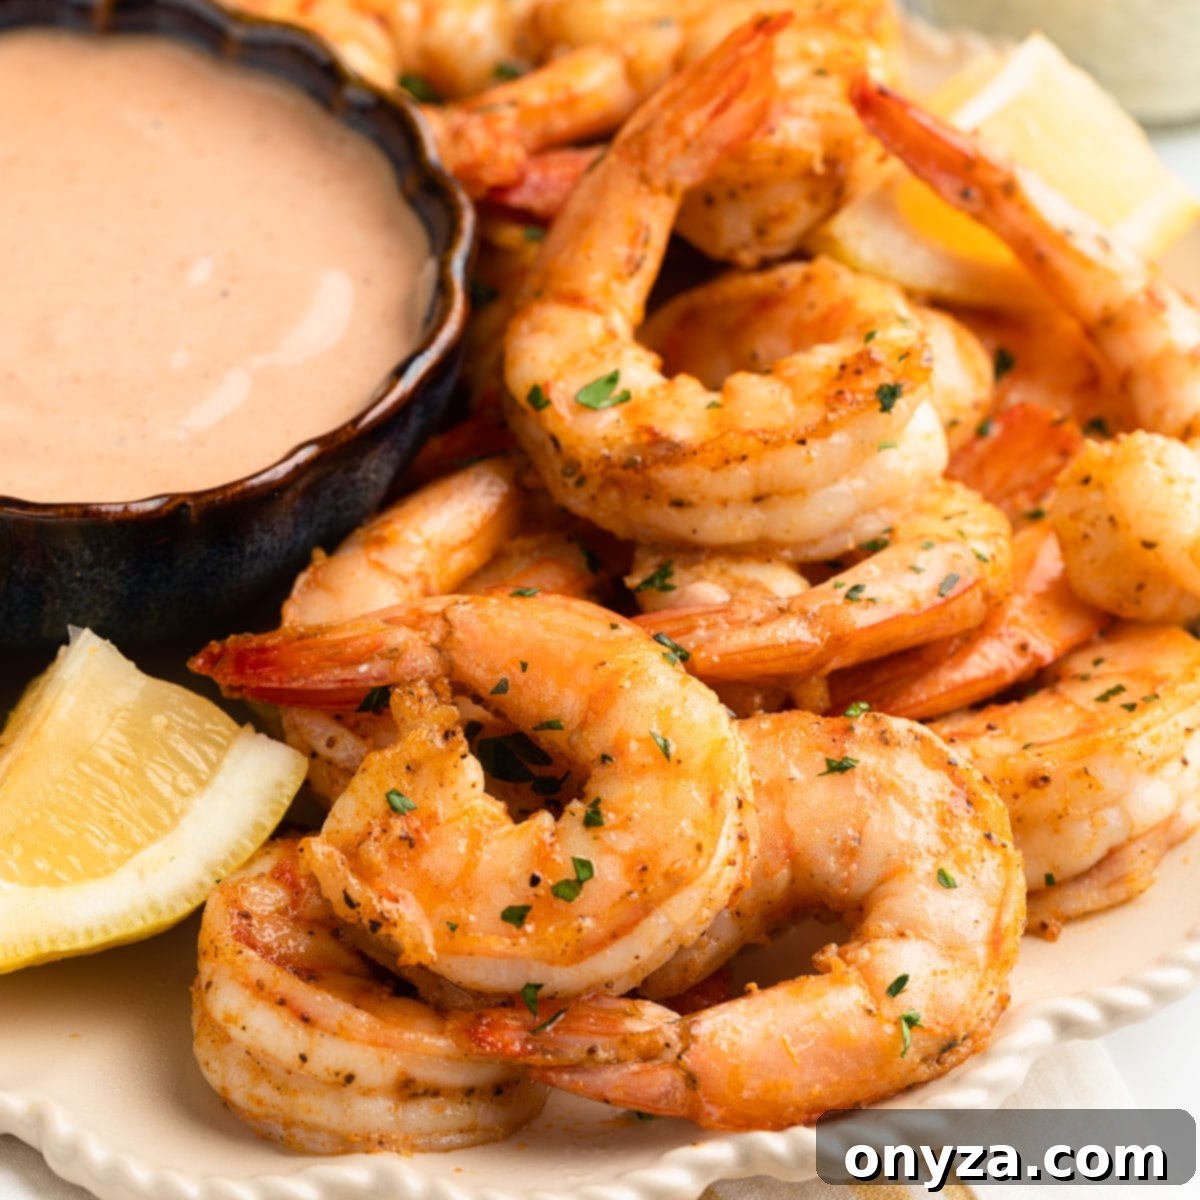
Looking for more shrimp appetizers? Try my Bacon Wrapped Shrimp with Bourbon Glaze, Coconut Shrimp, and Poached Shrimp (for Shrimp Cocktail).
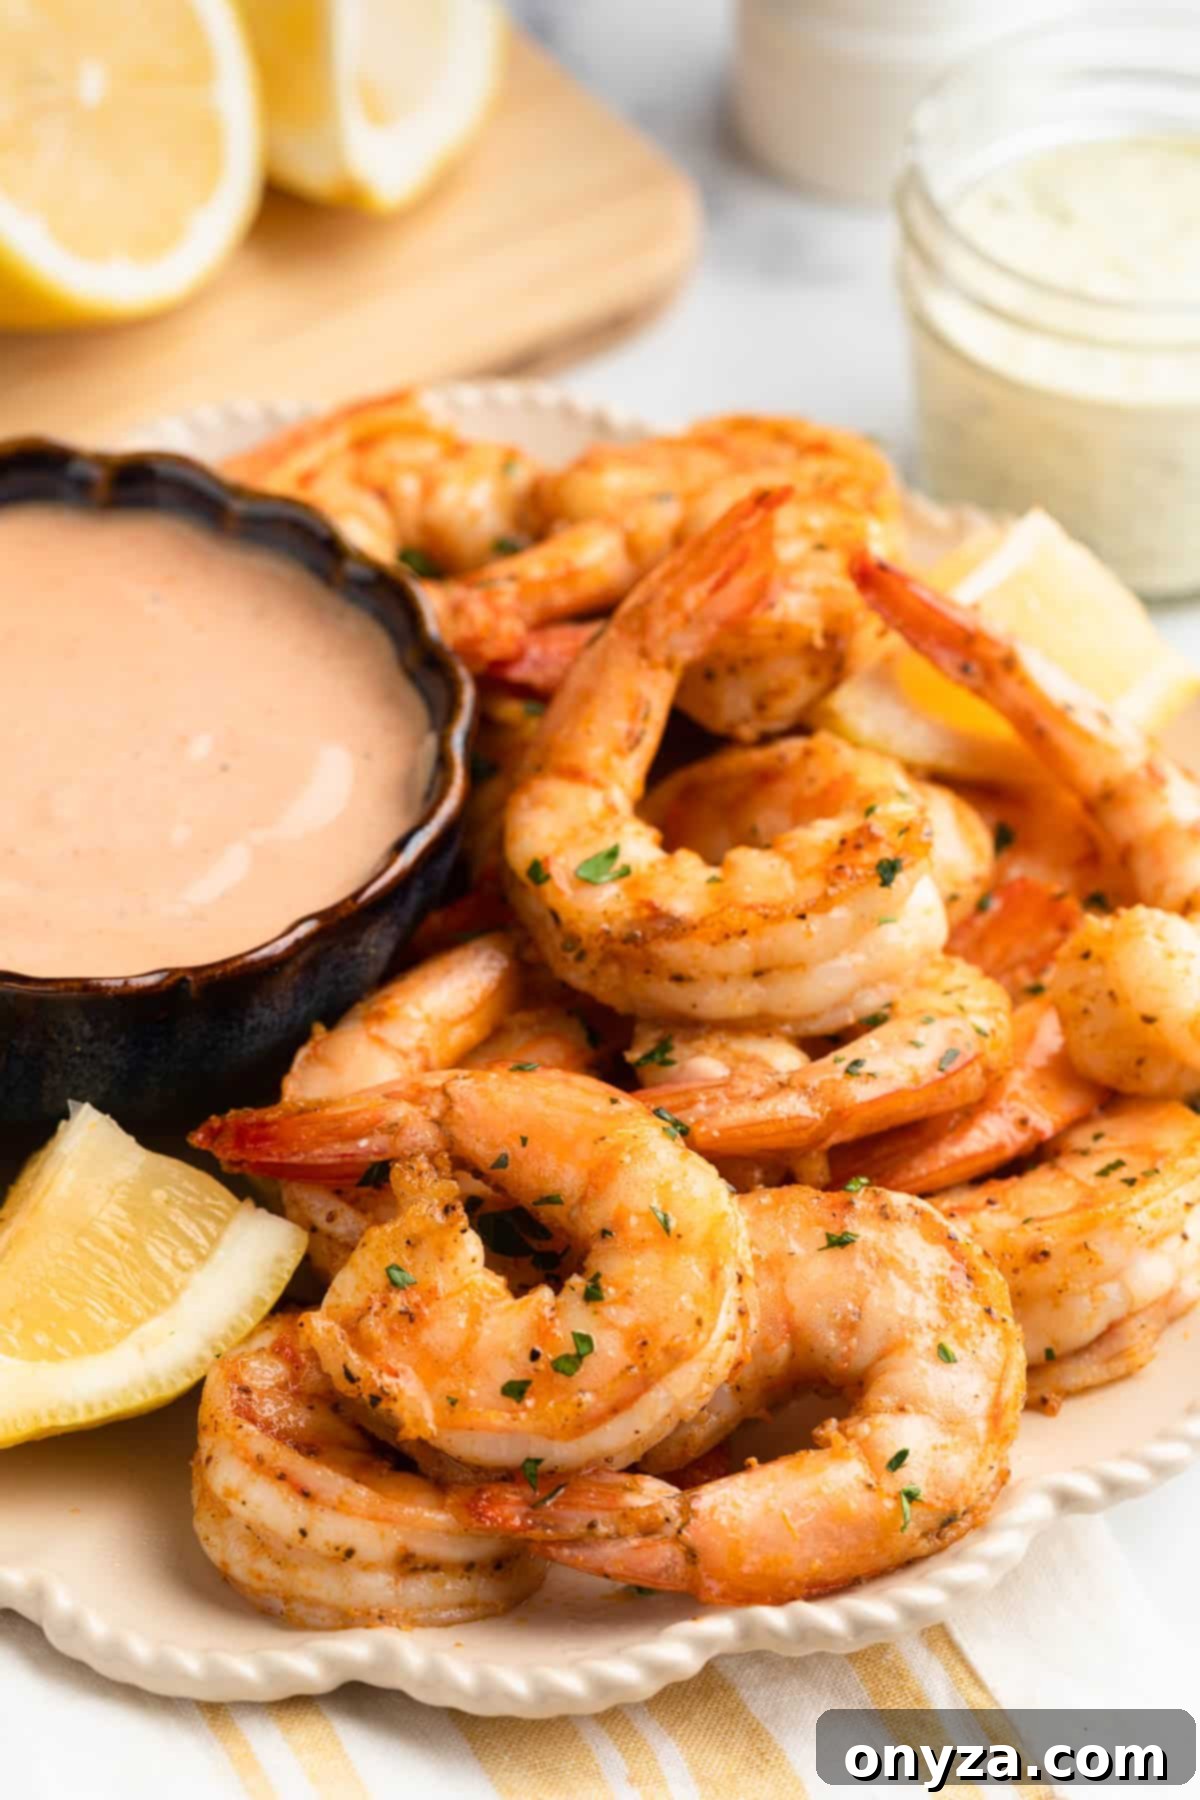
Effortlessly Delicious Air Fryer Shrimp: Your Guide to Perfect Seafood Every Time
Transform your weeknight meals and party appetizers with this incredibly simple yet utterly delicious Air Fryer Shrimp recipe. In just minutes, you can achieve succulent, flavorful shrimp that are perfectly tender and juicy, every single time. Forget the fuss of deep-frying or tedious pan-searing; your air fryer unlocks a world of convenience and incredible taste, delivering a healthy, restaurant-quality dish without the extra oil or effort. Seasoned with a classic blend of Old Bay and garlic, and brightened with a burst of fresh lemon, these unbreaded shrimp are a testament to how easy truly great seafood can be.
Why Air Fry Shrimp? The Ultimate Convenience and Flavor
The air fryer has revolutionized home cooking, and for good reason. When it comes to shrimp, this versatile appliance truly shines, offering numerous advantages over traditional cooking methods. Here’s why air-fried shrimp should be your new go-to:
- Unmatched Speed: From prep to plate, these shrimp are ready in as little as 15 minutes, making them ideal for busy weeknights or spontaneous gatherings.
- Perfect Texture Every Time: The air fryer’s circulating hot air cooks shrimp quickly and evenly, ensuring they emerge plump, juicy, and tender – never rubbery. This precise cooking minimizes the risk of overcooking, which is common with other methods.
- Healthier Option: By using minimal oil, air frying significantly reduces fat and calories compared to deep-frying, offering a guilt-free way to enjoy your favorite seafood.
- Exceptional Flavor: The dry heat of the air fryer helps to concentrate the flavors of the shrimp and seasonings, creating a more intense and satisfying taste. The exterior gets a slight crispness without needing any breading.
- Effortless Cleanup: Cooking in the air fryer basket means less splatter and fewer greasy pans, simplifying your post-meal cleanup.
- Incredibly Versatile: Whether served as a quick main course, a sophisticated appetizer, or incorporated into other dishes, air fryer shrimp are wonderfully adaptable.
Getting Started: Essential Tips for Perfect Air Fryer Shrimp
- You’ll need raw 16/20 count shrimp for this recipe—they’re large enough to stay plump and juicy in the air fryer without overcooking. These medium-large shrimp provide a satisfying bite and are less prone to drying out. For more details on selecting the best shrimp for any recipe, consult my Shrimp Sizes Guide to learn more about shopping for shrimp.
- Ready in just 15 minutes from prep to plate, Air Fryer Shrimp are perfect for busy weeknights, entertaining guests, or adding to game-day spreads—no fuss, just amazing flavor that will impress everyone.
- Prefer more heat or a milder seasoning? Easily adjust the spices to make these shrimp as bold or subtle as you like. We’ll explore various seasoning options to suit every palate.
- Fresh vs. Frozen: While fresh shrimp are always ideal, high-quality frozen shrimp can be an excellent alternative. Ensure they are fully thawed before cooking for the best results. Thaw them overnight in the refrigerator or under cold running water for quicker defrosting.
How to Make Air Fryer Shrimp: A Simple Step-by-Step Guide
Crafting perfectly seasoned, juicy, and tender shrimp has never been easier. With just a handful of ingredients and your trusty air fryer, you’re minutes away from a culinary delight. Follow these simple steps for flawless results every time.
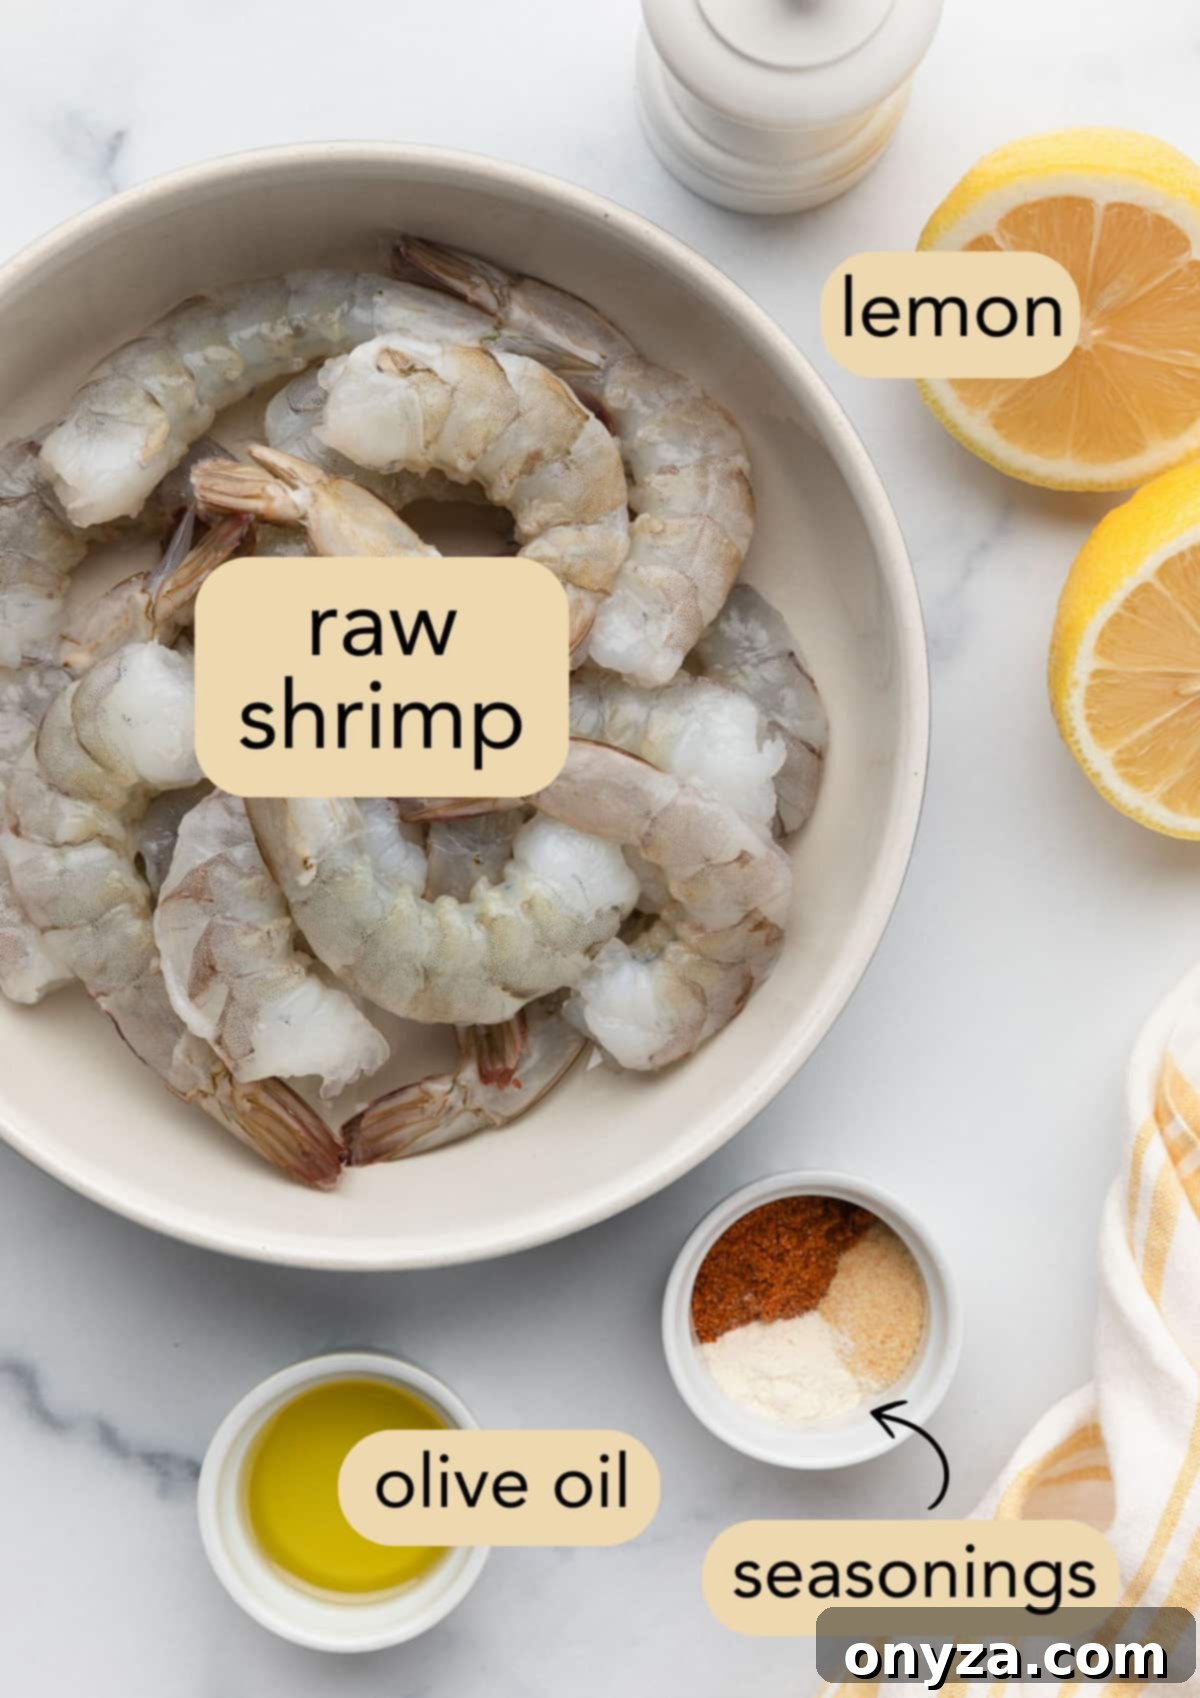
Step 1. Prepare Your Shrimp for Optimal Flavor and Texture
The foundation of delicious air fryer shrimp begins with proper preparation. For the highest quality and best presentation, I prefer to buy my shrimp cleaned but shell-on. Keeping the tail on after peeling not only provides an elegant touch but also serves as a convenient handle for dipping!
Effortlessly Remove the Shell and Devein the Shrimp
This step is crucial for both aesthetics and a pleasant eating experience. Here’s how to do it efficiently:
For EZ-Peel Shrimp: These typically come with a pre-split shell along the back, making removal incredibly simple. They are also often deveined. Gently pull the shell away from the shrimp, stopping just before the tail section. The vein should come out easily.
For Regular Shell-On Shrimp: If your shrimp don’t have pre-split shells, don’t worry—it’s still straightforward. Use a sharp paring knife or kitchen shears to make a shallow cut along the curved back of the shrimp. This cut should be along the top (where the dark vein is visible), not the underside where the legs are. Start at the thicker, meaty end and continue the cut just above the tail.
Once the cut is made, gently lift and remove the dark vein, which is the shrimp’s digestive tract. While not harmful to eat, removing it improves the shrimp’s appearance and texture. After deveining, peel away the shell in sections, being careful to leave the tail intact for that perfect dipping handle.
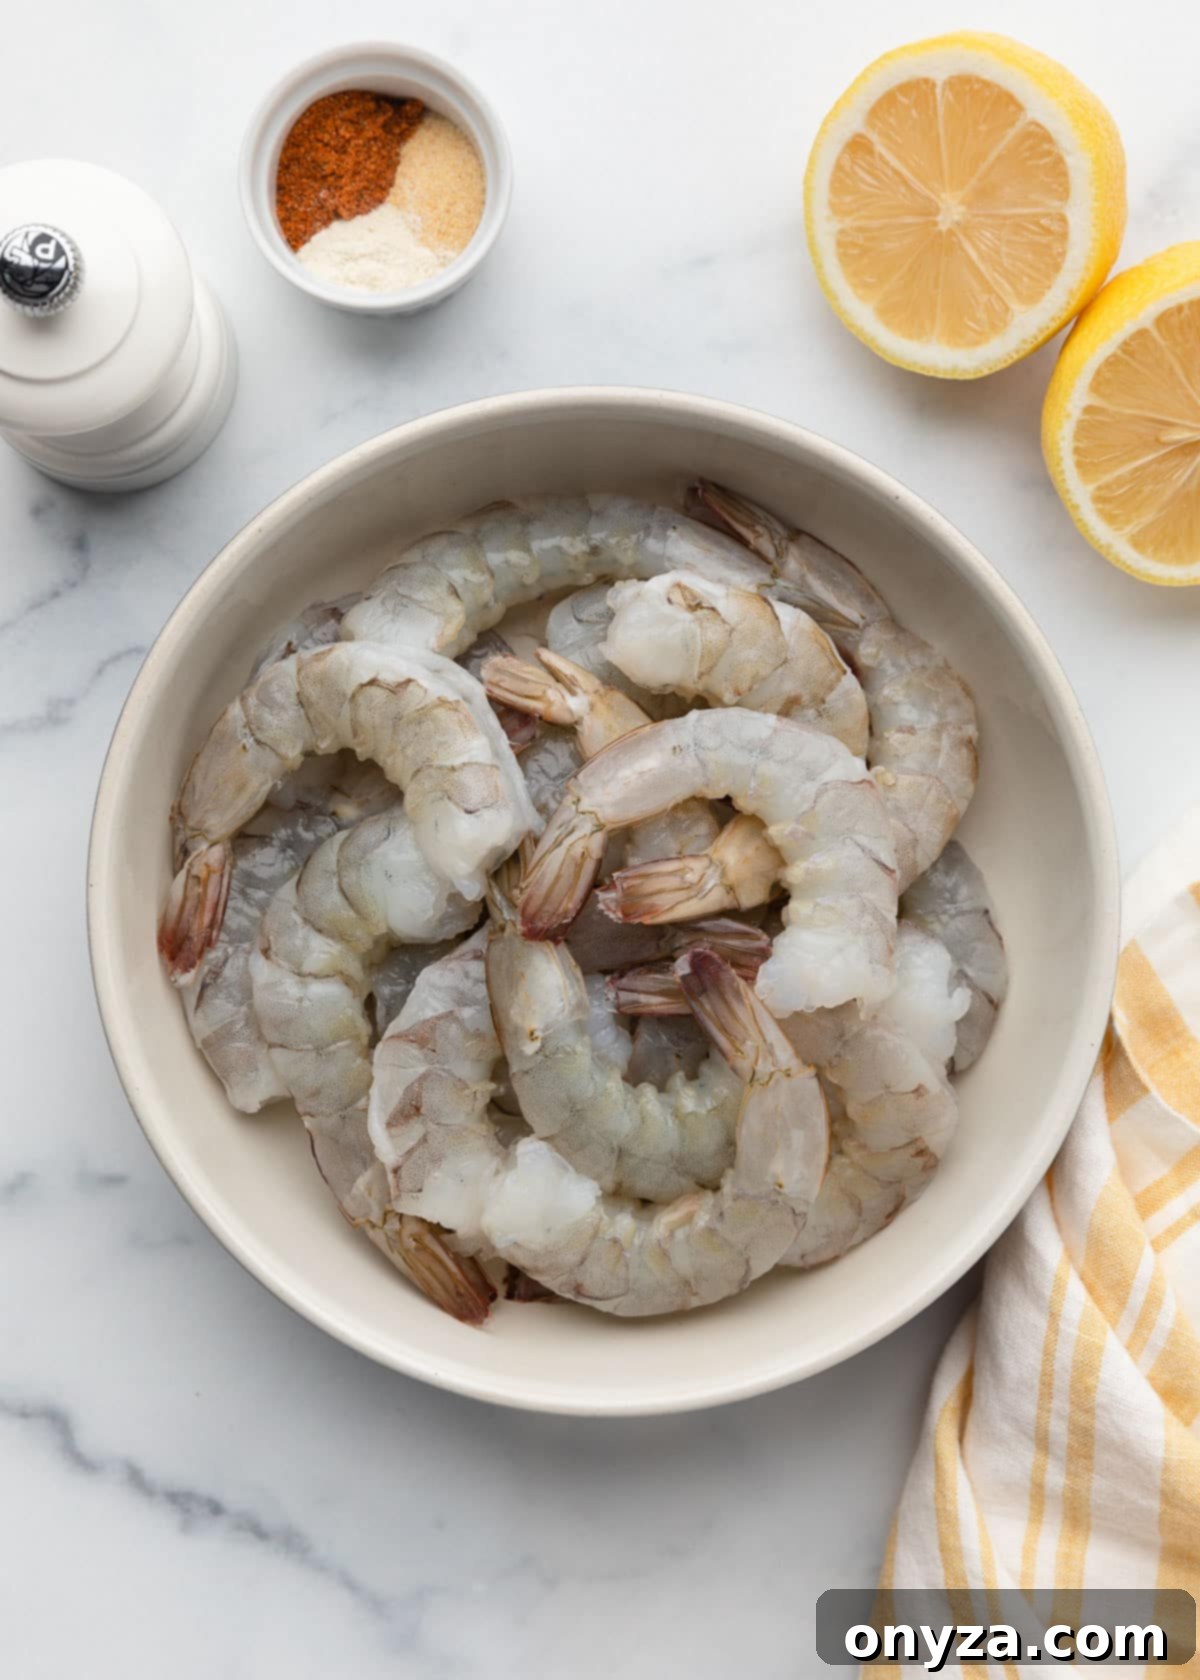
Rinse, Thoroughly Dry, and Perfectly Season Your Shrimp
After peeling and deveining, rinse the shrimp under cold water. This step is essential to wash away any lingering bits of shell or vein, ensuring your shrimp are perfectly clean.
Next, and this is a critical step for optimal seasoning adherence and crispiness, thoroughly pat the shrimp dry with a paper towel. Removing excess moisture allows the oil and seasonings to stick better, preventing a steamed texture and promoting a beautiful sear in the air fryer.
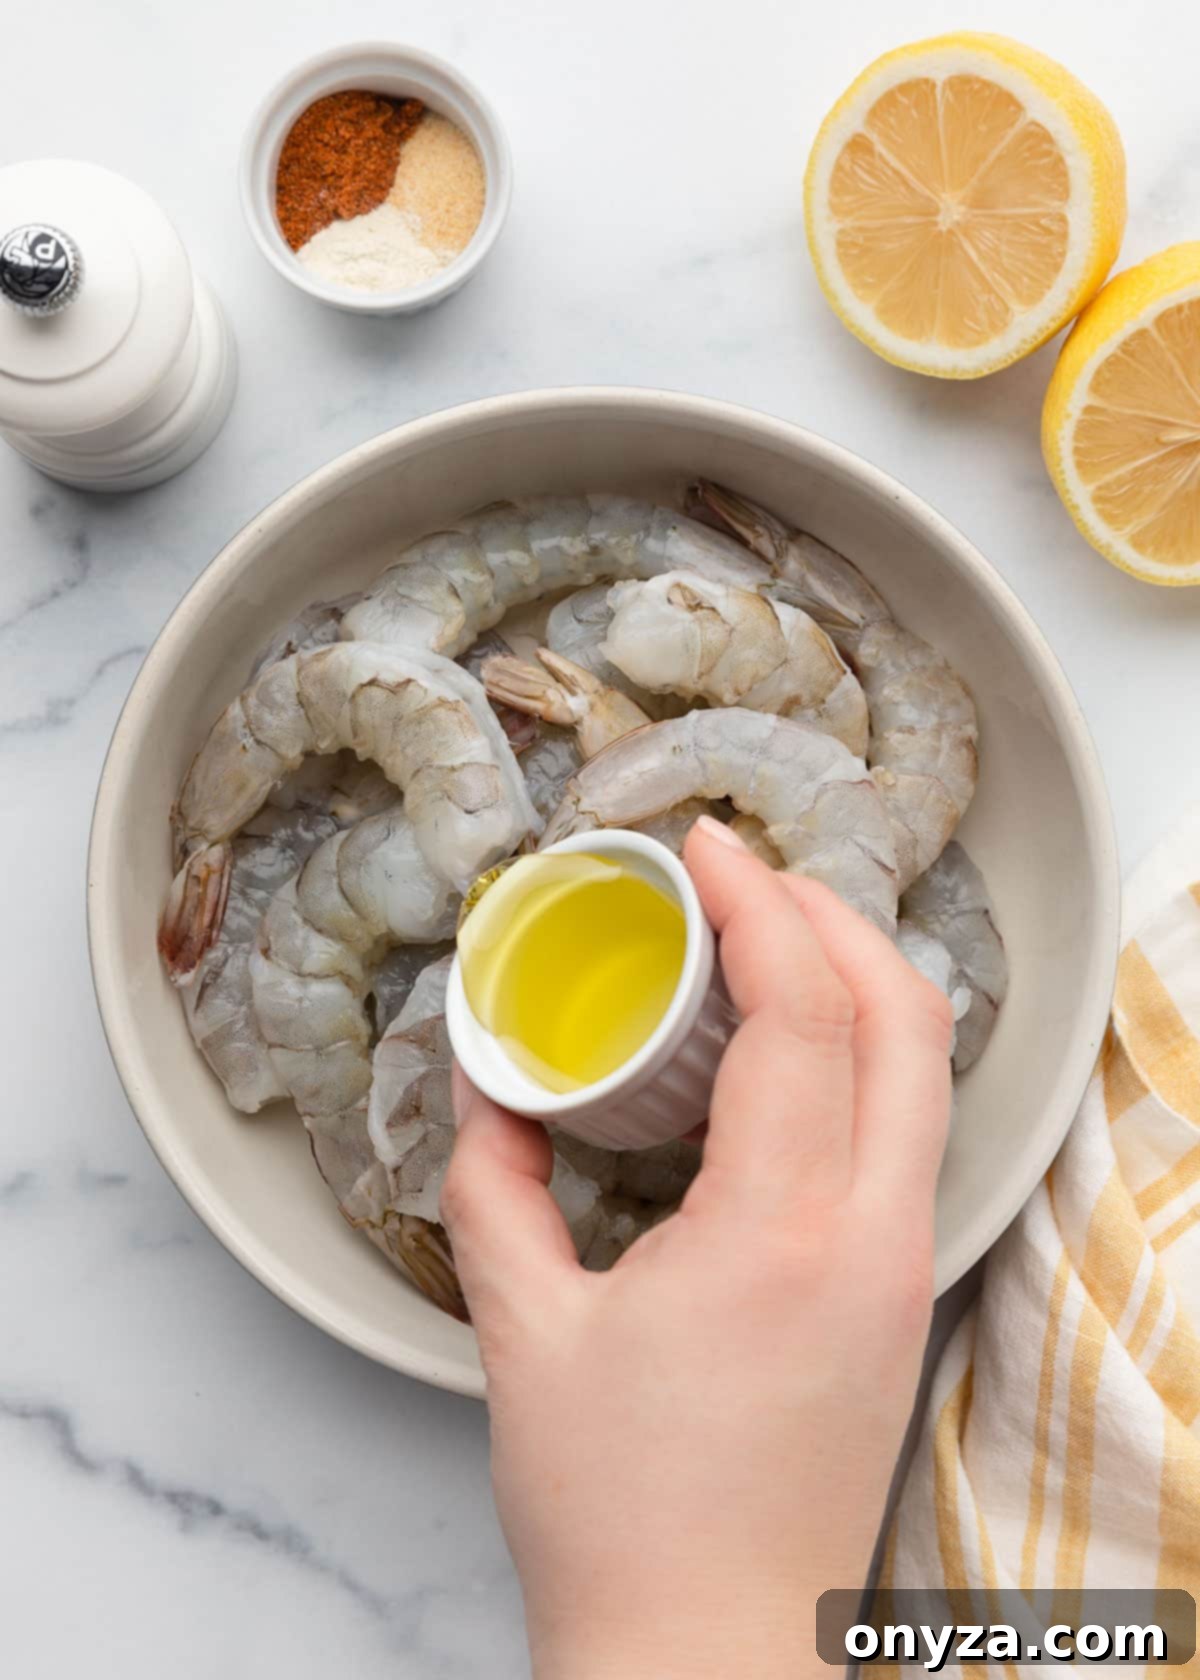
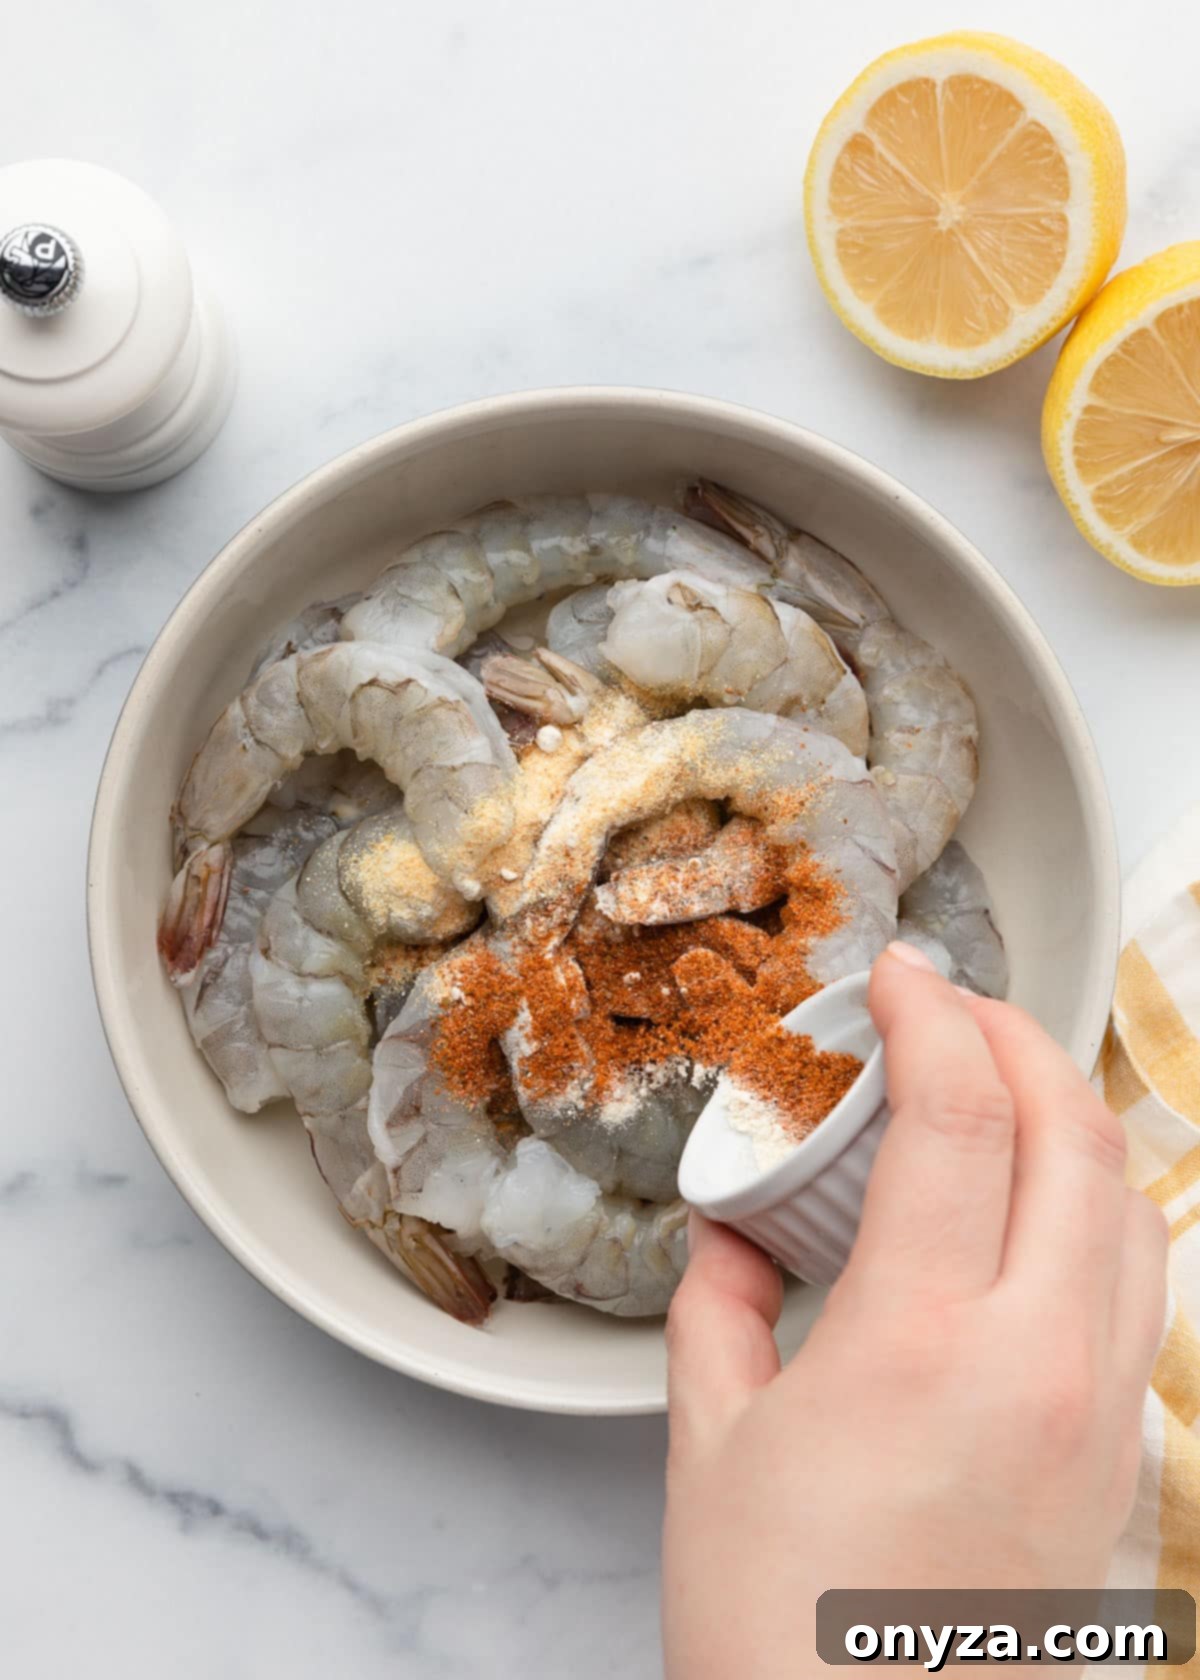
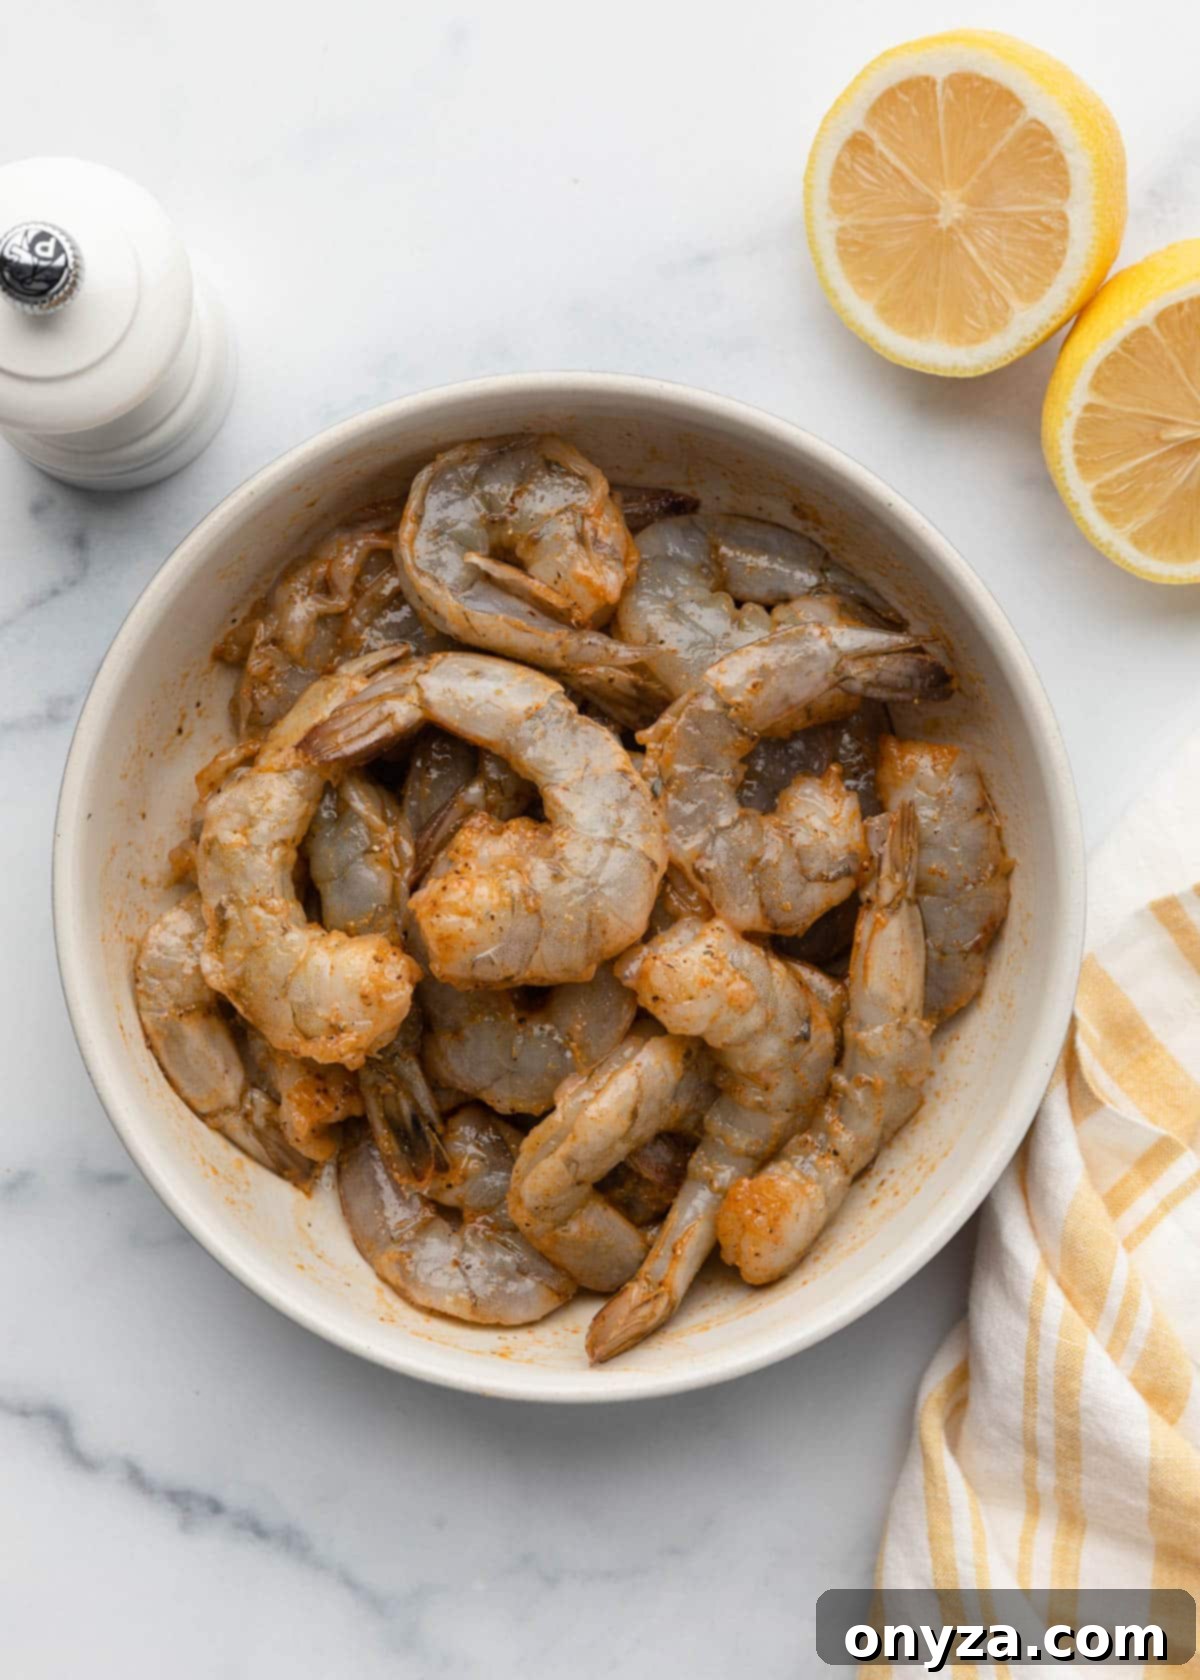
In a medium-sized bowl, toss the dried shrimp with a light coating of olive oil. This helps the seasonings adhere and promotes even cooking. Then, sprinkle generously with a savory blend of Old Bay seasoning, garlic powder, and onion powder. Use a rubber spatula or your hands to gently toss and ensure every shrimp is evenly coated with the aromatic spices.
Creative Seasoning Variations! Don’t be afraid to experiment with your flavor profile. Instead of Old Bay, consider using your favorite Cajun or Creole seasoning for a smoky, spicy kick. Alternatively, a sprinkle of lemon pepper offers a bright, zesty, and refreshing twist that perfectly complements the shrimp’s natural sweetness. For those who love a bit of heat, a pinch of cayenne pepper can be added to any of these blends.
Step 2. Preheat Your Air Fryer for Optimal Results
While it might be tempting to skip this step, preheating your air fryer is absolutely crucial for perfectly cooked shrimp. Set your air fryer to a temperature of 400°F (200°C) and allow it to preheat for approximately 3 to 5 minutes. The exact preheating time can vary by model; for instance, my Ninja XL Pro typically takes 3 minutes. Always consult your air fryer’s manual for specific recommendations.
The importance of preheating cannot be overstated for shrimp. A hot air fryer ensures that the shrimp begin cooking immediately upon contact, searing the exterior quickly. This rapid, even cooking locks in moisture, preventing the shrimp from becoming rubbery and guaranteeing that desirable plump and tender texture. Without preheating, the shrimp might steam rather than air-fry, resulting in a less appealing outcome.
Step 3. Air Fry the Shrimp to Golden Perfection
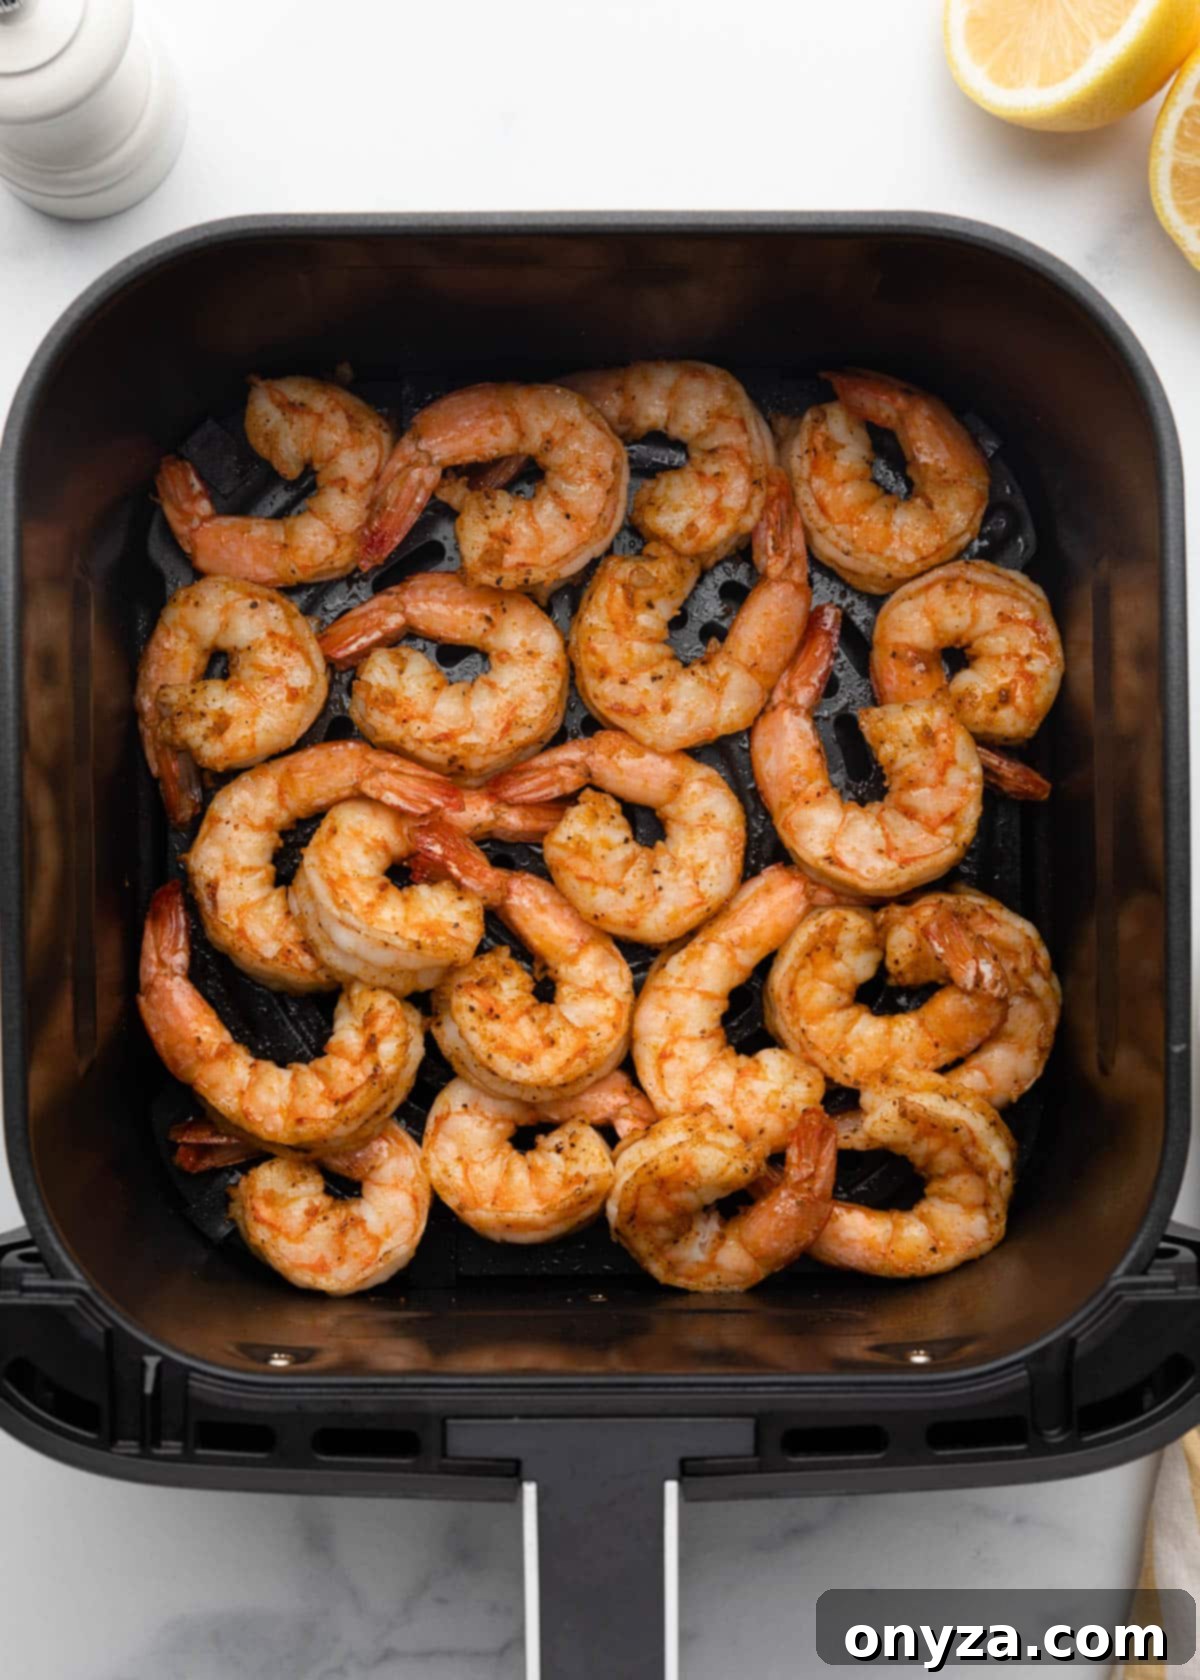
Once your air fryer is preheated, carefully arrange the seasoned shrimp in the basket in a single layer. Proper air circulation is key to achieving that ideal texture. A slight overlap is acceptable if absolutely necessary, but avoid piling the shrimp on top of each other. If you have a large batch, it’s always better to cook the shrimp in multiple batches to ensure each piece cooks evenly and gets adequately exposed to the hot circulating air.
Air fry the shrimp for a short duration of 4 to 6 minutes. Halfway through the cooking time (around the 2 to 3-minute mark), give the basket a good shake to redistribute the shrimp. This ensures even cooking and browning on all sides.
The shrimp are done when they are fully opaque, have turned a vibrant pink color, and form a loose “C” shape. An overcooked shrimp will curl tightly into an “O” shape and can be tough. For absolute precision, if you’re using an instant-read thermometer, the thickest part of the shrimp should reach an internal temperature of 145°F (63°C). Always err on the side of undercooking and check for doneness at the 4-minute mark, as cooking times can vary based on your air fryer model and shrimp size.

Step 4. Finish with a Bright Squeeze of Lemon
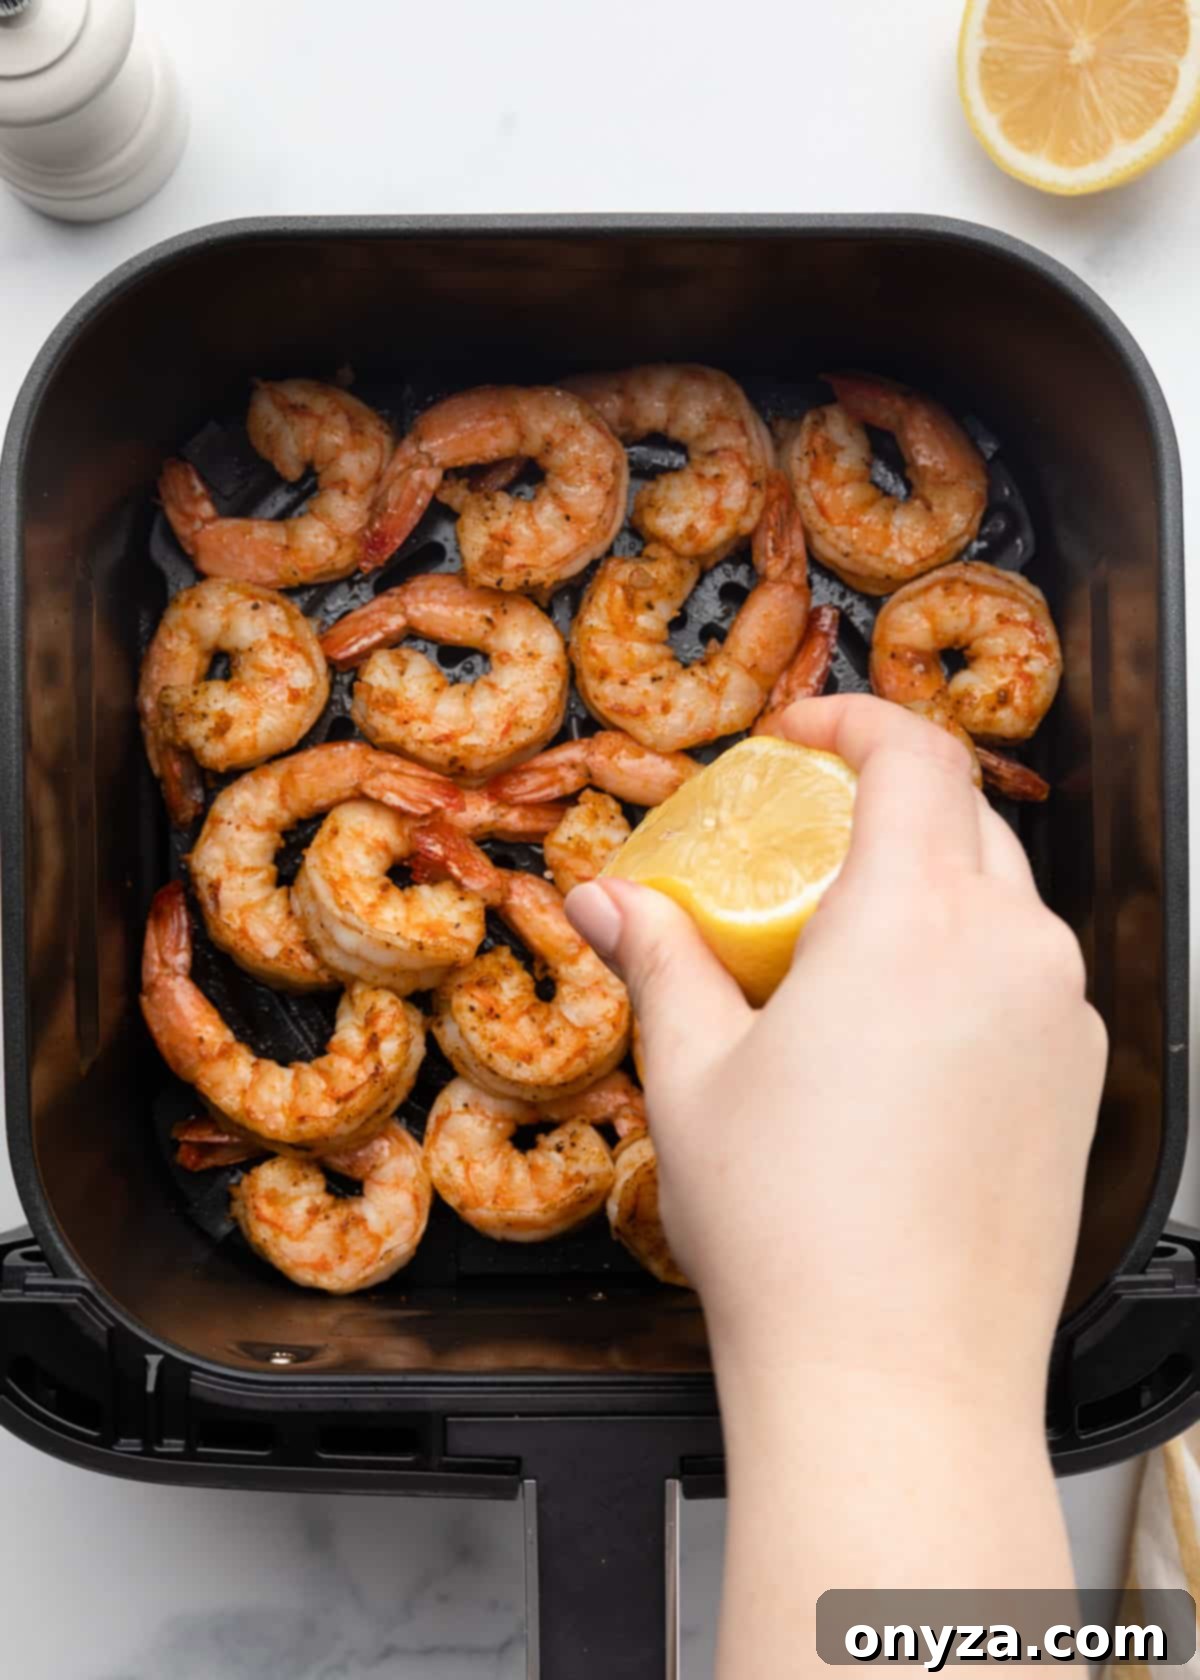
The final touch makes all the difference! Immediately after the shrimp are cooked and while they are still warm, squeeze fresh lemon juice generously over them. The bright acidity of the lemon cuts through the richness of the seasonings, enhancing the shrimp’s natural sweetness and adding a vibrant, fresh flavor profile that is characteristic of classic seafood dishes. The warmth of the shrimp will help the lemon flavor infuse beautifully.
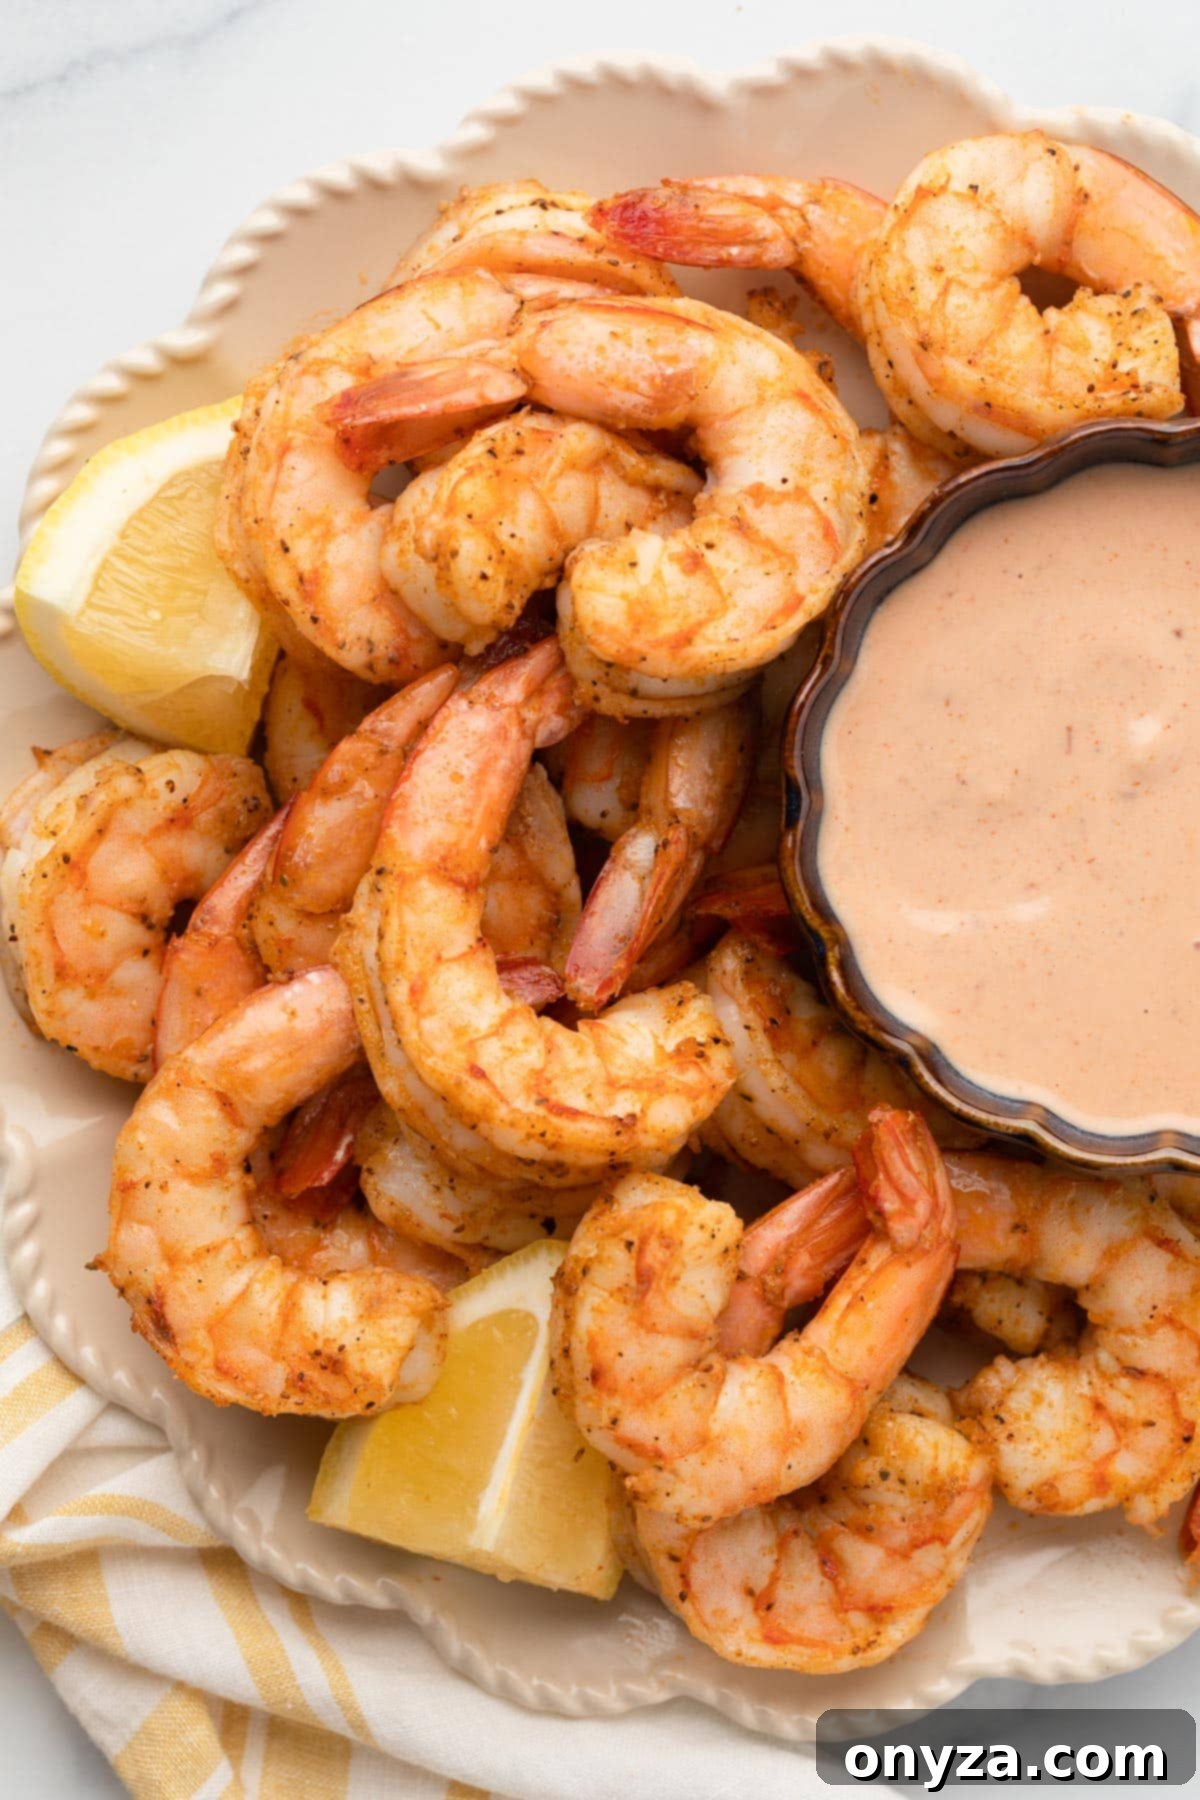
Transfer the succulent shrimp to a serving platter. Don’t leave behind any of that delicious seasoned oil in the air fryer basket; gently pour it over the shrimp on the platter to maximize flavor. When serving these as a main dish or an appetizer, I often like to sprinkle them with finely chopped fresh parsley. This simple garnish adds a pop of color and an additional layer of herbaceous freshness, making the dish even more appealing.
Customizing Your Air Fryer Shrimp: Flavor Variations
While the Old Bay and garlic combination is a timeless classic, the beauty of this Air Fryer Shrimp recipe lies in its adaptability. Don’t hesitate to experiment with different seasonings to match your mood or meal theme:
- Cajun/Creole: For a smoky, spicy kick with notes of paprika, cayenne, and herbs, swap Old Bay for your favorite Cajun or Creole seasoning blend. This is fantastic for a Southern-inspired dish.
- Lemon Pepper: Achieve a bright, citrusy twist by using lemon pepper seasoning. This adds an instant burst of zesty flavor that is incredibly refreshing, especially in warmer months.
- Spicy Garlic-Herb: Combine garlic powder with dried oregano, thyme, and a generous pinch of red pepper flakes for a robust and spicy Mediterranean-inspired flavor.
- Smoky Paprika: A good quality smoked paprika, combined with garlic and a touch of cumin, can give your shrimp a deep, earthy, and subtly smoky profile.
- Asian-Inspired: For a different take, try tossing the shrimp with a tiny bit of sesame oil, ginger powder, and a dash of white pepper. Serve with a sprinkle of toasted sesame seeds.
Serving Air Fryer Shrimp: Versatile Pairings for Any Occasion
These incredibly flavorful Air Fryer Shrimp are a true culinary chameleon, effortlessly transitioning from a quick and easy weeknight main course to a sophisticated, crowd-pleasing appetizer. Their delicious taste, whether fresh out of the air fryer or slightly cooled, makes them perfect for any entertaining scenario, from casual game-day spreads to elegant dinner parties.
Here are some of our absolute favorite ways to enjoy these delightful shrimp:
- As a Satisfying Main Course. Pair these succulent shrimp with a variety of complementary sides for a complete and healthy meal. They’re fantastic alongside fluffy rice pilaf, or for an extra air-fried delight, try them with crispy Air Fryer Potato Wedges. Other excellent choices include vibrant roasted asparagus, tender sautéed green beans, or a refreshing cucumber and tomato salad.
- As an Elegant Appetizer. Elevate your starter spread by adding these flavorful shrimp to a grand seafood platter. They pair wonderfully with my Air Fryer Crab Cakes or rich Roux Crab Cakes, creating an impressive and delectable offering for guests. Don’t forget a bowl of ice for a classic presentation.
- Irresistible Pasta Dishes. Toss the warm air-fried shrimp with al dente penne or delicate angel hair pasta and a light, zesty lemon-garlic butter sauce for a refreshing and quick dinner. For a more indulgent and creamy experience, serve them over luscious fettuccine Alfredo, allowing the rich sauce to complement the tender shrimp.
- Fresh and Flavorful Salads. Transform any ordinary salad into a restaurant-quality entrée by topping it with these seasoned shrimp. They’re particularly delightful over a crisp Caesar Salad, adding a zesty and protein-packed twist to a beloved classic. Experiment with your favorite greens, vegetables, and dressings for endless possibilities.
- Delectable Sandwiches and Rolls. Create a sensational sandwich by piling Air Fryer shrimp onto a lightly toasted hoagie roll with crisp lettuce, ripe tomato slices, and a creamy remoulade sauce for a delightful twist on a classic shrimp po’ boy. Alternatively, arrange them on a soft, buttery brioche bun with crunchy lettuce and a dollop of tartar sauce for a simple yet incredibly satisfying shrimp sandwich.
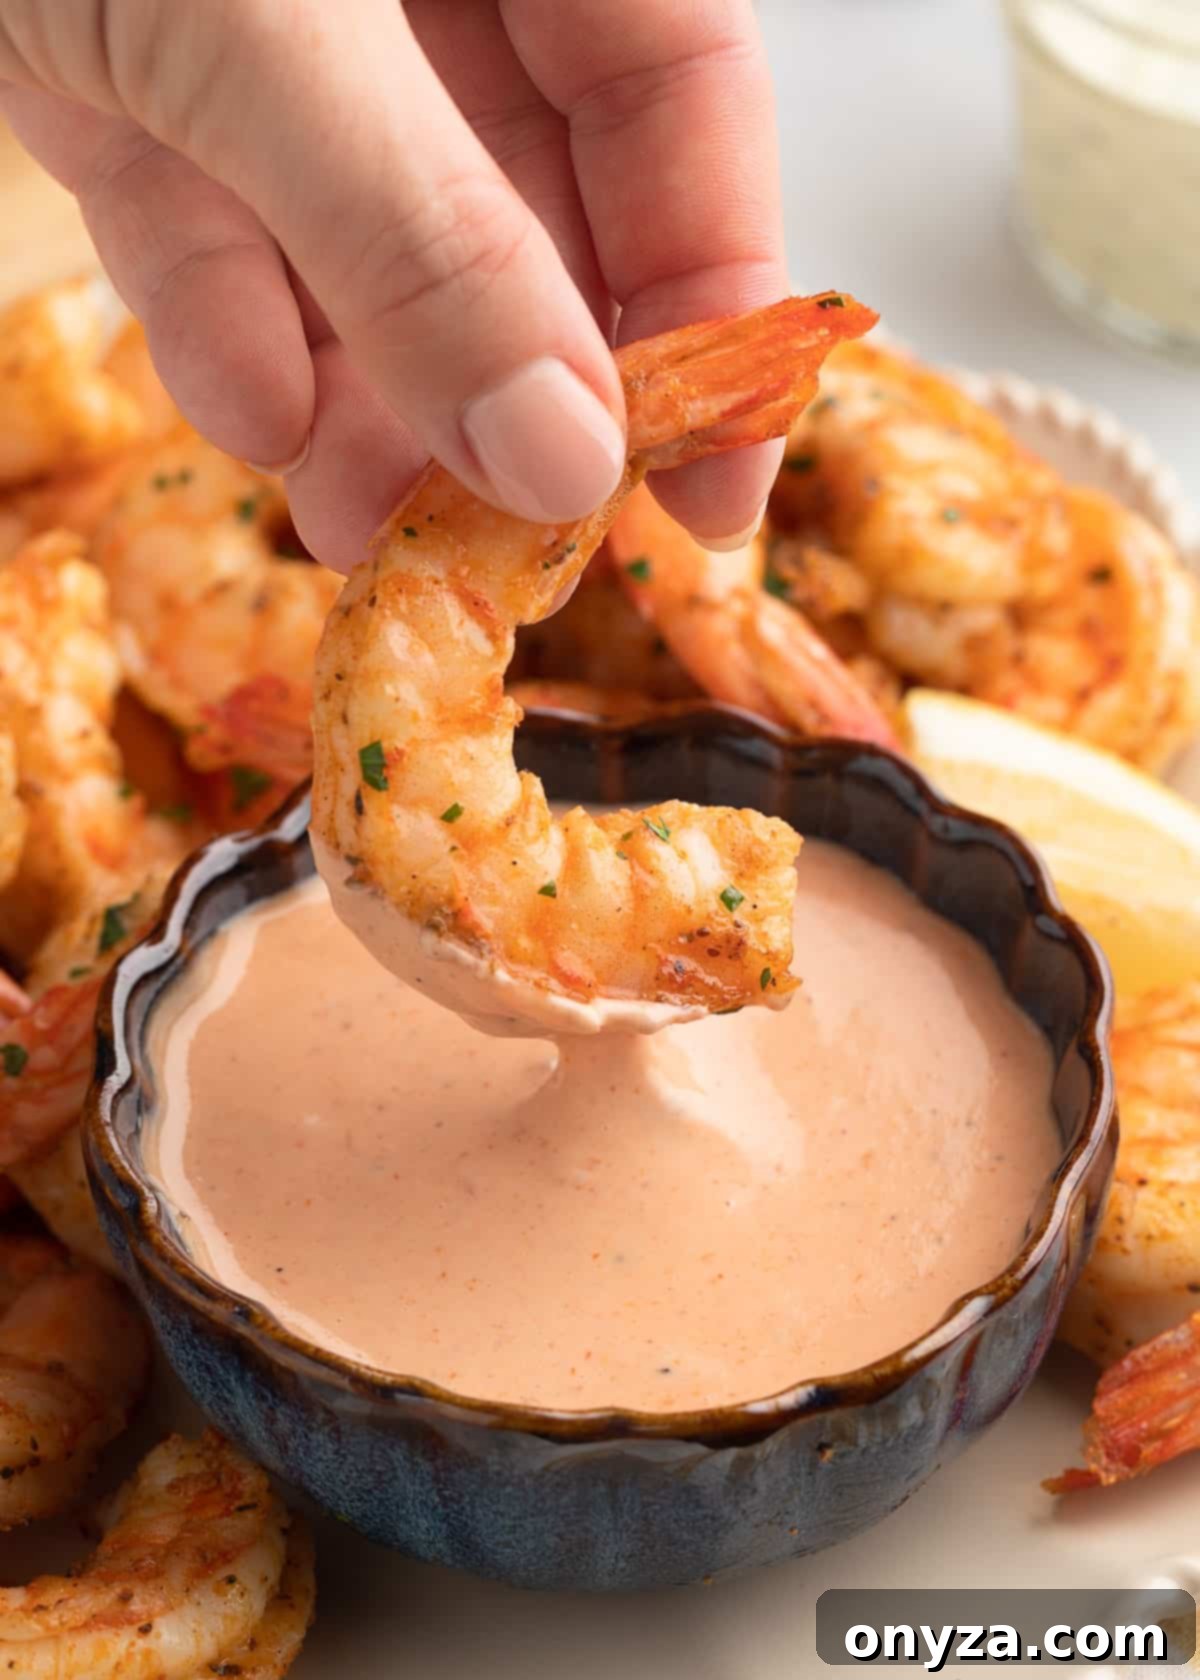
Don’t Forget the Dip! While these shrimp are bursting with flavor on their own, a superb dipping sauce can elevate the experience even further. My family absolutely adores them with creamy, zesty Comeback Sauce, classic Homemade Tartar Sauce with Pickle Relish, or its tangy cousin, Tangy Tartar Sauce (with cornichons). For a more traditional seafood pairing, a vibrant Homemade Cocktail Sauce is always a hit.
Expert Tips for Perfectly Cooked Air Fryer Shrimp
- Don’t Overcrowd the Basket: This is arguably the most important tip. Overcrowding prevents proper air circulation, leading to steamed rather than crispy shrimp. Cook in batches if necessary.
- Pat Dry Thoroughly: Moisture is the enemy of crispiness. Ensure your shrimp are as dry as possible after rinsing to allow seasonings to adhere and promote browning.
- A Little Oil Goes a Long Way: Even with unbreaded shrimp, a light coating of olive oil helps the seasonings stick, enhances flavor, and aids in achieving a beautiful, slightly crisped exterior.
- Know Your Air Fryer: Cooking times can vary significantly between air fryer models due to wattage and design. The first time you make this recipe, keep a close eye on your shrimp starting at the 3-minute mark to gauge the ideal cooking time for your specific appliance.
- Shake the Basket: Shaking the air fryer basket halfway through ensures even cooking and promotes consistent browning on all sides of the shrimp.
- Check for Doneness Visually: Beyond the C-shape, look for a vibrant pink color and opaque flesh throughout. A quick check with an instant-read thermometer (145°F/63°C) is foolproof.
- Serve Immediately: While air fryer shrimp are still tasty cooled, they are at their absolute best when served fresh and warm, right after that final lemon squeeze.
Frequently Asked Questions About Air Fryer Shrimp
Can I use frozen shrimp for this recipe?
Yes, absolutely! If using frozen shrimp, make sure to thaw them completely before you begin. You can thaw them overnight in the refrigerator or by placing them in a colander under cold running water for about 15-20 minutes. Once thawed, pat them very dry with paper towels to remove any excess moisture before seasoning and air frying.
Do I need to bread the shrimp?
No, this recipe specifically focuses on unbreaded shrimp, allowing the natural flavor of the shrimp and the seasonings to truly shine. The air fryer still gives them a wonderful texture without any heavy coating. If you prefer breaded shrimp, you would need to adjust the recipe and cooking times significantly.
My shrimp turned out rubbery, what went wrong?
Rubbery shrimp are almost always a sign of overcooking. Shrimp cook very quickly, especially in an air fryer. Ensure you are preheating your air fryer, not overcrowding the basket, and checking for doneness promptly (around the 4-minute mark). Look for the “C” shape and opaque pink color rather than a tight “O” curl.
Can I make this recipe spicier?
Of course! To add more heat, you can increase the amount of Old Bay seasoning (up to 2 teaspoons, but be mindful of salt content), or add a pinch or two of cayenne pepper to your seasoning mix. Another option is to use a spicier Cajun or Creole seasoning blend.
What if my air fryer model is different?
Air fryers can vary in wattage and cooking efficiency. The cooking times provided are a guideline. For your specific model, start checking for doneness at the lower end of the suggested time range (e.g., 4 minutes). If your shrimp are smaller or larger than 16/20 count, you’ll also need to adjust; smaller shrimp will cook faster, larger shrimp will take longer.
Storing and Reheating Your Air Fryer Shrimp
Cooked Air Fryer Shrimp are excellent for meal prep or enjoying as leftovers. Store any remaining shrimp in an airtight container in the refrigerator for 3 to 4 days. While they can certainly be enjoyed cold in salads or as a quick snack, I find that gently reheating them brings out their best flavor and texture, almost like they were freshly made.
To reheat, simply pop the shrimp back into your air fryer at 350°F (175°C) and cook for a brief 2 to 3 minutes, just until they are heated through. The key here is to be very careful not to overcook them, as this is when they can easily become rubbery and tough. A quick reheat will restore their tender, juicy quality without compromising their delicious taste.
Explore More Air Fryer Delights!
If you’ve fallen in love with the ease and efficiency of air frying, you’re in luck! There’s a whole world of delicious possibilities waiting in your air fryer. Expand your culinary repertoire with these other fantastic air fryer recipes:
- Air Fryer Chicken Tenders
- Air Fryer Crab Cakes
- Air Fryer Mozzarella Sticks
- Air Fryer Hot Dogs
- Air Fryer Buffalo Chicken Bites
Looking for more ways to cook with your Air Fryer? Check out my full Air Fryer recipe collection for even more inspiration and easy-to-follow guides!
Pin Recipe
Print Recipe
Air Fryer Shrimp
Ingredients
- 1 pound 16/20 shrimp , peeled, and deveined, tails left on
- 1-1/2 tablespoons regular olive oil
- 1 to 1-1/2 teaspoons Old Bay Seasoning (depending on how zesty you like your shrimp–see note below)
- ¾ teaspoon granulated garlic powder
- ½ teaspoon onion powder
- ½ lemon , juiced
- freshly-ground black pepper (optional)
- chopped fresh parsley , for garnish (optional)
Instructions
- Preheat your air fryer to 400°F (200°C) for 3 to 5 minutes, following your model’s instructions. (For reference, my Ninja Pro XL takes 3 minutes to preheat.)
- Prep the shrimp: After peeling and deveining, rinse and pat them dry with paper towels. In a medium bowl, toss the shrimp with olive oil, garlic powder, onion powder, and Old Bay seasoning until evenly coated. For extra spice, add a few grinds of freshly cracked black pepper (optional).
- Cook the shrimp: Arrange them in a single layer in the preheated air fryer basket. A little overlap is fine, but don’t pile them on top of each other so the air can circulate. Air fry for 4 to 6 minutes, shaking the basket halfway through.
- Check for doneness: The shrimp should be opaque, pink, and form a loose “C” shape (not a tight “O”). If using an instant-read thermometer, the internal temperature should reach 145°F (63°C) in the meatiest part. Since cooking times can vary by air fryer model, check for doneness at 4 minutes to prevent overcooking.
- Serve: Squeeze fresh lemon juice over the shrimp and use tongs to transfer them to a serving platter. Garnish with parsley, if desired, and serve with your favorite dipping sauces.
Notes
- Smaller shrimp (21/25 or 26/30) – Start checking for doneness at 3 minutes instead of 4.
- Larger shrimp (U/12 or U/15) – They’ll likely need closer to 6 minutes, possibly a minute or two longer, depending on your air fryer.
- Shrimp smaller than 26/30 – Not recommended, as they cook too quickly and can dry out.
To prevent overcooking, keep a close eye on the shrimp and adjust the timing based on your specific air fryer.
Old Bay Seasoning: After testing multiple batches of this recipe, my taste testers were split between mild and zestier shrimp. We decided it would be best to give a range for the quantity of Old Bay so that you can customize it to your preferred spice level.
- Milder Shrimp: Use 1 teaspoon of Old Bay.
- Zestier: Increase to 1 ¼ to 1 ½ teaspoons for bolder seasoning.
- Extra Zesty: Feel free to measure with your heart, but I don’t recommend exceeding 2 teaspoons. Old Bay contains salt and can make the shrimp too salty if used with too heavy a hand.
Want more heat without extra salt? Add a pinch or two of cayenne pepper to the seasoning mix.
Personally, I prefer a milder seasoning to let the shrimp’s natural sweetness shine—especially when serving them with Comeback Sauce, which brings its own kick of heat.
Flavor Variations: Swap out the Old Bay for Cajun or Creole seasoning (for a smoky, spicier flavor), or lemon pepper (for a bright, citrusy twist).
Nutrition Estimate
Nutrition information is automatically calculated, so should only be used as an approximation.
Please note that our recipes have been developed using the US Customary measurement system and have not been tested for high altitude/elevation cooking and baking.
