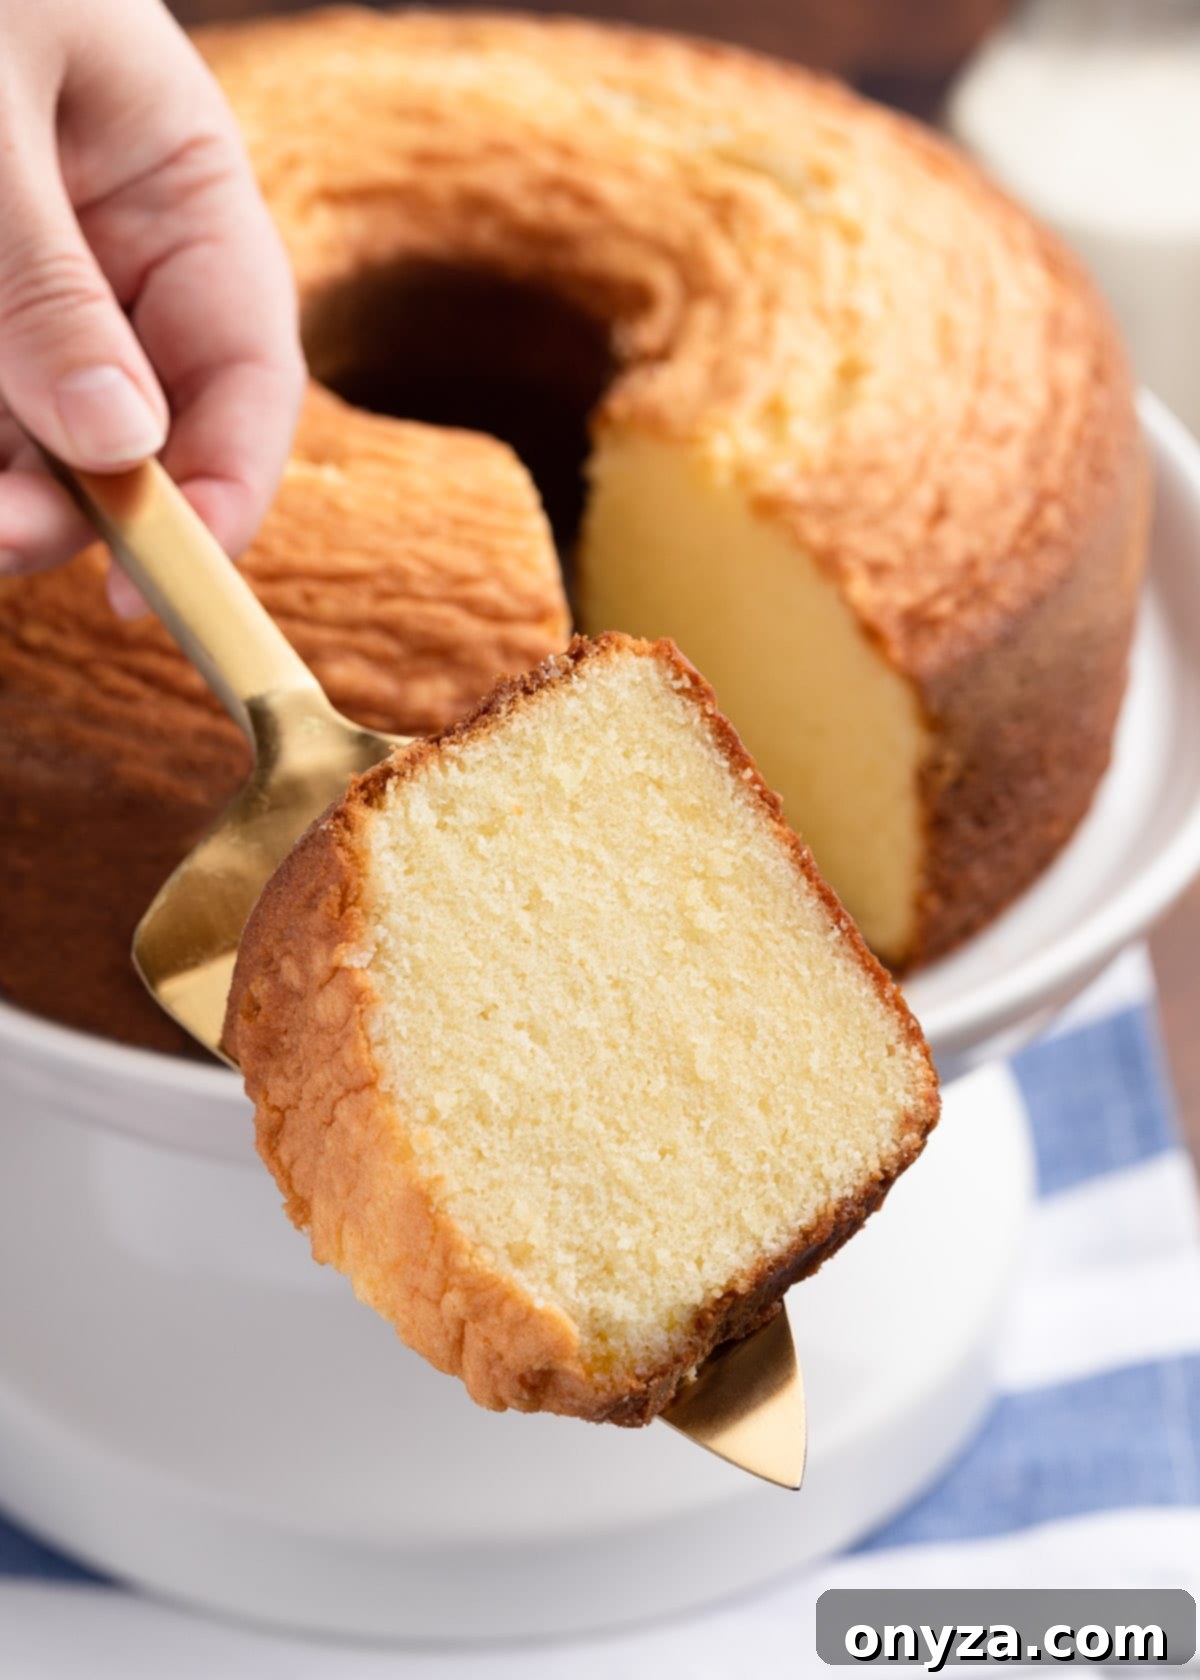
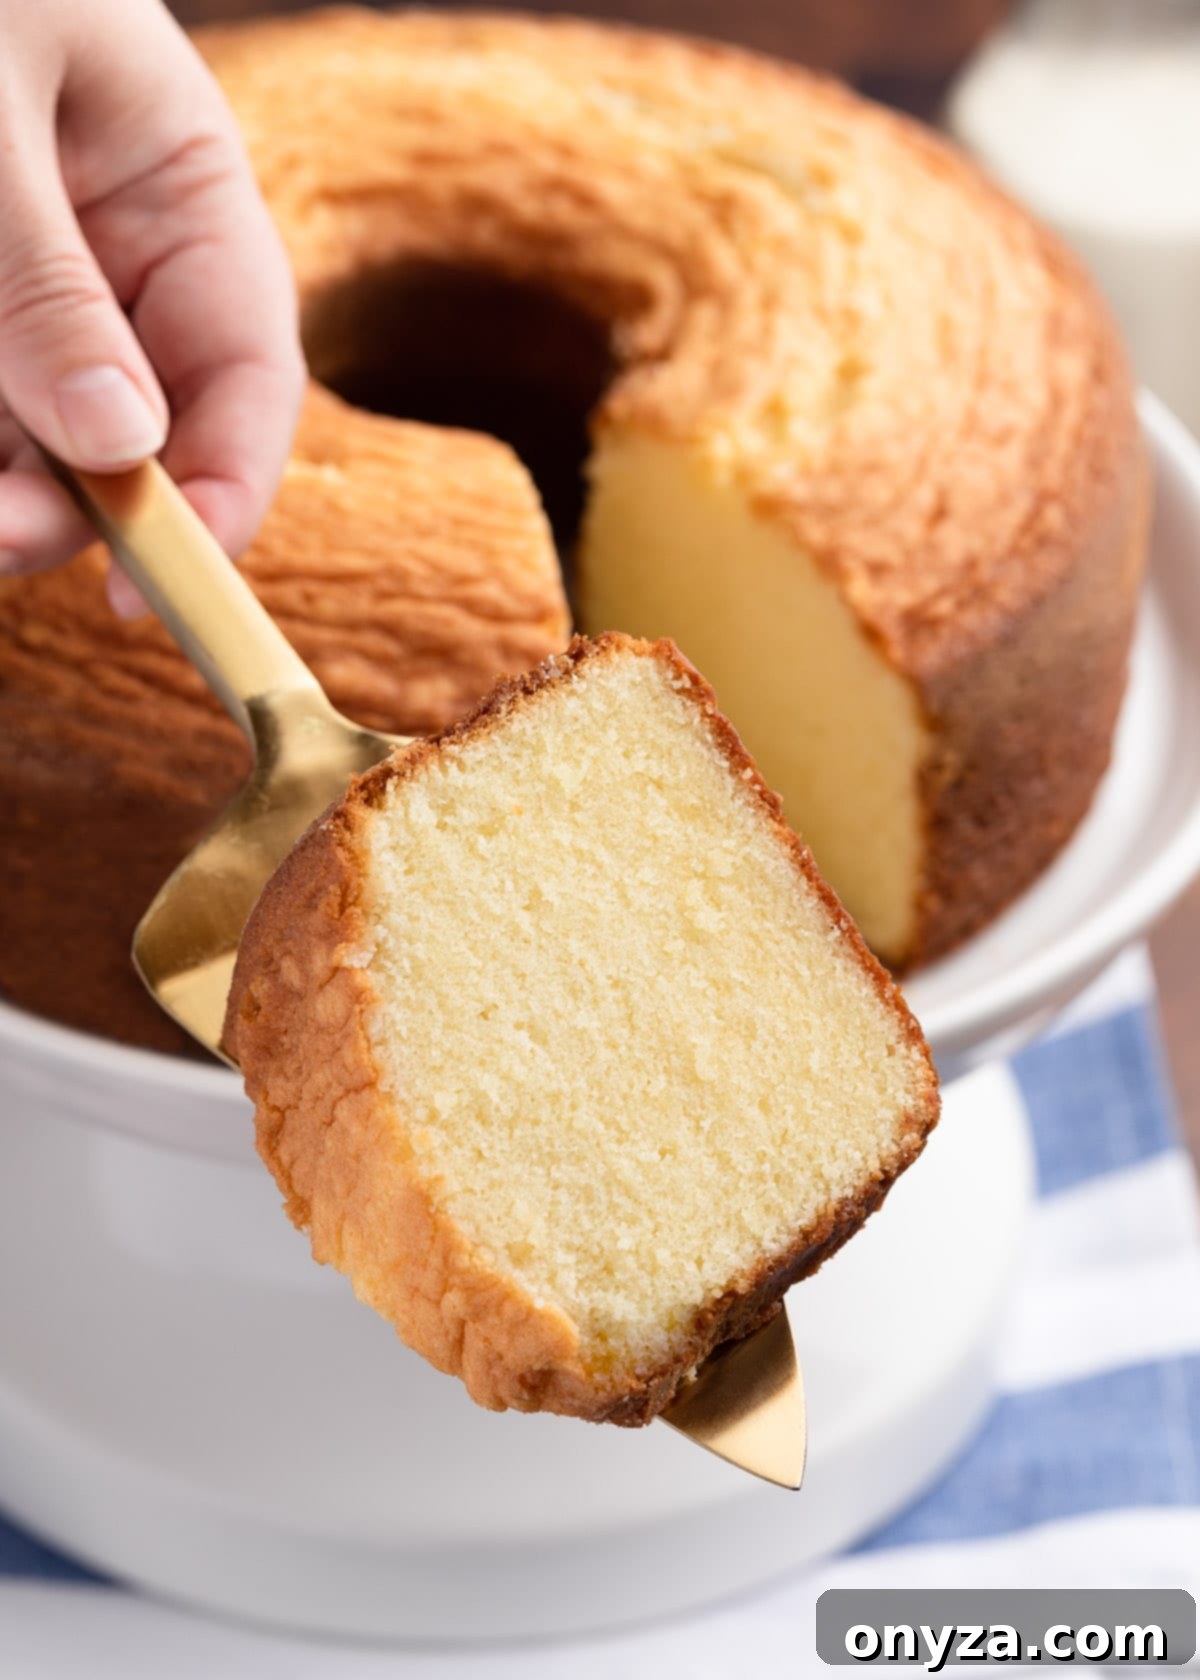
Rich, dense, and exceptionally buttery, this vanilla pound cake recipe is a cherished family tradition, perfected over years to deliver an unparalleled treat. Whether savored simply on its own or adorned with your favorite luscious toppings, this moist pound cake offers a comforting and indulgent experience perfect for any moment. From a delightful breakfast companion to a satisfying mid-afternoon snack or a grand dessert finale, its versatile charm shines through.
Beyond being a standalone delight, this easy vanilla pound cake serves as a magnificent foundation for a myriad of creative desserts throughout the year. Its adaptable nature means the possibilities are truly endless, making it a must-have recipe for any home baker.
This post may contain affiliate links. As an Amazon Associate, I earn a commission (at no additional cost to you) from qualifying purchases made by clicking these links. All recommendations and opinions expressed are always my own.
Discover the Rich History of Classic Pound Cake
Pound cake, a delightfully dense, sweet, and buttery confection, holds a particularly special place in the culinary heritage of the Southern United States. The origins of this beloved cake style are traced back to northern Europe, making its way to North America with colonists during the 18th century. Culinary historians suggest that the very first written recipe for pound cake in the American colonies dates back to Colonial Virginia in 1754, showcasing its deep roots in early American cuisine. (Historical Source: American Cake; Anne Byrn p. 21, 28)
The name “pound cake” itself provides a charming insight into its original formulation. Early recipes famously called for a pound of each primary ingredient: flour, sugar, butter, and eggs. This straightforward 1:1:1:1 ratio not only made the recipe easy to remember but also highlighted its rustic simplicity. In these earliest versions, chemical leaveners were entirely absent. The cake achieved its characteristic rise and tender texture solely through the laborious process of whipping air into the batter, a testament to the skill and patience of bakers before the advent of modern baking aids.
It’s fascinating to note that baking powder, a staple in today’s kitchens, wasn’t invented until the mid-19th century. Its introduction revolutionized baking, allowing for lighter, airier cakes. Despite these advancements, the pound cake, with its robust structure and rich flavor, has endured, adapting slightly over time while maintaining its core appeal.
Cakes with a similar dense, buttery texture to pound cake are celebrated across various cultures in Europe and the Americas. Notable examples include the French “quatre-quarts” (meaning “four quarters,” referring to its equal-part ingredients), the Mexican “panqué,” and the British “Madeira cake.” Each offers a unique cultural twist on the same comforting, rich cake profile, proving the universal appeal of this simple yet exquisite dessert.
What Makes This Vanilla Pound Cake Recipe Truly Special?
This particular vanilla pound cake recipe is a testament to culinary evolution, adapted over many years by my mother and me from a beloved cookbook, Southern Sideboards (Junior League of Jackson, 1974). The original recipe, named “Selma’s Virginia Pound Cake” and shared by Mrs. Patrick H. Scanlon, served as our inspiration, but we’ve made thoughtful adjustments to elevate its flavor and texture, resulting in what we believe is the ultimate homemade pound cake experience.
Our adaptation diverges from many classic pound cake recipes in several key ways, each contributing to its superior qualities. Firstly, unlike the traditional “pound per ingredient” ratio, our recipe introduces precise measurements for optimal balance. Secondly, we opt for cake flour instead of all-purpose flour, a crucial change that significantly impacts the cake’s texture. Cake flour, with its lower protein content, yields a remarkably tender and delicate crumb, distinguishing our pound cake from denser, more robust versions made with all-purpose flour.
Perhaps the most distinctive modification is the inclusion of solid vegetable shortening alongside butter. You might wonder, “Why shortening?” The science behind this choice is simple yet effective: shortening is 100% fat, whereas butter contains about 80% fat and 20% water. During the creaming process, shortening excels at trapping air molecules, creating a lighter, more aerated batter. This leads to a cake with a superior rise and an incredibly tender crumb that practically melts in your mouth.
By blending shortening with butter, this vanilla pound cake recipe truly delivers the best of both worlds: the rich, complex, and irresistible flavor that only butter can provide, combined with the unparalleled tenderness and beautiful rise facilitated by shortening. This strategic fat combination ensures a cake that is both deeply flavorful and exquisitely textured.
Additionally, many traditional pound cake recipes, including “Selma’s,” call for a substantial amount of sugar, often matching the flour ratio (e.g., 3 cups of sugar to 3 cups of flour). While delicious, my family found this to be a tad too sweet for our personal preferences, sometimes overpowering the delicate vanilla and butter notes. To achieve a more balanced sweetness, allowing the rich flavors of the other ingredients to shine, our version thoughtfully reduces the granulated sugar to 2-1/2 cups. This adjustment results in a pound cake that is perfectly sweet, allowing you to enjoy a larger slice without it being overly cloying, though we do provide an option to increase the sugar if you prefer a more traditionally sweet cake.
Essential Ingredients for Your Perfect Vanilla Pound Cake
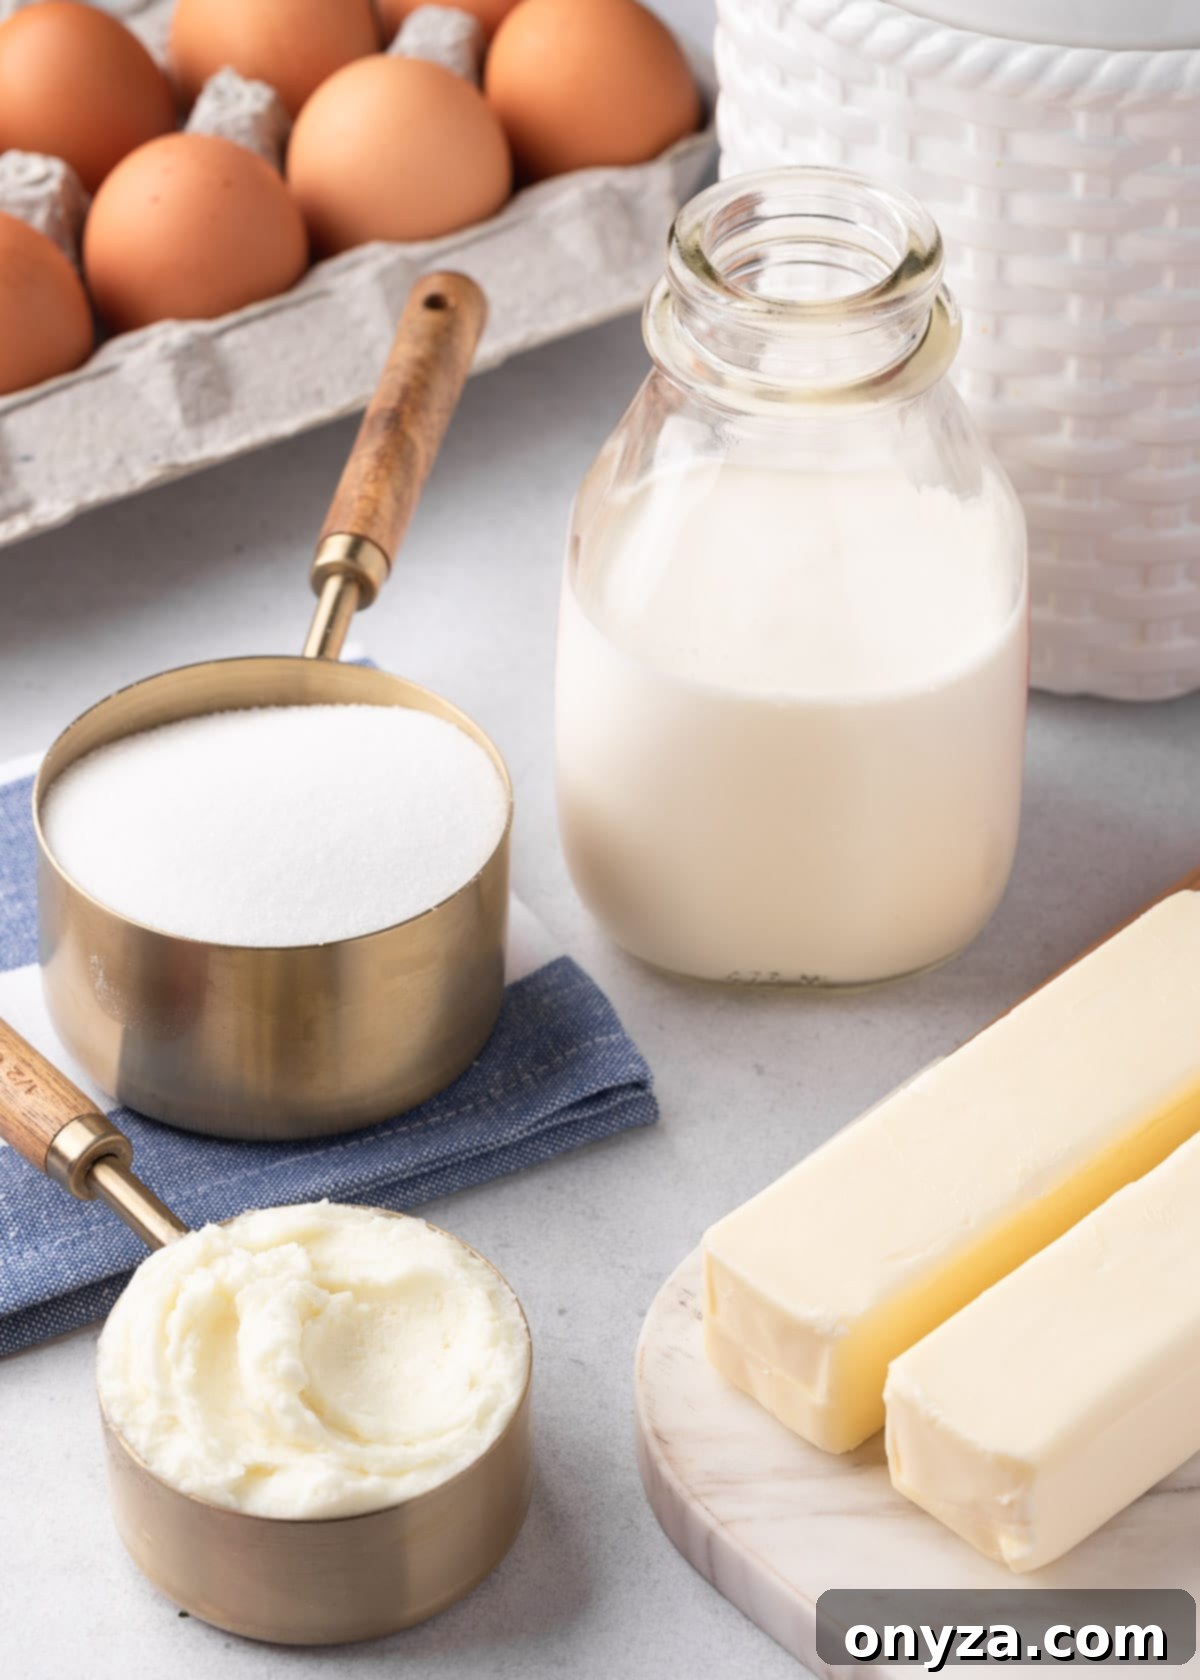
Crafting the perfect vanilla pound cake begins with selecting the right ingredients and preparing them correctly. Each component plays a vital role in achieving that rich, dense, and buttery texture we all crave:
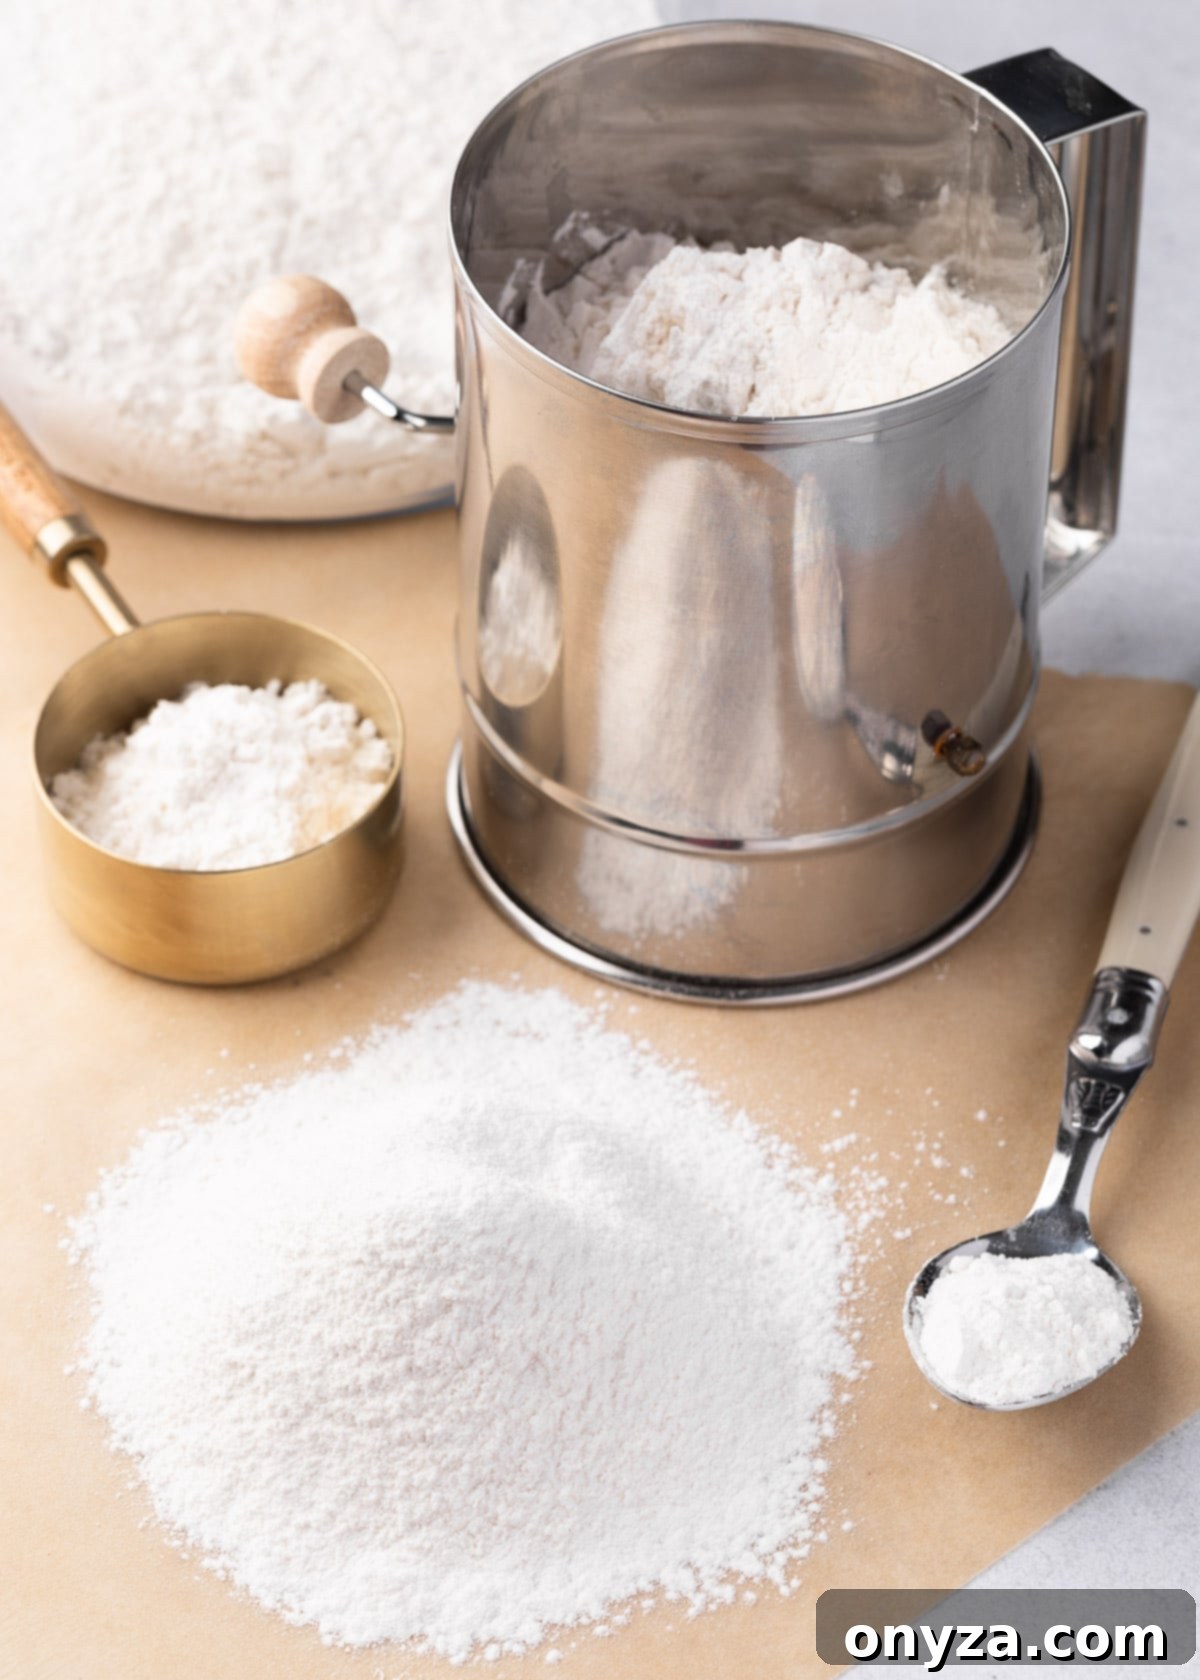
- Sifted Cake Flour: This is arguably the most crucial ingredient for achieving a tender crumb. Cake flour has a lower protein content than all-purpose flour, which means less gluten development and a more delicate cake. It’s essential to sift the flour before measuring to ensure it’s light and airy, preventing a dense, heavy cake. For accuracy, measure by weight using a food scale, or use the “spoon and sweep” method with a dry measuring cup (spoon flour into the cup, then level off with a straight edge).
- Baking Powder and Table Salt: While most of the pound cake’s lift comes from proper creaming, a small amount of baking powder provides a little extra boost. Salt is vital for balancing the sweetness and enhancing all the other flavors in the cake, preventing it from tasting flat.
- Softened Unsalted Butter: Using unsalted butter allows you complete control over the total salt content in your recipe. For optimal creaming and flavor, ensure your butter is properly softened to around 65 degrees F (18 degrees C) – it should be pliable but still cool to the touch. Over the years, I’ve experimented with both American and European-style butters. We’ve consistently found that European-style butters, like Kerrygold or Plugra, with their higher fat content, contribute to an even richer flavor and superior texture in the finished cake.
- Solid Vegetable Shortening: As discussed, shortening is key to achieving that extra tender crumb and impressive rise. Being 100% fat, it excels at trapping air during the creaming process. I’ve tested this recipe with both Crisco and Spectrum, and found that Crisco tends to deliver a slightly better rise, though both work well.
- Granulated Sugar: Beyond providing sweetness, sugar plays a critical role in the creaming process, helping to aerate the butter and shortening. It also contributes to the cake’s moistness and helps with browning. As mentioned earlier, our recipe uses 2-1/2 cups for a perfectly balanced sweetness. If you prefer a more traditionally sweet pound cake, feel free to increase the sugar to 3 cups.
- Room Temperature Large Eggs: This detail is paramount for a smooth, emulsified batter. Room temperature eggs blend more easily and evenly into the creamed butter and sugar mixture, preventing the batter from curdling. Cold eggs can cause the fat to seize up, resulting in a less cohesive batter and a denser cake. To quickly bring cold eggs to room temperature, simply place them (whole, shell-on) in a bowl and cover with warm (not hot!) tap water for about 10-15 minutes.
- Half and Half: While some contemporary pound cake recipes call for whole milk and others for heavy cream, we’ve discovered that half and half strikes the perfect balance. It provides enough richness for a moist and flavorful cake without making it excessively heavy, and contributes to a beautiful rise.
- Vanilla Extract: Use a high-quality pure vanilla extract. It adds a warm, rounded, and wonderfully aromatic flavor that complements the butter and sugar beautifully, making this cake a fantastic canvas for various toppings and culinary applications.
Choosing the Perfect Baking Pan for Your Pound Cake
The right baking pan is essential for achieving the iconic shape and perfectly baked texture of a pound cake. For this recipe, you’ll need a sturdy 9-1/2 to 10-inch tube pan, which typically holds 16 to 18 cups of batter. These pans are designed to allow heat to penetrate the center of the dense batter, ensuring even cooking. Tube pans can come with or without a removable bottom, and each has its advantages.
If you opt for a pan with a removable bottom, which can make unmolding the cake significantly easier, it’s crucial to ensure that the fit is very tight and secure. Any gaps can lead to unwanted leakage of the greasing fat or even the batter itself during baking, creating a messy situation and potentially compromising your cake. To prevent sticking, always thoroughly grease and flour your pan, paying special attention to all crevices and the central tube.
My personal favorite two-piece tube pan is the Chicago Metallic Professional 2-Piece 9.5-Inch Angel Food Cake Pan with Feet. I’ve consistently achieved excellent results with this pan, never experiencing any leakage while baking this pound cake. Its design also offers the convenience of easily removing the cake from the pan via the base insert, which simplifies the cooling and serving process. The light color of this pan also helps prevent over-browning of the crust.
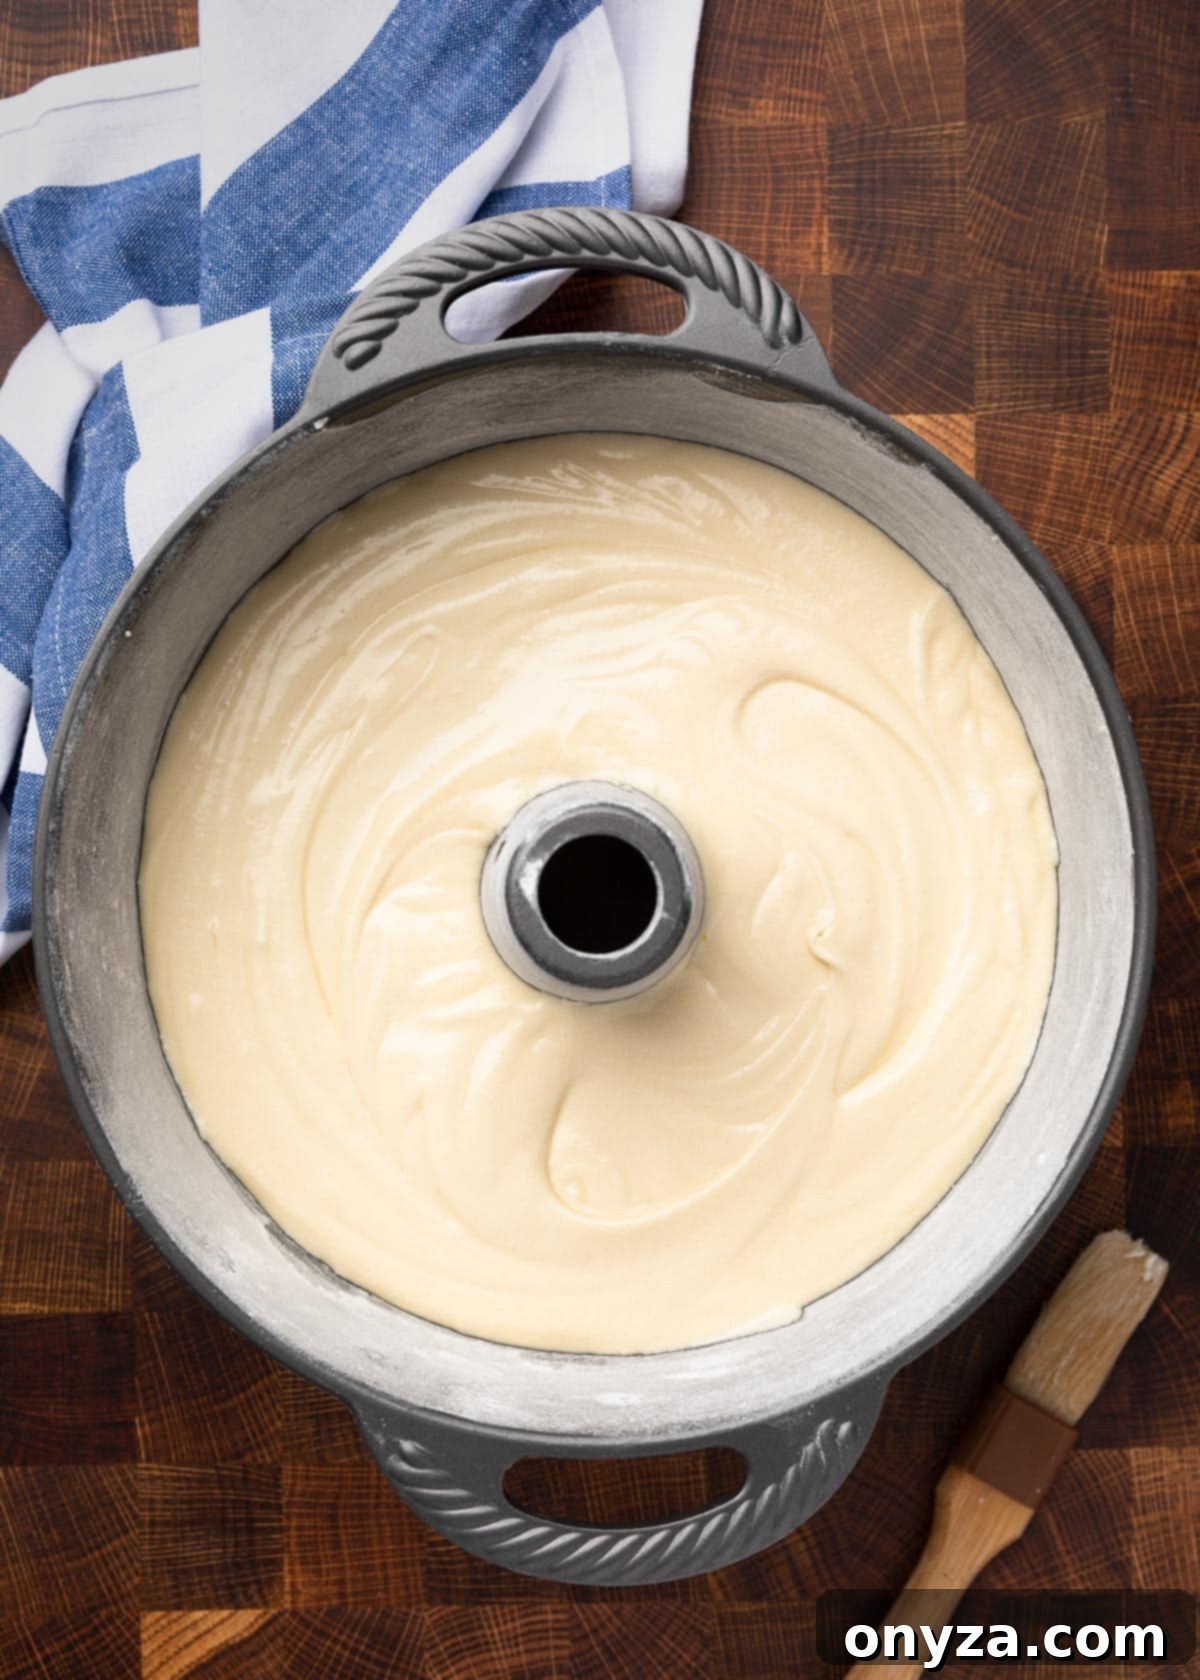
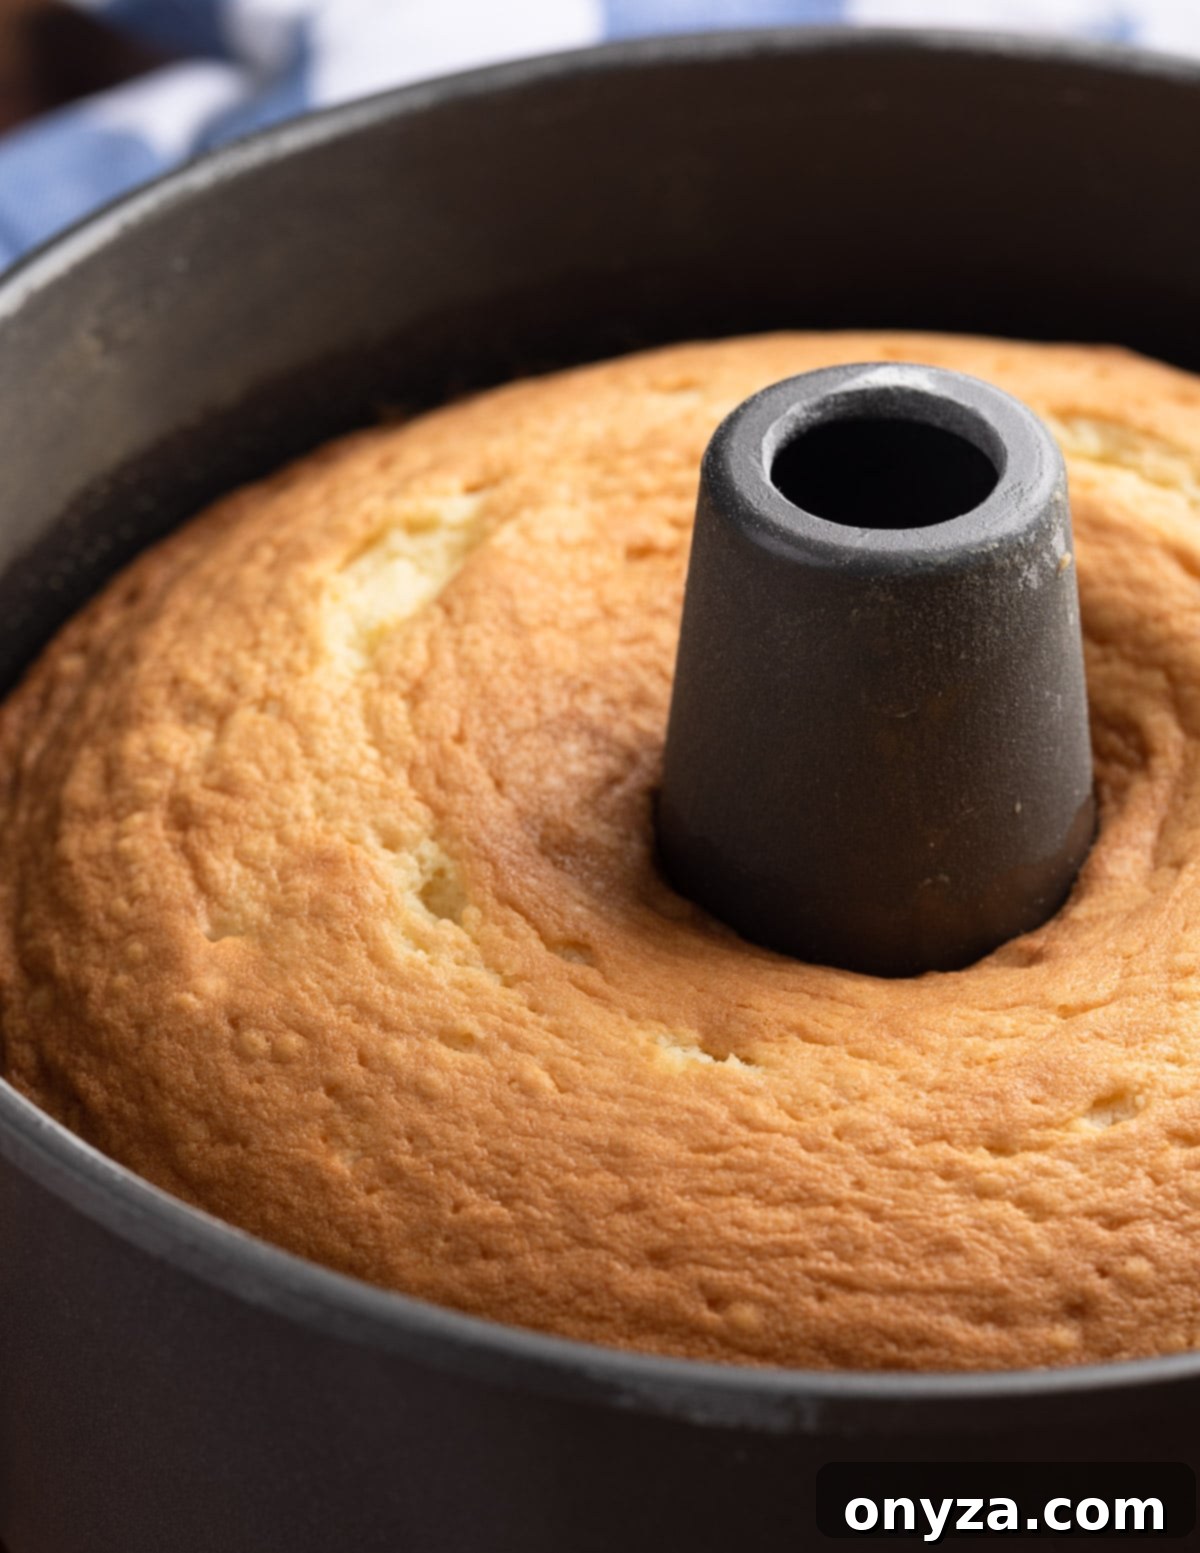
I also own the one-piece Nordic Ware Angel Food Cake Pan, which is pictured in some of the photographs accompanying this post. While a reliable pan, I’ve noticed that it tends to produce a slightly darker crust compared to the Chicago Metallic pan. If you choose to use a darker-colored pan like the Nordic Ware, it’s advisable to keep a closer eye on your baking time, as dark pans absorb more heat and can lead to faster browning. You might need to adjust the baking duration slightly to prevent the crust from becoming too dark before the interior is fully cooked.
Regardless of the specific brand, choosing a quality tube pan and preparing it properly (greasing and flouring thoroughly) are critical steps to ensure your vanilla pound cake bakes beautifully and releases cleanly, ready to be enjoyed.
Mastering Your Vanilla Pound Cake: Essential Baking Tips
Making a truly exceptional vanilla pound cake is a rewarding experience, and a few key techniques can make all the difference. While this recipe includes a small amount of baking powder for added insurance, the majority of the cake’s signature lift and tender texture come from the meticulous creaming of fats and sugar. This crucial step is where air is incorporated into the batter, forming tiny pockets that expand during baking.
The Art of Creaming: Your Foundation for a Fluffy Cake
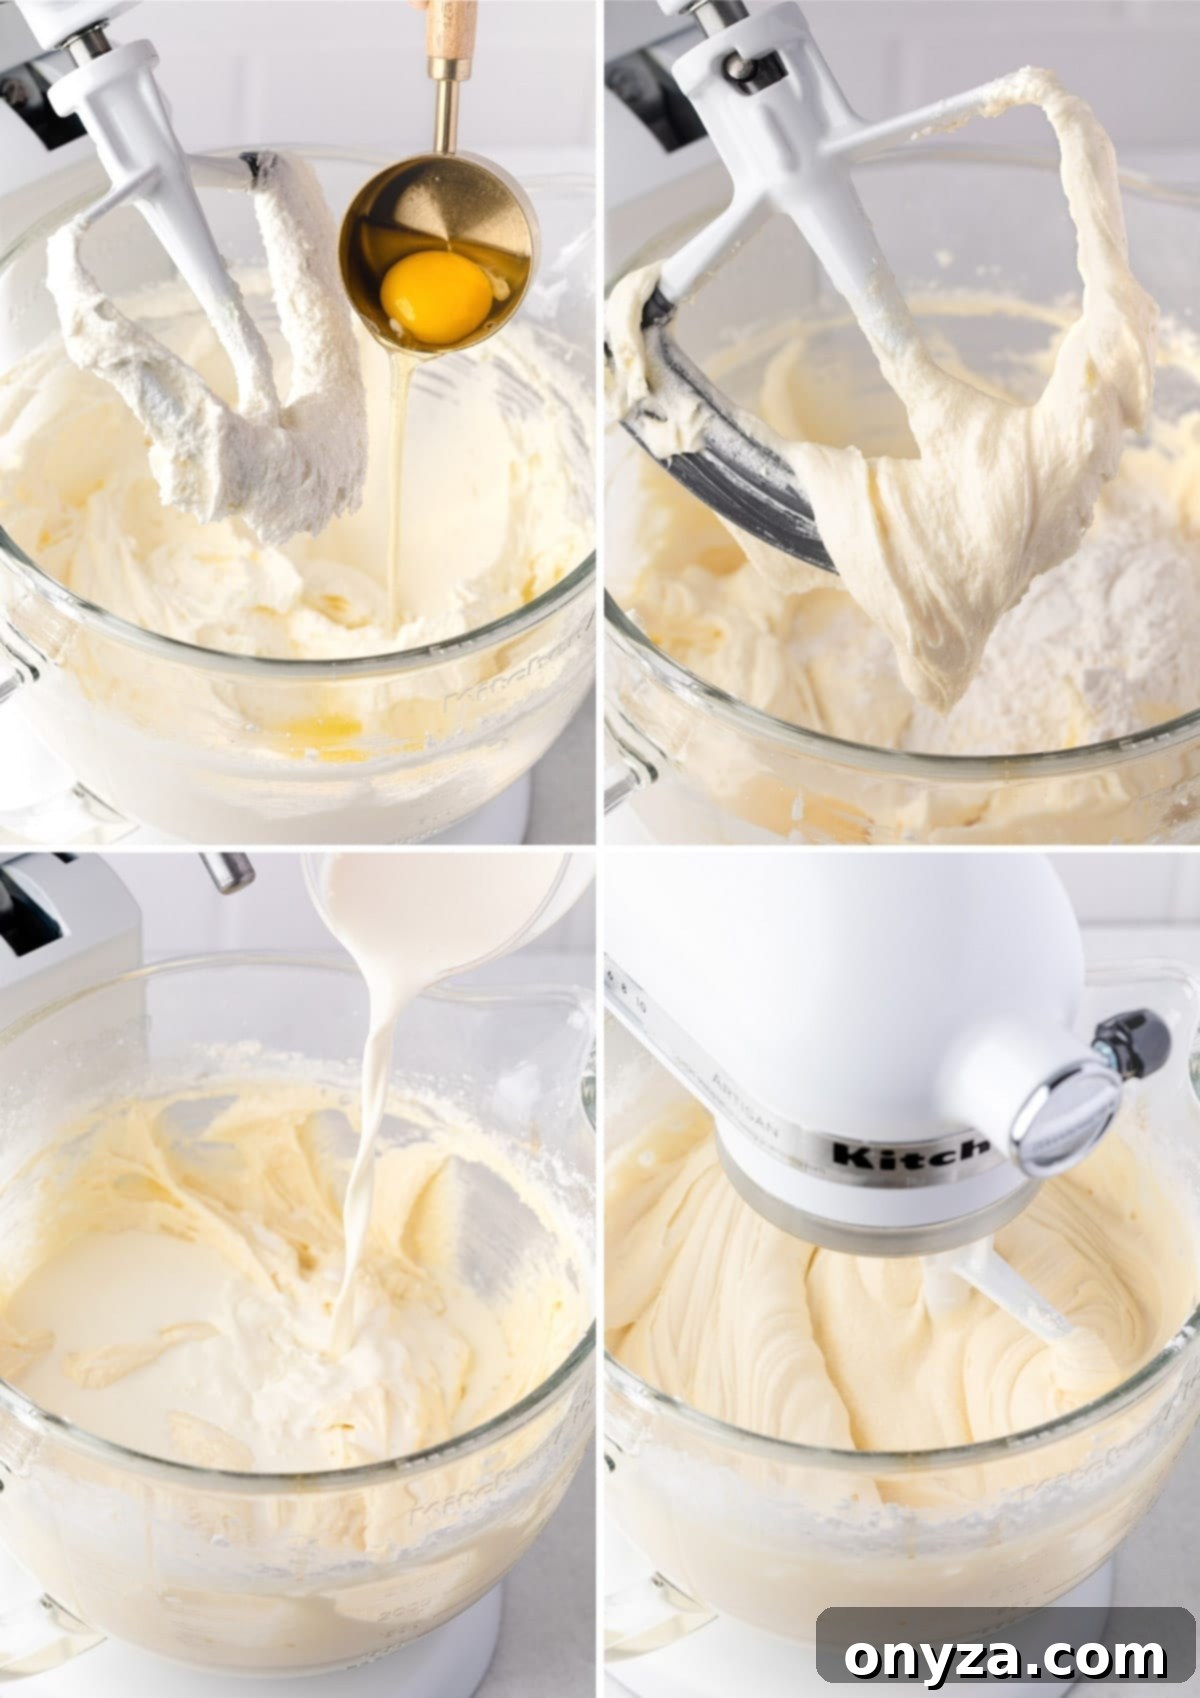
For the best results, I highly recommend using an electric stand mixer fitted with the paddle attachment. Begin by combining the softened butter and solid vegetable shortening, mixing until they are smooth and uniformly creamy. Then, add the granulated sugar. Initially, mix on low speed until the sugar is just incorporated. The magic happens next: increase the mixer speed to medium and cream the mixture for a full 8-10 minutes. This extended creaming time is vital. You’ll know it’s ready when the mixture transforms into a very light, almost white color, and becomes visibly fluffy and aerated. This light, voluminous texture signifies that ample air has been incorporated, which is paramount for the cake’s rise and tender crumb.
Shopping for a stand mixer? I personally own and love both the KitchenAid 5-Quart Artisan Stand Mixer and the equivalent of the 7-Quart Pro Line Stand Mixer (which has been a workhorse in my family for over 25 years and is still going strong).
Incorporating Eggs and Dry Ingredients: Precision is Key
Once the creaming is complete, it’s time to add the eggs. This step requires a gentle hand. Add the room temperature large eggs one at a time, ensuring each egg is fully incorporated into the batter on a low speed before adding the next. Over-whipping the eggs at this stage can introduce too much air too quickly, potentially leading to a meringue-like top on your cake that separates from the base, or a dry, crumbly texture. Remember to stop and scrape down the bottom and sides of the bowl occasionally with a rubber spatula to ensure everything is thoroughly combined.
Next, you’ll gradually incorporate the sifted dry ingredients (cake flour, baking powder, and salt) and the half and half. To prevent over-developing the gluten in the flour – which can lead to a tough cake – it’s best to alternate between the dry and liquid ingredients. I typically add the dry ingredients in three parts, alternating with two additions of half and half, starting and ending with the flour. Mix on low speed just until each addition is incorporated. This method ensures a smooth, homogeneous batter while keeping the cake tender.
Tip: If your stand mixer has a pouring shield, this is an excellent time to use it to prevent flour from escaping the bowl. If you don’t have one, try sifting your dry ingredients onto a large piece of parchment paper or wax paper. Then, lift the paper from opposite sides to create a funnel, allowing you to cleanly pour the dry ingredients into the mixer bowl without creating a cloud of flour.
Cold Oven vs. Preheated Oven: Choosing Your Baking Approach
The original “Selma’s Virginia Pound Cake” recipe suggests a traditional “cold oven” baking technique. This method involves placing the batter-filled pan into an unheated oven, setting the temperature to 325 degrees F, and allowing the cake to bake for 70 to 75 minutes as the oven gradually heats up. The theory behind this approach is that the slow, gradual increase in temperature contributes to a crunchy crust on top, a classic characteristic in many Southern pound cake recipes.
I’ve tested the cold oven method numerous times, and when conditions are absolutely perfect, it can indeed produce a delicious cake with a wonderfully crisp top and a buttery, moist crumb. However, my experience has shown that results can vary significantly depending on your specific oven and even the baking pan you use.
Factors like the age and calibration of your oven heavily influence how quickly it heats. In some tests performed in different home kitchens, I found that cold oven cakes required significantly longer baking times than prescribed. This extended baking often led to drier, denser cakes and, in some darker tube pans (like the Nordic Ware mentioned earlier), resulted in an excessively dark outer crust. Other times, the top of the cake browned far too quickly, necessitating covering it with foil mid-bake to prevent burning.
For these reasons, I personally prefer and strongly recommend using a preheated oven when making this vanilla pound cake for maximum reliability and consistent results. While a preheated oven might not yield the exact crunchy crust of the cold oven method, it guarantees a beautifully baked, incredibly moist, and buttery cake every single time, perfect for elegant slicing. The controlled, consistent temperature ensures even baking from start to finish.
When baking in a preheated 325 degrees F oven with the rack in the lower third, your cake will typically take 60-70 minutes. To confirm doneness, insert a wooden skewer or cake tester into the center of the cake; it should come out clean, or with just a few moist crumbs attached. Avoid opening the oven door too frequently, especially in the first 45 minutes, to prevent the cake from sinking. Once baked, allow the cake to cool in the pan for about 15 minutes before running a thin knife around the edges and inverting it onto a wire rack to cool completely. Cooling thoroughly is essential before slicing to ensure the cake’s structure sets properly.
Serving and Storing Your Delicious Vanilla Pound Cake
Once your exquisite vanilla pound cake has fully cooled, it’s ready to be enjoyed in countless ways. Proper storage ensures its freshness and delightful texture for days. After cooling, cover the cake and store it at room temperature. I love to keep mine in a domed glass cake pedestal on the kitchen counter; it’s not only practical for storage but also adds a cozy, welcoming touch to the kitchen decor.
Creative Serving Suggestions
The beauty of this vanilla pound cake lies in its versatility. You can serve it simply, perhaps with a delicate dusting of powdered sugar for a touch of elegance. For a more decadent experience, top individual slices with a dollop of freshly whipped cream and your favorite seasonal fresh fruit, such as berries, peaches, or sliced figs. We particularly adore pairing this vanilla pound cake with a scoop of creamy vanilla bean or strawberry ice cream, drizzled with a rich chocolate sauce or a vibrant fruit compote.
If you’re inclined to add a glaze, my basic Powdered Sugar Glaze is an excellent choice. It’s incredibly easy to make and can be customized with various flavorings. A citrus-flavored glaze—lemon, lime, or orange—beautifully complements the rich buttery notes of the pound cake, adding a bright, zesty counterpoint.
This pound cake also shines as a component in more complex desserts. Use sliced pieces as layers in elegant trifles, parfaits, or even a sophisticated bread pudding. For a truly indulgent breakfast or brunch, try it in place of brioche for a decadent Pound Cake French Toast—it’s an absolute game-changer! Sliced vanilla pound cake is also incredibly delicious when gently warmed in a toaster, grilled until lightly caramelized, or pan-fried in a touch of butter with a sprinkling of cinnamon sugar for a delightful crunch.
Optimal Storage and Rewarming
As is characteristic of all pound cake recipes, the texture will naturally become denser after a few hours, and especially overnight. This densification is part of its charm, offering a different, equally enjoyable eating experience. However, we often find that the cake’s texture is best restored and enhanced when gently rewarmed. Simply pop a slice into the microwave for 5-10 seconds, or warm it briefly in a toaster oven. This brief warming brings back its tender, moist crumb, making it feel freshly baked.
For longer storage, pound cake freezes exceptionally well. Wrap individual slices or the entire cooled cake tightly in plastic wrap, then aluminum foil, and place in a freezer-safe bag for up to 2-3 months. Thaw at room temperature or gently rewarm as desired.
More Indulgent Dessert Recipes from Our Kitchen:
If you loved this vanilla pound cake, be sure to explore more of our cherished dessert recipes that are perfect for any occasion:
- Pumpkin Bundt Cake: A cozy, spiced cake perfect for autumn gatherings.
- Bourbon Apple Crisp: A warm, comforting classic with a sophisticated twist.
- Fig Tart with Almond Cream: An elegant and fruit-forward dessert that’s perfect for entertaining.
- Homemade Apple Pie: The quintessential American dessert, crafted to perfection.

Vanilla Pound Cake
by Amanda Biddle
A rich, buttery vanilla pound cake recipe that’s perfect any time of day, from breakfast to dessert. Enjoy it on its own, with whipped cream and your favorite fresh fruit, or as the base for trifles, parfaits, or a decadent twist on French Toast!
Prep Time: 20 minutes
Cook Time: 1 hour 10 minutes
Total Time: 1 hour 30 minutes
Servings: 12 servings
Ingredients
- 3 cups sifted cake flour, not self-rising (315 grams)
- ½ teaspoon baking powder
- ½ teaspoon table salt
- 1 cup unsalted butter, softened (about 65 degrees F)
- ½ cup solid vegetable shortening (such as Crisco or Spectrum)
- 2-1/2 cups granulated sugar (500 grams)**
- 5 large eggs, room temperature
- 1 cup half and half
- 2 teaspoons vanilla extract
Instructions
- Preheat oven to 325 degrees F with rack in the lower third of the oven.* Grease and flour a large (9-1/2 to 10-inch diameter) tube pan.
- Sift together the flour, baking powder, and salt. Set aside.
- In the bowl of a stand mixer fitted with the paddle attachment, mix together butter and shortening until smooth and creamy-looking, about 3-4 minutes. Add sugar and mix on low speed until combined. Increase mixer to medium speed and cream until very light in color and fluffy, 8-10 minutes.
- Add the eggs to the bowl one at a time, incorporating well on low speed after each addition. Scrape the bottom and sides of the bowl occasionally. Mix in the vanilla extract.
- Gradually add the flour and half and half to the mixer bowl, alternating and mixing to incorporate after each addition. Start and end with the flour, adding it in 3 parts.
- Give the batter a final stir with a rubber spatula and pour it evenly into the prepared pan. Bake for 60 to 70 minutes, until a cake tester comes out clean.
- Cool the cake for 15 minutes in the pan. Run a thin knife around the edges and transfer to a wire rack to cool completely before slicing and serving.
- Store cooled cake, covered, at room temperature. Cake is best enjoyed within a couple of days.***
Notes
*Sift the flour, then weigh or measure using the “spoon and sweep” method.
**We like our pound cake a little less sweet than traditional recipes, so we use 2-1/2 cups granulated sugar. For a sweeter cake, increase to 3 cups.
***As is traditional for pound cake, the texture will densify as it cools, and overnight. We like the texture best when next-day cake is gently warmed. Simply pop slices into the microwave for 5-10 seconds, and enjoy. For additional serving and warming ideas, see the “Serving” section in the article above.
Nutrition Estimate
Serving: 1 slice (1/12 cake)
Calories: 447 kcal
Carbohydrates: 41g
Protein: 7g
Fat: 29g
Saturated Fat: 14g
Cholesterol: 126mg
Sodium: 138mg
Potassium: 108mg
Fiber: 1g
Sugar: 17g
Vitamin A: 657IU
Vitamin C: 1mg
Calcium: 49mg
Iron: 1mg
Nutrition information is automatically calculated, so should only be used as an approximation.
About Our Recipes
Please note that our recipes have been developed using the US Customary measurement system and have not been tested for high altitude/elevation cooking and baking.
