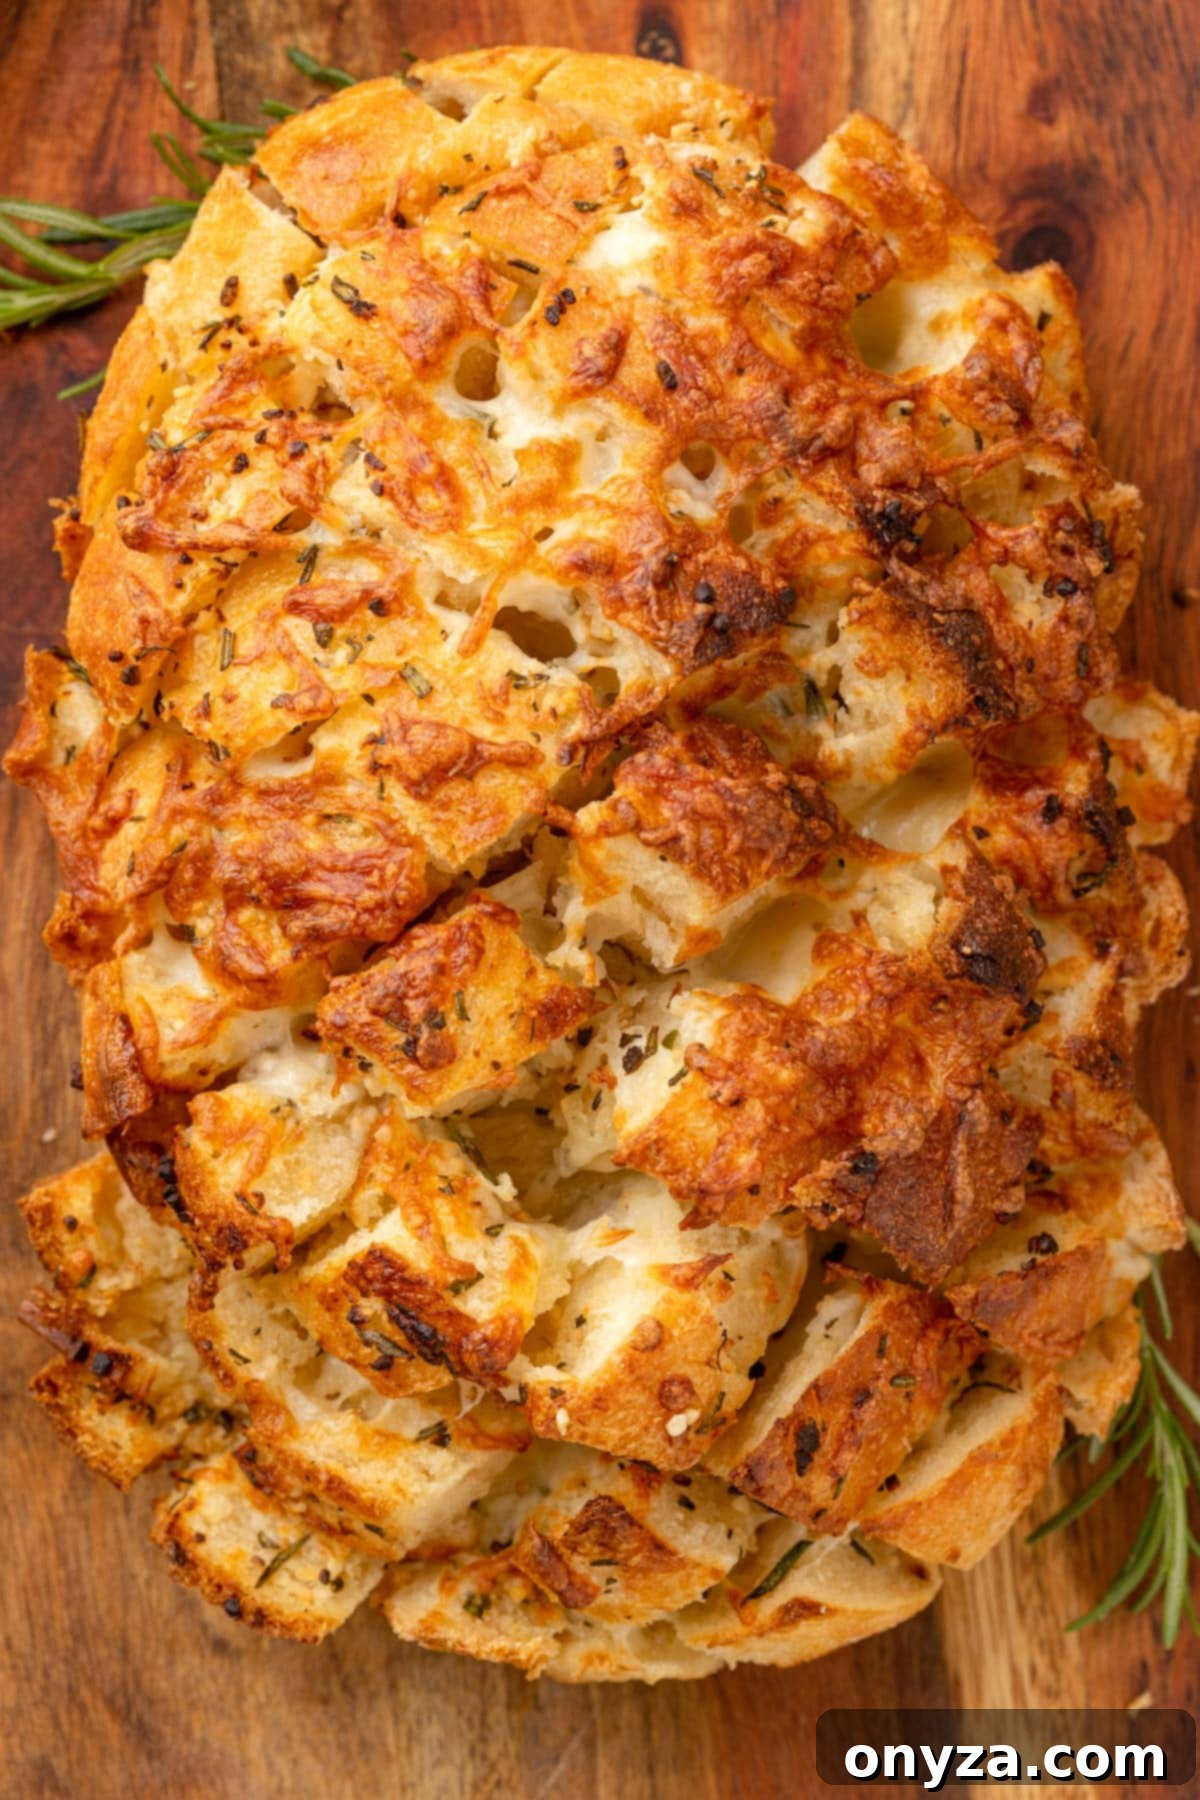
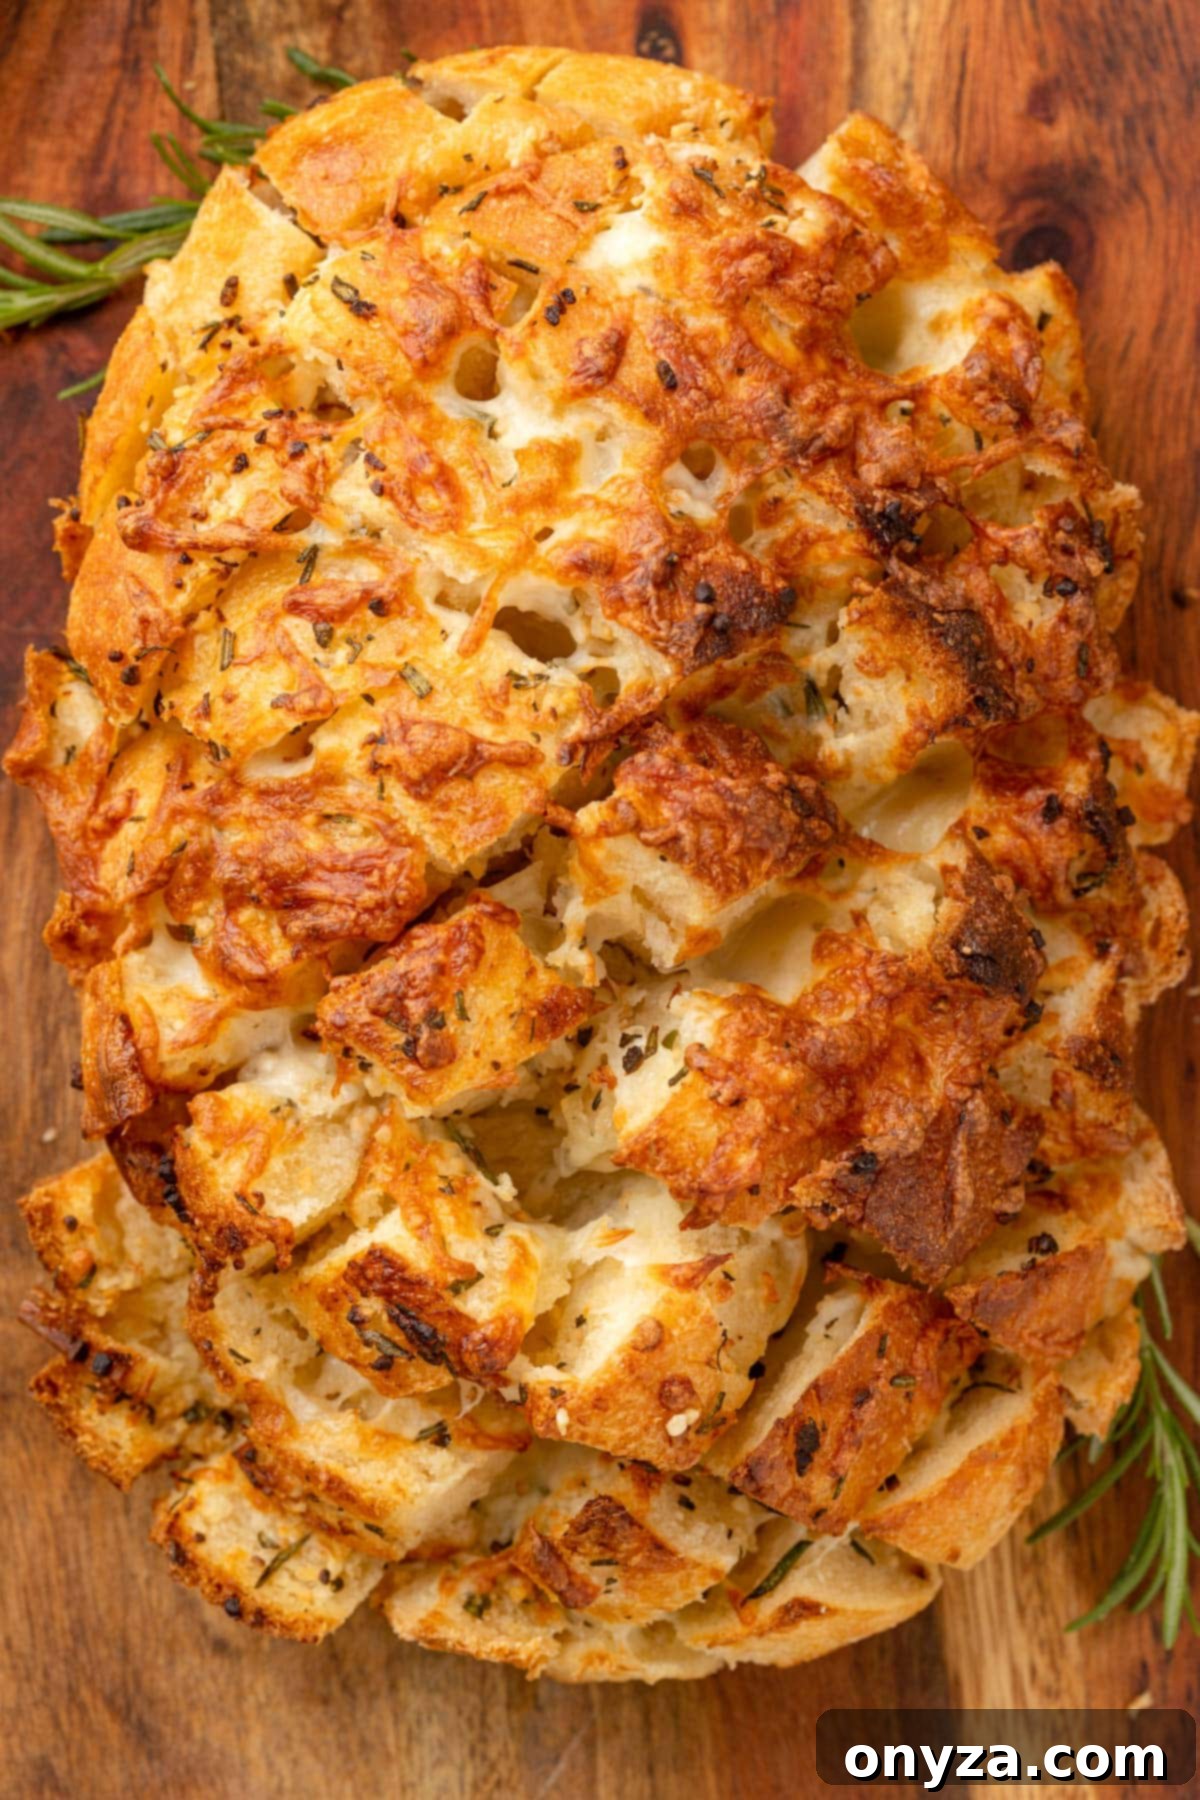
Transform a simple loaf of crusty bread into an irresistible culinary masterpiece: Cheesy Garlic Pull-Apart Bread. This incredibly satisfying recipe requires just a handful of common ingredients and minimal prep time, making it a perfect choice for any occasion. Imagine a warm, fragrant loaf, deeply infused with herbed garlic butter and generously stuffed with gooey, melted mozzarella. It’s no wonder this dish is a consistent family favorite, offering a delightful twist on classic garlic bread that’s guaranteed to disappear quickly.
Whether you’re hosting a lively game day gathering, seeking a comforting weekend appetizer, or simply need a quick, delicious mid-afternoon snack, this pull-apart bread fits the bill. It also serves as an outstanding side dish, elevating any Italian-inspired dinner, from hearty pasta dishes to savory grilled chicken. Versatile and convenient, you can achieve that perfect golden crispness and melted cheese magic using either your air fryer for speed or your oven for traditional baking. Get ready to experience garlic bread like never before, where every pull reveals a pocket of cheesy, garlicky perfection!
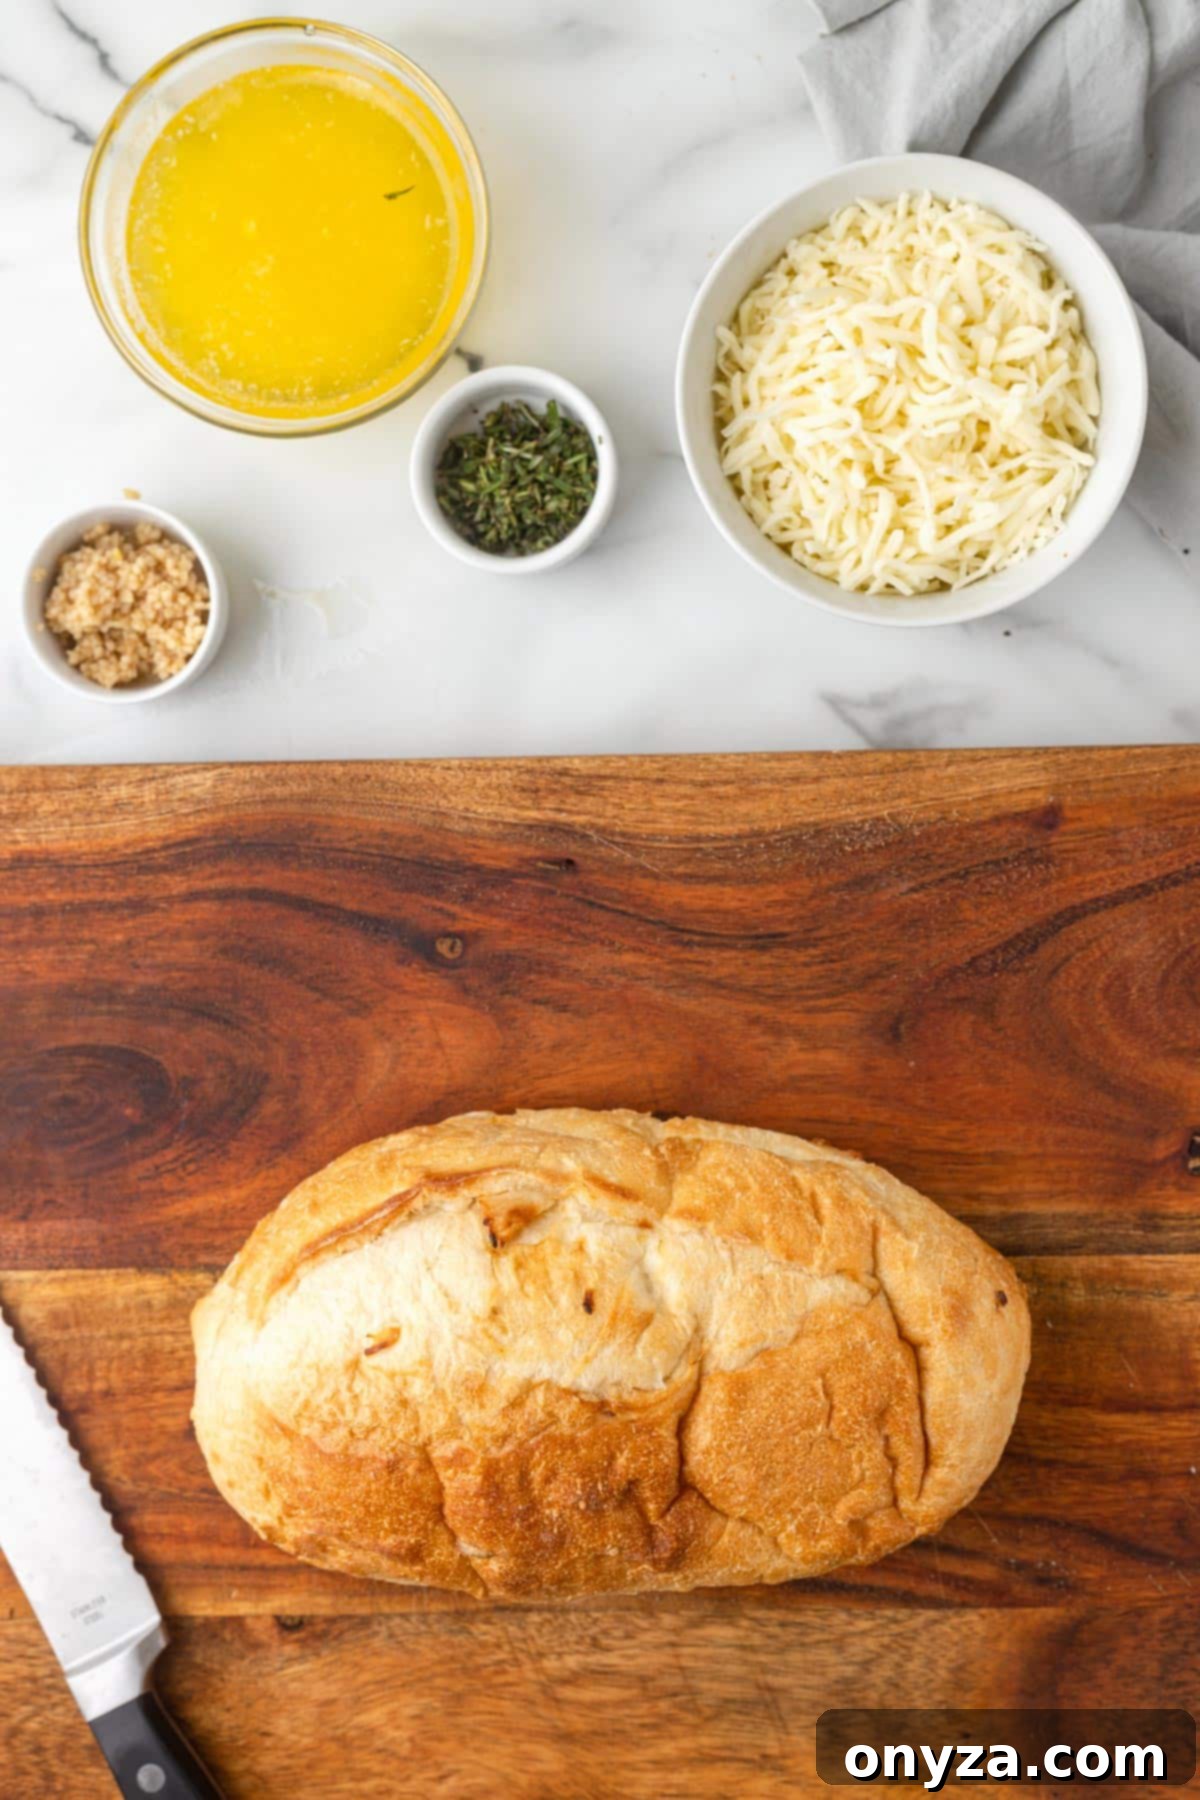
Essential Ingredients for the Best Cheesy Garlic Pull-Apart Bread
Crafting this mouthwatering cheesy garlic pull-apart bread is surprisingly simple, relying on just five core ingredients. Each component plays a vital role in achieving that perfect balance of crispy crust, tender interior, savory garlic, aromatic herbs, and utterly melty cheese. Here’s a closer look at what you’ll need:
- A Crusty Loaf of Bread: The foundation of this recipe is a high-quality, crusty loaf. My top recommendations include sourdough for its tangy depth, rustic Italian for its classic appeal, or a French boule for its beautiful round shape and sturdy crust. For the quantities of cheese and garlic butter provided in this recipe, a 14 to 16-ounce loaf is ideal. If your loaf is significantly larger or smaller, remember to adjust the butter, garlic, herbs, and cheese amounts proportionally to ensure every crevice is richly filled. When opting for the air fryer method, be mindful of the loaf’s size to ensure it fits comfortably in your air fryer basket; don’t hesitate to trim the ends if necessary. Costco’s Country French Bread has proven to be an excellent, readily available choice, yielding consistently delicious results.
- Melted Salted Butter: Butter is crucial for both flavor and creating that golden-brown crispness. While I personally favor European-style butters like Kerrygold or Plugra for their higher fat content and rich flavor, American-style butter works perfectly well here. If you only have unsalted butter on hand, a quick fix is to incorporate about 1/2 to 3/4 teaspoon of kosher salt into your garlic butter mixture, adjusting to your preferred taste. This ensures the butter is seasoned just right, complementing the other robust flavors.
- Minced Fresh Garlic: The heart of any great garlic bread is, of course, the garlic. You’ll need the equivalent of two large cloves, which typically translates to about 1-1/2 to 2 teaspoons of finely minced garlic. The beauty of this recipe is its flexibility; feel free to adjust the garlic quantity based on your preference. For a milder garlic note, use less; for an intense, pungent flavor, add a little extra. Freshly minced garlic is highly recommended for the best flavor profile.
- Chopped Fresh Herbs: Fresh herbs elevate the aroma and taste of this bread significantly. This is where you can truly customize the recipe to your liking! Visit your local market or step into your garden to pick your favorites. My personal go-to combination is fresh rosemary and Italian parsley, which offer a delightful herbaceous brightness. Other excellent choices include fresh thyme, oregano, or a blend of classic Italian herbs. Avoid dried herbs if possible, as their flavor isn’t as vibrant.
- Shredded Mozzarella Cheese: What’s pull-apart bread without those spectacular, stretchy cheese pulls? Shredded mozzarella is the star here, melting beautifully to create gooey pockets of deliciousness. To add more depth and complexity, consider incorporating other fantastic Italian melting cheeses alongside the mozzarella, such as Fontina for its nutty flavor, Provolone for its mild sharpness, or Asiago for a slightly bolder taste. Many grocery stores offer excellent pre-shredded Italian cheese blends; BelGioioso’s 4-Cheese Shred is a particular favorite in my household. Similar to the garlic, the amount of cheese can be tailored to your preference. Use 1 cup for a standard cheesy bread experience, or indulge with 1-1/2 cups (or more!) for an extra-cheesy delight!
Chef’s Tip: Shredding soft cheeses like mozzarella at home can sometimes be a sticky affair. To make the process much easier and cleaner, simply pop the block of cheese into your freezer for about 15 minutes before shredding. This firms it up just enough, allowing it to shred effortlessly and beautifully on the large holes of your box grater, ensuring perfect strands every time.
How to Create Irresistible Cheesy Garlic Pull-Apart Bread
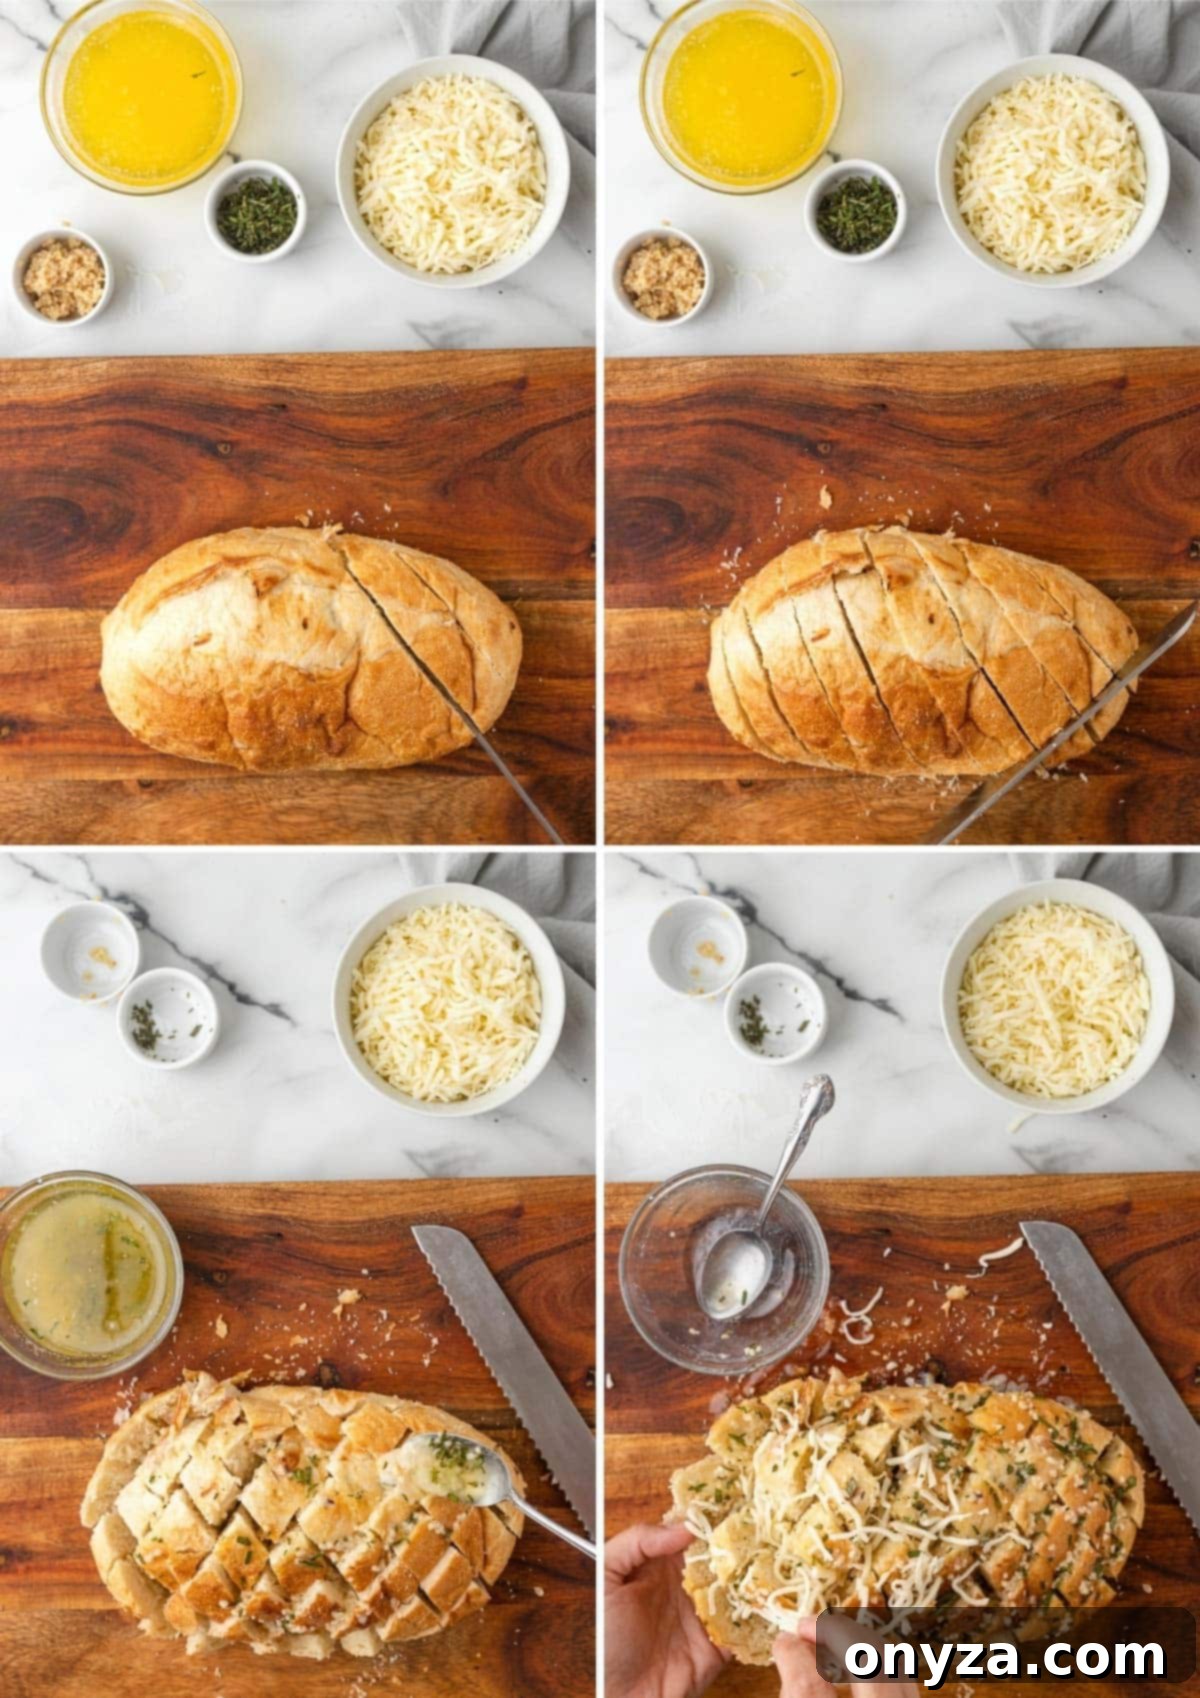
Making this cheesy garlic pull-apart bread is a straightforward process, but a few key techniques will ensure a perfect, Instagram-worthy result every time. The most critical step begins with how you prepare your bread. Using a sharp, serrated bread knife is paramount. This allows you to slice through the crusty exterior and soft interior of the loaf cleanly, creating the essential diamond pattern without squishing the bread or causing it to crumble prematurely. Precision in cutting is key to achieving those distinct, pullable cubes.
Upgrade Your Kitchen: In need of a reliable bread knife? My absolute favorite is the Mercer Culinary Millennia 10-inch. It boasts exceptional sharpness and a comfortable, secure grip, making it a joy to use. I’ve effortlessly sliced through every type of loaf with it, from thick wedges to delicate, thin slices. Beyond bread, it’s also remarkably versatile for preparing sandwiches and achieving perfectly thin tomato slices. A good knife truly makes all the difference!
Assembling Your Pull-Apart Bread Masterpiece
The assembly process is where the magic happens, transforming a simple loaf into a flavorful, cheesy delight. Follow these steps carefully to ensure maximum flavor distribution and those coveted cheese pulls:
- Prepare the Loaf: Begin by placing your chosen bread loaf on a stable cutting board. With your sharp serrated bread knife, make diagonal slices across the loaf. Each slice should be approximately 3/4 to 1-inch wide. The crucial part here is to stop your cut about 1/2-inch from the bottom of the loaf, ensuring you don’t slice all the way through. You want to create deep crevices that hold the fillings while keeping the loaf intact as a base.
- Create the Crisscross Pattern: Once your first set of diagonal slices is complete, rotate your loaf 90 degrees or turn your knife perpendicular to your initial cuts. Now, make a second set of diagonal slices across the loaf, again maintaining the 3/4 to 1-inch width and being careful not to cut through the bottom. This crisscross pattern will create individual pull-apart cubes, ready to be filled.
- Mix the Garlic-Herb Butter: In a small bowl, combine your melted salted butter, finely minced garlic, and chopped fresh herbs. Stir well to ensure all the flavors are thoroughly integrated. This fragrant mixture is the heart of your garlic bread.
- Infuse with Flavor: Gently use your fingertips to pry open the bread slices at each intersection. With a spoon, carefully pour some of the aromatic garlic-herb butter deep into each cut, making sure to disperse it evenly throughout the entire loaf. This step is essential for infusing every bite with rich garlic and herb flavor.
- Stuff with Cheese: After the butter, it’s time for the cheese! Generously stuff each crevice between the bread slices with your shredded mozzarella (and any other preferred melting cheeses). Don’t worry if some cheese overflows or spills out of the gaps; these bits will become wonderfully crispy and caramelized during baking, adding an extra layer of texture and flavor.
- Final Butter Brush: The process of thoroughly getting the butter and cheese down into all the bread slices might take a few minutes, but it is undoubtedly worth the effort for the exceptional flavor and texture it yields. For an extra crispy and golden crust, brush any remaining garlic-herb butter over the top surface of the entire loaf before cooking. This ensures a beautiful finish whether you’re using an oven or an air fryer.
Making Pull-Apart Bread in the Air Fryer
For a quick, efficient, and perfectly crispy result, the air fryer is an excellent tool for making cheesy garlic pull-apart bread. It significantly reduces cooking time while achieving that coveted golden-brown exterior and perfectly melted interior. My preferred method often involves using the Air Crisp function on my 8-quart Ninja Foodi.
To air fry, simply ensure your prepared and stuffed loaf fits comfortably into the air fryer basket. Set your air fryer to 375 degrees F (190 degrees C) and cook for approximately 8-10 minutes. Keep a close eye on it, checking until the bread is beautifully crispy on the outside, thoroughly heated through, and the cheese is gloriously melted and bubbling inside. When removing the hot bread from the basket, use oven mitts and two spatulas for safe and easy transfer to a serving board. Be extremely cautious, as the air fryer insert will be very hot.
It’s important to remember that air fryer cooking times can vary considerably between manufacturers and models. The first time you prepare this recipe in your air fryer, I highly recommend monitoring your bread closely. This will help you determine the optimal cooking time for your specific appliance, ensuring perfect results every time.
Baking the Bread in a Standard Oven
For those who prefer traditional baking or do not own an air fryer, achieving perfectly baked cheesy garlic pull-apart bread in a standard oven is equally simple and yields fantastic results.
Begin by preheating your oven to 375 degrees F (190 degrees C). Once the oven is hot, carefully wrap your stuffed loaf entirely in aluminum foil. This initial foil wrap is crucial as it helps steam the bread, ensuring the butter and cheese melt beautifully into the crevices and the bread heats through without burning the crust. Place the foil-wrapped loaf directly onto a baking sheet.
Bake the bread in the preheated oven for 15 minutes. After this initial baking period, carefully remove the baking sheet from the oven and unwrap the bread, discarding the foil. Return the unwrapped loaf to the baking sheet and place it back into the oven. Continue baking uncovered for an additional 5-10 minutes. During this final stage, the bread will crisp up, the cheese will achieve a beautiful golden melt, and the entire loaf will be perfectly warm and ready to enjoy. Keep an eye on it during these last few minutes to prevent over-browning.
Curious about cooking methods? If you’re interested in understanding the nuances between air frying and traditional baking, a helpful resource is Here’s the Difference Between Air Frying and Baking from Reader’s Digest. It offers valuable insights into how these two popular cooking techniques vary and when to use each for optimal results.
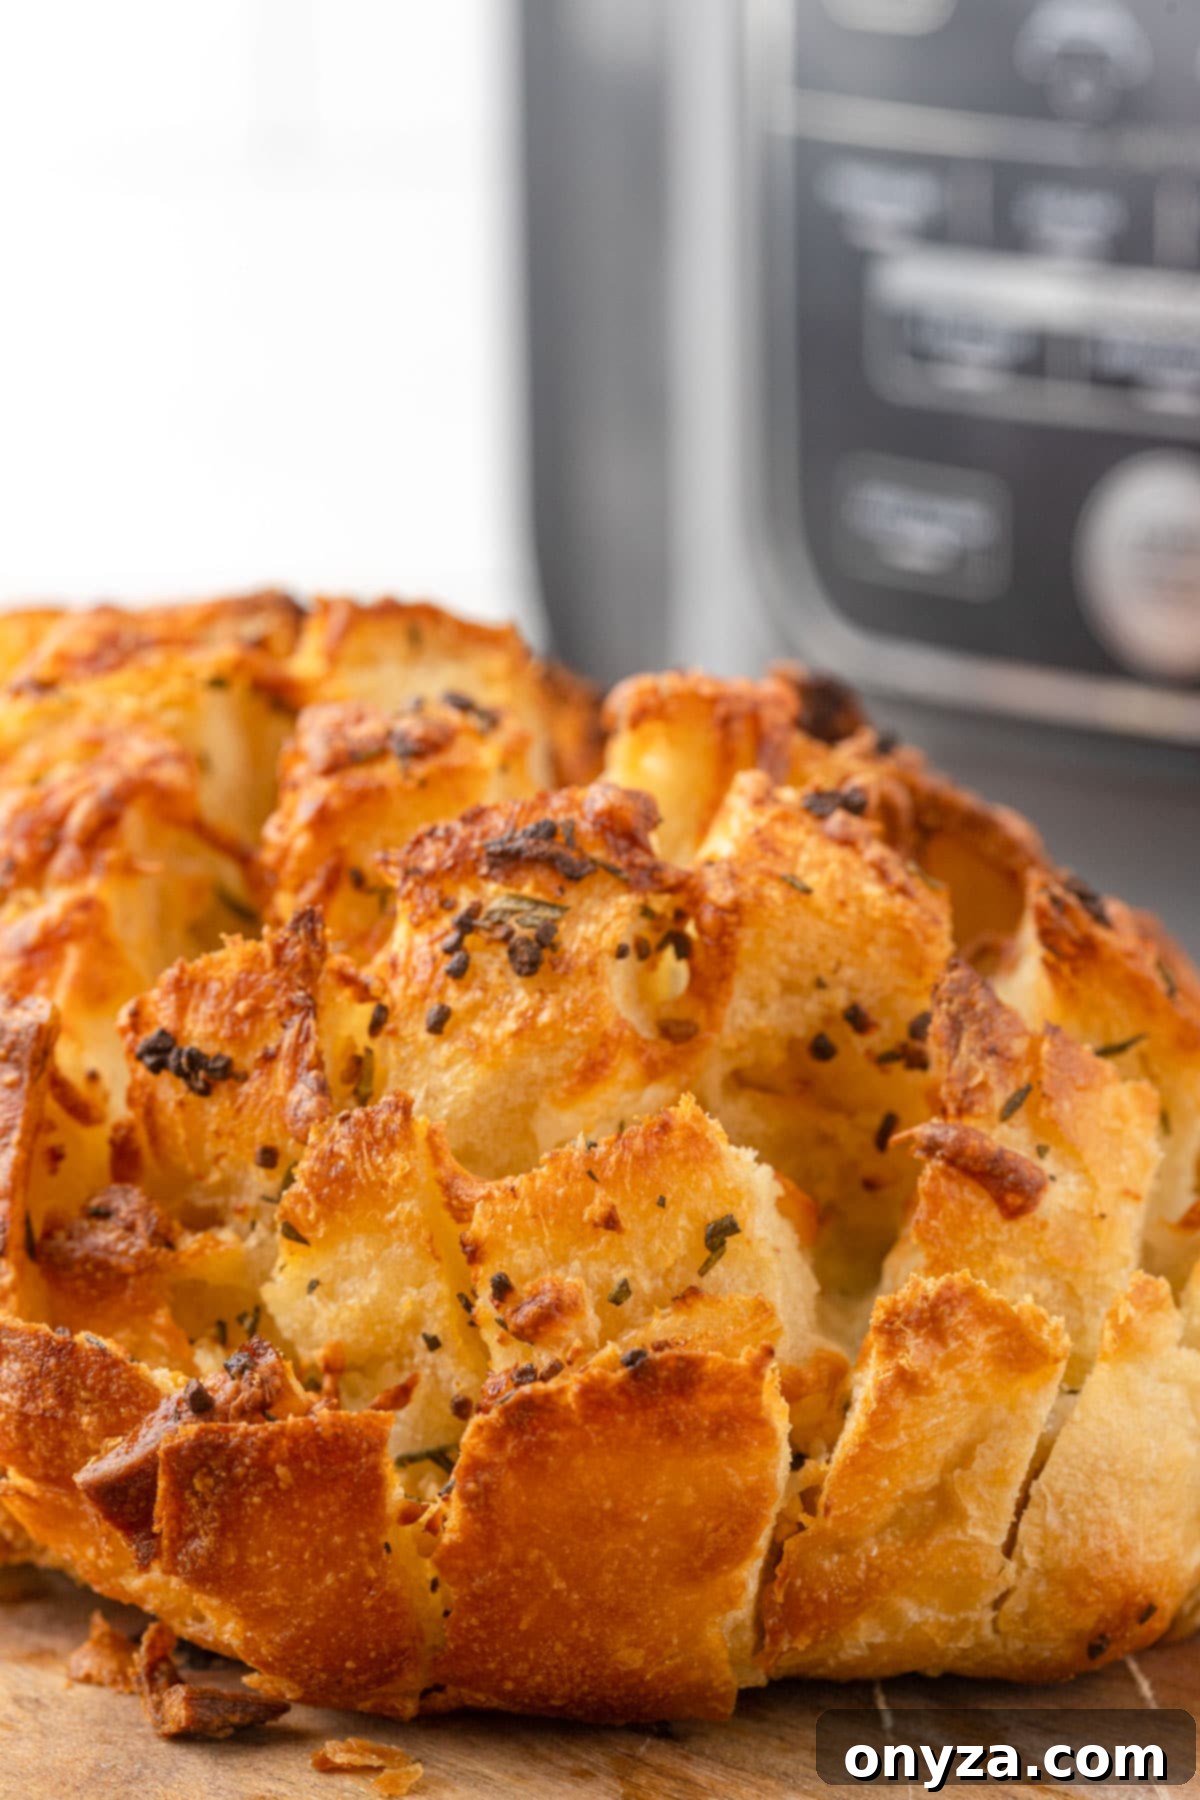
Serving and Enjoying Cheesy Garlic Pull-Apart Bread
The key to fully appreciating this cheesy garlic pull-apart bread lies in serving it immediately. For the absolute best experience, aim to serve it within 5 minutes of it coming out of the air fryer or oven. This short window ensures that the cheese is at its peak meltiness, gooey and stretchy, while the bread remains perfectly warm and wonderfully crispy. There’s nothing quite like the combination of hot, fragrant bread with oozing, golden cheese.
To enjoy, simply gather around and pull a cube of the cheesy bread directly from the loaf. The joy is in the communal experience of everyone reaching for their next delicious piece. Be sure to have a generous stack of napkins ready, as this delightful dish can be wonderfully messy – a true sign of its deliciousness! Encourage everyone to dig in and savor each garlicky, cheesy bite.
Once all the individual cubes of bread have been enthusiastically pulled from the loaf, you’ll be left with the base. This is, for many, one of the most anticipated parts! The base typically absorbs a little extra garlic-herb butter and cheese, becoming incredibly flavorful and wonderfully crusty. Do not, under any circumstances, discard it! Instead, grab your serrated bread knife and slice it into smaller, manageable pieces. It’s a hidden treasure, packed with concentrated flavor and a satisfying crunch, providing a perfect end to the feast. Every part of this pull-apart bread is designed to be savored.
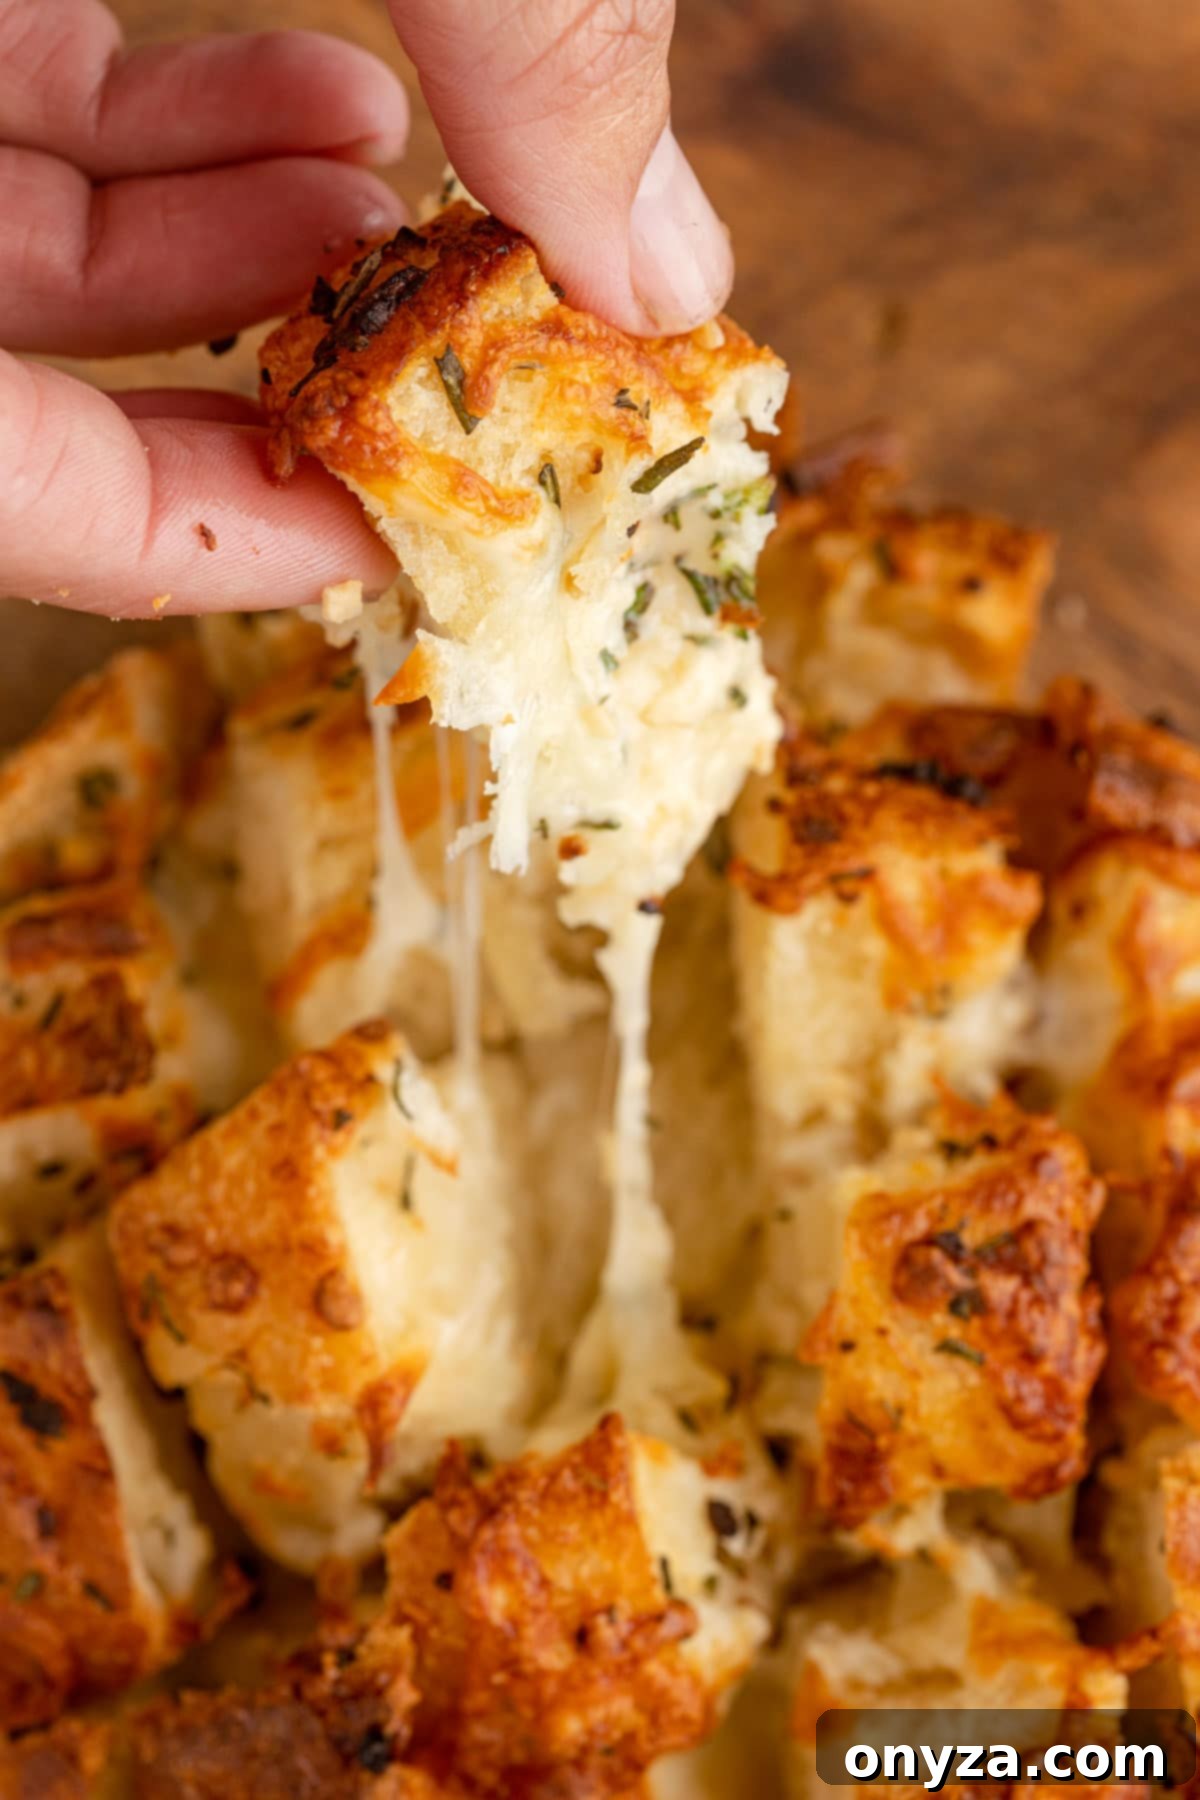
Variations and Customizations for Your Pull-Apart Bread
While the classic cheesy garlic pull-apart bread is undeniably delicious, this recipe is incredibly versatile, inviting you to experiment with flavors and ingredients to suit your personal preferences. Here are some ideas to inspire your next batch:
- Cheese Blends: Don’t limit yourself to just mozzarella! A blend of cheeses can add complexity. Try mixing in sharp cheddar for a more pronounced flavor, creamy provolone for extra meltiness, or a sprinkle of grated Parmesan for a salty, umami kick. A touch of smoked gouda could offer a sophisticated, smoky note.
- Spice it Up: For those who love a bit of heat, consider adding a pinch of red pepper flakes to your garlic butter mixture. A finely diced jalapeño could also offer a fresh, spicy crunch.
- Herb Extravaganza: While rosemary and parsley are fantastic, explore other fresh herbs. Fresh oregano or thyme can lend a distinctly Italian aroma. For a brighter, more Mediterranean feel, finely chopped basil could be stirred in right before serving.
- Savory Additions: Elevate the savory profile with additional ingredients. Crispy bacon bits or finely chopped cooked prosciutto tucked into the crevices alongside the cheese would be incredible. Sun-dried tomatoes (finely chopped) or a spoonful of pesto could add a delightful tangy, herbal burst. Caramelized onions offer a sweet and savory depth.
- Roasted Garlic Twist: Instead of minced raw garlic, try incorporating roasted garlic for a sweeter, mellower flavor. Simply roast a head of garlic, squeeze out the softened cloves, mash them, and mix into the butter.
- Gluten-Free Option: This recipe can easily be adapted for those with dietary restrictions. Simply use your favorite gluten-free crusty bread. Ensure it’s a sturdy loaf that can hold up to the cutting and filling process.
Tips for a Flawless Cheesy Garlic Pull-Apart Bread
Achieving bakery-quality cheesy garlic pull-apart bread at home is simple with these expert tips:
- Choose the Right Bread: The type of bread matters. A loaf with a good, sturdy crust will hold its shape better during cutting and baking, preventing it from becoming soggy. Avoid very soft sandwich breads. Look for breads labeled “crusty,” “artisan,” or “rustic.”
- Sharp Knife is Your Best Friend: As mentioned, a serrated knife is essential. A dull knife will squish and tear the bread, making it difficult to create neat pockets for your fillings. Invest in a good one, it’s worth it!
- Don’t Be Shy with Filling: While you need to be careful not to cut through the bottom, don’t be afraid to gently open the crevices wide enough to get ample butter and cheese deep inside. This ensures every pull-apart piece is rich with flavor.
- Even Distribution: Take your time to spoon the garlic-herb butter and stuff the cheese evenly throughout the loaf. This prevents some sections from being bland and others overly rich.
- Prevent Burning: If you notice the top of your bread browning too quickly during oven baking, especially during the uncovered phase, you can loosely tent it with aluminum foil to shield it while the cheese melts and the interior heats through.
- Serving Temperature: Remember, this bread is best served hot and fresh. The cheese will be perfectly molten and the bread crispy. If it cools too much, the cheese can firm up.
- Storage and Reheating: If you happen to have leftovers (a rare occurrence!), store them in an airtight container at room temperature for a day or two, or in the refrigerator for up to 3-4 days. Reheat gently in an oven or air fryer at 300-325°F (150-160°C) until warm and the cheese is soft again. Avoid microwaving, as it can make the bread soggy.
Frequently Asked Questions About Cheesy Garlic Pull-Apart Bread
Here are answers to some common questions about making and enjoying this delicious pull-apart bread:
- Can I prepare Cheesy Garlic Pull-Apart Bread ahead of time?
- Yes, you can do some prep work in advance. You can cut the loaf and prepare the garlic-herb butter mixture up to a day ahead. Store the cut loaf wrapped tightly in plastic wrap at room temperature, and the butter mixture in an airtight container in the refrigerator. When ready to bake, bring the butter mixture to room temperature or gently warm it to make it pourable before assembling and baking.
- How should I store leftovers?
- Leftover pull-apart bread can be stored in an airtight container at room temperature for up to 1-2 days, or in the refrigerator for up to 3-4 days. For best quality, always try to reheat it.
- What’s the best way to reheat Cheesy Garlic Pull-Apart Bread?
- To reheat, wrap the bread loosely in foil and warm it in an oven at 325°F (160°C) for about 10-15 minutes, or until heated through and the cheese is melted again. You can also use an air fryer at 300°F (150°C) for 5-8 minutes. Avoid the microwave, as it tends to make the bread soft and chewy rather than crispy.
- Can I use pre-minced garlic from a jar?
- While fresh garlic is always recommended for the most vibrant flavor, pre-minced garlic from a jar can be used in a pinch. Just be aware that its flavor might be slightly less potent and fresh compared to freshly minced cloves.
- What kind of bread is truly best for this recipe?
- A sturdy, crusty loaf like sourdough, rustic Italian, or a French boule is ideal. These breads hold their shape well and provide a fantastic contrast between the crispy exterior and soft, cheesy interior. Avoid softer loaves that might become overly soggy.
- Is this recipe freezer-friendly?
- You can assemble the bread and freeze it unbaked. Wrap the stuffed loaf tightly in aluminum foil, then in plastic wrap, and freeze for up to 1 month. When ready to bake, thaw in the refrigerator overnight, then bake as directed, adding a few extra minutes to account for the colder temperature.
More Appetizer and Side Dish Inspirations
If you loved this cheesy garlic pull-apart bread, you’re sure to enjoy these other crowd-pleasing appetizer and side dish recipes:
- 6-Cheese Spinach and Artichoke Dip: A rich and creamy classic, perfect for any gathering.
- Crispy Coconut Shrimp (Fried, Baked, or Air Fried): Sweet, crunchy, and served with a delicious dipping sauce.
- Flaky Puff Pastry Pigs in a Blanket: A nostalgic favorite, elevated with buttery puff pastry.
- Italian-Style Deviled Eggs with Garlic and Basil: A fresh, herbaceous twist on a party staple.
- Savory Palmiers with Bacon, Gruyere, and Caramelized Onions: Elegant and bursting with savory flavors.
- Perfect Air Fryer Chicken Tenders: Crispy, juicy, and a healthier alternative to fried.
Print Recipe
Cheesy Garlic Pull Apart Bread
Amanda Biddle
15 minutes
20 minutes
35 minutes
4 to 6 people
Ingredients
- 1 loaf crusty bread , such as sourdough, Italian, or a French boule (14-16 ounces)*
- 8 tablespoons salted butter , melted**
- 2 cloves garlic , minced (1-1/2 to 2 teaspoons)
- 1 tablespoon chopped fresh herbs , such as parsley, rosemary, or a combination
- 1 to 1-1/2 cups shredded mozzarella cheese ***
Instructions
Assemble the Bread
- Using a sharp, serrated bread knife, make diagonal slices across the loaf of bread, 3/4- to 1-inch wide. Be careful not to slice all the way through; stop about 1/2-inch from the bottom of the loaf. Turn your knife perpendicular to the first set of slices and cut across the loaf again in diagonal slices of the same width to create a crisscross pattern. Again, ensure you do not cut through the bottom of the loaf.
- In a small bowl, combine the melted butter, minced garlic, and chopped fresh herbs. Mix well until thoroughly combined.
- Using your fingertips, gently open the bread slices to create pockets. Use a spoon to carefully pour some of the garlic-herb butter between each cut, ensuring it is evenly dispersed throughout the loaf. Brush any remaining garlic-herb butter over the top surface of the loaf for an extra crispy crust.
- Generously stuff each crevice between the bread slices with the shredded cheese. Don’t worry if some cheese spills out; these pieces will become deliciously crispy when cooked.
To Air Fry
- Preheat your air fryer to 375 degrees F (190 degrees C). Carefully place the stuffed loaf into the air fryer basket.
- Air fry for 8-10 minutes, or until the bread is heated through, the crust is crispy, and the cheese is beautifully melted and bubbling. Cooking times may vary by air fryer model, so monitor closely during the first attempt and adjust as needed.
To Bake
- Preheat your oven to 375 degrees F (190 degrees C). Wrap the stuffed loaf completely in aluminum foil and place it on a baking sheet.
- Bake for 15 minutes. Then, carefully unwrap the bread and place it back on the baking sheet. Continue baking uncovered for an additional 5-10 minutes, until the bread is golden, crispy, and the cheese is fully melted.
To Eat
- This bread is best served immediately after baking or air frying, while the cheese is gooey and the bread is warm and crispy. Simply pull apart the bread cubes to enjoy the melted, delicious cheese inside. Don’t forget the crusty, garlic butter-infused base at the end – slice it up with a serrated knife for an extra treat!
Notes
**To prepare with unsalted butter, add 1/2 to 3/4 teaspoon of kosher salt to the melted butter mixture, adjusting to your personal taste preference.
***You can also use a delicious combination of your favorite Italian melting cheeses, such as shredded fontina, provolone, and/or Asiago, alongside the mozzarella. I often find a mix, like BelGioioso’s Italian 4-Cheese Shred, adds fantastic depth. Customize the cheese quantity to your personal tastes and the size of your loaf; we typically use between 1 and 1-1/2 cups. For reference:
- 1 cup shredded cheese: provides a delightfully cheesy bread.
- 1-1/2 cups (or more): results in an extra-cheesy, indulgent experience.
Nutrition Estimate
Calories: 384kcal |
Carbohydrates: 38g |
Protein: 12g |
Fat: 21g |
Saturated Fat: 12g |
Polyunsaturated Fat: 1g |
Monounsaturated Fat: 5g |
Trans Fat: 1g |
Cholesterol: 55mg |
Sodium: 593mg |
Potassium: 109mg |
Fiber: 2g |
Sugar: 2g |
Vitamin A: 610IU |
Vitamin C: 1mg |
Calcium: 130mg |
Iron: 3mg
Nutrition information is automatically calculated, so it should only be used as an approximation.
Please note that our recipes have been developed using the US Customary measurement system and have not been tested for high altitude/elevation cooking and baking conditions.
