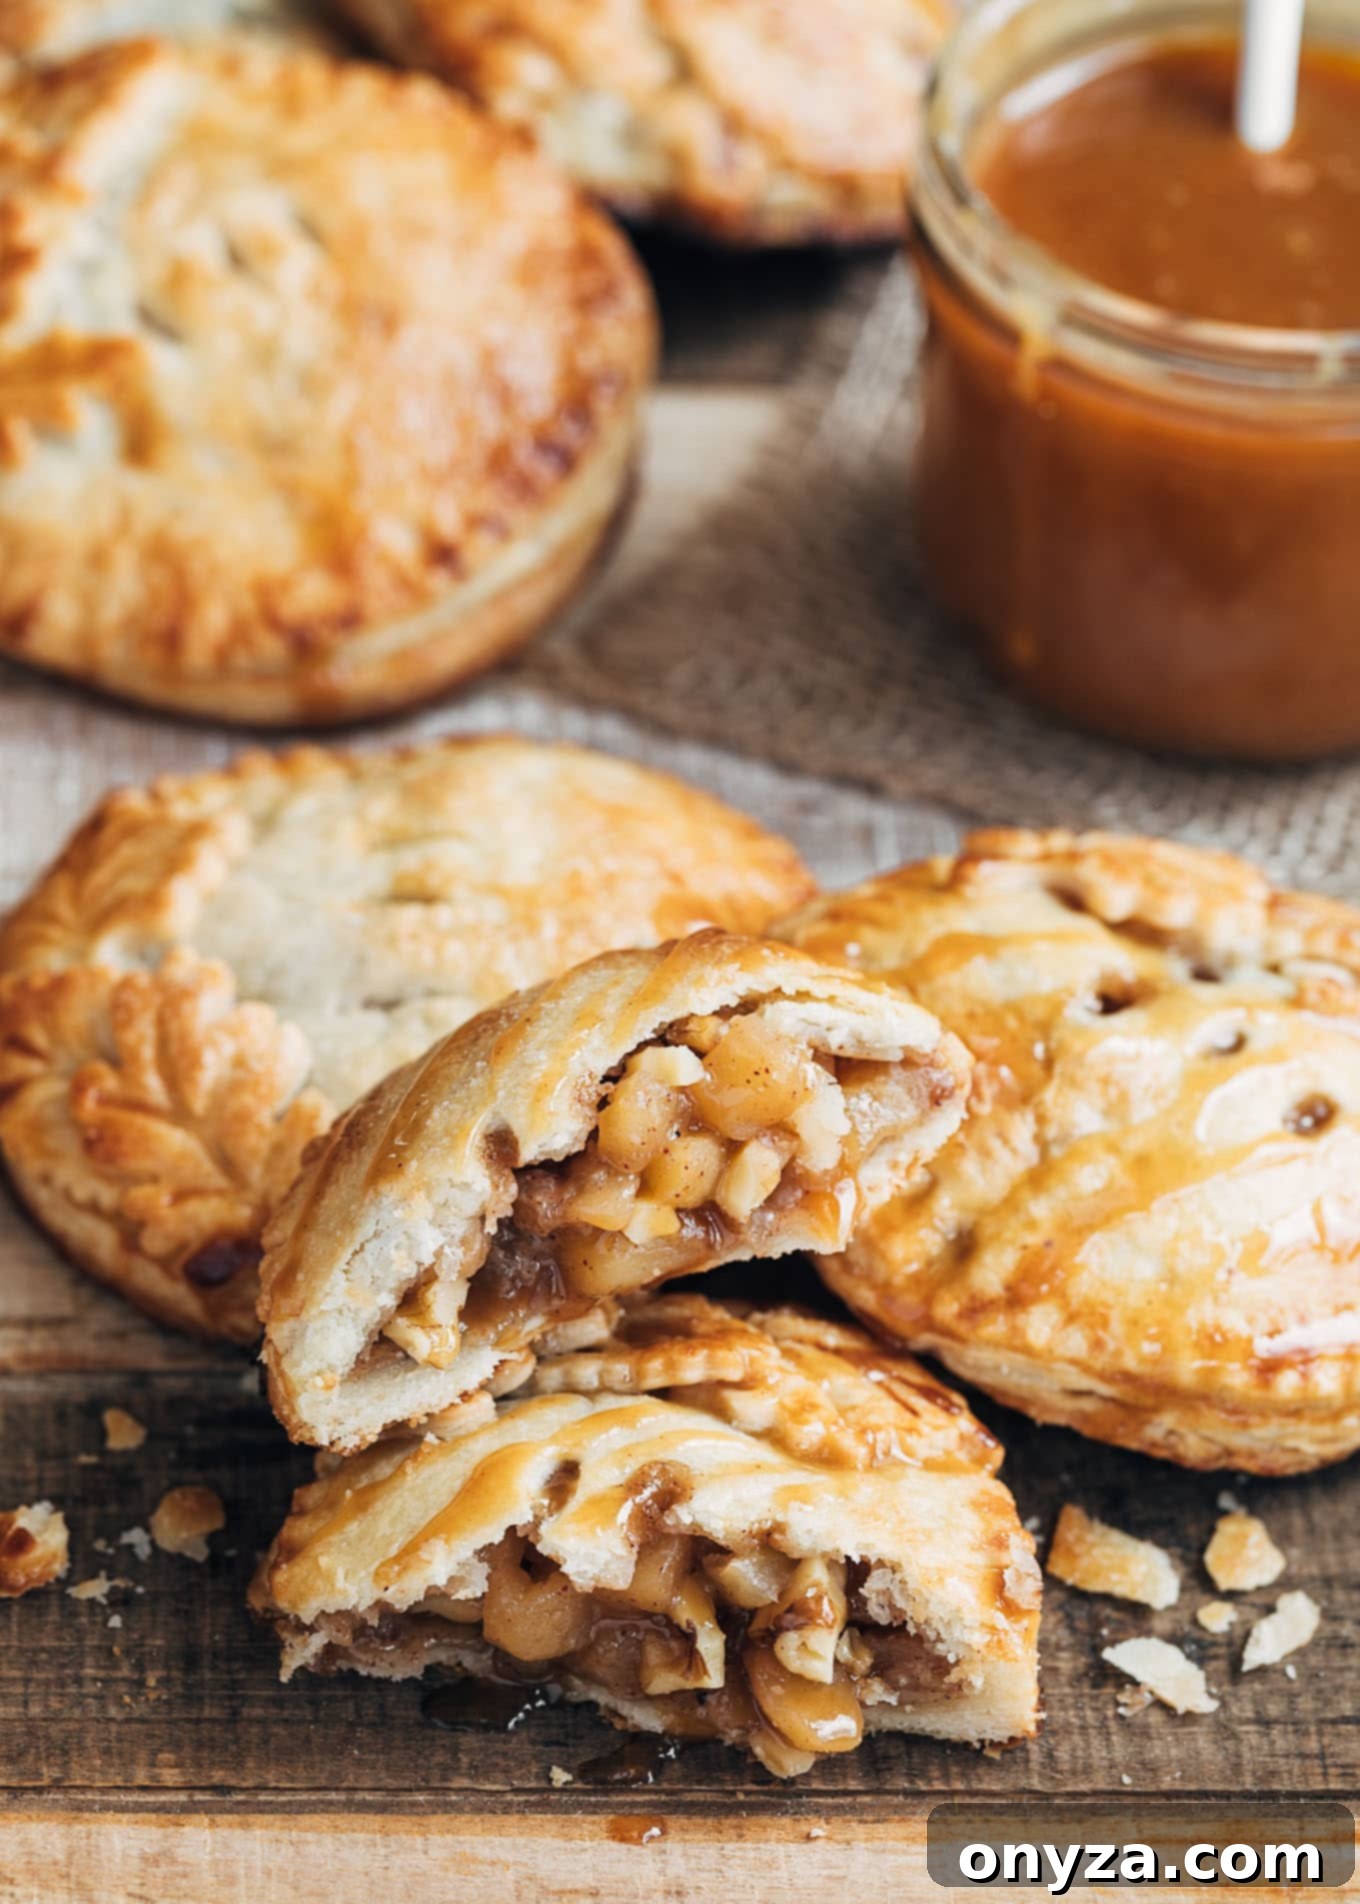
These Caramel Apple Hand Pies feature a flaky butter crust, a luscious apple-walnut filling, and cozy warm spices, making them the perfect treat for any season or occasion.
Irresistible Caramel Apple Hand Pies: Your Go-To Portable Dessert
In the expansive world of delightful desserts, few treats capture hearts quite like a perfectly crafted hand pie. There’s something undeniably charming about these individual-sized pastries, embodying all the beloved elements of a classic apple pie – a golden, flaky crust, a rich, sweet filling, and comforting aromatic spices – all conveniently wrapped into a portable, pre-portioned package. They are an ideal indulgence for a quiet evening at home, a crowd-pleasing option for tailgating events, or an elegant addition to your festive holiday dessert spread.
My absolute favorite rendition involves a delectable caramel apple walnut filling. This exquisite blend combines tender, diced apples with a harmonious mix of cinnamon and nutmeg, robust toasted walnuts, and my signature Apple Cider Caramel sauce. Each pie is baked within an all-butter crust until it achieves a magnificent golden hue, resulting in a treat that’s not just delicious but also beautiful. These hand pies are truly versatile – whether you’re seeking a comforting snack on a crisp autumn night, looking to impress guests at a holiday buffet, or crafting a thoughtful gift box for a dear friend.
Indeed, a thoughtful gift of homemade Apple Hand Pies would undoubtedly be met with appreciation. Their charm lies not only in their delightful flavor profile but also in their inviting, rustic appearance and the sheer joy of a personalized, homemade treat. These individual desserts offer a unique alternative to traditional pies, making them a standout choice for any occasion where ease of serving and portability are desired.
Choosing the Best Apples for Your Hand Pies
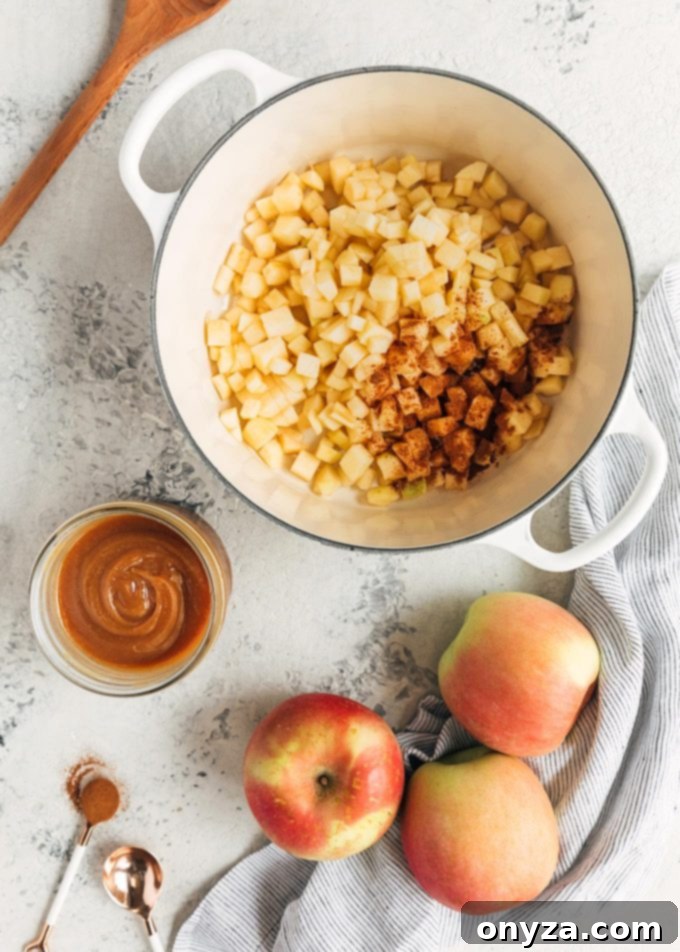
Selecting the right apples is crucial for achieving the perfect hand pie filling. Much like preparing my Homemade Apple Pie and Miniature Apple Raspberry Pies, I prefer to par-cook the filling for these Caramel Apple Hand Pies. This preliminary cooking step serves multiple important purposes: it guarantees that the apples become wonderfully tender, even during the relatively short baking time of hand pies, and it prevents the crust from becoming soggy by allowing the apples to release their excess juices before being encased in dough. This method ensures a consistently tender, flavorful filling every time.
Since the apples will undergo a cooking process on the stovetop, it’s essential to choose varieties that maintain their structure while softening. My top recommendation for this recipe is the sweet-tart Fuji apple. Fuji apples strike an excellent balance, holding their shape well and offering a delightful crispness that transforms into a tender bite when cooked. Other fantastic choices that perform similarly include Braeburn and Jonagold, both known for their firm flesh and balanced flavor profiles, which complement the rich caramel and warm spices beautifully.
Conversely, it’s generally best to steer clear of varieties such as Red Delicious or McIntosh. These apples, while popular for fresh eating, tend to break down and turn mushy when subjected to heat, leading to a less appealing, watery filling. The goal is a filling with distinct apple pieces, not an apple sauce texture.
If you prefer a more pronounced tartness to beautifully offset the sweetness of the caramel in the filling, consider using a variety like Granny Smith. While they might be a bit too sour for my family’s usual preference, many bakers adore the vibrant contrast they bring, creating a dynamic flavor profile that really makes the caramel shine. Feel free to experiment with a mix of sweet and tart apples to find your perfect balance.
Crafting Perfect Hand Pies: Step-by-Step Guide
While hand pies are individual masterpieces, the process of making them doesn’t demand significantly more effort than baking a traditional full-sized pie. The key difference lies in the shaping: instead of fitting your rolled-out dough into a pie plate, you’ll use a cookie cutter to create uniform rounds. This simple adjustment opens up a world of creative possibilities for your portable treats.
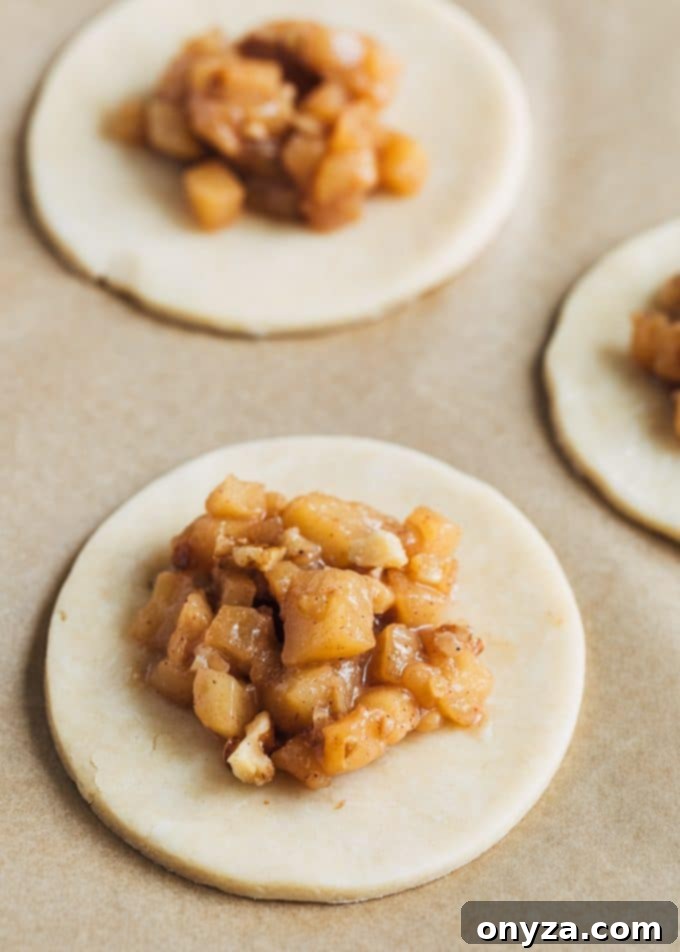
You have flexibility in shaping your hand pies. For a larger quantity of smaller, charming hand pies, you can fold the dough rounds into elegant half moons over the apple filling. This method requires a slightly smaller amount of filling for each round, typically about a tablespoon for a 4-inch round. Alternatively, as demonstrated in this guide and featured in the accompanying photos, you can opt for a classic circular hand pie by topping the apple filling with a second round of dough. This style often uses about two tablespoons of filling for a 5-inch round, creating a more substantial individual pie.
Essential Tips for Hand Pie Success:
- Maintain Cold Dough: The secret to a beautifully flaky crust lies in keeping your dough cold. If your pie dough begins to warm up too much while you’re cutting rounds or re-rolling scraps, don’t hesitate to return it to the refrigerator. A quick chill will firm it up and prevent the butter from melting prematurely, ensuring that coveted flaky texture.
- Ensure Filling is Completely Cooled: Before you even think about spooning the filling into your delicate pastry rounds, make absolutely certain it has cooled to room temperature. Introducing hot apples to cold, all-butter dough will cause the butter to melt too quickly, compromising the crust’s integrity and leading to a soggy bottom. Patience here truly pays off.
- Avoid Overfilling: It can be tempting to load up your hand pies, but resist the urge to overfill them. Precision is key. Use approximately one tablespoon of filling for smaller half-moon pies (made with 4-inch dough rounds) and about two tablespoons for larger circular pies (using 5-inch rounds). Overfilled pies are highly prone to splitting during baking, which not only looks messy but also allows precious filling to leak out.
- Seal Your Pies Thoroughly: A tight seal is paramount to keeping that delicious filling locked inside. Lightly brush the edges of the bottom dough round with a little water before placing the top layer. This creates a sticky surface for the two dough layers to adhere. For extra security and a classic look, use the tines of a fork to firmly crimp the edges together. Beyond the fork crimp, you can explore decorative folding or braiding techniques, similar to how one might seal an empanada, adding an elegant touch to your creations.
- Don’t Forget the Finishing Touches: Just like a grand full-sized apple pie, hand pies benefit from a few final details. Use the tip of a sharp paring knife to cut a couple of small slits or decorative vents into the top of each pie. These openings are essential for allowing steam to escape during baking, preventing the pies from bursting. A light application of an egg wash (egg yolk beaten with a teaspoon of water) will give your pies a rich, golden-brown sheen, and a generous sprinkling of granulated sugar before baking will add a beautiful sparkle and a delightful caramelized crunch to the crust.
Elevate Your Presentation: Decorating Hand Pies with Flair
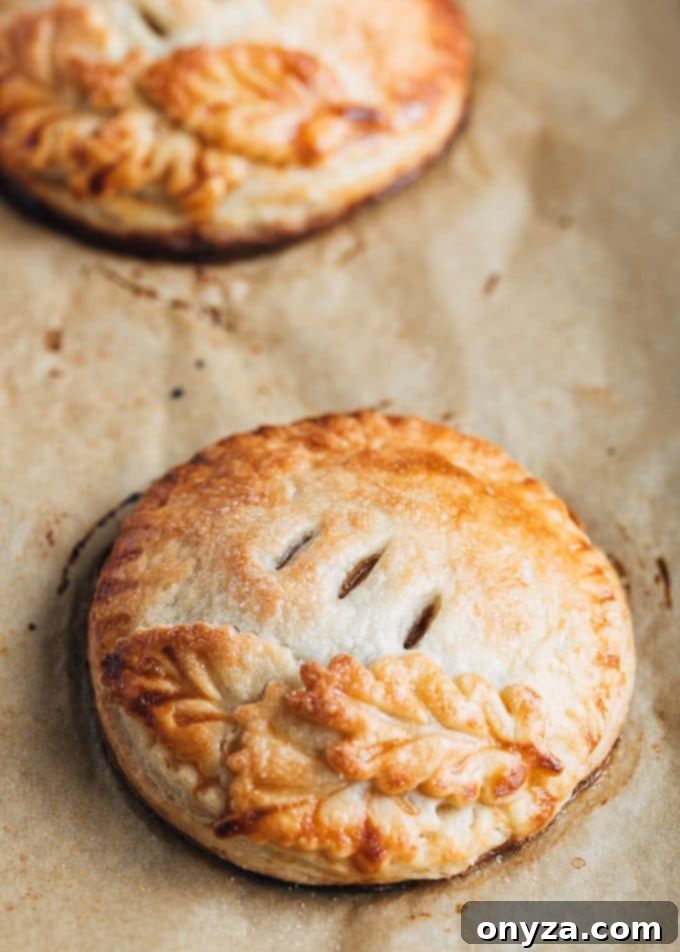
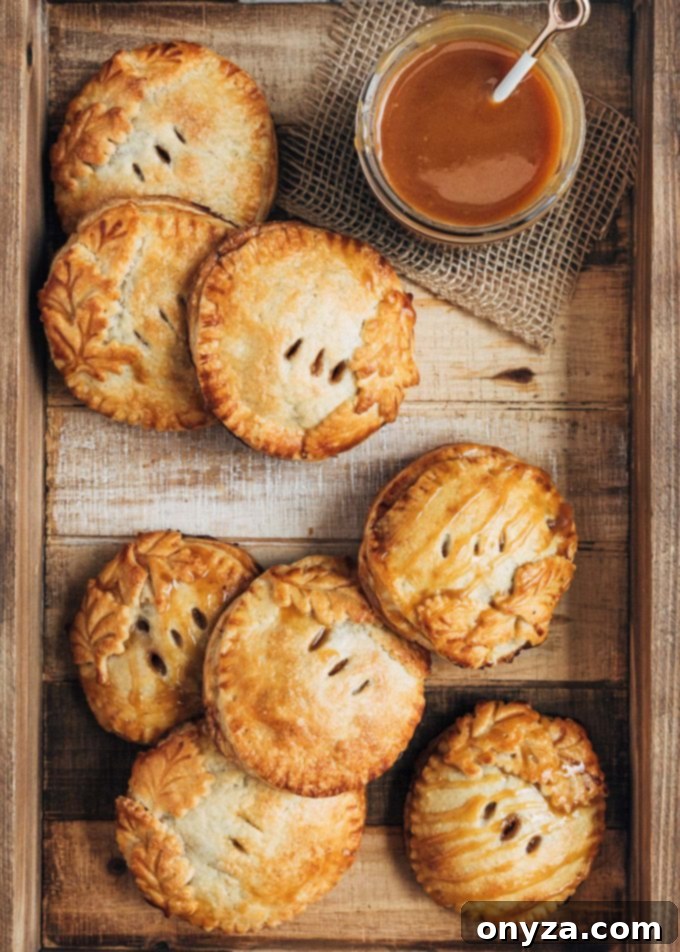
For those who enjoy adding an extra touch of artistry to their baking, decorating hand pies offers a wonderful opportunity to unleash your creativity. As showcased in the vibrant photographs accompanying this post, crafting delicate pie crust cutouts and using them to adorn your pies before baking can transform a simple treat into a visual delight. I often rely on my trusty leaf-shaped pie crust cutters for this purpose, which are readily available at most gourmet kitchen stores, especially during the festive fall and holiday seasons. However, don’t limit yourself – small stars, hearts, or geometric shapes can also create stunning effects.
The trick to making these edible decorations adhere beautifully is timing. After you’ve applied the initial egg wash to the main pie crust, carefully place your dough cutouts onto the surface. Then, give the cutouts themselves a light brush of egg wash. This double application ensures they stick firmly and achieve the same golden luster as the rest of the crust. Finally, proceed with sprinkling your pies with sugar for that perfect sparkle and delightful crunch.
These small, thoughtful details don’t add much time to your overall preparation, but they make an immense difference in presentation. Whether you’re serving these hand pies to guests at a special gathering or packaging them as heartfelt gifts, the extra effort will undoubtedly be noticed and appreciated, leaving a lasting impression of your culinary care and creativity.
Baking Memories: Hand Pies and Family Traditions
Some of the most cherished memories from my childhood revolve around the warmth and joy of cooking and baking alongside my mother and grandmother. There was always a special feeling of accomplishment and belonging when I was allowed to help prepare a sweet treat for our family, especially during the bustling holiday seasons. These moments in the kitchen weren’t just about food; they were about connection, learning, and creating lasting family bonds.
These caramel apple hand pies are an exceptionally wonderful recipe to involve little helpers in the kitchen. Kids naturally gravitate towards hands-on tasks, and this recipe offers plenty of opportunities for them to contribute. They’ll adore cutting out the dough rounds with various cookie cutters, carefully spooning out the cooled filling, mastering the art of crimping the edges together with a fork, and even creating decorative leaf shapes to adorn the pies. It’s a fantastic way to introduce them to the joys of baking and ignite a passion for creating delicious food.
A cherished, funny story: Growing up in the 80s, I had a beloved Cookie Monster doll who was a constant fixture on our kitchen counter during baking sessions. My grandmother, affectionately known as “Nanny,” would always “feed” him the dough scraps as she was rolling out the pie crust. To my four-year-old eyes, it was pure magic watching the pie dough mysteriously disappear as he “ate” it, leaving me utterly delighted and convinced of his culinary prowess. To this very day, I haven’t quite unraveled Nanny’s secret – where did she hide that dough? Up her sleeve? Discreetly dropped behind the doll? It remains one of the great, unsolved mysteries in my personal pie-making history. And yes, a laugh track often plays in my head when I recall it!
On that heartwarming note, I extend my sincerest wishes for you to enjoy many warm pies and create beautiful, lasting memories with your loved ones this holiday season and beyond. May your kitchen be filled with laughter, delicious aromas, and the joy of shared traditions.
For those interested in exploring alternative cooking methods, this recipe can even be adapted for an air fryer! For a different take, check out the recipe video I collaborated on with Good Housekeeping Magazine and KRUPS for my Air Fryer Apple Raspberry Hand Pies.
Caramel Apple Hand Pies with Toasted Walnuts
A delightful twist on a classic, these individual caramel apple hand pies are easy to make, lovely to serve, and utterly delicious to eat. Enjoy the perfect blend of sweet apples, warm spices, and crunchy walnuts encased in a buttery, flaky crust.
Yields: 10 servings
Prep Time: 30 minutes
Cook Time: 45 minutes
Total Time: 1 hour 15 minutes
Ingredients
- 1 recipe all-butter pie crust (for a double crust pie)
- 2-3 Fuji apples, peeled, cored, and diced into 1/4-inch pieces (approximately 3 cups)
- ¼ teaspoon ground cinnamon
- ⅛ teaspoon ground nutmeg
- Pinch of kosher salt
- 1 teaspoon cornstarch mixed with 1 teaspoon water (to create a “slurry”)
- ¼ cup caramel sauce (cooked to 130 degrees F and cooled), plus extra for drizzling (optional)
- ¼ cup toasted walnuts, finely chopped
- 1 large egg yolk, beaten with 1 teaspoon water (for egg wash)
- Granulated sugar, for sprinkling on top
- Flaked sea salt, for serving (optional)
Instructions
- In a medium nonstick pot, combine the diced apples, cinnamon, nutmeg, and a pinch of salt. Place over medium heat and bring the mixture to a gentle simmer, stirring occasionally. The apples will begin to release their natural juices as they warm. Once simmering, cover the pot and reduce the heat to low. Continue to cook, stirring periodically, for about 12-15 minutes, or until the apples have softened but still hold their shape.
- Add the cornstarch slurry to the apple mixture in the pot. Increase the heat back to medium and cook for another 1-2 minutes, stirring constantly, until the filling thickens noticeably. Remove the pot from the heat and stir in the ¼ cup of caramel sauce and the toasted walnuts. Allow the entire filling to cool completely to room temperature before proceeding to assembly.
- While the apple filling cools, prepare your pie crusts. On a lightly floured surface, roll out the pie dough to an even 1/8-inch thickness. Using a 5-inch round cookie cutter, cut out as many circles as possible. Gather the dough scraps, gently re-roll them, and cut out additional circles until all the dough is used.
- To assemble the hand pies, place approximately 2 tablespoons of the cooled apple filling onto the center of one dough circle. Lightly brush the edges of this dough circle with water. Carefully place a second dough round directly over the filling. Press the edges firmly together to seal, then use the tines of a fork to crimp the sealed edges all the way around, ensuring a tight seal and an attractive finish. Transfer the assembled pies to a baking sheet lined with parchment paper and refrigerate for at least 30 minutes to firm up the dough.
- Preheat your oven to 400 degrees F (200 degrees C). Once the pies are chilled, remove them from the refrigerator. Lightly brush the tops of the pies with the prepared egg wash. Using the tip of a small paring knife, carefully cut a few small slits or decorative vents into the top of each pie to allow steam to escape during baking. Finally, lightly sprinkle the tops of the pies with granulated sugar for a beautiful golden crust.
- Bake the hand pies for 20-25 minutes, or until the crust is beautifully golden brown and the filling is visibly bubbling through the slits in the crust. Once baked, carefully remove the pies from the oven and transfer them to a wire rack to cool until they are just warm to the touch.
- Serve these delectable hand pies warm, optionally drizzled with a little extra caramel sauce and a sprinkle of flaky sea salt for an elevated flavor experience. Enjoy!
Nutrition Estimate (per serving)
Calories: 221 kcal | Carbohydrates: 28g | Protein: 2g | Fat: 10g | Saturated Fat: 3g | Cholesterol: 18mg | Sodium: 184mg | Potassium: 82mg | Fiber: 1g | Sugar: 3g | Vitamin A: 50IU | Vitamin C: 1.7mg | Calcium: 15mg | Iron: 1.1mg
Please note that nutrition information is an approximation and may vary based on specific ingredients and preparation methods.
Our recipes are developed using the US Customary measurement system and have not been tested for high altitude/elevation cooking and baking.
