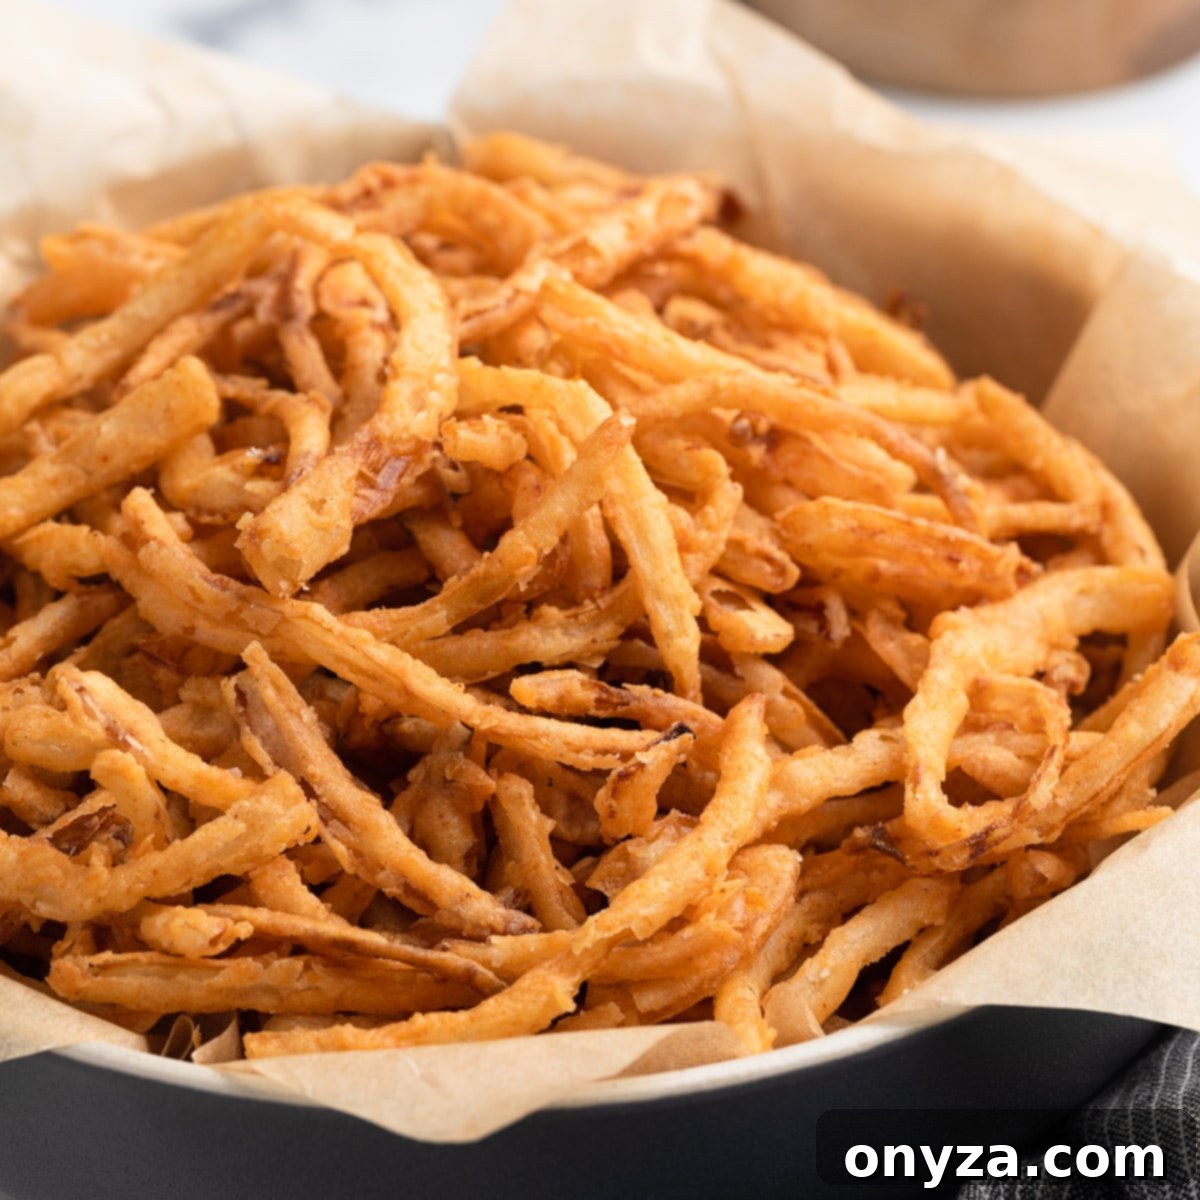
Forget the wimpy, mass-produced versions; there’s nothing quite like the unparalleled flavor and texture of truly **Homemade French Fried Onions**. These delightful crispy onion strings are surprisingly simple to craft from scratch, yet they elevate any meal with their light, airy crispness, perfectly balanced savory seasoning, and a natural hint of sweetness from the onions themselves. Whether you’re aiming to top a classic holiday casserole, add an irresistible crunch to your everyday salad, build the ultimate gourmet burger, or simply enjoy them as a standalone, addictive snack, these freshly fried onions are guaranteed to impress every palate.
Once you experience the superior taste, delicate crispness, and rich aroma of homemade French fried onions, you’ll quickly discover their versatility. They’ll become a cherished addition to your culinary repertoire, gracing more than just your Thanksgiving green bean casserole. They transform a simple weeknight dish into something special, offering a gourmet touch that is surprisingly easy to achieve right in the comfort of your own kitchen.
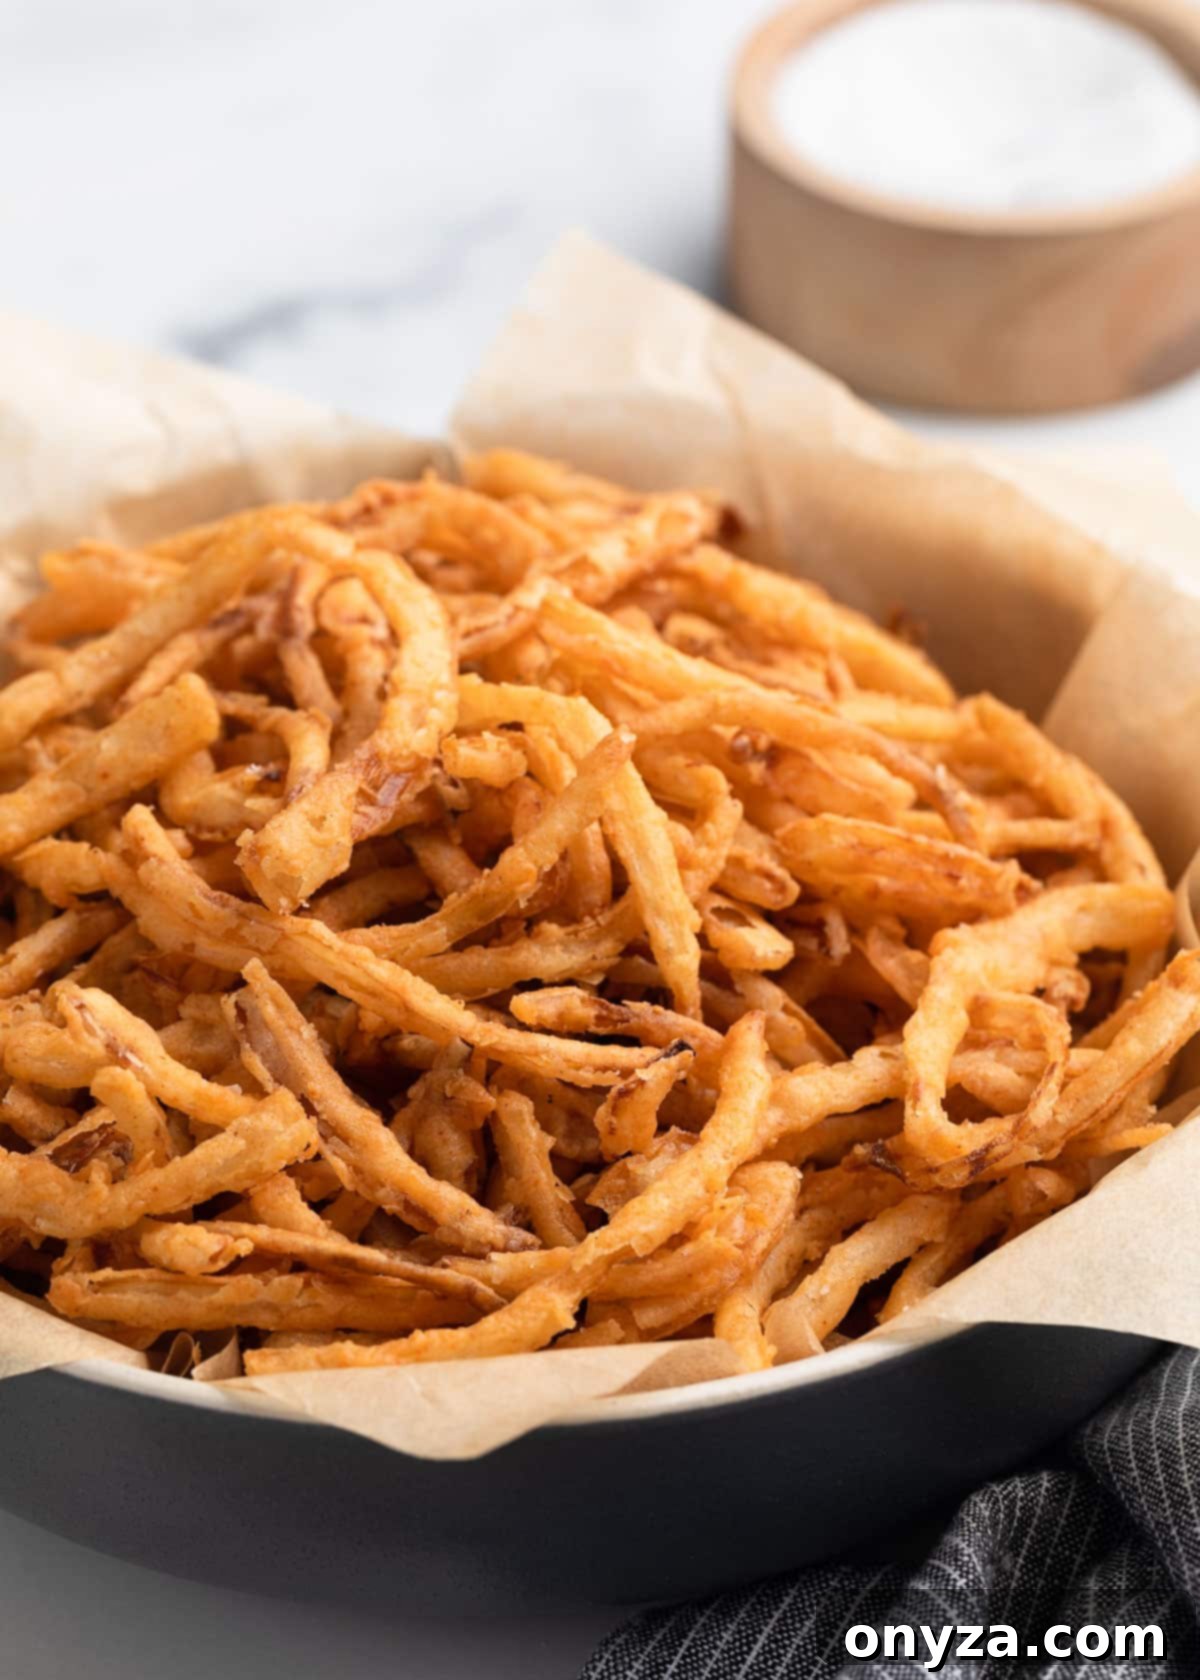
Essential Tips: What You Need to Know Before Making Crispy Onion Strings
Achieving a truly outstanding batch of homemade French fried onions begins long before the oil heats up. Paying close attention to these foundational details will ensure your crispy onion strings turn out flawlessly light, consistently crispy, perfectly seasoned, and incredibly delicious every single time you make them.
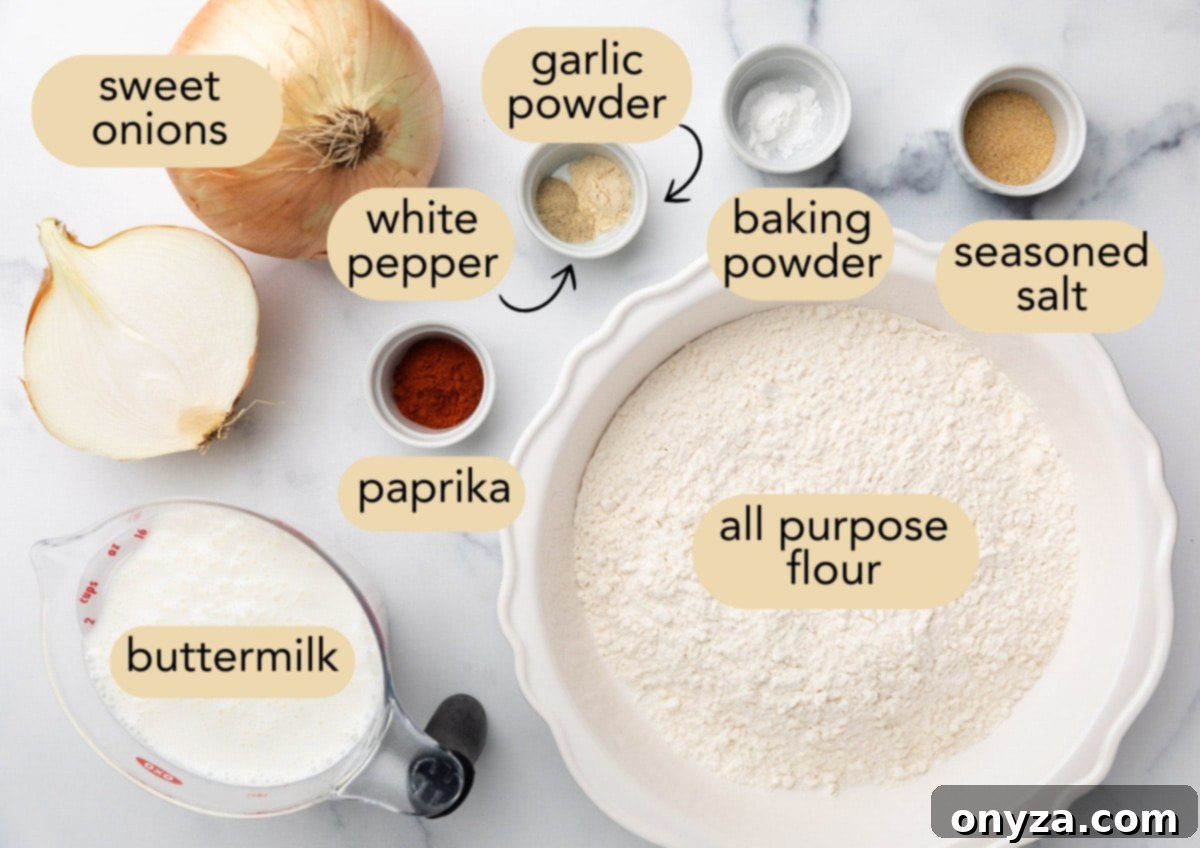
- Optimizing Your Onion Choice: While common yellow onions are certainly a viable option, for the absolute best flavor and tender sweetness, we highly recommend selecting large sweet onion varieties. Vidalia or Walla Walla onions are prime examples, known for their high natural sugar content and mild flavor. These natural sugars gently caramelize during the frying process, providing a delightful counterpoint to the savory coating and preventing any harsh or overly pungent onion taste. Their inherent sweetness ensures a more balanced and addictive fried onion experience. If sweet onions are not readily available, a good quality yellow onion will still yield excellent results, though the pronounced sweetness will be less evident. Always choose firm, unblemished onions.
- The Art of Even Slicing: Uniformity in your onion slices is arguably the most critical factor for achieving consistently crisp and evenly cooked French fried onions. Strive for paper-thin slices, ideally between 1/16- to 1/8-inch thick. While a sharp chef’s knife can accomplish this with careful, steady technique, a mandoline slicer is truly your best friend for this task. A mandoline ensures every single slice is perfectly even, which is paramount for all the onion pieces to fry at the same rate and reach optimal crispness simultaneously. Thinner slices also have the added benefit of frying faster and developing a significantly lighter, more delicate crispness, preventing any undesirable soggy or undercooked bits. Always exercise extreme caution and use the protective guard when operating a mandoline for safety.
- Planning and Preparation Ahead: The ultimate texture of these homemade crispy onion strings is undeniably at its peak when they are devoured freshly fried and still delightfully warm. However, life happens, and sometimes you need to prepare components of a meal in advance. If you need to make these crispy onions a day or two before a special gathering or holiday meal, they can certainly be prepared ahead of time. To refresh and restore their signature, satisfying crunch, simply spread them out in a single layer on a baking sheet and pop them into a preheated oven for a few minutes. We’ll cover proper storage and reheating techniques in more detail later to help you maintain their exquisite quality.
Step-by-Step Guide: Crafting Irresistible Homemade French Fried Onions
Creating these gourmet crispy onion strings at home is a rewarding culinary endeavor that promises incredible flavor and texture. Follow these detailed, easy-to-understand steps to ensure perfectly golden, light, and utterly delicious results with every batch.
Step 1: Precision Slicing and Buttermilk Soaking for Tenderness
Begin by taking a large sweet onion and carefully halving it lengthwise, ensuring your cut goes straight through the root end. This precise cut helps to keep the onion layers more intact, making subsequent slicing much easier and more uniform. Peel away the dry, papery outer layers of the onion. Next, place each onion half cut-side down on your sturdy cutting board. Slice crosswise into very thin half-moons, consistently aiming for that ideal thickness of 1/16- to 1/8-inch. Precision here pays off! Once sliced, gently separate these half-moon pieces into individual “strings” or rings. This crucial separation ensures that each piece receives a thorough coating and fries evenly, preventing clumping.
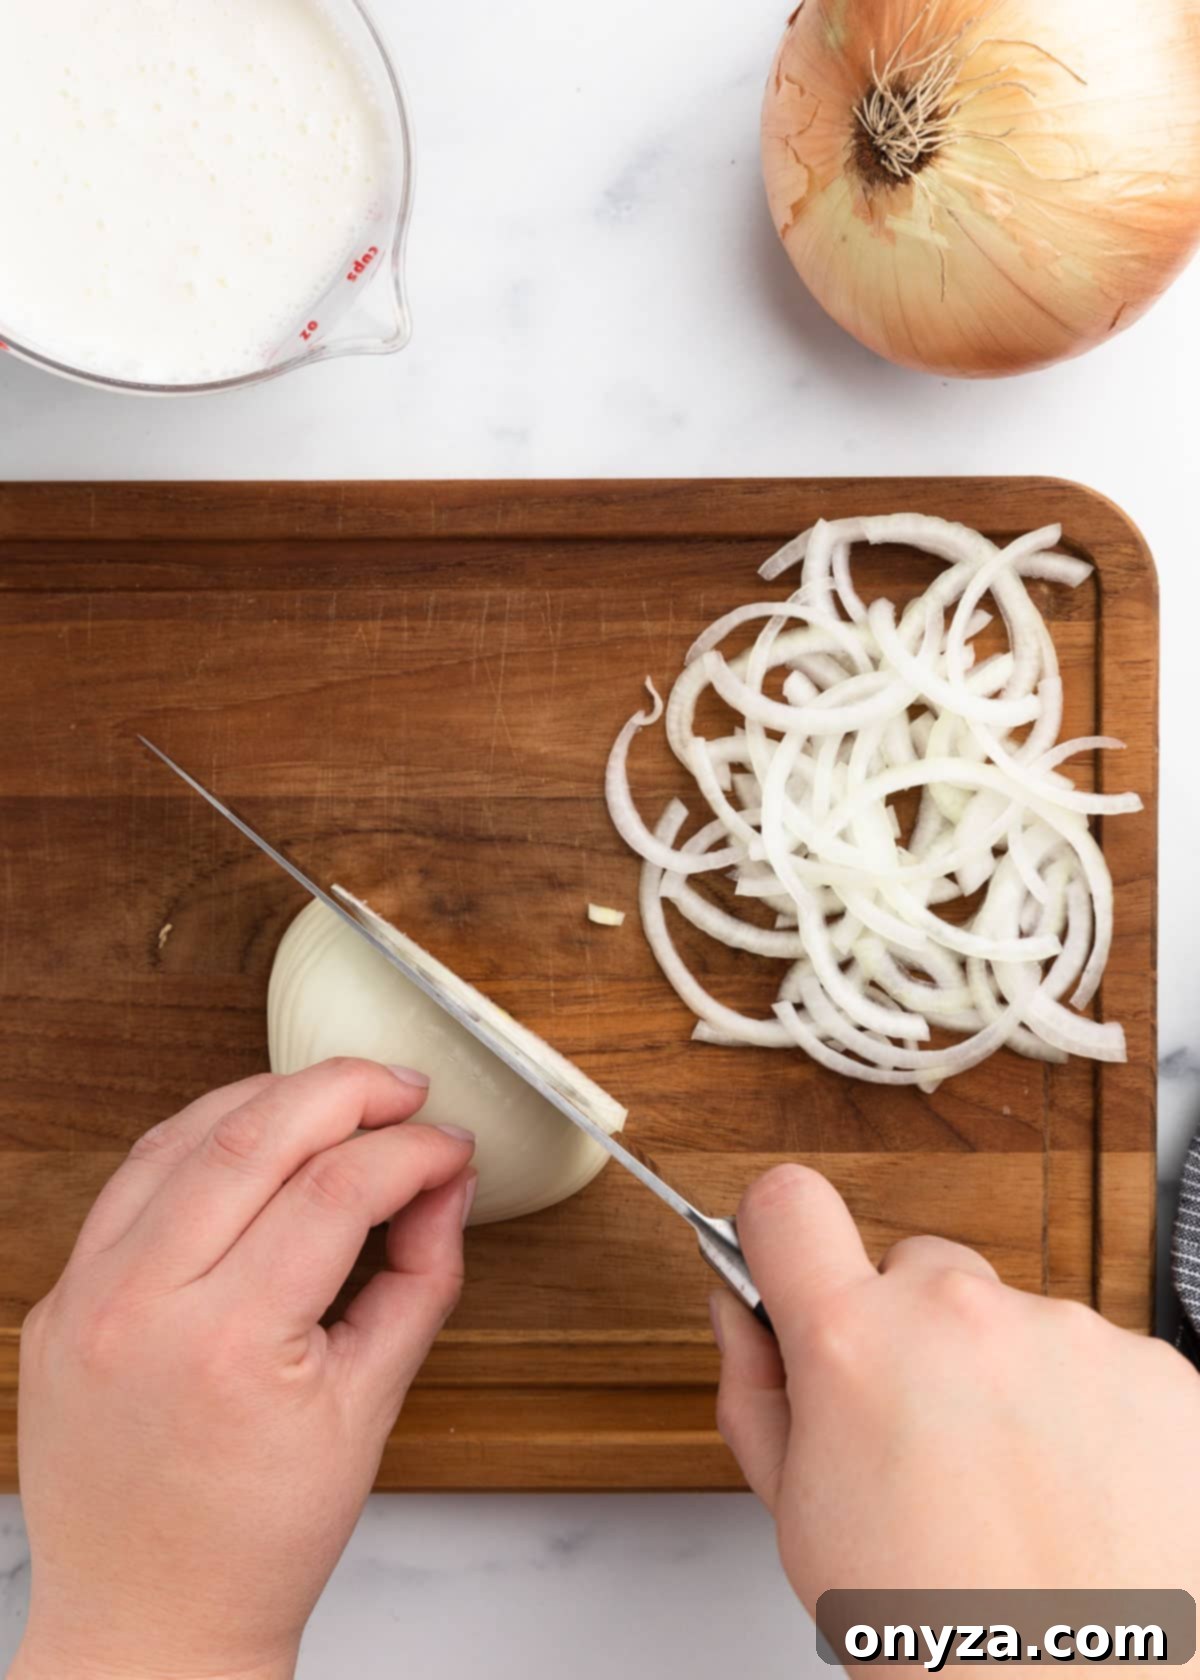
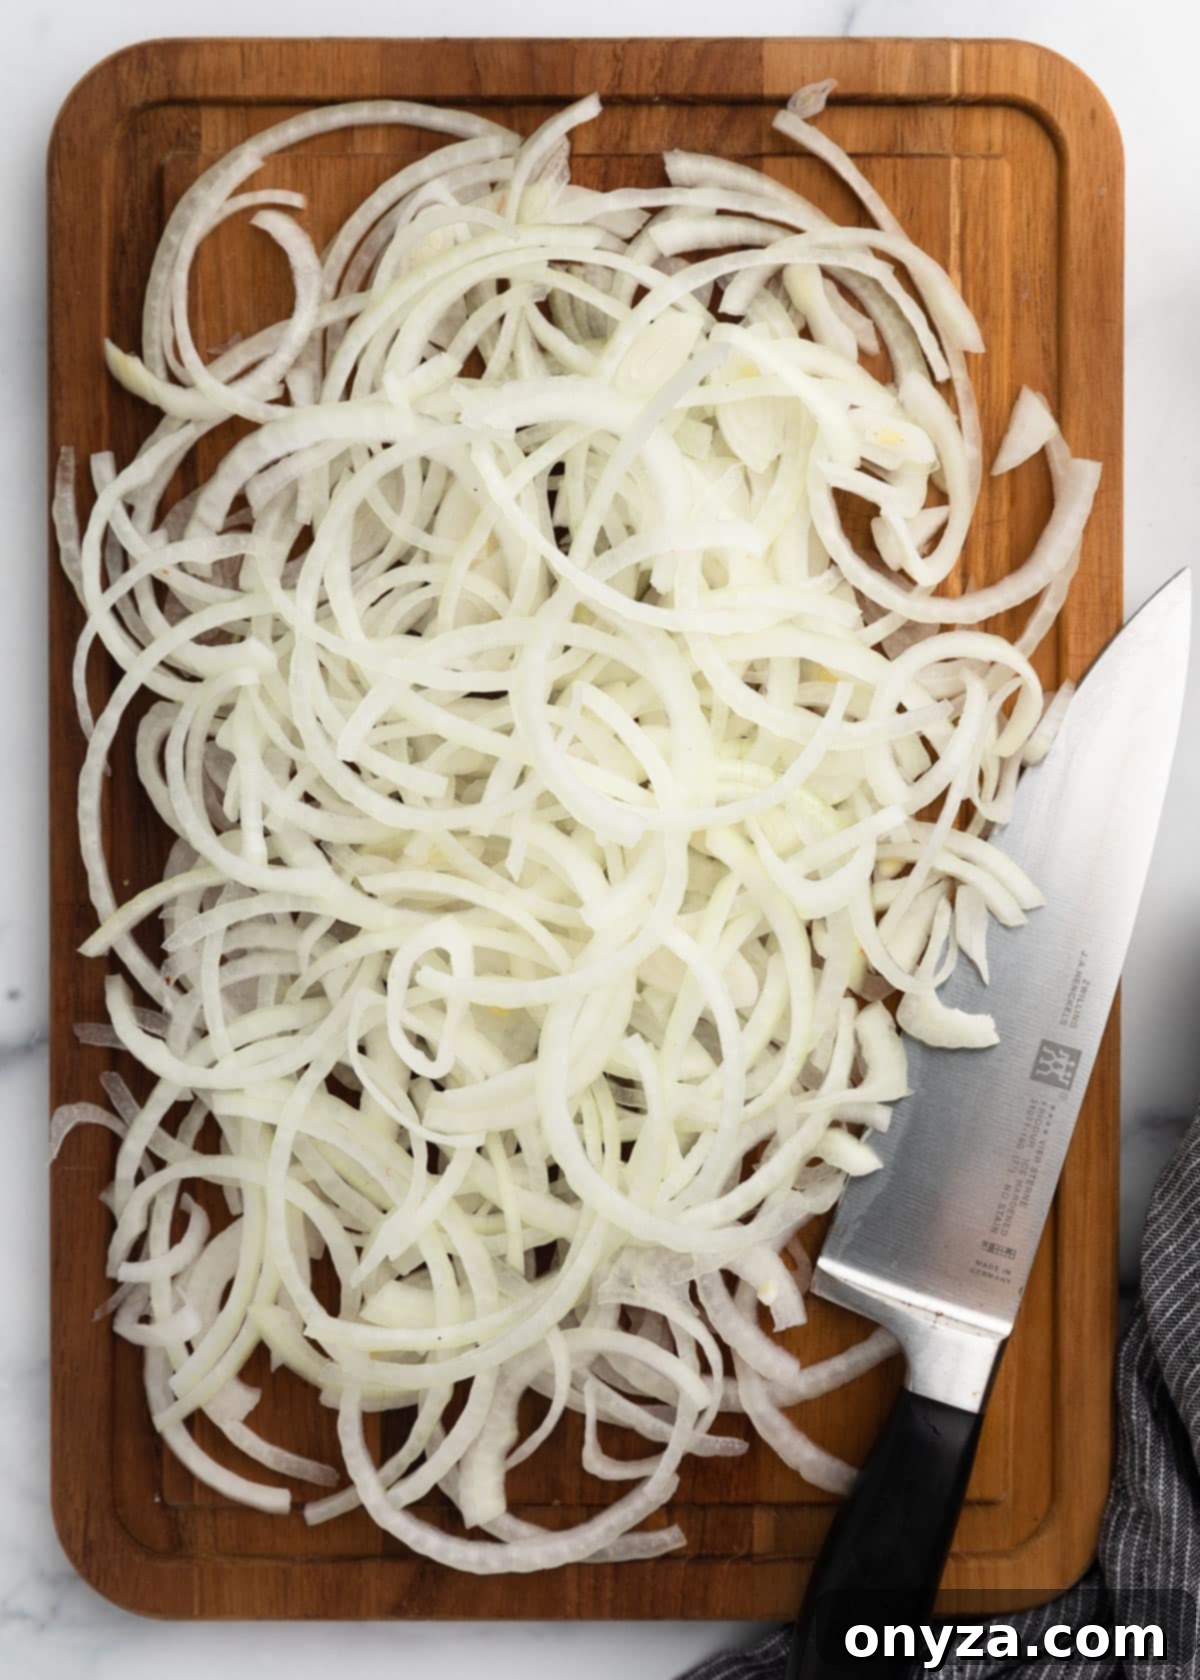
If you’ve opted to use smaller yellow onions, you might find it more convenient and effective to slice them into full, thin rings without halving them first. The key, regardless of the onion type or cut, is to ensure all layers are thoroughly separated into individual rings or strings before proceeding to the next stage – the all-important buttermilk soak.
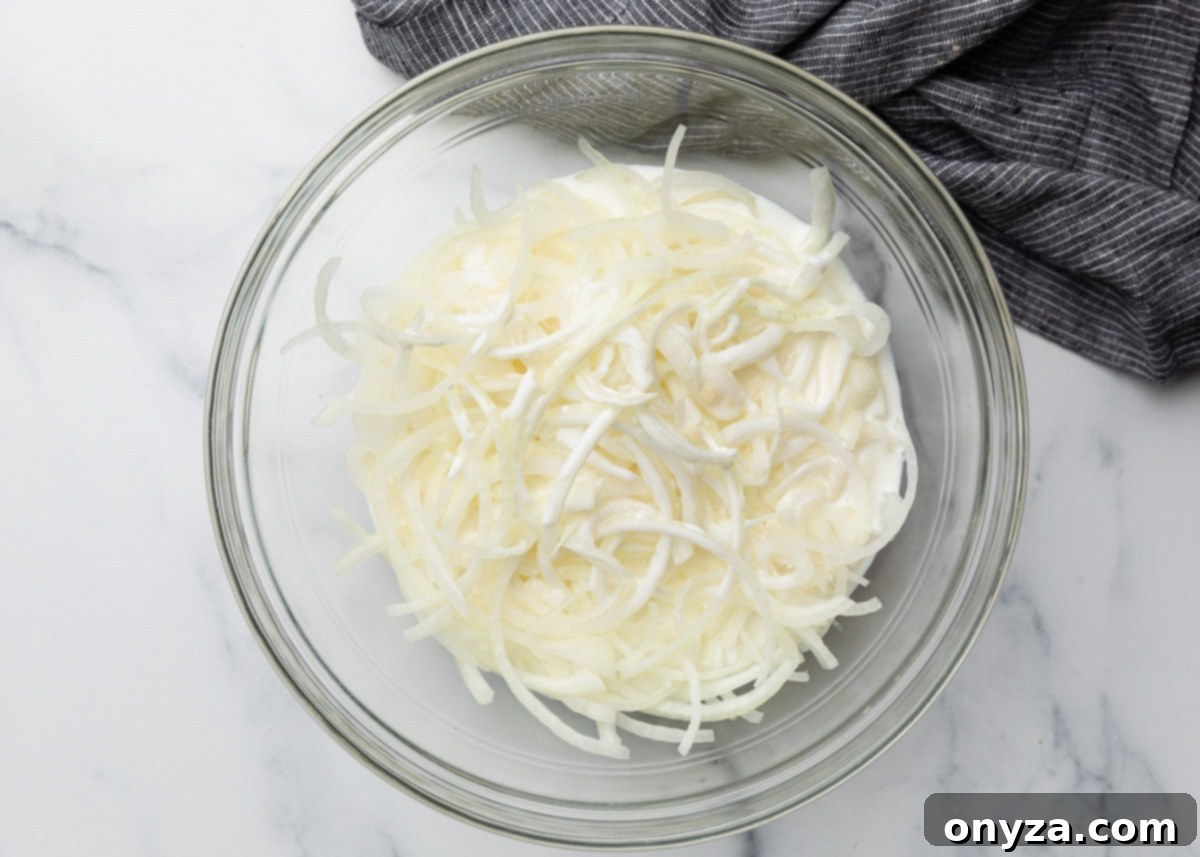
Once your onions are perfectly sliced and separated, transfer them to a medium-sized bowl. Pour enough buttermilk over the onions to completely cover and submerge all the pieces. Give them a gentle stir to ensure every single string is thoroughly coated in the buttermilk. Allow the onions to soak for a full **30 minutes**. During this tenderizing period, give them a stir once or twice to promote even liquid distribution and tenderization. The buttermilk serves a crucial dual purpose in this recipe: its mild acidity works to tenderize the onions, making them less pungent, more mellow, and delightful to eat. Equally important, the buttermilk creates a perfectly textured, slightly tacky surface for the seasoned flour coating to adhere to, which is fundamental for achieving that coveted crispy exterior.
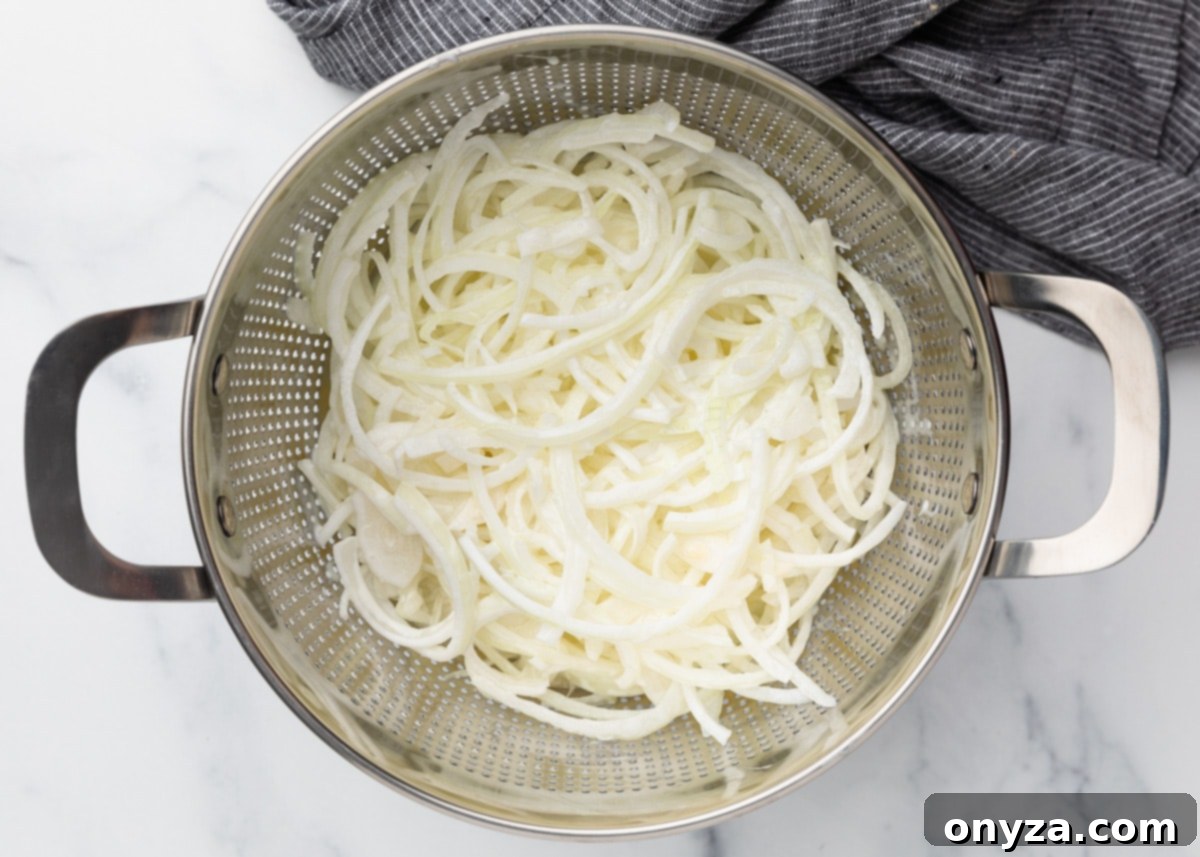
After the 30-minute buttermilk bath, it is absolutely critical to drain the onions exceptionally well. Transfer them to a colander and allow them to sit for several minutes, gently shaking the colander occasionally, to ensure all excess buttermilk drips off thoroughly. This step cannot be rushed or overlooked; any residual liquid will inevitably lead to a gluey, heavy, and clumpy coating during flouring. A wet coating will prevent your onion strings from achieving that desired light and airy crispness, instead causing them to stick together and fry unevenly.
Step 2: Crafting the Perfect Seasoned Coating for Ultimate Crunch
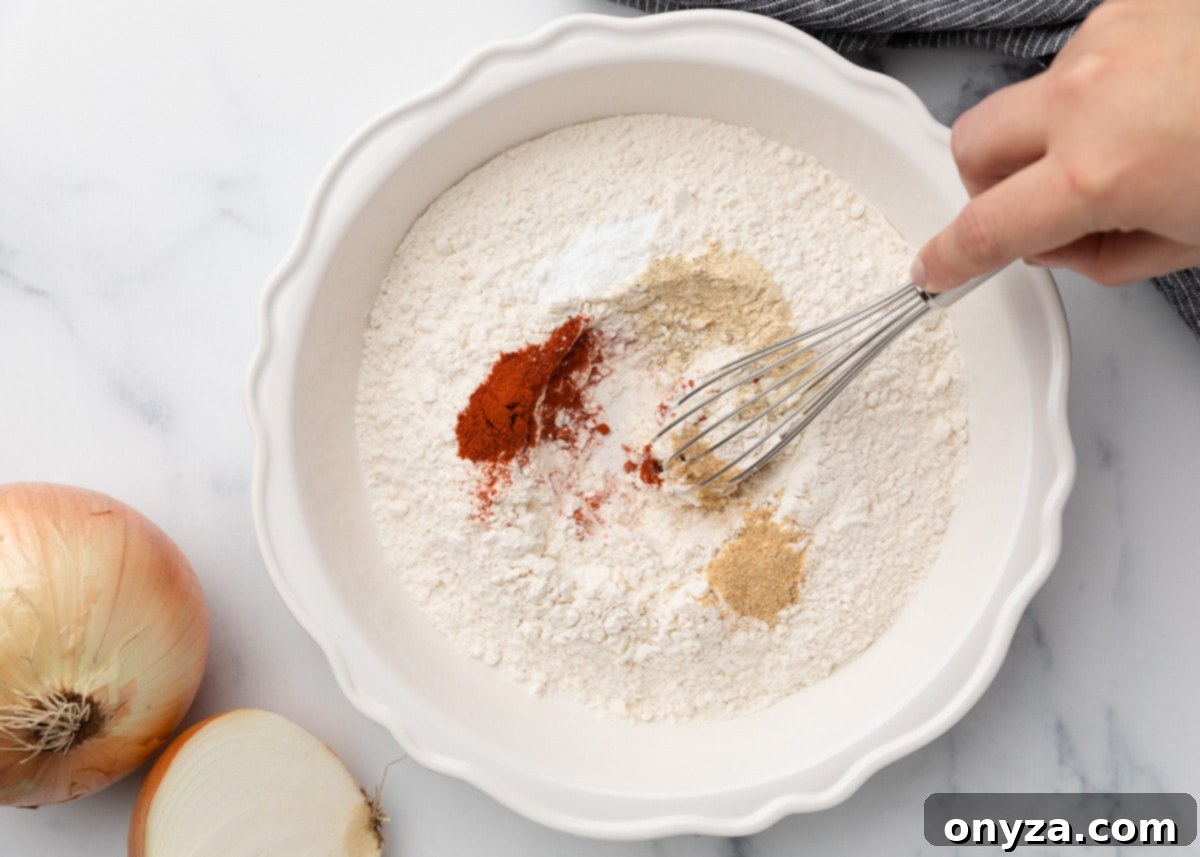
While your onions are soaking and diligently draining, this is the perfect time to prepare the flavorful, seasoned all-purpose flour mixture that will form their irresistible crispy coating. For this step, using a wide, shallow dish – such as a pie plate, a shallow baking pan, or a large rimmed plate – is highly recommended. A generous surface area provides ample room for tossing and coating the individual onion strings thoroughly without crowding, which is essential for an even application.
Into your chosen wide dish, whisk together the following carefully selected seasonings:
- Paprika: This vibrant spice is a powerhouse for both color and flavor. It not only imparts a beautiful golden-red hue to your fried onions, making them visually appealing, but also contributes a mild, sweet, and slightly earthy flavor. Sweet paprika is the traditional choice, offering a classic, approachable profile. However, for those who enjoy a more complex depth, a hint of smoked paprika can introduce a subtle, alluring smoky twist that wonderfully complements the inherent sweetness of the onions.
- Seasoned Salt: For a truly robust and comprehensively seasoned flavor profile, a high-quality seasoned salt like Lawry’s is an excellent choice. These blends often contain a harmonious mix of garlic powder, paprika, and celery salt, adding layers of savory notes that resonate deeply. If you prefer to have precise control over the salt content, or simply desire a more subtly flavored crispy onion string, you can certainly use plain kosher salt instead. In this case, be sure to adjust the amount of garlic powder accordingly to maintain flavor balance (specific guidance is provided in the recipe notes below).
- Baking Powder: This might appear to be an unexpected ingredient for a savory coating, but it plays a critically important role in achieving the desired texture. Baking powder works by reacting with the moisture and heat during frying, causing the flour mixture to puff up ever so slightly. This subtle leavening action results in a lighter, airier, and significantly more delicate crispness, rather than a dense, heavy, or bready crust. It’s the often-overlooked secret to those delightfully crisp, almost shatteringly light French fried onions.
- Garlic Powder and Ground White Pepper: These two ingredients are vital for providing essential aromatic depth and a gentle, nuanced kick. Garlic powder offers a foundational savory flavor that brilliantly complements the natural sweetness of the onion. Ground white pepper, in contrast to black pepper, contributes a clean, subtle heat without leaving visible black flecks, thus maintaining the attractive golden aesthetic of your perfectly fried onions.
Once your onions are thoroughly drained and your seasoned flour mixture is ready, it’s time to coat them. Work with only a small handful of onions at a time – this is an absolutely crucial step to ensure each piece receives an even, light coating and to prevent the flour from clumping into a thick, undesirable paste. Add the small batch of drained onions to the seasoned flour and gently toss them, using your hands or a fork, until every single string is fully and evenly coated. The objective is a delicate dusting, not a heavy batter.
Using a **spider tool or a slotted spoon**, carefully lift the coated onions out of the flour, gently shaking off any excess flour. Immediately spread these perfectly coated onions out in a single layer on a parchment-lined baking sheet. It is vital to avoid piling them up in a bowl or on top of each other, as this will inevitably trap moisture, make the coating damp, and cause the onion strings to stick together, completely compromising their ability to crisp up properly. The parchment paper further assists in preventing sticking to the pan.
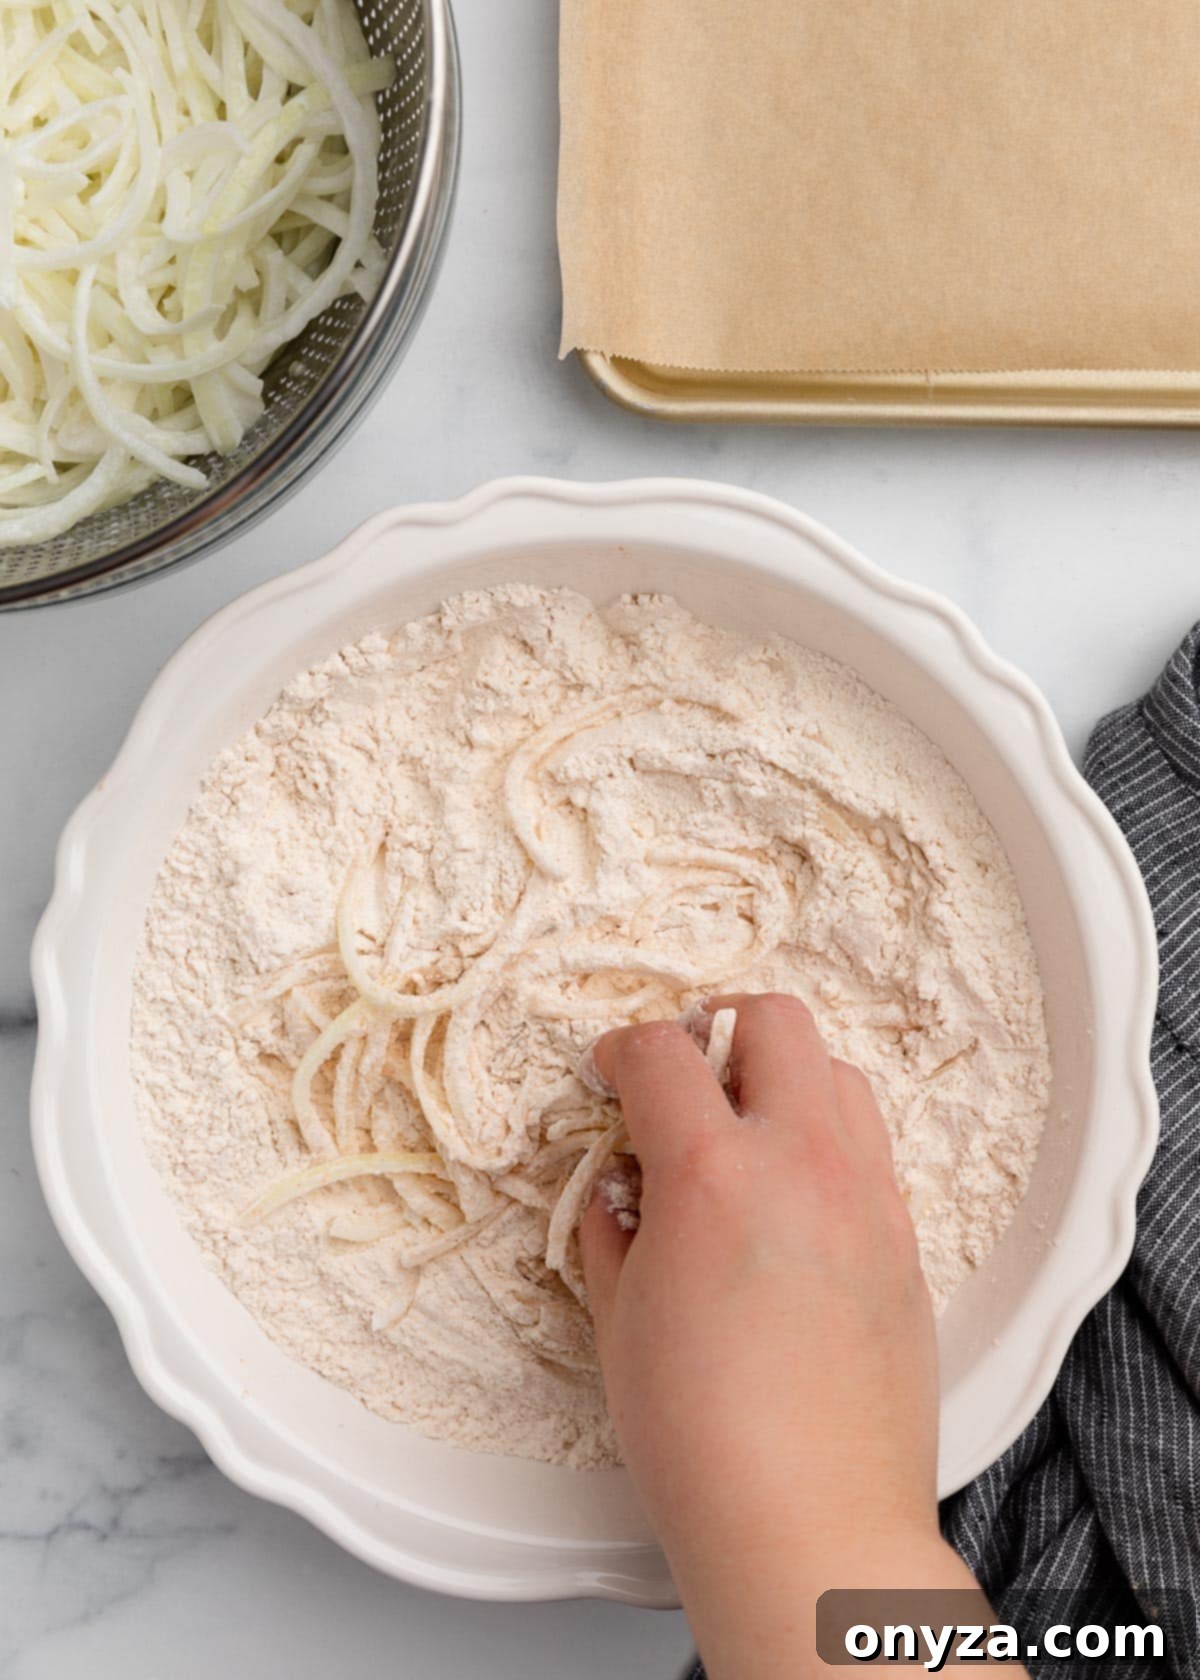
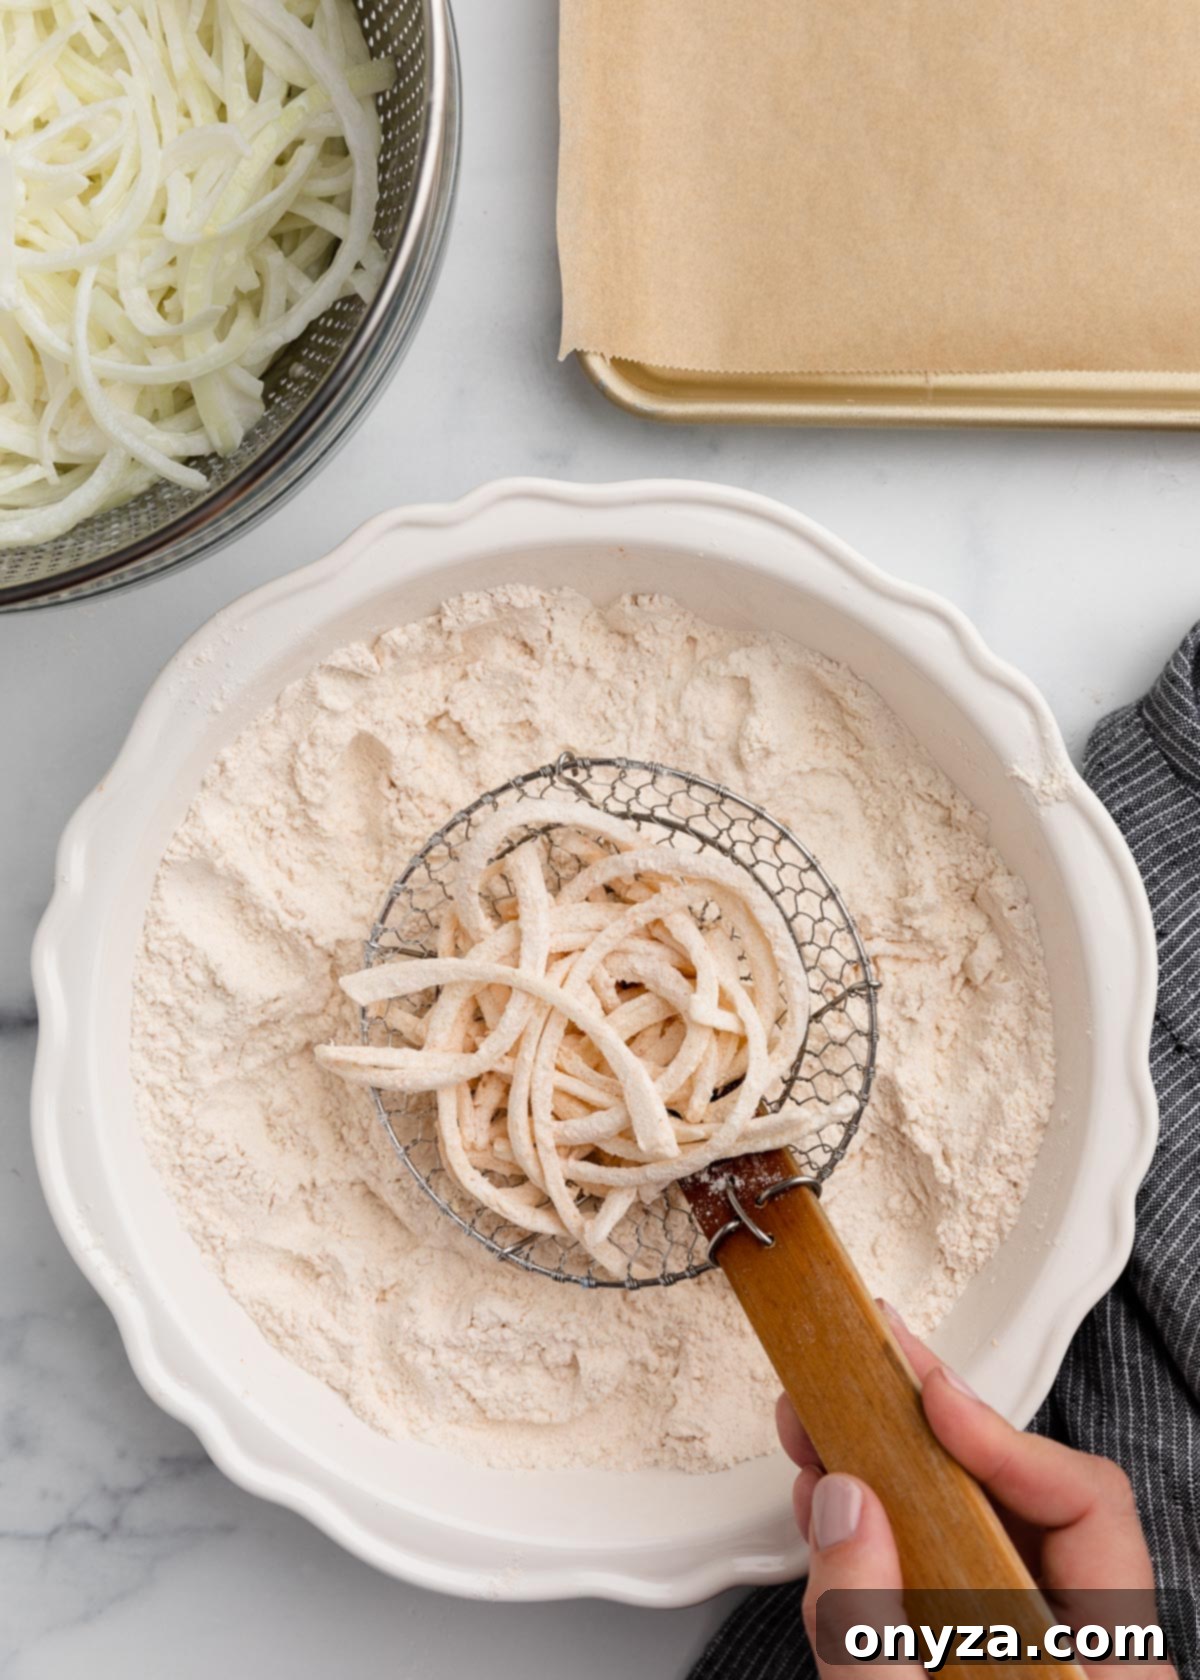
Continue this meticulous process, coating the onions in small, manageable batches until every piece has been lightly and evenly covered. You will likely observe that you have some seasoned flour mixture remaining in your shallow dish. Do not be tempted to use less flour initially; working with a generous volume of dry flour in the dish is essential. This ensures a consistent, dry, and even coating for all the onions by preventing the flour from quickly becoming saturated and gluey as the buttermilk-soaked onions introduce moisture. **Crucially, do not discard this extra flour!** Keep it readily accessible on the side. If, as you work through subsequent batches, any of the already coated onions begin to look damp or sticky from sitting, a quick re-toss in a small amount of this reserved dry flour will instantly refresh their coating and ensure they fry up perfectly crisp.
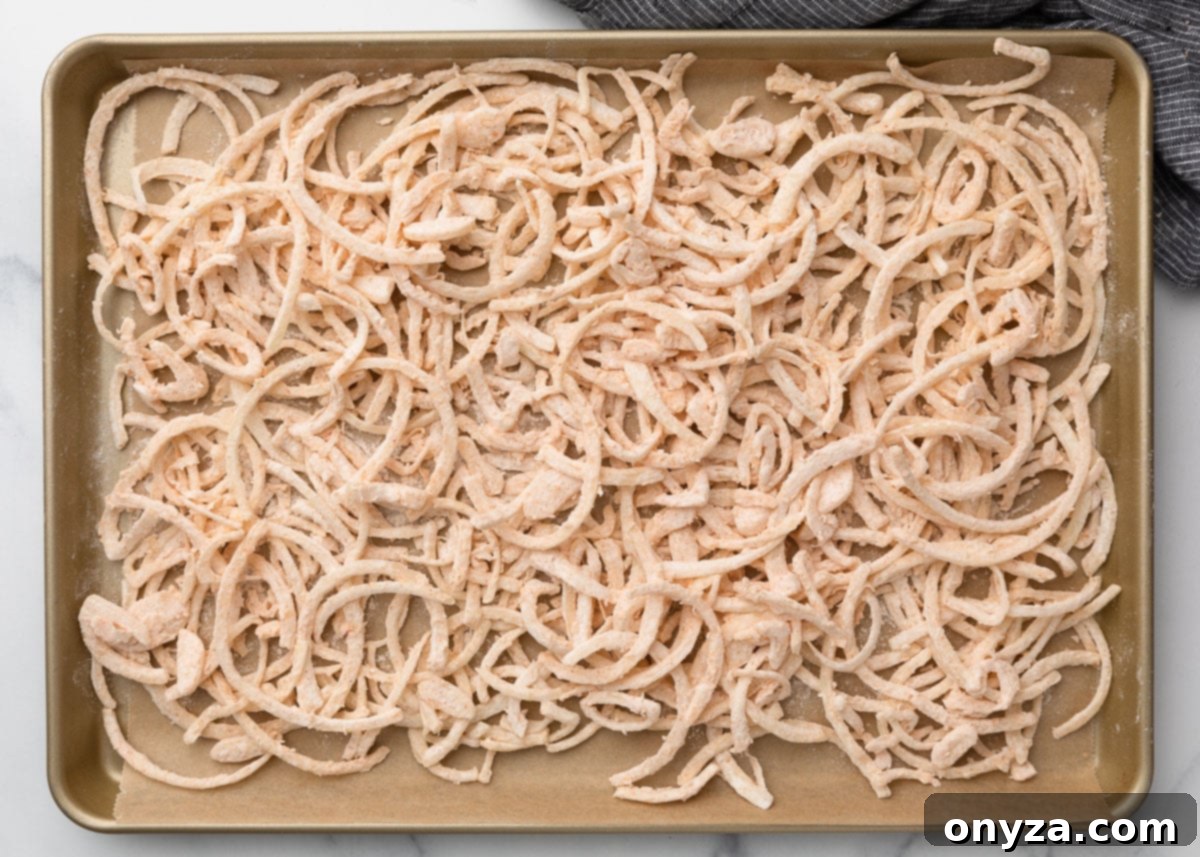
Step 3: Frying for Golden Perfection and Ultimate Crispness
Now, for the most exciting part of the process – achieving that coveted golden crispness! Pour approximately 2 inches of a high-heat, neutral frying oil (such as vegetable, canola, or peanut oil) into a deep, heavy-bottomed pot or Dutch oven. Heating the oil to the precise correct temperature is absolutely critical for producing truly crispy, non-greasy results. Aim for a consistent oil temperature of **375°F (190°C)**. Using a reliable deep-fry thermometer is not just recommended, it’s essential to accurately monitor and maintain this temperature throughout the entire frying process. If the oil is too cool, the onions will unfortunately absorb too much oil, resulting in a greasy and soggy texture. Conversely, if the oil is too hot, they will burn rapidly on the outside before crisping properly or cooking through.
Work diligently in small batches – typically a handful or two of coated onions at a time. Carefully add the coated onions to the hot oil using your spider strainer or slotted spoon. Immediately and gently stir them as they cook to prevent them from clumping together and to ensure even browning on all sides. Fry the onions until they achieve a beautiful, rich golden brown color and are wonderfully crisp to the touch. This process usually takes approximately **3–5 minutes per batch**, though the exact time may vary slightly depending on your oil temperature consistency and the precise thickness of your onion slices.
It is paramount to resist the urge to overcrowd the pot. Adding too many onions at once will cause a significant and undesirable drop in the oil temperature. This temperature reduction will lead to a batch of greasy, undercooked, and ultimately soggy fried onions. Patience with batch frying is the key to achieving that desirable light, airy, and audibly crunchy texture for every single onion string.
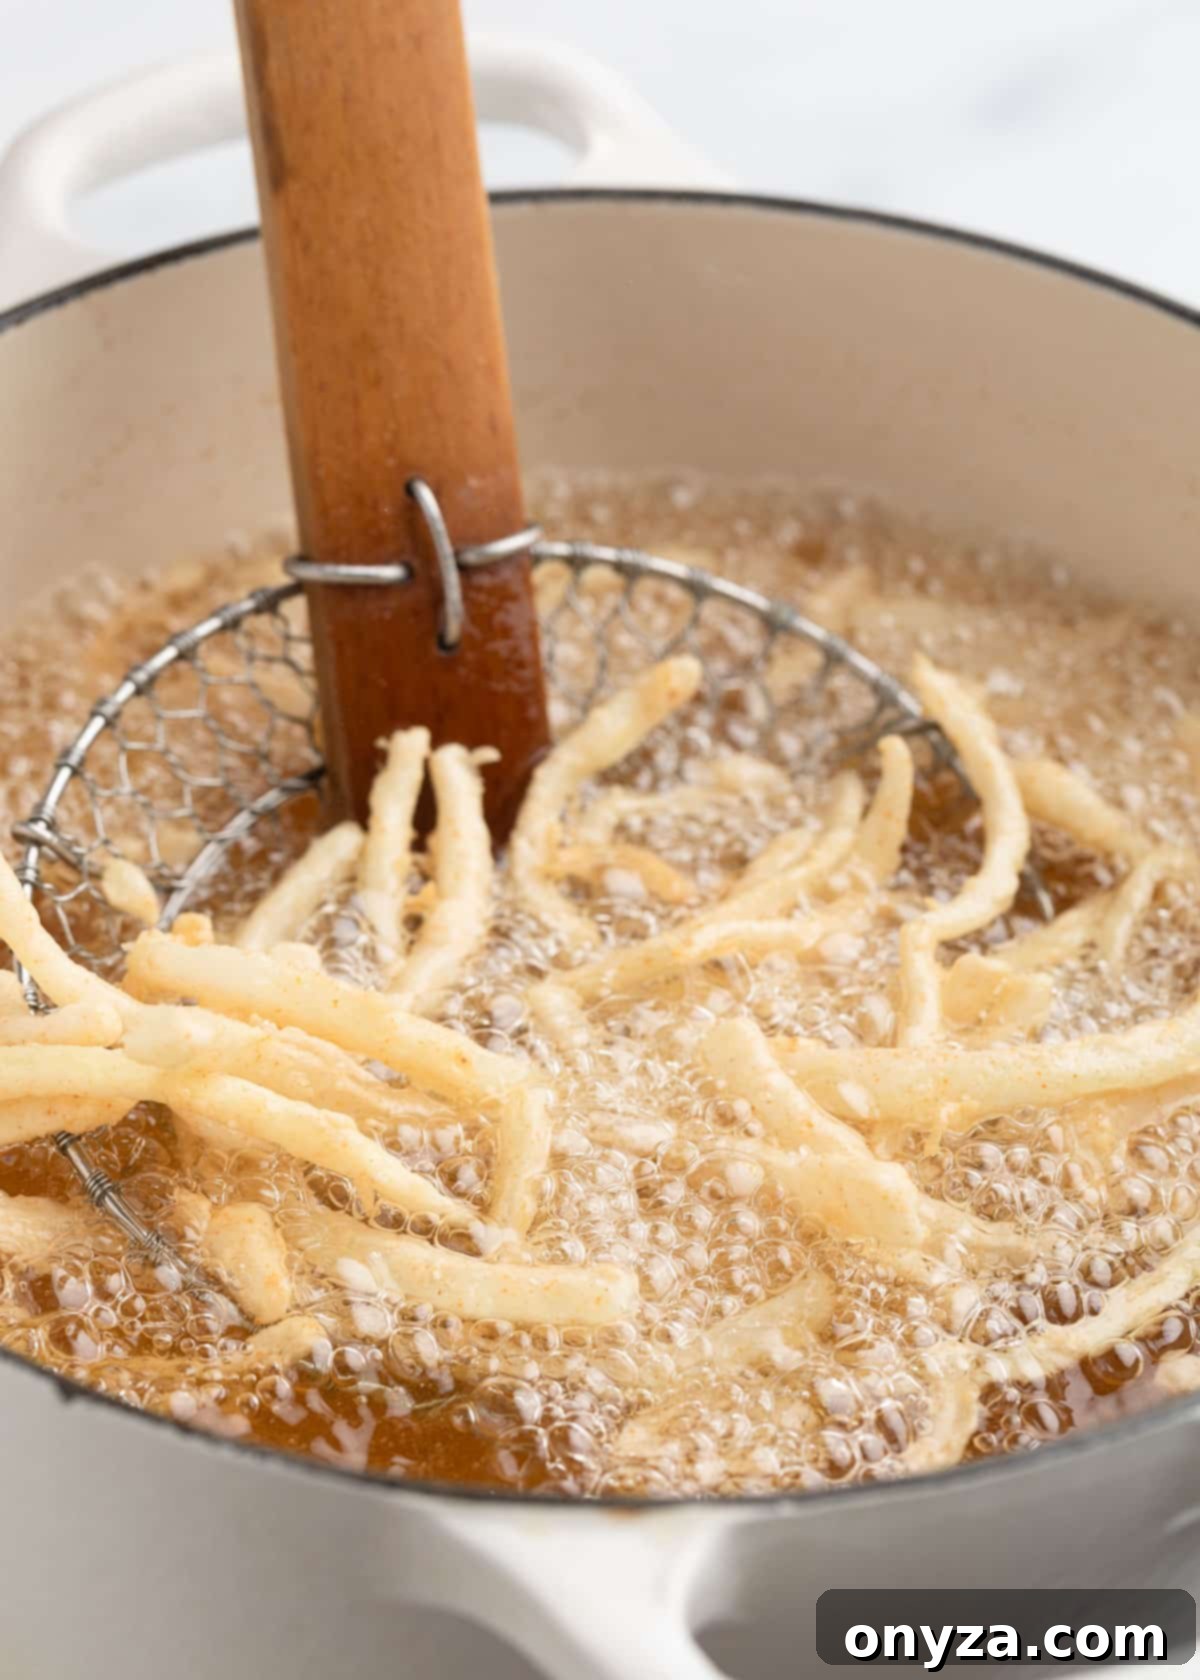
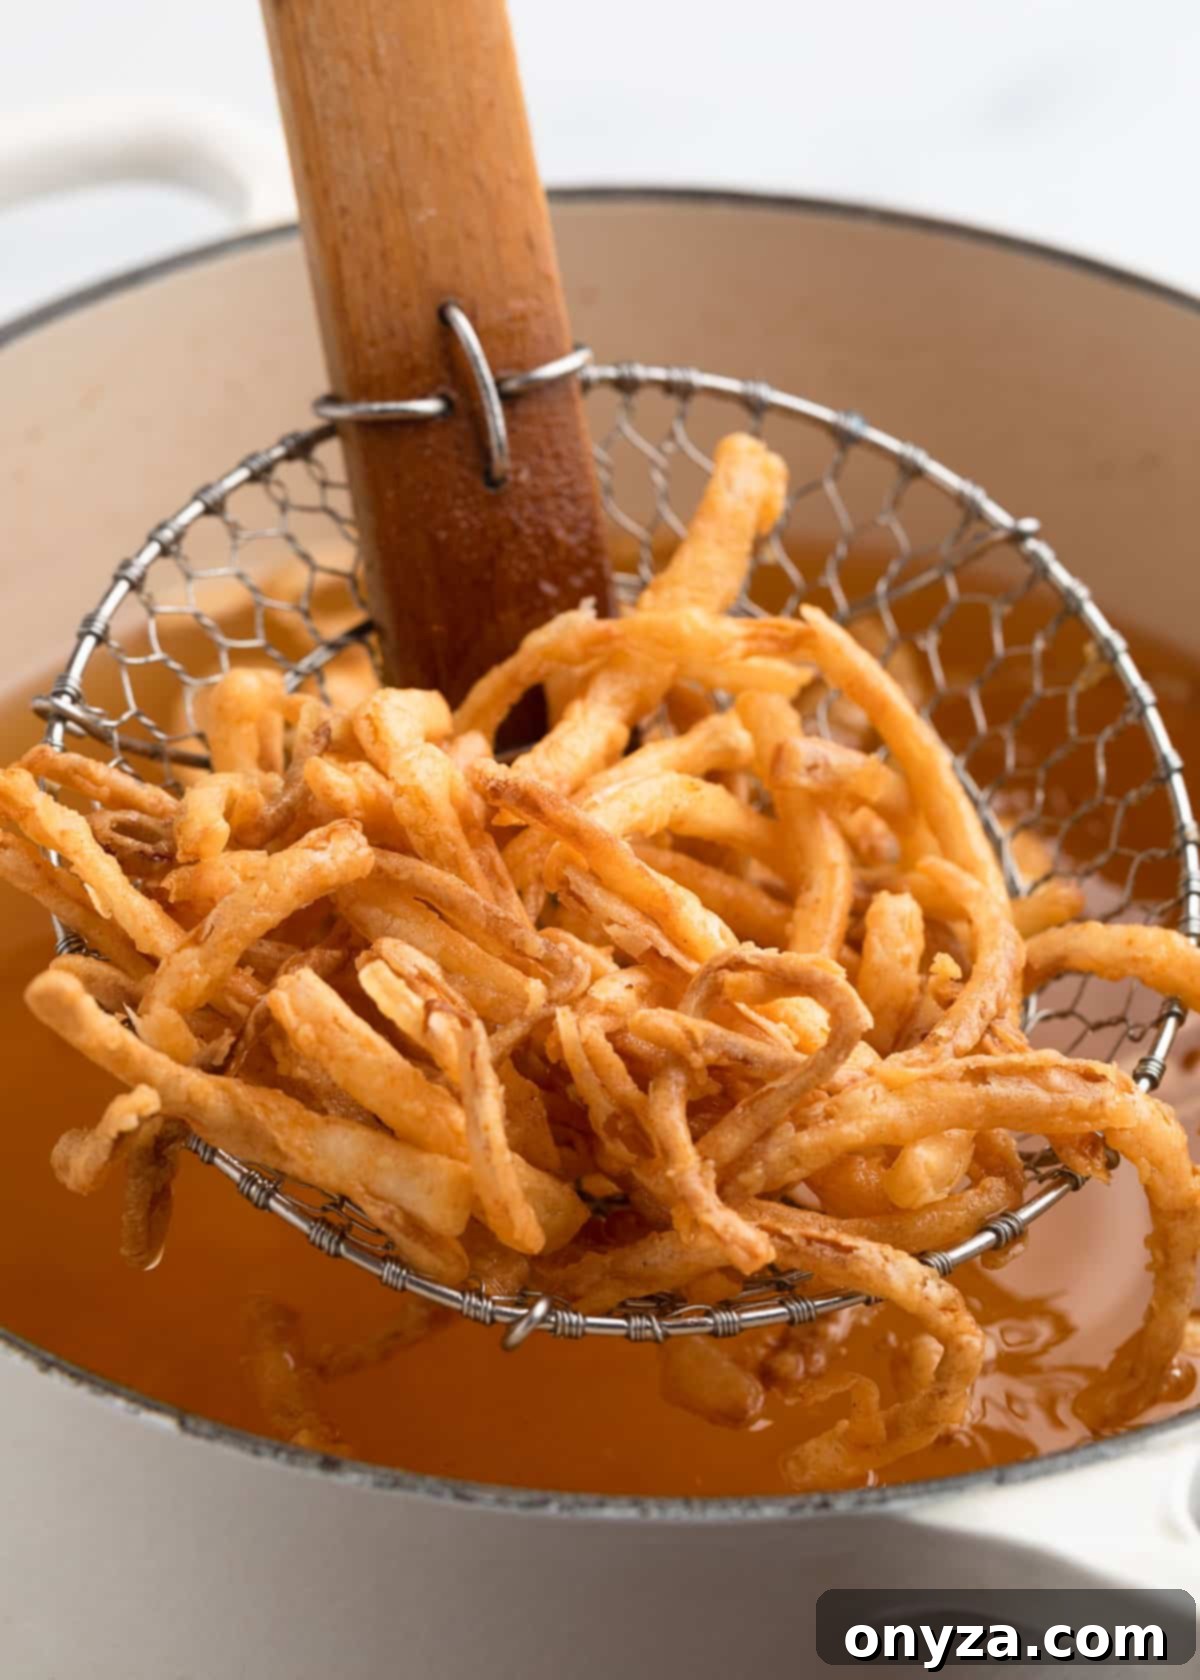
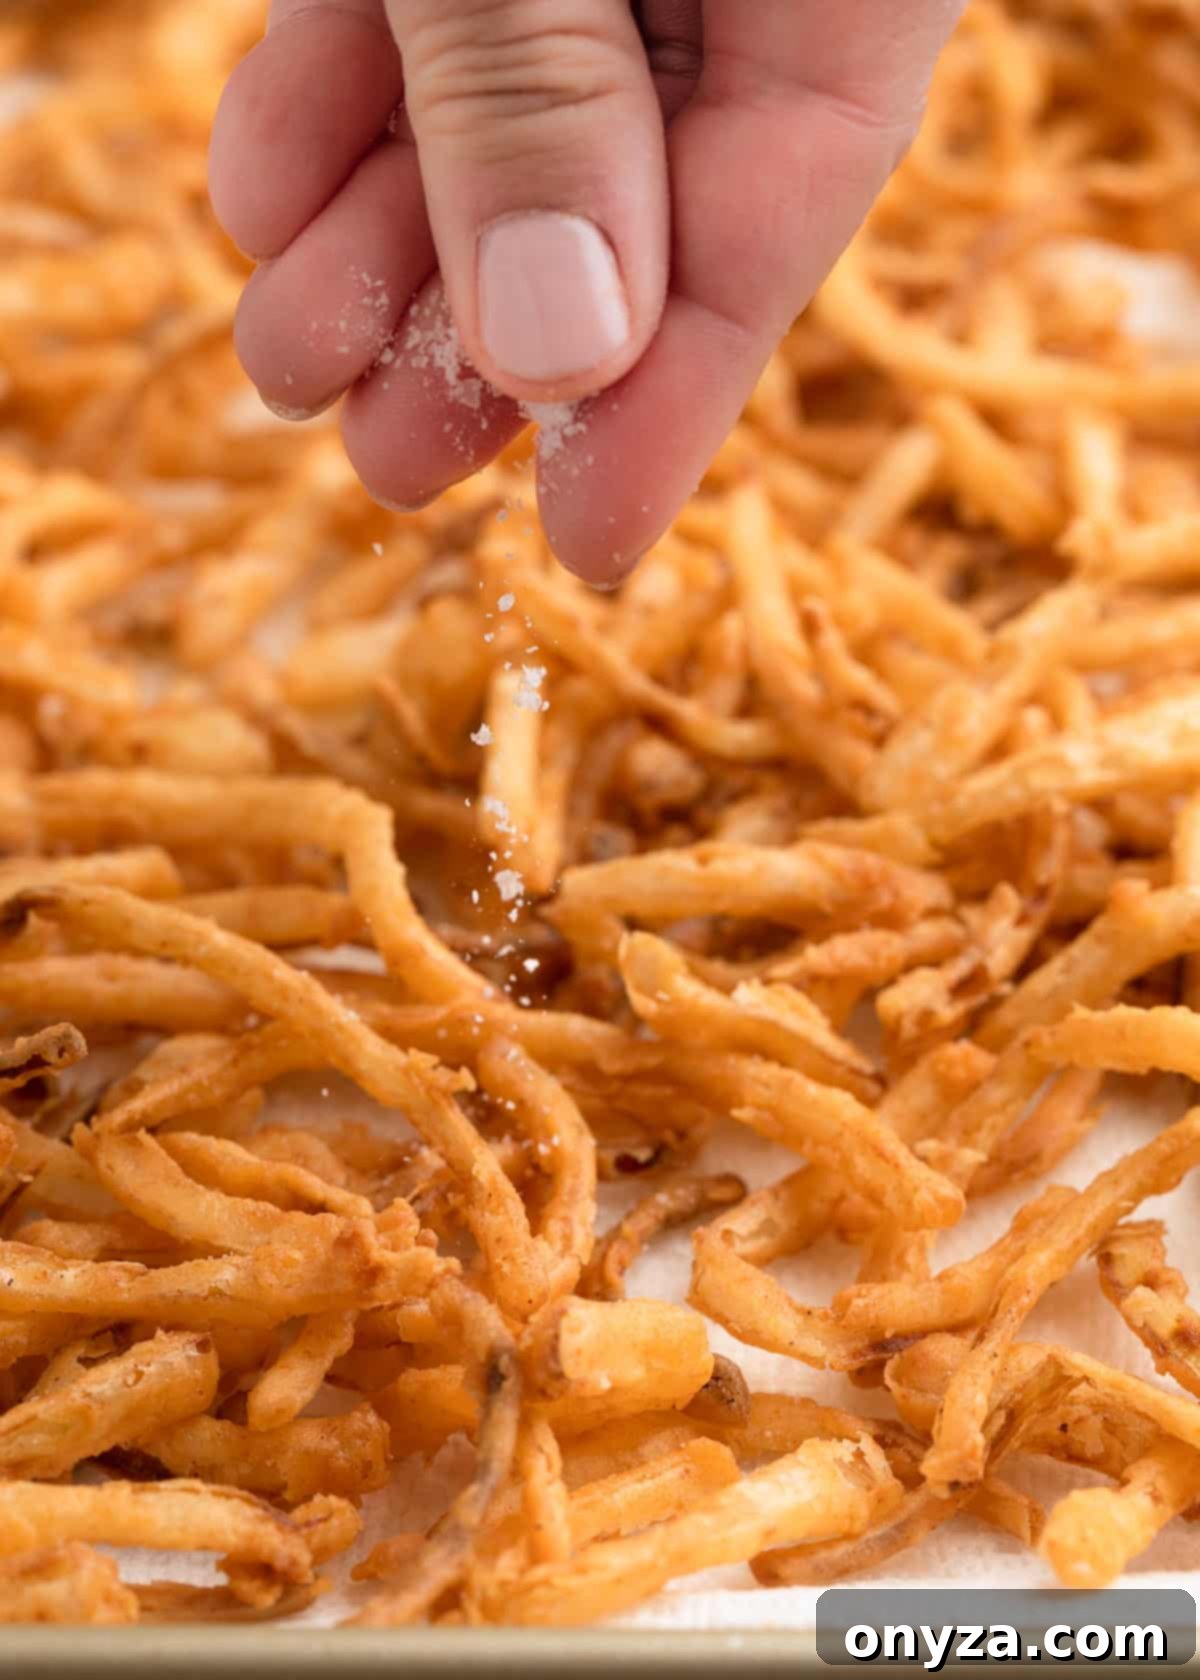
Once a batch of onions has achieved that beautiful golden brown hue and is wonderfully crisp, carefully lift them out of the hot oil using your spider strainer, allowing any excess oil to drip back into the pot. Immediately transfer the hot, freshly fried onions to a **paper towel–lined tray** or baking sheet to drain further. This step helps absorb any remaining surface oil, ensuring maximum crispness. Crucially, sprinkle them generously with kosher or fine sea salt while they are still piping hot. The residual heat helps the salt adhere beautifully and enhances their savory flavor instantly.
Between each subsequent batch of frying, it is absolutely essential to use your spider strainer to carefully skim out any stray flour bits or burned crumbs that may be floating on top of the oil. These small particles can quickly burn and impart an undesirable, bitter flavor to your subsequent batches. Additionally, ensure the oil temperature has returned to the ideal **375°F (190°C)** before adding the next batch. Maintaining this consistent temperature is vital for even cooking and achieving optimal crispness across all your fried onions.
As you meticulously work through all the coated onions, you might occasionally notice that some of the un-fried, coated onions on your baking sheet begin to look a little wet or start to feel sticky. If this happens, don’t worry! Simply and quickly re-toss them in a small amount of the reserved seasoned flour (from Step 2), making sure to shake off any excess, just before adding them to the hot oil. This quick refresh will ensure they maintain their light, dry coating and fry up perfectly crisp.
After the final batch has been fried, drained, and seasoned, for the very best, long-lasting crispness, spread all the cooled French fried onions out evenly on **wire racks**. Allowing ample air to circulate all around and underneath the onions prevents steam from getting trapped. Steam buildup is a common culprit for softening fried foods, and cooling on a rack ensures they remain delightfully airy and perfectly crunchy.
Storing and Reheating Your Homemade Crispy Onion Strings for Lasting Freshness
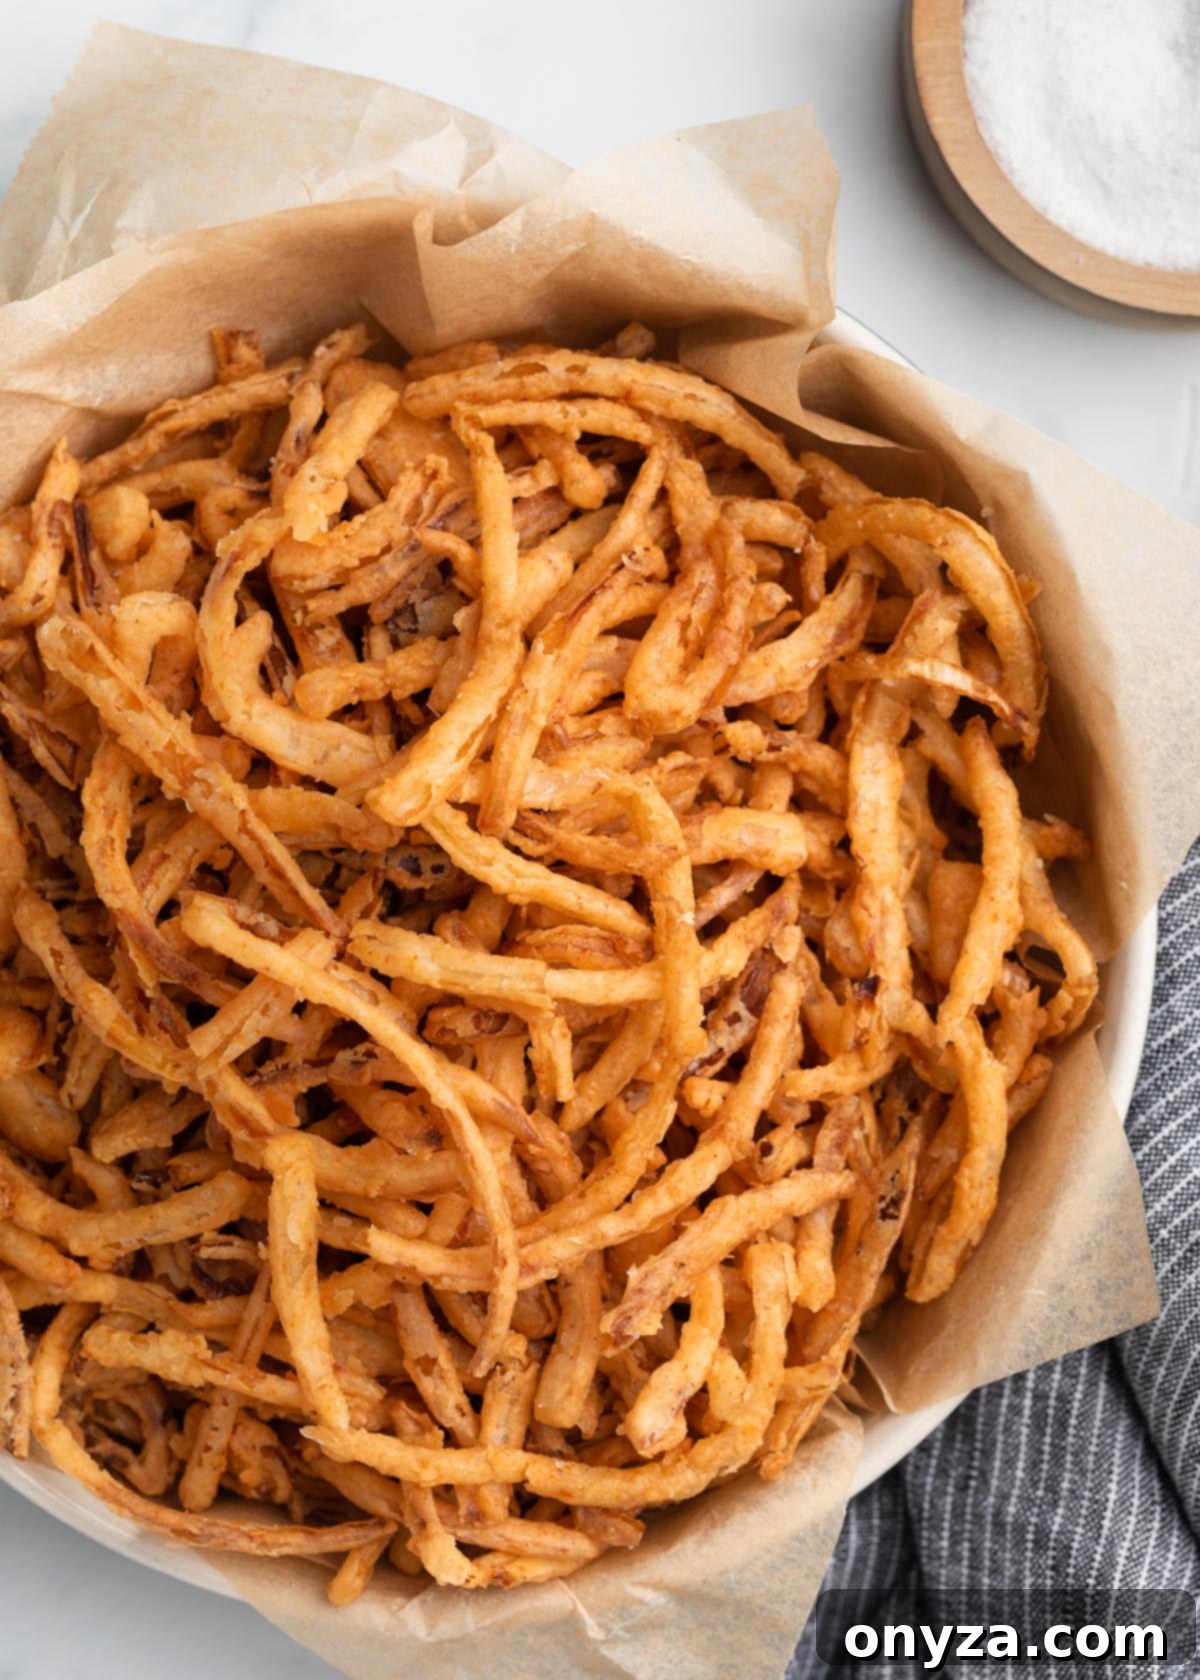
While these homemade French fried onions are undeniably at their absolute best when savored fresh, still warm and straight from the fryer, they can certainly be made ahead and stored for later enjoyment. Once they have cooled completely and thoroughly on the wire racks, transfer them to an airtight container. When stored at room temperature, they will maintain their excellent texture and delightful flavor for **2 to 3 days**. For longer preservation, you can freeze them for up to a month in a freezer-safe bag or container, though be aware that their texture might be slightly less crisp upon reheating compared to freshly made.
To effectively re-crisp your stored French fried onions and bring them back to their optimal state, spread them in a single, even layer on a baking sheet. Place them in a preheated oven at **375°F (190°C)** and bake for approximately **5–8 minutes**, or until they are thoroughly hot and have beautifully regained their signature delightful crunch. For added convenience when incorporating them into baked dishes, such as your beloved green bean casserole, simply sprinkle the room-temperature fried onions over the top of the dish during the last 5 minutes of its cooking time. This method allows them to warm through and crisp up perfectly without any risk of becoming soggy or burnt.
An Important Storage Note: Please avoid refrigerating these crispy onion strings. The moist, humid environment inside a refrigerator will almost certainly cause the delicate, crispy coating to become gummy and lose its signature crispness, leading to a disappointing and chewy texture. For optimal results and to preserve their incredible crunch, always opt for storage at room temperature or in the freezer.
Creative Serving Ideas for Your Irresistible Homemade French Fried Onions
The remarkable versatility of these homemade crispy onion strings extends far beyond their traditional role in the classic Thanksgiving casserole. Their irresistible savory crunch and subtle sweet onion flavor make them an absolutely fantastic and transformative addition to a wide array of dishes, effortlessly elevating ordinary meals into extraordinary culinary experiences.
The most iconic and beloved application, of course, remains as a crowning topping for creamy casseroles. Elevate your holiday favorite, the **Homemade Green Bean Casserole**, to new heights with a generous, golden layer of these onions. But don’t limit yourself there! They impart incredible texture and a burst of savory flavor to other cherished comfort food classics, such as hearty tuna noodle casserole, comforting creamy chicken casseroles, or even a simple dish of cheesy baked mashed potatoes, providing a delectable and unexpected crispy finish that everyone at the table will adore.
Beyond casseroles, these crispy onion strings truly shine as a gourmet garnish and textural enhancement. Sprinkle them generously over fresh, vibrant green salads or hearty grain bowls for an unexpected and delightful textural contrast. Stack them high and proud on your favorite juicy **burgers** or tender **chicken sandwiches** – they are particularly delightful when paired with rich, smoky cheddar cheese and a tangy BBQ sauce, or when used as a crunchy element to upgrade a classic grilled cheese sandwich. Imagine them piled high atop a succulent **pulled pork** sandwich, offering a perfect textural counterpoint to the tender meat and rich, saucy goodness, adding both a satisfying crunch and an extra layer of savory flavor.
Think outside the bun as well! Use these crunchy marvels to garnish hearty bowls of chili or a comforting, creamy tomato soup, adding an unexpected textural pop. Sprinkle them over scrambled eggs or avocado toast for a surprisingly delightful morning crunch. They can even introduce an exciting twist to your weekly taco night, add a gourmet touch to hot dogs, or serve as a unique, crispy component in homemade breadings for fried chicken or fish, bringing a new dimension to your recipes.
And let’s not overlook their incredible potential as a standalone snack. Serve a bowl of warm, freshly made French fried onions on their own during game day gatherings, cozy movie nights, or as an irresistible appetizer. They are incredibly addictive! For an even more indulgent experience, pair them with your favorite dipping sauces such as a tangy Honey Mustard Sauce, a classic cool ranch dressing, or a spicy and creamy Comeback Sauce for an easy and utterly satisfying treat that will disappear quickly.

Print Recipe
French Fried Onions (Crispy Onion Strings)
Amanda Biddle
25 minutes
30 minutes
30 minutes
1 hour 25 minutes
16 servings (1/4 cup)
Ingredients
- 1 pound large sweet or yellow onions (see note)
- 2 cups buttermilk, preferably whole
- 2 cups all-purpose flour
- 1 teaspoon sweet paprika
- 1 teaspoon Lawry’s seasoned salt or Diamond Crystal kosher salt, plus extra kosher salt for sprinkling after frying
- ½ teaspoon baking powder
- ¼ to ½ teaspoon garlic powder (see note)
- ¼ teaspoon ground white pepper
- 4-5 cups high heat, neutral oil (such as vegetable oil), for frying
Instructions
- Halve the onion through its root, then peel it thoroughly. Slice each half crosswise into very thin half-moons, aiming for a thickness of about 1/16–⅛ inch. A mandoline slicer is highly recommended for achieving consistently thin and even slices. Once sliced, carefully separate all the pieces into individual strands or rings.
- Place all the prepared sliced onions in a medium bowl and pour the buttermilk over them, ensuring they are completely covered and submerged. Stir gently to coat, then let them stand and soak for 30 minutes, stirring once or twice during this period. After soaking, drain the onions extremely well in a colander, allowing all excess liquid to drip away thoroughly. This step is crucial to prevent the coating from becoming heavy or gluey.
- In a wide, shallow dish (such as a pie plate or a large rimmed plate), vigorously whisk together the all-purpose flour, paprika, seasoned salt (or kosher salt), baking powder, garlic powder, and white pepper until they are thoroughly combined and evenly distributed. This wide dish will facilitate an easier and more even coating process.
-
Work with only a small handful of the drained onions at a time. Add them to the seasoned flour mixture and gently toss to ensure each piece is coated evenly and lightly. Use a spider strainer or a slotted spoon to lift the coated onions out, gently shaking off any extra flour. Spread the coated onions in a single layer on a parchment-lined baking sheet to prevent them from clumping together or getting damp while you coat the remaining batches.
Important Note: Do not discard any remaining seasoned flour; keep it readily available on the side. You will use it to quickly re-toss any onions that start to look damp or sticky while they are waiting to be fried. - Heat approximately 2 inches of a high-heat, neutral oil (such as vegetable or canola oil) in a deep, heavy-bottomed pot or Dutch oven. Bring the oil to a consistent temperature of 375°F (190°C). Use a deep-fry thermometer to monitor the temperature closely and accurately. Fry the coated onions in small batches. Carefully add a handful or two to the hot oil using your spider strainer or slotted spoon. Stir gently as they cook to keep them separated and ensure even browning. Fry until the onions are perfectly golden brown and wonderfully crisp, which typically takes 3–5 minutes per batch. To achieve the crispiest results and to prevent the oil temperature from dropping too much, it is crucial to avoid overcrowding the pot.
- Once each batch is fried to perfection, lift the onions out of the hot oil with the spider strainer, allowing any excess oil to drip back into the pot. Immediately transfer the hot fried onions to a paper towel–lined baking sheet to drain off any remaining surface oil. Crucially, sprinkle them generously with kosher or fine sea salt while they are still hot; the warmth helps the salt adhere beautifully and enhances their flavor.
-
Continue with the remaining onions, frying them in batches. Between each batch, use your spider strainer to skim out any stray flour bits or small crumbs from the surface of the oil. This prevents them from burning and imparting an undesirable flavor to subsequent batches. Ensure the oil temperature consistently returns to 375°F (190°C) before adding each new batch.
If any of the un-fried, coated onions on your baking sheet begin to stick together or appear too wet after sitting for a while, quickly re-toss them in a little of the reserved seasoned flour just before frying to refresh their coating. -
For maximum, long-lasting crispness, allow the fried onions to cool completely by spreading them out evenly on wire racks. This allows air to circulate freely around them, preventing steam buildup that can lead to softening. Once fully cooled, store them in an airtight container at room temperature for 2–3 days.
To refresh fried onions for snacking or for dishes that are not baked, spread them on a baking sheet and re-crisp in a 375°F (190°C) oven for 5–8 minutes. For casseroles, simply add your stored, room-temperature fried onions during the last 5 minutes of baking, allowing them to warm and crisp up beautifully without burning.
Notes
Paprika: Sweet paprika is incorporated into this recipe to impart a mild, earthy flavor and a pleasing reddish-orange color to the seasoned flour, enhancing the visual appeal of your fried onions. If you are a fan of a subtle hint of smokiness, you can experiment by substituting sweet paprika with smoked paprika for an interesting and delicious twist.
Seasoned Salt: Using a seasoned salt like Lawry’s contributes a complex and well-rounded blend of garlic, paprika, and celery salt, which significantly enhances the overall savory profile of your crispy onion strings. If you choose to use plain kosher salt instead, please refer to the specific garlic powder adjustment note below to ensure your onions are perfectly seasoned and flavorful.
Garlic Powder Adjustment:
- Use ½ teaspoon garlic powder if you are seasoning the flour mixture with plain kosher salt.
- Use ¼ teaspoon garlic powder if you are using Lawry’s seasoned salt, as this blend already contains garlic powder.
Seasoned Flour Quantity: You will notice that this recipe calls for a more generous quantity of seasoned flour than you might actually use for coating all the onions. This is an intentional and important detail. Working with a larger volume of dry flour in your shallow dish helps to keep the mixture light and prevents it from quickly turning gluey or pasty as the buttermilk-soaked onions introduce moisture. A generous quantity ensures that each batch of onions can be coated effectively and evenly, without the flour becoming saturated too quickly, which is key for maximum crispness.
Nutrition Estimate
Calories: 133kcal |
Carbohydrates: 16g |
Protein: 3g |
Fat: 7g |
Saturated Fat: 1g |
Polyunsaturated Fat: 3g |
Monounsaturated Fat: 2g |
Trans Fat: 0.04g |
Cholesterol: 3mg |
Sodium: 180mg |
Potassium: 107mg |
Fiber: 1g |
Sugar: 3g |
Vitamin A: 111IU |
Vitamin C: 1mg |
Calcium: 48mg |
Iron: 1mg
Nutrition information is automatically calculated and should be used as an approximation only. Individual results may vary based on exact ingredients and preparation methods.
Please note that our recipes have been developed using the US Customary measurement system and have not been tested for high altitude/elevation cooking and baking. Adjustments to ingredients and cooking times may be necessary depending on your specific location and environmental conditions.
Enjoyed this recipe? Please rate and share your comments below!
