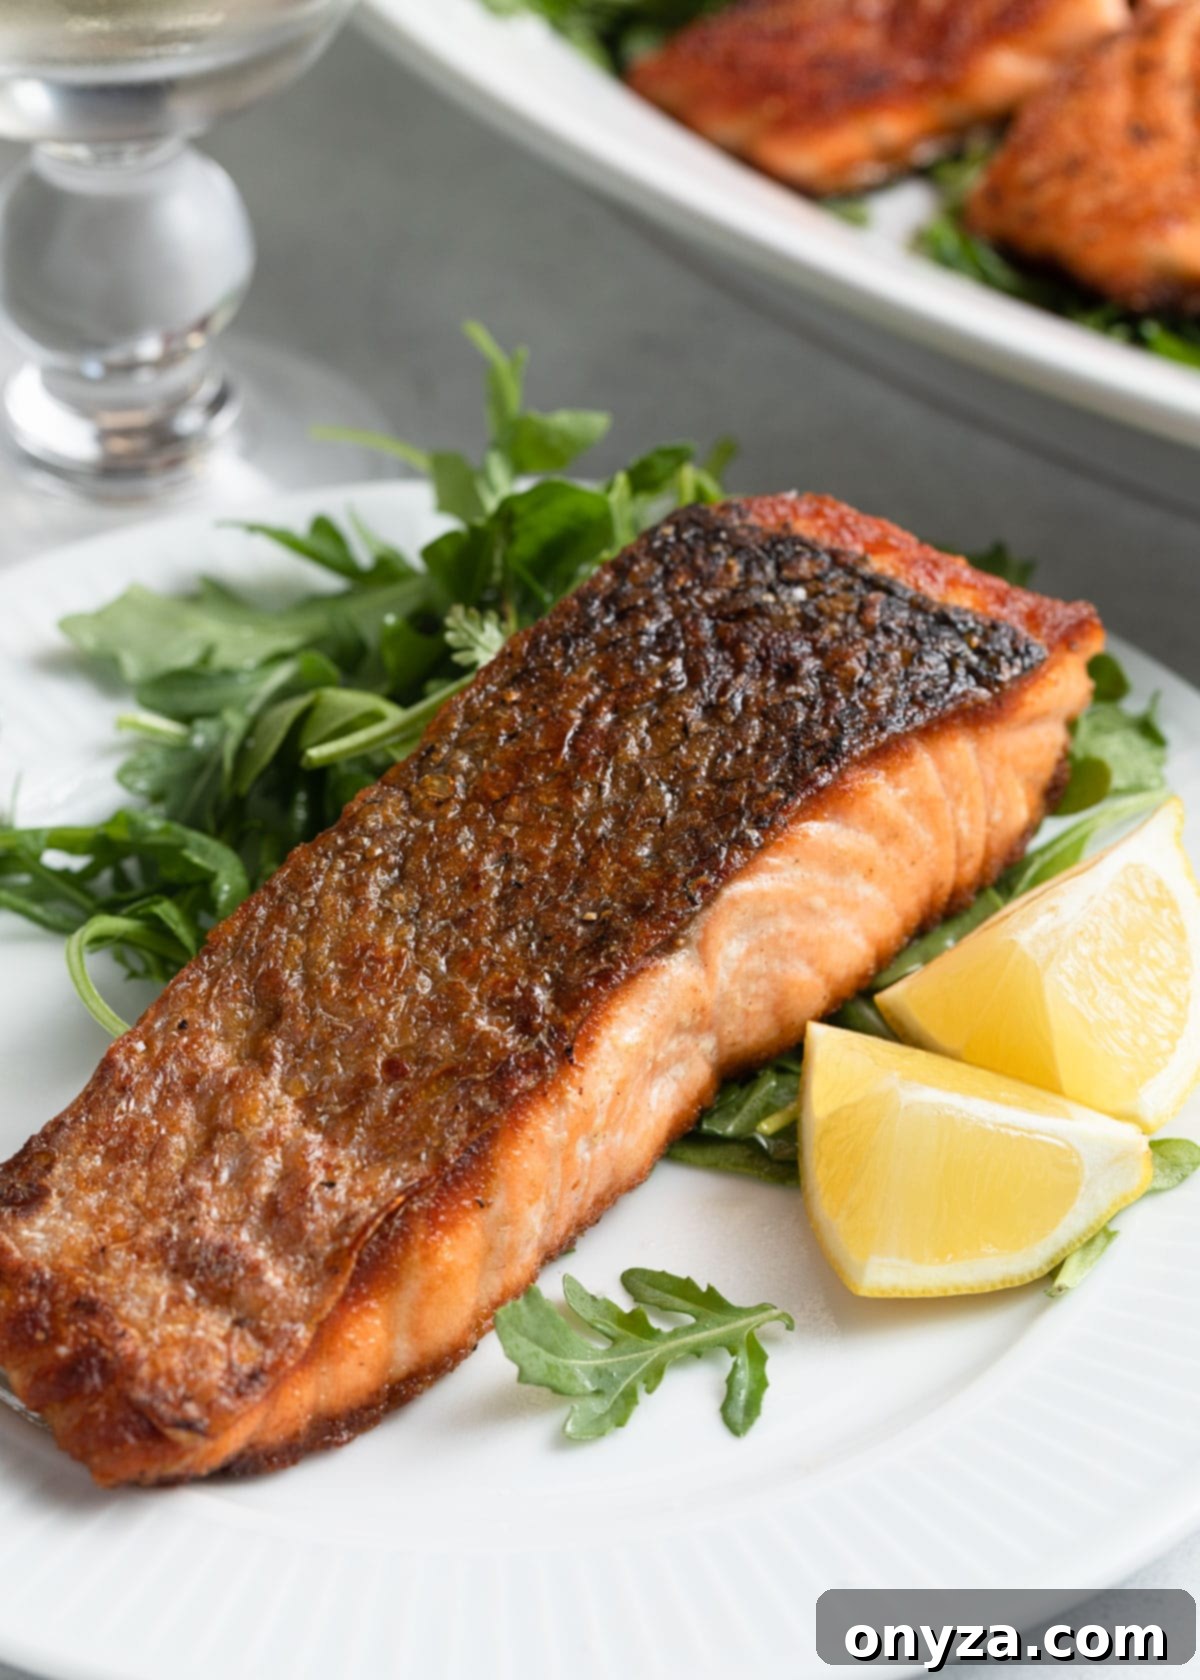
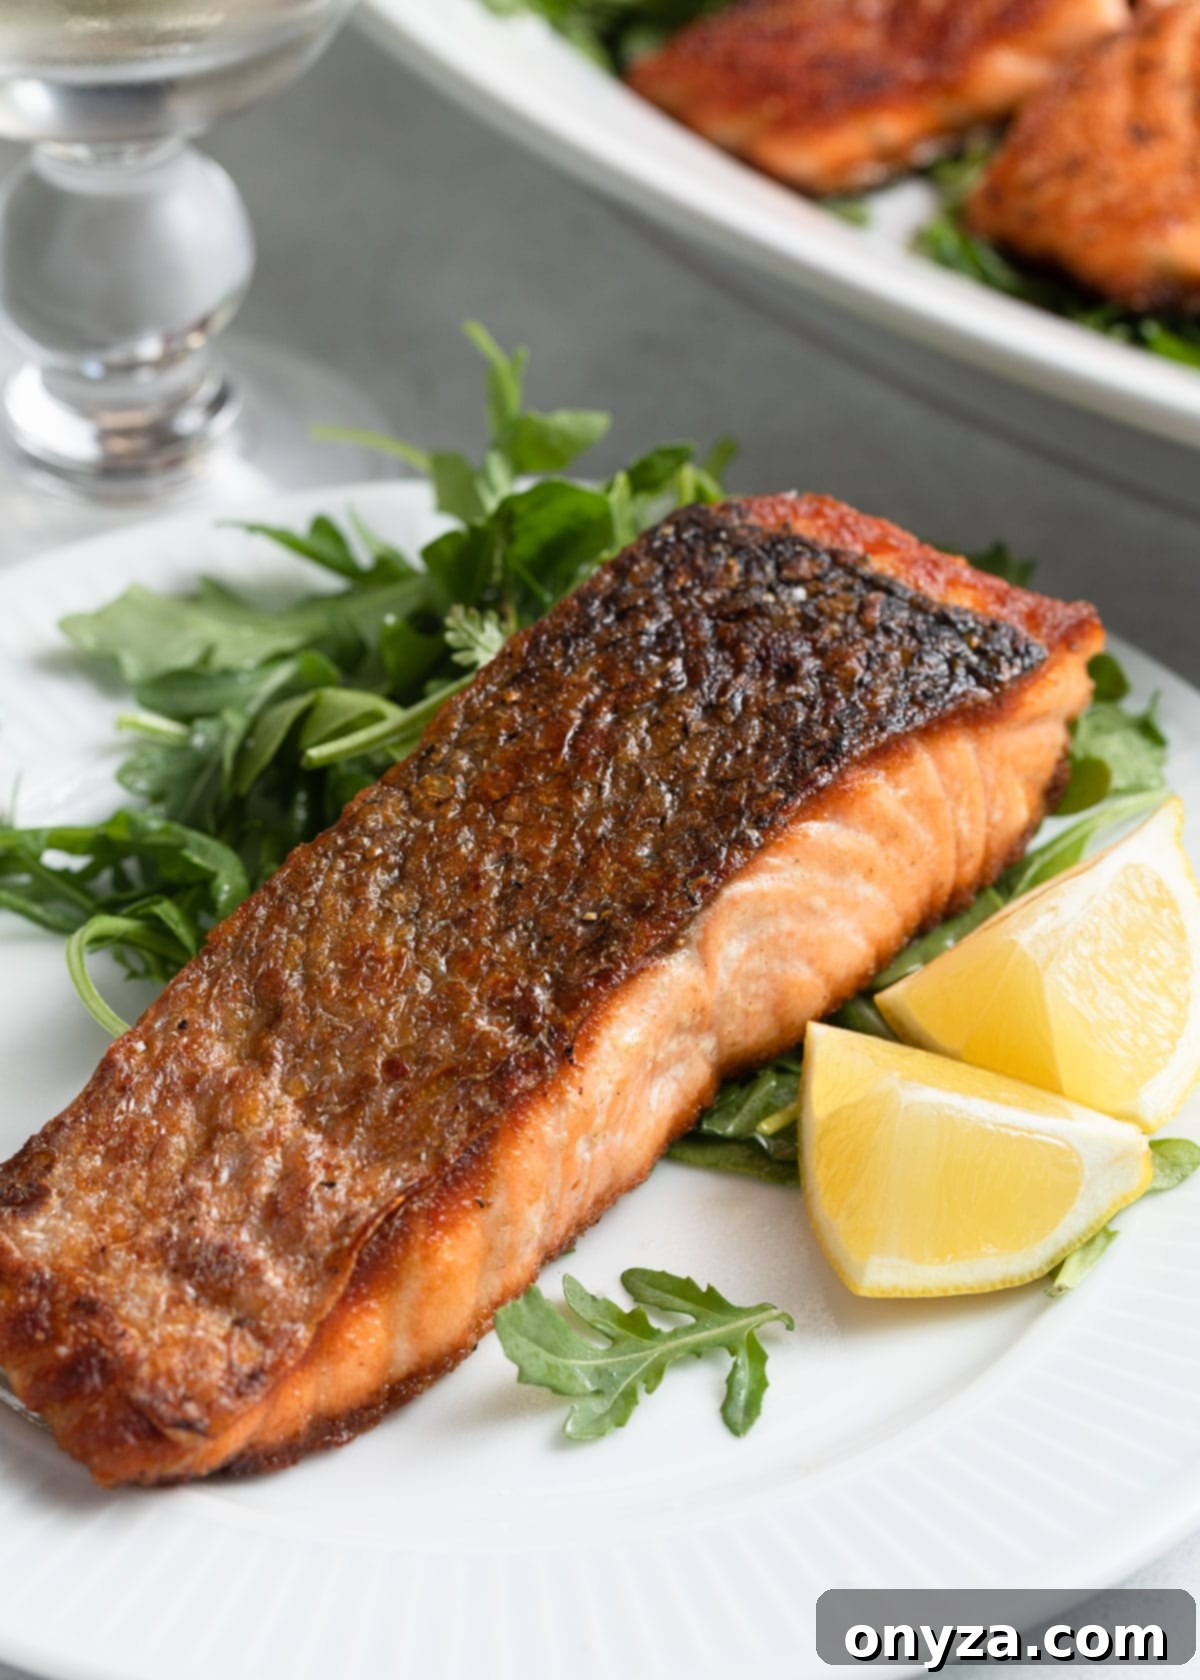
Welcome to the ultimate guide for mastering pan-seared salmon! Achieving a tender, flaky interior with a perfectly crisp, golden skin often feels like a restaurant secret, but it’s entirely within your reach at home. This comprehensive tutorial will demystify the process, sharing expert tips, proven techniques, and essential equipment recommendations to transform your salmon fillets into a culinary masterpiece. Prepare to impress your family and friends with perfectly cooked salmon every time, making it a staple in your weeknight repertoire.
In This Guide:
- Choosing the Best Salmon Fillets
- Essential Equipment for Searing
- Mastering the Pan-Searing Technique
- Knowing When Your Salmon is Perfectly Cooked
- Serving Your Pan-Seared Salmon
- Delicious Side Dish Pairings
- Restaurant-Quality Pan Seared Salmon Recipe
Choosing the Best Salmon Fillets for Pan Searing
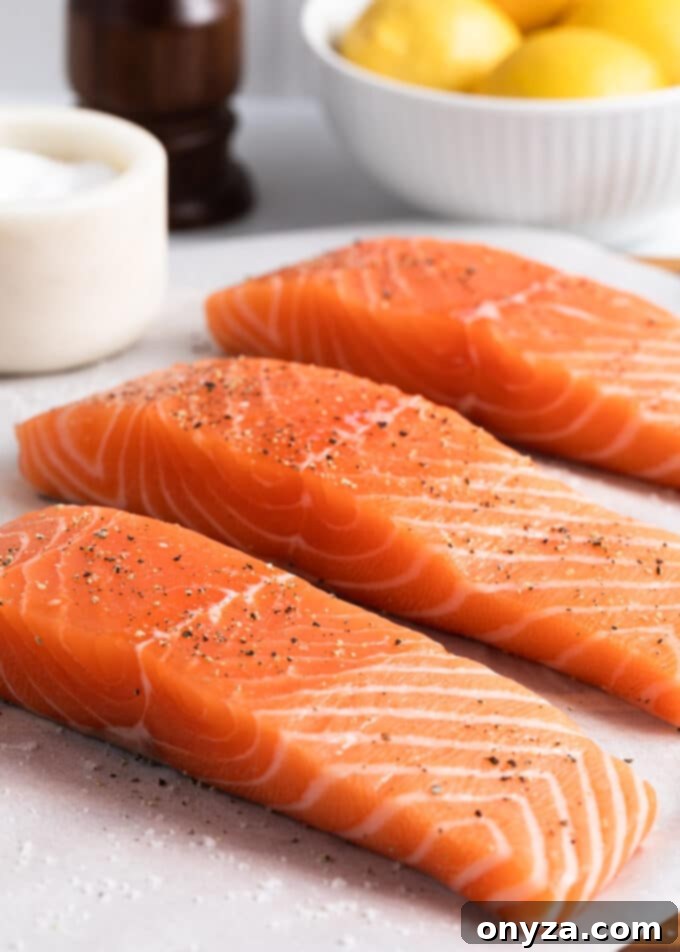
The foundation of any truly great salmon dish begins with selecting high-quality fish. When you’re at the seafood market or counter, prioritize freshness above all else. Fresh salmon fillets should exhibit a moist, vibrant appearance with firm flesh that springs back gently when pressed. Crucially, they should have a clean, oceanic aroma, never smelling distinctly “fishy.” If you’re utilizing frozen salmon fillets, ensure they are thoroughly defrosted in the refrigerator overnight prior to cooking. This crucial step guarantees even heat distribution and achieves an optimal, succulent texture.
For the pan-searing method, I wholeheartedly recommend purchasing skin-on salmon fillets. The ideal fillet size for searing is typically between 6 to 8 ounces, with a thickness of approximately 1 to 1.5 inches. Even if you don’t plan to consume the skin, cooking the fish with its skin intact serves as a natural protective barrier, safeguarding the delicate flesh from direct, intense heat. This method ensures the interior remains incredibly juicy and cooks more evenly. Additionally, the skin itself develops an irresistible crispiness that provides a delightful textural contrast to the tender fish. For the most consistent cooking results across multiple pieces, endeavor to select fillets that are comparable in both weight and thickness.
It’s important to be mindful that exceptionally thick salmon fillets – those significantly exceeding 1.5 inches – are generally not the most suitable choice for an exclusively pan-searing technique. With very thick fillets, the skin can over-crisp, or even burn, long before the center of the fish reaches its desired doneness. These thicker cuts are often better suited for alternative cooking methods like roasting, or a combination approach involving an initial pan-sear followed by finishing in the oven. For optimal maneuverability in the pan and uniform cooking, portioned individual fillets are always preferred over attempting to pan-sear a single, larger cut of fish.
Pan-searing is a wonderfully versatile cooking method applicable to both farmed and wild salmon varieties. Each type offers unique flavor profiles and textural characteristics. Wild salmon, such as Sockeye or Coho, typically presents a leaner flesh with a more robust, intense salmon flavor. In contrast, farmed Atlantic salmon tends to be richer and fattier, making it remarkably forgiving to cook and often resulting in a more buttery mouthfeel. To broaden your understanding of the diverse salmon options available and make informed choices, consider exploring A Guide to Every Type of Salmon You Can Buy from Food & Wine.
Before you leave the seafood counter, always engage with your fishmonger and request their assistance in preparing your fillets. Specifically, ask them to remove any residual pin bones from the fillets and to descale the skin. This thoughtful step will save you valuable time and effort in your kitchen, ensuring a more enjoyable and seamless cooking and eating experience.
Essential Equipment for Restaurant-Quality Pan Seared Salmon
While the art of pan-searing salmon is relatively straightforward, possessing the right tools can profoundly impact your cooking experience and, more importantly, the quality of your final dish. Investing in a few key pieces of equipment will undoubtedly elevate your home-cooked salmon to restaurant-worthy standards.
The Perfect Searing Pan
The frying pan you select is arguably the most critical piece of equipment for achieving successful pan-seared salmon. You’ll need a spacious frying pan, typically a 10-inch or 12-inch, with the exact size depending on the dimensions of your fillets and the number you intend to cook simultaneously. It is absolutely crucial not to overcrowd the pan, as this significantly lowers the pan’s temperature, preventing proper searing and instead causing the fish to steam rather than crisp. A good general guideline is to cook no more than two fillets at a time, ensuring ample space around each piece for even heat exposure.
My preferred types of pans for searing fish, known for their excellent heat characteristics, include:
- Clad Stainless Steel Pans: These are exceptional for developing the crispiest skin and a beautifully caramelized crust due to their superior heat retention and remarkably even heat distribution. Esteemed brands like Made In and All-Clad are highly regarded for their consistent performance in this category.
- Carbon Steel Pans: Sharing many advantages with cast iron but typically lighter and quicker to heat, a meticulously seasoned carbon steel pan also excels at forming a fantastic, shatteringly crisp skin. Made In’s carbon steel frying pans are a particular favorite of mine for their reliability and performance.
- Enameled Cast Iron Pans: While traditional, bare cast iron can sometimes absorb the strong flavors and oils of fish (potentially transferring them to subsequent dishes), enameled cast iron offers all the benefits of cast iron’s superior heat retention without the concern of flavor transfer. My Staub 12-inch Fry Pan is a frequently used item in my kitchen for its even heating capabilities and ease of cleaning.
- High-Quality Ceramic Nonstick Pans: Although I typically lean towards stainless or carbon steel for the absolute crispiest results, a premium ceramic nonstick pan, such as my GreenPan (featuring Thermolon™ coated aluminum), proves to be an outstanding option for a quick, effortless weeknight dinner. While the skin might not achieve the *same* level of intense crispness as with other surfaces, the sheer ease of cooking and subsequent cleanup makes it an invaluable choice.
The Indispensable Fish Spatula
Often referred to as a “fish turner” or “offset slotted spatula,” a dedicated fish spatula is an absolute game-changer for expertly cooking delicate seafood. Its uniquely thin, flexible, and often slotted blade is specifically engineered to effortlessly slide beneath fragile fillets, making it incredibly easy to maneuver, flip, and transfer them without any risk of tearing or breaking apart. This precision tool proves essential for two primary tasks when pan-searing salmon:
- Effortless Turning and Removal: The remarkable flexibility of the fish spatula allows you to gently release the salmon from the pan once its skin has achieved that coveted perfect crispness. It enables you to confidently flip the fillet to cook the second side, and later, to gracefully lift the fully cooked fish onto a serving plate without any damage to its delicate structure.
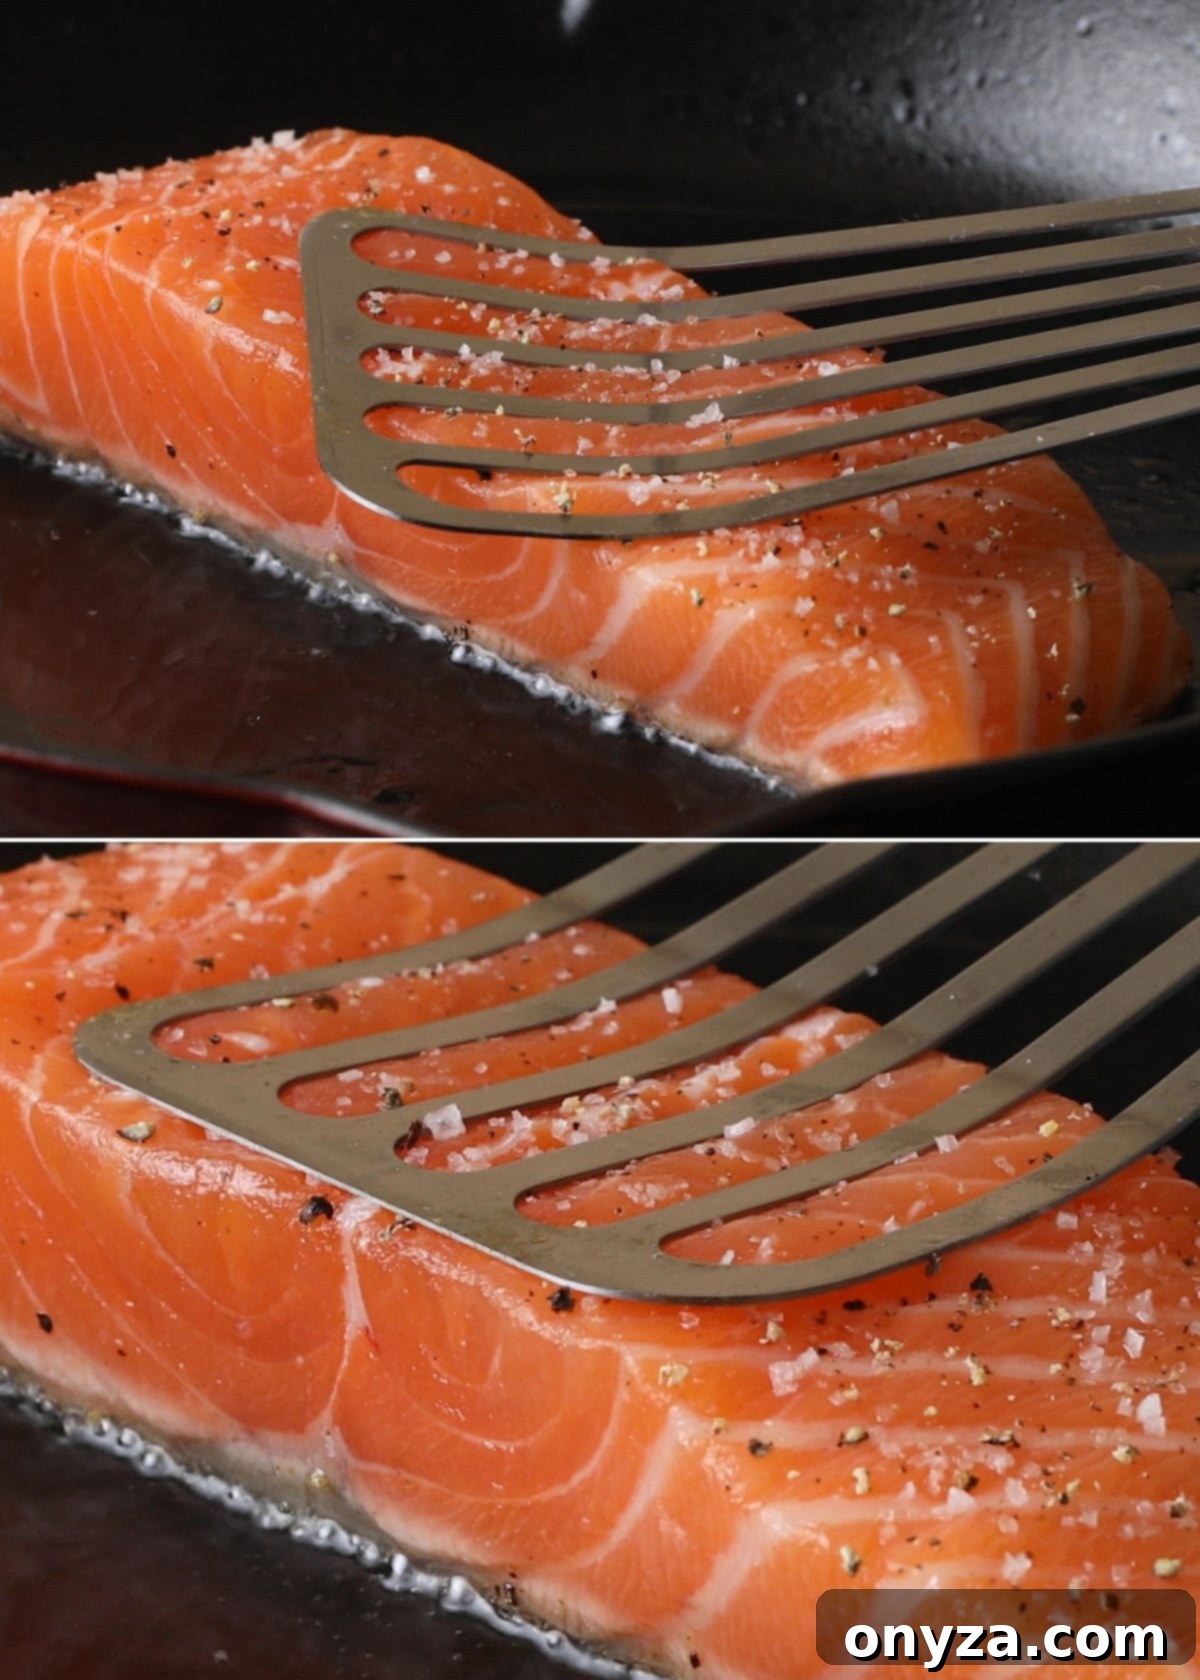
- Preventing Fillet Buckling: When a cooler salmon fillet makes contact with a scorching hot pan, it has a natural tendency to contract and buckle upwards in the middle. The fish spatula is the ideal implement for gently pressing down on the center of the fillet during the initial moments of searing. This action helps the fillet maintain its flat shape, ensuring uniform contact with the hot cooking surface for even cooking and, crucially, a consistently crisp skin across its entire area.
I strongly advocate for investing in a high-quality fish spatula; it’s a tool you’ll reach for frequently. My personal recommendations, both of which are exceptionally reliable choices, include the OXO Good Grips Stainless Steel Fish Turner and the Wusthof Gourmet Offset Spatula, 6-1/2 inch. Either option will prove to be an invaluable asset in your kitchen for years to come.
Mastering the Pan-Searing Technique for Flawless Salmon
With your carefully chosen salmon and essential tools at the ready, it’s time to delve into the precise, step-by-step process of pan searing. This technique will help you achieve that coveted crispy skin and succulent, flaky flesh that defines truly great salmon.
Prepping Your Fillets for Optimal Results
Proper preparation is the cornerstone of even cooking and maximizing the salmon’s natural flavors. Do not skip these crucial initial steps.
- Bring to Room Temperature: Approximately 15 to 20 minutes before you intend to cook, remove your salmon fillets from the refrigerator and allow them to rest at room temperature (around 70°F). Attempting to cook fillets directly from the fridge can lead to uneven cooking, where the exterior may overcook or burn while the interior remains undercooked. Additionally, introducing very cold fish to a hot pan increases the likelihood of albumin (the white protein that sometimes appears on cooked salmon) leaching out onto the surface, which, though completely harmless, is less aesthetically pleasing.
- Pat Dry Thoroughly: Moisture is the ultimate adversary when striving for crispy skin and a beautiful sear. Just before you’re ready to cook, use multiple layers of paper towels to vigorously and meticulously pat the salmon fillets dry on all sides, paying particular attention to the skin. Removing every trace of excess surface moisture is paramount for achieving that desirable golden-brown crust and shatteringly crisp skin.
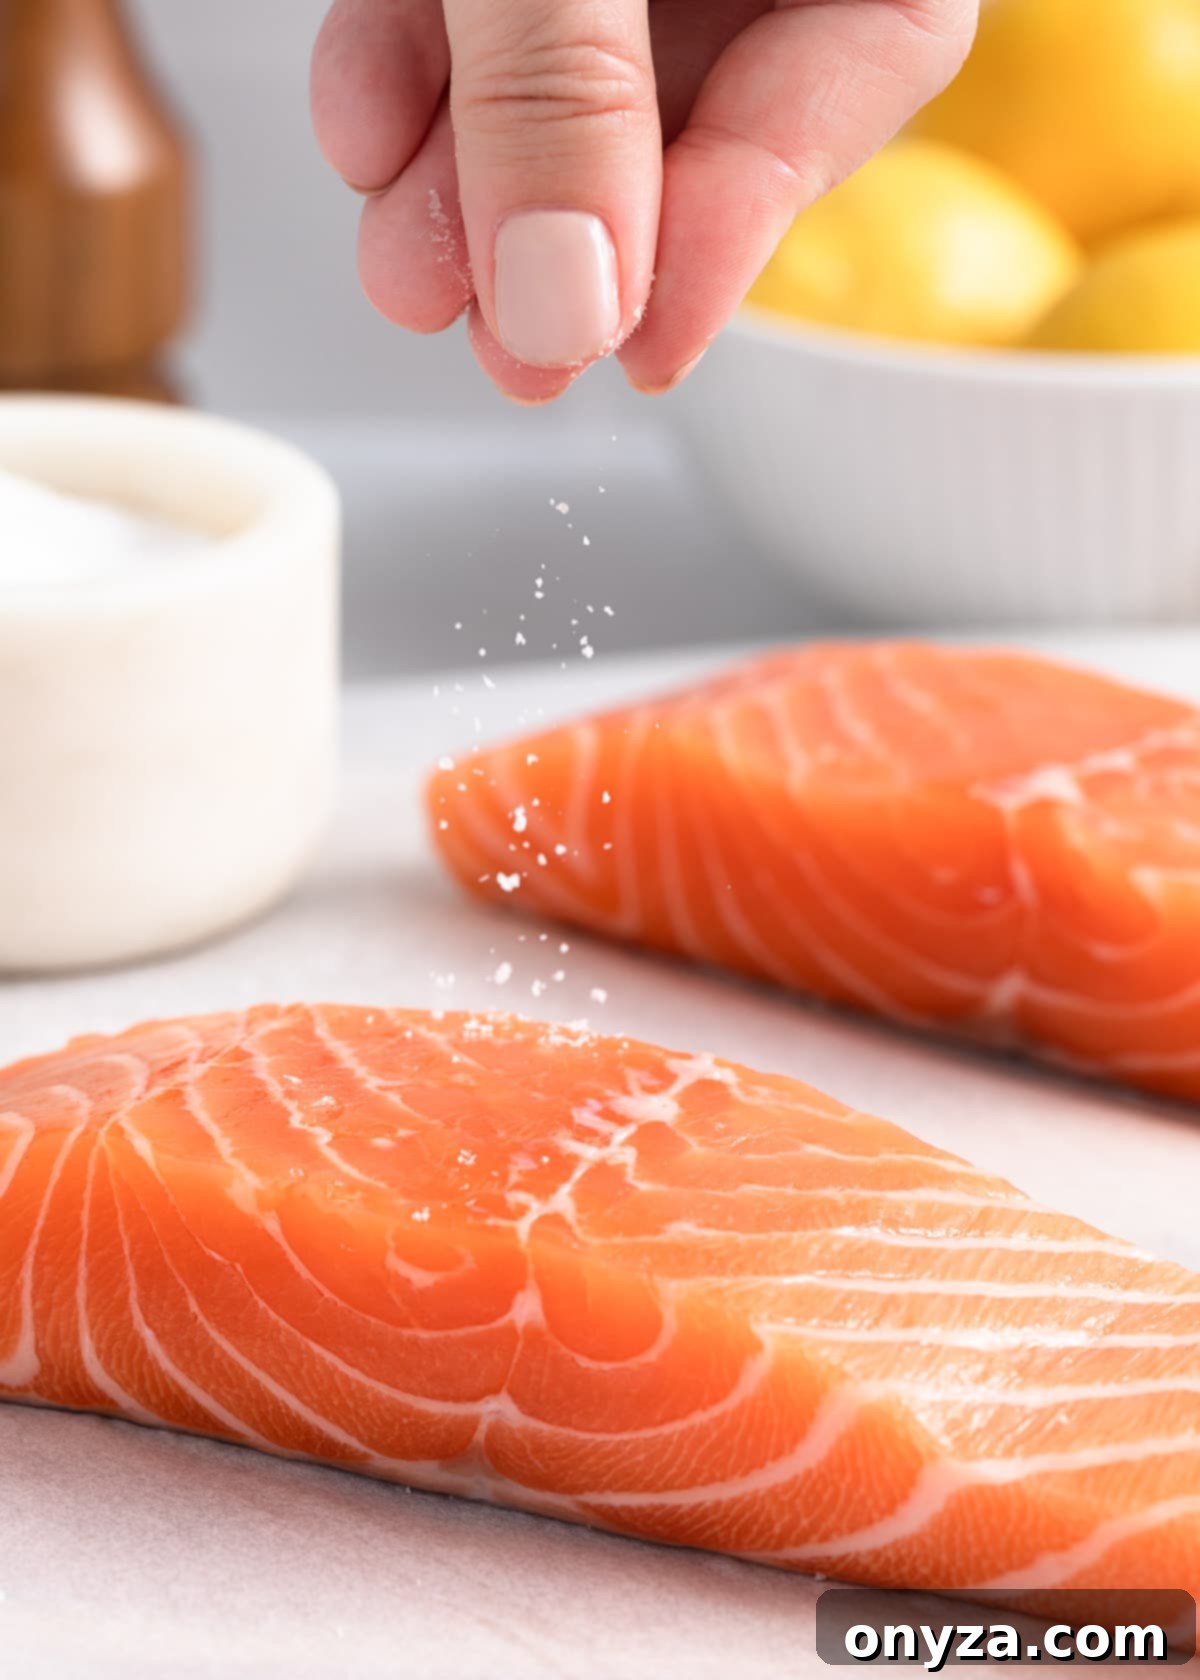
- Season Simply and Timely: For perfectly pan-seared salmon, I advocate for keeping the seasonings straightforward to let the fish’s natural flavors shine. A generous sprinkling of kosher or sea salt along with freshly-ground black pepper is often all that’s needed. Crucially, season the fillets immediately before they hit the hot pan. If you salt them too far in advance, the salt can draw out moisture from the fish, counteracting your efforts to achieve a crisp exterior.
The Searing Process: Achieving the Perfect Crisp
This is where careful execution truly pays off, transforming simple fillets into a gourmet experience.
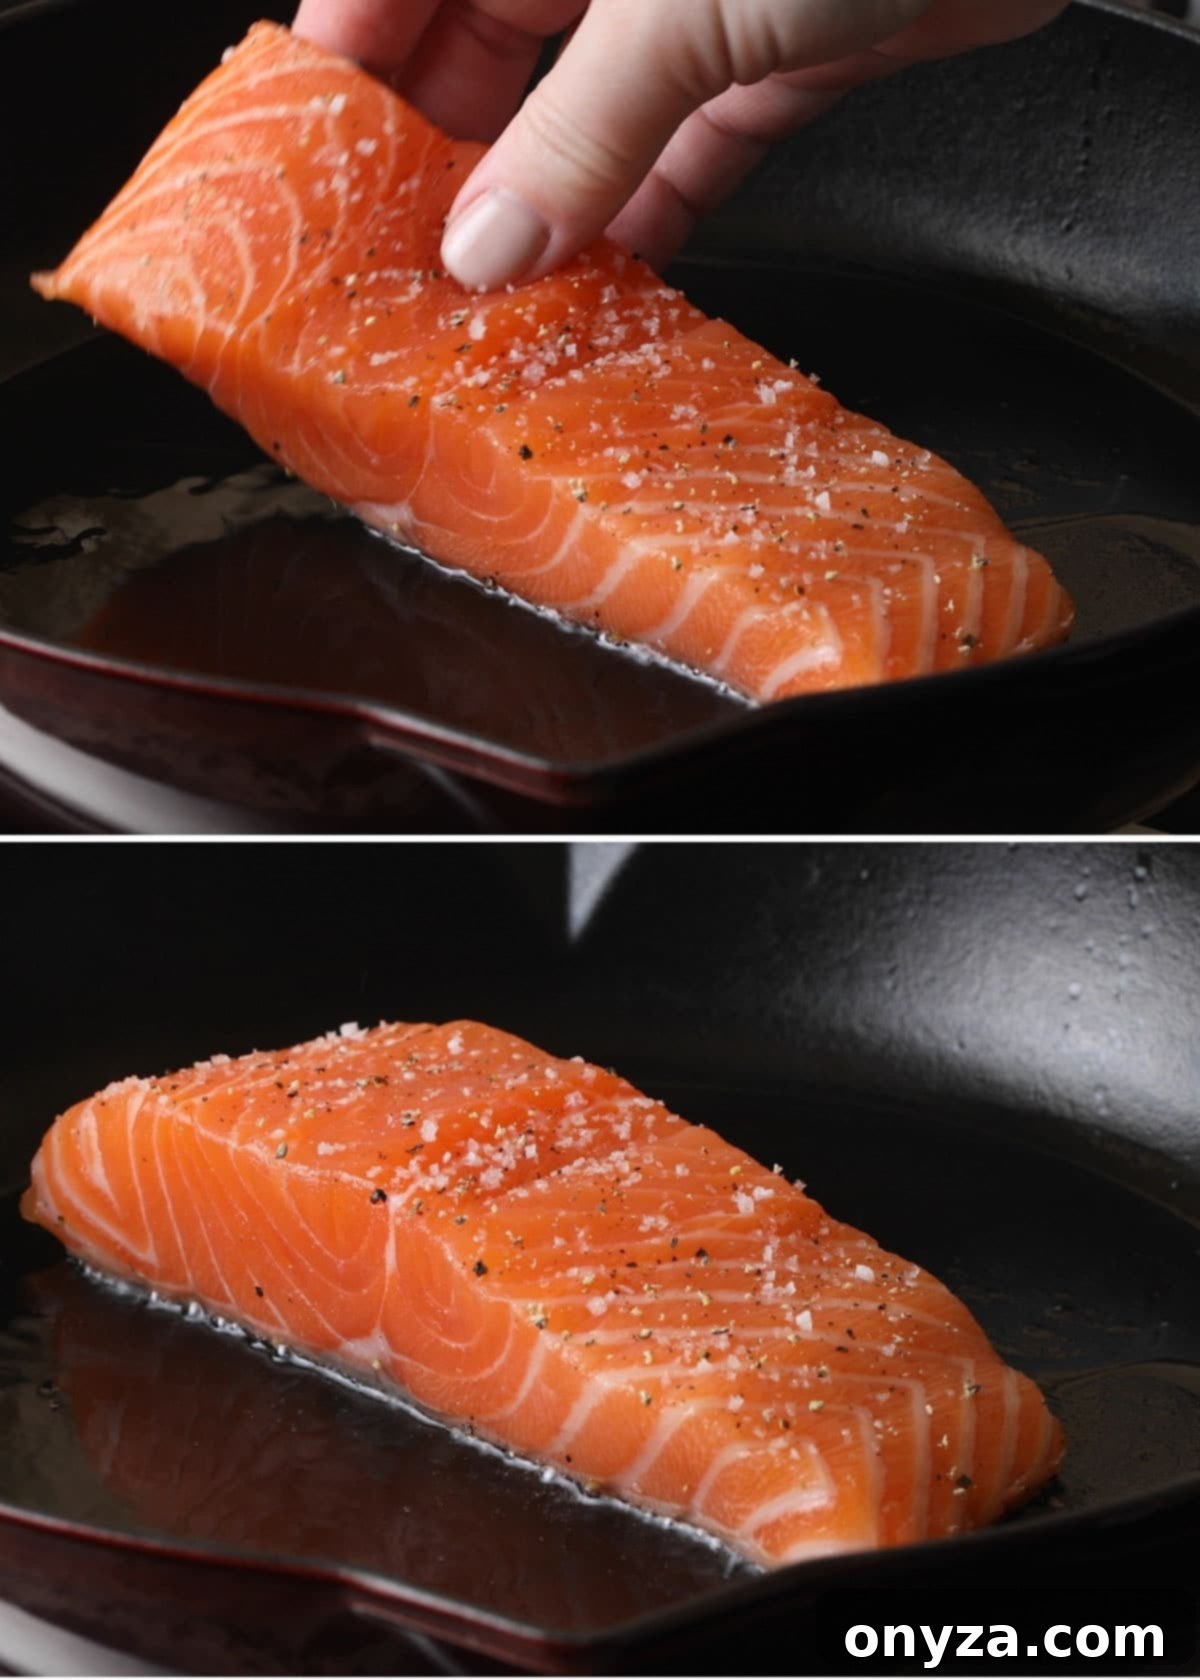
- Begin Skin-Side Down: Always initiate the cooking process by placing your salmon fillets skin-side down in the hot pan. The skin serves as an invaluable natural barrier, shielding the delicate flesh from the direct, intense heat and helping it cook through to a remarkably succulent finish. This extended contact with the hot surface also grants the skin ample time to develop that highly sought-after crispiness.
- Ensure Optimal Pan Temperature: Place your chosen pan over medium-high heat. To accurately gauge if the pan is sufficiently hot, flick a few droplets of water into the dry pan. If these droplets dance, bead up, and rapidly evaporate within a few seconds, your pan is perfectly ready for searing. Next, add enough neutral, high-smoking point oil (such as canola, grapeseed, or avocado oil) to lightly coat the entire bottom of the pan, typically 1 to 2 tablespoons per fillet. Allow the oil to heat until it shimmers visibly, but be vigilant and ensure it does not begin to smoke, as this indicates it’s overheating and will impart a burnt flavor.
Safety First: Adding the Fillets. When it’s time to place the fillets into the hot pan, a certain degree of oil splatter is almost inevitable due to the fish’s natural moisture content (even after patting dry). To minimize any risk of burns, always gently lay each fillet into the pan from the front of the pan, pushing it towards the back, in a deliberate motion away from your body. This ensures that any potential oil splatter moves in a safe direction, away from you.
- Address Fillet Buckling Immediately: As soon as the salmon fillets make contact with the hot pan, you will almost certainly observe them starting to contract and buckle upwards towards their center. It is crucial to immediately use your fish spatula to gently, but firmly, press down on the top of each fillet for approximately 30 seconds to a minute. This action helps them to flatten out and ensures even, consistent contact with the hot pan, which is absolutely vital for achieving uniformly crisp skin.
- Adjust Heat and Cook Thoroughly: After the initial searing and flattening phase, reduce the heat to medium or medium-low. This allows the fish to continue cooking through at a more moderate, controlled temperature without burning the skin or overcooking the exterior before the interior is done. The total cooking time will naturally vary depending on the specifics of your stove, the type of pan you are using, and, most importantly, the exact thickness of your salmon fillets.

Knowing When Your Pan-Seared Salmon is Perfectly Cooked
The hallmark of perfectly cooked salmon is a delicate balance: a tender, moist interior that easily flakes, complemented by a crisp exterior. Here’s how to precisely determine when your salmon has reached its ideal doneness.
- When to Flip the Fillets: The primary and most reliable indicator for when to flip your salmon is visual. As the salmon cooks skin-side down, meticulously observe the side of the fillet. You will notice a distinct and gradual color change, transitioning from a more vibrant, translucent coral hue at the bottom to a lighter, opaque shade as it cooks upwards. When this opaque line has climbed approximately 75% of the way up the side of the fillet, it signifies the opportune moment to flip. This process typically takes between 5 to 9 minutes, contingent on the fillet’s thickness and the intensity of your pan’s heat.
Troubleshooting Stuck Salmon Skin: If you attempt to flip the salmon and find that the skin is stubbornly adhering to the pan, resist any urge to force it. This is usually an indication that the skin has not yet fully crisped or naturally released its bond with the pan. Simply allow it another minute or two of cooking time and then try again. Provided there was sufficient oil and the pan was adequately heated initially, the skin will reliably release on its own when it has achieved that desired perfect crispness. Patience truly is a virtue in this step!
-
Cook to Your Desired Doneness: Once flipped, the salmon will only require a few more minutes of cooking on the flesh side to finish. The most accurate and safest method to ascertain doneness is by using an instant-read thermometer inserted into the thickest part of the fillet.
- The U.S. FDA officially recommends an internal cooking temperature of 145°F for salmon to ensure food safety.
- Many professional chefs and experienced home cooks, however, prefer a slightly lower internal temperature of 120-125°F for a more tender, exceptionally juicy, medium-rare result. This is particularly desirable for leaner wild salmon varieties.
- For farmed fillets, which tend to have a higher fat content, I often aim for 125-130°F for a perfect medium doneness. It’s important to remember that the fish will continue to cook slightly (carryover cooking) for a few minutes after it’s removed from the heat.
- The Importance of Resting: Once your salmon has reached your desired internal temperature, promptly remove the fillets from the pan and transfer them to a clean plate. Allow them to rest undisturbed for 3 to 5 minutes. This vital resting period enables the internal juices to redistribute evenly throughout the flesh, guaranteeing that every bite is as moist, tender, and flavorful as possible.
*Disclaimer: Consuming raw or undercooked seafood, especially by vulnerable populations, may significantly increase your risk of food-borne illnesses. Always cook seafood to safe internal temperatures that align with your personal health and safety preferences.
Serving Your Pan-Seared Salmon: Simple Elegance
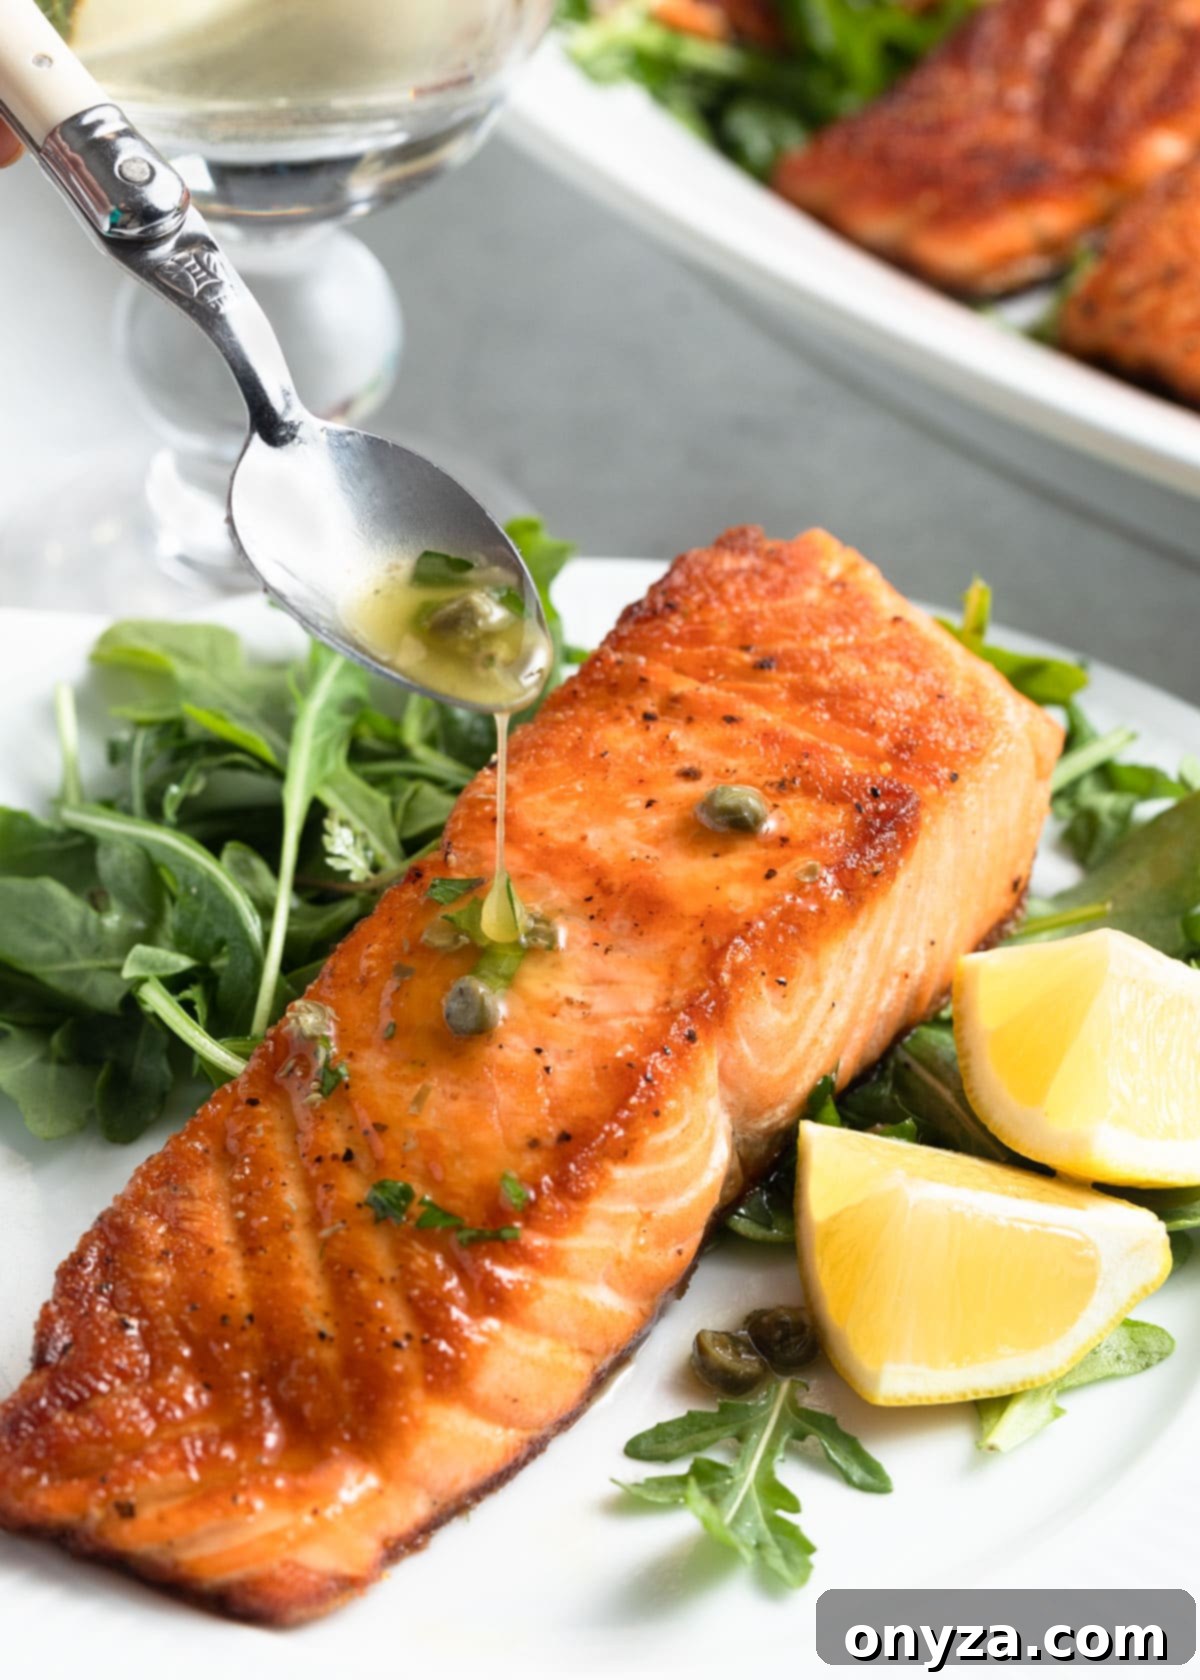
A beautifully pan-seared salmon fillet is a dish of inherent elegance, often requiring minimal adornment to truly shine. You have the delightful choice of serving it either with its crispy skin intact or gently removed. If you opt to keep the skin on, always present the fish skin-side up to preserve and highlight its delightful crisp texture. To remove the skin, simply use your flexible fish spatula to gently slide between the cooked flesh and the skin, working carefully from each end until the fillet lifts cleanly away in one piece.
Often, the most effective enhancements are the simplest. A bright squeeze of fresh lemon juice immediately awakens and enlivens the salmon’s flavor, while a delicate sprinkle of finely chopped fresh herbs – such as dill, parsley, or chives – adds a wonderfully fresh aromatic note. For those who enjoy a little something extra, a thoughtfully chosen, simple sauce can elevate the dish without ever overpowering the salmon’s natural, delicate taste. Some truly fantastic options include:
- Classic Beurre Blanc: A rich, velvety, and subtly tangy butter sauce that provides a sophisticated complement to salmon.
- Bright Lemon-Caper Vinaigrette: Offers a zesty, briny, and refreshingly sharp counterpoint to the richness of the fish.
- Homemade Tartar Sauce: A creamy, tangy, and herbaceous classic that pairs exceptionally well with any seared fish.
- Fresh Tzatziki: The cool, crisp cucumber and creamy yogurt blend provides a refreshing and vibrant contrast, particularly effective with fattier salmon varieties.
- Sweet and Savory Honey-Ginger Sauce: This Asian-inspired glaze adds a delightful balance of sweetness and gentle spice that is both simple to prepare and deeply flavorful.
Beyond being a superb standalone main course, pan-seared salmon is incredibly versatile. It’s excellent when gently flaked into warm entree salads, such as my personal favorite, Seared Salmon and Couscous Salad, or beautifully presented topped with a vibrant scoop of fresh Cherry Tomato Confit for a burst of color and bright, sweet-tart flavors.
Delicious Side Dish Pairings for Pan-Seared Salmon
Pairing your perfectly pan-seared salmon with the right side dishes can transform a simple meal into an unforgettable culinary experience. These easy and delicious ideas are specifically chosen to complement the richness and delicate flavor of salmon, ensuring a balanced and satisfying plate:
- Haricots Verts with Lemon-Herb Brown Butter: These delicate French green beans, tossed in a nutty, aromatic brown butter sauce with bright lemon zest and fresh herbs, create an elegant and incredibly flavorful accompaniment that’s both simple and sophisticated.
- Greek-Inspired Orzo Salad with Feta: A light, refreshing, and vibrant pasta salad featuring Mediterranean flavors like sun-dried tomatoes, olives, cucumber, and crumbled feta. It offers a wonderful contrast that expertly balances the richness of the salmon.
- Arugula and Fennel Salad: The peppery bite of fresh arugula combined with the crisp, refreshing, and subtly anise-like flavor of thinly shaved fennel provides a vibrant, clean, and highly refreshing contrast to the richness of the fish.
- Simple Sweet Corn Succotash: A colorful and comforting medley of sweet corn kernels, tender lima beans, and other fresh vegetables. This side dish brings a delightful touch of sweetness and garden-freshness to your meal.
- Roasted Asparagus with Parmesan: A timeless and highly popular pairing. The slight bitterness and tender-crisp texture of perfectly roasted asparagus, often enhanced with a sprinkle of savory Parmesan cheese, beautifully complements the rich flavor of salmon.
- Creamy Lemon Risotto: For a more indulgent and utterly satisfying accompaniment, a bright and zesty lemon risotto adds a luxurious, comforting touch that pairs wonderfully with the delicate fish.
- Garlic Herb Roasted Potatoes: Crispy on the outside, wonderfully fluffy on the inside, these aromatic potatoes, infused with garlic and fresh herbs, provide a hearty, flavorful, and universally loved choice for a side dish.
Stay Connected for More! Don’t miss out on our latest delicious recipes, expert cooking insights, and exclusive content. Subscribe to our newsletter today and join our vibrant culinary community on Facebook, Pinterest, and Instagram for all the newest updates and inspiration.
Restaurant-Quality Pan Seared Salmon
Amanda Biddle
15 minutes
12 minutes
3-5 minutes
30-32 minutes
2 servings
Ingredients
- 2 skin-on salmon fillets (6 to 8 ounces each, 1 to 1-1/2 inches thick, pin bones removed and skin descaled)
- 1-2 tablespoons neutral, high-smoking point oil (such as canola, grapeseed, or avocado oil)
- Kosher salt and freshly-ground black pepper, to taste
Instructions
- Remove salmon fillets from the refrigerator 15 minutes before cooking and let stand at room temperature (about 70°F) for even cooking.
- Heat a 10 to 12-inch frying pan over medium-high heat until hot. You can test by adding a few water droplets; they should dance and evaporate quickly. Add 1-2 tablespoons of neutral, high-smoking point oil (e.g., canola, grapeseed, or avocado oil) to lightly coat the bottom of the pan. Heat until shimmering, but do not let it smoke.
- Just before searing, pat the salmon fillets thoroughly dry on all sides with paper towels. Season the flesh liberally with kosher salt and freshly-ground black pepper.
- Carefully place the fillets into the hot pan, skin-side down, laying them away from your body to prevent oil splatter. Reduce the heat to medium or medium-low. As the fillets hit the heat, they may buckle. Use a fish spatula to gently press down on the flesh for about 30-60 seconds to flatten them and ensure even contact with the pan.
- Cook on the skin side until the fillets are about 3/4 of the way cooked through. You’ll observe the color changing from a rich, translucent coral to an opaque, pastel shade, progressing upwards from the skin. This typically takes 5-9 minutes, depending on the fillet thickness and pan heat. Do not attempt to flip until the skin naturally releases from the pan.
- Once the color has reached approximately 3/4 up the sides, use your fish spatula to carefully flip the fillets. Continue cooking on the flesh side for an additional 1-4 minutes, or until desired doneness. The USDA recommends an internal temperature of 145°F. For a medium-rare (juicier) result, aim for 120-125°F; for medium, target 125-130°F; and for medium-well, 135°F.* Use an instant-read thermometer for accuracy.
- Remove the cooked fillets from the pan and place them on a plate lined with paper towels to drain any excess oil. Let them rest for 3-5 minutes. Serve immediately with a squeeze of fresh lemon juice, chopped herbs, or your favorite finishing sauce. For maximum crispiness, serve skin-side up. To remove the skin, slide your fish spatula between the skin and flesh and lift the fillet away.
Notes
Nutrition Estimate
Calories: 340kcal |
Protein: 45g |
Fat: 16g |
Saturated Fat: 2g |
Cholesterol: 125mg |
Sodium: 100mg |
Potassium: 1111mg |
Vitamin A: 91IU |
Calcium: 27mg |
Iron: 2mg
Nutrition information is automatically calculated and should be used as an approximation only.
Please note that our recipes have been developed using the US Customary measurement system and have not been tested for high altitude/elevation cooking and baking.
Like this? Rate and comment below!
