Irresistible Chocolate Hazelnut Thumbprint Cookies with Fresh Raspberries
Few cookies bring as much joy and versatility to the baking world as thumbprints. They are simple to master, endlessly customizable, and always a delight to share. Among my favorite variations are these exquisite chocolate hazelnut thumbprint cookies, a sophisticated twist on a classic that promises to captivate chocolate lovers and dessert enthusiasts alike.
These beautiful cookies feature a rich, cocoa-infused base, generously filled with a luscious chocolate hazelnut spread, and crowned with a vibrant, fresh raspberry. The combination creates a symphony of flavors and textures, making them a perfect treat for festive occasions like the holiday season, a charming addition to a Valentine’s Day spread, or simply a delightful indulgence any time of year.

The Allure of Thumbprint Cookies: A Beloved Classic Reimagined
Thumbprint cookies, often tracing their origins back to Swedish “Hallongrotta” (raspberry caves), traditionally feature a shortbread-like base filled with jam. This timeless cookie holds a special place in many hearts for its charming appearance and comforting taste. Our recipe takes this beloved classic and elevates it with a decadent chocolate twist, creating a truly unforgettable experience.
Instead of a plain butter cookie, we craft a tender, melt-in-your-mouth cocoa-infused base. This provides a deep chocolate flavor that pairs exquisitely with the creamy, nutty richness of chocolate hazelnut spread. It’s a combination designed to fulfill every chocolate lover’s dream, offering a profound depth of flavor that is both comforting and luxurious.
To perfectly balance the cookie’s inherent richness and sweetness, and to respectfully nod to the fruit element of the traditional recipe, each filled thumbprint is elegantly topped with a fresh, juicy raspberry. The bright, sweet-tart berry cuts through the creamy chocolate hazelnut spread and complements the chewy cookie base with refreshing acidity, making each bite a perfectly harmonized delight. These cookies encapsulate everything crave-worthy in a chocolate-berry dessert, all wrapped up in a convenient, two-bite package. Furthermore, the fresh raspberry adds a pop of color and natural elegance, ensuring a stunning presentation on any cookie plate or dessert spread.
Crafting Perfection: Essential Ingredients for Your Chocolate Hazelnut Thumbprints
The foundation of these delightful cookies is a straightforward yet remarkably tender chocolate sugar cookie dough. Success begins with selecting quality ingredients. Here’s what you’ll need from your pantry and fridge, along with some tips for best results:
- All-purpose Flour: The structural backbone of our cookies. For consistent results, I recommend using a reliable brand like King Arthur. Always measure your flour using the spoon-and-level method: gently spoon flour into your measuring cup and level off the top with a straight edge, avoiding packing it down. This prevents a dense, dry cookie.
- Unsweetened Cocoa Powder: This is where the magic chocolate flavor comes from. For the deepest color and richest, most complex chocolate flavor, opt for unsweetened dark or Dutch-process cocoa powder. Brands like Droste or Valrhona are excellent choices. Dutch-process cocoa has been treated with an alkali to neutralize its acidity, resulting in a darker color and a smoother, less bitter chocolate flavor compared to natural cocoa powder.
- Kosher Salt: A crucial ingredient that enhances the sweetness and depth of all the other flavors. I prefer Diamond Crystal kosher salt for its consistent grain and clean taste. Don’t skip the salt; it’s what prevents the cookies from tasting flat and one-dimensional.
- Unsalted Butter: The key to a tender, flavorful cookie. Using unsalted butter allows you to control the exact amount of salt in the recipe. For superior flavor and texture, particularly in baking, I love European-style butters such as Plugra or Kerrygold, which have a higher fat content. However, these cookies turn out wonderfully even with good quality American-style butter. Ensure your butter is at room temperature so it creams easily with the sugar, creating a light and airy base.
- Granulated Sugar: This recipe uses granulated sugar in two ways: it’s incorporated into the cookie dough itself for sweetness and structure, and a little extra is reserved for rolling the dough balls before baking. Rolling the dough in sugar adds a delightful crisp texture to the exterior and a pleasant sparkle, similar to how Peanut Butter Blossoms are prepared.
- Egg Yolks: We use only egg yolks in this recipe to achieve a particularly rich, tender, and somewhat chewy texture. The fat in the yolks contributes to the cookie’s delightful crumb, while omitting the whites prevents a drier, crispier result.
- Vanilla Extract: A classic and indispensable ingredient that provides a warm, aromatic complement to the deep chocolate flavor. Use a good quality pure vanilla extract for the best taste.
- Chocolate Hazelnut Spread: The star filling! Brands like Nutella or Nocciolata are perfect for their creamy texture and irresistible chocolate-hazelnut flavor. This spread provides a luscious, gooey center that contrasts beautifully with the cookie.
- Fresh Raspberries: The crowning glory of these thumbprints. Choose bright, plump, and firm raspberries. If your berries are particularly large, consider gently cutting them in half before topping the cookies for a more proportionate bite and elegant presentation.
Mastering the Technique: Step-by-Step Baking Guide
Baking these chocolate hazelnut thumbprint cookies is a truly enjoyable process. With a few simple steps and helpful tips, you’ll create professional-looking and tasting cookies every time. The overall process is quite straightforward, making it a fantastic baking project to involve the whole family.
- Prepare the Dry Ingredients: In a medium bowl, thoroughly whisk together the all-purpose flour, Dutch-process cocoa powder, and kosher salt. Whisking ensures these ingredients are evenly distributed, which is crucial for uniform cookies. Set this mixture aside.
- Cream Butter and Sugar: In the bowl of a stand mixer fitted with the paddle attachment, cream together the softened unsalted butter and 3/4 cup of granulated sugar on medium speed until the mixture is light, fluffy, and pale in color. This process incorporates air, contributing to the cookie’s tender texture. Don’t rush this step! Scrape down the sides of the bowl with a spatula, then add the egg yolks and vanilla extract, mixing until just combined.
- Combine Wet and Dry: Gradually add the whisked dry ingredients to the wet ingredients in three additions. Mix on low speed, scraping the bottom and sides of the bowl well after each addition, until just combined. Be careful not to overmix, as this can develop the gluten in the flour and lead to tougher cookies. Once the dough comes together, wrap it in plastic and refrigerate it for at least 30 minutes. Chilling the dough helps prevent spreading during baking and makes it easier to handle.
- Preheat Oven and Prepare Baking Sheets: While the dough chills, preheat your oven to 350 degrees F (175 degrees C) with racks positioned in the upper and lower thirds of the oven. Line two baking sheets with parchment paper or nonstick baking mats. This prevents sticking and promotes even baking.
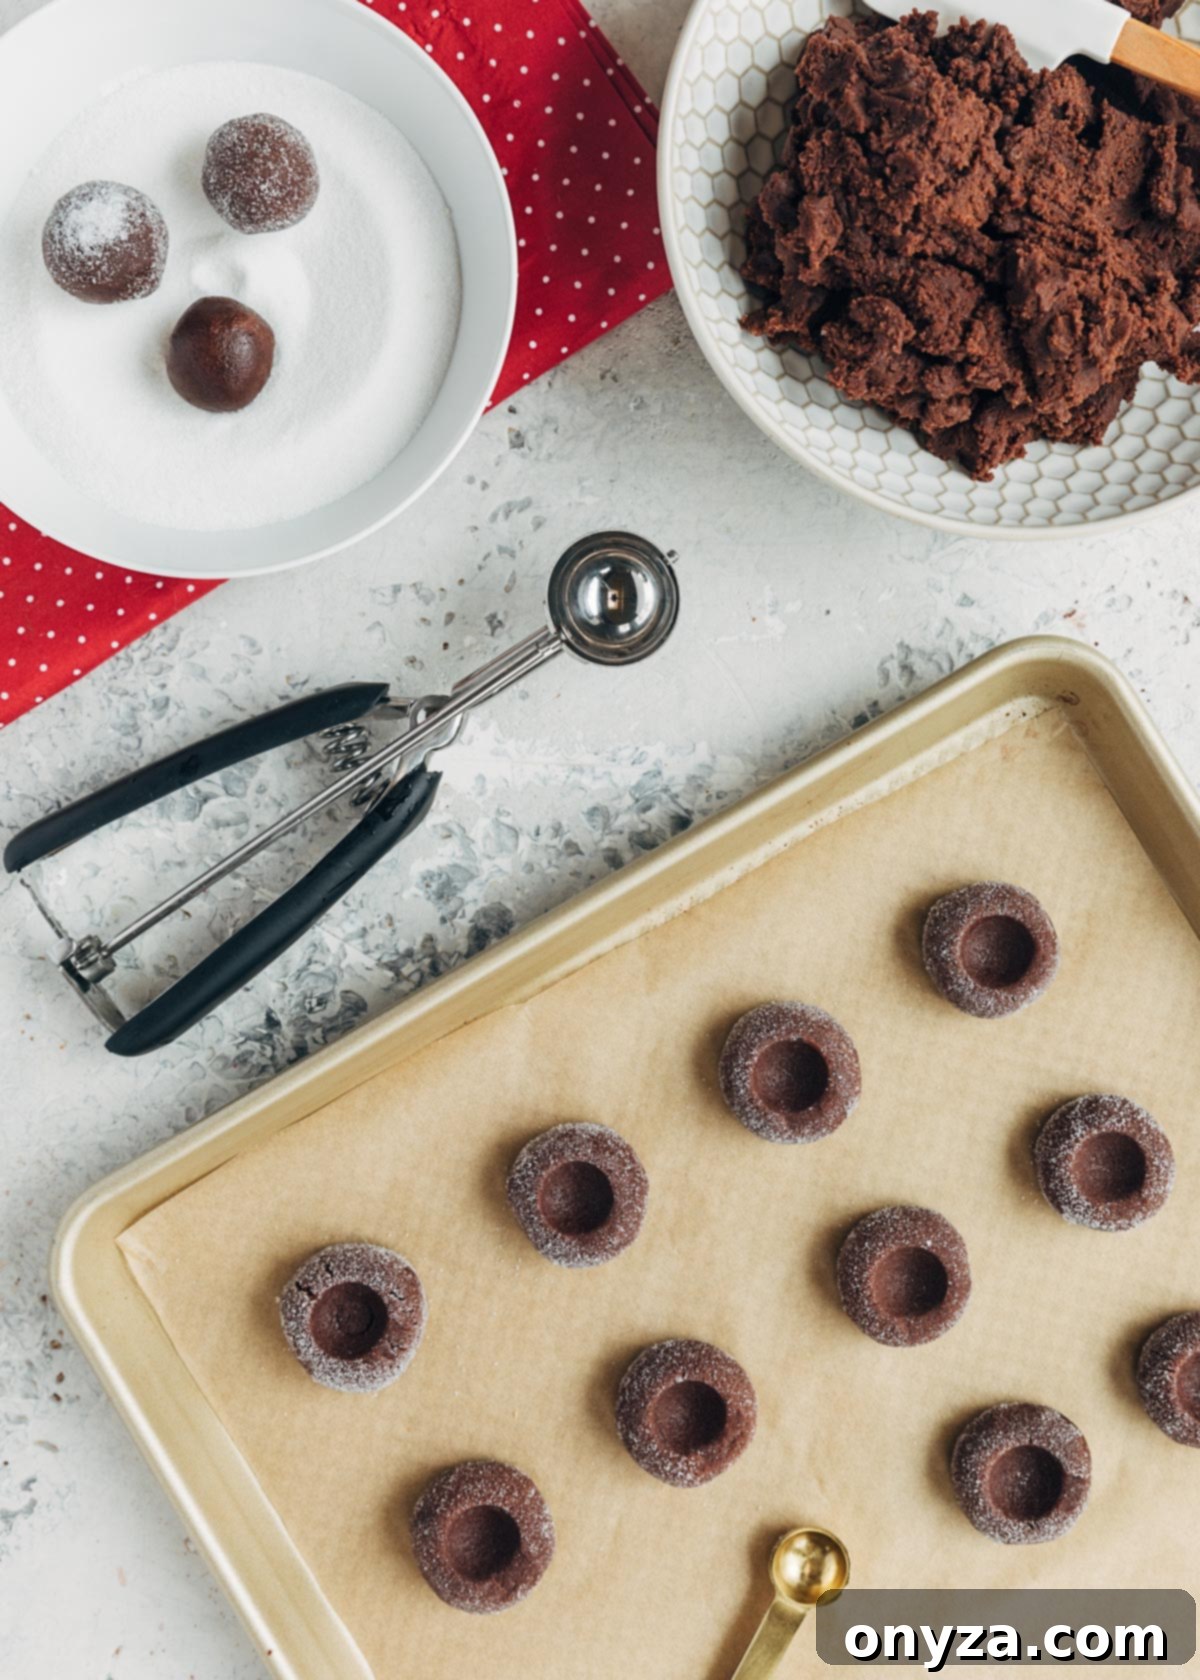
- Portion and Roll the Dough: Scoop the chilled dough into 1-1/2 teaspoon portions. A small cookie scoop (often labeled as a #50 or #60 scoop) is ideal for creating uniform cookies. Roll each portion between your palms to form a smooth ball. Place a few tablespoons of granulated sugar in a shallow dish, then gently roll each dough ball in the sugar to coat it evenly. This adds a beautiful sparkle and a delightful textural contrast.
- Form the Indentations: Arrange the sugar-coated dough balls on the prepared baking sheets, leaving about 2 inches between them. Now, it’s time to create the characteristic “thumbprint.” You can use your actual thumb or knuckle, but for more uniform and well-defined wells, I find that the back of a 1/4 teaspoon measuring spoon works perfectly. Gently press the spoon into the center of each cookie to create an indentation.
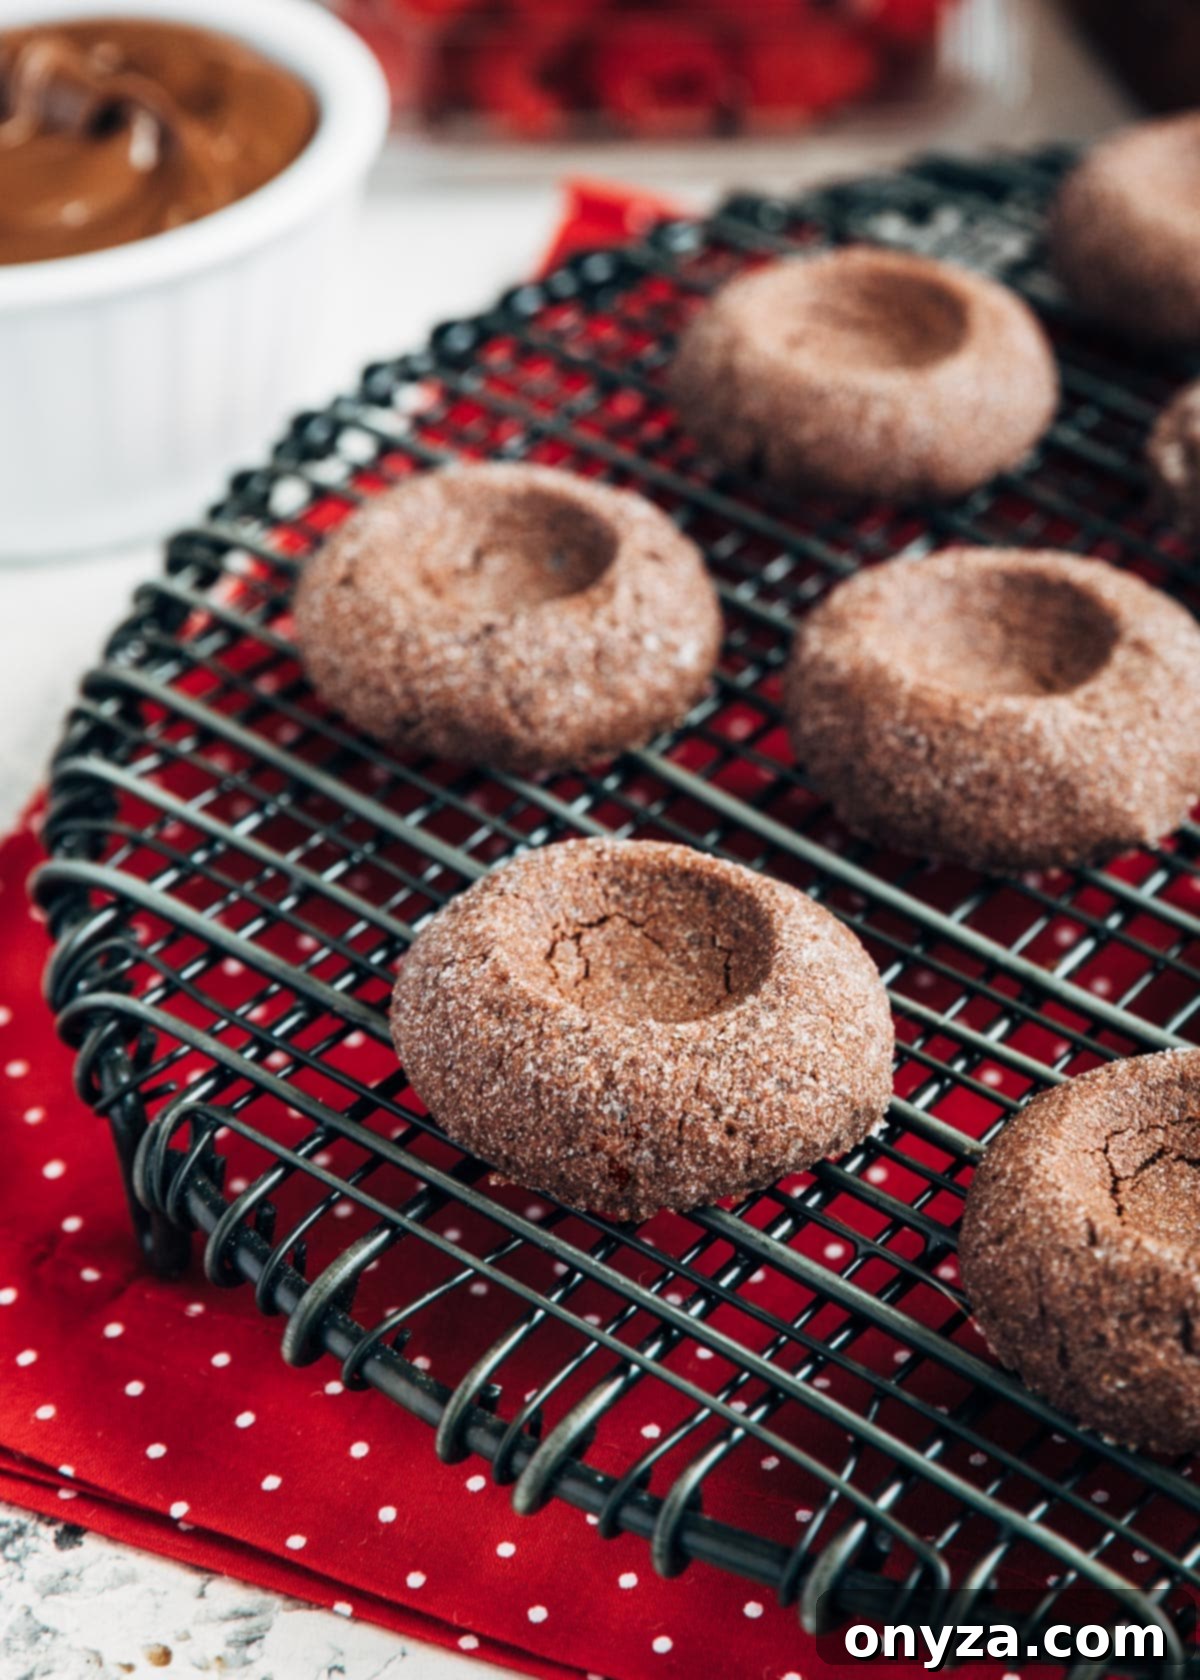
- Bake to Perfection: Bake the cookies for 13-15 minutes, rotating the pans halfway through to ensure even baking. The cookies are done when the edges are set and lightly golden, and the centers appear slightly puffed but still soft. As soon as you remove them from the oven, use the back of a 1/2 teaspoon measuring spoon to gently re-press and redefine the indentations. This ensures they maintain their shape for the filling. Let the cookies cool on the baking sheets for about 5 minutes before transferring them to wire racks to cool completely.
- Fill and Garnish: Once the cookies are completely cool (this is crucial to prevent the spread from melting!), use a spoon or a piping bag to fill each indentation with approximately 1 teaspoon of chocolate hazelnut spread. Finally, top each filled cookie with a fresh raspberry. If your raspberries are large, cut them in half for a more elegant presentation. Serve immediately and enjoy!
Tips for Flawless Thumbprints Every Time
While thumbprint cookies are generally easy to make, a few insider tips can elevate your baking experience and ensure perfect results:
- The Indentation Tool: As mentioned, while your thumb works fine, a round measuring spoon (starting with 1/4 teaspoon for the raw dough, then 1/2 teaspoon after baking) creates perfectly defined, uniform wells. The re-pressing after baking is key to preventing the centers from rising too much and losing their shape.
- Cool Completely Before Filling: This tip cannot be stressed enough! If the cookies are still warm, the chocolate hazelnut spread will melt and seep into the cookie, creating a messy rather than luscious center. Patience here is a virtue.
- Don’t Overmix the Dough: Overmixing develops gluten, leading to tougher cookies. Mix just until the ingredients are combined.
- Chilling is Your Friend: The initial 30-minute chill for the dough is important. It solidifies the butter, making the dough easier to handle and preventing excessive spreading in the oven, ensuring your thumbprints hold their shape.
- Even Baking: Rotating the baking sheets halfway through the baking time helps ensure that all cookies bake evenly, preventing some from being underdone while others are overdone.

Make-Ahead Magic: Preparing Your Cookies in Advance
One of the many appealing aspects of these chocolate hazelnut thumbprint cookies is their adaptability for make-ahead preparation. Since fresh raspberries are delicate and look best when added shortly before serving, it’s ideal to assemble the filled and topped cookies within a few hours of serving. However, this doesn’t mean you can’t get a significant head start on your baking!
You can bake the cookie bases up to 3 days in advance. Once baked and completely cooled, store the unfilled cookies in an airtight container at room temperature. When you’re ready to serve, simply fill them with the chocolate hazelnut spread, top with the fresh raspberries, and you’ll have a beautiful, freshly assembled dessert ready in minutes. This makes them an excellent choice for entertaining or for busy holiday preparations, allowing you to enjoy the process without last-minute stress.

Beyond the Plate: Serving and Gifting Ideas
These chocolate hazelnut thumbprint cookies with raspberries are not just a treat for the taste buds; they’re also a feast for the eyes. Their elegant appearance makes them perfect for a variety of occasions:
- Holiday Gatherings: Their festive colors and rich flavors are a wonderful addition to any holiday cookie platter, from Christmas to New Year’s.
- Valentine’s Day: The combination of chocolate and red raspberries makes them inherently romantic, ideal for a sweet gesture on Valentine’s Day.
- Afternoon Tea: Their two-bite size and sophisticated flavor profile make them a lovely accompaniment to an afternoon cup of tea or coffee.
- Edible Gifts: Pack them in a decorative box or tin for a thoughtful, homemade gift. They travel well (unfilled, then filled just before gifting if possible) and are always appreciated.
- Everyday Indulgence: Don’t wait for a special occasion! Treat yourself and your loved ones to these delicious cookies as an everyday dessert or a comforting snack.
Explore More Berry-Inspired Delights
If you’re captivated by the fresh, vibrant flavors of berries, you’ll love these other recipes that celebrate the goodness of nature’s candy:
- Lemon Cream Mixed Berry Tart
- Homemade Strawberry Soda with Basil
- Strawberry Balsamic Salsa
- Blackberry-Lemon Mint Juleps
CRAVING MORE? Subscribe to my newsletter and join me on Facebook, Pinterest, and Instagram for the latest recipes and news.

Pin
Chocolate Hazelnut Thumbprint Cookies with Raspberries
Ingredients
- 2 cups all purpose flour (measured using a spoon-and-level method), 252 grams
- ½ cup unsweetened Dutch process cocoa powder
- ½ teaspoon kosher salt
- 1 cup unsalted butter , room temperature (2 sticks)
- ¾ cups granulated sugar , plus extra for rolling
- 2 large egg yolks
- 1 teaspoon vanilla extract
- ¾ cup chocolate hazelnut spread
- 36 raspberries
Instructions
- In a bowl, whisk together flour, cocoa powder, and salt. Set aside.
- In the bowl of a stand mixer fitted with the paddle attachment, cream together butter and 3/4 cup sugar until light and fluffy. Scrape the bowl and mix in egg yolks and vanilla extract.
- Add the dry ingredients in 3 additions, scraping the bottom and sides of bowl between each addition. Refrigerate for 30 minutes.
- Preheat oven to 350 degrees F with racks in the upper and lower thirds of the oven. Line two baking sheets with parchment or nonstick baking mats.
- Scoop dough into 1-1/2 teaspoon portions (I use a small cookie scoop) and roll between your hands into a ball. Place a few tablespoons of granulated sugar in a shallow dish and roll the dough balls in the sugar to coat.
- Place dough onto the prepared baking pans. Using your finger or the back of a 1/4 teaspoon measuring spoon, make an indentation in the center of each cookie.
- Bake for 13-15 minutes, rotating pans halfway through, until cookies are set. Remove from the oven and use the back of a 1/2 teaspoon measuring spoon to gently re-press the indentations. Let cookies stand on the baking sheets for 5 minutes before transferring to wire racks to cool completely.
- Use a spoon or a piping bag, fill each indentation with about 1 teaspoon of chocolate hazelnut spread. Top with a raspberry (cut in half if large) and serve.
Notes
Make ahead:
The cookies should be filled with chocolate hazelnut spread and topped with a raspberry the day of serving. You can bake the cookies and store them at room temperature, unfilled, up to 3 days in advance in a tightly-covered container.
Nutrition Estimate
Nutrition information is automatically calculated, so should only be used as an approximation.
Please note that our recipes have been developed using the US Customary measurement system and have not been tested for high altitude/elevation cooking and baking.
