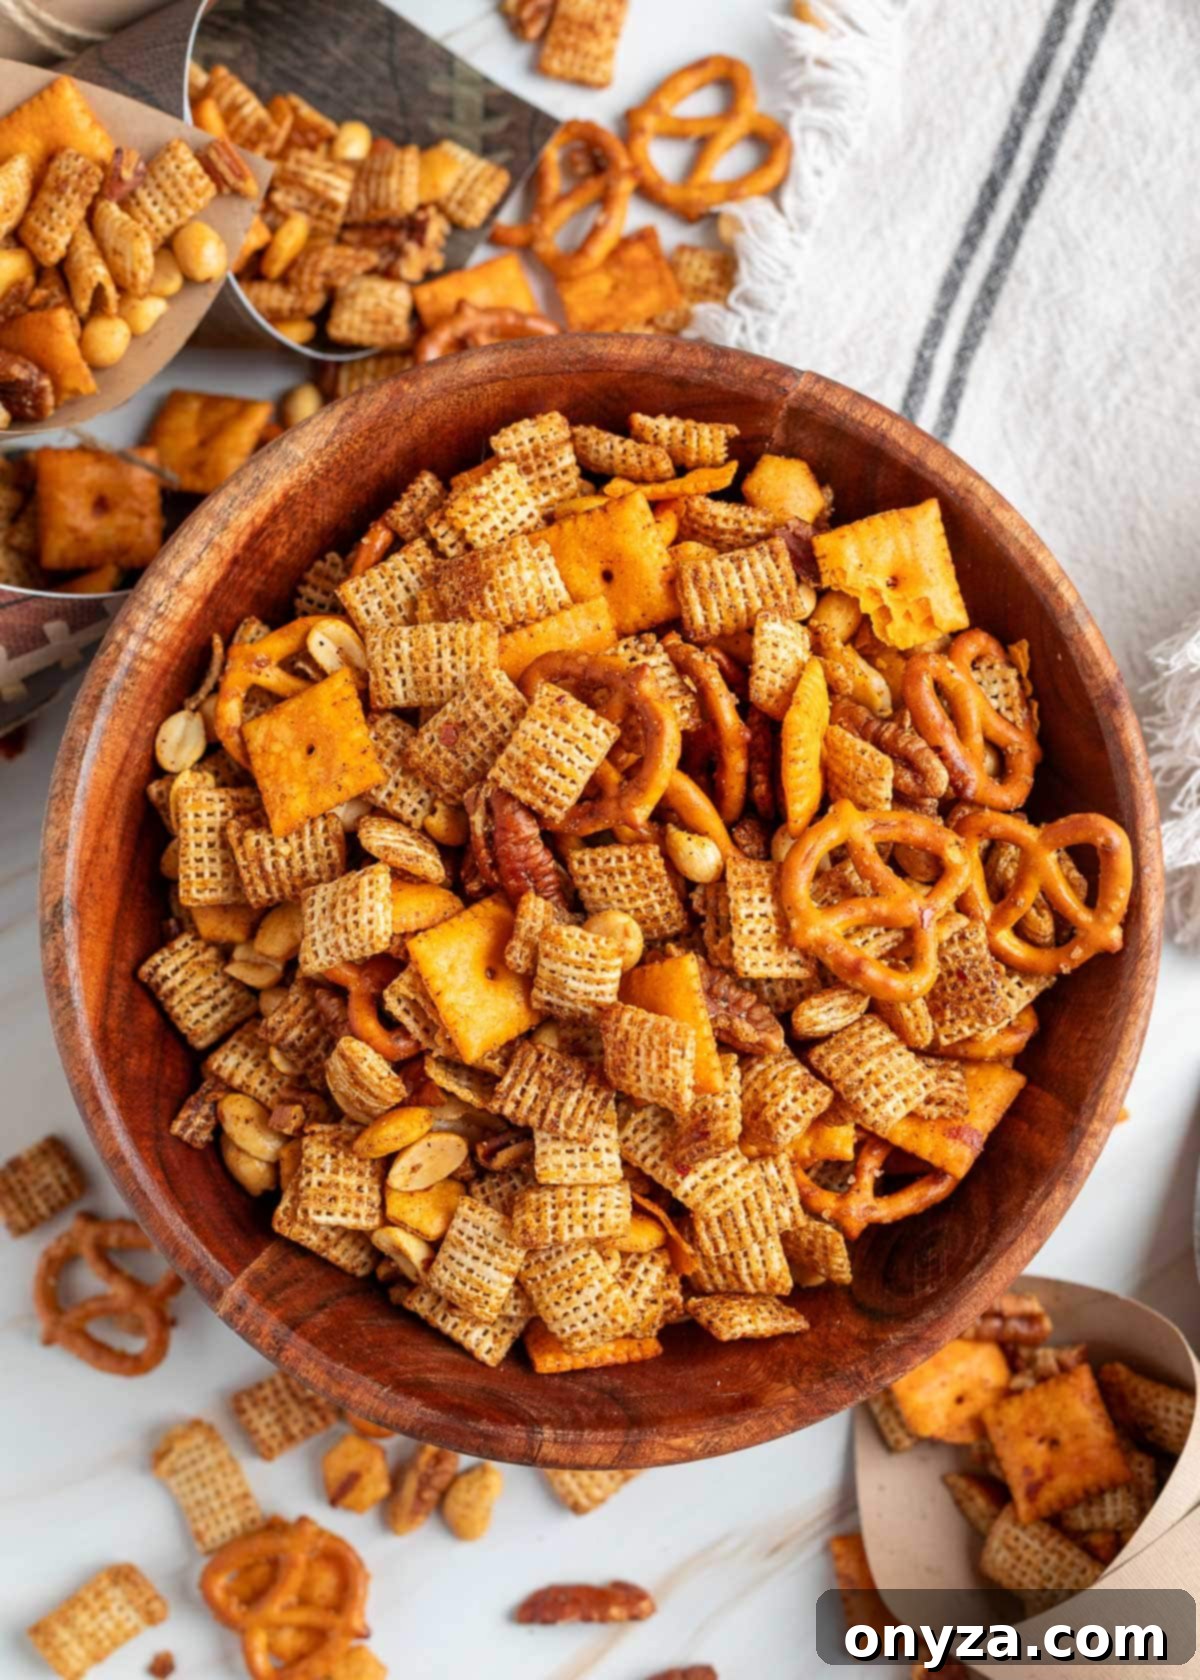
Welcome to the ultimate party centerpiece: a homemade BBQ Snack Mix that’s utterly irresistible. Imagine a delightful blend of smoky, crunchy, and subtly sweet sensations, all wrapped up in a bold seasoning that promises to be the star of any gathering. This isn’t just any ordinary snack mix; it’s a gourmet twist on a beloved classic, featuring an exciting medley of Chex cereal, crisp pretzels, savory cheese crackers, wholesome nuts, and airy oyster crackers. Each ingredient is generously coated in a rich, buttery, smoky-sweet glaze with just the right touch of warmth, making every bite an explosion of flavor. Perfect for game nights, casual get-togethers, or simply satisfying a savory craving, this BBQ Snack Mix is designed to impress and delight. Its robust flavor profile and satisfying crunch make it a standout addition to any snack table, ensuring guests will keep coming back for more.
Essential Tips Before You Begin
Preparing this incredible BBQ Snack Mix is straightforward, but a few key considerations will ensure your batch turns out perfectly crispy, flavorful, and ready for any occasion. These tips will help you optimize your preparation, baking, and storage for the best possible results.
- Choose the Right Mixing Bowl (or Two): This recipe yields a generous, party-sized quantity—approximately 15 cups of deliciousness. To ensure every piece is evenly coated with the buttery, smoky seasoning, a very large mixing bowl or a spacious roasting pan is essential. If your largest bowl isn’t quite big enough to accommodate all the ingredients comfortably, don’t hesitate to divide the snack base and seasoning between two bowls. Mixing in smaller batches ensures uniform coating, preventing any dry spots or overly saturated areas, which is crucial for achieving that perfect, consistent flavor.
- Cool Completely for Ultimate Crispness: Patience is a virtue, especially when it comes to snack mix! After baking, it’s absolutely vital to allow the BBQ snack mix to cool completely and undisturbed before you even think about storing it. Sealing warm snack mix too soon will trap steam inside the container, leading to condensation. This moisture is the enemy of crispiness, turning your perfectly crunchy treats soggy. Spreading the warm mix in a single layer on the baking sheets or a wire rack and letting it air-dry will allow it to continue crisping up as it cools, achieving that satisfying snap we all crave.
- Plan Ahead for Enhanced Flavor: One of the best qualities of this BBQ Snack Mix is that its flavors actually improve over time. While undeniably delicious straight out of the oven, the smoky-sweet seasoning blend truly develops and melds with the snack ingredients on the second day. This makes it an ideal make-ahead appetizer for holidays, game days, or any event where you want to minimize last-minute cooking stress. Preparing it a day in advance allows the complex BBQ notes to deepen, creating an even more harmonious and addictive snack experience for your guests.
- Prepare Your Baking Sheets Properly: For easy cleanup and to prevent sticking, always line your baking sheets with parchment paper. This simple step ensures that the buttery, sugary seasoning won’t bake onto your pans, and the snack mix will lift off effortlessly once it’s cooled. It also contributes to even baking and less chance of scorching.
Crafting the Perfect BBQ Snack Mix: A Step-by-Step Guide
Creating this irresistible BBQ snack mix is a fun and rewarding process. By following these easy steps, you’ll achieve a perfectly seasoned, crunchy, and utterly addictive treat that will be devoured in no time.
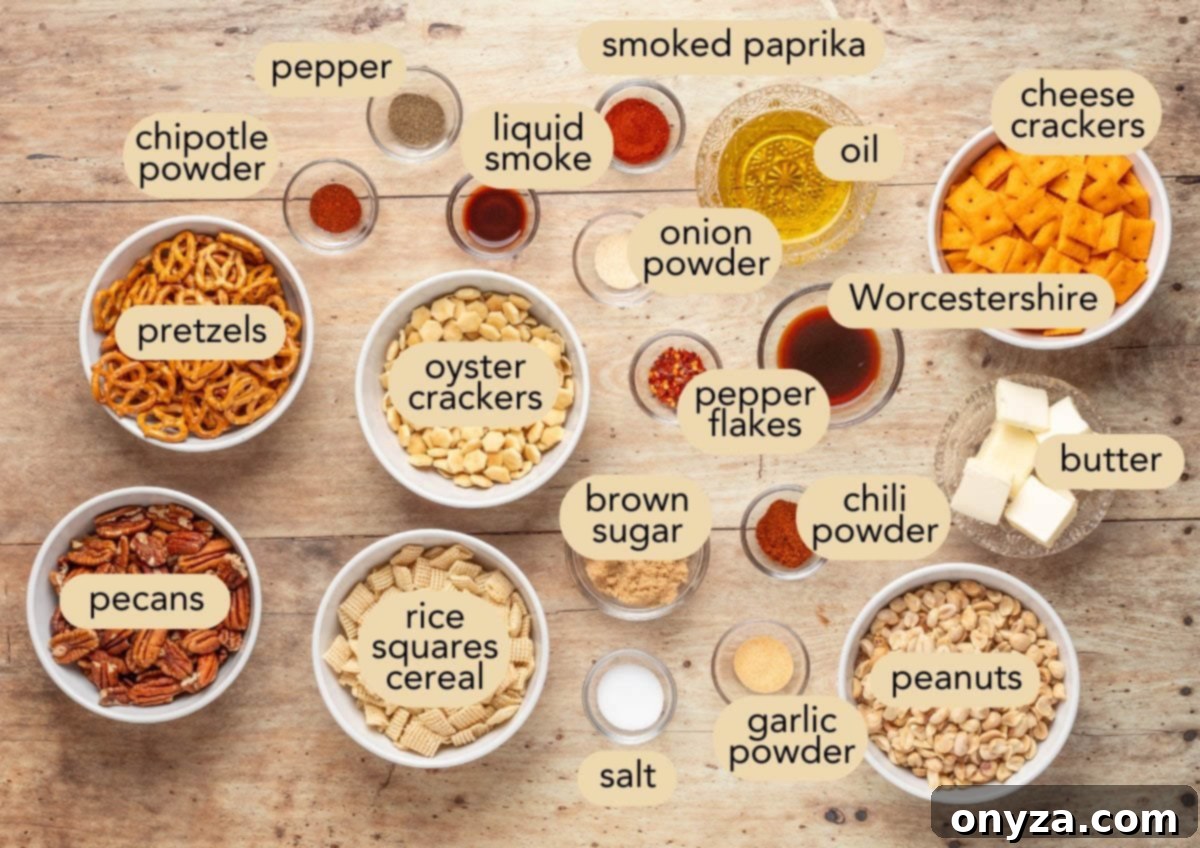
Step 1: Assemble the Flavorful Snack Base
Begin by preparing your foundation for this amazing mix. In your chosen large mixing bowl (or bowls, if dividing the batch), carefully add your square rice cereal, such as the classic Chex. This cereal provides a light, airy, and incredibly crispy base that readily absorbs the savory seasoning. For an added layer of texture and a subtle hint of sweetness, you can opt for a half-and-half mixture of both rice and corn Chex. The slight difference in flavor and crispness from corn Chex can elevate the overall experience.
Next, introduce the delightful crunch of mini pretzels. Whether you prefer the classic salted variety or butter snaps for an extra buttery note, pretzels contribute a wonderful salty counterpoint and an essential textural element. Follow this with Cheez-Its, which bring a sharp, tangy, cheesy flavor and a satisfying snap. These crackers are fantastic for soaking up the butter mixture and creating pockets of intense BBQ flavor.
Don’t forget the humble but mighty oyster crackers! These small, delicate crackers are perfect for this mix because their porous texture makes them ideal sponges for the smoky, buttery seasoning. They become wonderfully savory and crunchy, offering a unique contribution that sets this snack mix apart.
To enhance both flavor and texture, mix in pecan halves or pieces and lightly salted peanuts. As the mix bakes, these nuts will toast beautifully in the oven, intensifying their natural nutty flavors and adding a delightful richness and crunch that complements the crackers and cereal. You could also experiment with other nuts like cashews or almonds for variation.
Once all your chosen snack components are in the bowl, give them a few gentle tosses. The goal is to evenly distribute the different shapes and sizes, ensuring that each scoop offers a diverse and exciting blend of textures and flavors. Handle them with care to prevent excessive breakage, especially for the more delicate crackers.
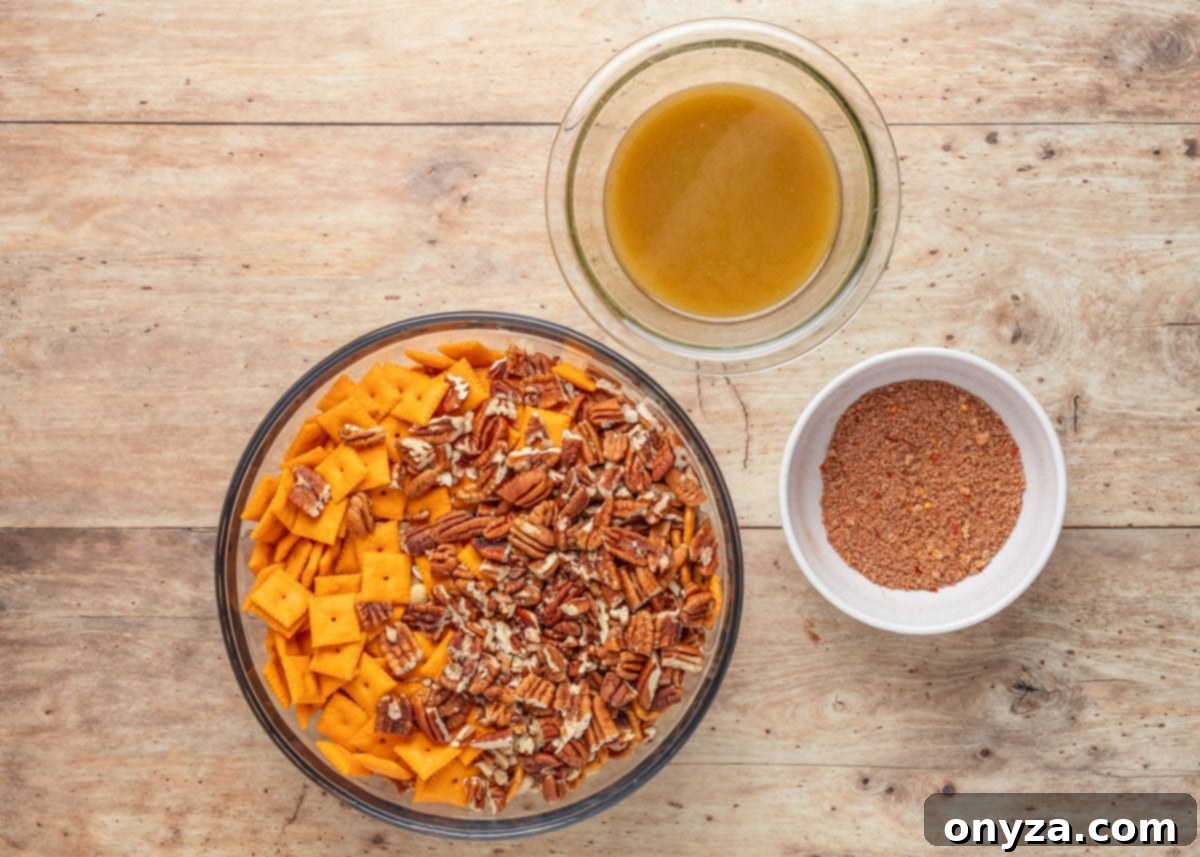
Step 2: Craft the Irresistible Smoky BBQ Seasoning
The heart of this BBQ Snack Mix lies in its incredible seasoning. In a separate small bowl or a liquid measuring cup, combine the rich base: melted unsalted butter and a touch of regular olive oil. It’s important to use “pure” or regular olive oil, not extra-virgin, as its neutral flavor won’t overpower the delicate spice blend. Alternatively, a neutral oil like canola or avocado oil works wonderfully. The butter is crucial for adding a luxurious richness and depth, while the oil plays a vital role in helping the snack mix achieve that coveted crisp texture as it bakes in the oven.
Now, it’s time to whisk in the “flavor builders” that give this party mix its signature smoky, tangy, and subtly spicy BBQ character:
- Worcestershire Sauce: This classic condiment is a powerhouse of savory umami depth, adding a complex tang that truly elevates the overall flavor profile. It’s essential for that authentic BBQ taste.
- Liquid Smoke: To achieve that deep, outdoor grill-like smokiness without the grill, liquid smoke is key. I highly recommend Colgin Hickory Liquid Smoke for its smooth, rounded, and natural smoke flavor. Since it often contains vinegar and molasses, it also contributes a subtle sweetness and tang that perfectly complements the other ingredients. If you’re using a stronger, more concentrated brand like Wright’s, which is typically just smoke and water, be sure to reduce the amount slightly to prevent the smoke flavor from becoming overwhelming.
- Light Brown Sugar: A critical component for balance, light brown sugar introduces a gentle sweetness that beautifully counteracts the heat and tang from the other seasonings. It also aids in creating a lovely caramelization on the snacks during baking, enhancing both color and flavor.
- Aromatic Spices: This blend is carefully curated for a deep, smoky-savory vibe:
- Smoked Paprika: The foundation of the smoky flavor profile, providing warmth and a beautiful reddish hue.
- Garlic Powder & Onion Powder: These essential aromatics create a savory base, adding depth and complexity to the overall seasoning.
- Red Pepper Flakes: For a touch of controlled heat and a visual pop, these flakes introduce a gentle warmth that builds with each bite.
- Mild Chili Powder: A blend of various chili peppers and other spices, chili powder contributes a nuanced, earthy heat and a broader spectrum of flavor.
- Chipotle Powder: This spice is a game-changer, offering not just heat but a distinct, earthy, and smoky pepper flavor that deepens the BBQ character.
- Salt and Freshly Ground Black Pepper: Fine table salt is essential for seasoning and enhancing all the other flavors, while freshly ground black pepper adds a pungent kick and aromatic freshness.
Once all ingredients are in the bowl, whisk vigorously until the mixture is completely smooth. Ensure that the brown sugar has dissolved and all the spices are thoroughly and evenly distributed throughout the melted butter and oil. This step is crucial for consistent flavor in every single piece of your snack mix.
Step 3: Evenly Coat the Snack Mixture
With your flavor-packed seasoning ready, it’s time to coat your snack base. This step requires a bit of care to ensure every piece gets its fair share of the delicious glaze. Gradually pour the buttery seasoning mixture over the cereal, crackers, and nuts. Don’t dump it all at once! Instead, drizzle a few spoonfuls at a time, then immediately begin stirring the snack mix with a sturdy rubber spatula.
Continue this process—drizzle a little, then toss gently but thoroughly—until you’ve used all the seasoning and every single piece of the snack mix appears lightly coated and glossy. This gradual approach is key to achieving an even distribution without oversaturating certain areas or leaving others dry. If you’ve opted to work with two separate bowls, remember to give the seasoned butter mixture a good whisk between pours to prevent the spices from settling at the bottom, ensuring both batches are equally flavorful.
By the time you’re finished, you should see a light, lustrous coating on all the ingredients, with no visible puddles of seasoning left in the bottom of your mixing bowl. This indicates a perfectly coated snack mix, ready for baking.
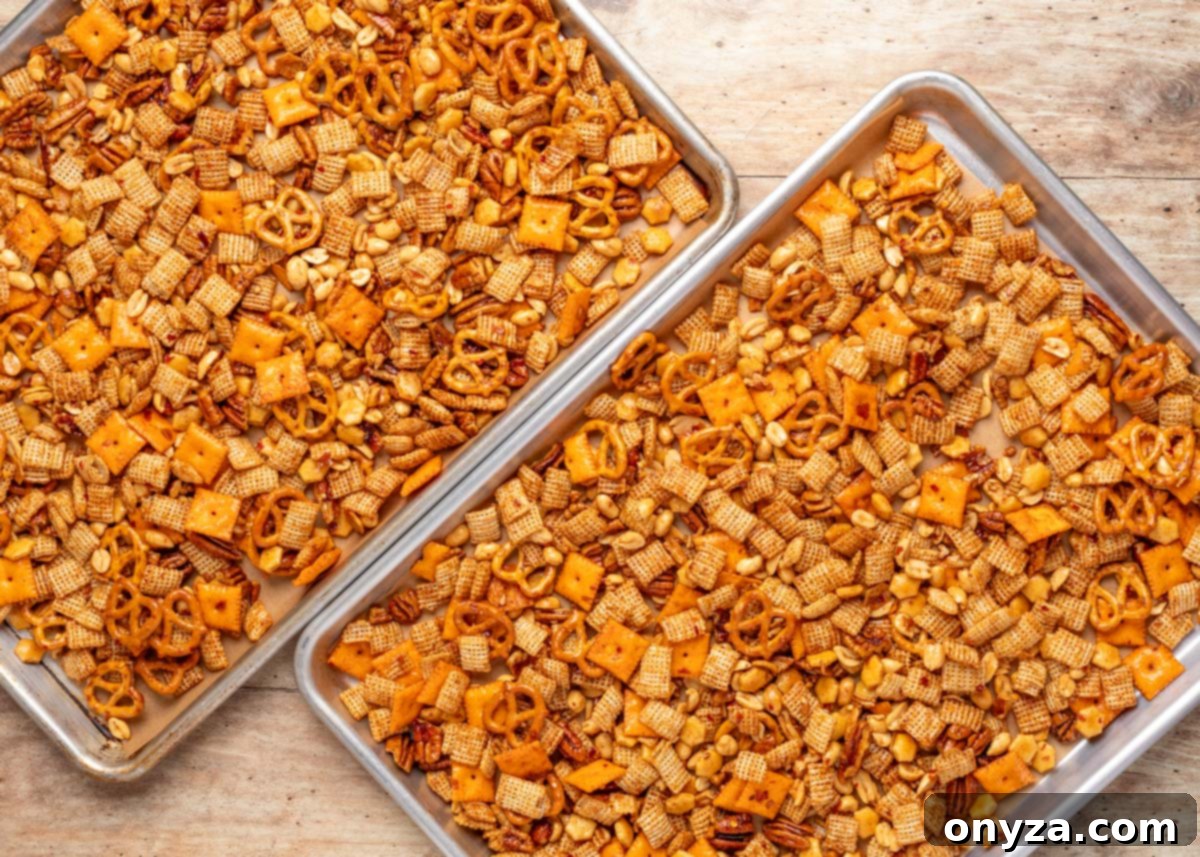
Step 4: Bake to Perfection – Low and Slow
Now for the magical transformation! Carefully spread your seasoned snack mix onto two parchment-lined half sheet pans. It’s essential to arrange the mix in an even, relatively thin layer across both pans. Avoid overcrowding, as this is critical for achieving optimal crispiness. Once evenly spread, place both pans into your preheated 250°F (120°C) oven and bake for approximately 45 to 50 minutes.
The “low and slow” baking method is intentional. Baking at a lower temperature for a longer duration allows the snacks to slowly dry out and toast, resulting in an incredibly crisp texture without burning the delicate ingredients. During this baking time, it’s crucial to stir the mix every 15 minutes. This regular stirring ensures that all sides of the snack pieces are exposed to the heat, promoting uniform toasting and crisping throughout. This also prevents any single part from getting overcooked or sticking to the parchment paper.
Even though this recipe yields a large batch, baking on two shallow pans is far superior to piling everything into one deep roasting pan. A deep pan can trap steam, which hinders the crisping process and can result in a soggy or unevenly toasted mix. Spreading it out on two pans allows for better air circulation and consistent heat exposure, guaranteeing perfectly crisp results every time.
When your BBQ snack mix is ready, it should be lightly golden brown and fill your kitchen with an absolutely incredible aroma. The spices will be fragrant and the snacks visibly toasted. Once removed from the oven, resist the urge to immediately transfer or taste it. Let the mix cool completely on the pans. As it cools, it will continue to firm up and crisp, achieving that irresistible crunch that makes this snack so addictive. Only once it’s fully cooled should you proceed to serving or storage.
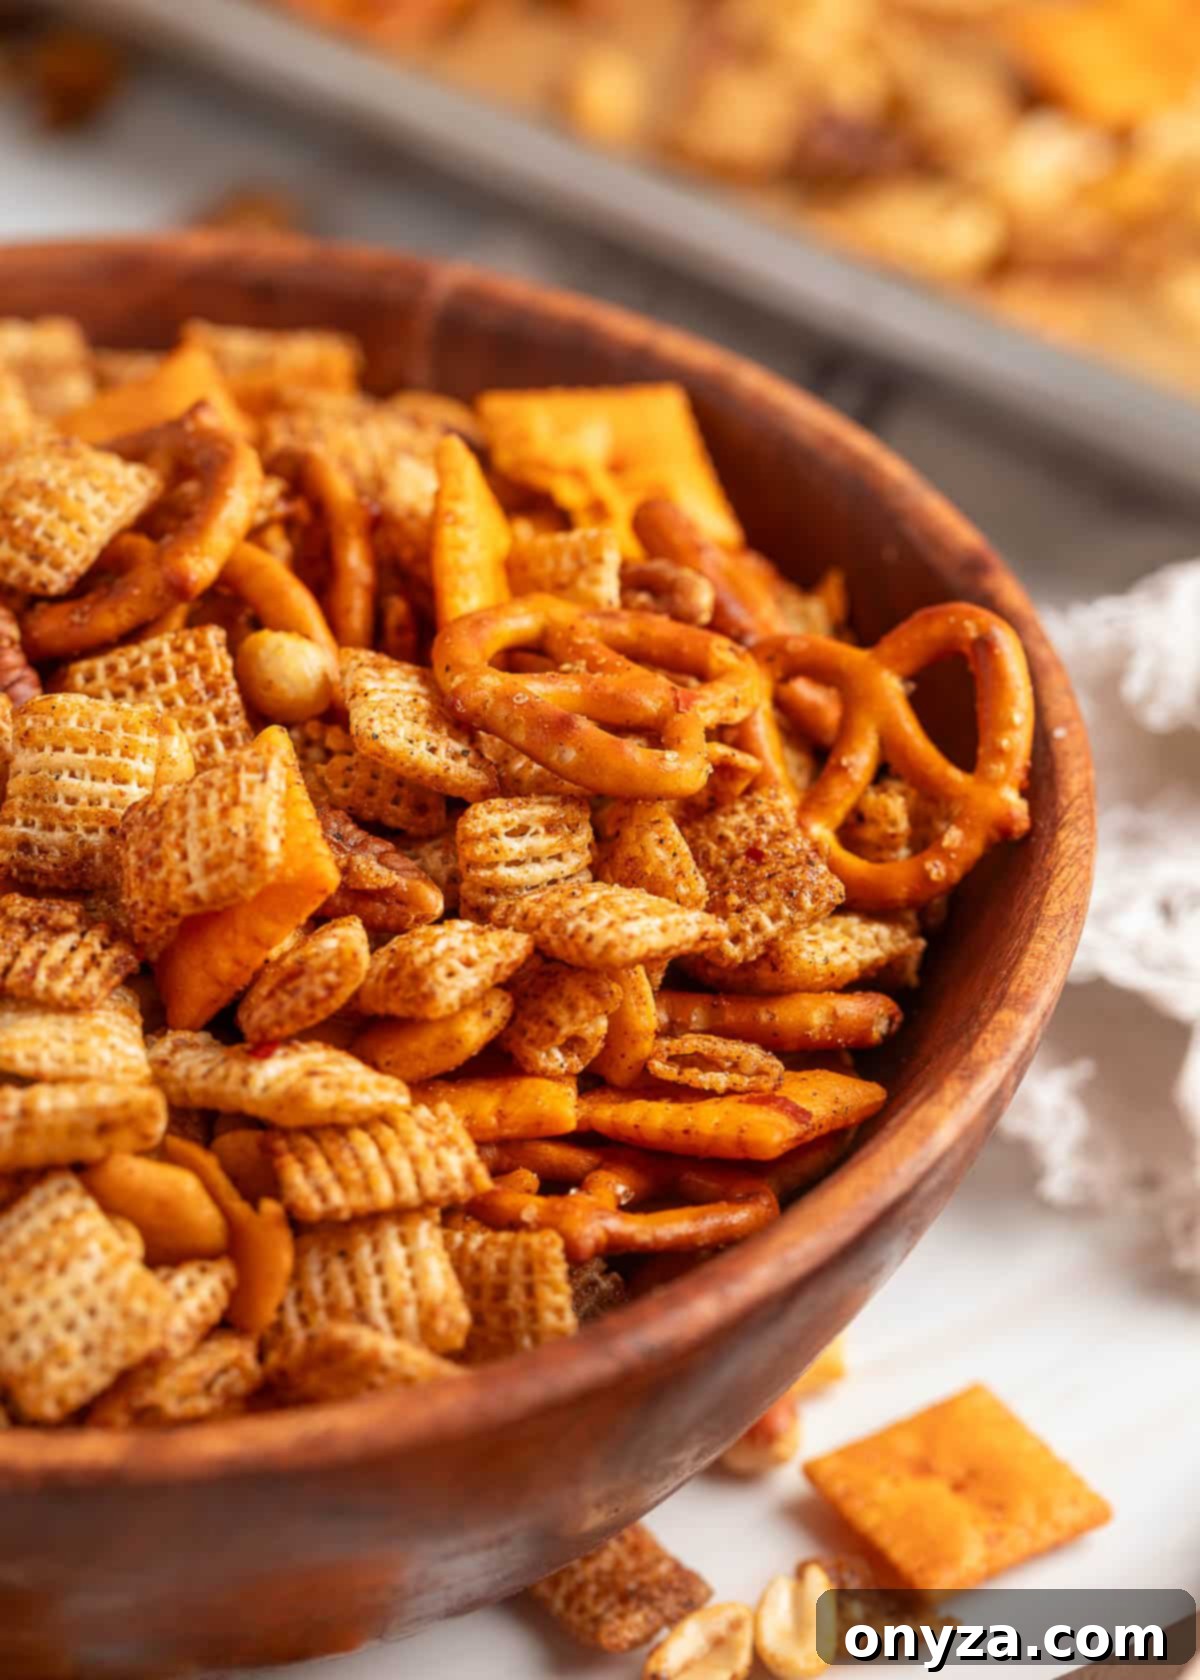
Preserving Freshness: Storing Your BBQ Snack Mix
Proper storage is key to maintaining the delightful crunch and robust flavor of your homemade BBQ Snack Mix. Once your snack mix has cooled completely to room temperature, it’s ready for storage to keep it fresh and delicious for as long as possible.
For everyday enjoyment and to maintain its crisp texture, transfer your cooled BBQ Snack Mix into airtight containers or sturdy zip-top bags. Stored this way, it will remain fresh and flavorful for approximately one week at room temperature. However, in most households, this irresistible treat rarely lasts that long!
If you’ve made a particularly large batch or wish to enjoy this savory snack over a longer period, it freezes exceptionally well. Simply transfer the completely cooled mix into freezer-safe bags or containers. When properly sealed, it can be stored in the freezer for up to 1 month. Freezing is an excellent option for meal prepping snacks or ensuring you always have a delicious treat on hand for unexpected guests.
Should you find that your snack mix has lost some of its initial crispiness after thawing from the freezer or if it’s been sitting out for a while, don’t worry—it’s easy to revive! Simply spread the mix back onto a parchment-lined baking sheet in a single layer. Warm it in a 250°F (120°C) oven for about 10 to 15 minutes, keeping a close eye on it to prevent burning. This gentle warming process will help dry out any moisture and restore its wonderful crunch. As always, let the mix cool completely on the pan before serving again to allow it to fully crisp up.
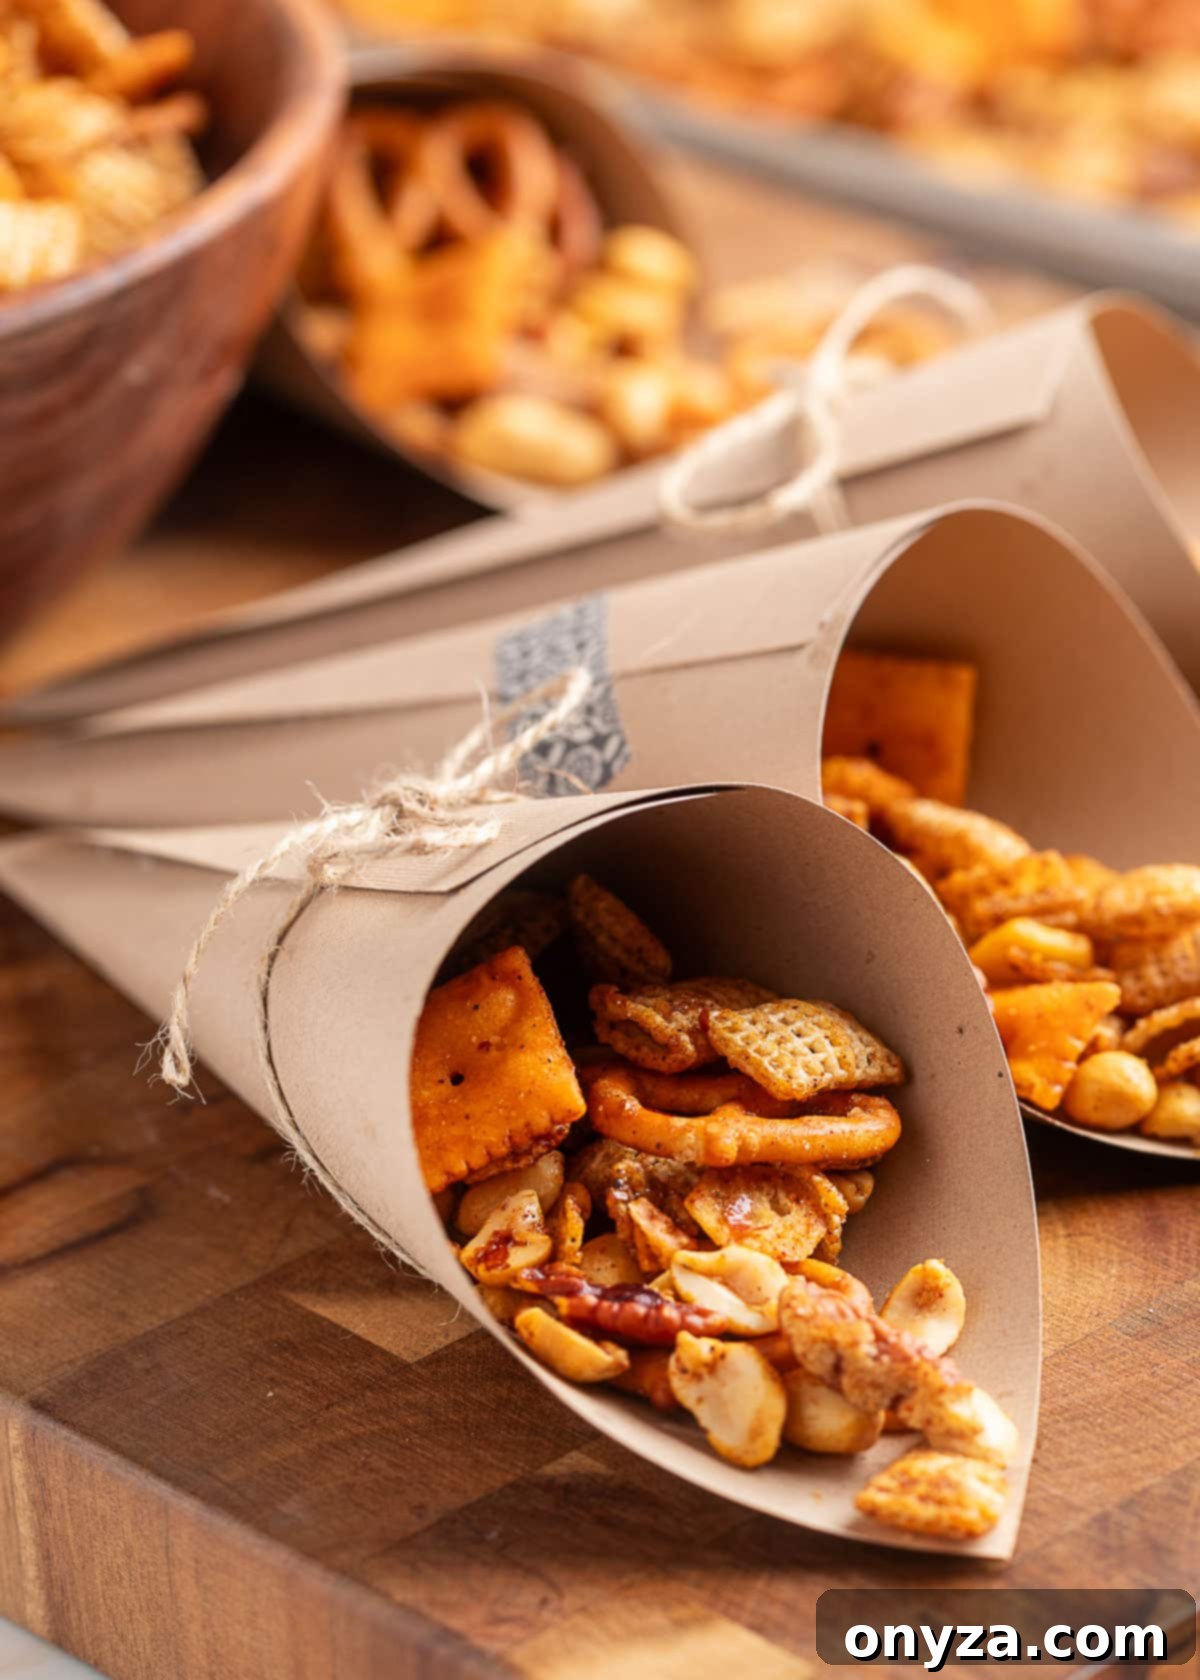
Creative Ways to Serve Your BBQ Snack Mix
This BBQ Snack Mix is not only incredibly delicious but also wonderfully versatile in how it can be served. Its savory, crunchy appeal makes it perfect for a wide array of occasions, from casual family evenings to lively celebrations. Here are some serving tips to make your snack mix shine:
- Classic Community Bowl: For a relaxed atmosphere, such as a game day gathering, a casual movie night, or an informal get-together with friends, simply pour the entire batch into one large, attractive serving bowl. Alternatively, use several smaller bowls strategically placed around your entertaining space. This encourages guests to mingle and easily grab handfuls as they chat and move around.
- Individual Portions for Convenience: When hosting events like tailgates, backyard barbecues, or any party where guests might be on the move, pre-portioning the mix is a fantastic idea. Scoop individual servings into charming paper cups or snack cones (tied with twine for an extra touch of flair!). This method is not only hygienic but also makes it easy for guests to grab their own portion without needing communal serving utensils.
- Self-Serve Station: For a slightly more interactive approach, set out your big bowl of BBQ snack mix alongside a stack of empty paper cups or cones and a small scoop. This allows guests the pleasure of filling their own portions, making it a fun and practical solution for any party setting.
- Complementary Pairings: This bold snack mix pairs wonderfully with a variety of beverages. Think crisp, cold beers, refreshing iced tea, or even a sparkling cider. The smoky and sweet notes also complement a wide range of dips, though it’s often perfect on its own.
- Travel-Friendly Treat: Pack individual bags for road trips, picnics, or school lunches. It holds up well and provides a satisfying, flavorful snack on the go.
However you choose to present it, this BBQ Snack Mix is guaranteed to be a hit, bringing smiles and satisfied crunching to everyone who tries it!
More Irresistible Recipes for Snacking by the Handful
If you loved this BBQ Snack Mix, you’ll surely enjoy these other hand-held snack sensations, perfect for any occasion:
- Spiced Pepitas
- Cajun Spiced Mixed Nuts
- Ranch Crackers with Dill
BBQ Snack Mix: The Ultimate Party Appetizer
Author: Amanda Biddle
Smoky, crunchy, a little sweet, and with just enough spice—this BBQ Snack Mix offers a bold and exciting twist on the classic party favorite! Packed with savory pretzels, crispy cheese crackers, wholesome nuts, and a tantalizing smoky butter seasoning, it’s the perfect treat for parties, game days, or any time you crave a seriously satisfying snack.
Prep Time: 15 minutes
Cook Time: 45 minutes
Total Time: 1 hour
Yields: 30 servings (approximately ½ cup per serving)
Ingredients
For the Snack Mix
- 6 cups rice squares cereal (such as Chex – see notes)
- 2 cups mini salted pretzels
- 2 cups cheese crackers (e.g., Cheez-It)
- 2 cups lightly-salted dry roasted peanuts
- 2 cups pecan halves or pieces
- 1 cup oyster crackers
For the Smoky BBQ Seasoning
- ½ cup unsalted butter, melted
- ¼ cup regular olive oil (or other neutral oil – see notes)
- 2 tablespoons Worcestershire sauce
- 2 to 3 teaspoons smoked paprika (adjust to taste – see notes)
- 3 to 4 teaspoons hickory liquid smoke (adjust based on concentration – see notes)
- 3 tablespoons light brown sugar, lightly packed
- 1½ teaspoons table salt
- 1½ teaspoons crushed red pepper flakes (optional, for heat)
- 1 teaspoon garlic powder
- 1 teaspoon onion powder
- 1 teaspoon mild chili powder
- ¾ teaspoon freshly-ground black pepper
- ¼ teaspoon chipotle powder (optional, for smoky heat)
Instructions
- Prepare the Oven & Pans: Preheat your oven to 250°F (120°C). Line two half-sheet pans with parchment paper for easy cleanup and to prevent sticking.
- Combine Snack Base: In a very large mixing bowl (or divide ingredients between two bowls if necessary), combine the rice cereal, pretzels, cheese crackers, oyster crackers, peanuts, and pecans. Toss gently to ensure all components are evenly mixed.
- Whisk the Seasoning: In a smaller bowl or liquid measuring cup, stir together the melted butter and regular olive oil. Whisk in the Worcestershire sauce, liquid smoke, light brown sugar, and all the spices (smoked paprika, salt, red pepper flakes, garlic powder, onion powder, chili powder, black pepper, and chipotle powder) until the mixture is smooth and all ingredients are thoroughly blended.
- Coat the Mix: Gradually drizzle the prepared buttery seasoning mixture over the snack components in the large bowl(s). As you drizzle, continuously toss the mixture with a rubber spatula to ensure everything is lightly and evenly coated. If working with two bowls, whisk the seasoning well between pours to prevent spices from settling at the bottom. Continue until all snack ingredients are covered in a glossy, light coating with no excess liquid remaining.
- Bake to Crisp: Spread the coated snack mixture evenly onto the two prepared parchment-lined baking pans in a single layer. Bake for 45 to 50 minutes, stirring the mix thoroughly every 15 minutes, until it is lightly golden brown and wonderfully crisp. The snack mix will continue to crisp further as it cools.
- Cool & Store: Allow the BBQ snack mix to cool completely on the pans before serving or transferring to storage. Once cooled, store it in airtight containers or zip-top bags at room temperature for up to 1 week, or freeze for up to 1 month for longer preservation.
Notes
- Cereal Choice: You can use all Rice Chex, or a combination of Rice and Corn Chex. Corn Chex adds a subtle hint of sweetness and a slightly different crisp texture, which many find appealing.
- Oil Selection: For the best results, use “pure” regular olive oil (often labeled as cooking olive oil), not extra-virgin olive oil, as its stronger flavor can alter the taste of the seasoning. Alternatively, any neutral-tasting oil like canola, vegetable, or avocado oil would be suitable.
- Smoked Paprika: The recipe suggests 2 to 3 teaspoons of smoked paprika. This range allows you to customize the intensity of the smoky flavor. Use 2 teaspoons for a milder smoke, or bump it up to 3 teaspoons for a bolder, more pronounced BBQ note. The freshness and potency of your paprika can also affect the final taste, so adjust to your preference.
- Liquid Smoke: I recommend Colgin Hickory Liquid Smoke (using 4 teaspoons) for its balanced, smooth, and slightly sweet-tangy smoke flavor. If you are using a more concentrated brand (like Wright’s, which is typically just smoke and water), start with a smaller quantity (e.g., 2-3 teaspoons) and adjust carefully to avoid overpowering the mix.
- Customize the Heat:
- For a Spicier BBQ Mix: Increase the amount of crushed red pepper flakes and/or chipotle powder, or add a small pinch of cayenne pepper for an extra kick.
- For a Less Spicy Mix: Simply omit the crushed red pepper flakes and/or the chipotle powder entirely.
- Nut-Free Option: If you or your guests have nut allergies, you can easily make this mix nut-free. Simply omit the peanuts and pecans and substitute with additional pretzels, cereal, or other crispy crackers. For extra crunch and flavor (especially if nut-free), consider stirring in honey-roasted sesame sticks after the mix has finished baking and cooled slightly.
- Refreshing Thawed Mix: If you’re reheating frozen mix, or if it has softened, you can re-crisp it in the oven. Spread the mix on a parchment-lined baking sheet and warm it at 250°F (120°C) for 10 to 15 minutes. Always let it cool completely before serving to ensure maximum crispiness.
Nutrition Estimate
This nutrition information is an approximation. Each serving (approximately 0.5 cup) contains: Calories: 278 kcal | Carbohydrates: 25g | Protein: 6g | Fat: 18g | Saturated Fat: 4g | Polyunsaturated Fat: 3g | Monounsaturated Fat: 8g | Trans Fat: 0.1g | Cholesterol: 13mg | Sodium: 376mg | Potassium: 150mg | Fiber: 3g | Sugar: 3g | Vitamin A: 349IU | Vitamin C: 1mg | Calcium: 58mg | Iron: 3mg.
Please be aware that our recipes have been developed using the US Customary measurement system. We have not specifically tested these recipes for high altitude or high elevation cooking and baking. Adjustments to ingredients or cooking times may be necessary for areas at significantly higher altitudes.
Enjoyed this recipe? Please consider rating it and leaving a comment below to share your experience!
