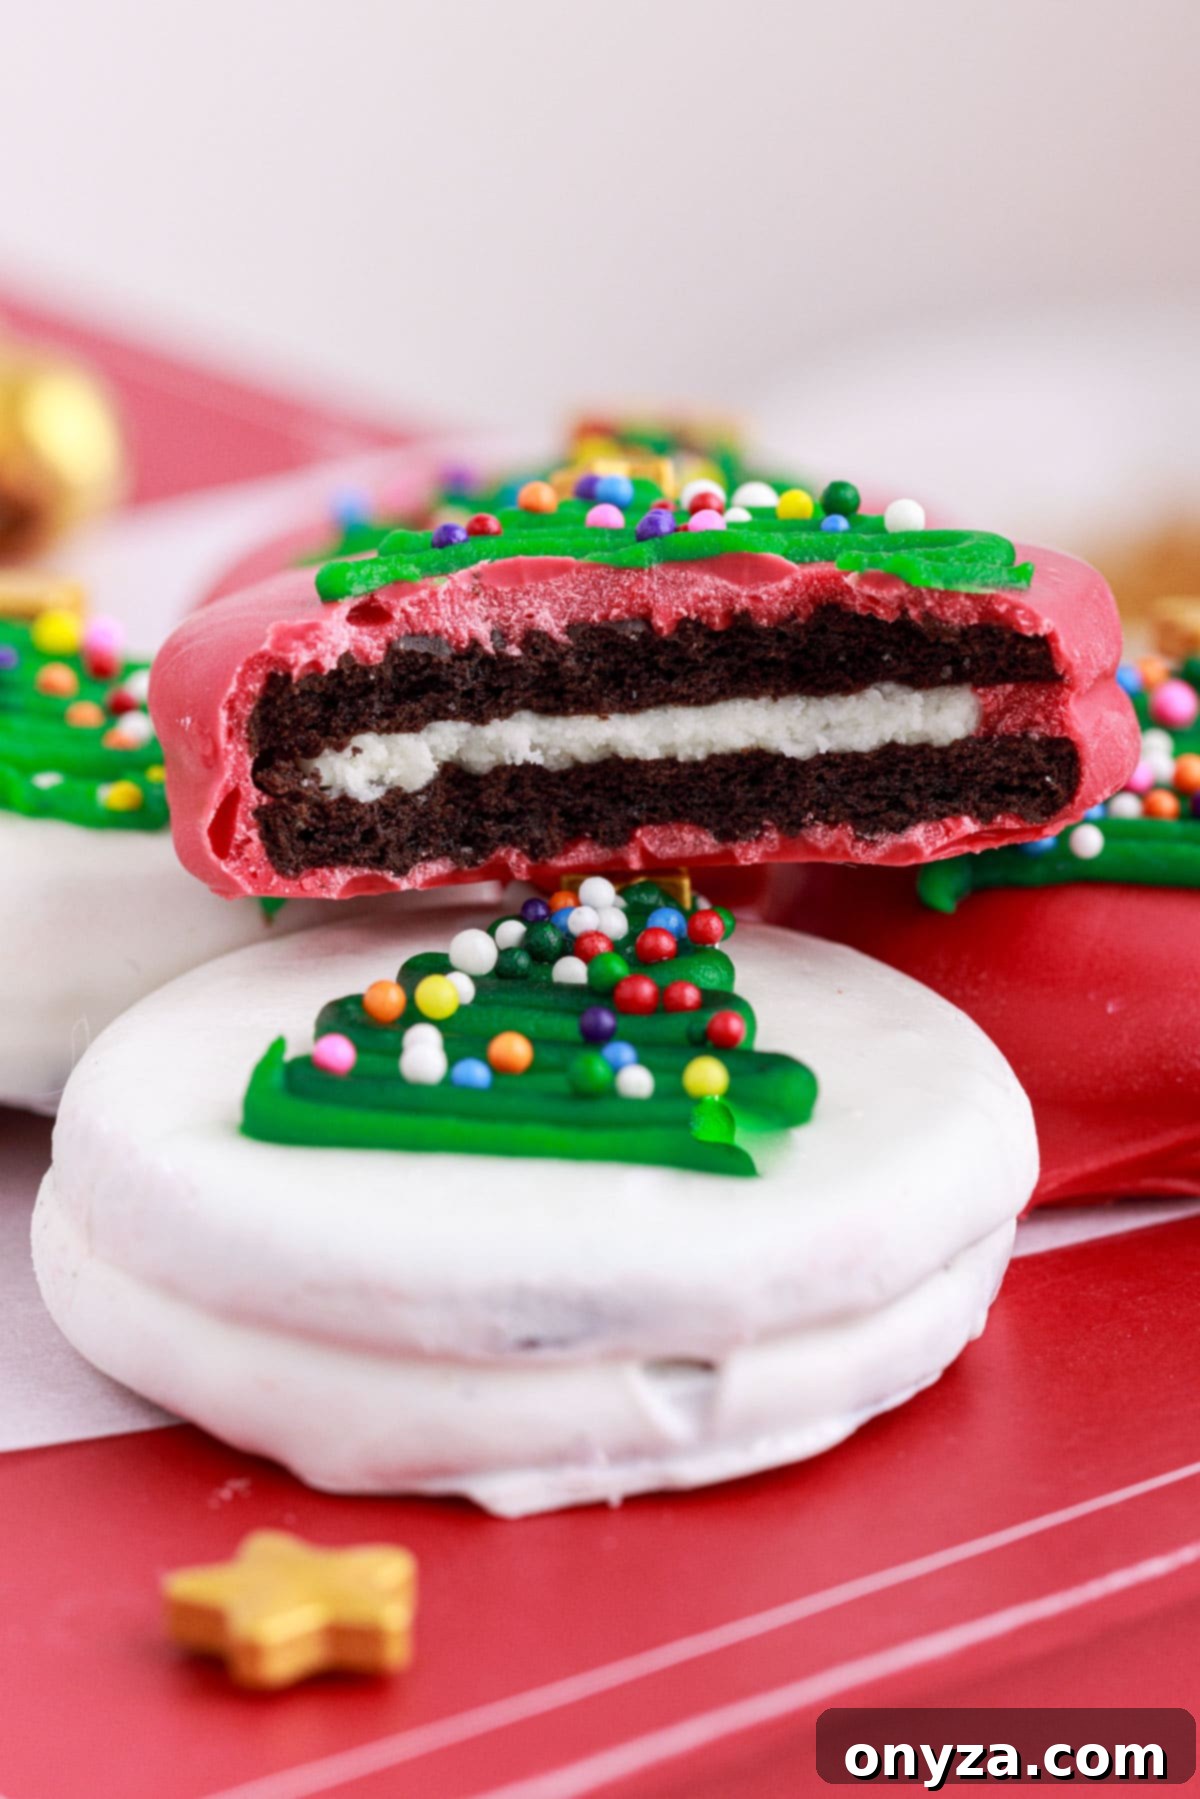
Elevate your holiday dessert spread with these utterly charming and effortlessly made Dipped Oreo Christmas Tree Cookies. These festive treats are a delightful combination of classic chocolate sandwich cookies, vibrant red and white candy melts, and simple yet enchanting Christmas tree decorations. Perfect for bringing extra cheer to any holiday gathering, these cookies are not only fun to make with the entire family but also incredibly enjoyable to eat. Their appealing look and delicious taste make them an instant favorite, embodying the spirit of the season in every bite. Whether you’re hosting a festive party, contributing to a cookie exchange, or simply looking for a joyful kitchen activity, these dipped Oreos promise to deliver smiles and holiday magic.

This post contains affiliate links. As an Amazon Associate, I earn a commission (at no additional cost to you) from qualifying purchases made by clicking these links. As always, all recommendations and opinions expressed are my own.
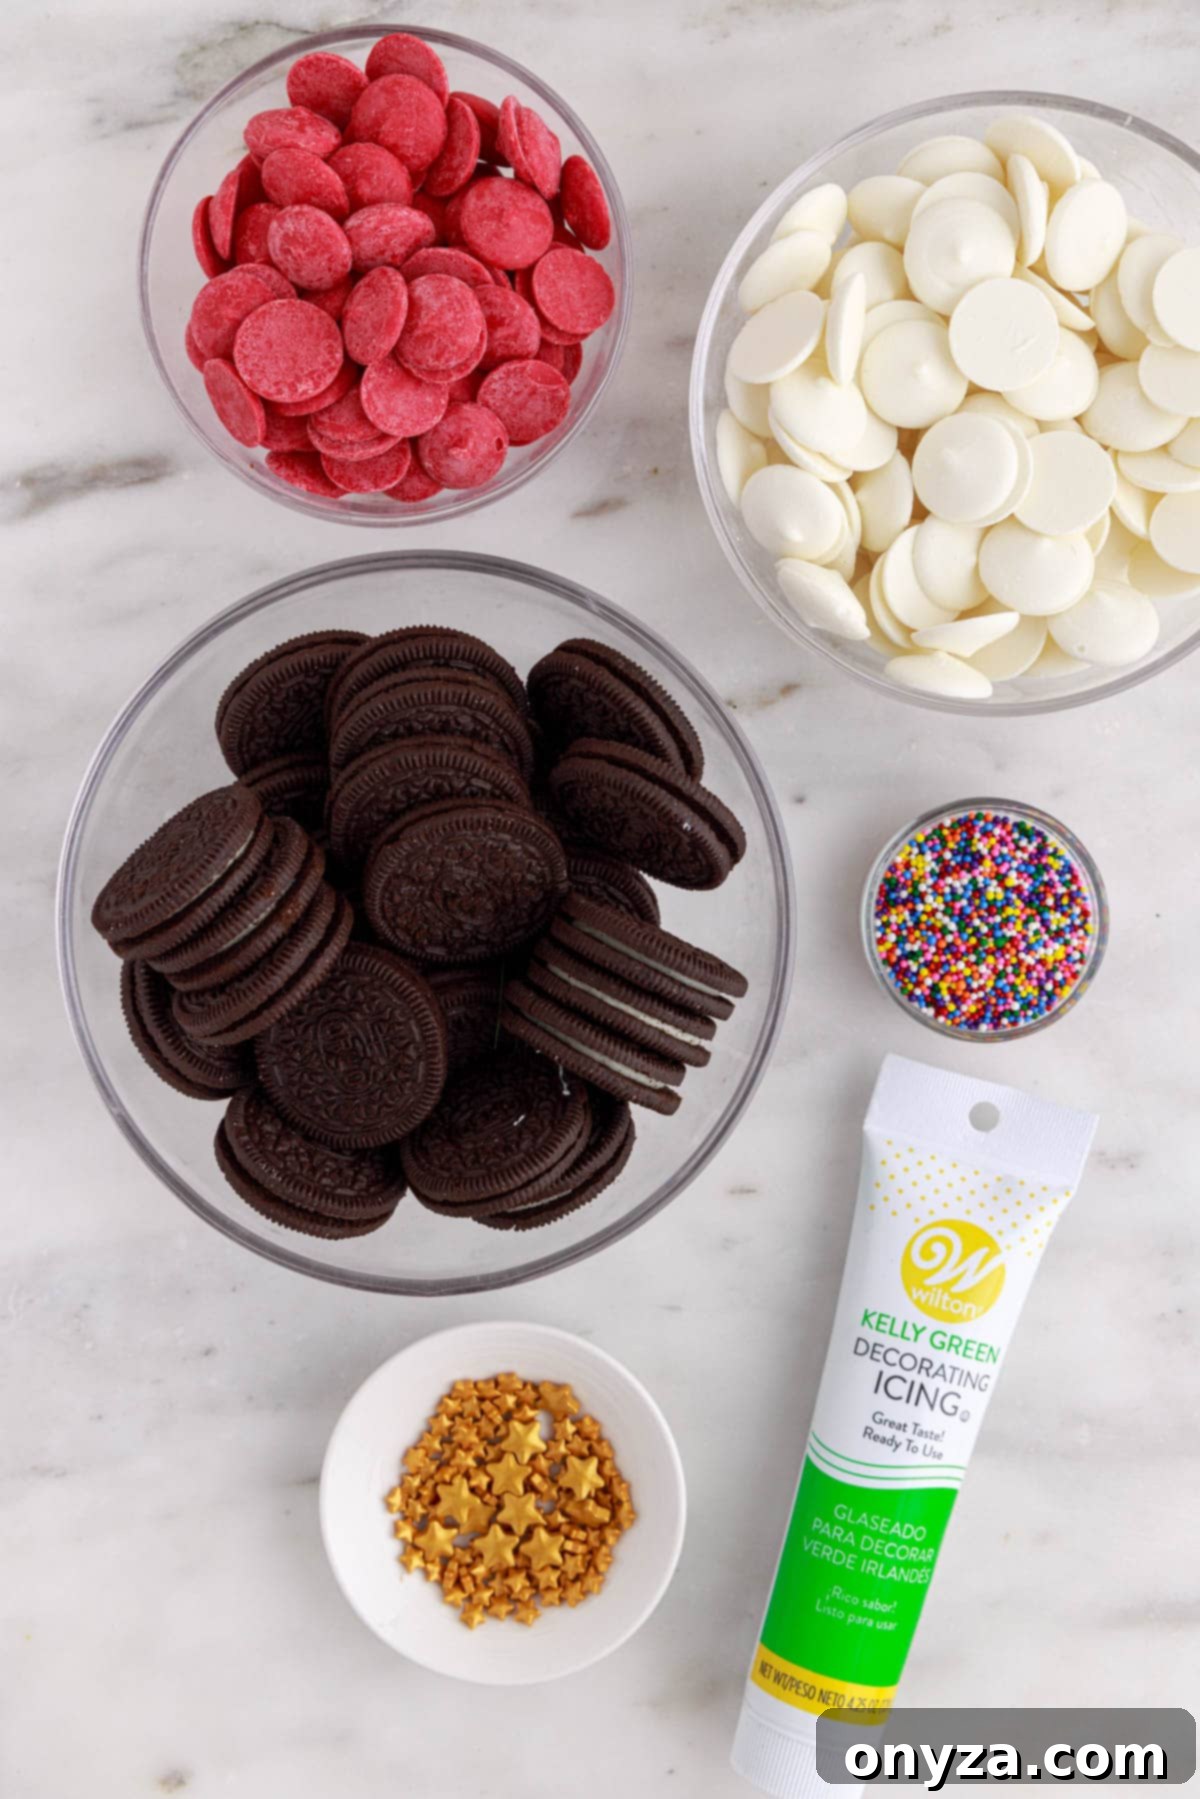
Essential Ingredients and Tools for Dipped Oreo Christmas Tree Cookies
Crafting these festive cookies requires just a few key ingredients and basic kitchen tools, making it an accessible project for bakers of all skill levels. Here’s a detailed look at everything you’ll need to create your own batch of dazzling holiday treats.
- Chocolate Sandwich Cookies (such as Oreos). The foundation of our delightful cookies! While classic Oreo cookies are always a hit, don’t hesitate to explore different flavors to add a unique twist. Imagine the rich flavor of Double Stuf Oreos for an extra creamy center, the refreshing zest of Mint Oreos, the deep indulgence of Chocolate Creme Oreos, or the sophisticated notes of Chocolate Hazelnut Oreos. Any variety will provide a delicious base for the candy coating and decorations.
- Red and White Candy Melts. These specialized confections are specifically formulated for melting and dipping, ensuring they set quickly to a solid, smooth, and vibrant coating. Unlike regular chocolate, candy melts are easy to work with and don’t require tempering, making them ideal for this simple recipe. You can typically find them in the baking aisle of most grocery stores, at craft supply stores like Michaels or Hobby Lobby, and readily available for order online. We recommend Wilton Red Candy Melts and Wilton White Candy Melts for their consistent quality and beautiful finish.

- Green Decorating Icing. This is essential for piping the whimsical Christmas trees onto your dipped cookies. A tube of ready-to-use decorating icing, especially brands like Wilton, is perfect for this project. Wilton tubes often feature an adaptable tip, allowing you to attach any standard-sized piping tip for various decorating designs. For these cookies, a small round piping tip works best to create the tree shape. It’s crucial to avoid using “gel writers” as they are typically too thin and runny, making them prone to smearing and less ideal for structured designs. Look for decorating icing tubes in the baking aisle of your grocery store, at craft stores, or online, such as Wilton Kelly Green Decorating Icing.
Homemade Icing Option: If you prefer a homemade touch, you can certainly use your favorite crusting frosting recipe. A classic American Buttercream, dyed a vibrant green with gel food coloring, works wonderfully. Alternatively, a Piping Royal Icing offers a harder finish, providing excellent detail and stability for your festive trees. Just ensure your homemade icing is stiff enough to hold its shape when piped.
- Multicolored Nonpareil Sprinkles and Gold Star Sprinkles. These tiny adornments transform simple icing trees into dazzling Christmas masterpieces. Nonpareils, with their small, round, and colorful shape, act as perfect “lights” for your trees, adding a playful burst of color. They are widely available in the baking sections of grocery stores, at craft stores, and on Amazon, such as Wilton Rainbow Nonpareils. Gold star sprinkles, on the other hand, provide that essential “tree topper” sparkle, completing the festive look. These can sometimes be a bit more specialized, typically found at craft stores, dedicated sprinkle shops, or online. Sugar Deco Shiny Metallic Sequin Confetti Sprinkles are a great option for these stars. For an extra touch of visual interest, consider sourcing star sprinkles in two different sizes to vary the decorations across your batch. The contrasting colors and textures of these sprinkles are what truly make these cookies shine.
*Important Note: When selecting decorative sprinkles and candies, especially for cookies intended for young children, always check the recommended age guidelines on the product packaging. This ensures that any small, hard candies or sprinkles do not present a choking hazard, prioritizing the safety and enjoyment of all who partake in these delightful holiday treats. Your good judgment, combined with product information, is key to a safe and festive celebration.

Crafting Your Festive Dipped Oreo Christmas Tree Cookies: A Step-by-Step Guide
The beauty of these Christmas Tree Oreos lies in their simplicity. The process is straightforward and incredibly rewarding, involving just two main stages: dipping and decorating. Get ready to transform ordinary sandwich cookies into extraordinary holiday masterpieces!
Dipping the Oreos: Achieving a Perfect Candy Coating
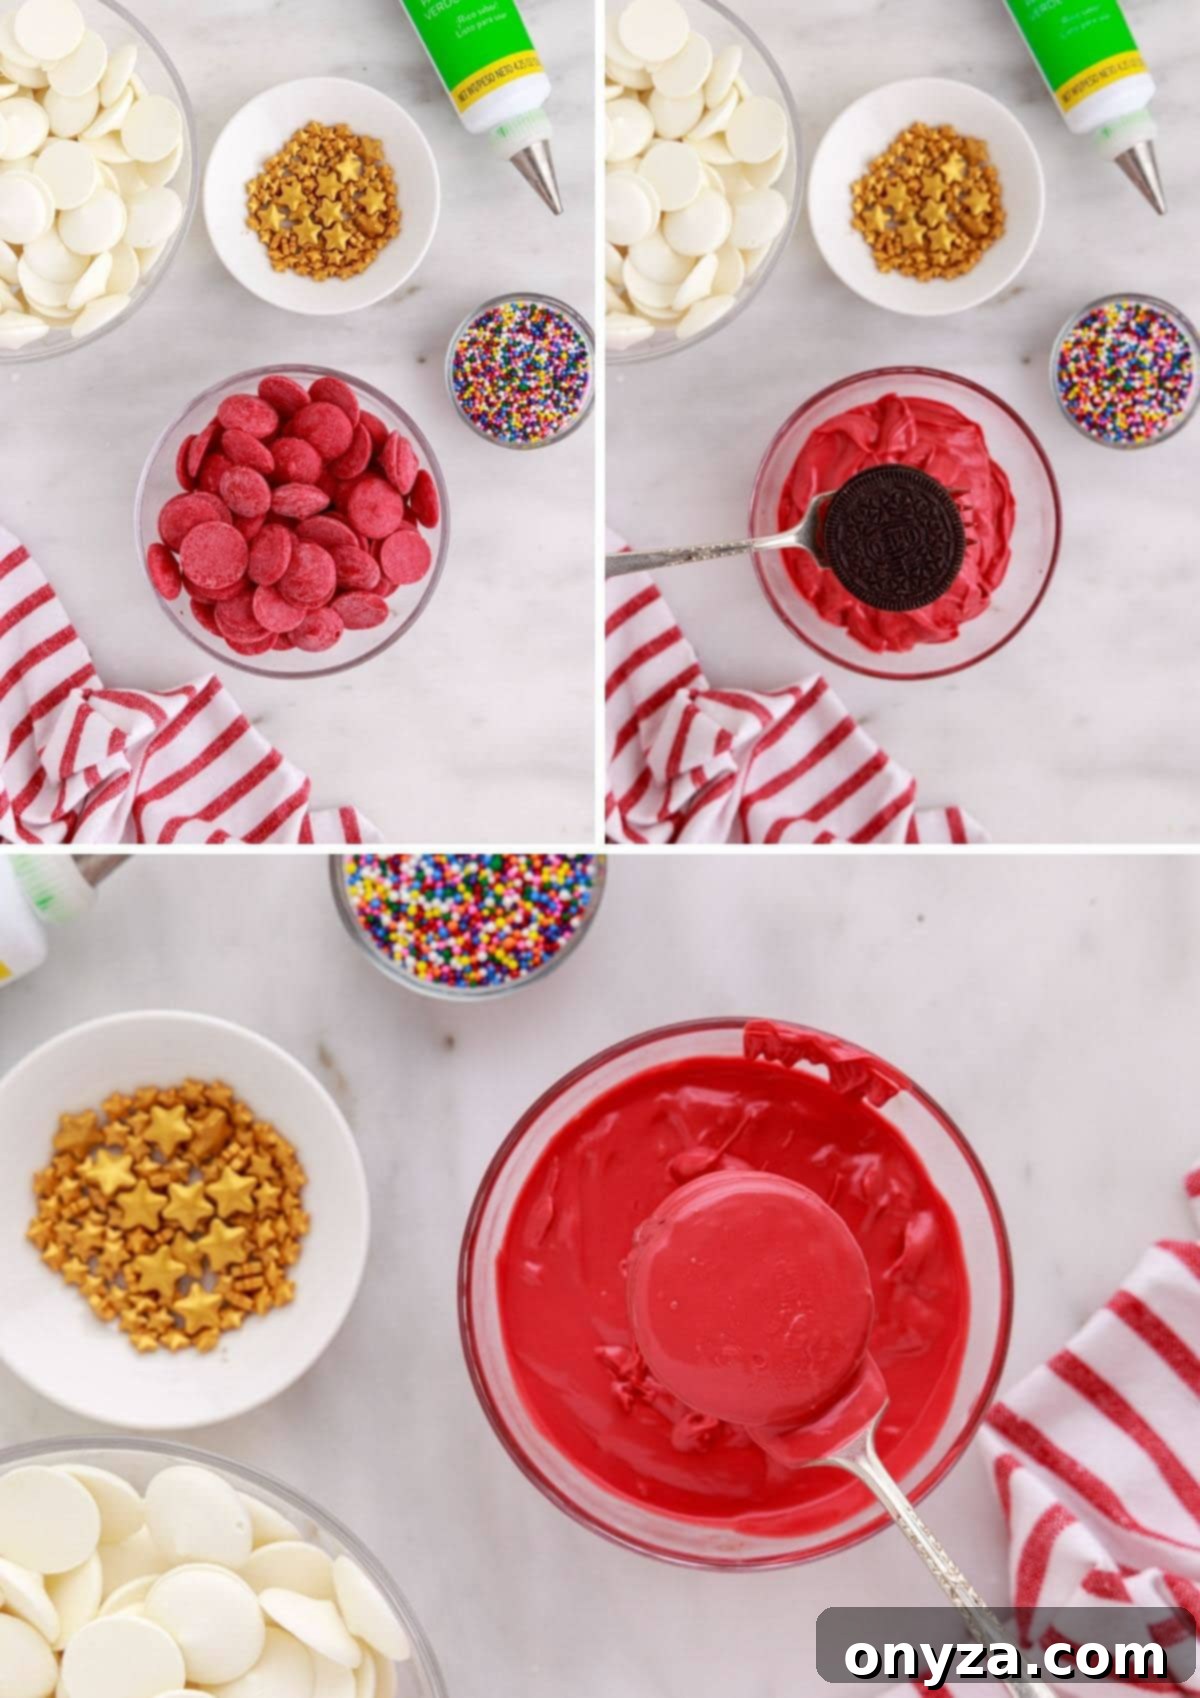
The first step is to prepare your vibrant candy coatings. Begin by melting the red and white candy melts in separate, microwave-safe bowls, carefully following the package directions. For optimal results, use the microwave in short 30-second increments at half power, stirring thoroughly after each interval to prevent overheating. Alternatively, a double boiler setup on the stovetop provides a gentle, even heat for melting the candy. Both methods are effective, but consistent stirring and careful temperature control are key.
When working with candy melts, precision is important. Exercise caution not to overheat them, as this can cause the candy to become thick, lumpy, or even burn. Similarly, ensure no water comes into contact with the melting candy, as even a tiny drop can cause the candy to “seize up,” turning it into a stiff, unusable mess. If this happens, or if your melted coating appears too thick to smoothly cover the cookies, don’t despair!
Troubleshooting Candy Melts: If your candy melts seize or become too thick, there are solutions. Wilton offers a product called EZ Thin Dipping Aid, which is specifically designed to help restore a smooth, dippable texture. Alternatively, you can stir a small amount of solid vegetable shortening into the melted wafers. Wilton typically recommends a ratio of about 2 tablespoons of shortening per 12-ounce bag of candy melts. Add it gradually, stirring until you achieve the desired consistency.
Once your candy is perfectly melted and smooth, it’s time for the dipping. Gently insert a fork or a sturdy toothpick between the two cookie layers of an Oreo. Carefully submerge the entire cookie into one of the bowls of melted candy, rotating it to ensure it’s fully coated on all sides. Lift the cookie out of the bowl, allowing any excess coating to drip back into the bowl for a few seconds. This helps achieve a clean, even layer. Once the dripping subsides, carefully place the coated cookie onto a baking sheet lined with parchment paper. Parchment paper is crucial here as it prevents the cookies from sticking and makes for easy removal once set.
As you continue to dip the rest of your batch, you’ll notice that the candy melts in the bowls will naturally begin to cool and thicken. This is normal but can make it challenging to achieve that perfectly smooth coating. If the candy becomes too thick, simply rewarm it in the microwave in 15-second increments at half power, stirring well after each interval, until it returns to a fluid, dippable consistency.
Continue this process, alternating between the red and white candy coatings, until all your Oreo cookies are beautifully dipped. Once dipped, the cookies need time to set and harden. For best results and to speed up the process, transfer the parchment-lined baking sheets to the refrigerator for 10-20 minutes, or until the candy coating is completely firm to the touch. A fully set coating provides a stable canvas for your holiday decorations.

Decorating Your Dipped Oreo Cookies with Festive Christmas Trees
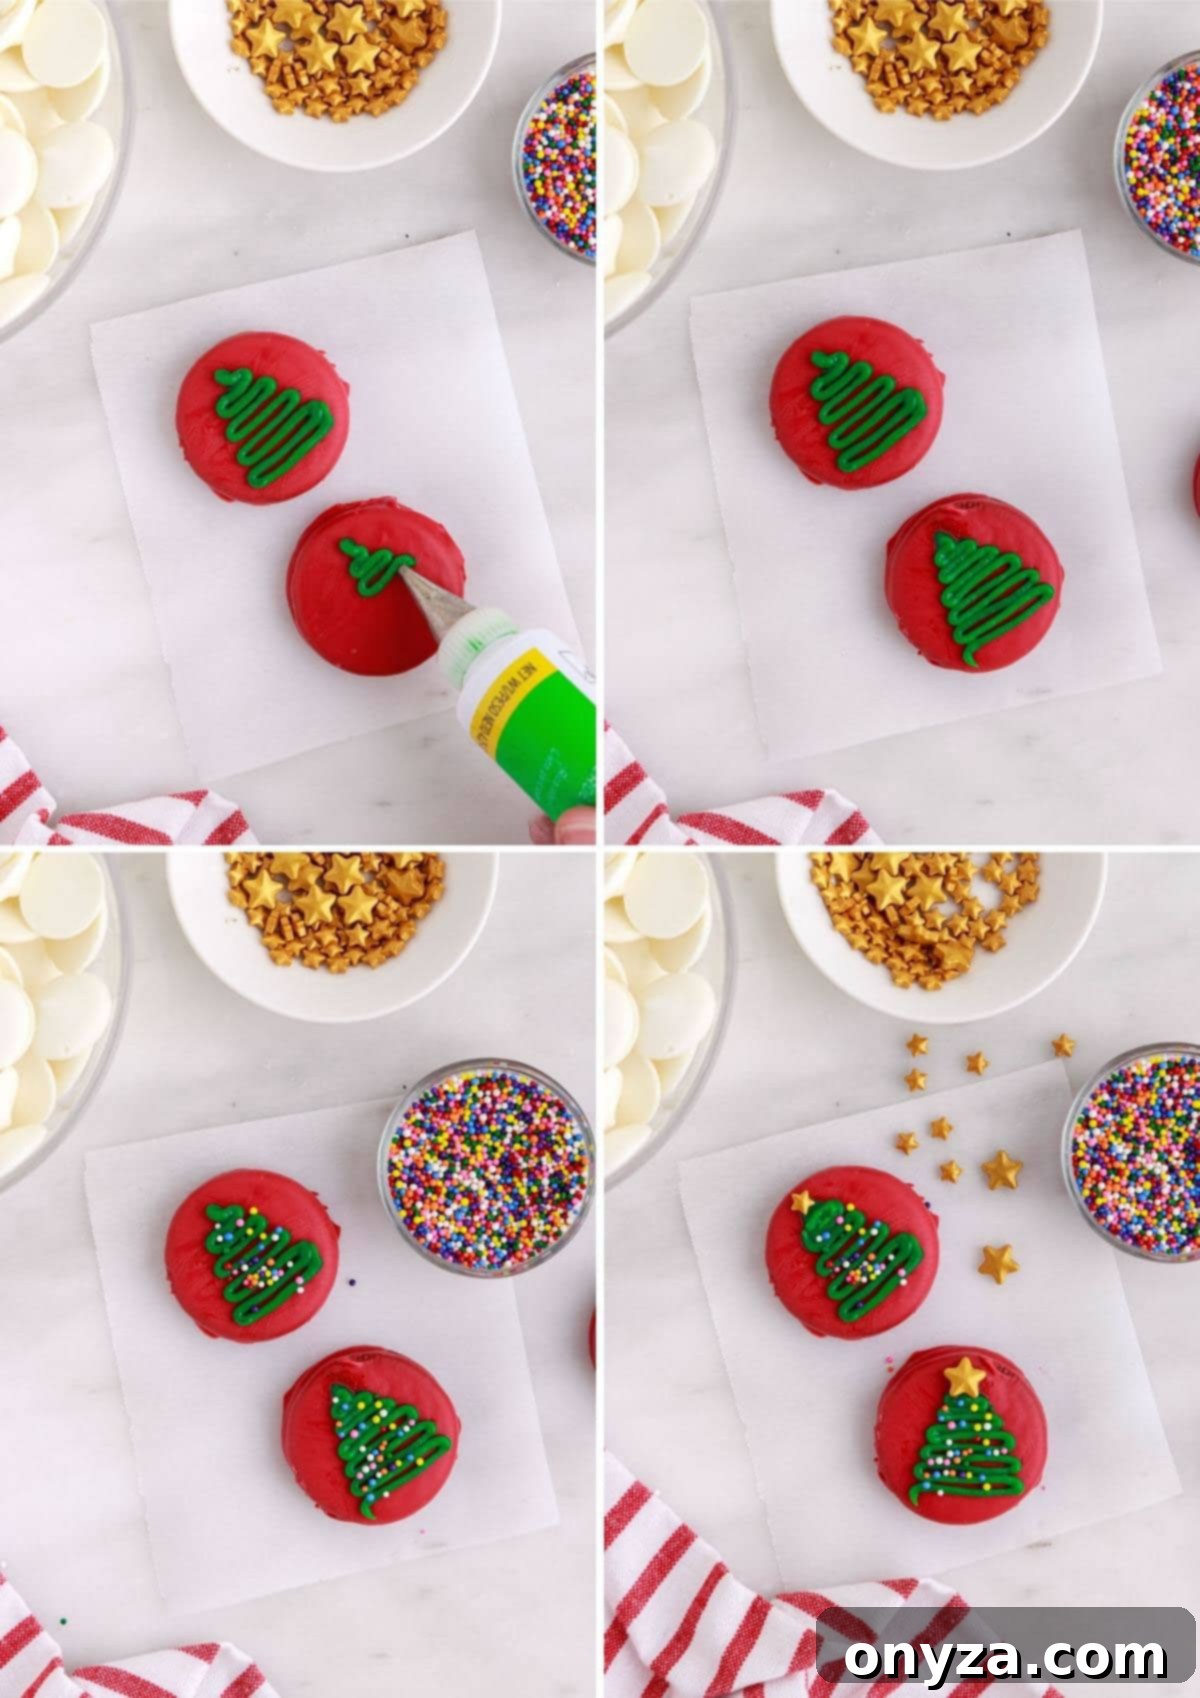
With your candy-coated cookies perfectly set, the fun part begins: decorating! This is where you can unleash your creativity and truly bring these Christmas treats to life. To create the charming Christmas trees, attach a small round piping tip to your tube of green decorating icing. If you don’t have a piping tip, you can snip a very small corner off the icing bag for a similar effect, though a tip offers more control.
Hold the icing tube steadily and, starting near the top center of each cookie, begin to draw a “squiggle” design. Use a small back-and-forth motion, gradually widening with each pass as you move downwards to form the base of the tree. The motion should mimic drawing a zig-zag line, with each subsequent zig-zag slightly wider than the last, creating the classic triangular Christmas tree shape. The goal is to create a delightful, slightly whimsical tree, so don’t worry about perfection—each unique tree will add to the charm of your holiday tray.
Once the green icing tree is piped, quickly sprinkle the multicolored nonpareils over the fresh icing. These will adhere immediately, acting as vibrant “lights” on your Christmas tree. Finally, carefully place a gold star sprinkle at the very top of each icing tree, giving it that iconic tree topper sparkle. It truly is that easy to create a batch of stunning, festive cookies that look like they came straight from a professional bakery!

Frequently Asked Questions About Dipped Christmas Oreo Cookies
Here are some common questions and helpful answers to ensure your cookie-making experience is as smooth and successful as possible.
Q. Can I use real chocolate to dip the cookies instead of candy melts?
A. Yes, absolutely! However, using real chocolate requires a slightly different approach to ensure a smooth, shiny, and stable coating. You’ll need to temper the chocolate first, a process that involves carefully heating and cooling the chocolate to stabilize its cocoa butter crystals. This prevents blooming (white streaks) and ensures a crisp snap. For detailed instructions on this technique, check out resources like How to Temper Chocolate from Epicurious. If tempering feels too advanced, a fantastic alternative is to use high-quality chocolate melting wafers. Brands like Ghirardelli produce wafers specifically designed for easy melting and dipping, similar to candy melts, offering a rich chocolate flavor without the tempering fuss. They come in delicious milk chocolate, dark chocolate, and white chocolate varieties.
Q. How do I store these dipped Oreo cookies and how long will they last?
A. To maintain their freshness and appealing appearance, store your Dipped Oreo Christmas Tree Cookies in an airtight container at room temperature. They will remain fresh and delicious for 1 to 2 weeks. For the best presentation, particularly to avoid smudging the delicate icing trees, it’s advisable to store the cookies in a single layer rather than stacking them. While the green decorating icing will form a crust, it typically will not harden completely, making careful handling beneficial for preserving their festive look. If you need to stack them, place a piece of parchment paper between layers.
Q. Can kids help make these cookies?
A. These cookies are a perfect family activity during the holiday season! Absolutely, this recipe is wonderfully designed for family participation, allowing everyone to contribute to the festive fun. We recommend that adults, teens, and tweens handle the dipping of the cookies into the melted candy melts, as this step requires a bit more precision and careful handling of warm ingredients. Younger, school-aged children, however, will absolutely love taking charge of drawing the icing trees and adding the colorful sprinkles. With a little assistance if needed, they can unleash their creativity and proudly decorate their own cookies. As with any kitchen activity involving children, always use your best judgment regarding age-appropriate tasks and supervise closely to ensure safety and enjoyment for all the little helpers amongst your friends and family.

These delightful Dipped Oreo Christmas Tree Cookies offer a fantastic way to celebrate the holiday season, combining ease of preparation with undeniable festive charm. They are sure to be a cherished addition to your holiday traditions, creating sweet memories along with delicious treats. Gather your loved ones, don your aprons, and get ready to create some holiday magic in your kitchen!
More Festive Cookies for Your Holiday Season
- Classic Peanut Butter Blossoms
- Elegant White Chocolate Chai Shortbread Cookies
- Irresistible Chocolate Peanut Butter Chip Cookies
- Decadent Chocolate Hazelnut Thumbprint Cookies with Raspberries
CRAVING MORE? Subscribe to my newsletter for weekly recipe inspiration and join me on Facebook, Pinterest, and Instagram for the latest recipes and culinary news.

Dipped Oreo Christmas Tree Cookies
Ingredients
- 12 ounces red candy melts
- 12 ounces white candy melts
- 24 Oreo cookies
- 1 tube green decorating icing , 4.25 ounces (not “gel” writers)
- ¼ cup rainbow nonpareil sprinkles
- 24 gold star sprinkles *
Instructions
- Place the red and white candy melts in separate bowls and heat them according to the package instructions. You can use either a microwave (in 30-second increments at half power, stirring after each) or a double boiler. Be careful not to overheat the candy melts or allow any water to enter the bowls, as this can cause them to seize.
- Gently insert a toothpick or a fork between the two cookie layers of an Oreo. Dip the cookie into the melted candy, ensuring all sides are evenly coated. Tap off any excess coating and carefully place the dipped cookie onto a baking sheet lined with parchment paper. Repeat this process, alternating between red and white candy melts, until you have 12 red-dipped and 12 white-dipped cookies.
- Allow the cookies to sit until the candy coating is fully hardened. For quicker setting, you can place the baking sheets into the refrigerator for 10-20 minutes, or until the coating is firm to the touch.
- Attach a small round piping tip to the tube of green decorating icing. On the center of each dipped cookie, draw a “squiggle” to create a Christmas tree shape. Start with a small back-and-forth motion for the top of the tree, gradually widening the swirls as you move down to the tree’s base.
- While the icing is still wet, sprinkle the rainbow nonpareils over the piped tree to create “lights.” Then, carefully place a gold star candy at the very top of each icing tree.
- Store the finished cookies in a single layer in airtight containers at room temperature for 1-2 weeks to maintain freshness and prevent smudging of the decorations.
Notes
*When preparing these cookies, especially for or with children, always ensure to check the recommended consumption age on the packaging of any decorative sprinkles or candies you purchase. This, combined with your personal judgment, helps to ensure they do not pose a choking hazard for young children.
If you notice that the candy melts begin to thicken as you proceed with dipping the full batch of cookies, simply reheat them in the microwave at half power for brief 15-second intervals, stirring thoroughly after each to restore their smooth, dippable consistency.
Nutrition Estimate
Nutrition information is automatically calculated, so should only be used as an approximation.
Please note that our recipes have been developed using the US Customary measurement system and have not been tested for high altitude/elevation cooking and baking.
