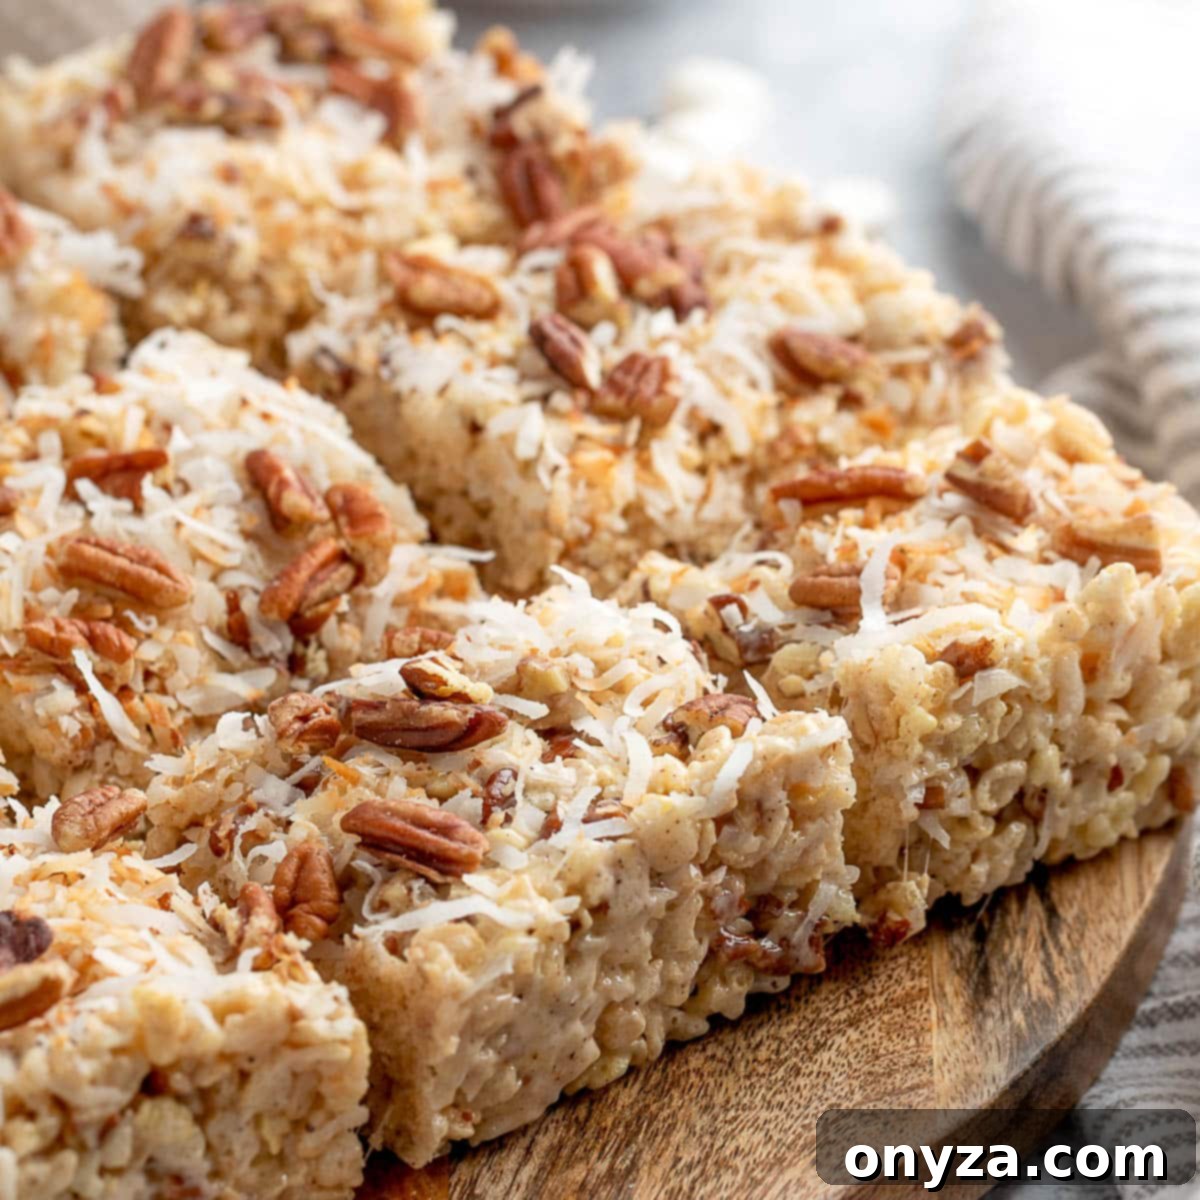
Welcome to a delightful twist on a cherished classic: **Gourmet Coconut Pecan Rice Krispie Treats**! These aren’t just any ordinary marshmallow treats; they’re an elevated experience, transforming a simple no-bake dessert into something truly special. Imagine the comforting chewiness you love, infused with the rich, nutty notes of brown butter, the aromatic crunch of toasted pecans, and the sweet, tropical essence of coconut. This recipe takes your childhood favorite and introduces a sophisticated flavor profile, making it an irresistible treat for any occasion.
Whether you’re looking for an effortless yet impressive dessert for holidays, a crowd-pleasing addition to your next potluck, or simply a quick, flavorful indulgence to brighten your day, these brown butter Rice Krispie treats with coconut and pecans are your answer. They are remarkably simple to make, requiring no oven, but deliver a depth of flavor that belies their ease. Each bite offers a harmonious blend of textures – the crispness of the cereal, the soft chewiness of the marshmallow, the hearty bite of pecans, and the delicate flakes of coconut. Get ready to impress with this upgraded classic!
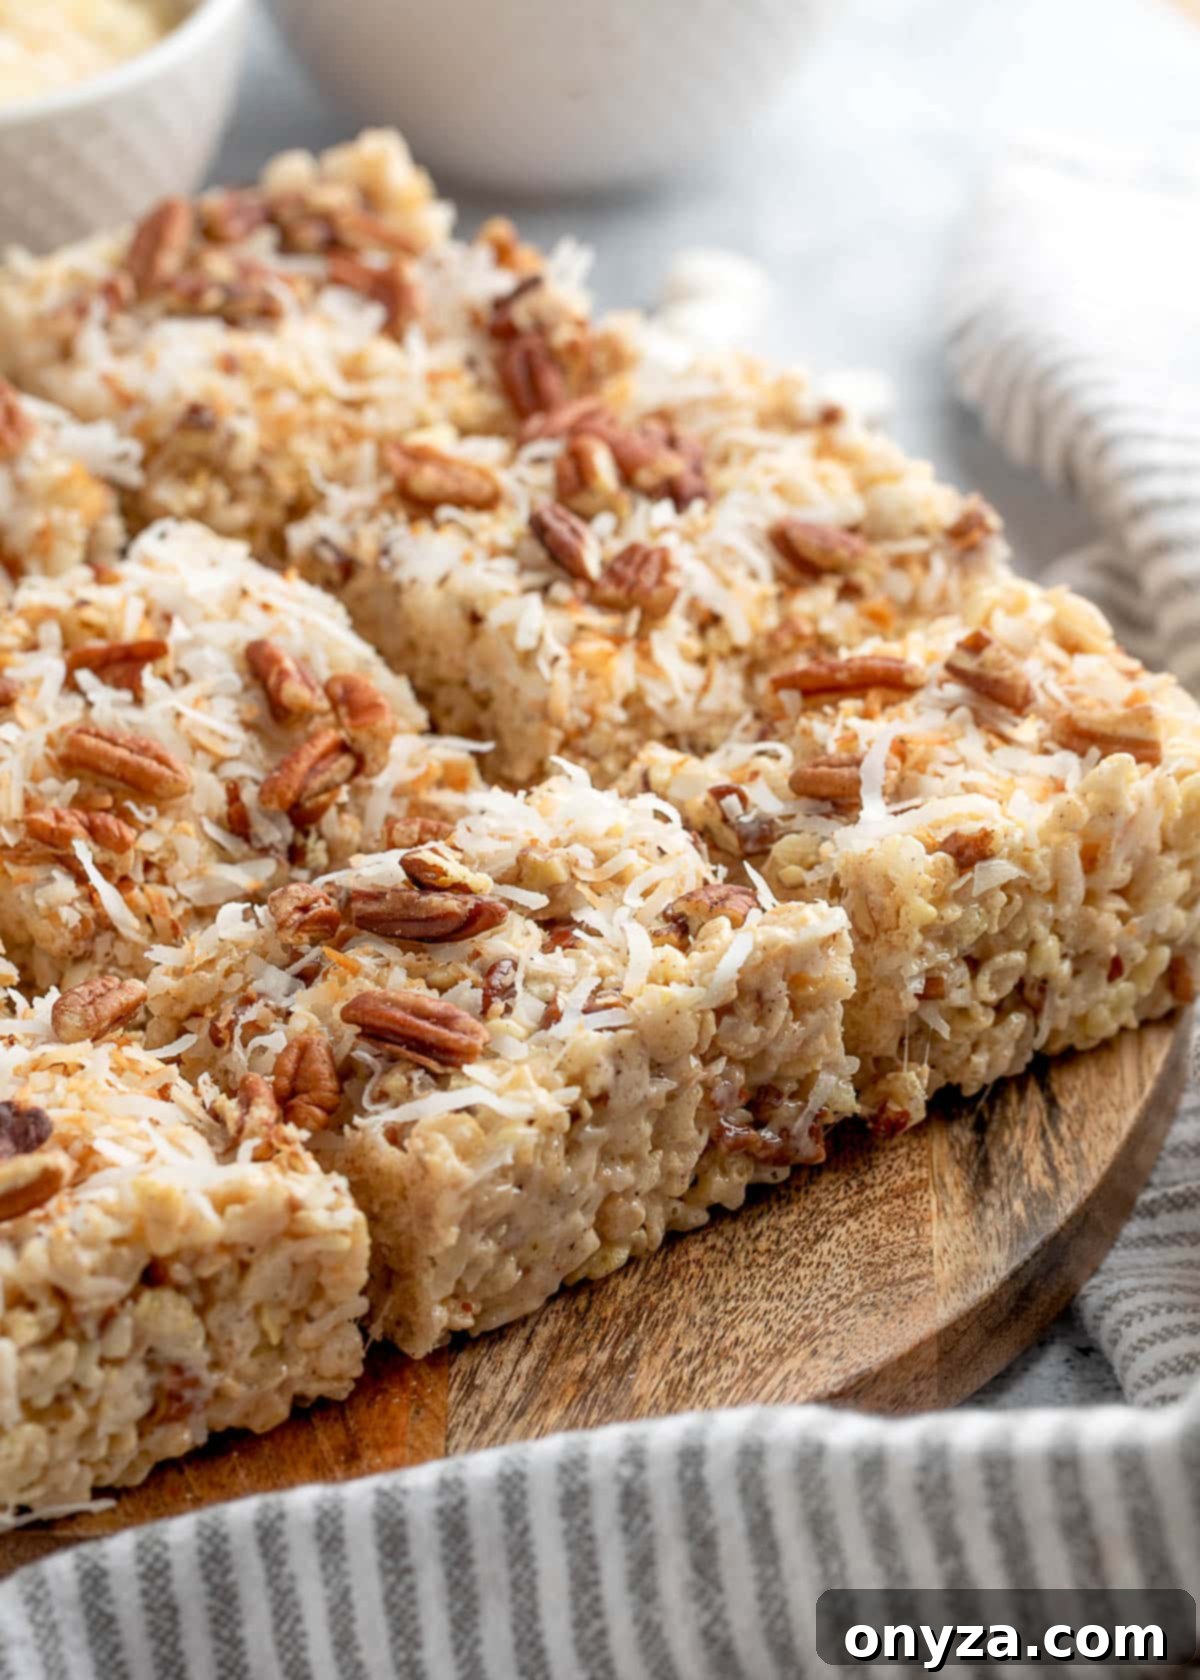
Essential Tips for Perfect Coconut Pecan Rice Krispie Treats
Achieving the perfect balance of chewy, crispy, and flavorful in your homemade Rice Krispie treats starts with a few key considerations. These tips will guide you toward creating treats that are consistently delicious and boast that ideal texture every time.
- Embrace the Brown Butter Magic: This is arguably the most crucial step for elevating these treats. Browning butter isn’t just about melting; it’s about transforming the butter’s flavor. As the milk solids in the butter toast, they develop a deep, nutty, and slightly caramel-like aroma that adds incredible richness to the finished product. Use a large, light-colored pot, such as a stainless steel pan or a pale-enameled Dutch oven. The light interior allows you to clearly monitor the color changes of the milk solids, preventing them from burning, which can happen very quickly. This step takes your treats from ordinary to gourmet.
- Measure and Prep Ahead (Mise en Place): Speed is key once the butter is browned and marshmallows begin to melt. Having all your ingredients pre-measured and within arm’s reach (what chefs call “mise en place”) ensures a smooth and stress-free process. This includes your Rice Krispies cereal, fresh marshmallows, both toasted and untoasted coconut, and chopped pecans. A well-organized workspace prevents rushed mistakes and ensures everything is incorporated at the right moment for optimal texture and flavor.
- Gentle Heat for Marshmallows: The secret to perfectly chewy, not hard, Rice Krispie treats lies in how you melt your marshmallows. Overheating the marshmallows can cause their sugars to caramelize too much, leading to a brittle and firm texture once cooled. Melt them just until they are mostly smooth, stirring constantly. The residual heat from the browned butter and the pot itself will continue to melt them off the heat. If absolutely necessary, return the pot to the lowest possible heat setting for only a few seconds, just until they reach the desired smooth, gooey consistency.
- Press Lightly, Not Firmly: When transferring the warm mixture to your prepared pan, resist the urge to pack it down aggressively. Using excessive force compacts the cereal and marshmallows, resulting in dense, tough, and overly firm bars. Instead, spread the mixture into an even layer using gentle pressure. A butter wrapper, a piece of parchment paper, or a spatula lightly sprayed with cooking spray can help you achieve an even layer without sticking or over-compressing. This gentle touch ensures your treats remain wonderfully chewy and light.
How to Craft Your Irresistible Coconut Pecan Rice Krispie Treats
Making these upgraded Rice Krispie treats is a straightforward process that yields incredibly delicious results. Follow these detailed steps to create a batch of perfectly chewy, nutty, and coconut-infused squares that will vanish quickly!
Step 1: Prepare Your Baking Pan for Easy Removal
First, ensure your pan is ready for the sticky goodness to come. For an 8×8-inch square baking pan, line it completely with parchment paper. Crucially, leave a generous overhang of parchment on two opposite sides. These overhangs will serve as a convenient “sling” later, allowing you to easily lift the entire slab of treats out of the pan once cooled, making slicing a breeze and preventing any sticking. To keep the parchment paper from shifting while you work, a light spritz of cooking spray inside the pan before laying the paper down works wonders, helping it adhere neatly to the bottom and sides.
Step 2: Unlock Deep Flavors by Toasting Coconut and Pecans
This step, though simple, is a flavor game-changer. Toasting coconut and pecans amplifies their natural sweetness and nutty aromas, adding incredible depth to your treats. We’ll be toasting some of the coconut and pecans for the topping to provide a delightful crunch, while keeping some coconut untoasted in the base for a softer chew and richer flavor integration.
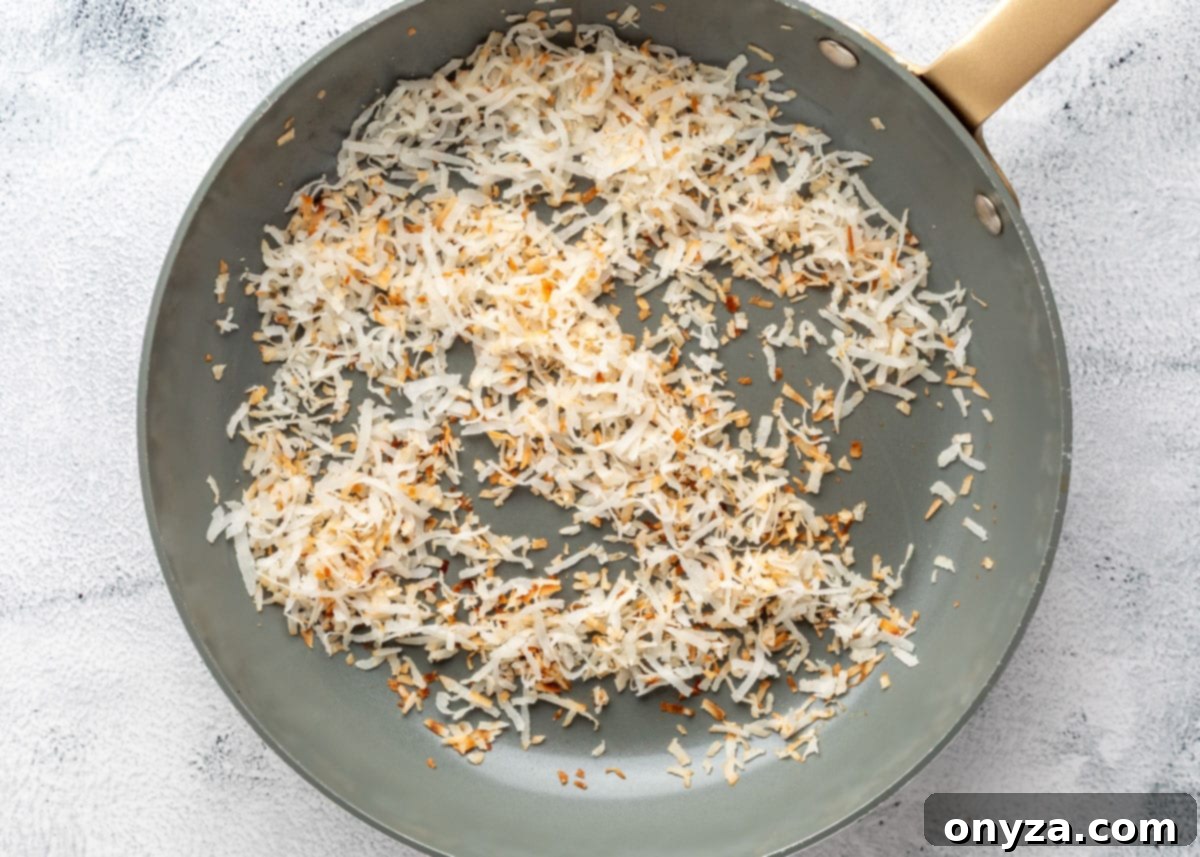
- Perfectly Toasted Coconut: For this recipe, we recommend using sweetened shredded coconut, often labeled “angel flake” style. Its fine shreds toast beautifully and contribute a lovely texture. Scatter about ⅓ cup of this coconut in a dry skillet (no oil needed) over medium heat. Stay by the stove and stir constantly. Coconut can go from perfectly golden to burnt in a matter of seconds, so vigilant stirring is essential. You’ll observe the bright white shreds gradually transform, becoming flecked with a beautiful golden-brown color and releasing a fragrant, sweet aroma. This usually takes just a few minutes. As soon as it’s golden, immediately transfer it to a separate plate to cool completely and reserve it for the topping. The remaining coconut for the base will be added untoasted, providing a different textural element.
- Fragrant Toasted Pecans: Begin with shelled pecan halves if possible; they tend to toast more uniformly than pre-chopped pieces. Place them in the same dry skillet over medium heat. Stir them frequently for approximately 3 to 5 minutes. You’ll know they’re ready when they become noticeably fragrant and appear a shade darker, indicating their oils are releasing and flavors are developing. Similar to coconut, be careful not to burn them. Once toasted, transfer the pecans to a plate to cool. Once cooled, roughly chop them. You’ll set aside about 1 cup of these chopped toasted pecans for the main mixture and the remaining ¼ to ⅓ cup for sprinkling on top as a garnish.
Chef’s Tip: If you’re using pre-chopped pecans, they have more surface area exposed and will toast faster. Reduce the toasting time by about a minute and keep an even closer watch to prevent burning.
Got extra coconut and pecans? Don’t let them go to waste! Explore other delicious recipes that celebrate these incredible ingredients. Try our comforting Coconut Custard Pie for a creamy, tropical treat, or indulge in the rich, boozy flavors of our Chocolate Bourbon Pecan Pie. For a quick snack or garnish, our Caramelized Pecans are simply irresistible!
Step 3: The Art of Browning Butter for Unmatched Richness
Browning butter is an easy technique that adds an incredible depth of flavor to these Rice Krispie treats. Start by adding a full stick (8 tablespoons) of unsalted butter, cut into cubes for faster melting, to a large, light-colored pot set over medium heat. The light interior of the pot is crucial as it allows you to clearly see the butter’s color change, which is vital for preventing burning.
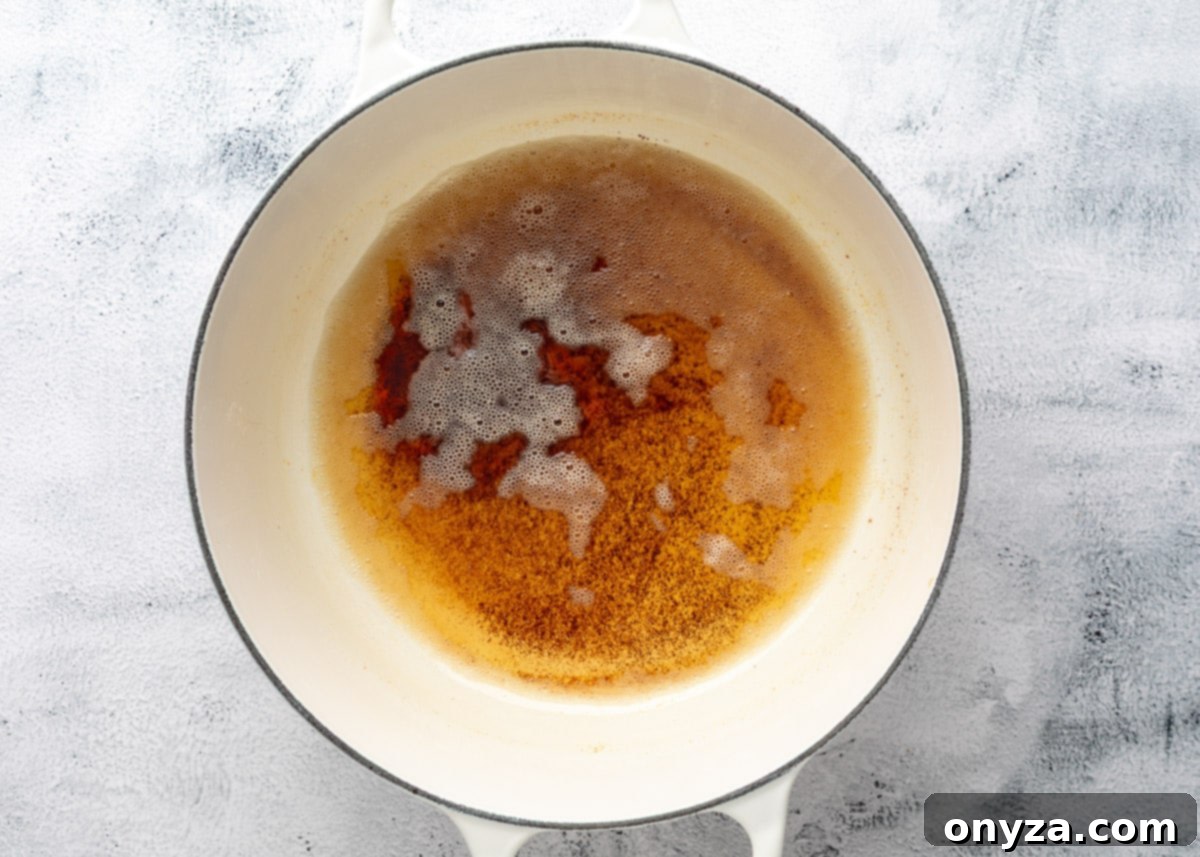
As the butter melts, it will begin to foam and bubble. Stir it frequently to ensure even browning. Initially, the butter will be a clear yellow liquid, then it will become quite foamy. Beneath this foam, the milk solids will gradually separate and sink to the bottom of the pan, slowly changing color. After approximately 4 to 7 minutes, you’ll notice these milk solids at the bottom of the pot turning a beautiful golden brown. At this point, the butter will emit a distinctly nutty, caramelized, and incredibly fragrant aroma – this is the magic of brown butter!
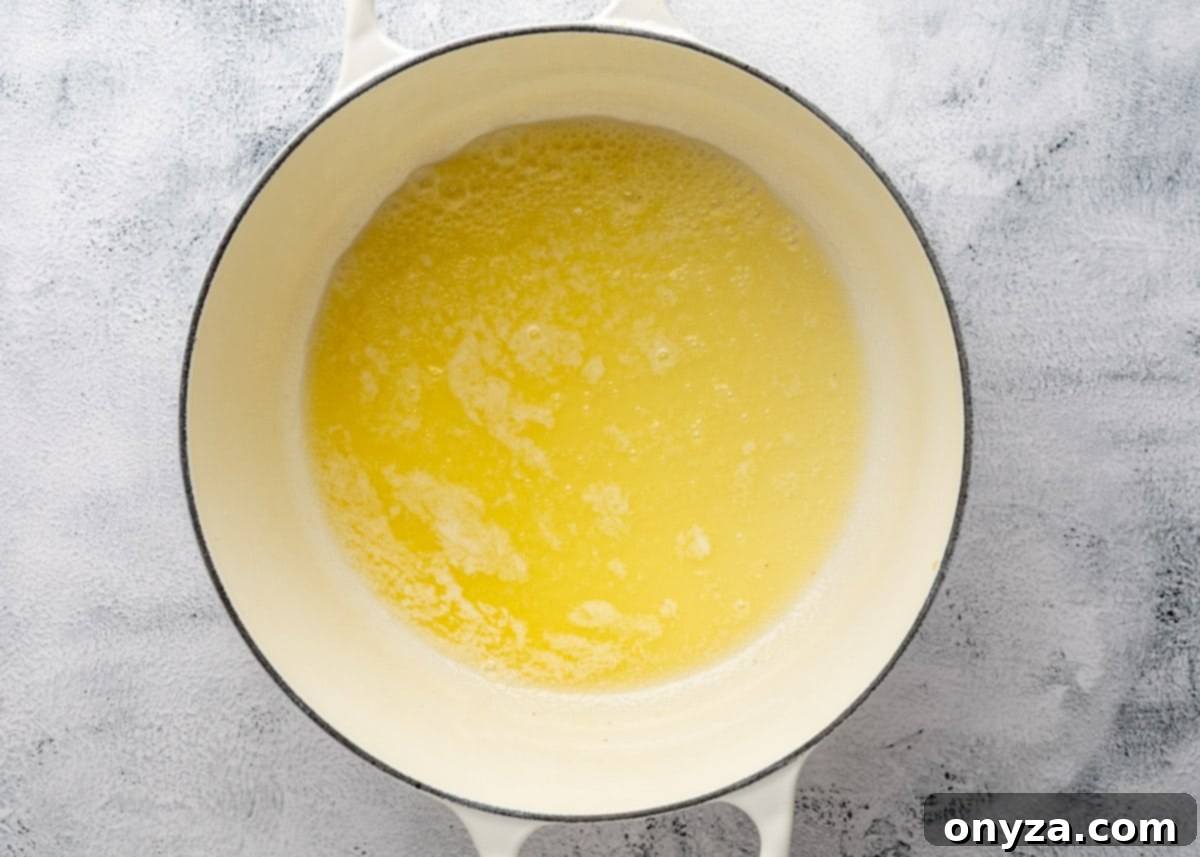
While American-style butter works perfectly fine for these treats, consider using European-style butter, such as Plugra or Kerrygold, if you want an extra indulgent touch. These butters typically have a higher butterfat content, which contributes to an even richer flavor and a more luxurious mouthfeel in the finished bars. The moment the butter reaches an amber hue and smells deeply nutty, immediately remove the pot from the heat. This prevents the milk solids from burning, which would result in a bitter, undesirable flavor. Swift action here is key to perfect brown butter.
Step 4: Achieve Perfect Chewiness by Melting Marshmallows Gently
With your beautifully browned butter ready, it’s time to incorporate the marshmallows. Immediately, and off the heat, add your mini marshmallows to the pot. The residual heat from the pot and the hot butter is usually sufficient to melt the marshmallows to the perfect consistency. Stir them into the butter until they are about three-quarters melted. You’ll notice they become soft and gooey, but might still have a few small lumps.
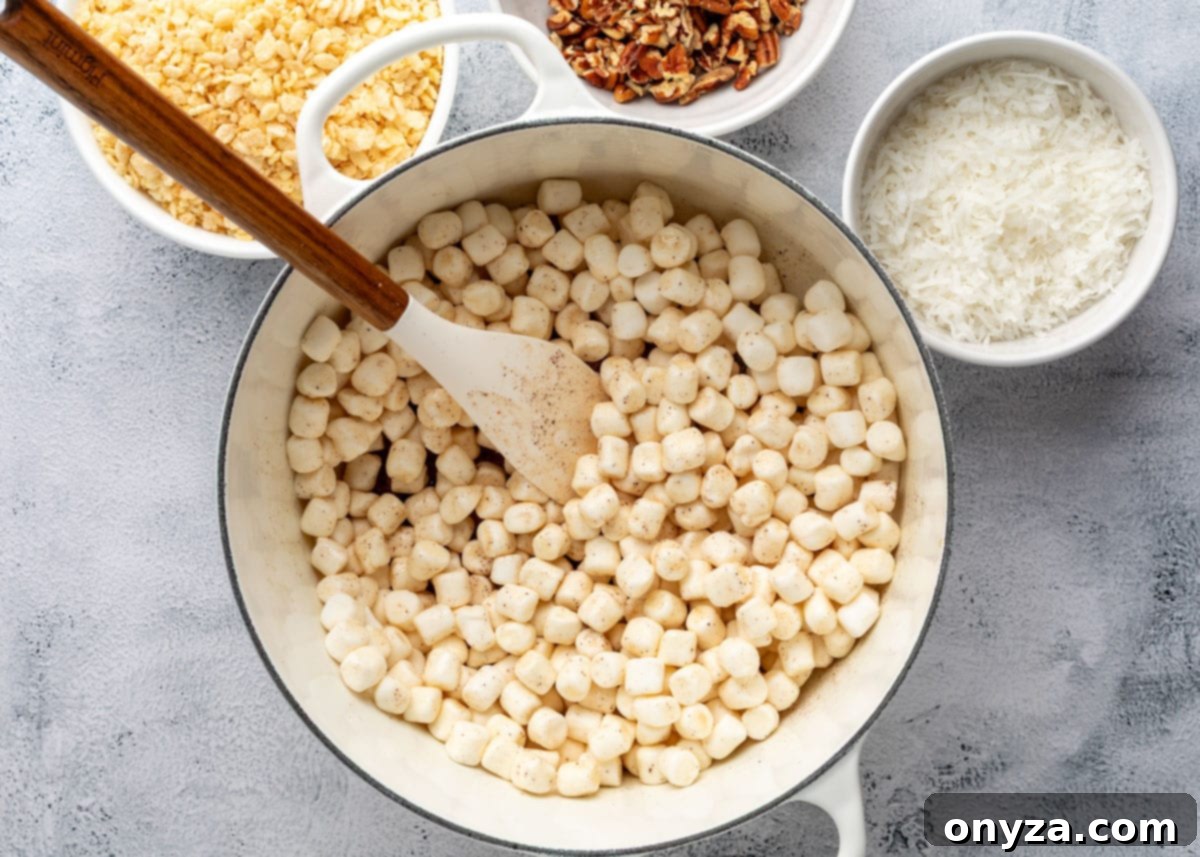
The key here is not to overcook the marshmallows. Excessive heat or prolonged cooking can cause the sugars in the marshmallows to caramelize too much, leading to hard, brittle treats once they cool. If after a minute or two of stirring off the heat, your marshmallows still need a little help to melt, return the pot to the stove on the very lowest heat setting for just a few seconds, stirring constantly. Remove it as soon as they are mostly smooth.
Once the marshmallows are nearly melted, stir in the coconut extract and vanilla extract. These extracts significantly enhance the overall flavor profile, adding a delightful tropical note from the coconut and a classic warmth from the vanilla. A pinch of salt is also essential here; it beautifully balances the sweetness and helps to boost all the other flavors, making them pop. Continue stirring just until the marshmallows are fully incorporated into the butter and the mixture looks smooth and luscious, with no significant lumps remaining.
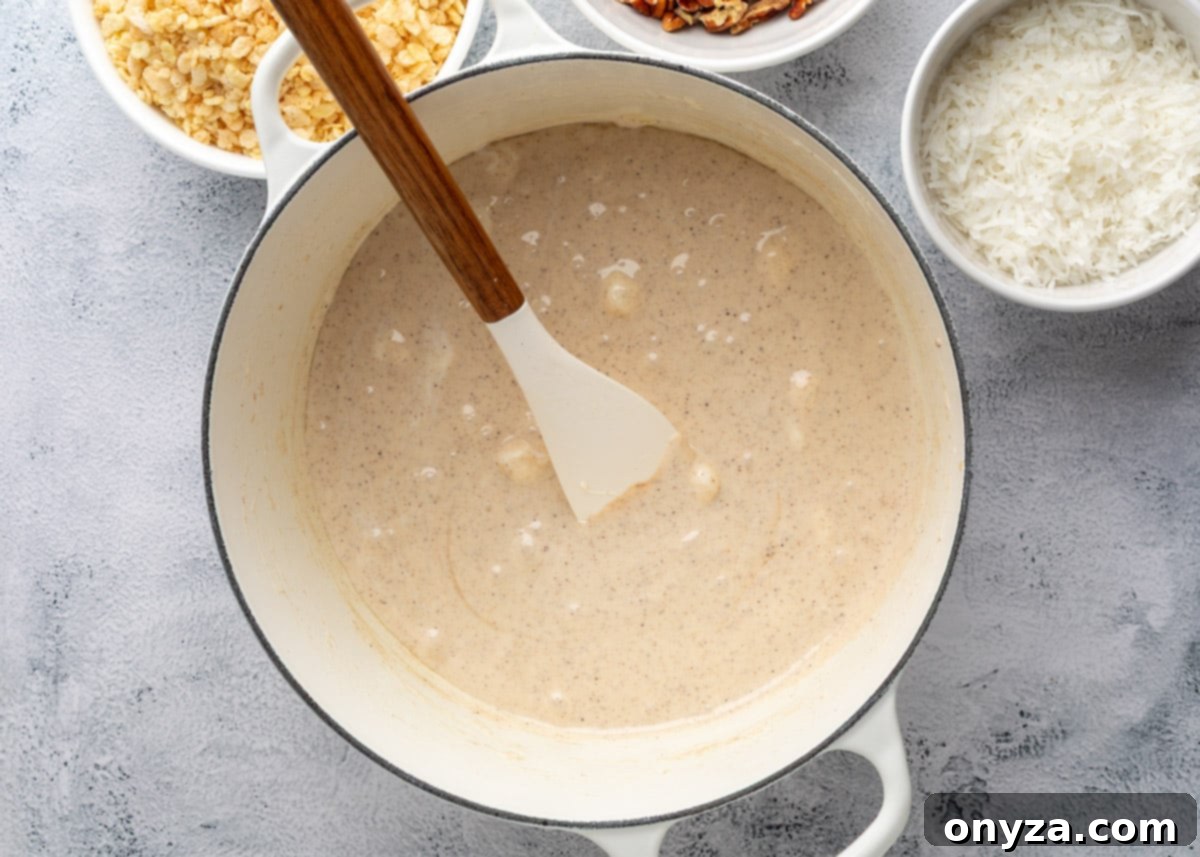
Step 5: Gently Fold in Cereal and Flavorful Add-Ins
Working quickly, as the marshmallow mixture will start to set as it cools, it’s time to combine the base ingredients. Add your Rice Krispies cereal, the untoasted shredded coconut (which provides a softer chew and richer coconut flavor within the bar), and 1 cup of your previously toasted and chopped pecans to the pot with the melted marshmallow mixture. This combination creates a fantastic blend of textures and flavors.
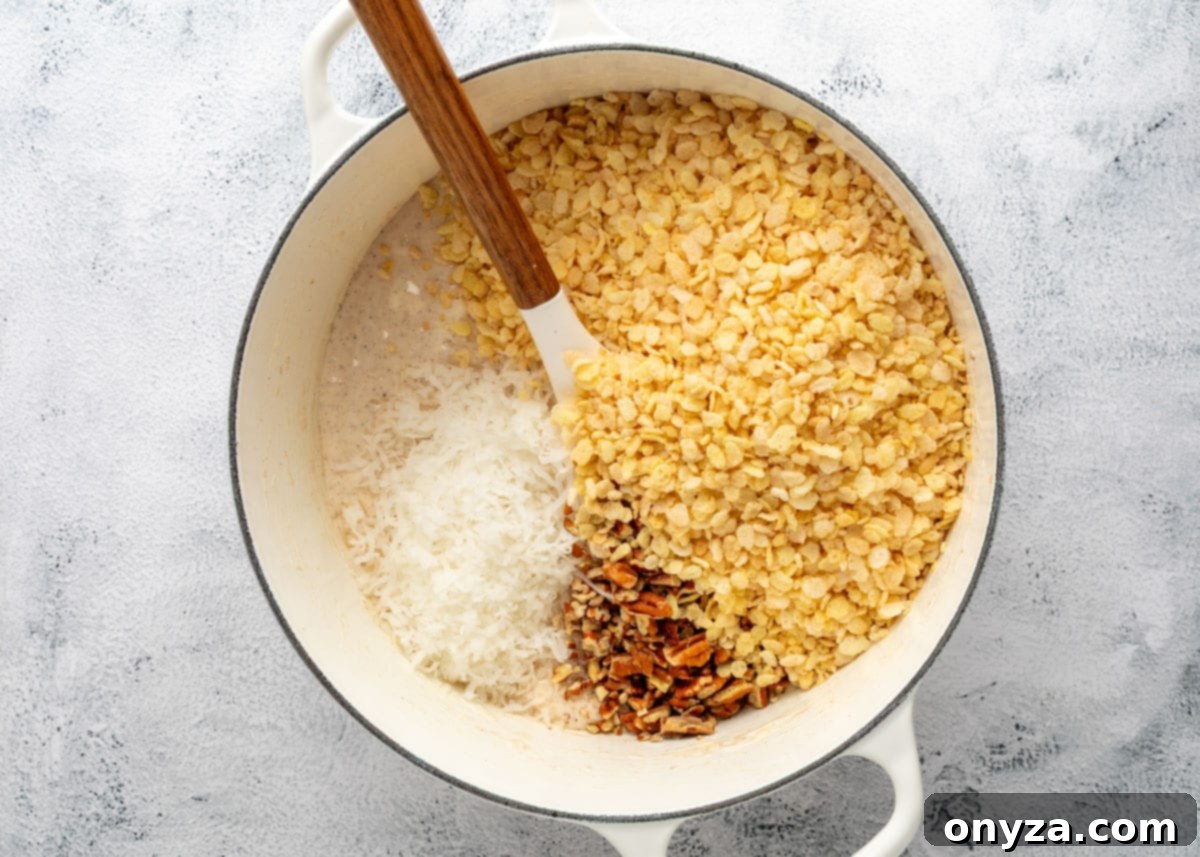
Using a sturdy rubber spatula, gently fold the ingredients from the bottom of the pot upward. The goal is to evenly coat all the cereal, coconut, and pecans with the marshmallow mixture without crushing the delicate Rice Krispies. Mashing or stirring too vigorously can break up the cereal, leading to a less appealing texture in your finished treats. Continue folding until everything is thoroughly coated and evenly distributed. The mixture should still appear somewhat loose and stringy with marshmallow strands; don’t worry, it will firm up beautifully as it cools to room temperature.
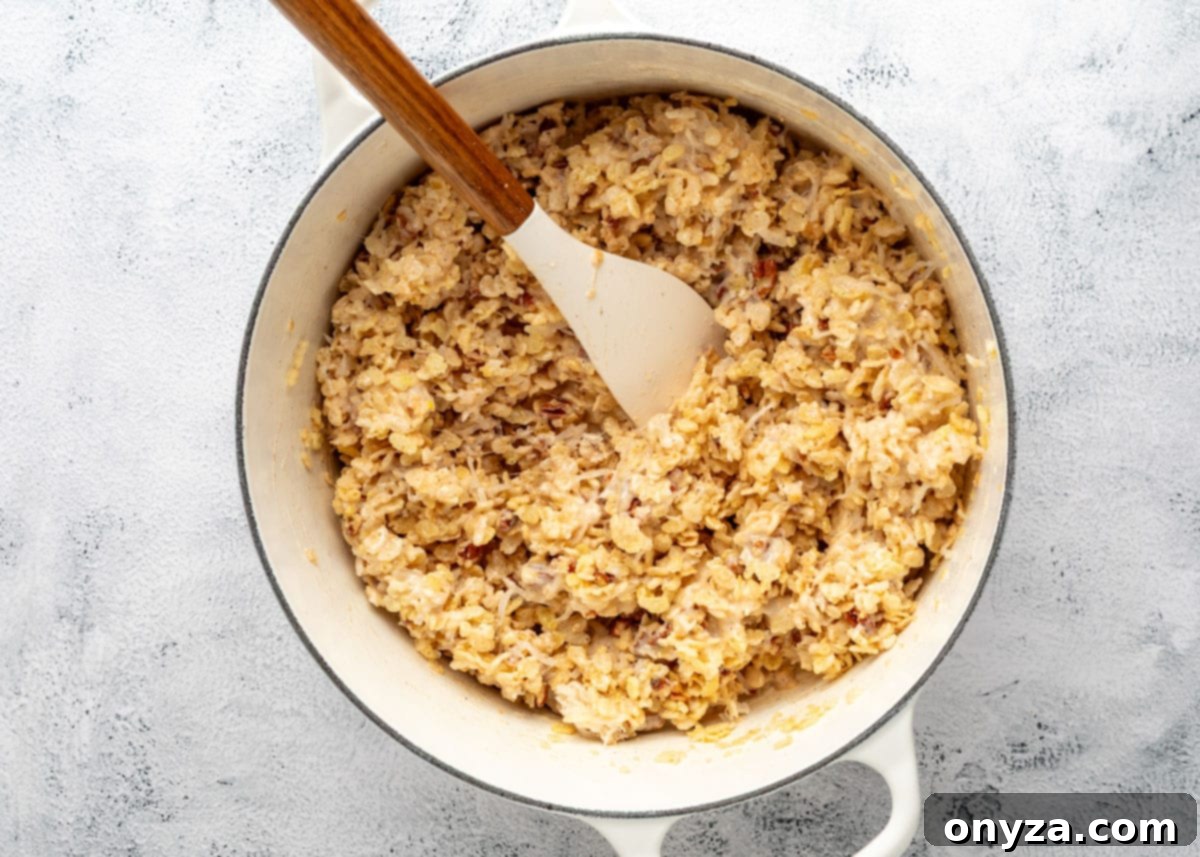
Step 6: Press Gently and Add a Flavorful Topping
Once the cereal mixture is evenly combined, immediately transfer the warm, sticky mass into your prepared 8×8-inch pan. This mixture will be very sticky, so having a non-stick aid is helpful. You can use the butter wrapper (the waxed side works great!), a fresh piece of parchment paper, or a clean spatula, all lightly sprayed with cooking spray, to prevent sticking to your hands or tools.
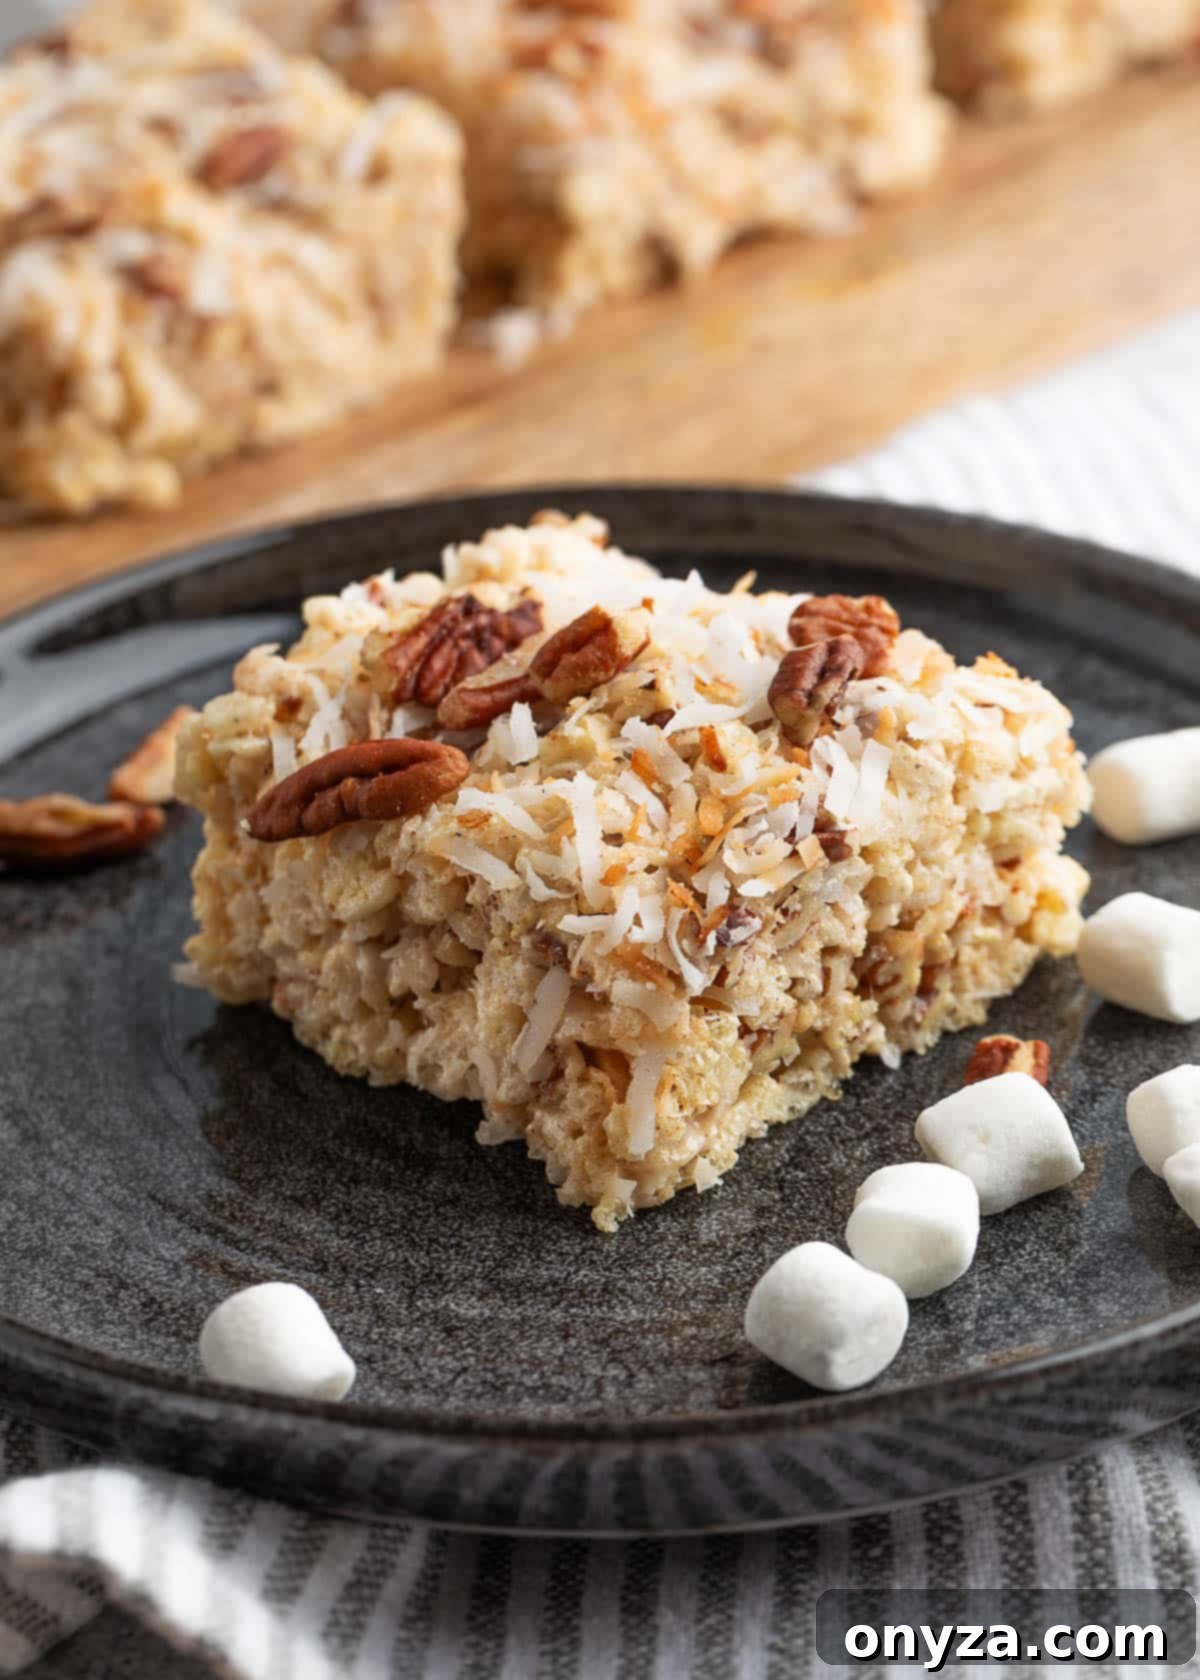
Using one of these aids, press the mixture into an even layer across the bottom of the pan. Remember the crucial tip: **do not pack it down too firmly.** Gentle, even pressure is all that’s needed to create a cohesive slab without sacrificing the signature chewy texture. Once the base is evenly spread, scatter the reserved toasted coconut and the remaining toasted chopped pecans generously over the top. Gently press them into the surface of the treats to help them adhere. This topping adds an extra layer of crunch and visual appeal.
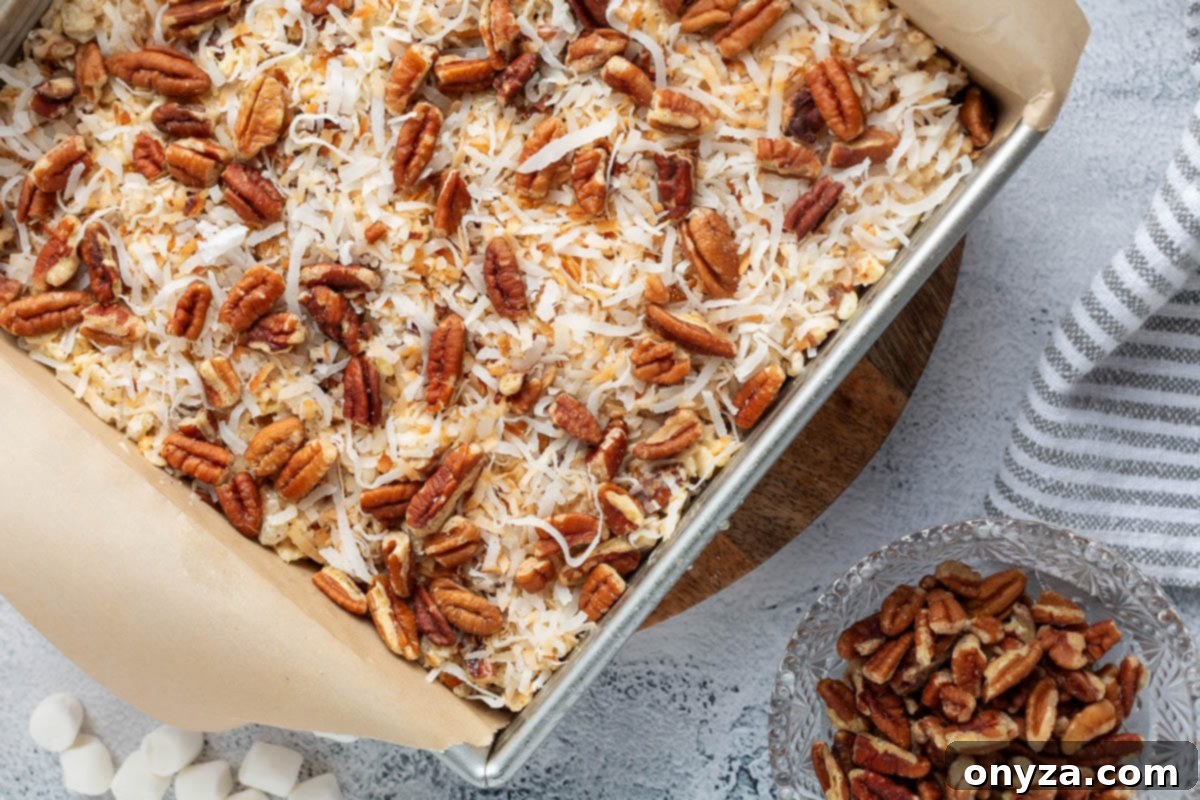
Step 7: Patience is Key – Cool and Slice with Precision
Now comes the hardest part: waiting! Allow the treats to set at room temperature for approximately one hour. This cooling period is essential for the marshmallow to firm up and for the treats to become stable enough for clean slicing. Resist the temptation to speed up the process by refrigerating them, as chilling can make the treats too firm and dense.
Once cooled and set, use the parchment paper overhangs as a sling to easily lift the entire slab of treats out of the pan and onto a cutting board. For the cleanest cuts, use a sharp, non-serrated knife. You can slice them into 9 generous large squares, perfect for a satisfying indulgence, or cut them into 16 smaller bites for sharing or portion control at parties. If you’re not planning to slice them immediately, simply cover the pan with plastic wrap once they’ve fully cooled to prevent them from drying out, and they can wait for a few hours before being cut.
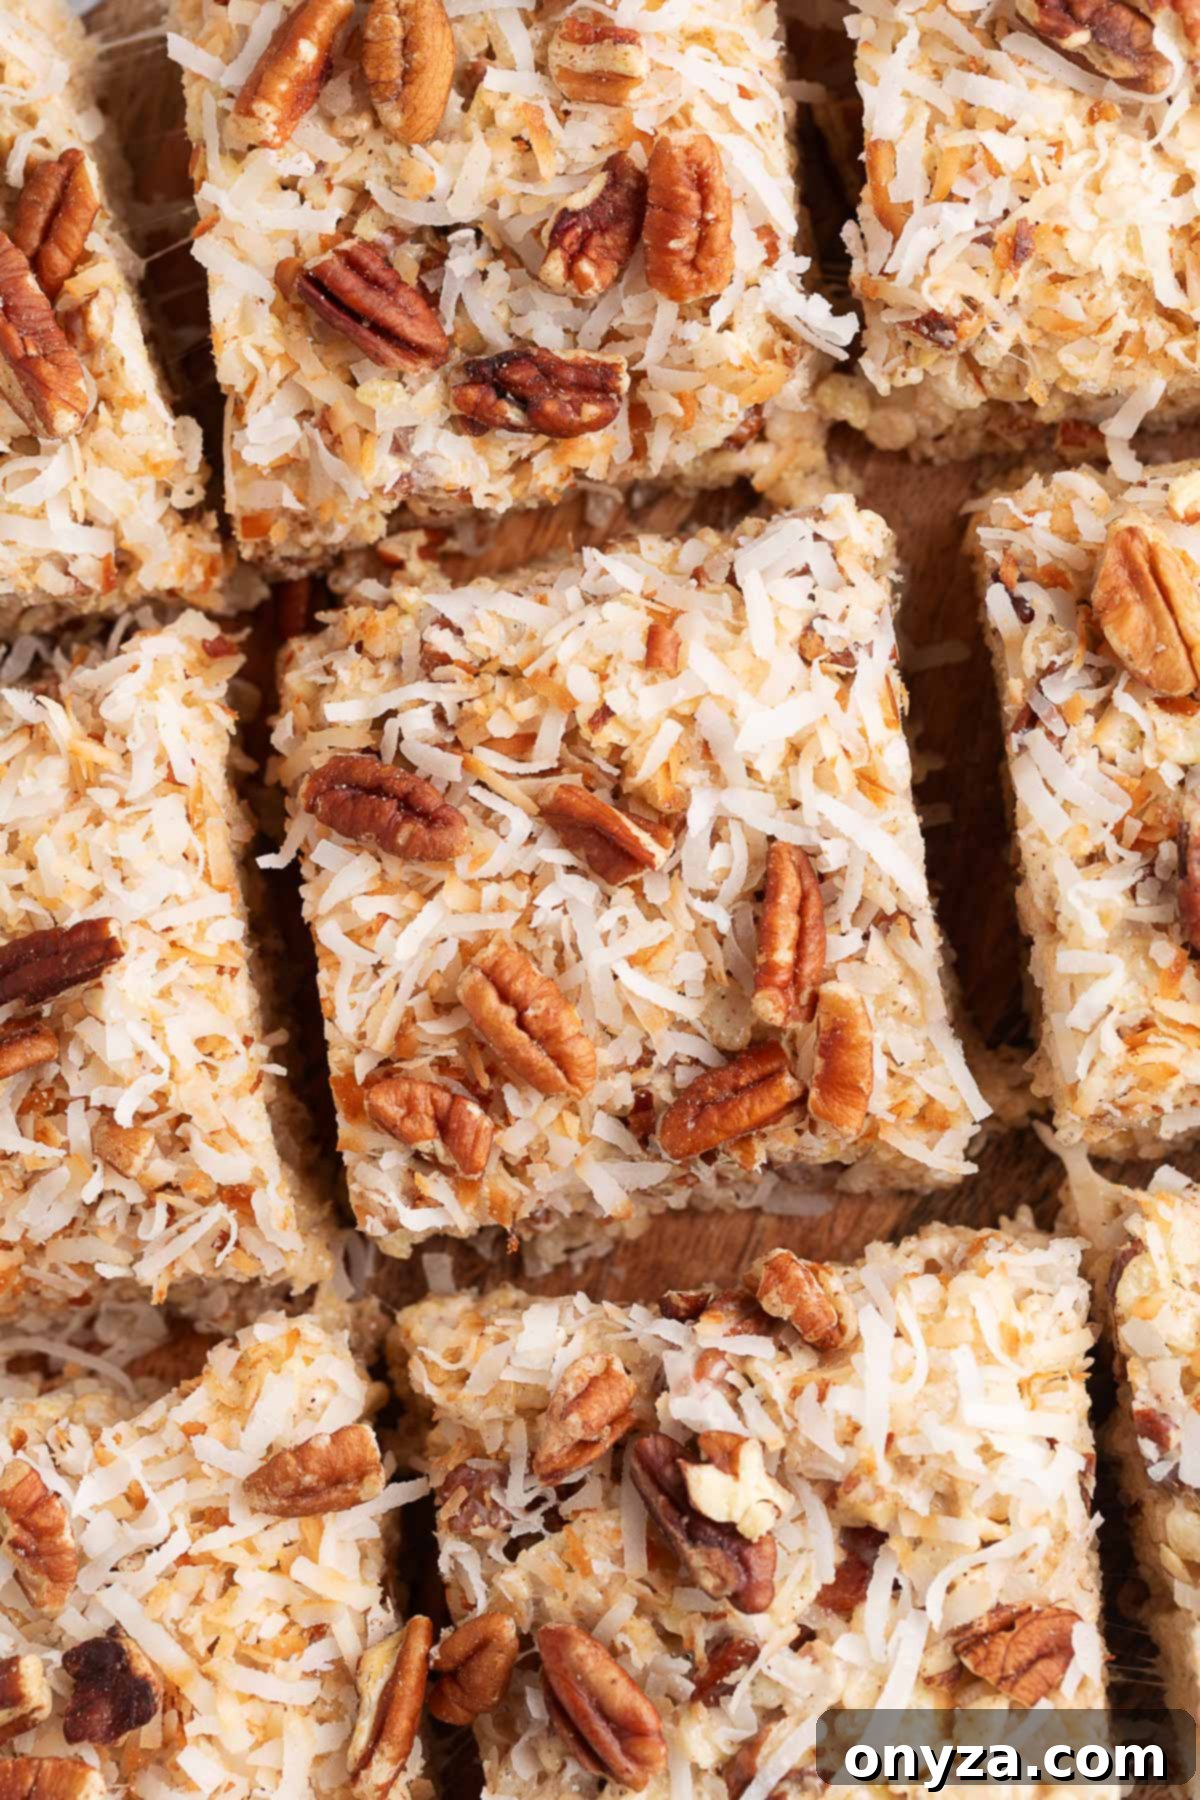
Serving and Storing Your Delicious Coconut Pecan Rice Krispie Treats
These delightful Coconut Pecan Rice Krispie Treats are best enjoyed at room temperature, where their chewy texture and rich flavors truly shine. For optimal freshness and to maintain their delightful consistency, store them in an airtight container at room temperature. They will remain wonderfully soft and enjoyable for up to 3 days.
We highly recommend against refrigerating these treats. While it might seem like a good way to preserve them, chilling can cause the marshmallows to firm up significantly, leading to a much tougher, denser texture that detracts from their appeal. The goal is that perfect balance of crispy cereal and soft, gooey marshmallow, which is best maintained at room temperature.
Like most Rice Krispie treats, these are at their absolute peak of softness and chewiness on the day they are made. However, thanks to the generous amount of brown butter and the addition of shredded coconut in the base – both of which help to lock in moisture – these treats maintain a surprising amount of softness even on days 2 and 3. My family can attest to their enduring deliciousness, with no complaints about them becoming overly firm.
If, after a day or two, your bars seem to have lost a tiny bit of their initial softness, there’s a quick and easy trick to revive them. Simply pop a single square on a plate into the microwave for just 5-6 seconds. This brief warming will gently soften the marshmallow, bringing back that delightful, just-made, gooey texture. It’s a perfect way to enjoy a slightly older treat as if it were freshly prepared.
Creative Variations for Your Rice Krispie Treats
While the classic Coconut Pecan Rice Krispie Treats are undeniably delicious, they also serve as a fantastic canvas for culinary creativity. Don’t hesitate to experiment with these variations to customize your treats and discover new favorite flavor combinations.
- Chocolatey Cocoa Krispies: For chocolate lovers, a simple swap can transform this recipe. Replace the traditional Rice Krispies cereal with Cocoa Krispies for a rich, chocolatey base. This variation pairs beautifully with the coconut and pecans, offering a dessert reminiscent of a German chocolate cake in a no-bake bar format. Consider adding a few mini chocolate chips to the mixture or a chocolate drizzle on top for an extra decadent touch.
- Nutty Alternatives: Pecans offer a wonderful buttery crunch, but other nuts can be equally delightful. Chopped toasted walnuts provide an earthy, slightly bitter contrast that works well with sweet coconut. Macadamia nuts lend a rich, creamy texture and a subtle tropical note. Almonds, when toasted and chopped, offer a classic pairing with coconut, especially when you think of “Almond Joy” candies. Feel free to use your favorite nut, ensuring it’s toasted for enhanced flavor.
- Boost the Toasty Coconut Flavor: If you adore the deep, caramelized flavor and crisp texture of toasted coconut, feel free to toast all of the shredded coconut called for in the recipe, not just the portion for the topping. Incorporating more toasted coconut into the base mixture will give every bite a more pronounced roasted coconut flavor and an extra layer of delightful crunch throughout the bar.
- Decadent Chocolate Drizzle: Elevate the elegance and flavor of these treats with a luxurious chocolate drizzle. Once the slab of treats has cooled and set, melt some dark, milk, or white chocolate chips or a chopped chocolate bar. Drizzle the melted chocolate artistically over the entire surface before slicing. A dark chocolate drizzle will offer a pleasing bittersweet contrast, while white chocolate will add extra sweetness and a creamy finish. If you opted for almonds instead of pecans, a chocolate drizzle truly enhances that “Almond Joy” inspired flavor profile.
- Seasonal Flavor Twists: Get creative with extracts! During the fall, try adding a touch of maple or butterscotch extract alongside the vanilla. For a winter holiday treat, a hint of peppermint or almond extract can be festive. Always ensure the extracts complement the coconut and pecan flavors.
Explore More Delicious Rice Krispie Treat Creations
If you love these Coconut Pecan Rice Krispie Treats, you’ll be excited to discover the endless possibilities of this versatile dessert. From fruity to decadent, there’s a Rice Krispie treat for every palate and occasion. Expand your repertoire with these other fantastic recipes:
- Caramel Apple Pie Rice Krispie Treats: A seasonal favorite, capturing the essence of apple pie in a chewy, no-bake bar.
- Strawberry Rice Krispie Treats: Bursting with fresh fruit flavor, these are perfect for spring and summer gatherings.
- Peanut Butter Cup Rice Krispie Treats: The ultimate combination of sweet and salty, blending peanut butter and chocolate in every bite.
- Loaded Rice Krispie Treats: Packed with all your favorite mix-ins, these are the definition of indulgence.
Coconut Rice Krispie Treats with Pecans
Amanda Biddle
40 minutes
1 hour
1 hour
40 minutes
9
large squares (or 16 small)
Ingredients
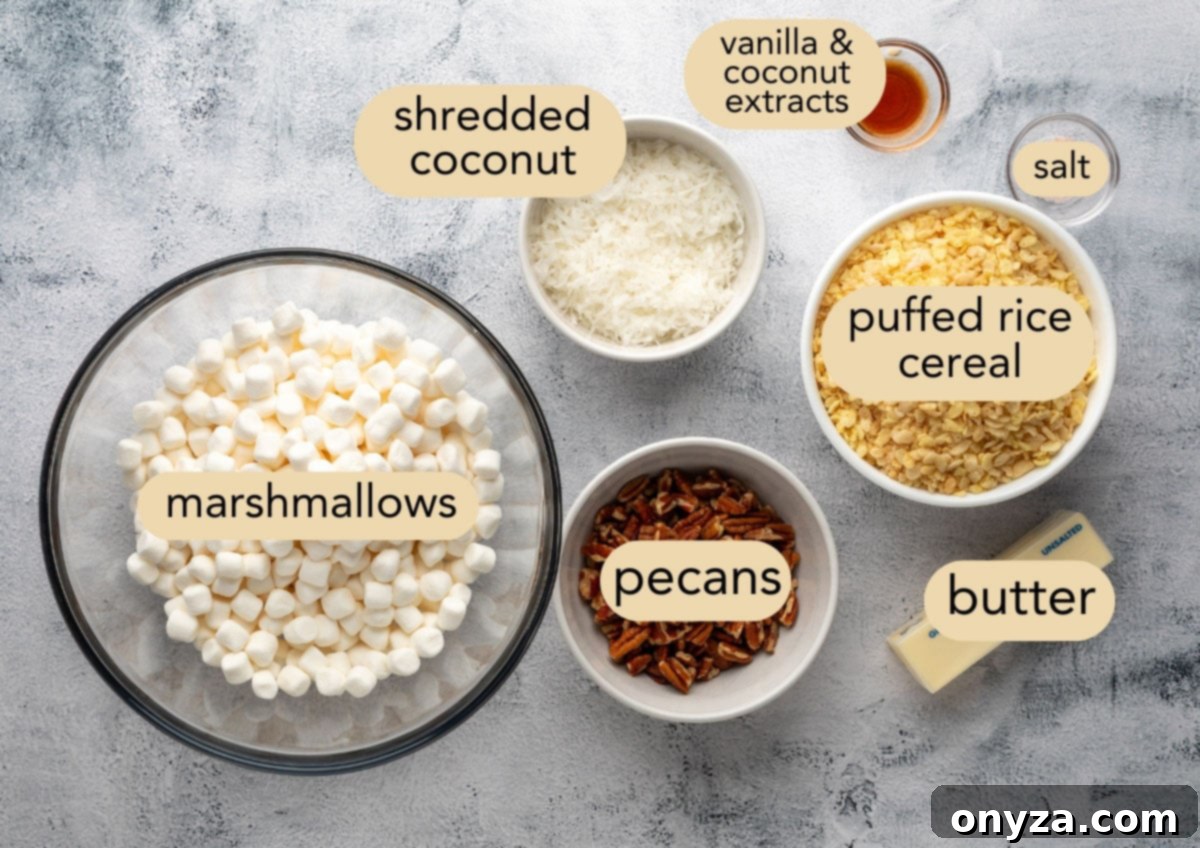
- 8 tablespoons unsalted butter , cubed (see note)
- 10 ounces Jet-Puffed mini marshmallows (see note)
- 1 teaspoon coconut extract
- ½ teaspoon vanilla extract
- ¼ teaspoon table salt
- 4 cups Rice Krispies cereal (4 ounces)
- 1⅓ cups sweetened shredded coconut , divided (see note)
- 1⅔ cups shelled pecan halves , divided (5½ ounces, see note)
Instructions
- Prepare the pan. Line an 8×8-inch square baking pan with parchment, leaving an overhang on 2 sides for easy lifting. Lightly spray the pan with cooking spray before lining it so the parchment sticks.
- Toast the coconut and pecans. In a dry skillet over medium heat, toast ⅓ cup coconut until golden, stirring constantly (it browns quickly). Set aside for topping and leave the rest of the coconut untoasted.
In the same skillet, toast the pecan halves for 3–5 minutes, stirring often, until fragrant. Remove the pecans from the skillet, let them cool, and roughly chop. Set aside 1 cup for the base and the remaining (¼ to ⅓ cup) for topping the treats.
- Brown the butter. In a large, light-colored pot, melt the butter over medium heat, stirring often. After 4–7 minutes, the milk solids will turn golden and smell nutty. Remove from heat immediately once it turns amber-colored, so it doesn’t burn.
- Melt the marshmallows. Off the heat, immediately stir in the mini marshmallows until about three-quarters melted. If needed, return to the lowest heat briefly to help the marshmallows melt. Stir in coconut extract, vanilla extract, and the salt.
- Fold in cereal and add-ins. Working quickly, fold in Rice Krispies, 1 cup untoasted coconut, and 1 cup toasted pecans with a rubber spatula. Gently fold from the bottom up—don’t crush the cereal. The mixture will look loose and stringy; it firms up as it cools.
- Press and top. Immediately transfer the mixture into the prepared pan. Use the butter wrapper or greased parchment to press lightly into an even layer (don’t compact firmly). Sprinkle with reserved toasted coconut and pecans, pressing gently to adhere.
- Cool and slice. Let the pan sit at room temperature for about 1 hour, until cooled and set. Lift the treats out with the parchment sling and cut into 9 large or 16 smaller squares. (If you won’t be slicing the treats right away, cover the pan once they’re cooled so they don’t dry out.)
- Serve and store. Keep the treats in an airtight container at room temperature for up to 3 days. Do not refrigerate.
Notes
Marshmallows: Be sure they’re fresh for the best-textured treats! For the best results, measure by weight. If measuring by volume from a larger bag, fill your measuring cup loosely. A 10-ounce bag of marshmallows contains about 5½ to 6 cups of marshmallows.
Coconut: Sweetened shredded coconut is also often labeled “angel flake” coconut. For the most accurate measurement, weigh it. 1⅓ cups should equal about 3.7 ounces (roughly 2.8 ounces for the base and 0.9 ounces for the topping). If measuring by volume, lightly spoon the coconut into a dry measuring cup and gently level it off without packing.
Pecans: 1⅔ cups shelled pecan halves will yield 1¼ to 1⅓ cups when roughly chopped. If you’re starting with chopped pecans, they’ll need about a minute less toasting time. Watch them carefully.
Nutrition Estimate calculated from cutting the treats into 9 squares.
Nutrition Estimate
Serving:
1
treat
|
Calories:
417
kcal
|
Carbohydrates:
45
g
|
Protein:
3
g
|
Fat:
27
g
|
Saturated Fat:
12
g
|
Polyunsaturated Fat:
4
g
|
Monounsaturated Fat:
10
g
|
Trans Fat:
0.4
g
|
Cholesterol:
27
mg
|
Sodium:
192
mg
|
Potassium:
132
mg
|
Fiber:
2
g
|
Sugar:
26
g
|
Vitamin A:
1148
IU
|
Vitamin C:
8
mg
|
Calcium:
18
mg
|
Iron:
5
mg
Nutrition information is automatically calculated, so should only be used as an approximation.
Please note that our recipes have been developed using the US Customary measurement system and have not been tested for high altitude/elevation cooking and baking.
