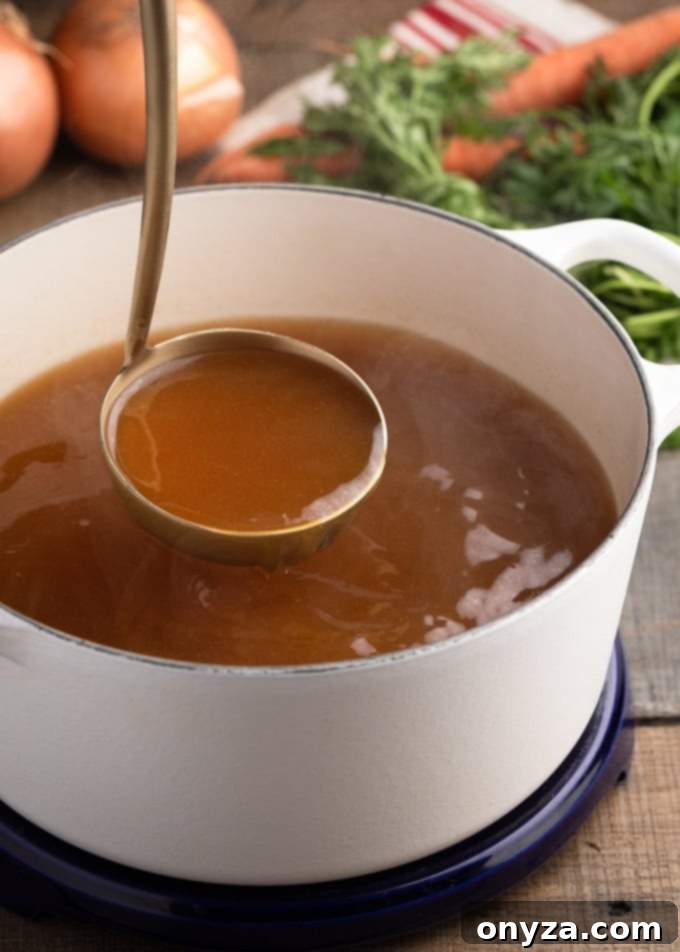
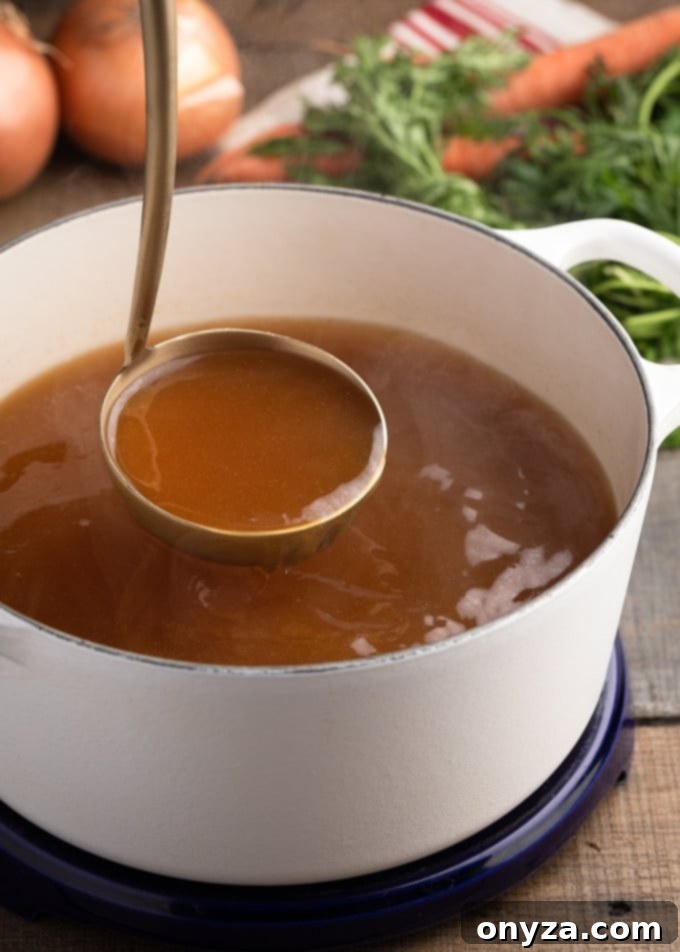
A truly flavorful stock is the unsung hero of any Thanksgiving celebration, transforming ordinary dishes into extraordinary culinary experiences. This comprehensive guide to making delicious make-ahead turkey stock empowers you to get a significant head start on your holiday preparations, ensuring a stress-free and delicious feast. Imagine a rich, aromatic, and deeply satisfying homemade turkey stock at your fingertips, ready to infuse every element of your Thanksgiving dinner—from succulent stuffing and velvety gravy to basting your magnificent bird and creating comforting soups.
In this Article (click headings to jump)
Why Homemade Turkey Stock is a Game Changer
Essential Ingredients and Equipment for Turkey Stock
Step-by-Step Guide to Making Make-Ahead Turkey Stock
i. The Preparation Phase
ii. Simmering Your Stock to Perfection
iii. Achieving a Crystal-Clear Stock
iv. Food Safety: Rapid Cooling for Stock
Storing and Maximizing Your Homemade Turkey Stock
Why Homemade Turkey Stock is a Game Changer for Your Thanksgiving Feast
There’s an undeniable magic that homemade stock brings to the kitchen, especially during the holidays. Unlike its store-bought counterparts, homemade turkey stock is a symphony of all-natural flavors, free from artificial additives and excessive sodium. It’s a culinary foundation that adds unparalleled depth, richness, and authenticity to your dishes. The process itself fills your home with the most wonderful, comforting aromas, setting a truly festive mood long before the main event.
Often, I create flavorful stocks from the leftover bones of a roasted chicken or turkey, carefully portioning and freezing them for future use. It’s an excellent way to extract every last bit of goodness from a roasted bird, minimizing waste and maximizing flavor. However, in the bustling days leading up to Thanksgiving, I typically don’t have a stripped-clean turkey carcass readily available. Yet, many of my most cherished holiday recipes for the grand feast—stuffing, gravy, and even some festive soups—depend heavily on a robust, savory stock.
Instead of resorting to a less flavorful store-bought option that can compromise the overall taste of your holiday meal, I employ a clever make-ahead strategy. This guide will walk you through preparing a generous batch of rich, homemade turkey stock several days in advance, ensuring that your Thanksgiving dinner is nothing short of a showstopper, bursting with deep, authentic flavor.
Essential Ingredients and Equipment for Crafting Turkey Stock from Scratch
To create a truly exceptional turkey stock without the need for a leftover turkey carcass, selecting the right ingredients is paramount. Each component plays a crucial role in developing the depth and clarity of flavor that elevates your holiday cooking.
Key Ingredients:
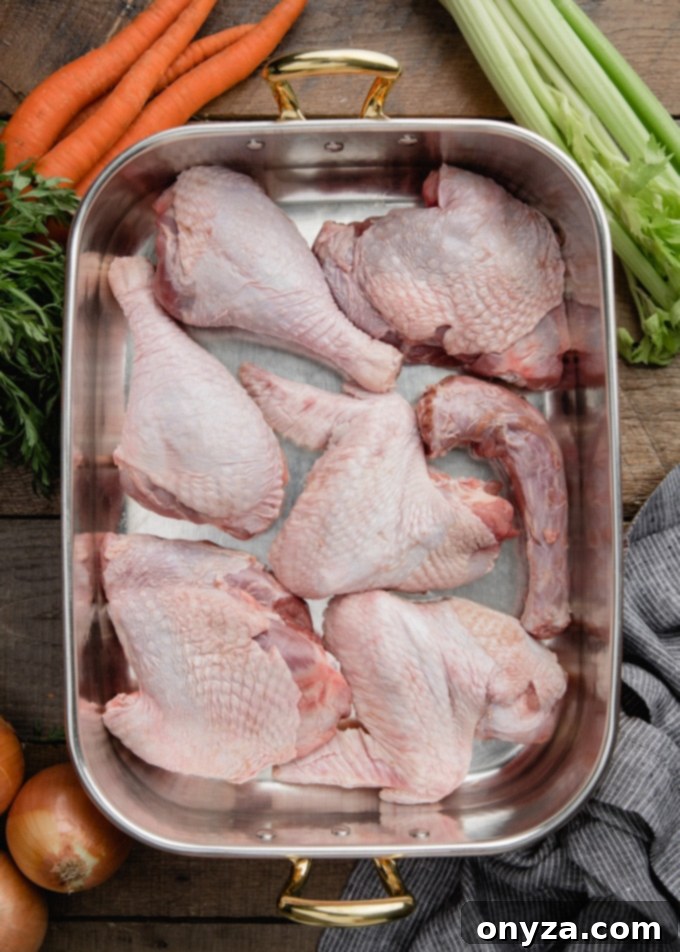
- Raw Turkey Parts: Focus on parts with a high proportion of bones to meat, such as wings, drumsticks, and necks. Bones are rich in collagen, which breaks down during the long simmering process to create a gelatinous, full-bodied stock—a true mark of quality. Wings and necks are particularly excellent choices. If these aren’t readily visible in your grocery store’s meat case, don’t hesitate to inquire with the butcher; they often have them in the back or can order them for you.
- Should you include giblets? Absolutely! Giblets (excluding the liver) can add an extra layer of savory depth. Turkey necks are especially prized for stock. If including a neck, be mindful that it might roast faster than other parts; monitor it to prevent over-browning. Always omit the liver, as its strong, sometimes metallic flavor can impart an undesirable bitterness to your stock.
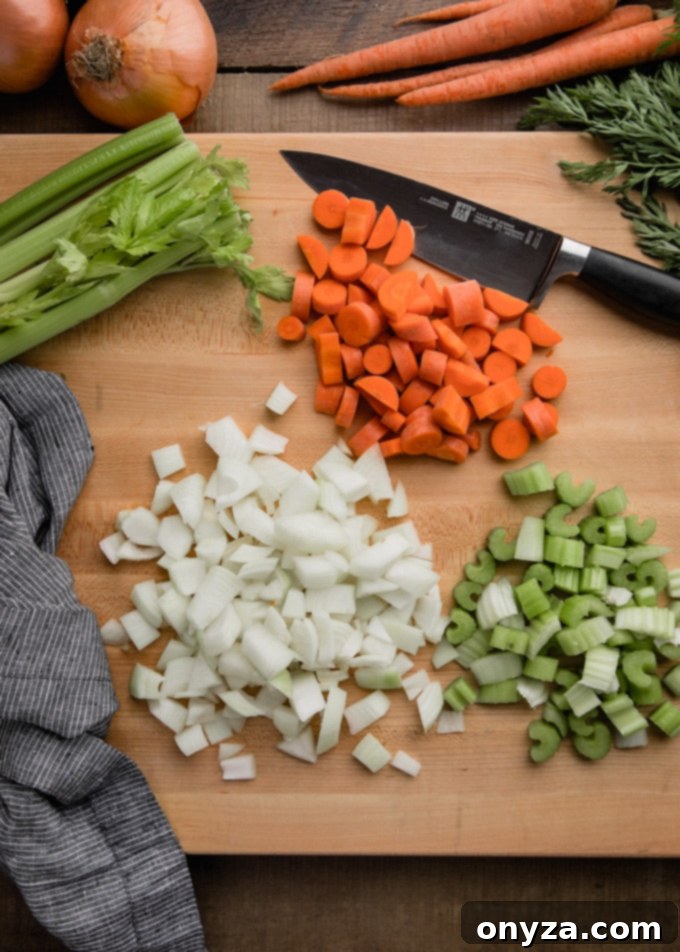
- Mirepoix: This classic aromatic base is non-negotiable for a rich stock. You’ll need generously chopped carrots, celery, and yellow onions. There’s no need for meticulous peeling of carrots or de-stringing celery, as these vegetables will be strained out and discarded after they’ve imparted their flavor. The rough chop simply ensures maximum surface area for flavor extraction during simmering.
- Neutral-Flavored Oil: A small amount of a neutral oil, such as vegetable or canola oil, is used for roasting the turkey parts and sweating the mirepoix. Its purpose is to facilitate browning and flavor development without introducing its own strong taste.
- Cool Water: Always begin your stock with cool or cold water. Introducing hot or boiling water initially can lead to a cloudy stock due to the rapid coagulation of proteins. Starting cold allows for a gradual and even extraction of flavors, resulting in a clearer, more appealing final product as the water slowly comes to a simmer.
- Aromatic Seasonings: These herbs and spices enhance the savory profile of your turkey stock:
- Fresh Parsley: Adds a clean, fresh, slightly peppery note.
- Fresh Thyme Sprigs: Contributes an earthy, slightly minty aroma.
- Bay Leaf: Essential for a subtle, complex herbal undertone. It’s crucial to use bay laurel (often labeled Turkish bay). Fresh California bay leaves possess a significantly stronger, almost medicinal flavor that can overwhelm and even spoil your stock. If in doubt, opt for dried bay leaves, which are almost universally bay laurel.
- Whole Black Peppercorns: Provides a gentle, woody warmth without the harshness that ground pepper can impart.
- Why no salt in the stock? It’s a golden rule of stock making: do not add salt. Stock is typically intended as a base ingredient for other recipes that will themselves be seasoned. Furthermore, stock is often reduced during cooking (e.g., for sauces or gravies), which concentrates its flavors. If the stock is already salted, this reduction would result in an overwhelmingly salty final dish. It’s always best to salt the final recipe to taste, not the stock itself.
Essential Equipment:
- Large Roasting Pan: Indispensable for browning the turkey parts, which is a critical step in developing deep, caramelized flavors for your stock. Choose a sturdy pan that can withstand high oven temperatures and can also be used for deglazing on the stovetop.
- Large Stock Pot (at least 8-12 quarts): You’ll need a substantial pot to accommodate all the turkey parts, vegetables, and ample water for simmering. A heavy-bottomed pot ensures even heat distribution and prevents scorching.
- Fine-Mesh Strainer: Essential for separating the liquid stock from the solids (bones, meat, vegetables). A fine-mesh strainer ensures a clearer stock. For an exceptionally clear result, consider having a second, even finer mesh strainer or some cheesecloth on hand.
Step-by-Step Guide to Making Make-Ahead Turkey Stock for Thanksgiving
Creating homemade turkey stock is an all-day affair, but rest assured, much of the process involves passive simmering, allowing you to enjoy a leisurely day at home while your kitchen fills with incredible aromas. This methodical approach ensures a rich, deeply flavored stock that will be the cornerstone of your holiday cooking.
i. The Preparation Phase: Building the Flavor Foundation
The initial steps are crucial for laying down the foundational flavors of your stock, focusing on browning the turkey parts and sweating the aromatics.
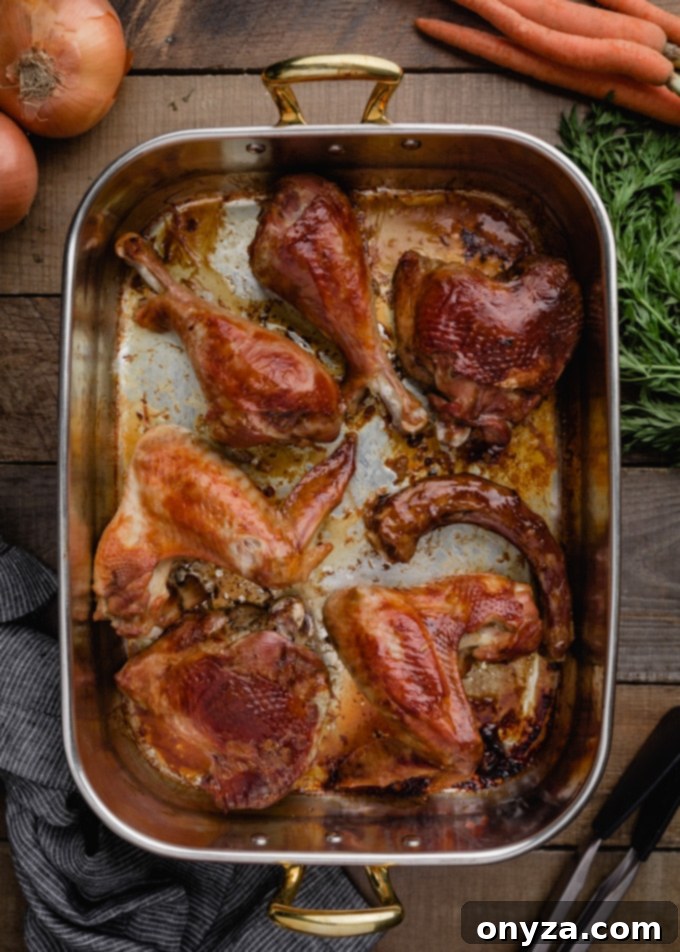
- Roast the Turkey Parts for Deep Flavor: Preheat your oven to a robust 425 degrees F (220 degrees C). Arrange the turkey legs, wings, and neck in a single layer within your large roasting pan, ensuring they have enough space to brown properly without steaming. Roast for approximately 90 minutes, or until all parts achieve a deep golden-brown hue on all sides. For optimal browning, remember to flip them halfway through the cooking time. This roasting step is critical; it initiates the Maillard reaction, which develops complex, savory flavors and a rich color that would otherwise be absent in an unroasted stock.
- Chef’s Tip: While the primary goal is stock, you might find some meatier pieces like thighs or drumsticks that have cooked beautifully. If desired, you can shred a small amount of this tender turkey meat for a cook’s treat! Just be sure to leave a substantial amount on the bones to contribute to the richness of your stock.
- Prepare and Sweat the Aromatics: As the turkey parts near the end of their roasting time, roughly chop your carrots, celery, and onions (mirepoix). In your large stock pot, heat a few tablespoons of neutral oil over medium-high heat. Add the chopped vegetables and “sweat” them—cook them until they are softened and just beginning to turn translucent or lightly brown, typically 8-10 minutes. The goal here is to release their aromatic compounds and sweetness without full caramelization, which can make the stock too dark or slightly bitter. Remove the pot from the heat once the vegetables are ready.
- Deglaze the Roasting Pan: Capturing Every Ounce of Flavor: The caramelized bits (known as “fond”) stuck to the bottom of your roasting pan are pure gold—a concentrated source of umami flavor. Do not leave them behind! Carefully remove the roasted turkey parts from the pan and transfer them into your stock pot with the sweated vegetables. At this point, you’ll likely see rendered fat in the roasting pan. Skim or pour off this fat. You can either discard it or, even better, refrigerate it to use as a flavorful base for your Thanksgiving gravy roux.
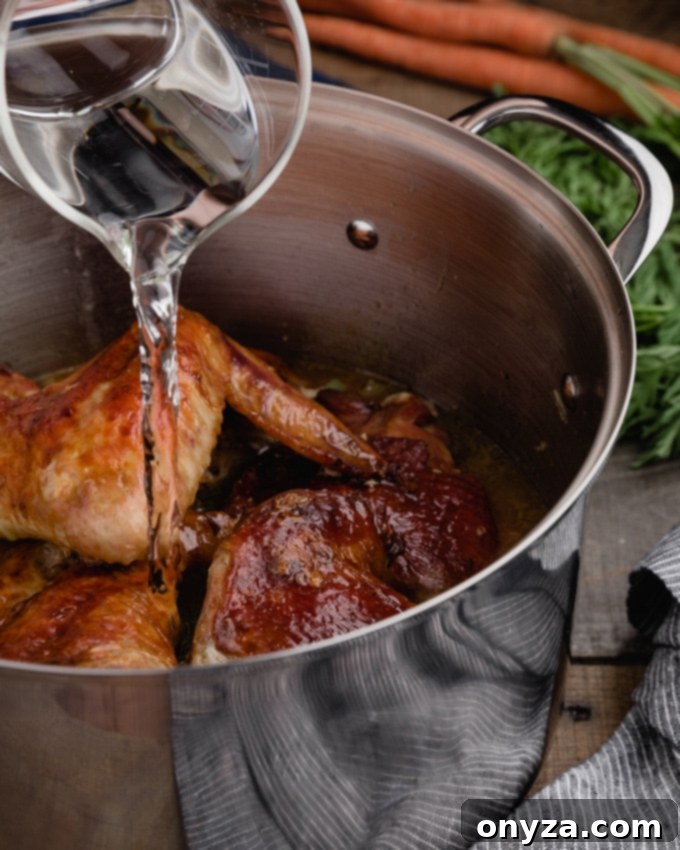
- Now, add 2 cups of cool water to the still-hot roasting pan. Using a sturdy wooden spoon, vigorously scrape up all those delicious, caramelized brown bits from the bottom. The heat from the pan will help dissolve them into the liquid. Pour this incredibly flavorful deglazing liquid into the stock pot. This step not only enriches your stock immensely but also gives you a fantastic head start on cleaning your roasting pan!
- Pro Tip for Deglazing: If your roasting pan has cooled significantly, or if the fond proves stubborn, you can place the pan across two burners on your stovetop to gently heat the water. This will help loosen the caramelized bits more effectively. However, most of the time, the residual heat from the oven is sufficient.

ii. Simmering Your Stock to Perfection: The Heart of the Process
This phase is where the magic truly happens, as flavors slowly meld and intensify over several hours.
- Initiate the Simmer: Pour the remaining gallon of cool water into the stock pot. Ensure the water adequately covers the turkey parts and vegetables by about 1 to 2 inches. Place the pot over medium-low heat and slowly bring it to a bare simmer. A “bare simmer” means you’ll see only occasional, tiny bubbles breaking the surface, not a vigorous boil.
- Crucial Technique: Avoid a Rolling Boil! For the clearest, most beautiful stock, it is absolutely essential to maintain a steady, gentle simmer and to avoid letting the pot boil heavily. A rapid boil agitates the ingredients, emulsifying fats and breaking down solids into fine particles, which results in a cloudy, greasy stock. Patience is key here.
- Skim the Surface for Clarity: As the liquid gradually heats and approaches its initial simmer, you will notice a white, foamy substance accumulating on the surface. This foam consists of impurities and coagulated proteins. Use a clean spoon or a fine-mesh skimmer to carefully remove and discard this foam. Skimming is important for achieving a clear, clean-tasting stock.
- Add the Aromatic Seasonings: Once the initial foam has been skimmed, it’s time to introduce your aromatics. Add the fresh parsley, thyme sprigs, bay leaf, and whole black peppercorns to the pot, ensuring they are submerged in the liquid. If your celery stalks had leaves, now is the perfect time to add them as well, as they contribute additional flavor.
- Timing Your Seasonings: I prefer to add my seasonings after the initial skimming, rather than at the very beginning with the turkey parts and water. This prevents accidentally skimming off valuable peppercorns or herb sprigs along with the impurities, ensuring all the aromatic goodness remains in your stock.
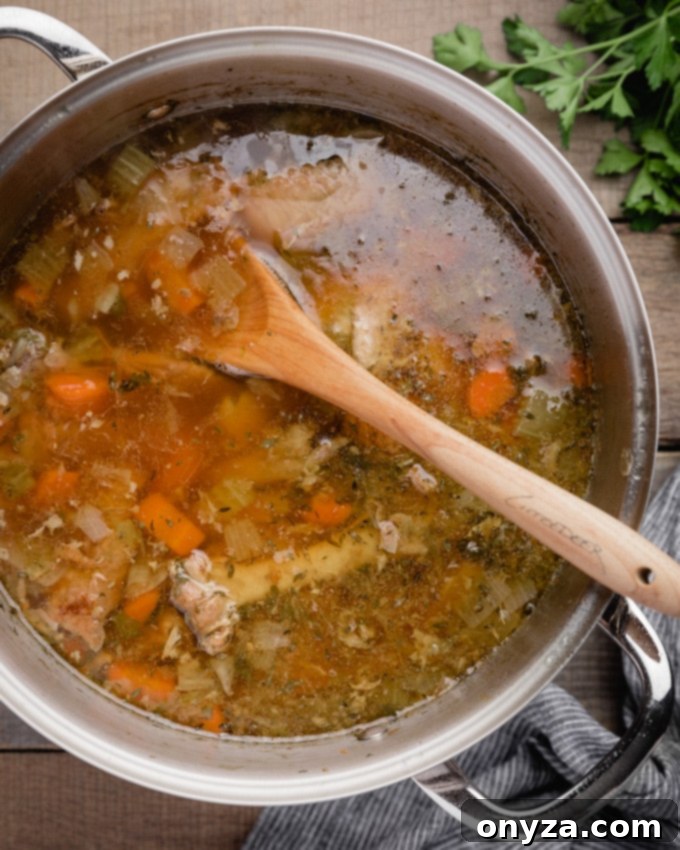
- The Long Simmer: Continue to maintain a gentle, steady simmer for 3 to 4 hours. During this time, the liquid will gradually reduce, concentrating the flavors and extracting all the rich goodness from the bones and vegetables. Your kitchen will be filled with a truly heavenly aroma, a sure sign that your stock is developing beautifully.
iii. Achieving a Crystal-Clear Stock: The Straining Process
Once your stock has simmered sufficiently, the next step is to carefully separate the rich liquid from the spent solids, aiming for maximum clarity and flavor.
- Initial Strain: Carefully remove the large turkey bones, meat, and cooked vegetables from the pot. I recommend straining the stock in manageable batches into a heatproof bowl or another clean pot, allowing as much liquid as possible to drain naturally from the solids. A crucial tip for preventing cloudiness: resist the urge to press down heavily on the vegetables or bones. Squeezing them can force tiny particles and emulsified fats into your stock, making it murky.
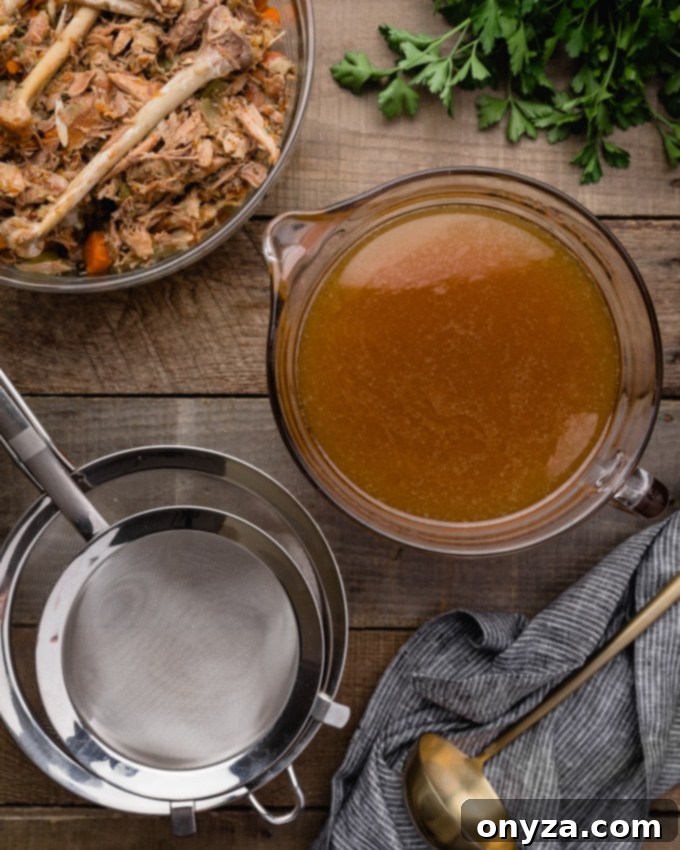
- Double Strain for Exceptional Clarity: For the most beautiful, crystal-clear stock, I almost always double strain. For the first pass, I use a standard stainless steel mesh strainer to remove the larger solids. Then, for the second pass, I pour the liquid through a much finer mesh strainer. Alternatively, you can line your standard strainer with several layers of cheesecloth. Is this extra step absolutely mandatory? No, but if you appreciate a truly gorgeous, perfectly clear stock that shines in your dishes, it’s well worth the effort.
- Advanced Tip: Consider a Remouillage (Second Stock)! For the truly dedicated cook, don’t discard those bones just yet! You can use them to create a “remouillage,” which is a French technique for making a “second stock.” By adding fresh water to the already-simmered bones and simmering again for 1-2 hours, you’ll yield a weaker stock than your first batch. This remouillage is perfect as a flavor booster in place of water when starting your next batch of stock, or for lighter applications.
- Check Volume and Reduce (if necessary): After straining, you should ideally have approximately 8 cups (2 quarts) of concentrated turkey stock. If you find you have significantly more, return the strained liquid to a clean pot and continue to gently simmer it until it reduces to the desired volume. This ensures your stock is appropriately concentrated for maximum flavor impact in your recipes.
iv. Food Safety: Rapid Cooling for Your Homemade Stock
Due to its high protein and nutrient content, homemade stock can become a prime breeding ground for bacteria if not handled correctly. Rapid cooling is absolutely essential to prevent the growth of harmful microorganisms and ensure your stock is safe for consumption and storage.
- The “Danger Zone” Challenge: The primary issue with a large pot of hot stock is twofold:
- It takes an unacceptably long time to cool down naturally to the “safe zone” (below 40 degrees F or 4 degrees C), increasing the risk of bacterial growth.
- Placing a large, very hot container directly into a home refrigerator can drastically raise the internal temperature of the appliance, potentially compromising the safety of other foods stored inside.
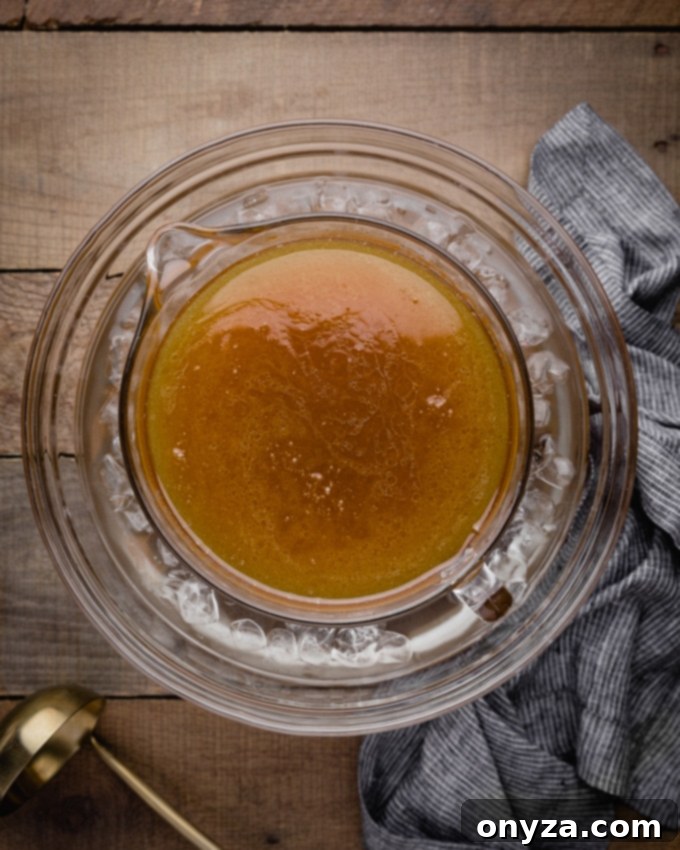
- The Ice Water Bath Technique: The most effective method for rapid cooling is an ice water bath. Transfer your strained stock into a clean, high-sided pot or sturdy container. Then, place this container into a larger bowl (or directly into a clean kitchen sink) filled with ice water. The ice water should come about halfway up the sides of the stock container.
- Let the stock cool in this bath for approximately 30 minutes, replenishing the ice as it melts to maintain a consistently cold environment. Stir the stock occasionally—every 5 to 10 minutes—to help distribute the cold and accelerate the cooling process evenly.
- After 30 minutes in the ice bath, the stock’s temperature will have dropped sufficiently to safely transfer it, covered, to the refrigerator for complete chilling. This proactive cooling significantly reduces the risk of bacterial proliferation.
- Safety Precaution: Secure Your Container! When using an ice water bath, always ensure your stock container is stable and securely placed within the larger bowl or sink. You don’t want it to tip over, nor do you want any of the ice bath water splashing into the precious stock you’ve worked so hard to create!
Storing and Maximizing Your Homemade Make-Ahead Turkey Stock
Once your rich, homemade turkey stock is made and properly cooled, understanding how to store and effectively utilize it will streamline your holiday cooking and beyond.
Immediate Use and Fat Management:
If you plan to use the stock immediately while it’s still hot, allow it to stand for about 10 minutes after straining. This brief resting period gives the fat a chance to rise and separate to the top. Use a large spoon or ladle to carefully skim off this rendered fat. This flavorful turkey fat (often called schmaltz) is a culinary gem! I highly recommend saving it in an airtight container in the refrigerator; it’s absolutely perfect for making a roux for your gravy base, adding an unparalleled depth of turkey flavor. It can also be used for roasting vegetables or frying eggs.
Long-Term Storage Solutions:
- Refrigeration: For short-term use, store your homemade turkey stock in clean, airtight containers in the refrigerator for up to 3 to 4 days. Ensure it is completely chilled before sealing and refrigerating.
- Freezing for Extended Freshness: For longer storage, homemade turkey stock freezes beautifully. It can be safely stored in the freezer for up to 3 months. To make future meal prep easier, I like to freeze stock in convenient 1-cup or 2-cup portions using freezer-safe containers, zip-top bags (laid flat), or even ice cube trays for smaller quantities. This allows you to thaw just the amount you need for a specific recipe.
The Magic of Gelatinization:
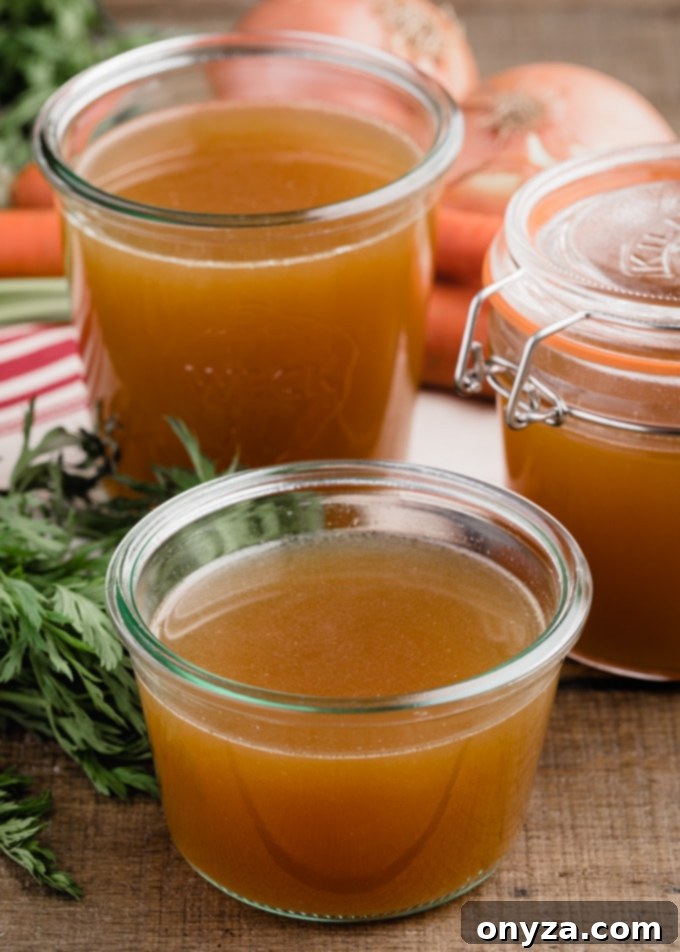
As your homemade stock chills in the refrigerator, you’ll notice it often develops a wonderful, gelatin-like consistency. This is a clear indicator of a high-quality stock, rich in collagen. Collagen, a protein naturally present in the bones and connective tissues of the turkey, breaks down into gelatin during the slow simmering process. A gelatinous stock is not only a sign that you’ve done everything right, but it also contributes to a richer mouthfeel and body in your finished dishes. Don’t worry, it will quickly regain its fluid consistency as it’s gently warmed.
Before reheating or using your chilled, gelatinous stock, you might find a solidified layer of fat on the very top (if you didn’t skim it off when the stock was hot). This fat acts as a natural seal, helping to preserve the stock below. You can easily scrape off this solid fat layer with a spoon and either save it for cooking (as mentioned for gravy) or discard it, depending on your preference and dietary needs.
Unleashing the Full Potential of Your Turkey Stock:
On the big day, or any day you crave a touch of gourmet flavor, your homemade make-ahead turkey stock will be an invaluable asset. Use it generously for:
- Creating an incredibly flavorful make-ahead gravy base that will be the star of your meal.
- Moistening and enriching your favorite stuffing recipe, like a savory cranberry pecan stuffing.
- Basting your magnificent roasted turkey, ensuring a moist and exceptionally flavorful bird.
- Adding depth to roasted vegetables or mashed potatoes.
- Serving as the perfect, robust base for a comforting leftover turkey soup, transforming your holiday remnants into another delicious meal.
CRAVING MORE CULINARY INSPIRATION? Stay updated with the latest recipes, tips, and culinary adventures! Subscribe to our newsletter and join our vibrant community on Facebook, Pinterest, and Instagram for daily doses of deliciousness.
Make Ahead Turkey Stock Recipe
A rich and deeply flavored turkey stock that you can prepare several days in advance of Thanksgiving. This homemade broth provides an unparalleled flavor foundation for your stuffing, gravy, and soup recipes, ensuring a memorable holiday feast!
Author: Amanda Biddle
Prep Time: 30 minutes
Cook Time: 5 hours 30 minutes
Total Time: 6 hours
Yields: 16 servings (approximately 8 cups / 2 quarts)
Rating: 5 out of 5 stars (from 1 vote)
Ingredients
- 5 to 6 pounds turkey parts (wings, thighs, drumsticks)
- 1 turkey neck (optional, but highly recommended for flavor)
- 1 gallon cool water, divided
- 3 cups roughly-chopped yellow onion (about 1 pound or 2 large onions)
- 1-1/2 cups roughly-chopped carrots (about 1/2 pound or 2 large carrots)
- 1-1/2 cups roughly-chopped celery (about 1/2 pound or 2 large celery ribs – remove any leaves and reserve for stock)
- 2 tablespoons vegetable or canola oil
- ¼ teaspoon whole black peppercorns
- 1 small handful fresh parsley (about 8-10 sprigs)
- 6 sprigs fresh thyme
- 1 large Turkish bay leaf (ensure it’s bay laurel, not California bay)
Instructions
Roast and Prep
- Preheat your oven to 425 degrees F (220 C). Arrange the turkey parts (wings, thighs, drumsticks, and optional neck) in a single layer in a large roasting pan. Roast for about 90 minutes, turning them halfway through, until they are deeply golden brown on all sides. This step is key for developing rich flavor and color.
- While the turkey parts are roasting, roughly chop your onions, carrots, and celery. In a large stock pot, heat the 2 tablespoons of vegetable or canola oil over medium-high heat. Add the chopped vegetables and “sweat” them, cooking until they are softened and just beginning to brown, approximately 8-10 minutes. Remove the pot from the heat.
- Once the turkey parts are roasted, carefully remove them from the roasting pan and transfer them to the stock pot with the sweated vegetables. (If any meat on the legs or thighs looks appealing, you can shred a small amount to enjoy, but leave a good proportion on the bones for a hearty stock.) Pour off any rendered fat from the roasting pan. You can refrigerate this flavorful fat for making gravy or discard it.
- To deglaze the roasting pan, pour 2 cups of cool water into it. Use a sturdy wooden spoon to scrape up all the flavorful brown bits (the “fond”) stuck to the bottom of the pan. If the pan isn’t hot enough to easily release the fond, and if it’s stove-safe, you can place it across two burners on the stove to gently heat the liquid and aid the deglazing process. Pour this rich deglazing liquid into the stock pot.
Simmer the Stock
- Add the remainder of the 1 gallon of water to the stock pot, ensuring the turkey parts are covered by 1 to 2 inches. Place the pot over medium-low heat and slowly bring it to a bare simmer. As it heats, use a spoon or fine-mesh skimmer to remove and discard any white foam that floats to the surface. Maintain a gentle simmer, avoiding a rolling boil to keep the stock clear.
- After skimming, add the fresh parsley, thyme sprigs, bay leaf, and whole black peppercorns to the pot, submerging them in the liquid. Continue to gently simmer the stock for 3 to 4 hours, allowing the flavors to meld and deepen.
Strain the Stock
- Carefully strain the stock, separating the liquid from the bones, meat, and vegetables. Pour the contents through a large mesh strainer set over a clean heatproof bowl or pot. Allow the liquid to drain naturally, avoiding the temptation to press down heavily on the solids, as this can make your stock cloudy. For the clearest possible stock, I recommend double-straining: first through a standard mesh strainer, then through a very fine-mesh sieve or a strainer lined with cheesecloth.
- After straining, you should have approximately 8 cups (2 quarts) of rich turkey stock. If you find you have significantly more, return the strained liquid to a clean pot and continue simmering gently until it reduces to the target volume, concentrating its flavors.
Skim, Cool, and Store
- If you plan to use the stock immediately, let it stand for about 10 minutes to allow the fat to separate and rise to the top. Use a spoon to skim this layer of fat from the surface. (As with the fat from the roasting pan, this flavorful turkey fat can be refrigerated and used for making gravy or other cooking applications.)
- If you intend to store the stock for later use, it’s crucial to cool it down quickly and safely. Transfer the stock into a high-sided, sturdy container or pot. Place this container into a larger bowl filled with ice water, ensuring the ice water comes about halfway up the sides of the stock container. Cool for approximately 30 minutes, refreshing the ice as needed and stirring the stock every 5-10 minutes to promote even cooling.
- Once sufficiently cooled (it should be noticeably cooler to the touch), transfer the stock to clean, lidded, airtight containers. Refrigerate for up to 3-4 days or freeze for up to 3 months. When chilled, the stock will often develop a jelly-like consistency due to the presence of gelatin; this is a sign of high quality and it will become fluid again upon warming. If you didn’t skim the fat when the stock was liquid, it will solidify into a layer on top of the gelatinous stock in the refrigerator, which can easily be scraped off and saved or discarded.
- Utilize your homemade turkey stock as directed in your favorite Thanksgiving recipes, or for any dish that calls for a rich, savory broth.
Notes
For more detailed insights, additional tips, and explanations regarding each step of making turkey stock, I highly recommend reading through the comprehensive article above. There’s a wealth of information that can further enhance your stock-making prowess!
Nutrition Estimate
Nutrition information is automatically calculated, so should only be used as an approximation.
Calories: 52 kcal | Carbohydrates: 3g | Protein: 3g | Fat: 3g | Saturated Fat: 2g | Cholesterol: 8mg | Sodium: 25mg | Potassium: 94mg | Fiber: 1g | Sugar: 2g | Vitamin A: 721IU | Vitamin C: 3mg | Calcium: 20mg | Iron: 1mg
Please note that our recipes have been developed using the US Customary measurement system and have not been tested for high altitude/elevation cooking and baking.
