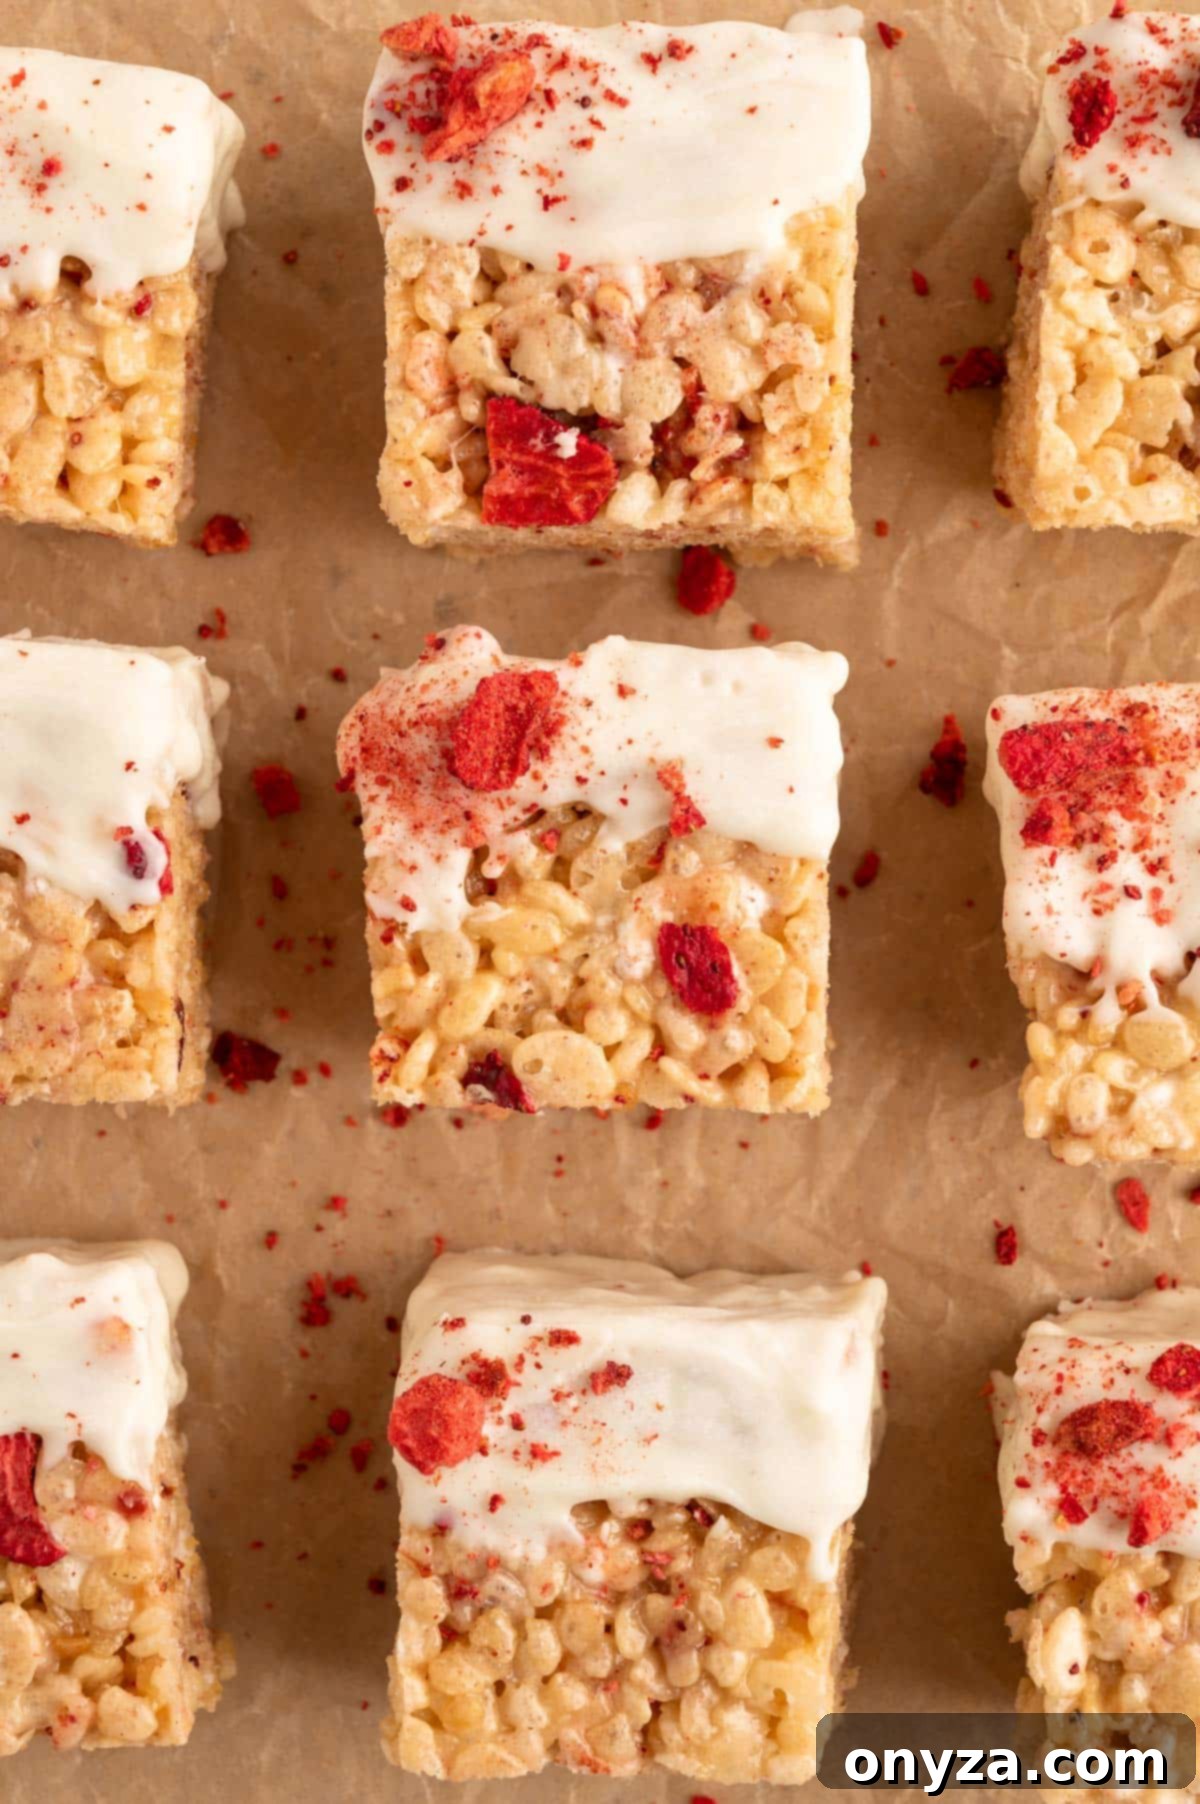
Indulge in a delightful twist on a classic treat with these incredible Strawberry Rice Krispie Treats. This recipe masterfully combines the buttery, chewy goodness of marshmallows with the vibrant, sweet-tart essence of real strawberries and a luxurious touch of chocolate. Expect that satisfying crunch synonymous with traditional Krispie treats, elevated by a burst of fresh, fruity flavor. Perfect for celebrating Valentine’s Day, adding a festive touch to spring gatherings, or simply satisfying a sweet craving any time of year, these homemade marshmallow bars are sure to become a cherished favorite.
Why These Strawberry Rice Krispie Treats Are Irresistible
For many, the mention of Rice Krispie Treats evokes a wave of nostalgia, conjuring memories of childhood lunchboxes and simple, blissful moments. As adults, we often seek to recapture that innocent joy, and these Strawberry Rice Krispie Treats offer a delightful journey back to those cherished times, with an elegant, fruit-infused upgrade. This recipe isn’t just a dessert; it’s an experience that appeals to both young and old, blending the familiar comfort of a classic with a refreshing, natural twist.
Here’s a deeper dive into what makes this particular recipe stand out and why it’s guaranteed to be a new family favorite:
- Effortlessly Simple & No-Bake: Just like their traditional counterparts, these strawberry-infused treats require no oven, making them an ideal choice for quick dessert fixes or when you need a crowd-pleasing snack without the fuss. The process is straightforward, perfect for even novice bakers.
- Fun for All Ages: The act of making and decorating these treats is a joy in itself. Gather the family for a fun kitchen activity, allowing everyone to get creative with dipping, drizzling, and sprinkling. It’s a wonderful way to create delicious memories together.
- Naturally Delicious Strawberry Flavor: We pride ourselves on using only natural ingredients to achieve that authentic strawberry taste. This recipe skips artificial sugars, flavors, and dyes, ensuring a pure, sweet-tart fruitiness that truly shines through, reminiscent of fresh summer berries.
- Visually Stunning & Festive: With their beautiful pink hue and potential for chocolate drizzles or dips, these treats are incredibly photogenic and festive. They are particularly perfect for holiday celebrations like Valentine’s Day, Easter, Mother’s Day, or any spring and summer gathering where a pop of color and a touch of sweetness are desired.
- The Perfect Texture Balance: This recipe delivers the quintessential crispy chewiness you expect from Rice Krispie treats, complemented by soft, gooey pockets of extra marshmallows and the subtle, delightful chew of freeze-dried strawberries. Each bite is a harmonious blend of textures.
- Versatile & Customizable: While fantastic on their own, these treats are also a blank canvas for customization. Dip them in white, dark, or milk chocolate, add sprinkles, or experiment with different garnishes to match any occasion or preference.
Curious about food history? Discover the inspiring story behind one of the women credited with inventing the original Rice Krispies Treats recipe in the 1930s. Read ”
Love Rice Krispies Treats? You Have an Iowan to Thank” from the Des Moines Register.
Essential Ingredients for Your Strawberry Krispie Treats
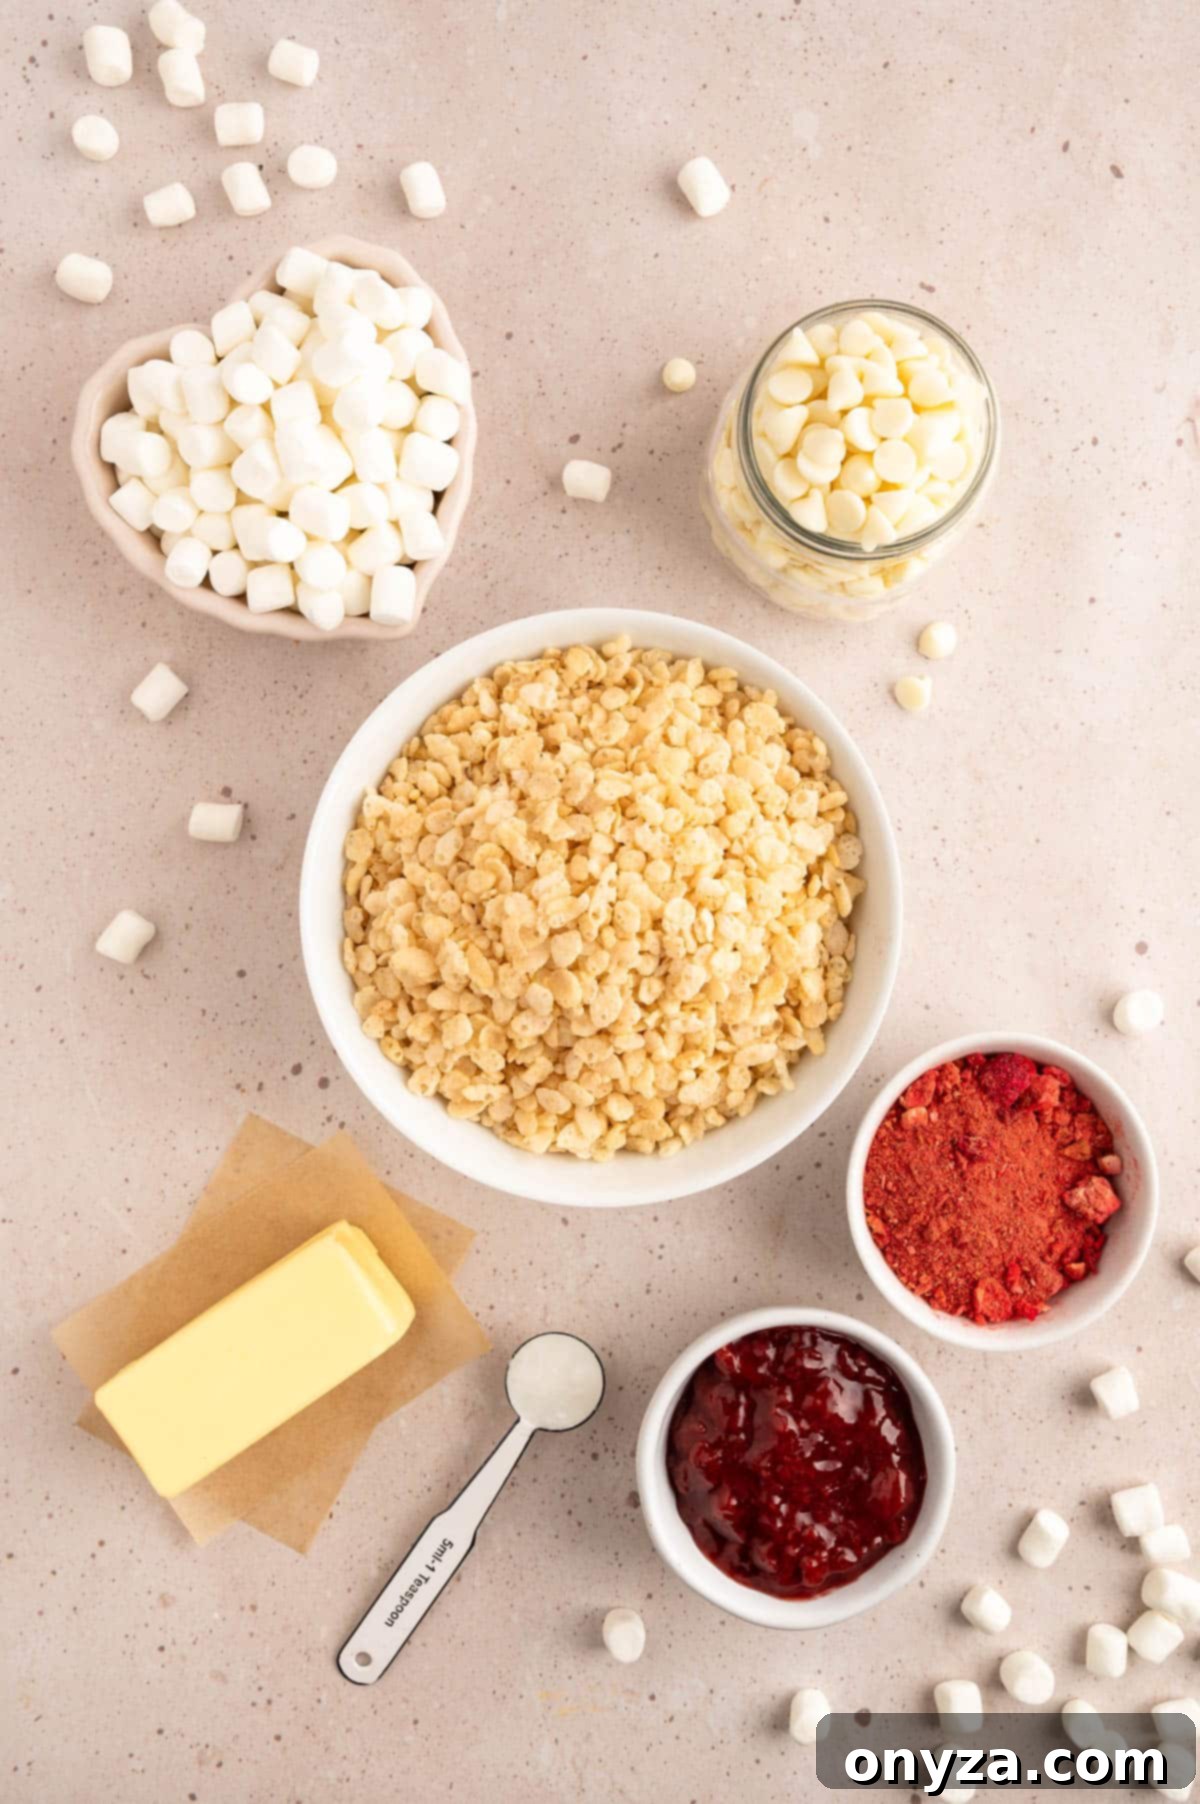
Crafting the perfect Strawberry Rice Krispie Treat starts with selecting high-quality ingredients. Each component plays a crucial role in achieving the desired flavor, texture, and overall deliciousness. Here’s what you’ll need and why:
- Butter: Opt for a rich, creamy European-style butter, such as Plugra or Kerrygold. Its higher fat content contributes a more pronounced and luxurious buttery flavor, which is a hallmark of truly exceptional Krispie treats. Using salted butter is key here, as it beautifully balances the sweetness from the marshmallows and preserves, creating a more complex and satisfying taste profile.
- Fresh Mini Marshmallows: You’ll need mini marshmallows for two distinct purposes. The majority will be melted to form the sticky, gooey base, providing that signature chewiness. A portion will be added whole towards the end of the recipe. These un-melted marshmallows create delightful, soft, gooey pockets within the treats once they set, adding an extra layer of texture and sweetness. The freshness of your marshmallows is paramount; stale marshmallows can result in hard, unappetizing treats.
- High-Quality Strawberry Preserves: This ingredient is vital for injecting a deep, authentic strawberry flavor and a lovely pink hue into your treats. Choose a brand with a high fruit content and noticeable pieces of fruit. Bonne Maman Strawberry Preserves are an excellent choice. Avoid jelly, as it lacks fruit pieces and a robust flavor. While jam is acceptable, preserves are superior due to their larger fruit chunks, which enhance both taste and texture.
- Crushed Freeze-Dried Strawberries: These are a secret weapon for intensifying the strawberry flavor and adding natural color without any artificial additives. When crushed into a fine powder, they integrate seamlessly into the treats, providing a concentrated burst of fruitiness. A few larger pieces can also be reserved for a beautiful garnish on top of the chocolate coating. You can typically find freeze-dried strawberries in the “Natural Foods” section, with other dried fruits, or sometimes near the produce department of your grocery store. You can also easily
find them online. - Puffed Rice Cereal: Whether you choose the brand name (Rice Krispies) or a generic puffed rice cereal, ensure it’s the plain, original variety. Avoid flavored cereals like Cocoa Krispies or Frosted Krispies, as they will alter the intended strawberry flavor. Just like the marshmallows, the cereal must be fresh. Stale cereal will result in a soft, rather than crispy, treat, diminishing that iconic crunch.
- Chocolate Chips (White or Dark): For an optional yet highly recommended embellishment, your favorite chocolate chips are essential for dipping or drizzling. White chocolate chips complement the strawberry flavor beautifully, echoing a chocolate-covered strawberry, while dark chocolate offers a sophisticated contrast. Brands like Guittard Choc-Au-Lait White Chocolate Baking Chips or Ghirardelli Semi-Sweet Chocolate Chips are excellent choices. Alternatively, you can use melting chocolates or wafers (e.g., Ghirardelli Melting Wafers), which are formulated to melt smoothly and set firmly without additional ingredients.
- Coconut Oil: If you’re using standard chocolate chips for dipping or drizzling, a touch of coconut oil is crucial. It helps to thin the melted chocolate, achieving the perfect smooth consistency for a beautiful, even coating that sets nicely. The exact amount may vary slightly depending on the brand and type of chocolate you use, so start with the recommended amount and adjust as needed.
- Vanilla Extract (Optional, but Recommended): A small splash of vanilla extract can enhance and round out the flavors of the treats, adding a warm, aromatic note that complements both the strawberry and marshmallow elements. It’s a subtle addition that makes a noticeable difference.
Selecting the Right Pan for Your Treats
The baking pan you choose significantly impacts the thickness and number of treats you yield. For this recipe, an 8-inch square baking dish is often considered ideal. It produces 16 thick, substantial squares, each offering a generous bite. Both stoneware, metal, and glass pans perform equally well in this application.
However, if you prefer thinner treats, or wish to increase the yield, a 9×9-inch or 13×9-inch pan can be used. A 9×9-inch pan will give you slightly thinner squares, while a 13×9-inch pan is excellent for making a larger batch, perfect for parties or events. The larger pan is also particularly convenient if you plan to use cookie cutters to create fun shapes, such as hearts for Valentine’s Day, as it provides a larger surface area to work with. Regardless of the pan size, always remember to line it with parchment paper, leaving a slight overhang on two sides. This simple step makes removing the set treats incredibly easy and simplifies cleanup.
Crafting Delicious Strawberry Rice Krispie Treats: A Step-by-Step Guide
1. Prepare Your Pan and Freeze-Dried Strawberries
Begin by preparing your baking pan to ensure a smooth process. Line an 8×8-inch baking pan with parchment paper, allowing a 2-inch overhang on two sides. This overhang acts as “handles,” making it incredibly easy to lift the entire slab of treats out of the pan once they’ve cooled and set, simplifying both cutting and cleanup.
Next, tackle the freeze-dried strawberries. These are typically sold in slices or whole pieces, but for this recipe, you’ll need them crushed into a fine powder. If left as larger pieces, they can become quite chewy when incorporated into the treats, potentially detracting from the desired crunchy texture of the finished product. An easy method is to place the freeze-dried strawberries in a zip-top bag and gently crush them with a rolling pin. Alternatively, for a finer powder, you can pulse them in a food processor for a few seconds.
2. Create the Sticky Marshmallow Base
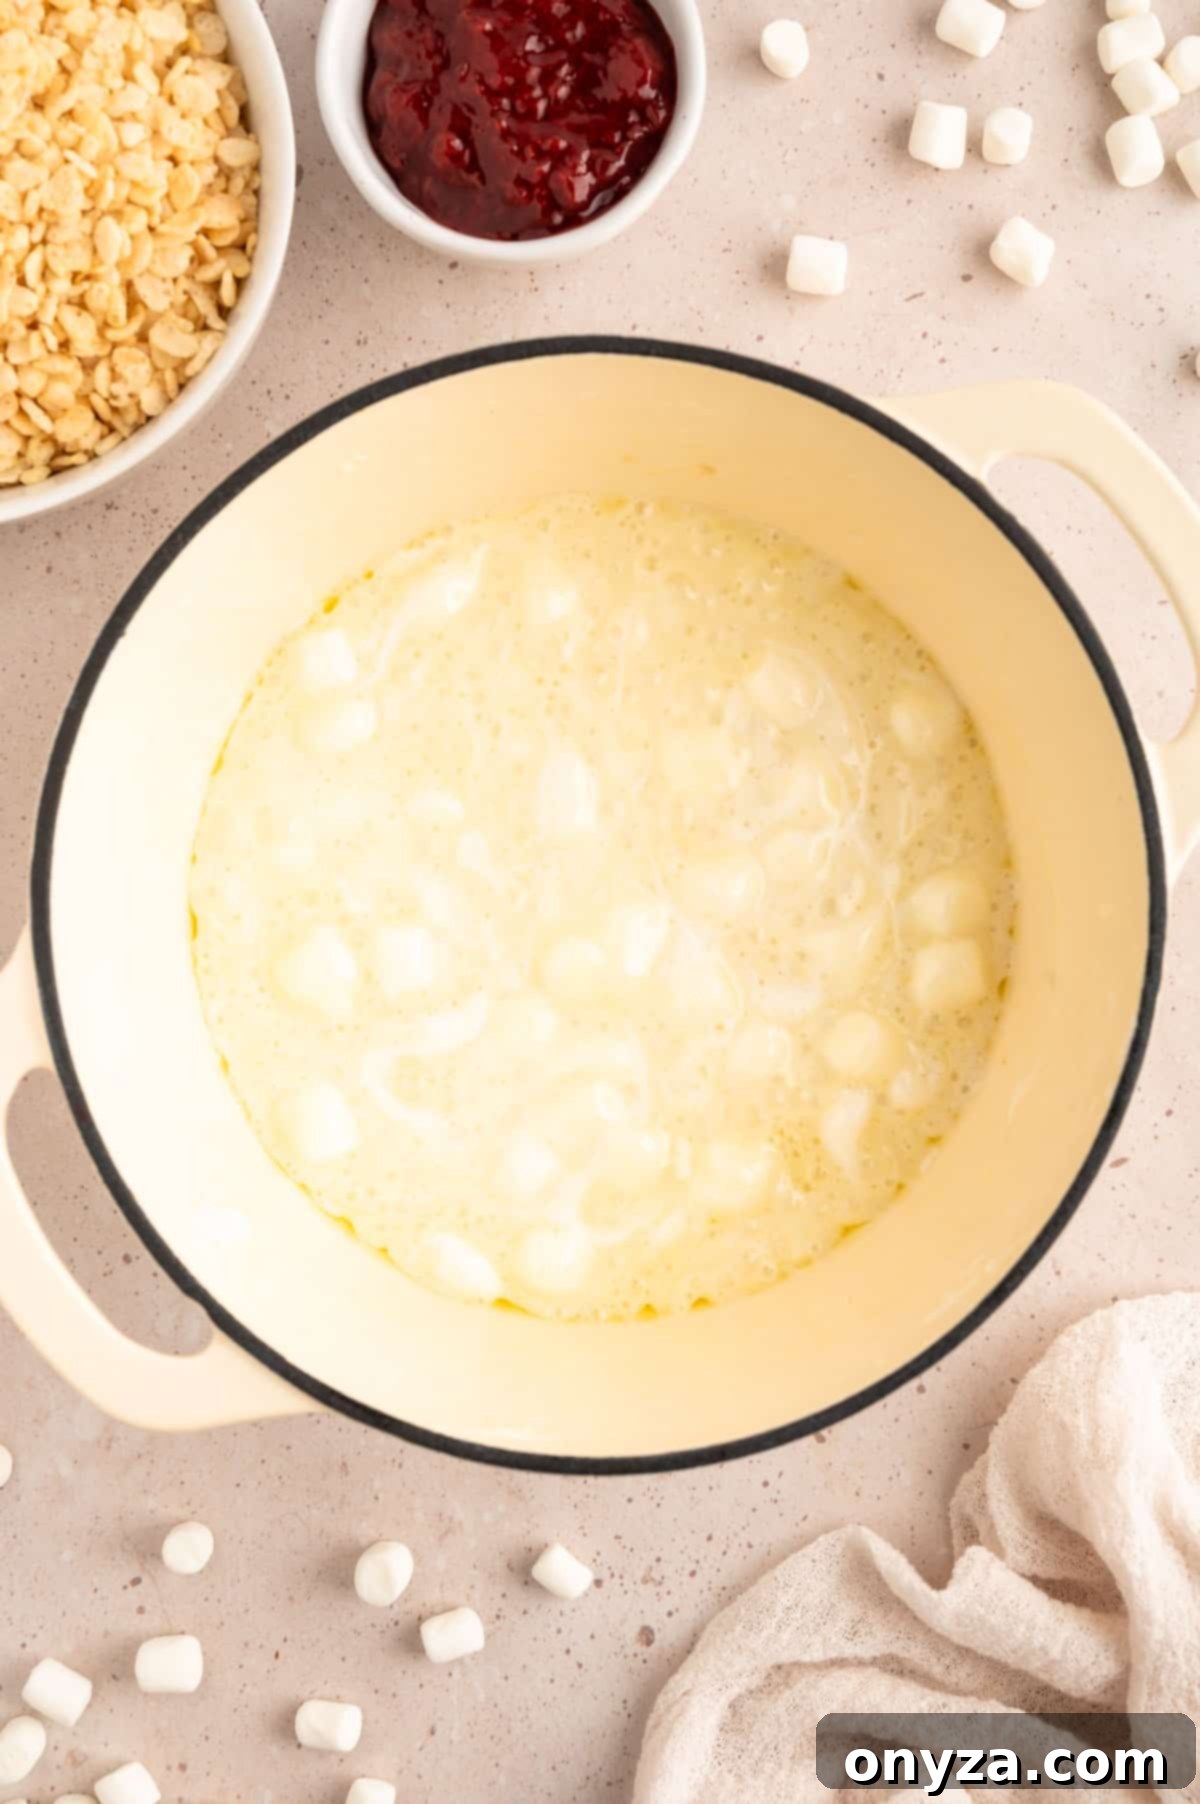
The heart of any Rice Krispie treat is its gooey marshmallow base. To begin, melt the butter in a large, heavy-bottomed pot or Dutch oven over medium-low heat. A heavy pot, such as an enameled cast iron Dutch oven, is ideal as it distributes heat evenly, preventing scorching. Once the butter is completely melted, add a 10-ounce bag of mini marshmallows, along with an additional 1 cup of mini marshmallows, to the pot.
Clever Tip: Don’t discard that butter wrapper! It will come in handy later for pressing and smoothing the sticky treats into the baking dish without them adhering to your hands.
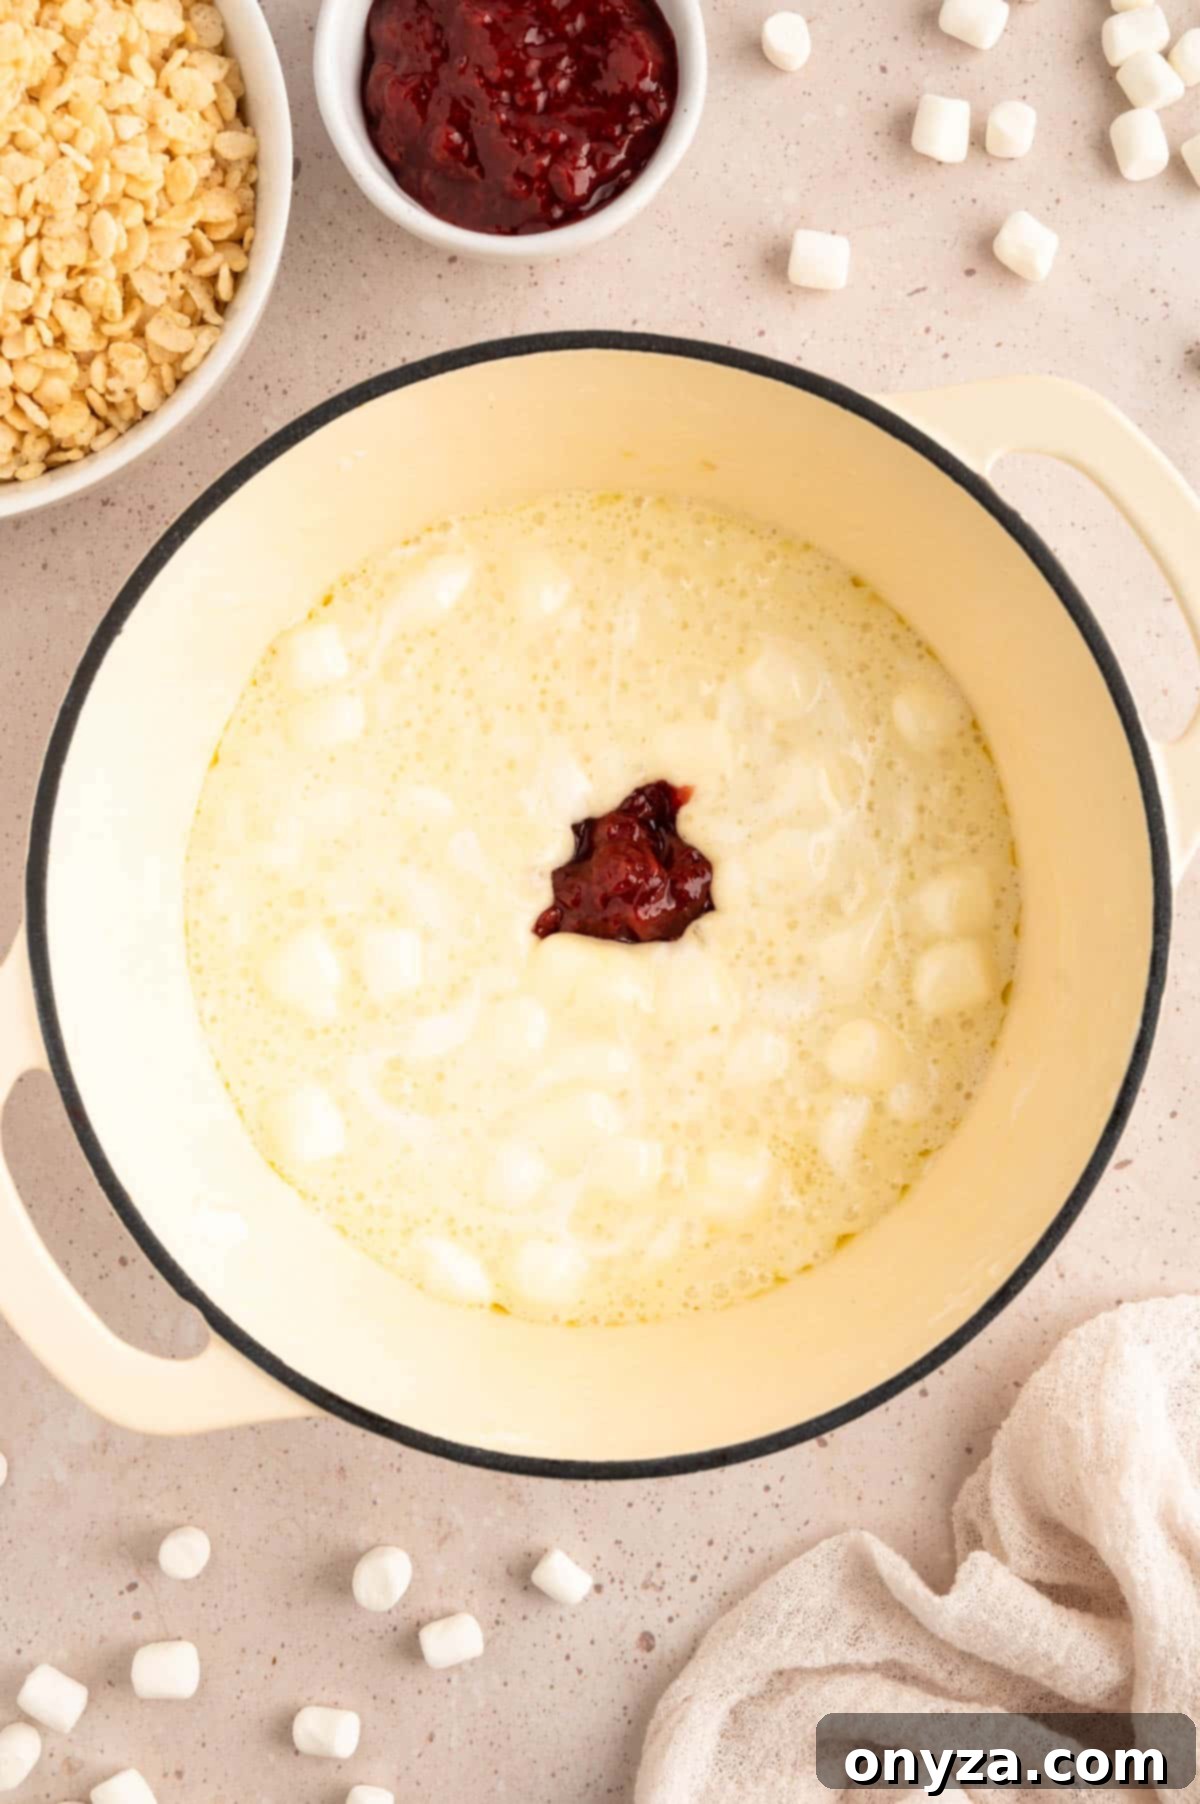
Continue cooking over low heat, stirring constantly with a rubber spatula or wooden spoon. This consistent stirring is crucial to ensure the marshmallows melt evenly and don’t stick to the bottom of the pot. Cook until the marshmallows are puffed and almost entirely melted, but still slightly lumpy. At this point, stir in the strawberry preserves and the optional (but highly recommended) vanilla extract. Continue stirring for just another minute or two, allowing everything to combine into a smooth, vibrant pink mixture.
Crucial Note on Heat: It is paramount to maintain low heat throughout this step. Overheating the sugars in the marshmallows and preserves can lead to a chemical change, resulting in treats that are too firm, brittle, or candy-like once cooled. Gentle, low heat ensures the treats remain perfectly crispy yet delightfully pliable and chewy.
3. Incorporate Cereal, Strawberries, and Extra Marshmallows
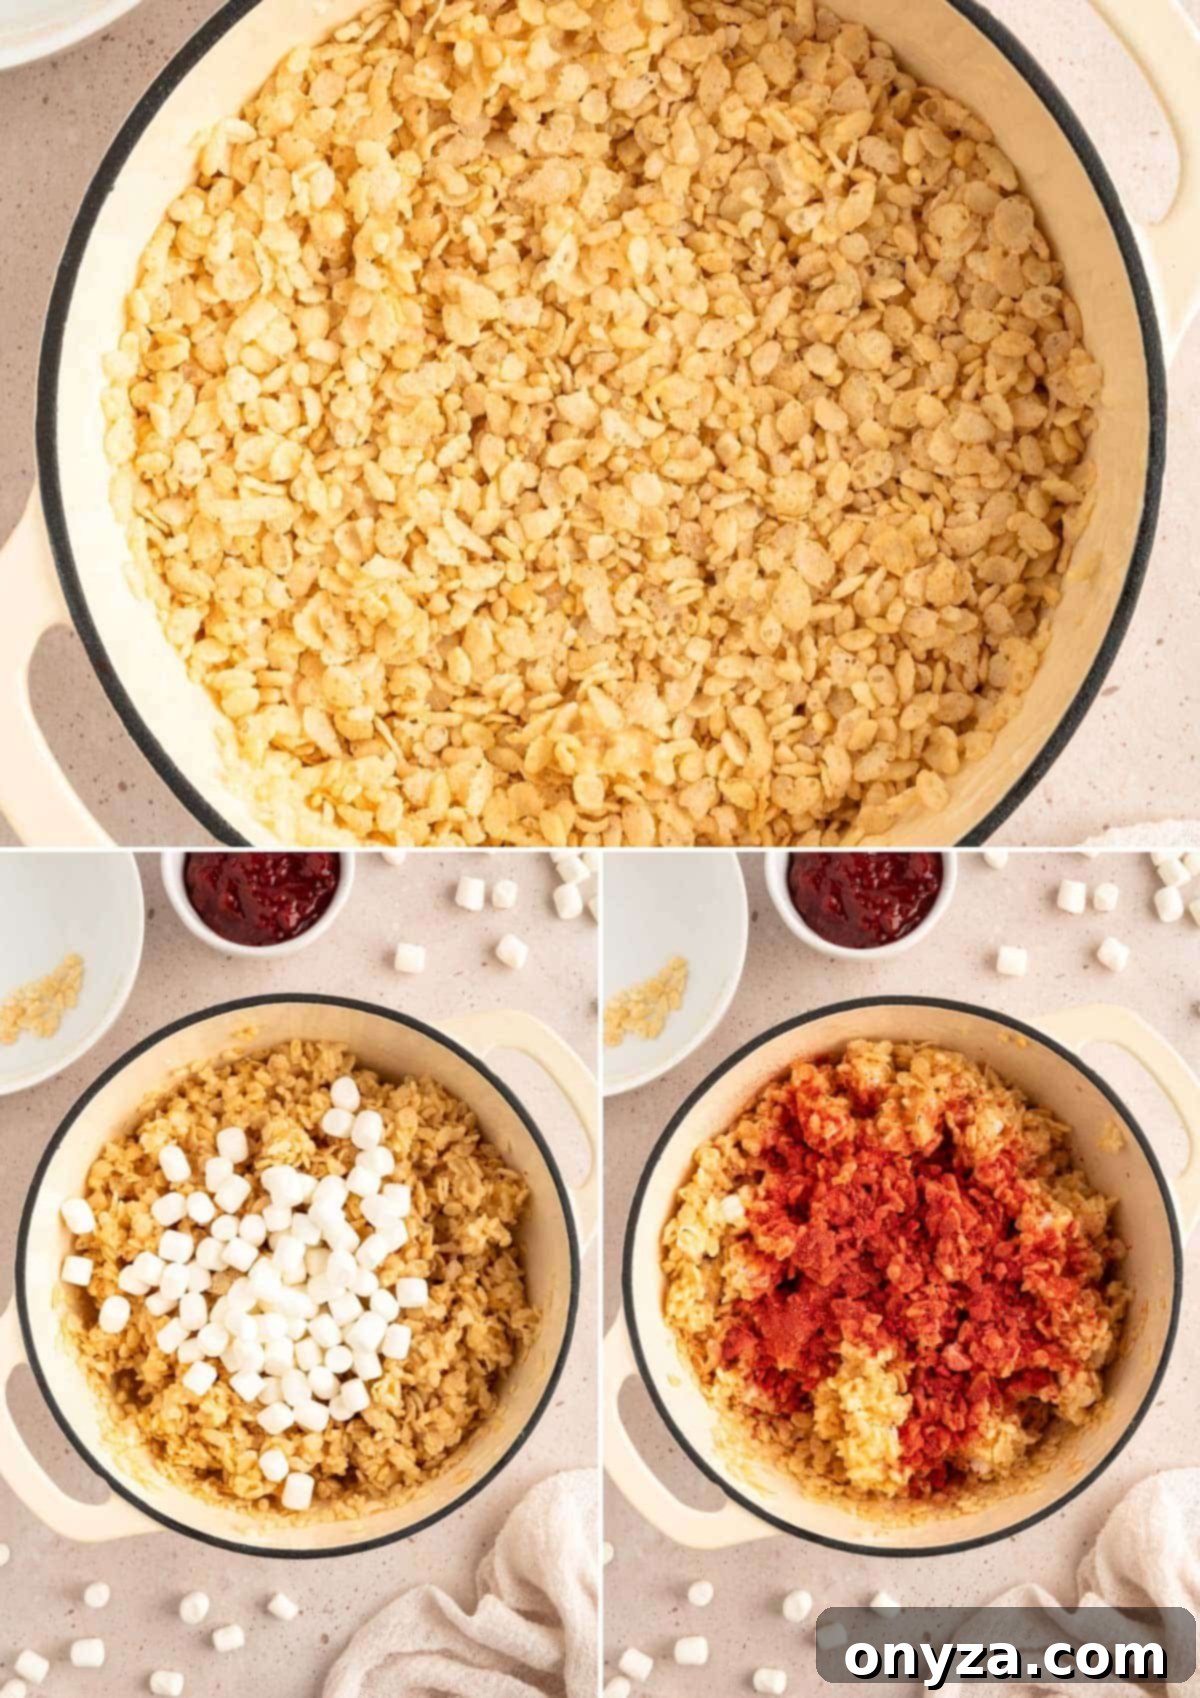
Once your marshmallow base is smooth and fragrant, immediately remove the pot from the heat. This prevents further cooking and ensures the cereal retains its crunch. Promptly add the puffed rice cereal to the hot marshmallow mixture. Using a sturdy rubber spatula, gently fold the cereal into the mixture until it is just combined. Avoid overmixing, which can crush the cereal and lead to a less crispy texture.
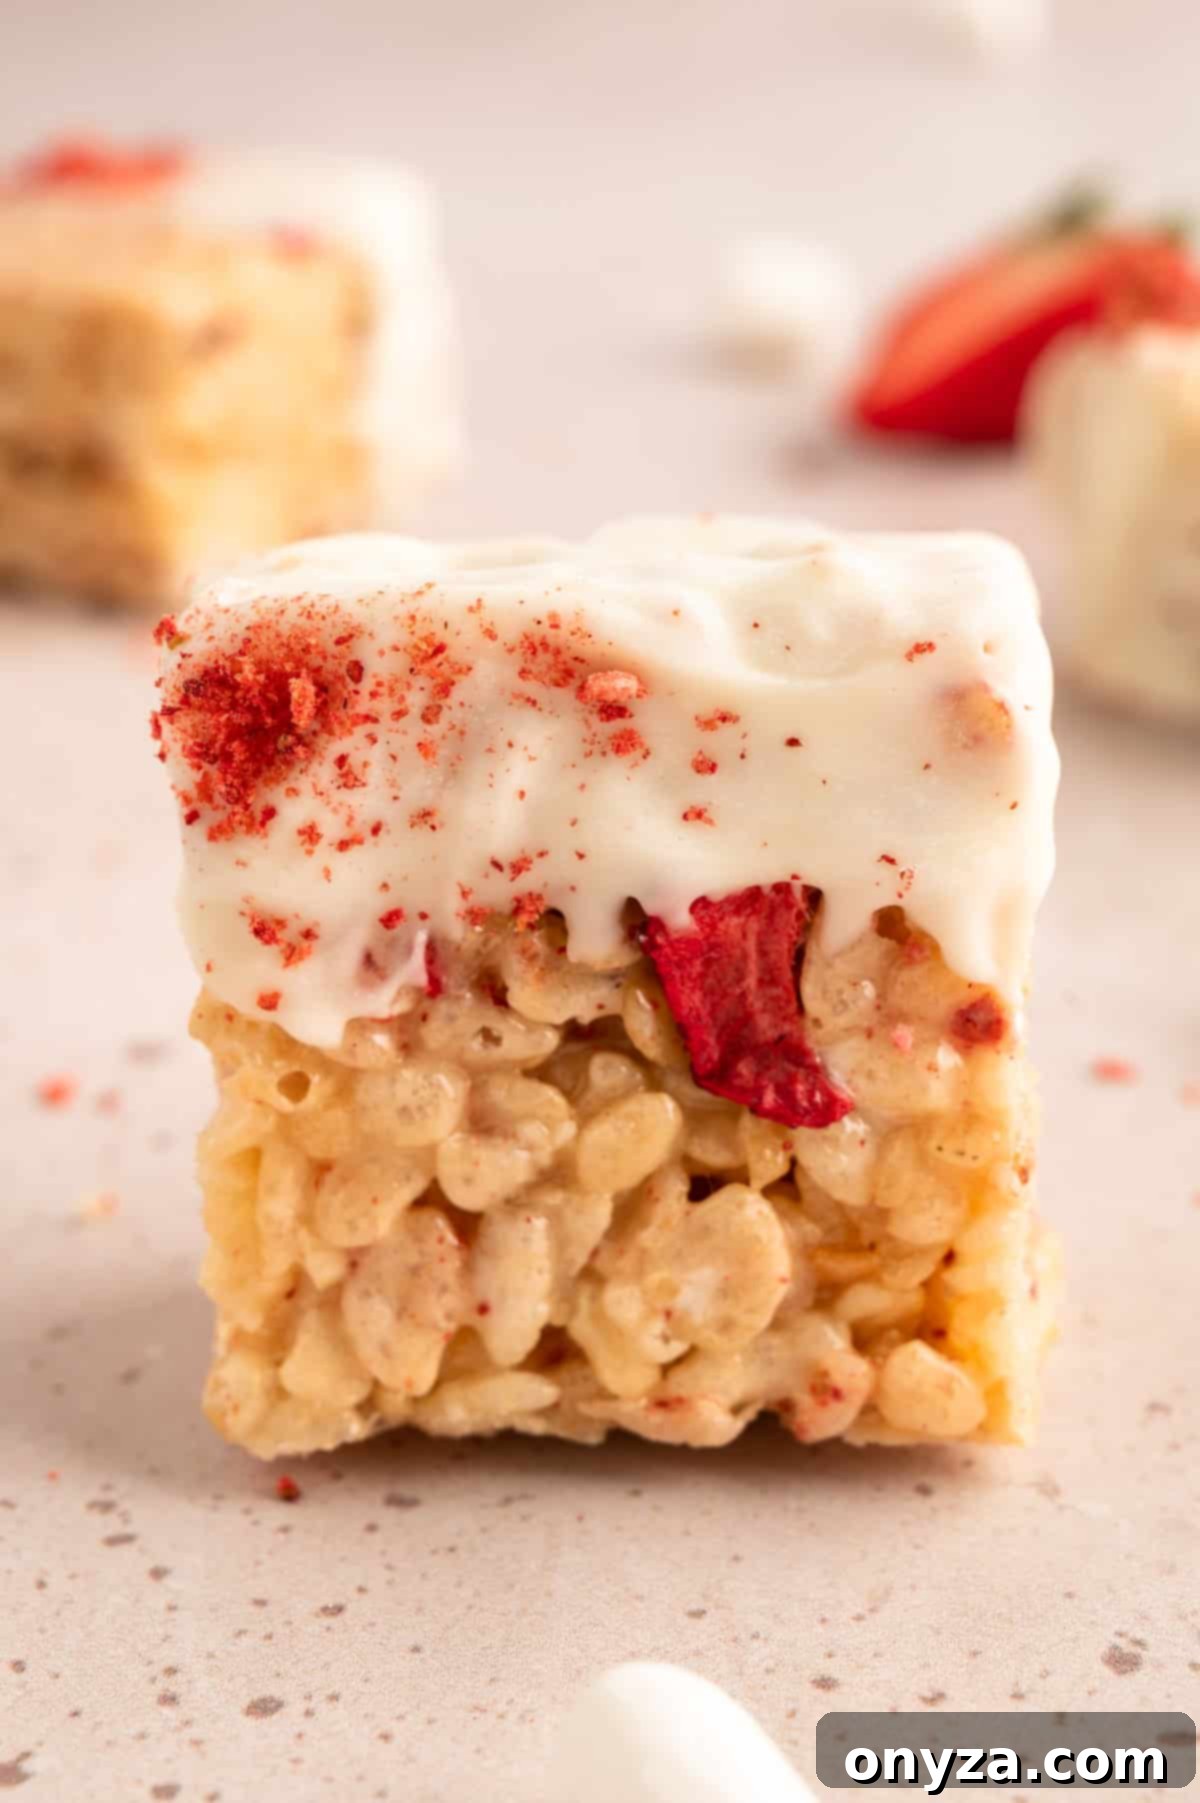
Next, add the crushed freeze-dried strawberries and the remaining 1 cup of miniature marshmallows to the pot. Stir gently until these ingredients are evenly distributed throughout the cereal mixture. The goal here is for the extra cup of marshmallows to soften from the residual heat, but not fully melt. These softened, yet still intact, marshmallow pieces will create wonderful, gooey pockets within the Strawberry Krispie Treats when they are cut, offering a delightful textural contrast to the crunchy cereal. This thoughtful addition elevates the chewiness and visual appeal of each square.
4. Assemble and Set the Treats
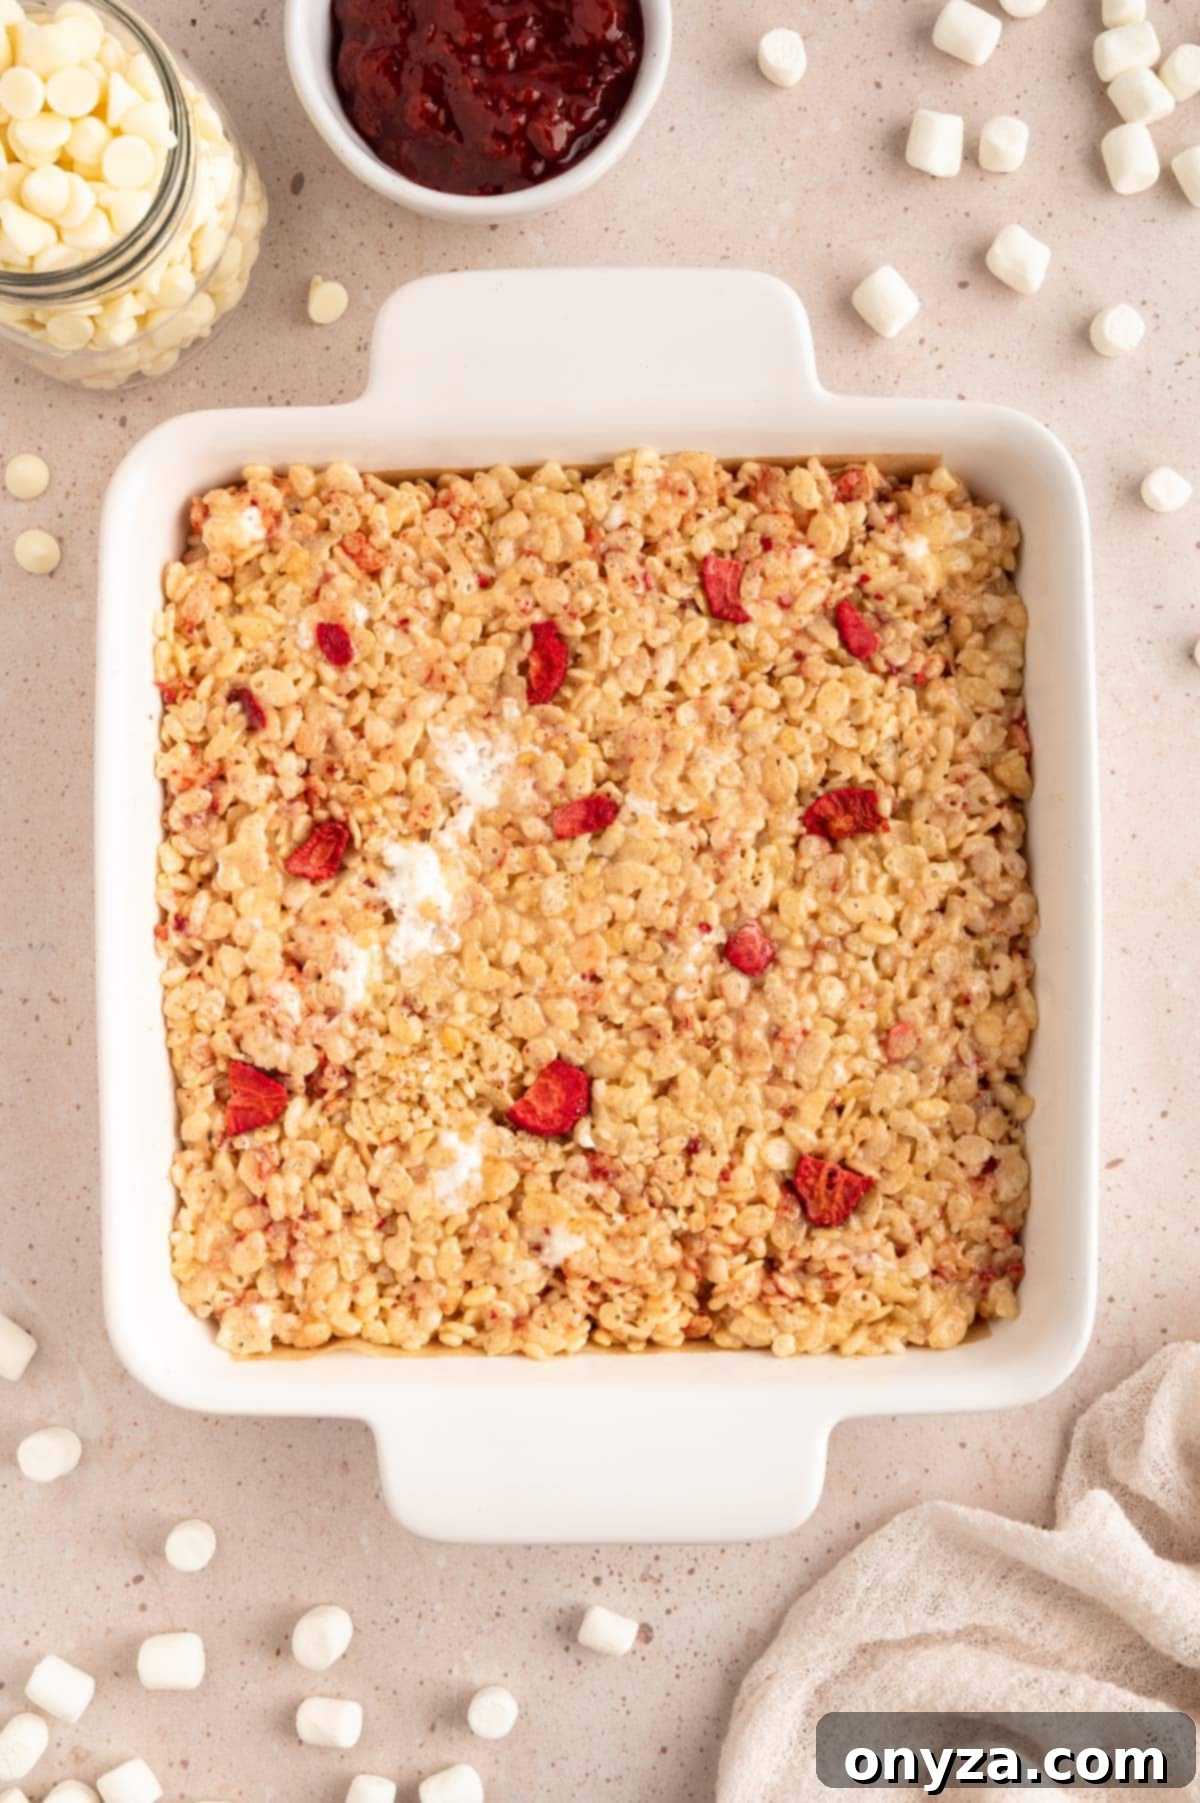
Now it’s time to assemble your delicious creation. Carefully spoon or pour the warm cereal mixture into your prepared baking dish. A rubber spatula is excellent for this task, as it helps scrape every last bit of the sticky mixture from the pot. Once the mixture is in the pan, use a piece of parchment paper or, better yet, the empty butter wrapper (as per our earlier tip!) to gently but firmly pat the treats into an even layer from edge to edge.
Achieving the right level of compaction is key to the perfect Krispie treat texture. You want to press them firmly enough so that the cereal binds together, ensuring clean cuts once cooled, and preventing the treats from falling apart. However, be careful not to over-compact them, as this can result in tough, dense treats instead of the desired chewy and crispy texture. For an 8×8-inch pan, aim for a thickness of approximately 2 inches.
If you wish to add an extra visual flourish, you can gently press a few un-crushed pieces of freeze-dried strawberries onto the surface of the treats at this stage. Keep in mind that these larger pieces of fruit will soften and not remain crunchy after setting.
Once assembled, allow the Strawberry Rice Krispie Treats to rest undisturbed at room temperature. A minimum of one hour is necessary for them to properly set, but for the absolute best results in terms of firmness and ease of cutting, I recommend allowing them to rest for 2-3 hours if time permits. Avoid the temptation to refrigerate them, as chilling can make the treats excessively hard and compromise their chewy texture.
5. Precisely Cut Your Treats
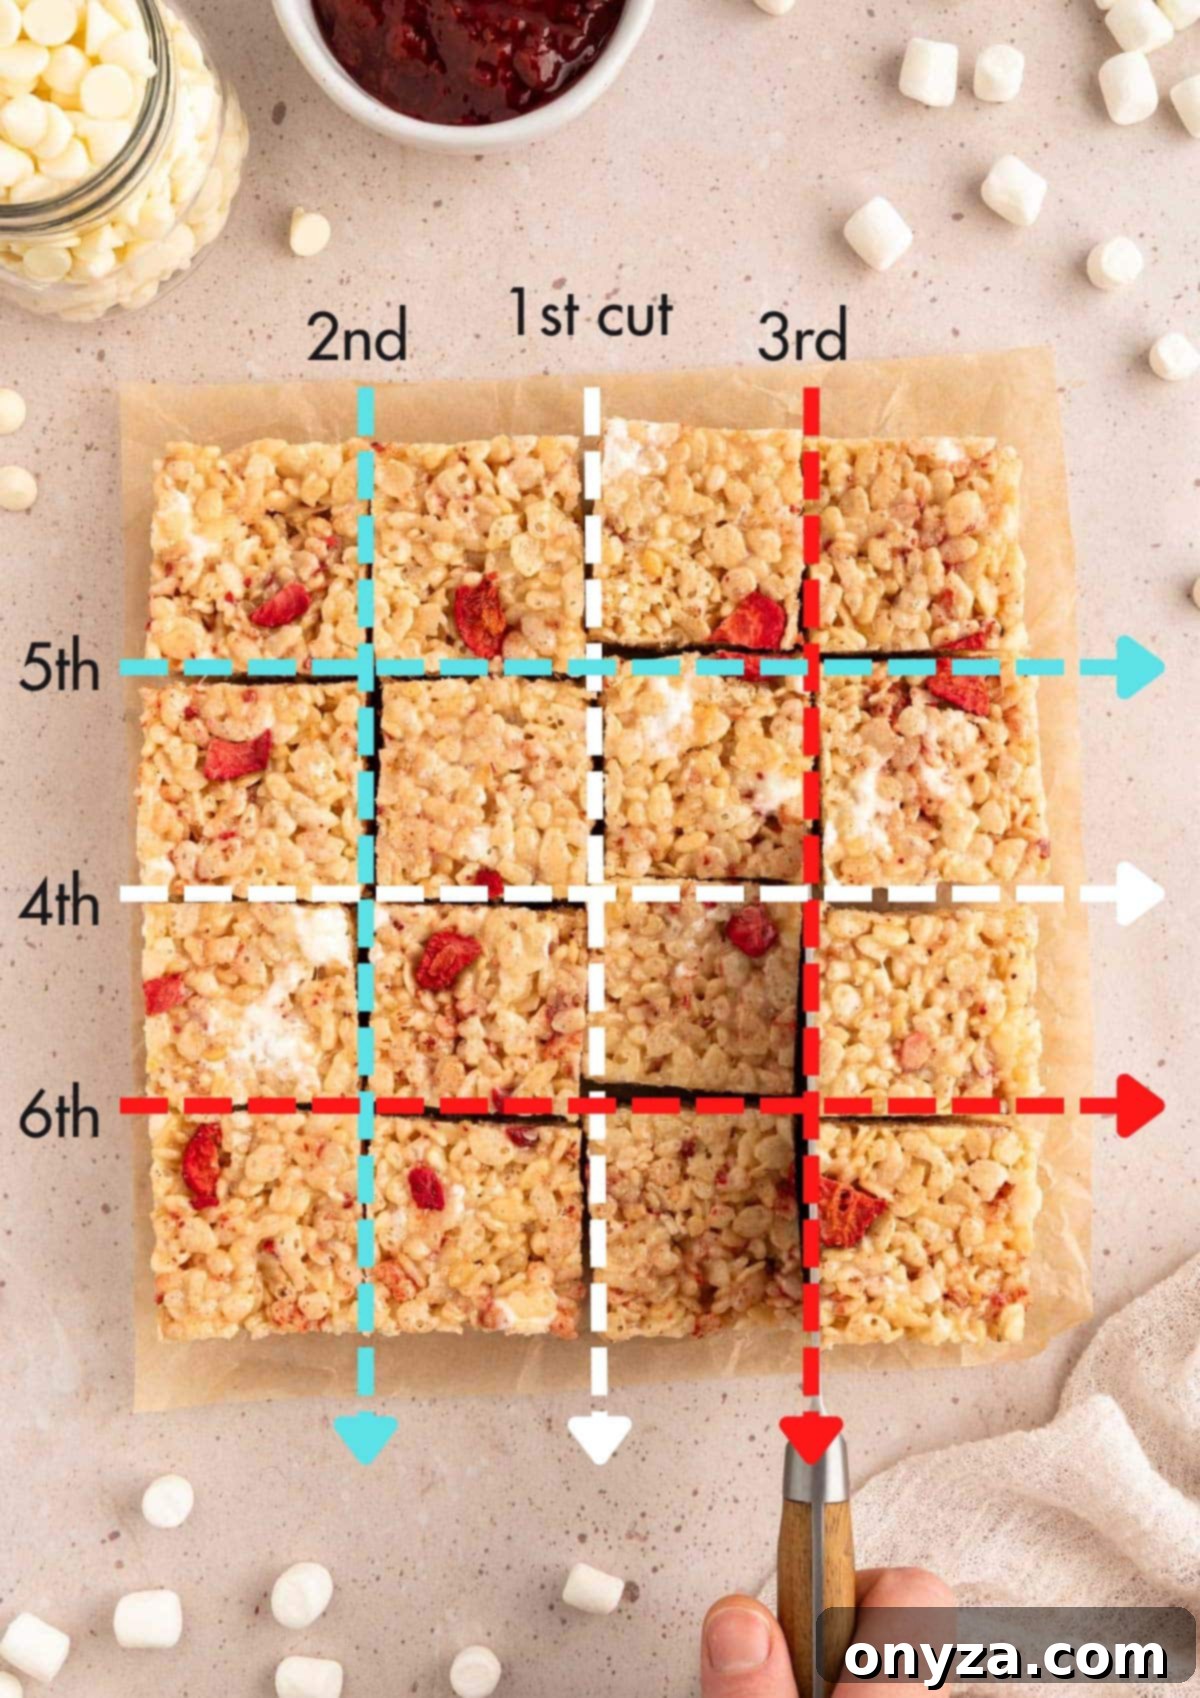
Once your Strawberry Rice Krispie Treats have fully set and cooled, it’s time to cut them into perfectly portioned squares. Carefully transfer the entire slab of treats from the baking pan to a cutting board. If you didn’t leave a parchment overhang or if some edges are sticking, you might need to run a thin knife gently around the pan’s perimeter to loosen them.
For the cleanest, most precise edges, I highly recommend using a sharp serrated knife or a Santoku knife. These types of blades slice through the sticky, chewy texture more effectively than a straight-edged knife, minimizing tearing. To achieve 16 even squares, each approximately 2 inches wide, I find the following method to be incredibly efficient and accurate, removing the need for measuring: Start by cutting the entire pan of treats in half from one edge to the other. Then, slice each of these larger halves in half again from both sides. Essentially, you’ll make three equidistant cuts along each dimension of the square, resulting in an even grid.
While there’s no single “wrong” way to cut these treats, this particular technique consistently yields uniform squares. I’ve personally found it far easier than simply eyeballing cuts from left to right, a strategy that often works well for brownies or cookie bars too.
6. Dip and Decorate (Optional, but Highly Recommended!)
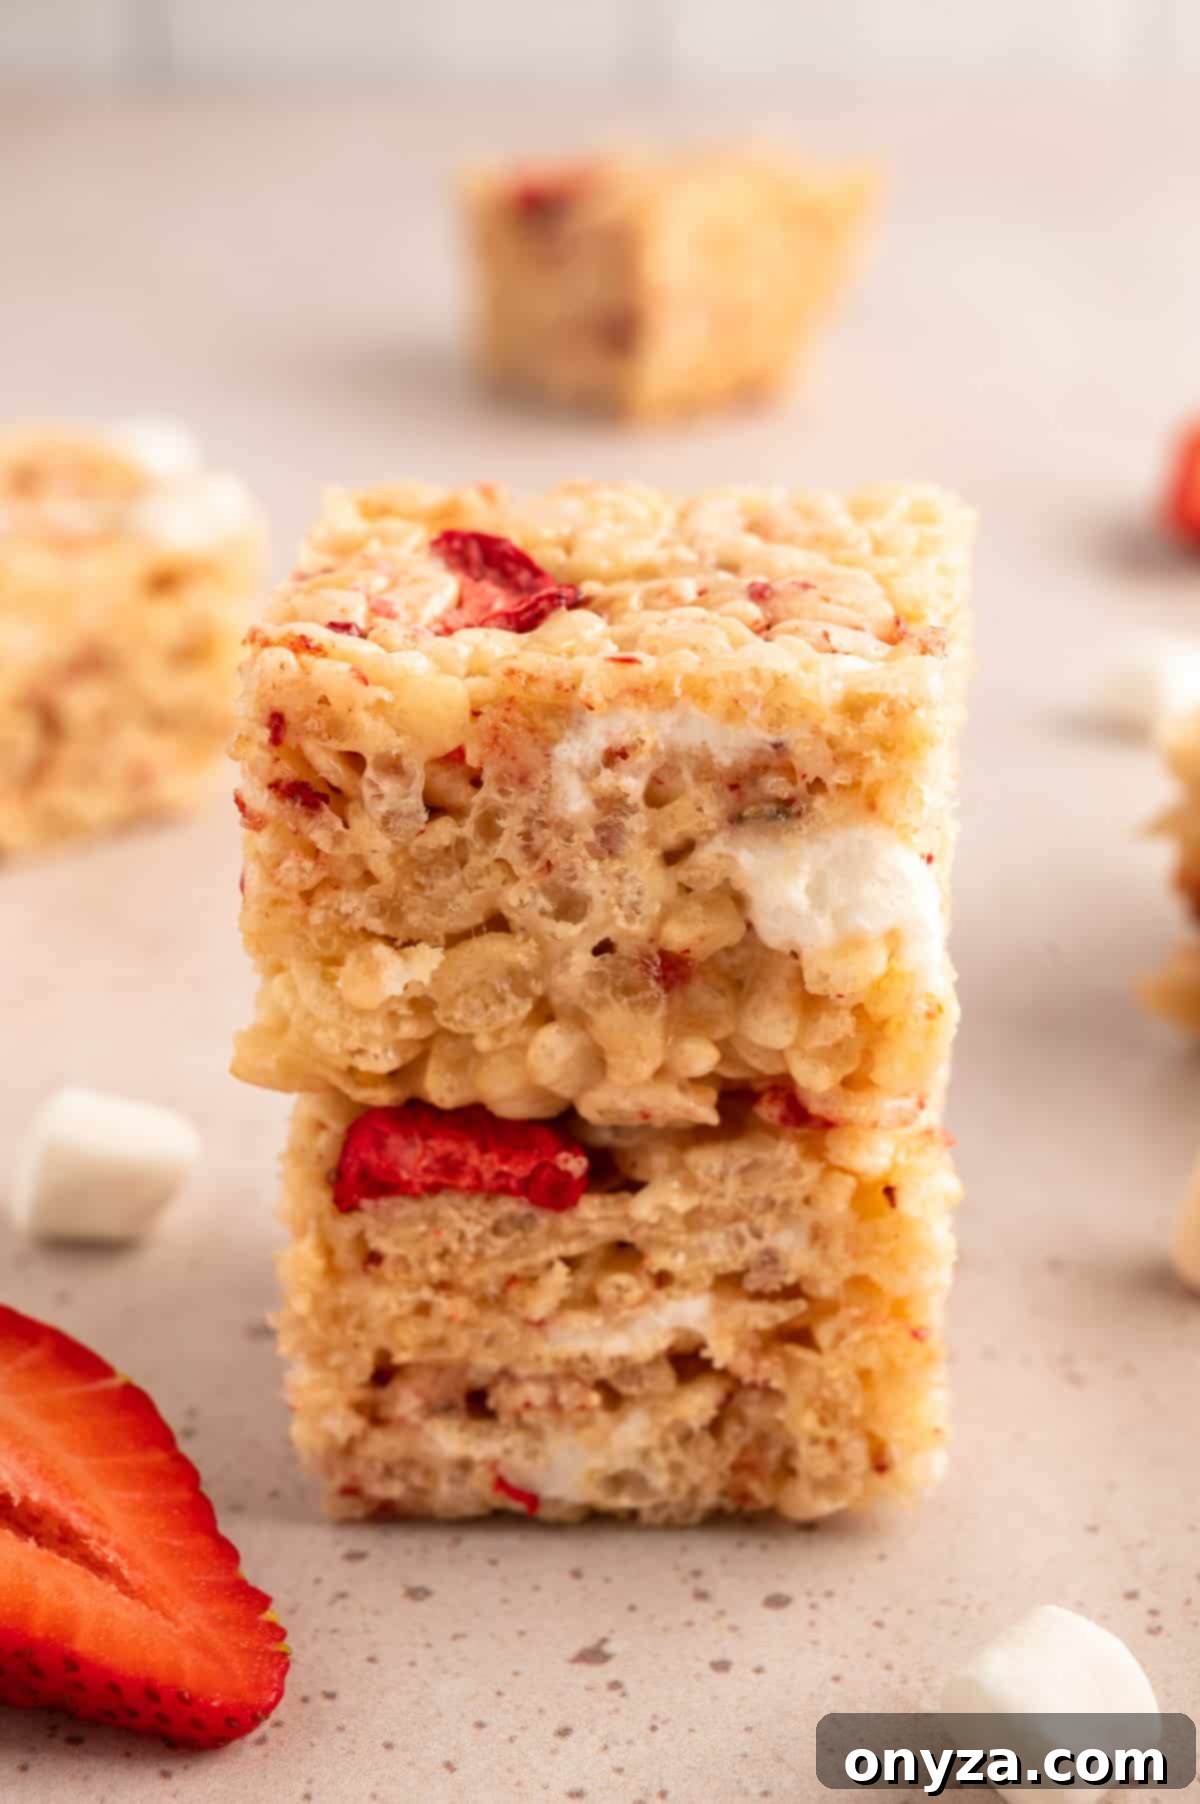
These Strawberry Rice Krispie Treats are utterly delicious in their plain form, offering a delightful combination of sweet-tart strawberry, chewy marshmallow, and crispy cereal. If you wish to stop here, they will still be a fantastic homemade treat. However, to truly elevate them and lean into that luxurious “chocolate-covered strawberry” vibe, I highly recommend decorating them with either dipped or drizzled chocolate. This step adds both visual appeal and an extra layer of flavor complexity.
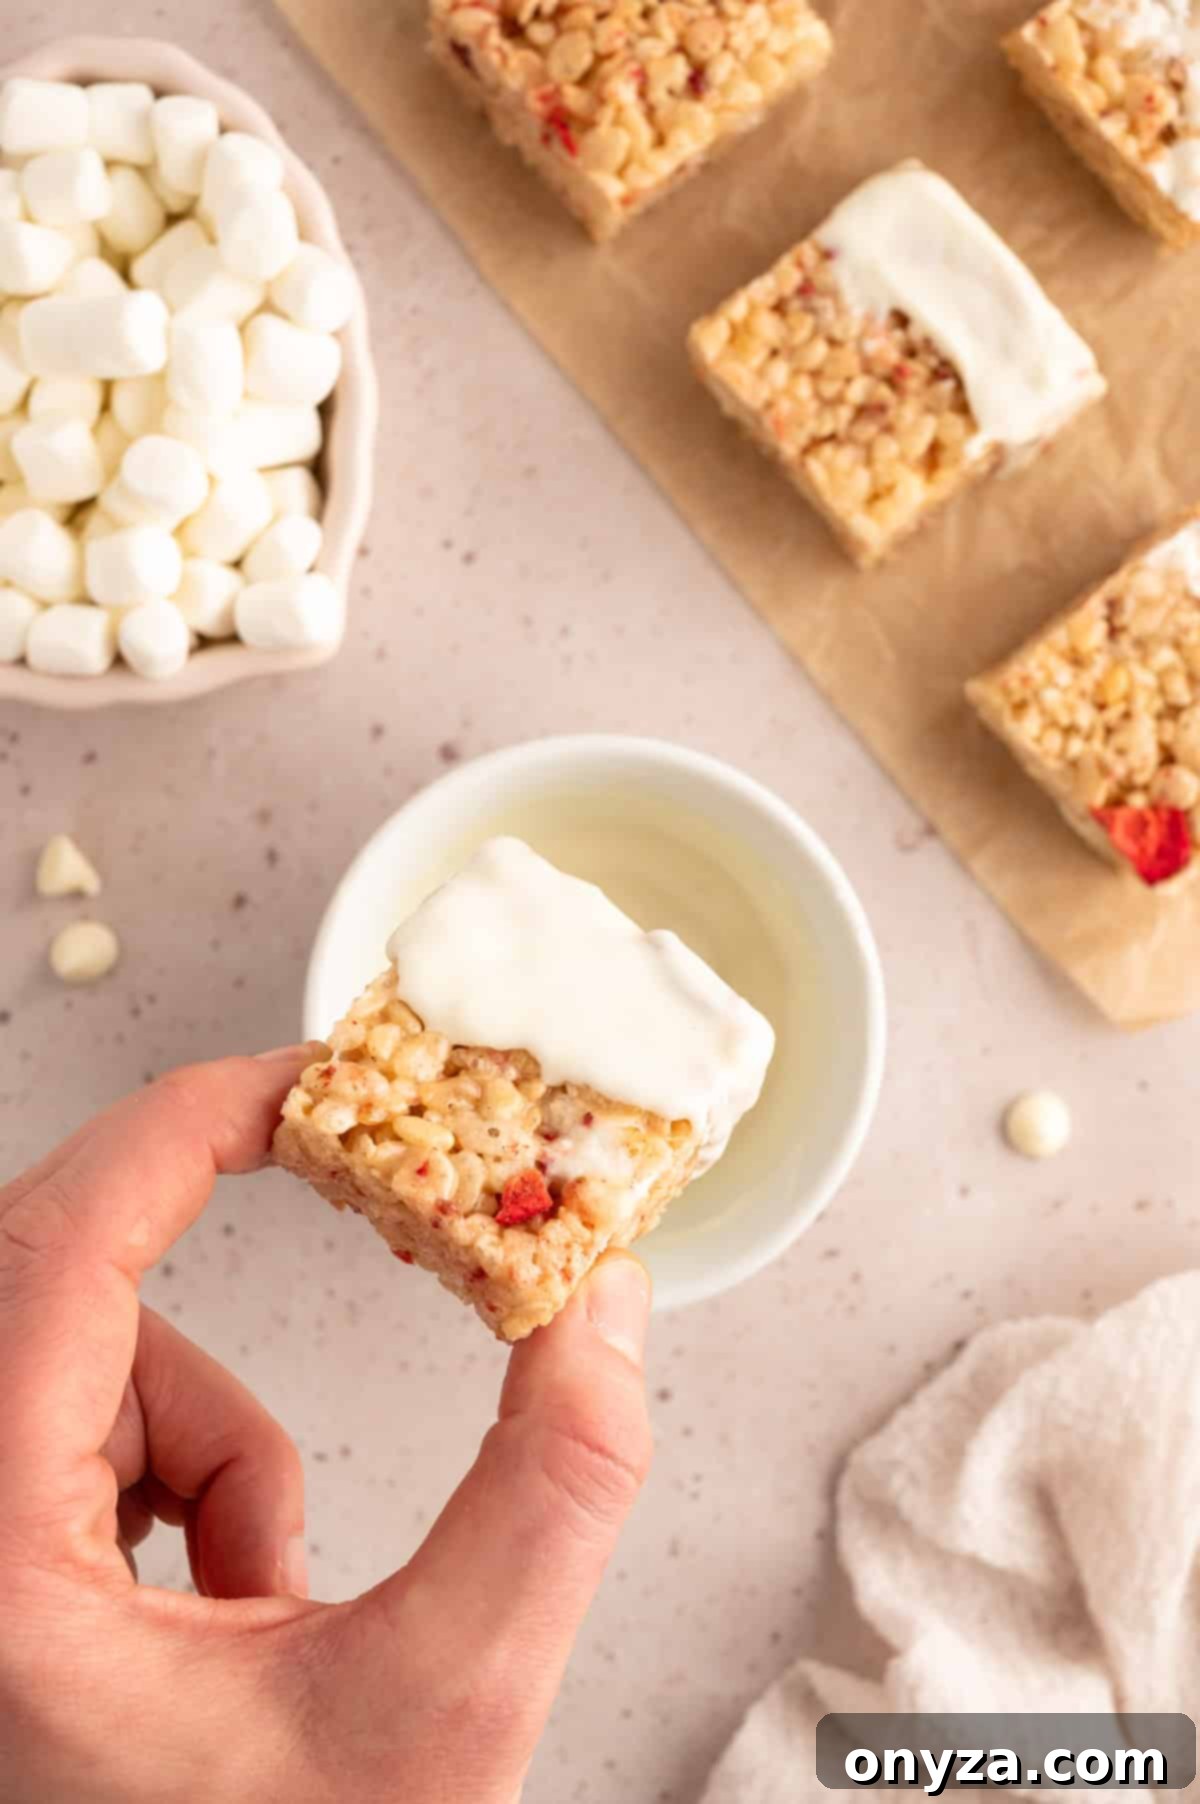
If you opt to dip the ends of your cut treats, choose a small but deep bowl for melting your chocolate. A deeper bowl allows for easier and more thorough dipping with less chocolate. If using a standard-sized, shallower bowl, you might need a larger quantity of chocolate or a spoon to assist in coating the treats completely.
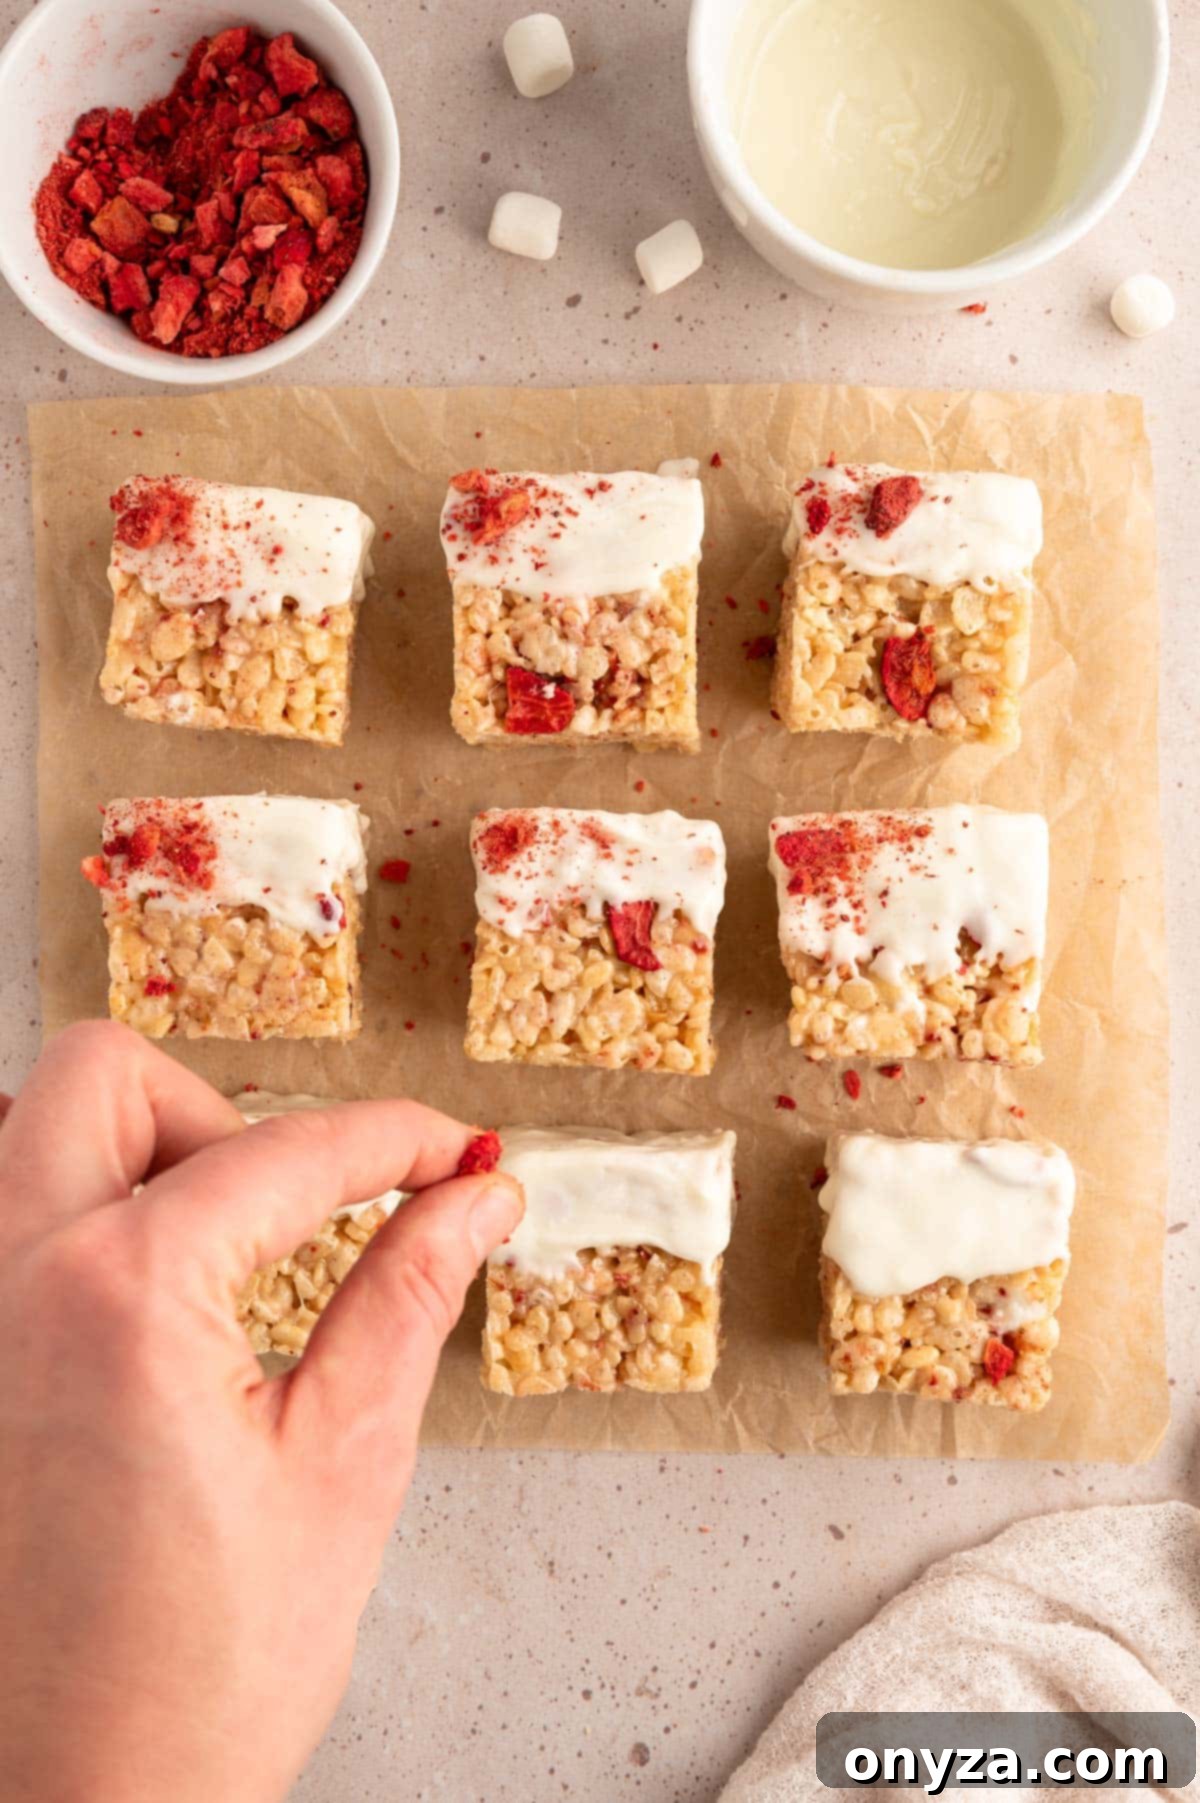
To dip, hold a treat by one end and submerge the opposite end into the melted chocolate. Allow any excess chocolate to drip back into the bowl for a few seconds before carefully placing the dipped squares in a single layer on a piece of parchment paper or a silicone baking mat. Immediately after dipping, while the chocolate is still wet, sprinkle a pinch of crushed freeze-dried strawberries onto the chocolate coating. This adds a beautiful pop of color and an extra layer of strawberry flavor. You can crush these strawberries a bit more rustically for garnishing, leaving a few chunkier pieces for visual interest, contrasting with the finer powder used inside the treats. Allow the chocolate to set completely at room temperature until firm.
Alternatively, for a different presentation, you can drizzle melted chocolate over the tops of the treats. Drizzling creates elegant wisps of chocolate that provide a delightful burst of flavor in each bite. To drizzle, simply dip a fork or a small spoon into the melted chocolate, then move it in a zig-zag or swirling motion over the treats arranged on parchment paper. For more precise control, you can transfer your melted chocolate into a pastry bag fitted with a very small round tip, or even a plastic zip-top bag with just a tiny bit of one bottom corner snipped off after filling. This method allows for delicate lines and patterns, giving your treats a professional finish.
Frequently Asked Questions About Strawberry Rice Krispie Treats
Q. Can I make this recipe dairy-free?
A. Yes, it is generally possible to adapt this recipe to be dairy-free. Many dairy-free butter alternatives, such as vegan margarine or specific plant-based butter sticks, can be successfully substituted for traditional butter in Rice Krispie treats. However, it’s important to note that I have not personally tested this specific recipe with dairy-free butter alternatives, so results may vary slightly in terms of flavor and texture. Ensure all other ingredients, like chocolate chips, are also dairy-free if you are strictly avoiding dairy.
Q. Why are my treats not firm and crispy?
A. There are typically a few common culprits when Rice Krispie treats turn out soft or too sticky instead of firm and crispy. First, insufficient packing into the pan can leave too many air pockets, preventing the treats from setting properly. Ensure you press them firmly and evenly across the pan using parchment paper or a butter wrapper. Second, not allowing enough setting time at room temperature is a frequent issue; the treats need adequate time to cool and solidify. If you’ve addressed these factors, reconsider your ingredient measurements. Precise measurements are crucial for the right ratio of marshmallow to cereal. While volume measurements are provided, using a kitchen scale for both cereal and marshmallows (especially marshmallows by weight) offers the most accurate results and can prevent overly soft or hard treats.
Q. Do I really need the extra 2 cups of miniature marshmallows, or is one 10-ounce bag enough?
A. Trust me, you absolutely need the full amount of marshmallows as listed in the recipe! A single 10-ounce bag is simply not enough to create the desired sticky, gooey base and those delightful, soft pockets of whole marshmallows that contribute significantly to the unique texture of these treats. The total marshmallow quantity is carefully balanced with the cereal and other ingredients to ensure a perfectly pliable, chewy, and irresistibly delicious treat. Skimping on marshmallows will result in dry, crumbly, and less enjoyable bars. Follow the ingredient list precisely for the best taste and texture.
Q. How does the flavor of these treats differ from Strawberry Krispie Treats made with strawberry gelatin?
A. The flavor profile of these Strawberry Rice Krispie Treats is distinctly different and, we believe, superior to those made with artificial strawberry gelatin. Because this recipe utilizes natural ingredients like high-quality strawberry preserves and freeze-dried strawberries, the resulting flavor is a more authentic, complex sweet-tart profile that truly mimics the taste of fresh strawberries. Gelatin-based versions tend to be much sweeter and often carry an artificial, candy-like strawberry flavor. Our approach delivers a more nuanced and refreshing taste, free from any artificial dyes or synthetic fruit flavors, making for a more sophisticated and natural-tasting treat.
Q. How should I store my treats to maintain freshness?
A. To keep your Strawberry Rice Krispie Treats fresh and perfectly chewy, store them in an airtight container at room temperature. A storage tin, a plastic zip-top bag, or any sealed container works wonderfully. They will maintain their quality for up to 4 days. It is crucial to avoid refrigerating these treats. Chilling them in the refrigerator will cause the marshmallows to harden excessively, resulting in a much firmer, tougher texture that diminishes their delightful chewiness.
Q. Can I use a different type of fruit preserve in this recipe?
A. Absolutely! While strawberry preserves are fantastic, you can certainly experiment with other fruit preserves to create different flavor profiles. Raspberry, cherry, or even a mixed berry preserve could offer delicious variations. Just ensure you select high-quality preserves with visible fruit pieces for the best results, similar to how strawberry preserves are used in this recipe.
Q. What kind of pot is best for melting the marshmallows?
A. A large, heavy-bottomed pot or a Dutch oven is ideal for melting marshmallows. The heavy bottom helps to distribute heat evenly and prevents the marshmallows from scorching, which can happen easily in thinner pots. Enameled cast iron Dutch ovens are particularly good choices for their excellent heat retention and non-reactive surface.
Q. Can I make these treats ahead of time for a party?
A. Yes, these Strawberry Rice Krispie Treats are an excellent make-ahead dessert! Since they store well in an airtight container at room temperature for up to 4 days, you can easily prepare them a day or two before your event. This allows them ample time to set perfectly and frees up your time on the day of the party. Just remember to keep them sealed to maintain their freshness and ideal texture.
Discover More of Our Favorite Strawberry Recipes
If you’re a fan of fresh, vibrant strawberry flavors, you’ll love these other delightful recipes perfect for any occasion:
- Croissant French Toast Bake with Berries
- Refreshing Strawberry Basil Soda
- Zesty Strawberry Balsamic Salsa
- Easy No-Bake Cheesecake Cups (featuring luscious Strawberry Pie Filling)
- Classic Strawberry Mojito
Explore More Creative Rice Krispie Treat Recipes
For those who love the endless possibilities of Rice Krispie Treats, dive into these other inventive variations:
- Caramel Apple Pie Rice Krispie Treats
- Coconut Rice Krispie Treats with Pecans
- Irresistible Peanut Butter Cup Rice Krispie Treats
- Loaded “Kitchen Sink” Rice Krispie Treats
Strawberry Rice Krispie Treats
Amanda Biddle
5 minutes
15 minutes
1 hour 15 minutes
1 hour 35 minutes
16 squares
Ingredients
For the Krispie Treats
- ½ cup salted butter (8 tablespoons; I use European-style butter, such as Plugra or Kerrygold)
- 8 cups Jet-Puffed mini marshmallows divided (1, 10 oz. bag + 2 cups total or about 13.3 ounces total)*
- 3 tablespoons strawberry preserves
- ½ teaspoon vanilla extract (optional, but recommended)
- 3 tablespoons crushed freeze-dried strawberries (plus a few un-crushed slices for garnish, if desired)**
- 6 cups Rice Krispies or puffed rice cereal (180 g)
To Decorate (Optional)
- 1 cup white or dark chocolate chips or baking chips ***
- 1 teaspoon coconut oil
- 2 tablespoons crushed freeze-dried strawberries
Instructions
- Line an 8×8 baking pan with parchment paper and set aside. For easy treat removal, leave a 2-inch overhang on two sides.
- Melt butter in a large, heavy-bottomed pot or Dutch oven on the stove over medium-low heat.
- While the butter is melting, place freeze-dried strawberries in a small zip top bag and crush them with a rolling pin into a powder. (You can also pulse them in a food processor.)
- Once the butter is fully melted, add a 10-ounce bag of mini marshmallows and 1 additional cup of mini marshmallows to the pot. Lower the heat and stir continuously so that the sugars don’t overheat or burn.
- When the marshmallows are almost melted, stir in the strawberry preserves and vanilla extract until well incorporated and the mixture is smooth.
- Remove the pot from the heat. Fold the cereal into the marshmallow mixture until combined (I like to use a rubber spatula).
- Stir in 3 tablespoons of crushed freeze-dried strawberries and the remaining 1 cup of marshmallows until evenly distributed. The extra marshmallows should soften, but not fully melt into the treats.
- Using a rubber spatula, transfer the cereal mixture into baking pan, spreading it out evenly. Use a piece of parchment paper or your empty butter wrapper to press the mixture to an even thickness of about 2 inches. (For the best treats, you’ll want to press firmly enough that the cereal sticks to itself, but not so much that it compresses and becomes tough.)
- If desired, garnish the treats with a few larger pieces of dried strawberries, pressing them into the top of the cereal mixture.
- Allow the treats to set at room temperature for at least an hour. (I let them rest for 2-3 hours when I have the time.)
- Once set, remove the treats from the pan and cut them into 16 squares.
Dip or Drizzle (Optional)
- Place the chocolate chips and coconut oil in a small but deep bowl that will be used for dipping. Heat the chocolate in the microwave for 15-second intervals on medium power, stirring between each interval.
- Dip the ends of the cut treat squares into the melted chocolate, allowing the chocolate to drip off over the bowl for several seconds before placing them on parchment paper to set. While the chocolate is still wet, sprinkle a pinch of crushed freeze-dried strawberries onto each square. When the chocolate is running low, you may need to use a spoon to help coat the remaining few squares.
- Alternately, you can drizzle the tops of the treats with chocolate instead of dipping. Use a fork or spoon dipped into the bowl of chocolate and drizzle using a zig-zag or swirl motion over the treats. You can also place the melted chocolate in a pastry bag fitted with a very small round tip, or a plastic zip top bag with a tiny bit of one of the bottom corners snipped off.
- Allow treats to set for about 15 minutes and then enjoy! Store extras in an airtight container at room temperature for up to 4 days. Do not refrigerate.
Notes
**You will need a little less than a full 1.2-ounce bag of freeze-dried strawberries for this recipe (including topping).
***Depending on the brand of chocolate you’re using, you may need to add more than the recommended teaspoonful of coconut oil to achieve a dipping consistency. Alternately, you can use “melting chocolate” or “melting wafers” to dip or drizzle these treats (such as Ghirardelli Chocolate Flavored Melting Wafers). These are specifically made for melting and setting and will not require the addition of coconut oil.
Nutrition Estimate
Serving: 1 treat | Calories: 261kcal | Carbohydrates: 43g | Protein: 2g | Fat: 10g | Saturated Fat: 6g | Polyunsaturated Fat: 0.4g | Monounsaturated Fat: 3g | Trans Fat: 0.2g | Cholesterol: 18mg | Sodium: 132mg | Potassium: 113mg | Fiber: 1g | Sugar: 27g | Vitamin A: 879IU | Vitamin C: 63mg | Calcium: 27mg | Iron: 4mg
Nutrition information is automatically calculated, so should only be used as an approximation.
Please note that our recipes have been developed using the US Customary measurement system and have not been tested for high altitude/elevation cooking and baking.
