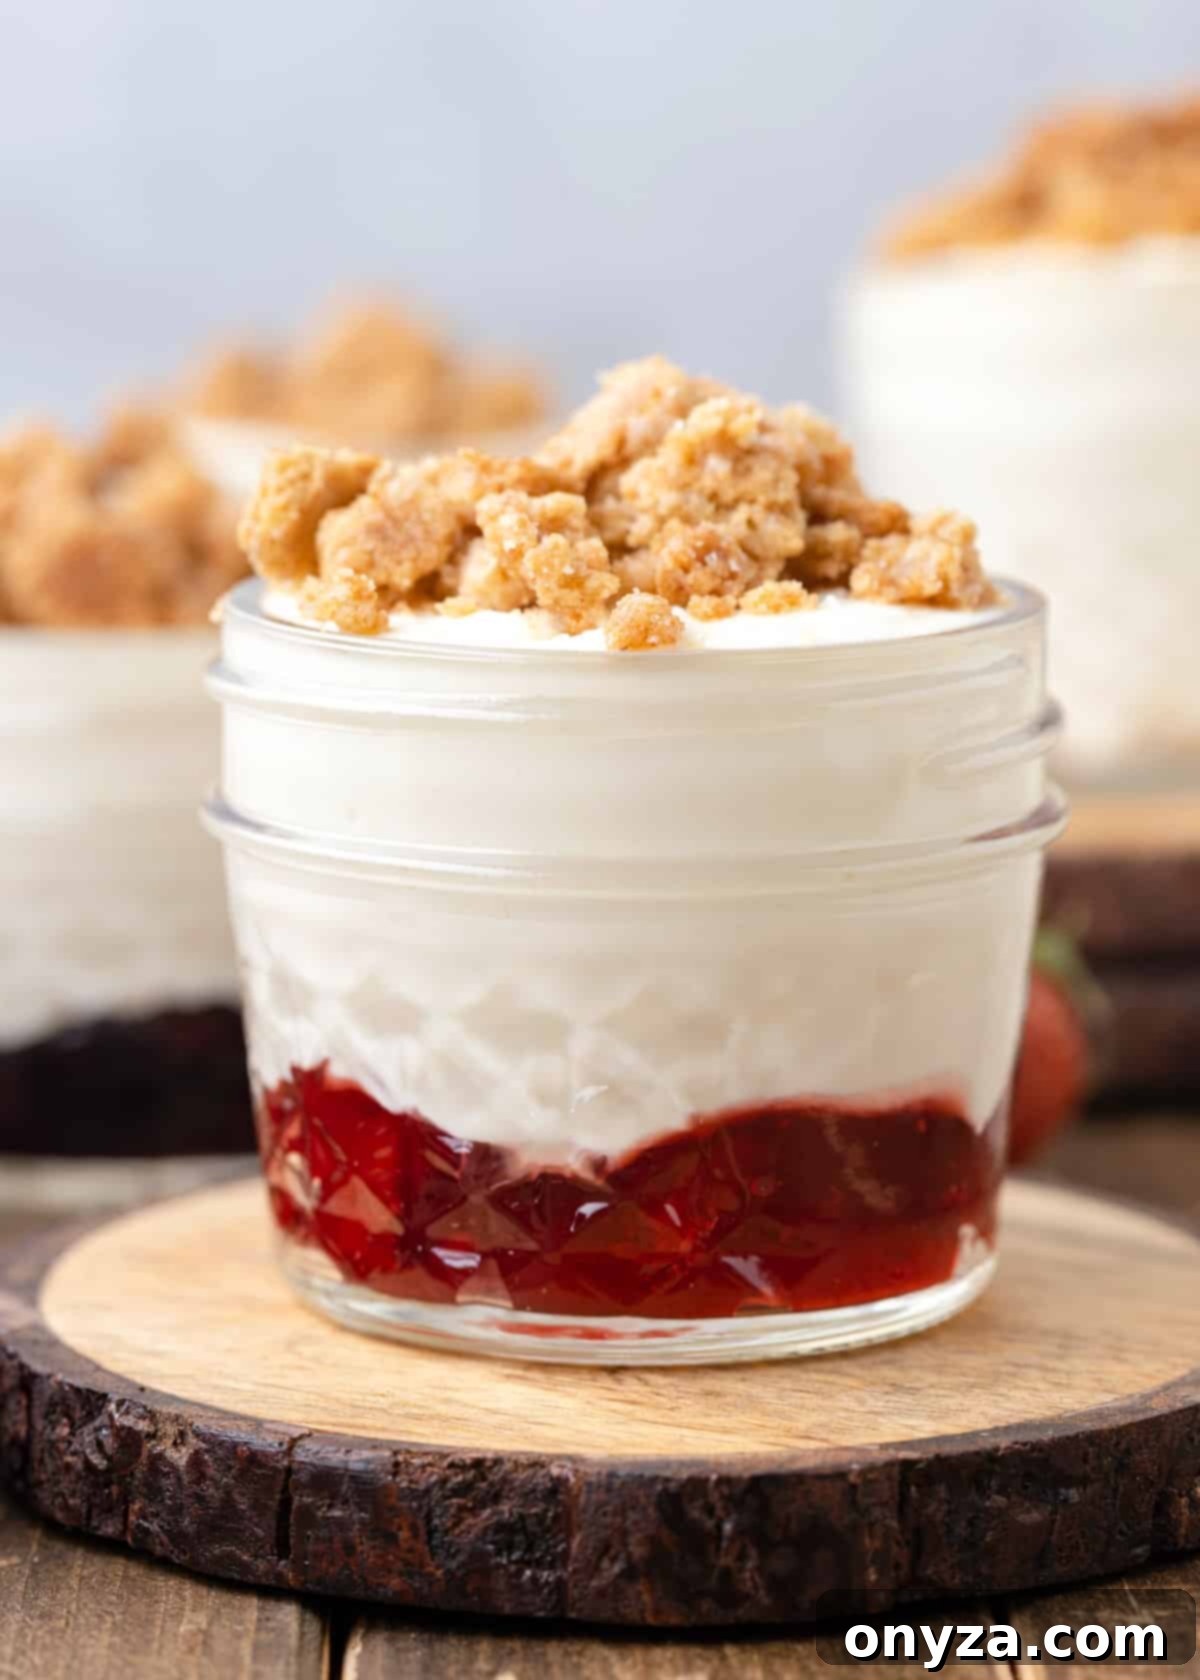
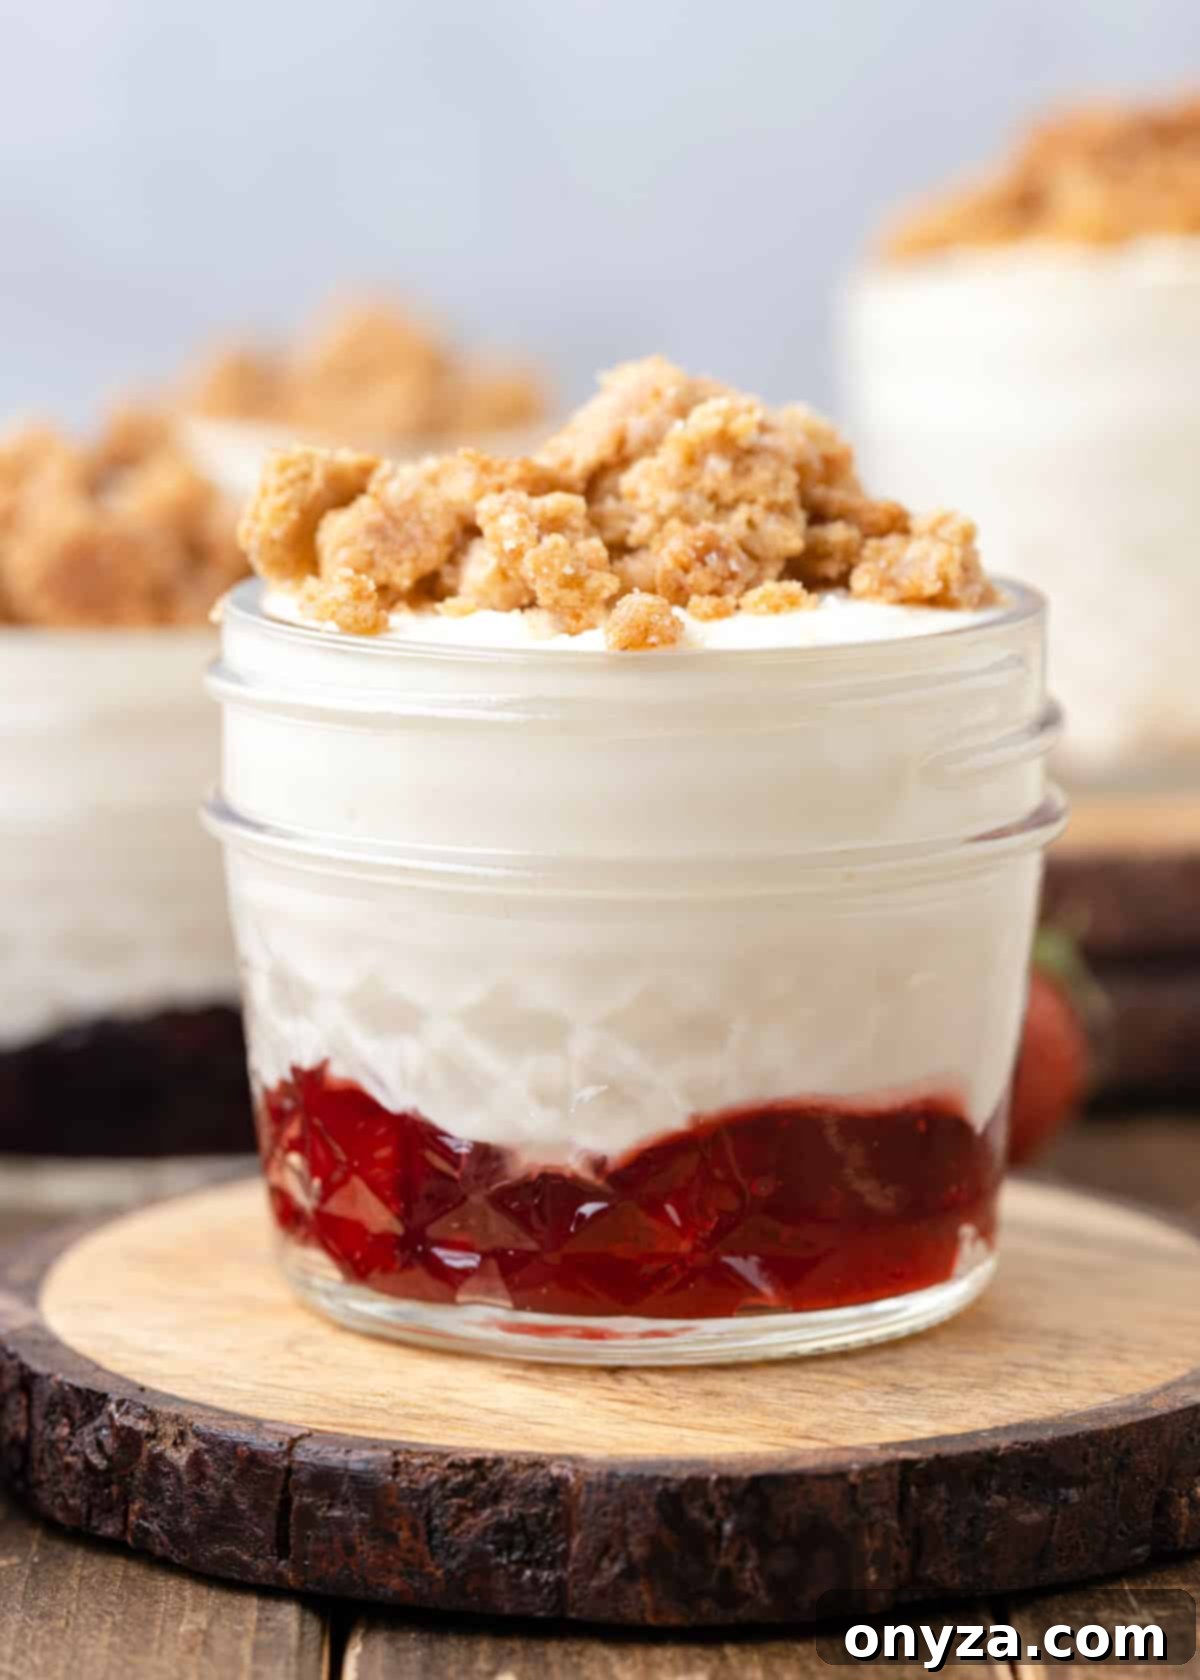
Welcome to the world of effortless desserts! These No-Bake Cheesecake Cups are a true game-changer for anyone craving a decadent, creamy treat without the fuss of traditional baking. Imagine layers of light, whipped cheesecake filling, perfectly complemented by your favorite vibrant fruit pie filling or rich dessert sauce, all crowned with a delightfully crunchy graham cracker crumble topping. This is more than just a dessert; it’s a sweet escape, easy to whip up for a quick weeknight indulgence or to impress guests at your next gathering.
This post contains affiliate links. As an Amazon Associate, I earn a commission (at no additional cost to you) from qualifying purchases made by clicking these links. As always, all recommendations and opinions expressed are my own.
Irresistible No-Bake Cheesecake Cups with Crunchy Graham Cracker Crumble: Your Go-To Easy Dessert
If you’re a devoted fan of fruit-topped cheesecake and the classic buttery crunch of a graham cracker crust, then prepare to fall in love with these individual No-Bake Cheesecake Cups. Inspired by the popular store-bought cheesecake crumble dessert cups, this homemade version elevates the experience, offering a superior taste and texture that’s incredibly satisfying and surprisingly simple to create.
This recipe delivers a creamy, mousse-like cheesecake filling that’s tangy and sweet, perfectly balanced by the rich, buttery crunch of our signature graham crumbles. With a customizable flavor layer that allows for endless variations, you can have this impressive dessert on your table in under an hour, making it perfect for spontaneous cravings or planned celebrations.
Why You’ll Love Making These No-Bake Cheesecake Cups
There are countless reasons why these individual cheesecake delights will become a staple in your dessert repertoire. Here’s what makes them truly exceptional:
- Effortless Preparation and Make-Ahead Convenience: Say goodbye to oven woes and cracked cheesecakes! These cups require no baking, significantly cutting down on prep time and cleanup. They are incredibly easy to assemble, making them ideal for busy schedules. Plus, they can be prepped ahead of time, allowing you to focus on other tasks when entertaining, or simply enjoy a ready-made treat after a long day. Just layer, chill, and serve!
- Charming Single-Serve Presentation: Whether it’s a casual family dinner or an elegant dessert spread, these individual cheesecake cups make an adorable and sophisticated presentation. Serving desserts in jars adds a rustic yet chic touch, making each guest feel special with their own personalized portion. They’re perfect for dessert tables, picnics, or even just a cozy night in.
- A Symphony of Creamy, Crunchy, Indulgent Textures: Every spoonful offers a delightful contrast. The cheesecake filling is remarkably light, airy, and velvety smooth, melting in your mouth. This creamy texture is beautifully complemented by the rich, buttery, and deeply crunchy graham cracker crumble, creating a textural harmony that is utterly indulgent and satisfying. It’s a treat for both the palate and the senses!
- Endless Customization for Every Palate: This recipe is a blank canvas for your culinary creativity. The beauty of these cheesecake cups lies in their versatility. Family members and guests can easily customize their cups with their favorite fruit fillings (strawberry, blueberry, cherry, raspberry), rich dessert sauces (salted caramel, chocolate fudge), or even a dollop of hazelnut spread like Nutella. This ensures everyone gets exactly what they desire, making dessert time interactive and fun.
- Perfect Portion Control Without Compromising Indulgence: For those who enjoy a sweet treat but prefer mindful portions, these single-serving jars are an excellent solution. Each cup delivers a satisfying amount of dessert to curb any sweet tooth without the temptation of a large, entire cheesecake in the refrigerator. It’s the ideal way to enjoy indulgence responsibly, ensuring you get just enough to feel content.
Essential Ingredients for Your Luscious No-Bake Cheesecake Cups
Crafting these delectable cheesecake cups requires a few simple, high-quality ingredients. Here’s what you’ll need to gather:
- Cream Cheese: The foundation of any great cheesecake. It’s crucial to use brick-style cream cheese, not the spreadable or whipped varieties found in tubs. Brick cream cheese provides the necessary firmness and richness for the filling. Ensure it’s softened to room temperature before mixing, as this prevents lumps and ensures a smooth, creamy texture. Both full-fat and 1/3-less fat cream cheese work wonderfully.
- Confectioner’s Sugar: Also known as powdered sugar, this fine sugar is essential for sweetening the cheesecake filling while ensuring a silky-smooth, lump-free consistency. Its delicate texture blends seamlessly into the cream cheese mixture.
- Sour Cream: This ingredient is the secret to imparting that characteristic tangy flavor that distinguishes a true cheesecake. It adds a subtle tartness and helps balance the sweetness, contributing to the overall complexity of the dessert.
- Vanilla Extract and Fresh Lemon Juice: These classic flavor enhancers are non-negotiable for a truly delightful cheesecake filling. Vanilla adds warmth and depth, while a touch of fresh lemon juice brightens the flavors, preventing the dessert from tasting too heavy or one-note.
- Heavy Cream: Chilled and whipped to stiff peaks, heavy cream is folded into the cream cheese mixture to lighten it, creating that airy, fluffy, mousse-like texture that makes these no-bake cups so irresistible. Proper whipping is key to achieving the perfect consistency.
- Fruit Pie Filling or Dessert Sauce: This is where the customization truly shines! Layer the bottom of your jars with your favorite store-bought or homemade options. Think classic fruit flavors like cherry, strawberry, blueberry, or raspberry pie filling. For a richer alternative, try a luscious dessert sauce like salted caramel, or even a generous dollop of Nutella for chocolate lovers.
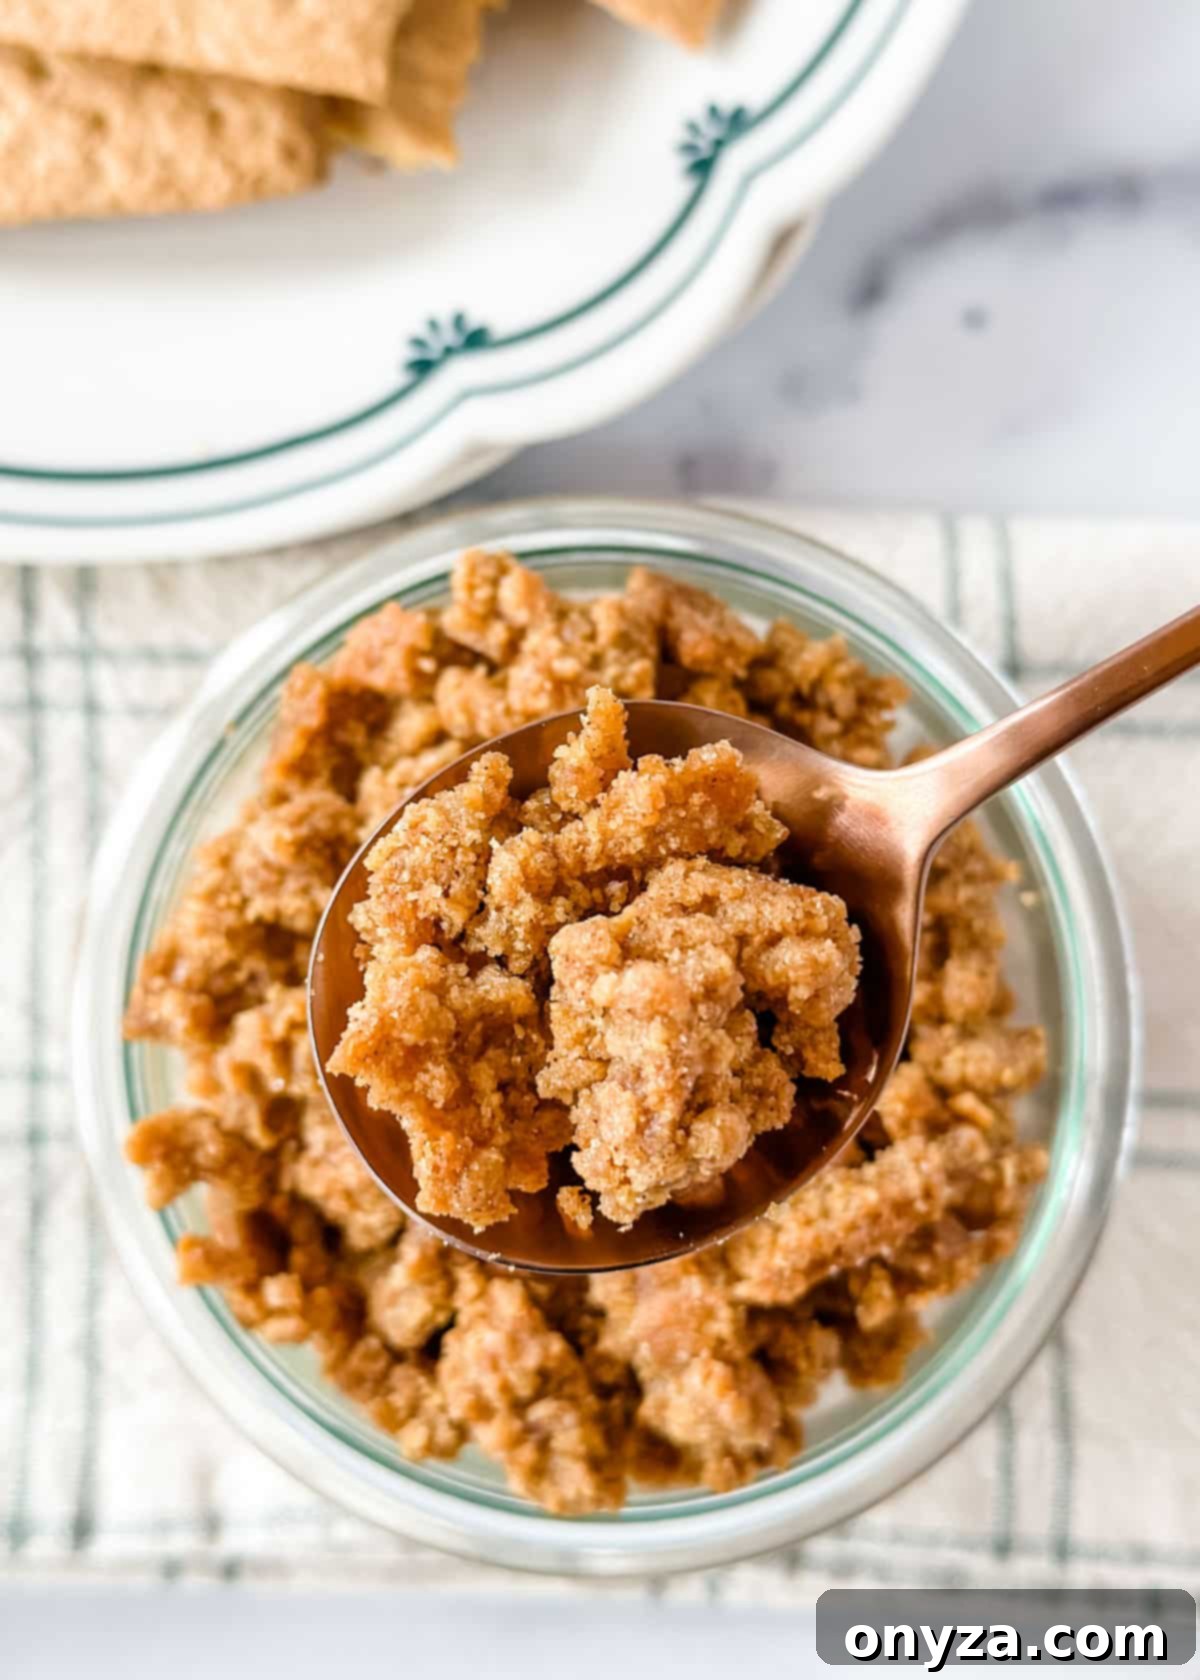
- Graham Cracker Crumble: While a traditional crushed graham cracker crust is good, our buttery, toasted Graham Cracker Crumble takes this dessert to the next level. This easy-to-make crumble adds an unparalleled texture and depth of flavor. You’ll need about a quarter of a batch for these dessert cups, but I highly recommend making the full recipe and keeping the extra in the freezer – it’s perfect for topping ice cream, yogurt, or other desserts, and it’s always quickly devoured in my household! You can bake it in advance or while you’re preparing the cheesecake filling.
Crafting Your Velvety Smooth No-Bake Cheesecake Filling
The heart of these delightful cups is the incredibly light and creamy cheesecake filling. Making it is a straightforward, two-step process that yields perfect results every time:
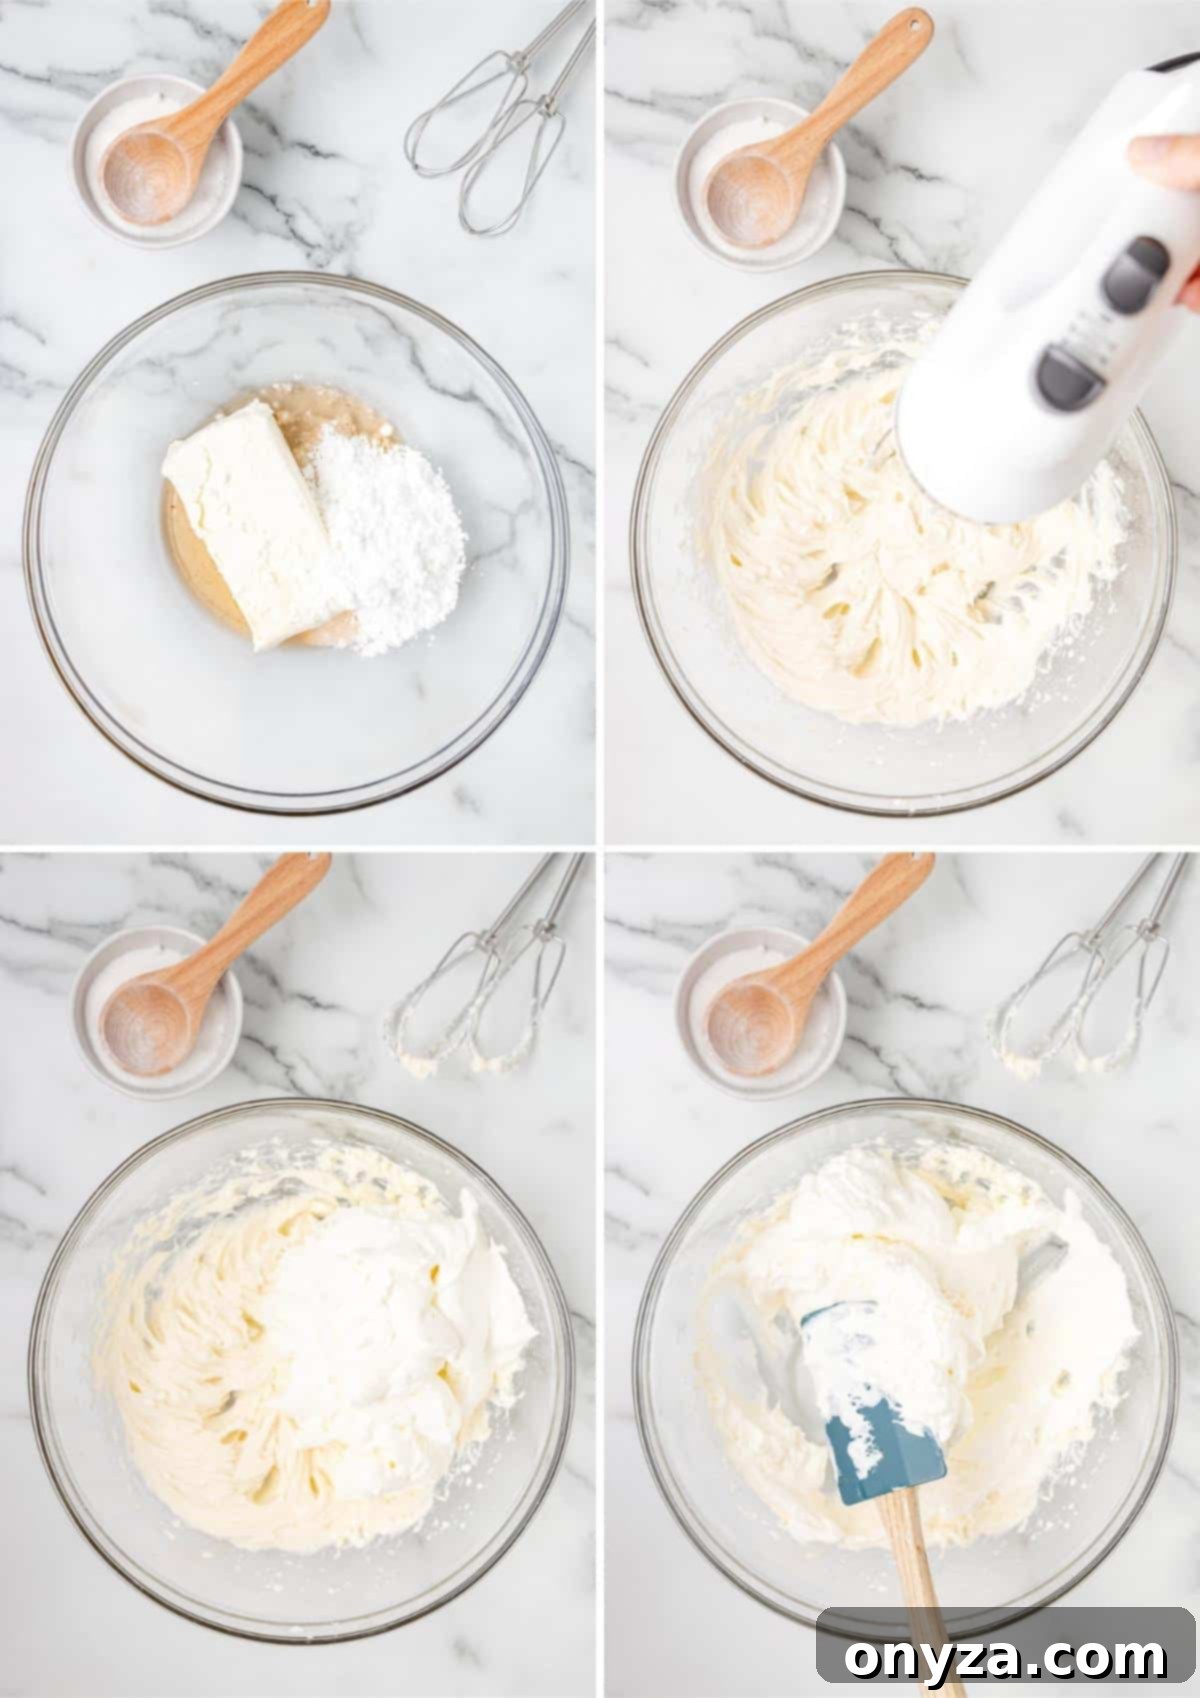
First, in a large mixing bowl, combine the softened brick-style cream cheese, sour cream, vanilla extract, fresh lemon juice, and sifted confectioner’s sugar. Using either a hand mixer or a stand mixer fitted with the paddle attachment, beat these ingredients together on medium speed until the mixture is completely smooth, creamy, and free of any lumps. Be sure to scrape down the sides of the bowl occasionally to ensure everything is thoroughly incorporated. This step creates the rich, tangy base of your cheesecake.
Next, in a separate, clean bowl, whip the chilled heavy cream. You can use a whisk for a good arm workout, or an electric mixer with clean beaters for quicker results. Whip the cream on medium-high speed until it forms stiff peaks. You’ll know it’s ready when you lift your whisk or beaters out of the bowl, and the whipped cream stands straight up without flopping over. It’s important to be careful not to over-whip the cream, as this can cause it to become grainy or even turn into butter, which would compromise the light texture of your filling.
Finally, it’s time to gently combine the two mixtures. Using a rubber spatula, carefully fold the whipped cream into the cream cheese mixture. I find it best to do this in two additions. First, add about a third of the whipped cream to the cream cheese mixture and fold it in. This initial addition helps to lighten the denser cream cheese base, making it easier to incorporate the remaining whipped cream without deflating it. Then, gently fold in the rest of the whipped cream until the mixture is well-combined, smooth, and beautifully airy. The goal is to retain as much of that lovely whipped cream volume as possible for the ultimate light and fluffy cheesecake texture.
Want to brush up on your folding technique? Check out How to Fold Egg Whites or Whipped Cream Into Batter from Spruce Eats for a detailed guide.
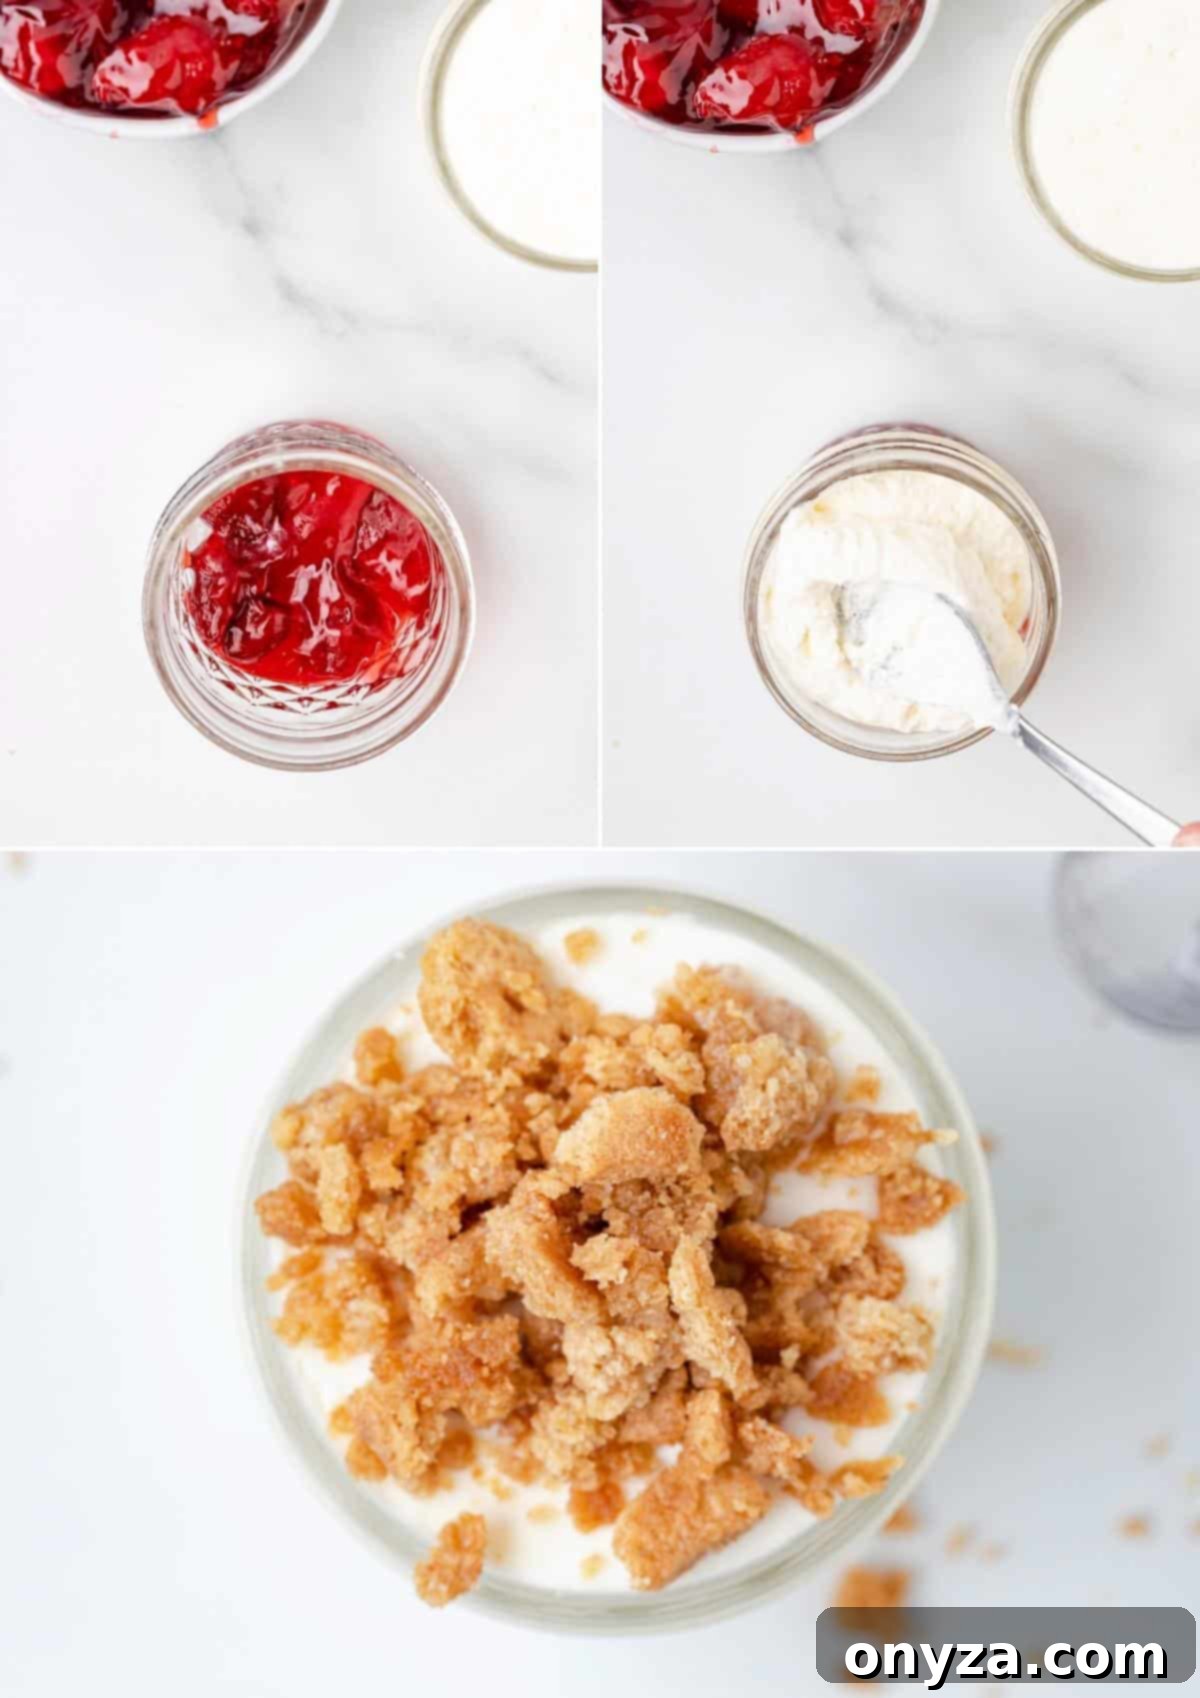
Assembling and Serving Your Delightful Cheesecake Cups
Once your rich cheesecake filling is perfectly whipped and your homemade graham crumbles are ready, it’s time for the fun part: layering your dessert jars!
Choosing the right jar size is key for an ideal single-serving portion. I’ve found that 4-ounce jelly jars are the absolute perfect size for this dessert, yielding approximately 8 charming cups from the full recipe. If you prefer a slightly more generous portion, 6-ounce jars work well, and you’ll typically get about 5 servings from this recipe. These sizes strike a wonderful balance, providing a satisfying treat without being overly large.
To assemble the Cheesecake Cups, begin by placing a rounded tablespoonful of your chosen fruit pie filling or dessert sauce at the very bottom of each jar. This creates a delightful ‘fruit-on-the-bottom’ effect, similar to popular yogurt cups, and adds a burst of flavor with every spoonful.
Next, spoon or pipe the creamy cheesecake filling into each jar, filling it almost to the very top. For a neat and professional look, a piping bag fitted with a large round tip can be incredibly helpful, allowing for smooth, even layers. However, a spoon works just as well – don’t stress about perfection!
At this stage, you have a couple of options. You can either serve the cups right away for an immediately gratifying dessert, or you can cover them with lids and refrigerate them for later enjoyment. When served immediately, the cheesecake filling will possess a wonderfully light, airy, and mousse-like consistency. If refrigerated overnight, the filling will thicken slightly, developing a denser, more classic cheesecake texture, which is equally delicious.
For immediate serving, simply sprinkle a generous tablespoon or two of the crunchy graham crumbles over the top of each cheesecake cup, and then dig in! My family always loves to keep extra crumbles on hand to add a little more crunch as we’re eating them – you can truly never have too much of that buttery goodness!
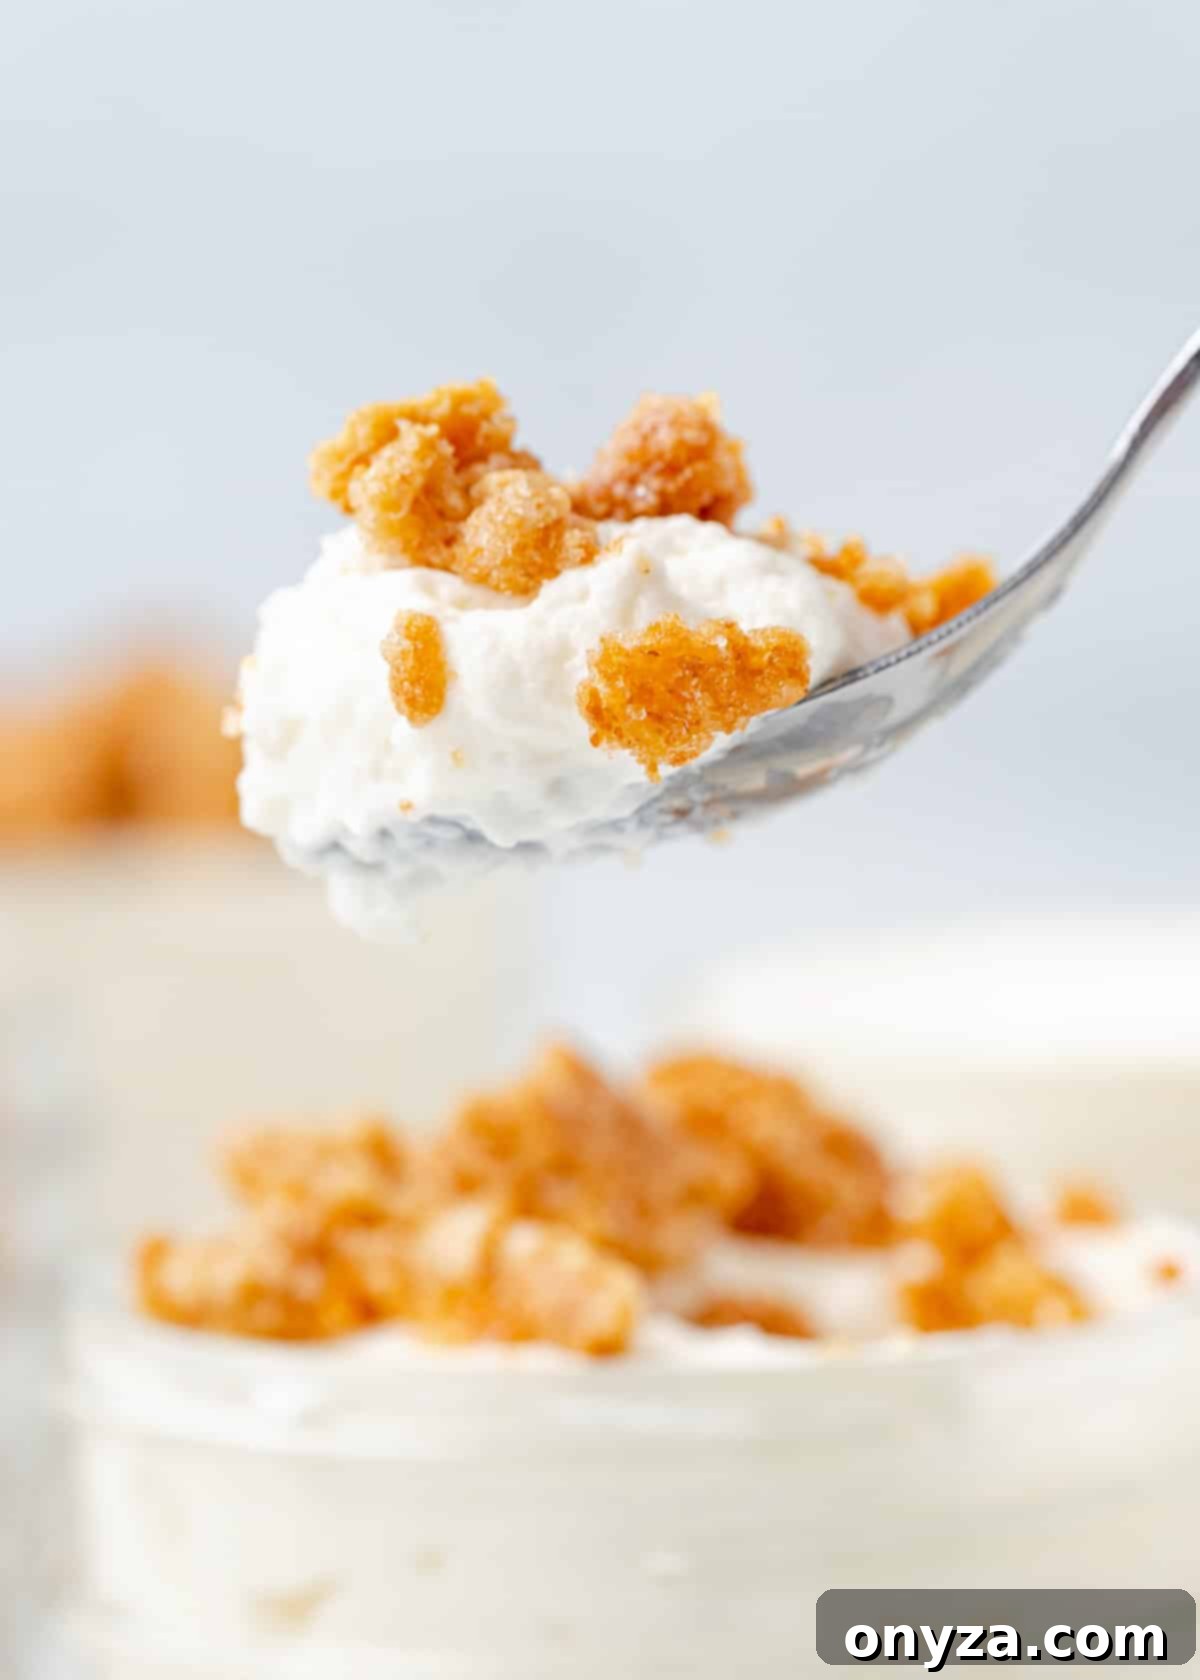
Customization & Serving Ideas for Your Cheesecake Cups
The versatility of these No-Bake Cheesecake Cups makes them perfect for any occasion and any taste preference. Beyond the base recipe, there are many ways to make them uniquely yours:
- Flavor Variations: Don’t limit yourself to fruit! Explore other bottom layers like a swirl of lemon curd for a zesty kick, a layer of chocolate ganache for true decadence, or even a spiced apple butter for a fall-inspired treat.
- Crumble Creativity: While graham cracker crumble is classic, consider alternatives. Use crushed chocolate graham crackers, vanilla wafers, gingersnaps, or even shortbread cookies for different flavor profiles. You can also mix in finely chopped nuts like pecans or walnuts into your crumble for added texture.
- Elegant Garnishes: Elevate the presentation with simple garnishes. Fresh berries (strawberries, blueberries, raspberries) are always a beautiful and delicious choice. A small sprig of fresh mint adds a pop of color, while a dollop of extra whipped cream or a drizzle of chocolate sauce can make them feel extra special. Chocolate shavings or a dusting of cocoa powder also work wonderfully.
- Holiday Themes: Adapt these cups for holidays! Use pumpkin puree as the bottom layer with a hint of cinnamon in the crumble for Thanksgiving, or a vibrant red cherry pie filling with green mint for Christmas.
Recipe FAQs: Your Questions Answered
Q. Can I use whipped topping (like Cool Whip) instead of fresh heavy cream?
A. Absolutely! For convenience, you can substitute 2 cups of thawed whipped topping for the freshly whipped heavy cream. Keep in mind that most frozen whipped toppings are already lightly sweetened, so you might want to reduce the amount of confectioner’s sugar in the cream cheese filling by a tablespoon or so to maintain your desired sweetness level.
Q. How far in advance can I prepare these cheesecake cups?
A. These No-Bake Cheesecake Cups are fantastic for make-ahead preparation! You can fully assemble the jars with both the fruit/sauce layer and the cheesecake filling up to 3 days in advance of serving. Simply cover each jar tightly with its lid and refrigerate. For the best texture and crunch, always add the graham cracker crumbles just before you’re ready to serve.
Q. Can I reverse the layering order and put the fruit layer on top?
A. You certainly can! While I personally love the graham crumbles directly on top of the cheesecake layer, creating a “fruit-on-the-bottom” effect similar to how many grocery store dessert cups are sold, feel free to switch it up. If you prefer to have the fruit or dessert sauce as the crowning layer, simply spoon that on top of the cheesecake filling, and then sprinkle the crumbles as a final garnish, or even layer crumbles in the middle. Customize to your heart’s content!
Q. Can I freeze these cheesecake cups?
A. While you can freeze cheesecake, these particular No-Bake Cheesecake Cups are best enjoyed chilled and fresh. Freezing can alter the delicate mousse-like texture of the filling and make the crumbles soggy once thawed. For optimal taste and texture, it’s recommended to store them in the refrigerator for up to 3 days and add crumbles just before serving.
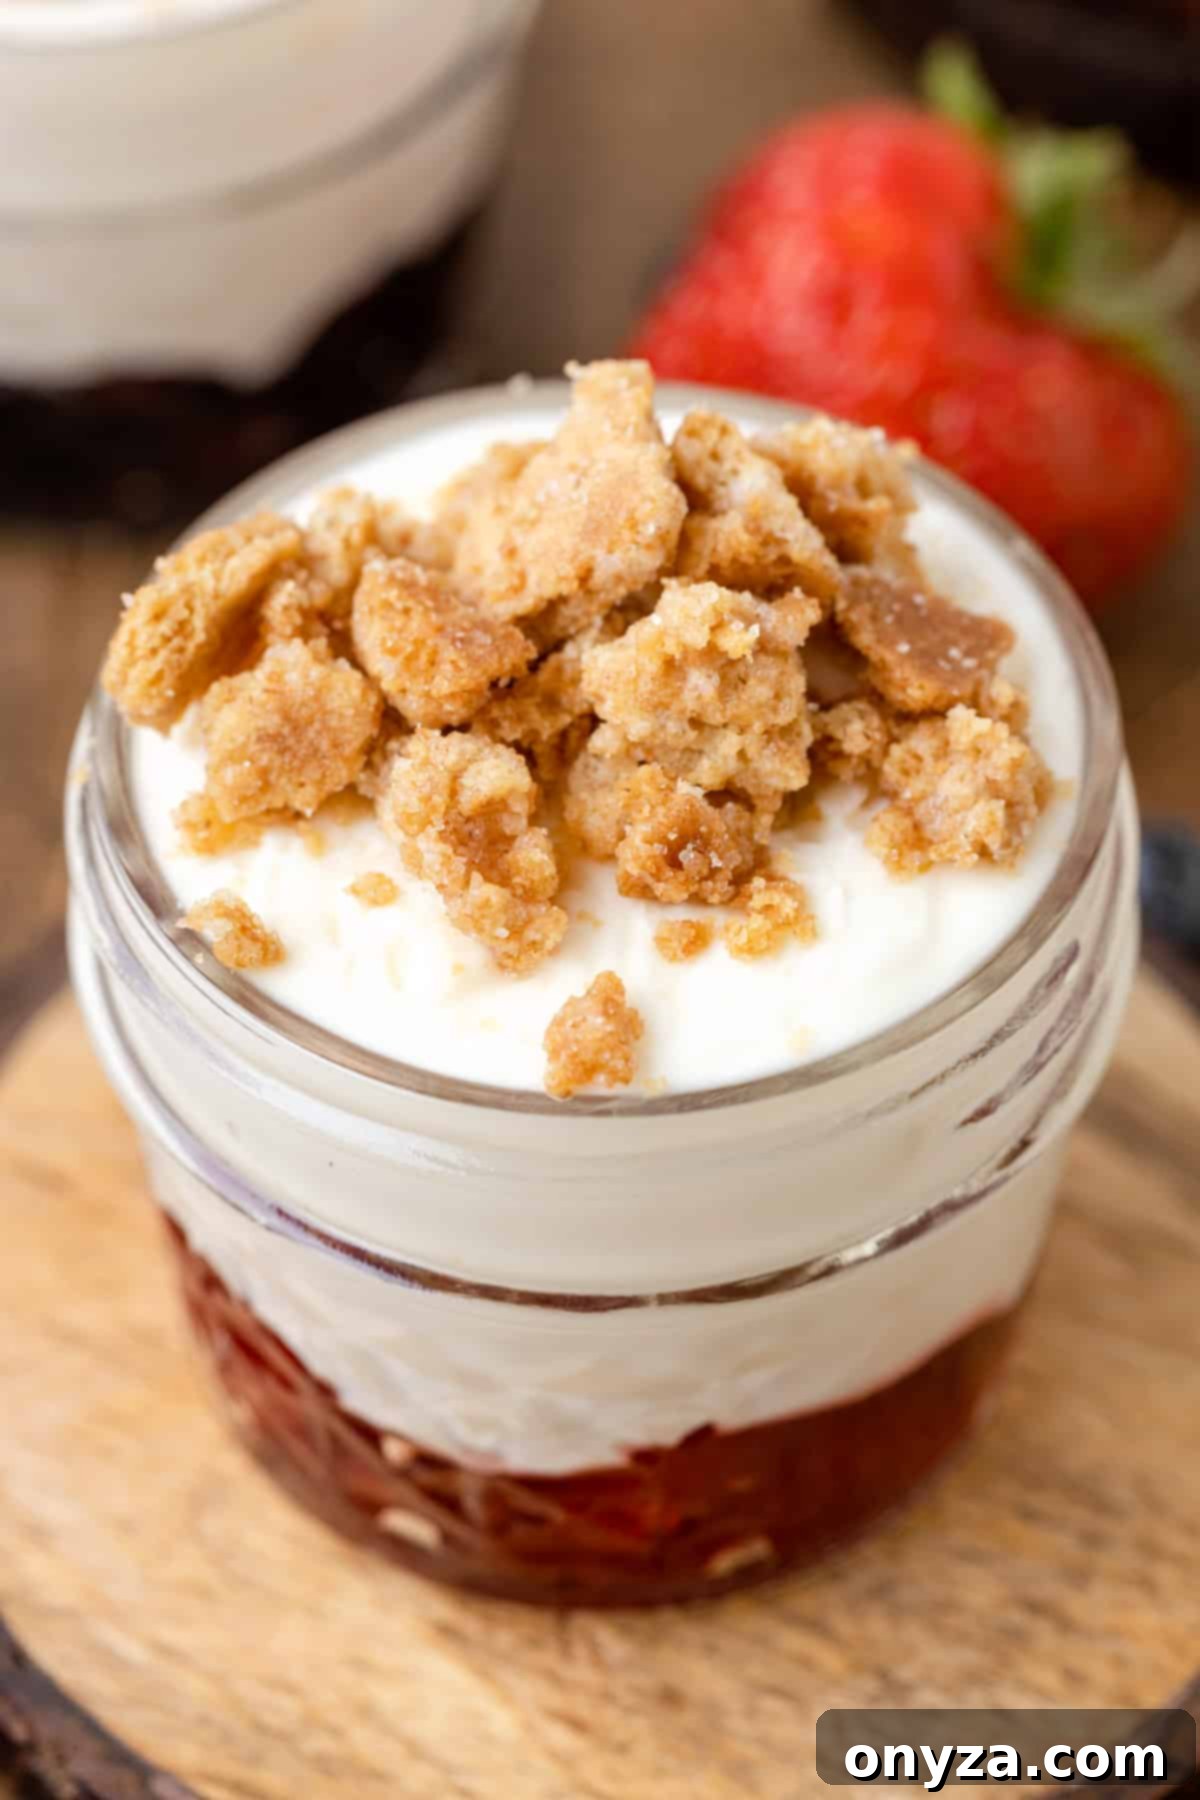
More Reader-Favorite Dessert Recipes to Explore
If you loved these No-Bake Cheesecake Cups, you might enjoy discovering more delightful dessert recipes from our collection:
- Classic Vanilla Pound Cake
- Irresistible Chocolate Peanut Butter Chip Cookies
- Homestyle Jam Bars with Oat Crumble Topping
- Charming Miniature Apple Raspberry Pies
CRAVING MORE? Subscribe to my newsletter and join me on Facebook, Pinterest, and Instagram for the latest recipes and news.
No Bake Cheesecake Cups with Graham Crumble Topping
by Amanda Biddle
These easy-to-make No Bake Cheesecake Cups layer whipped cheesecake filling with your favorite fruit pie filling or dessert sauces and a crunchy graham cracker crumble topping. A delicious single-serve dessert for weeknights or entertaining!
Prep Time: 30 minutes
Cook Time: 10 minutes
Total Time: 40 minutes
Yields: 8 servings
Ingredients
- ¼ recipe Graham Cracker Crumble Topping (click underlined text for the recipe)
- 8 ounces brick-style cream cheese, softened to room temperature
- 2 tablespoons sour cream
- 1 teaspoon vanilla extract
- 1 teaspoon fresh lemon juice
- ½ cup sifted confectioner’s sugar (2 ounces)
- 1 cup heavy cream, chilled
- ½ cup prepared pie filling (such as blueberry, strawberry, cherry, or raspberry), or your favorite dessert sauce/Nutella
Instructions
Make the Crumble Topping
- Prepare the Graham Cracker Crumble topping according to the linked recipe. Allow it to cool completely before using.
Make the Cheesecake Filling
- In a large bowl, using a hand mixer, or in the bowl of an electric mixer fitted with the paddle attachment, beat together the softened cream cheese, sour cream, vanilla extract, lemon juice, and confectioner’s sugar until the mixture is completely smooth and creamy. Ensure there are no lumps and scrape down the sides of the bowl as needed.
- In a separate, clean bowl, whip the chilled heavy cream to stiff peaks. Use a whisk or an electric mixer with clean beaters. When you lift the whisk or beaters, the whipped cream should hold its shape and stand straight up. Be careful not to over-whip, which can make the cream grainy.
- Gently fold the whipped cream into the cream cheese mixture using a rubber spatula. For the best airy texture, incorporate it in two additions: first, fold in about one-third of the whipped cream to lighten the mixture, then carefully fold in the remaining cream until it’s just combined and no streaks remain. Avoid overmixing to preserve the light texture.
Assemble the Cheesecake Cups
- Add a rounded tablespoonful of your preferred pie filling, dessert sauce, or Nutella to the bottom of eight 4-ounce jam jars.
- Spoon or pipe the prepared cheesecake mixture into each jar, filling it almost to the top. For a neater finish, a piping bag can be very helpful.
- If you are serving the cups immediately, sprinkle a generous tablespoon or two of the cooled graham cracker crumbles over the top of each cheesecake cup.
- If you are prepping ahead, place lids securely on the jars and refrigerate them for up to 3 days. When ready to serve, simply remove the jars from the refrigerator and top with the graham cracker crumbles.
Notes
- You’ll only need about ¼ of the linked Graham Cracker Crumble recipe to make 8 Cheesecake Cups. However, I highly recommend making the full recipe – the crumble freezes exceptionally well and is fantastic for other uses like topping ice cream, yogurt, or other desserts!
- If you prefer a plain Cheesecake Cup, simply omit the pie filling layer and fill the jars entirely with the cheesecake mixture. For non-fruit options, try adding your favorite dessert sauces to the bottom of the jar (such as strawberry, chocolate fudge, or salted caramel), or a dollop of Nutella (which pairs wonderfully with crumbles made from chocolate graham crackers).
- The stated Cooking Time and Total Time for this recipe include the time required to make the Graham Cracker Crumble from the linked recipe. I typically like to prepare the cheesecake filling and layer the cups while the crumble is baking and then cooling down, maximizing efficiency.
Nutrition Estimate
Serving: 4 ounce cup | Calories: 208kcal | Carbohydrates: 16g | Protein: 5g | Fat: 14g | Saturated Fat: 9g | Polyunsaturated Fat: 1g | Monounsaturated Fat: 3g | Trans Fat: 0.05g | Cholesterol: 42mg | Sodium: 211mg | Potassium: 129mg | Fiber: 0.1g | Sugar: 11g | Vitamin A: 538IU | Vitamin C: 1mg | Calcium: 124mg | Iron: 0.1mg
Nutrition information is automatically calculated, so should only be used as an approximation.
Please note that our recipes have been developed using the US Customary measurement system and have not been tested for high altitude/elevation cooking and baking.
