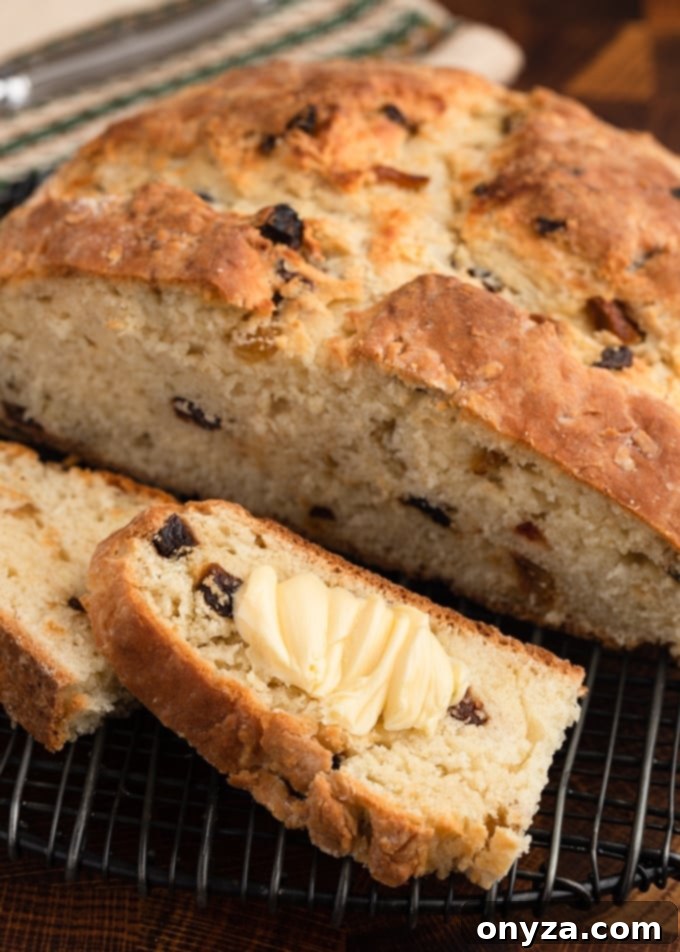
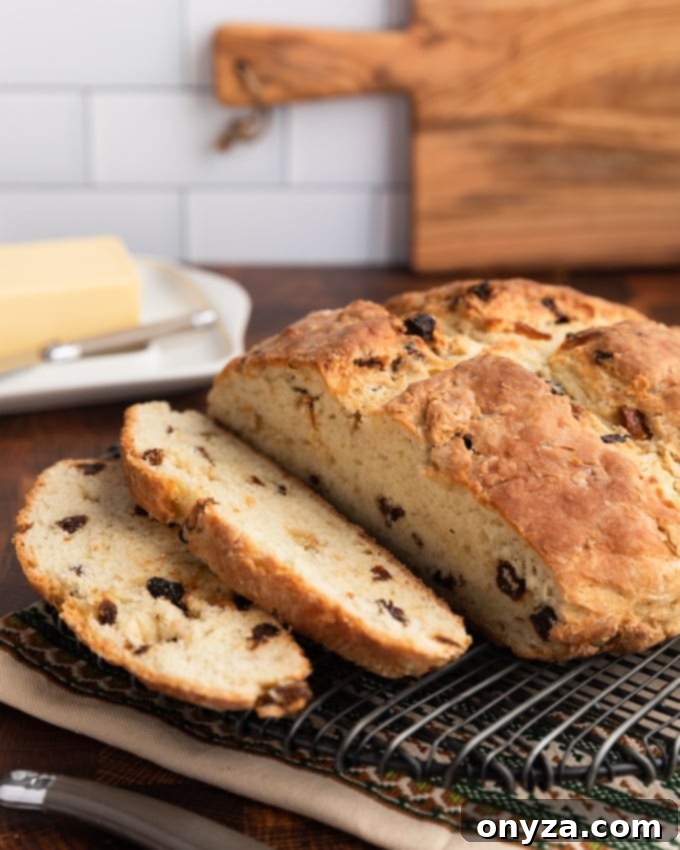
Uncover the comforting tradition of Irish-American Soda Bread, a beloved loaf distinguished by its dense, yet tender texture and a subtly sweet flavor profile. This delightful bread often features a scattering of plump raisins, dried currants, or aromatic caraway seeds, making each bite a journey of taste. Perfect when served just slightly warm or at room temperature, it pairs exquisitely with a generous slather of softened Irish butter, enhancing its rich character.
This post contains affiliate links. As an Amazon Associate, I earn a commission (at no additional cost to you) from qualifying purchases made by clicking these links. As always, all recommendations and opinions expressed are my own.
Exploring the Difference: Traditional Irish vs. Irish-American Soda Bread
The world of soda bread offers two distinct, yet equally cherished, variations: the authentic Irish version and its Irish-American counterpart. Understanding their differences not only sheds light on their unique characteristics but also tells a fascinating story of culinary adaptation and heritage.
Authentic Irish Soda Bread is a testament to culinary simplicity and necessity. This yeast-free bread is traditionally made with just four core ingredients: soft wheat flour, baking soda, salt, and buttermilk. Its origins trace back to the 1800s in Ireland, where it emerged as a fast, easy, and economical everyday bread. Farmers and families, often with limited resources, relied on the natural acidity of buttermilk reacting with baking soda to leaven the dough, producing a dense, hearty loaf that was a staple at every meal. This traditional bread is unsweetened and free of any additions like fruit or seeds, emphasizing its functional role as a simple, nourishing accompaniment to savory dishes.
Want to read more about the history behind the recipe? Check out Inside the Origin of Irish Soda Bread from Gillie Houston at MyRecipes.
In contrast, Irish-American Soda Bread represents an evolution of this classic. When Irish immigrants arrived in America, they brought their beloved bread tradition with them, but adapted it to new environments and available ingredients. This adaptation typically builds upon the basic Irish recipe by introducing several key additions. Granulated sugar is often included to lend a touch of sweetness, appealing to a different palate. Cubed butter is cut into the dry ingredients, contributing to a richer flavor and a more tender, somewhat flaky crumb. Some recipes, like mine, also incorporate a beaten egg, which adds moisture, richness, and helps bind the dough, resulting in a slightly softer texture.
Furthermore, American-style soda bread is famously studded with sweet additions like raisins or dried currants, or with the distinctive, aromatic bite of caraway seeds. These inclusions transform the humble everyday loaf into a richer, more celebratory bread, often associated with holidays like St. Patrick’s Day or enjoyed as a sweet treat with coffee or tea. This delightful fusion of Irish heritage and American innovation creates a bread that is deeply comforting and uniquely flavorful, a true testament to the enduring legacy of Irish baking.
The Secret to the Best Loaf: Key Ingredients Explained
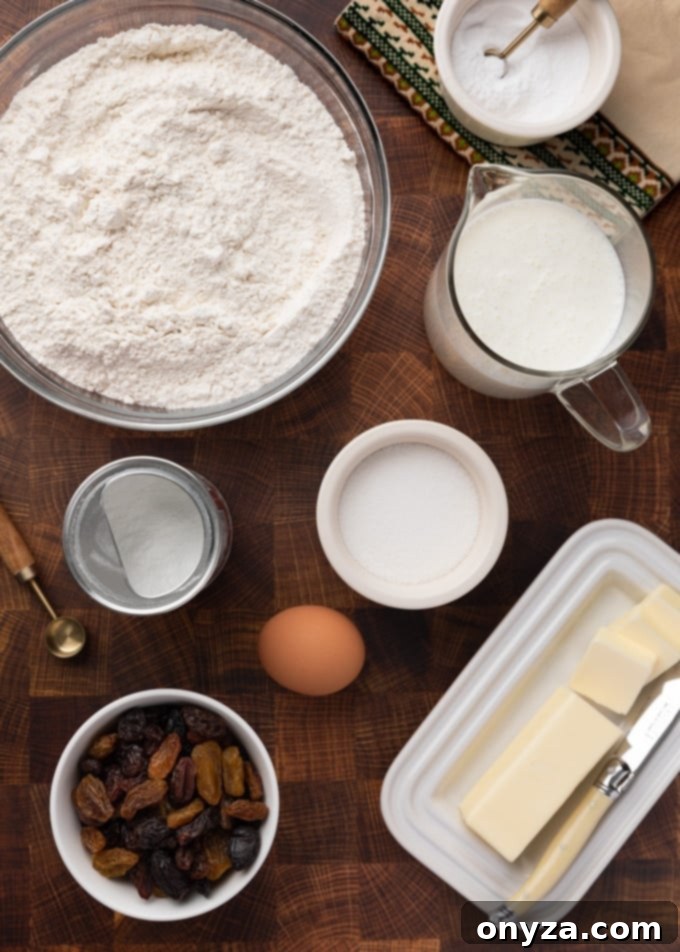
Achieving a truly exceptional Irish-American Soda Bread hinges on the quality and type of ingredients you choose. Over the years, I’ve discovered that prioritizing a few specific components makes a significant difference in the final taste and texture of this beloved loaf.
- Whole Buttermilk: Buttermilk is the cornerstone of soda bread, reacting with baking soda to provide its signature rise and tender crumb. Irish buttermilk is traditionally richer and thicker than its American counterpart. To best approximate this, I always opt for whole buttermilk in my recipe. Its higher fat content contributes to a more luxurious texture and richer flavor. You’ll often find it in the organic or farm-fresh sections of your grocery store’s dairy aisle. While low-fat buttermilk can be substituted if whole buttermilk is unavailable, be aware that the resulting loaf may not be quite as rich or moist. For an emergency substitute, you can also make your own by adding one tablespoon of lemon juice or white vinegar to a measuring cup, then filling the rest with whole milk to the 1 cup mark. Let it sit for 5-10 minutes until it slightly curdles, then proceed with the recipe.
- Medium-Protein All-Purpose Flour: The type of flour plays a crucial role in preventing a tough, rubbery loaf. High-protein flours, like bread flour, develop more gluten when kneaded, which is ideal for yeast breads but detrimental to soda bread. For this dough, I’ve found that all-purpose flour brands with a slightly lower protein content are less prone to overworking, resulting in a wonderfully tender crumb. Brands like Gold Medal (around 10.5% protein content) or Pillsbury (typically 10-11% protein content) are excellent choices. This moderate protein level ensures enough structure without creating excessive chewiness. Always measure your flour using the spoon-and-level method: gently spoon flour into your measuring cup until it overflows, then level it off with a straight edge. This prevents compaction, which can lead to a dry, dense bread.
- Irish Butter: If you’re aiming for authentic flavor and superior richness, Irish butter is an absolute game-changer. Both for incorporating into the dough and serving alongside the baked loaf, Irish butter, such as Kerrygold, is unparalleled. It boasts a higher butterfat content (typically 82% or more, compared to around 80% in American butter) and less water, which translates to a richer taste and a more golden hue. This higher fat content contributes to a moister, more tender crumb and a depth of flavor that American butter simply can’t match. Its vibrant yellow color is also a beautiful visual cue of its quality. If Irish butter isn’t accessible, high-quality European-style unsalted butter is a good alternative.
- Raisins or Caraway Seeds: While optional, these additions define the “Irish-American” style. Plump raisins or sweet dried currants add bursts of sweetness and chewiness, while caraway seeds introduce a distinct, savory, anise-like flavor that beautifully complements the bread, especially when served with hearty stews. Choosing fresh, moist raisins or high-quality caraway seeds will ensure the best flavor and texture in your loaf.
Crafting Your Perfect Loaf: How to Make Irish-American Soda Bread
One of the most appealing aspects of Irish-American Soda Bread is its straightforward preparation. Unlike yeast breads that demand lengthy kneading and proofing times, this recipe is incredibly forgiving and quick to assemble, making it perfect for bakers of all skill levels. Its simplicity allows you to enjoy freshly baked bread with minimal effort.
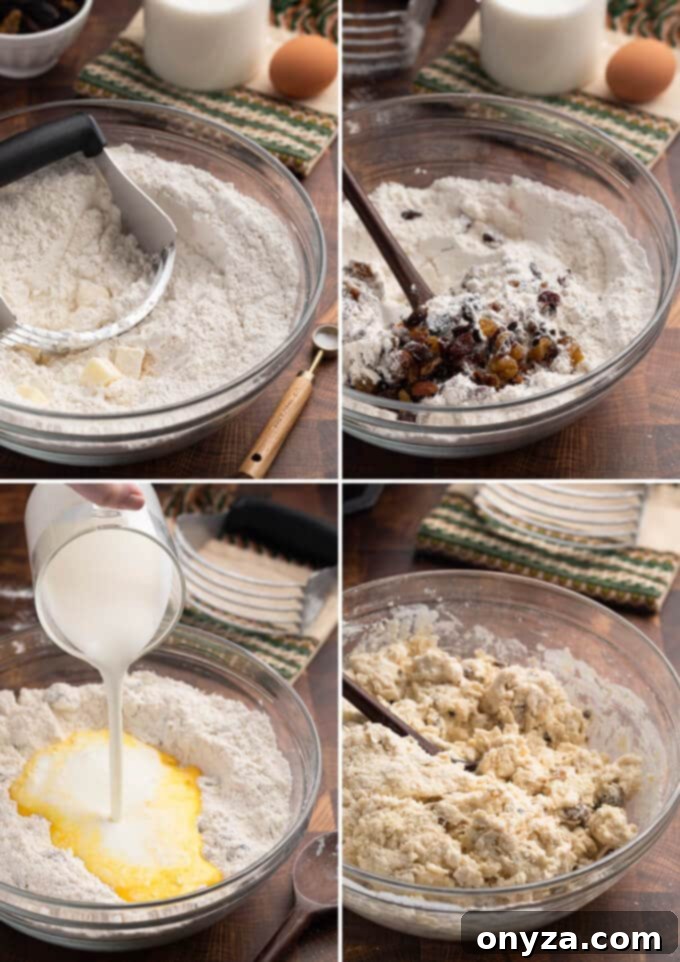
This soda bread is designed as a convenient, one-bowl recipe, streamlining the cleanup process. Begin by thoroughly whisking together all of your dry ingredients—flour, granulated sugar, baking soda, baking powder, and salt. Ensure they are well combined to distribute the leavening agents evenly. Next, introduce cold, cubed butter into this dry mixture. Using a pastry blender or even a sturdy fork, cut the butter into the flour until the mixture resembles coarse crumbs. The goal is to have tiny bits of butter dispersed throughout the flour, not large pieces. These small pockets of butter will melt during baking, creating steam that contributes to the bread’s tender texture and a slightly flaky quality.
Once the butter is incorporated, it’s time for the optional but highly recommended additions: toss in your chosen seedless raisins, dried currants, or caraway seeds. Give them a quick stir to ensure they are evenly distributed throughout the dry ingredients. Finally, create a well in the center of the mixture and pour in the lightly beaten egg and whole buttermilk. You can also whisk the egg and buttermilk together in a separate measuring cup before adding them to the bowl for an even pour.
The crucial step here is to stir just enough to bring everything together. The moment the dry and wet ingredients begin to form a cohesive dough, stop mixing. Over-mixing is the single most common mistake that leads to a tough, dense soda bread. The reaction between the buttermilk and baking soda starts immediately upon contact, and excessive mixing develops the gluten in the flour too much, compromising the bread’s tender crumb. A light hand is key to achieving that wonderfully soft texture.
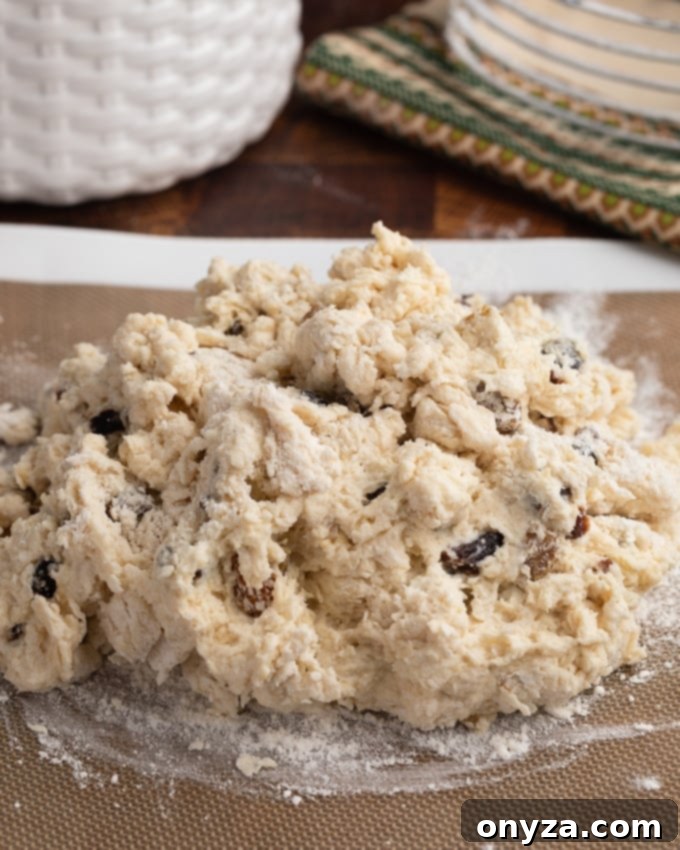
Shaping the Loaf to Perfection
Once your dough has just come together, gently transfer it from the mixing bowl to a lightly floured marble board or pastry mat. Resist the urge to aggressively knead it. With floured hands, work the dough just until you can shape it into a round ball. It’s important to embrace its rustic nature at this stage; the dough should have a somewhat scraggly, uneven appearance. This is perfectly normal and a sign that you haven’t over-kneaded it.
Remember, the golden rule for soda bread is “less is more” when it comes to handling the dough. Overworking the dough is arguably the worst thing a baker can do to an otherwise good soda bread recipe (aside from, of course, burning or undercooking it!). Excessive kneading develops gluten, which is desirable in chewy yeast breads, but for soda bread, it leads to a dry, tough, and dense texture instead of the desired tender crumb. A light, quick touch ensures the final loaf remains soft and delightful.
For the ultimate crust, I highly recommend baking your Irish-American Soda Bread in a lightly-buttered cast iron skillet. The skillet’s even heat distribution and ability to retain heat create a wonderfully crisp, golden-brown crust on the bottom and sides of the loaf, adding another layer of texture and flavor. If you don’t have a cast iron skillet, a parchment-lined baking sheet is a perfectly acceptable alternative, though the bottom of the loaf may not achieve quite the same level of crispness.
Before the bread goes into the oven, a traditional and practical step is to use the tip of a sharp paring knife to cut a cross into the top of the dough round. Make sure to cut deep enough, stopping about an inch from each edge. Practically, this cross serves several purposes: it helps the center of the loaf to bake more evenly by allowing heat to penetrate more efficiently, and it also acts as a vent, preventing the bread from cracking erratically. According to charming Irish tradition, making the cross in the bread is believed to bring good luck, ward off evil spirits, or, as some old wives’ tales playfully suggest, to “let the fairies out.”
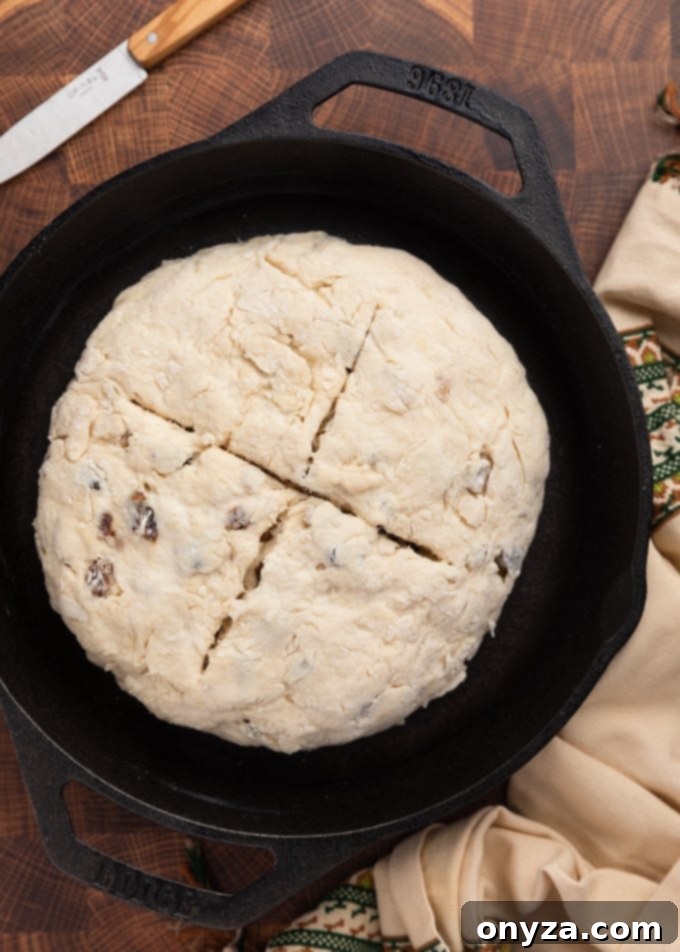
Baking to Golden Perfection
The final step in creating your delectable Irish-American Soda Bread is baking it to a beautiful golden perfection. Preheat your oven to 400 degrees Fahrenheit (approximately 200 degrees Celsius). The exact baking time can vary slightly depending on your chosen baking vessel. If you’re using a cast iron skillet, expect the loaf to bake for approximately 40-50 minutes, possibly requiring a few minutes longer than if you were using a standard baking sheet, as the skillet retains and transfers heat differently. Always consider the visual cues and a doneness test for accuracy.
During the baking process, it’s wise to keep a watchful eye on your bread, especially towards the latter half of the cooking time. You might notice that the top of the loaf begins to brown quite quickly, potentially before the center is fully cooked through. If this happens, simply lay a piece of aluminum foil loosely over the top of the loaf. This simple trick will shield the crust from over-browning while allowing the interior to continue baking evenly until done.
You’ll know your Irish-American Soda Bread is ready when it has achieved a rich, golden-brown crust all around, and a cake tester or wooden skewer inserted into the very center of the loaf comes out clean, or with just a few moist crumbs attached. Avoid any wet batter, as that indicates it needs more time. Another good indicator is to gently tap the bottom of the loaf; it should sound hollow. Once baked, carefully remove the hot loaf from the oven.
For an extra touch of indulgence and a beautiful sheen, I highly recommend a final step: immediately upon taking the bread out of the oven, lightly brush the top with a little melted butter. This not only enhances the flavor but also helps to soften the crust slightly and gives it a lovely, appetizing glow. After this, transfer the loaf to a wire cooling rack and allow it to cool for at least 20-30 minutes before attempting to slice it. While it’s tempting to cut into a warm loaf, letting it cool slightly allows the interior to set properly, ensuring a cleaner slice and better texture.
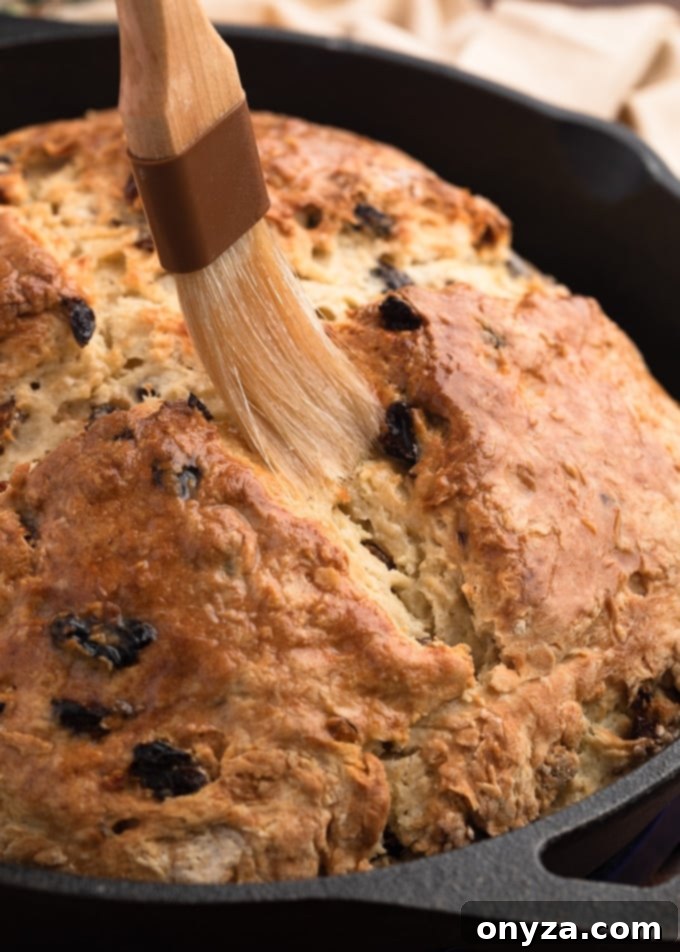
Serving Your Delicious Irish-American Soda Bread
While the aroma of freshly baked bread often tempts us to dig in immediately, Irish-American Soda Bread truly shines when it’s allowed to cool slightly, ideally closer to room temperature. This allows the flavors to meld and the texture to fully develop, ensuring the most enjoyable eating experience. We particularly love to serve it with a generous dollop of softened, high-quality Irish butter, which melts into its tender crumb, adding incredible richness and flavor. It makes for an absolutely delightful and hearty breakfast alongside a warm cup of tea or coffee, providing a comforting start to any day.
Because this bread isn’t overly sweet, its versatility extends far beyond breakfast and tea time. Its balanced flavor profile makes it an excellent accompaniment to a variety of savory dishes, perfectly complementing robust flavors without overpowering them. Consider pairing it with:
- Corned Beef: A classic pairing, especially around St. Patrick’s Day. Imagine a slice alongside my Beer Braised Corned Beef, Instant Pot Corned Beef, or Slow Cooker Corned Beef. The bread’s slight sweetness and dense texture beautifully contrast the savory, salty flavors of the meat.
- Hearty Stews: There’s nothing quite like dipping a piece of homemade soda bread into a rich, comforting stew. It’s especially wonderful with Guinness Beef Stew, where the bread (particularly if made with caraway seeds) soaks up every last drop of the flavorful broth, adding a delightful textural component to the meal.
- Stout Beer Braised Short Ribs (made in the Instant Pot or Dutch oven): The tender, flavorful short ribs, slow-cooked in a rich stout gravy, find a perfect partner in the dense, absorbent soda bread, making for a truly satisfying and decadent meal.
This American-style Irish Soda Bread is undeniably best enjoyed the day it’s baked. The texture is at its peak—wonderfully tender and moist. While you can certainly wrap any leftovers tightly in foil and save them for the next morning, do be aware that the loaf tends to become a bit heavier and denser as it sits. For the ultimate fresh flavor and ideal texture, we always try to make it a special same-day treat, ensuring every slice is enjoyed at its finest.
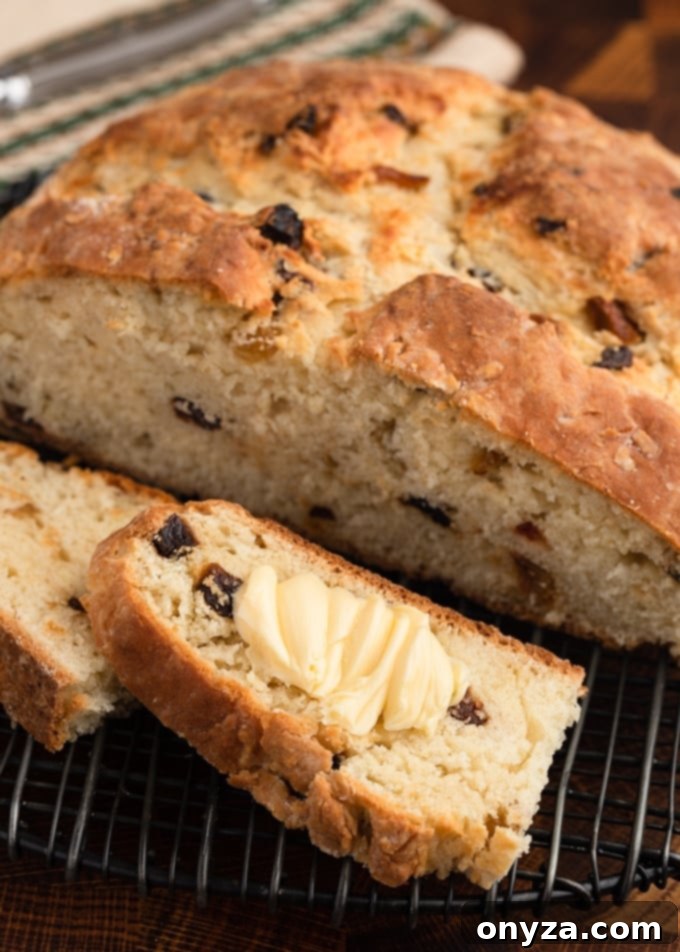
More St. Patrick’s Day Recipes to Celebrate
As St. Patrick’s Day approaches, or anytime you’re craving a touch of Irish comfort, this rich, sweet soda bread feels like a little pot of gold at the end of the rainbow. It’s a wonderful centerpiece for a festive meal or a cozy treat. Here are some more delightful Irish-inspired recipe ideas to complete your holiday feast or simply bring a taste of Ireland to your table. Sláinte! (Cheers!)
- Colcannon: A classic Irish mashed potato dish with cabbage or kale, perfect as a savory side.
- Irish Scones: Light, fluffy, and endlessly customizable, these are ideal for breakfast or an afternoon tea.
- Homemade Irish Cream: A luxurious and smooth liqueur that’s perfect for sipping or adding to coffee and desserts.
- Corned Beef and Potato Cakes: A fantastic way to use up leftovers, turning them into crispy, flavorful patties.
Irish-American Soda Bread Recipe
This dense and slightly sweet loaf, studded with raisins or caraway seeds, is a comforting classic. Serve it slightly warm or at room temperature with softened Irish butter for the best experience.
Prep Time: 20 minutes
Cook Time: 40-50 minutes
Total Time: Approximately 1 hour to 1 hour 10 minutes
Servings: 8 servings (1 loaf)
Ingredients
- 4 cups all-purpose flour, plus more for kneading, measured using the spoon-and-level method*
- 3 tablespoons granulated sugar
- 2 teaspoons baking powder
- 1 teaspoon baking soda
- 1 teaspoon table salt
- 5 tablespoons unsalted butter, divided (4 tbsp cubed cold, 1 tbsp melted)
- 1-1/2 to 1-3/4 cups whole buttermilk, preferably whole**
- 1 large egg, lightly beaten
- 1 cup seedless raisins or currants (I use mixed raisins) AND/OR 1 tablespoon caraway seeds (choose one or both)
Instructions
- Preheat oven to 400 degrees F (200 degrees C). Line a baking sheet with parchment paper or lightly butter a 9-inch cast iron skillet.
- In a large bowl, whisk together flour, sugar, baking soda, baking powder, and salt. Cut 4 tablespoons of cold butter into small cubes. Cut the butter into the flour mixture with a pastry blender or a fork until coarse crumbs form.
- Stir in raisins/currants and/or caraway seeds (if using). Make a well in the center of the bowl. Pour the beaten egg and buttermilk into the well. (Alternatively, you can beat the egg and buttermilk together in the measuring cup before adding them to the bowl.) Stir just until the dough begins to come together. Do not over-mix.
- Transfer the dough to a lightly floured pastry board or mat. Knead with floured hands just until the dough forms a ball. It will look somewhat scraggly. For a tender crumb, do not over-knead!
- Form the dough into a 6 to 7-inch round and transfer it to the prepared skillet or baking sheet. Using a sharp knife, cut a cross shape across the top of the round, stopping about an inch from each edge.
- Bake until the loaf is golden brown and a skewer inserted into the center comes out clean, or with just a few moist crumbs attached. This will take 40-50 minutes, depending on whether you’ve used a cast iron skillet or baking sheet. (The skillet usually takes a few extra minutes than the baking sheet.)
- Watch the bread while it’s baking. If the top starts to brown too much before the center is cooked, loosely lay a piece of foil over the top.
- While the bread is baking, melt the remaining 1 tablespoon of butter. Remove the loaf from the oven and immediately brush the top with the melted butter. Transfer to a wire rack to cool for about 20-30 minutes before slicing and serving.
- This bread is best enjoyed the day it is baked. Leftovers can still be eaten the next day if the cooled loaf is tightly-wrapped in a double layer of foil and stored at room temperature. The bread will be denser on the second day.
Notes
- *For best results, read about the ingredient brands and varieties I like to use for this recipe in the “Key Ingredients Explained” section in the article above.
- **The amount of buttermilk you need will range from 1-1/2 to 1-3/4 cups. Start with 1-1/2 cups, and if the dough isn’t coming together, add an additional 1/4 cup, 1 tablespoonful at a time. I almost always use the full 1-3/4 cups with the brands I use, but your flour or environment might require slightly less.
Nutrition Estimate
Serving: 0.125 loaf | Calories: 405kcal | Carbohydrates: 70g | Protein: 10g | Fat: 10g | Saturated Fat: 6g | Cholesterol: 45mg | Sodium: 789mg | Potassium: 406mg | Fiber: 3g | Sugar: 7g | Vitamin A: 335IU | Vitamin C: 1mg | Calcium: 128mg | Iron: 4mg
Nutrition information is automatically calculated, so should only be used as an approximation.
Please note that our recipes have been developed using the US Customary measurement system and have not been tested for high altitude/elevation cooking and baking.
